

 TL;DR:
Photoshop corrects photo lens distortion through precise manual filter adjustments, while Wondershare Filmora provides a preset-driven alternative that fixes both photo and video warping instantly.
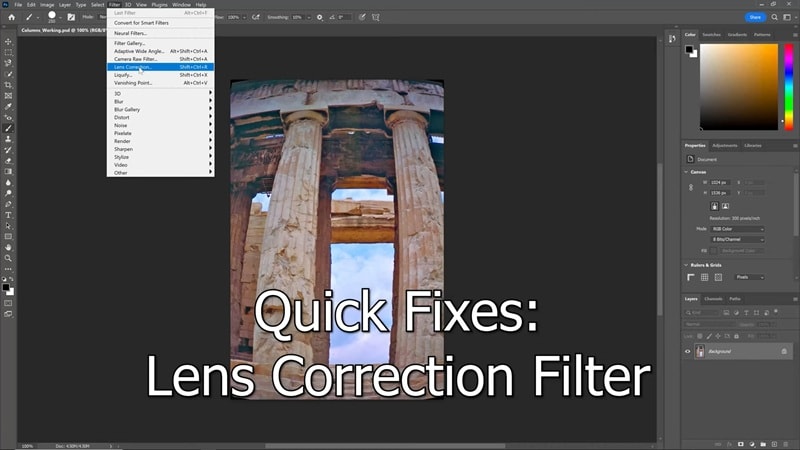
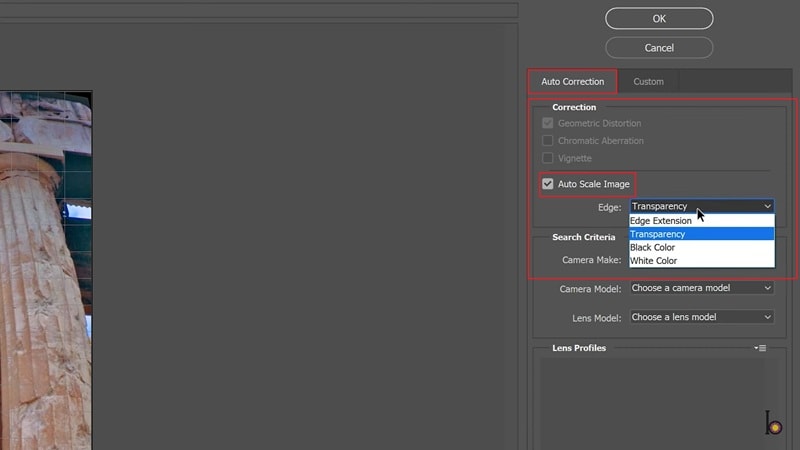
● Navigate to Filter → Lens Correction in Photoshop to apply automatic scaling or manual slider adjustments, keeping in mind this method is strictly limited to still images and often requires edge cropping.
● Filmora is best suited for beginners and action camera creators, featuring one-click AI tools with built-in profiles for devices like the GoPro 9, 10, and 11 that automatically adapt to resolutions from WVGA up to 4K.
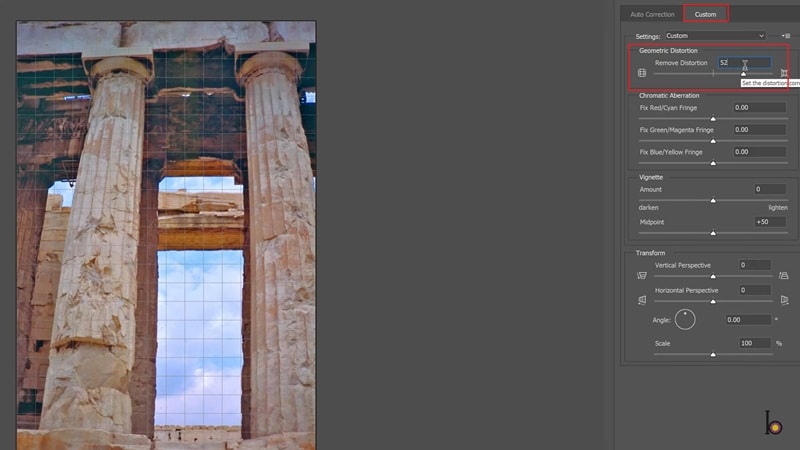
● Correcting extreme fisheye curves requires significantly higher manual slider adjustments in Photoshop compared to standard subtle distortion, which increases the risk of over-stretching peripheral image details.
Ask AI for a summary
 ChatGPT
 Perplexity
 Gemini
 Claude
 Grok
Grok
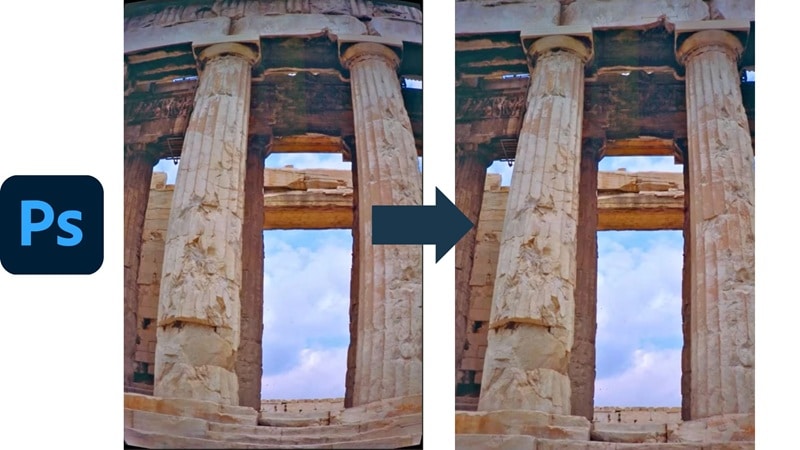
Lens correction is essential for turning bent lines into straight ones and for removing the curved edges caused by wide-angle or fisheye lenses. It brings balance back to photos, whether they suffer from subtle distortion or dramatic warping. And as one of the most sought-after tools for correcting lens distortion, Photoshop has become a favorite among photographers and editors.
However, for beginners, learning how to correct Photoshop lens distortion can seem intimidating. This guide simplifies the process and also introduces Filmora lens correction as a faster, one-click solution for both photo and video editors.
Part 1. How to Correct Lens Distortion in Photoshop (Step-by-Step Guide)
Before we begin, let's clear up a bit of confusion around the terms. It's easy to confuse lens distortion, lens correction, and fisheye correction, but they each mean something a little different.
Basically, lens distortion is the problem. It is the optical issue that makes straight lines look bent or edges appear stretched. Whereas lens correction is the process of fixing those issues inside your editing software like Photoshop. Meanwhile, fisheye correction is a more specific fix that straightens the dramatic curves caused by ultra-wide or fisheye lenses.
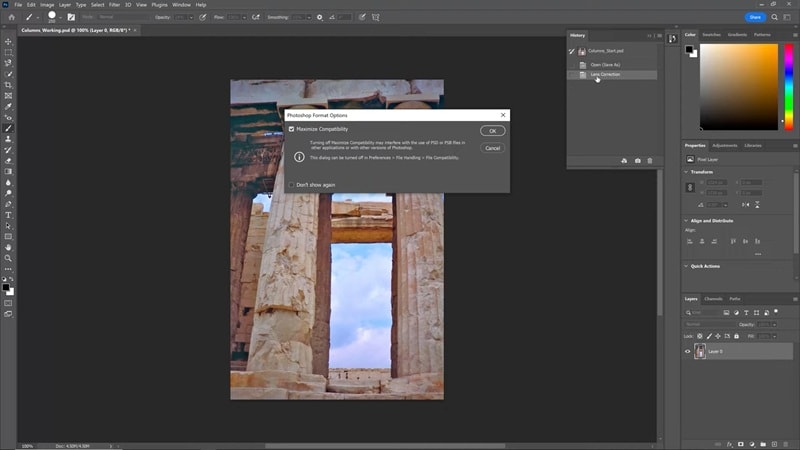
Once you know the difference, it all starts to make sense. Now, let's move on to how you can actually correct lens distortion in Photoshop and bring your images back into balance.
To make things easier, we're following along with a handy tutorial from
on YouTube, so here's a simple step-by-step guide to distortion correction in Photoshop:
Part 2. Smart Tips for Better Distortion Correction in Photoshop
As you've just seen, using Photoshop lens correction is a straightforward process that can dramatically improve your photos. Correct lens distortion using Photoshop tools not only fixes those bent edges but also brings back a more natural perspective.
That said, every photo is different, and sometimes the first fix won't be enough. To keep your results looking sharp and consistent, here are a few practical tips you'll want to follow as you move forward.

- Start Small For Natural Results: When using the Photoshop lens correction sliders, begin with subtle moves. Pushing them too far can create new warps, so gentle adjustments keep the image looking natural.
- Mind The Crop While Editing: Fixing lens distortion in Photoshop often trims the edges of your photo. Keep this in mind while shooting or editing so your composition stays intact after the correction.
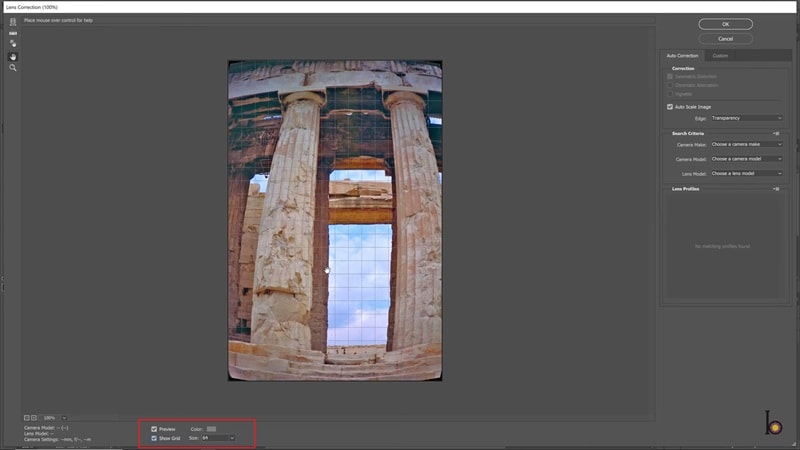
- Use Guides To Stay Aligned: Turn on grids or rulers during distortion correction in Photoshop. These visual aids make it easier to straighten lines and ensure everything looks properly aligned.
- Fix Color Fringes Too: Distortion correction Photoshop tools also let you remove chromatic aberration. A quick tick of the option clears away distracting purple or green edges around objects.
- Balance Perspective With Care: Not every curve or angle needs correcting. Sometimes the distortion is part of the creative feel, so use Photoshop lens correction with your artistic vision in mind.
Bonus: Fisheye Correction Tips
Fisheye correction is a little different from regular distortion fixes. When working on fisheye correction in Photoshop, push the "Remove Distortion" slider higher to tone down the bubble effect. Keep an eye on the frame and adjust slowly so the photo looks natural without stretching the details too far.
Part 3. Filmora Lens Correction: A Faster, Easier Alternative to Photoshop for Photos & Video
As you can see, Photoshop is a powerhouse when it comes to distortion correction, but it isn't always the quickest or friendliest tool to use. Navigating through complex menus takes time, and Photoshop lens correction only works for photos, not videos.
That's why, for a faster and more versatile solution, many creators turn to Wondershare Filmora. With its built-in lens correction tools, you can straighten out both photos and videos in seconds, making it a faster and more approachable option for both photo and video editing.

Here's why Filmora is the smarter solution to fix lens distortion than Photoshop:
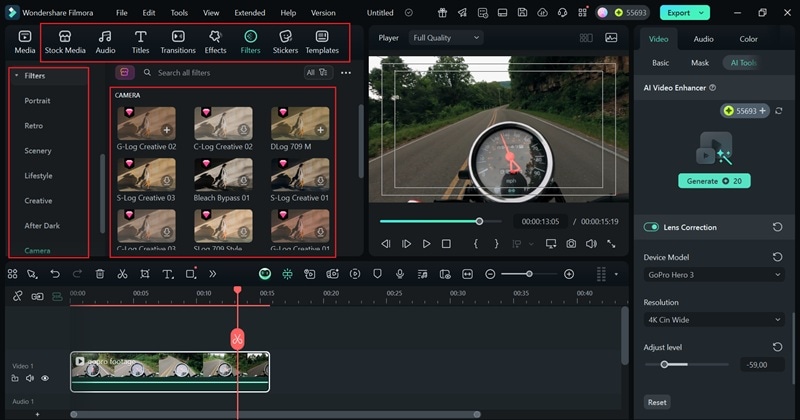
- One-Click Lens Correction: Filmora keeps it simple with a single click. No endless sliders or trial and error, just apply the correction and your photo or video looks clean right away.
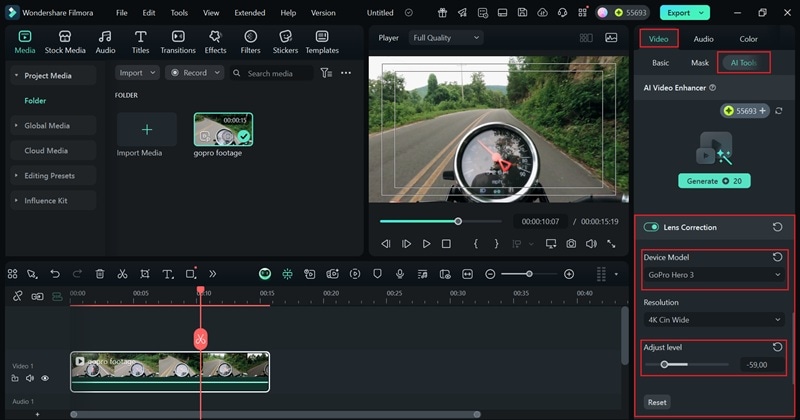
- Presets For Action Cameras: Built-in presets cover popular cameras like GoPro 9, 10, and 11, so fisheye distortion is fixed instantly without extra setup.
- Resolution Friendly Adjustments: You can fine-tune lens correction in Filmora while keeping your footage sharp. The edits don't compromise quality, even at higher resolutions.
- Automatic Adaptation: Filmora lens correction adjusts automatically to the resolution you select. It works smoothly across formats like 4K, 2.7K, 1080p, 720p, 1440p, 960p, and WVGA, with options including Wide, SuperView, Medium, and Narrow.
- All-In-One Editor: Filmora is more than just distortion correction. You get a complete video editor with transitions, effects, music, and AI tools, all in one place.
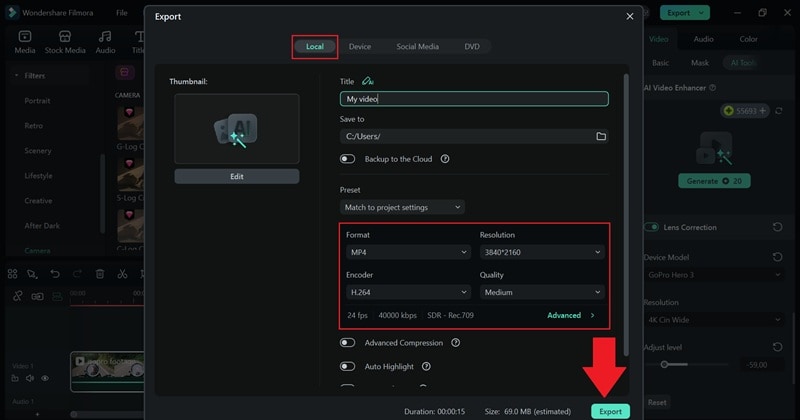
With these features, correcting lens distortion in your videos becomes quick and easy. Not to mention, Filmora's lens correction tool works on both Windows and macOS, so you can jump right in no matter what device you're using. Plus, there's a free trial waiting for you, which makes it even easier to give it a go.
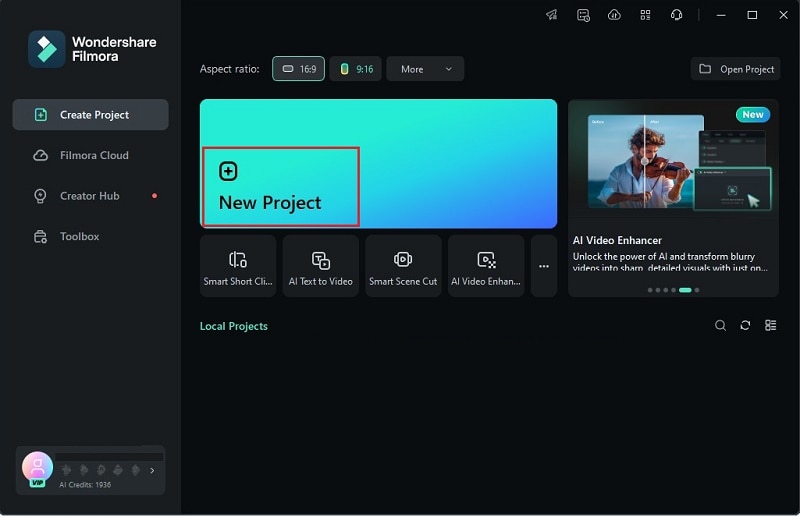
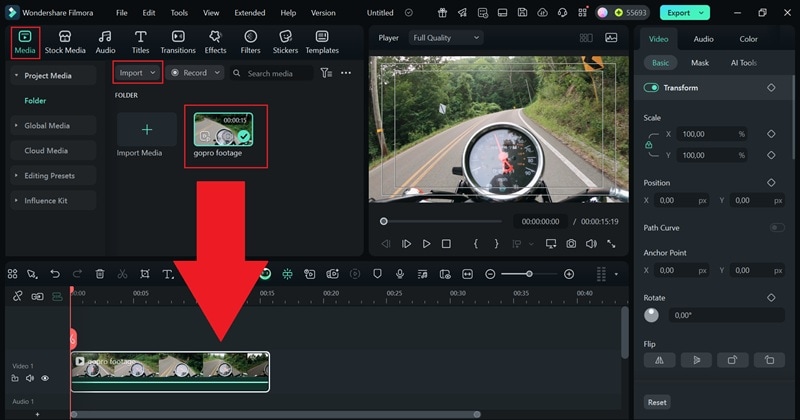
So, no excuses left to not try right now! Check out the simple steps below to begin:
Conclusion
Lens distortion in photos can be distracting, which is why we explored how to correct lens distortion in Photoshop. The Photoshop lens correction filter is powerful and effective, but it can feel overwhelming for beginners and is limited to photos only.
If you want a simpler and more versatile option, Wondershare Filmora is a smarter choice. Its lens correction feature works on both photos and videos, giving you quick results without complicated steps. On top of that, Filmora offers a complete editing toolkit packed with effects, music, and AI tools that make the creative process easier and more fun.
Frequently Asked Questions
-
Can I fix lens distortion in Photoshop without a lens profile?
Yes, you can. Even without a matching profile, the Photoshop lens correction filter lets you adjust distortion manually using sliders until the lines look natural. -
Is fisheye correction in Photoshop the same as distortion correction?
Not exactly. Correcting lens distortion in Photoshop usually fixes subtle warps, while fisheye correction in Photoshop is more specific and tones down the heavy bubble effect from fisheye lenses. -
Does fixing distortion reduce image quality?
A little cropping or scaling may happen, but Photoshop tools to correct distortion are designed to keep your image looking sharp. The key is using small, careful adjustments. -
Is Filmora's lens correction only for videos?
Filmora shines for video editing, but it also works well for still images. Its lens correction feature is built to handle both photos and videos with the same ease.
