

 TL;DR:
You can create the Ken Burns effect by manually animating Position and Scale keyframes in Adobe Premiere Pro for precise control, or use Wondershare Filmora's built-in Pan and Zoom tool for a faster, keyframe-free alternative.
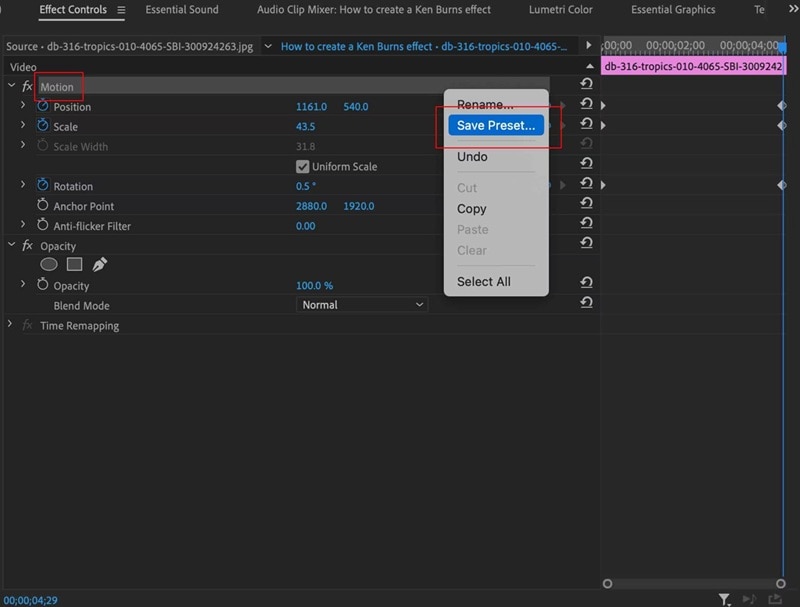
● Activate the stopwatch icons for Position and Scale in Premiere Pro's Effect Controls panel to set your motion keyframes, which you can right-click and save as a custom preset to instantly apply to future clips.
● Filmora bypasses complex keyframing by using adjustable green and red bounding boxes to define the start and end frames visually, alongside five one-click styles for immediate zooming or panning.
● Premiere Pro is best suited for editors who need professional-grade flexibility and utilize Adobe's subscription model, while Filmora is ideal for beginners seeking a quicker workflow and more affordable pricing options.
Ask AI for a summary
 ChatGPT
 Perplexity
 Gemini
 Claude
 Grok
Grok
Still images don't always have to sit flat on the screen. Filmmakers and professional editors, for example, often use a technique called the Ken Burns effect to give a bit of movement to the image. This simple trick can be done in a video editing program like Premiere Pro.
If you are wondering how to do the Ken Burns effect in Premiere Pro, you're in the right place. We will show you two ways to add Ken Burns effect Premiere Pro: setting keyframes manually or using a downloaded ken burns effect premiere pro preset. Mastering this simple trick in Adobe Premiere will transform your still images.
Part 1. What is the Ken Burns Effect?
The Ken Burns effect is an editing technique that adds slow pans or zooms to still photos. It creates depth and the feeling of motion by moving across the image, which results in making a static photo flow like a video and draws viewers into the frame.
You will usually see the Ken Burns effect in documentaries, especially when the filmmaker wants to highlight historical photos, letters, or old footage. It's also common in slideshows, interviews, and video essays, where capturing fresh video footage isn't always possible.
Who is Ken Burns?
The Ken Burns effect was named after the American documentary filmmaker Ken Burns, who became known for using this technique extensively in his work. He is best known for works such as "The Civil War," "Baseball," and "Jazz."
Why Video Creators Use the Ken Burns Effect
Other than simply adding subtle motion, the Ken Burns effect serves a clear purpose in storytelling. Every pan or zoom is usually intentional, because it can:
- ✅ Direct the viewer's gaze to important details within a photo.
- ✅ Control the flow of information by revealing elements gradually.
- ✅ Evoke emotion through slow, dramatic zooms that highlight faces or expressions.
- ✅ Build atmosphere by creating a sense of movement and pacing in otherwise static scenes.
Examples of the Ken Burns Effect in Movies & YouTube
1. Netflix's Crime Documentary "My Father, the BTK Killer"

2. Vox's Video Essays "The British Museum is full of stolen artifacts"
Part 2. Step-by-Step: How to Add the Ken Burns Effect in Adobe Premiere Pro
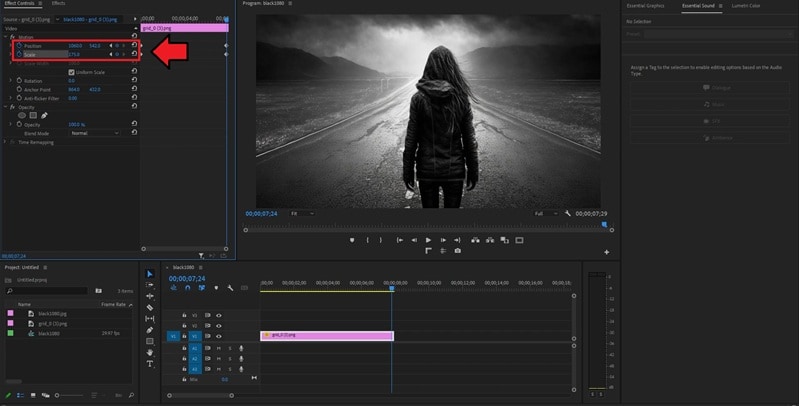
Creating the Ken Burns effect in Premiere Pro involves setting keyframes manually for Position and Scale. The Scale controls how large or small your image appears on screen, while Position determines where the image sits within the frame.
After you have built the effect, you also have the option to save it as a preset, so you can quickly apply the Ken Burns effect to multiple clips or future projects.
1. How to Create the Ken Burns Effect in Premiere Pro
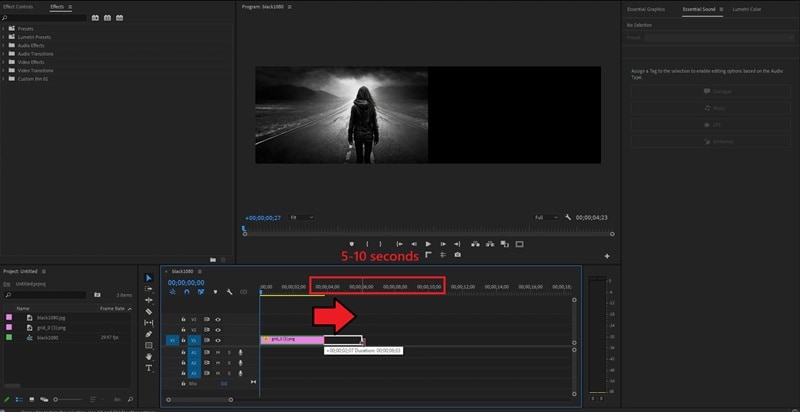
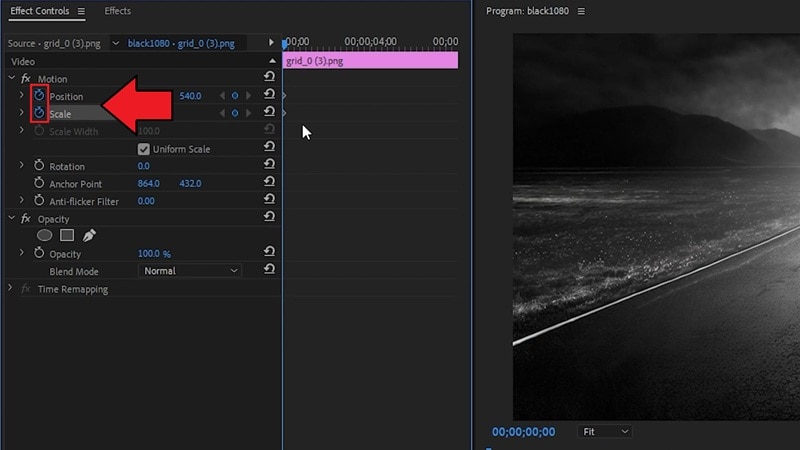
- Scale: Zoom in or out on the subject — a new keyframe will be added automatically.
- Position: Pan across the image to frame the subject the way you want — this adds another keyframe.
2. Ken Burns Effect Premiere Pro Preset Download & Save for Automatic Application
Part 3. Easier Way to Create the Ken Burns Effect Without Premiere Pro
While you've learned how to do Ken Burns on Premiere Pro, the editing software indeed gives you professional control. However, creating the Ken Burns effect doesn't always need to be that technical. Many video editors offer a simpler way to add motion to still images, and one of the easiest tools for this is Wondershare Filmora.
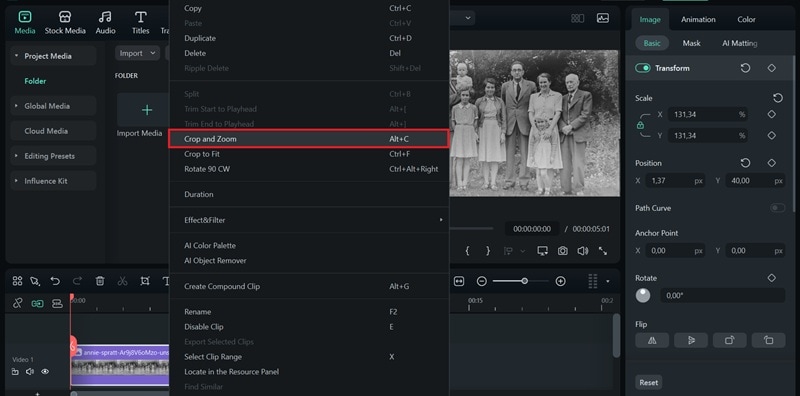
With Filmora's built-in Pan and Zoom feature, you can achieve the Ken Burns effect without manual keyframes. You'll get to choose the starting and ending frames directly on your image, and Filmora will generate the smooth zoom or pan between them.
If you want the movement to be slower or faster, you can adjust the effect by changing the clip's length on the timeline. Follow the steps below to create the Ken Burns effect in Filmora.
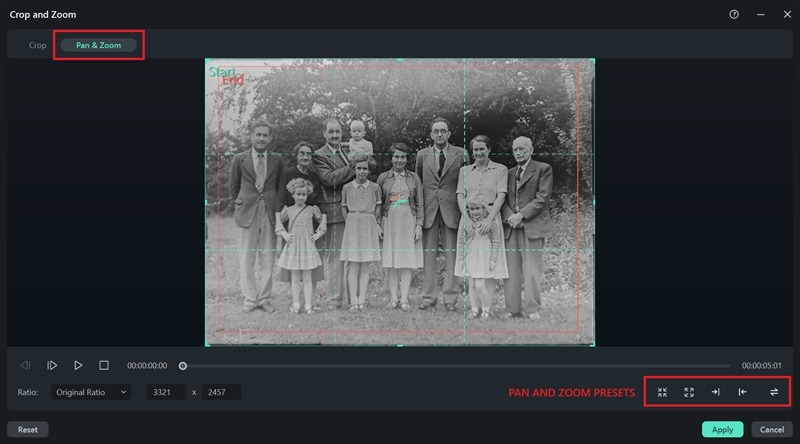
- Zoom In: Moves from a wide green frame to a tighter red frame to create a close-up effect.
- Zoom Out: Expands from a smaller green frame to a larger red frame to reveal more of the scene.
- Pan Left: Shifts the view horizontally from left to right.
- Pan Right: Shifts the view horizontally from right to left.
- Swap: Instantly switches the start and end frames.
Premiere Pro vs Filmora: Which is Best for the Ken Burns Effect?
| Features | Premiere Pro | Filmora |
| Ease of Use | Moderate | Easy |
| Flexibility | High | Moderate |
| Cost | Higher price (Subscription-based) | More affordable (free, one-time, or subscription plans available) |
| Output Quality | Professional-grade | High quality, optimized for quick editing |
Why Filmora is the Easier Alternative
- ✅ Faster workflow: Filmora's Pan and Zoom tool applies the Ken Burns effect in a few clicks, while Premiere Pro requires manual keyframing.
- ✅ Affordable pricing: You can access Filmora with a one-time plan or a lower-cost subscription, unlike Premiere Pro's ongoing Adobe Creative Cloud fees.
- ✅ Beginner-friendly: No need to set keyframes or navigate complex panels; you just need to set the start and end frames.
- ✅ All-in-one editing: Filmora not only makes the Ken Burns effect simple but also includes templates, transitions, and AI tools for a complete editing package.
Conclusion
If you're into storytelling through visuals, learning how to apply the Ken Burns effect is one of the most valuable editing techniques you should master.
You can do the Ken Burns effect in Premiere Pro. But if you prefer a faster, more beginner-friendly route, Filmora's Pan and Zoom tool delivers the same cinematic motion without complexity.
Try both methods and see which one fits your editing style best. Either way, your still images will never look boring again!
