Transcript
Preparation: You need a steady tripod that supports the weight of the camera perfectly. Adjust the camera height so that you can get the subject’s full height, and there is enough between the head and the top of the frame.
Stand next to a cupboard where you will be choosing and changing clothes. The tripod needs to be on your right, and choose a spot and do not move from it through the filming process. Put the clothes in the cupboard where they are easy to grab.
Pretend that you are walking into the dressing room and open the cupboard door. Grab clothing A and admire it. Then open it up and grab the top corners and throw it onto yourself while leaning back and cut the video.
After cutting the filming process, wear clothing A and start filming. You should be in the leaning back position and then move your body forward. Choose clothing B, lean back, and throw clothing B on you. Close the cupboard and walk away.
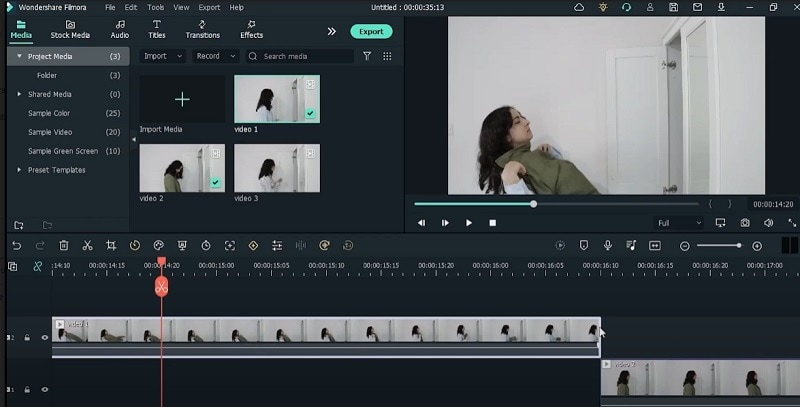
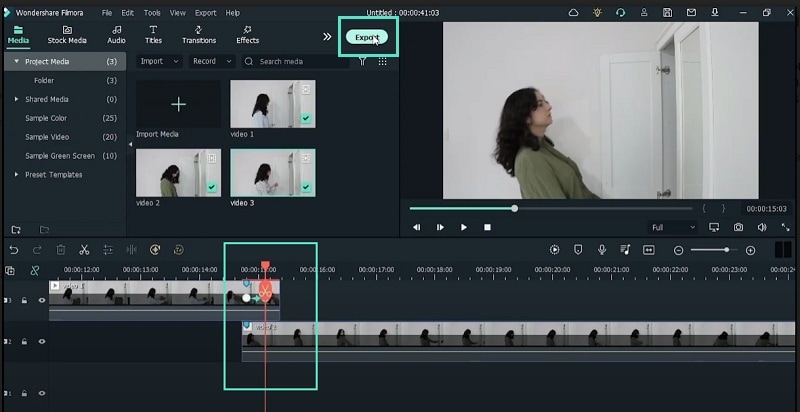
Import the three video clips into Wondershare Filmora Project. Video 1 is about walk up to the closet, open the door, look at the options and grab outfit A. Admire and open it up and throw it onto yourself while leaning back.
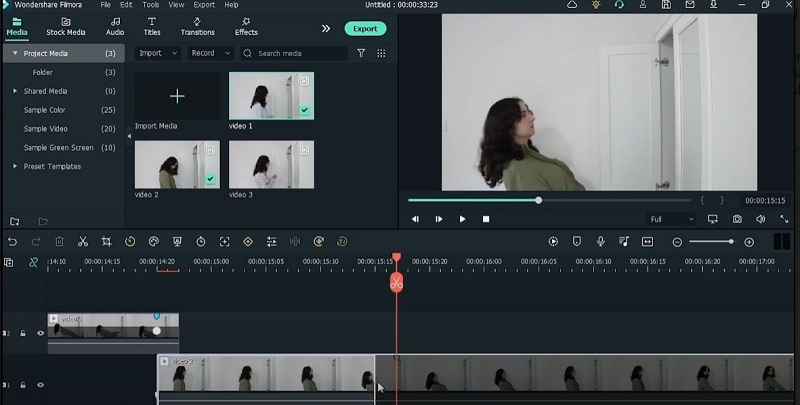
The second video is where you wear that outfit A and move your body forward. Admire the outfit and then go for the other outfit. Take a look at the outfit before trying it out, throw it on yourself, and lean back.
In the third video, you have the new outfit on, admire the clothing, close the cupboard door and move out of frame. All of these should be shot in the same spot and you should not move while changing the outfits.
Drag on Video 2 first onto your timeline. Zoom out the timeline. Drag Video 1 right above. If your video has audio, select the video clips and press Ctrl + Shift + M to mute them.
Drag Video 2 right after Video 1. So when Video 1 finishes, Video 2 starts. Zoom in the timeline and look at that frame where you are leaning back. Trim the rest of the video and press M to create a marker.
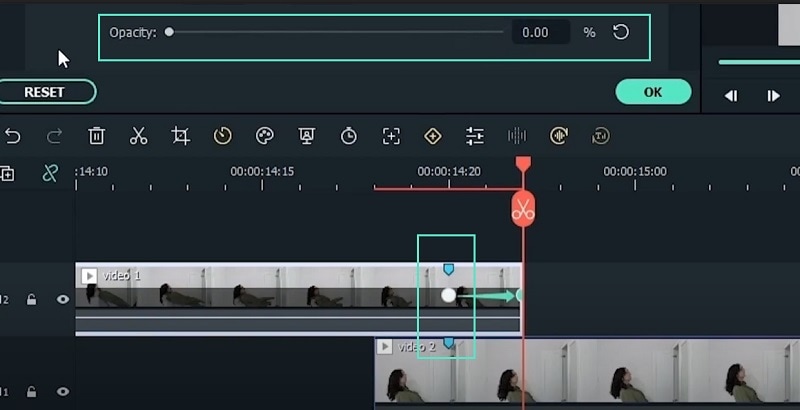
Double-click on the video clip and go to Animation> Customize and lower the opacity. Place Video 2 underneath and find out where you are leaning back. Press M to mark that spot. Get rid of the extra parts.
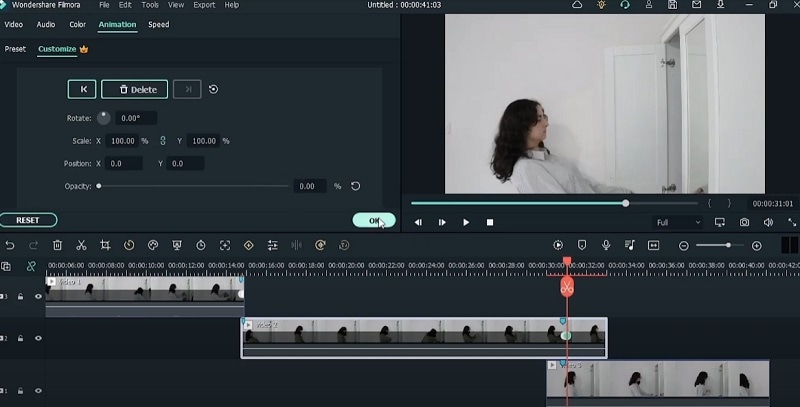
Now place Video 2 underneath Video 1 by matching the markers. Double-click Video 1 and grab the keyframe and delete it. Again, make a keyframe with opacity 100% and move the playhead to the end of Video 1.
Now, create a keyframe and make the opacity 0%. Drag and drop Video 3 below Video 2. Find out where you are leaning back in Video 2 and press M to set a marker. Press Ctrl + Shift + M to mute audio.
You will need a greenscreen video of someone dancing and a photograph of a building with a greenscreen behind the windows. First, we need a background, go to Effects and search for “Background”.
Create a new keyframe with opacity of 100% and for the second keyframe, move two frames forward and bring down the opacity to 0%. Get rid of the excess parts. Move the keyframe forward so that they are seven frames apart.
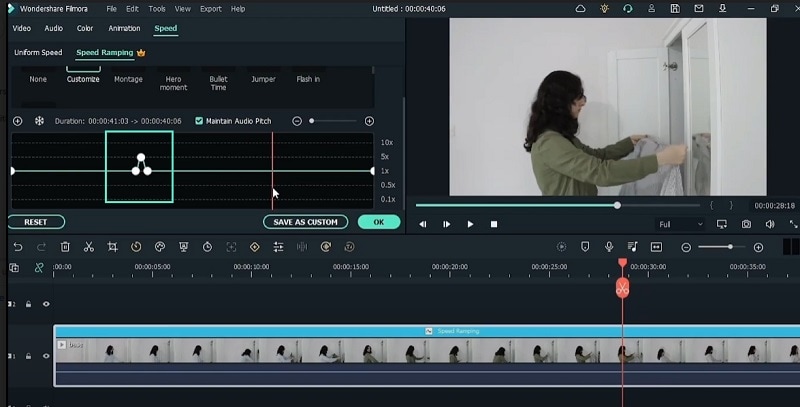
Go ahead and export this video and then import it back in. Go through to find the part where the subject throws the clothes back in. Go to Speed Ramping> Customize and realign the keyframes.
Grab the first keyframe and move it where we are about to throw the shirt back in. Grab the second keyframe and bring it close to the first keyframe. Place the third keyframe where we are done throwing the shirt.
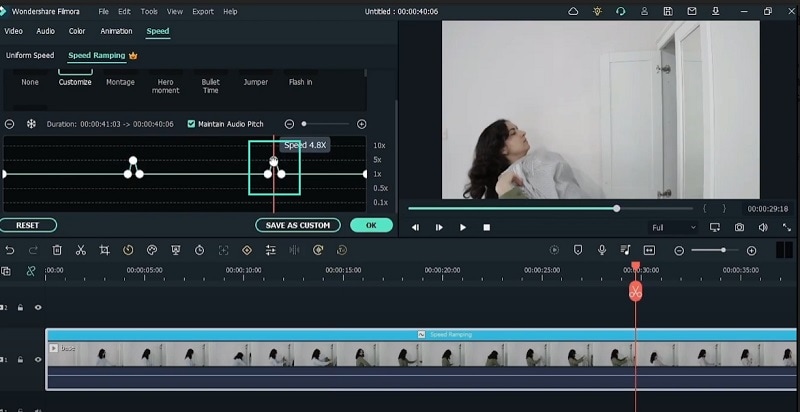
Make sure that all the keyframes are in one time and bring the middle one above to speed 4.8X. Use the playhead to go where you are about the throw the next shirt. Make a keyframe and go forward and make another.
The third keyframe will be where we stop leaning back. Bring up the middle frame to 4.8X speed. We are done and play the video and watch the seamless transition of clothes instantly.
How to Change Clothes in a Video: Magical Dress Transition Video Effect
What you need to prepare to change clothes in videos:
- Your computer or laptop
- Greenscreen video of the subject dancing
- A Dress Change Video Editor
Download and install Wondershare Filmora on your computer. Launch the video clothes changer application and choose New Project on the welcome screen. Go to File> Import Media> Import Media Files to import the video clips. Otherwise, you can drag and drop the video clips directly into the Project Media folder.

Drag and drop Video 2 onto the timeline. Drag Video 1 on top of Video 2 on the timeline. Turn off audios of the videos by pressing Ctrl + Shift + M. Drag Video 2 right next to Video 1 where Video 1 finishes. Look for one frame where you are fully leaning back in Video 1. Place the playhead them and trim Video 1 clip.
Hit “M” on your keyboard to mark the spot out on the timeline. Double-click on Video 1 and go to Animation> Customize and lower the opacity. Drag and place Video 2 underneath Video 1 now. Find the spot on Video 2 where you are leaning back. Hit “M” and delete the parts before it.
Move Video 2 underneath Video 1 again and make sure the markers are matching. Grab the keyframe on Video 1 that you created beforehand and delete it. Then make another keyframe with 100% opacity. Move forward two frames and create another keyframe with 0% opacity. Bring in Video 3 underneath Video 2.
Again, we are going to check where we are leaning back on Video 2 and hit “M” to mark the spot. Press Ctrl + Shift + M to mute the audio. Lower the opacity. Mark out the spot of leaning back on Video 3 now. Match the markers and get rid of the keyframe on Video 2. Add keyframes at 100% opacity and 0% opacity as done before for Video 1.
Get rid of excess parts and move the second keyframe to the right so that it is away from the first keyframe by seven frames. Click on Export button at the top and save the video as “Base”. Import Base video to Project Media folder. Delete all video clips on the timeline and drop Base video onto the timeline.
Find the part where we are throwing in the shirt and go to Speed Ramping option by clicking on the timer icon. Click on Customize and bring the three keyframes next to one another. Move the second keyframe upwards to Speed 4.8X.
Go to the part where we are throwing in the second shirt and look for the motion blur. Add a keyframe and add another keyframs a few frames later. The third keyframe should be where you have put on the shirt. Make the second keyframe speed to 4.8X. That is it and you can play the video to watch the effect.
What you’ve learned:
- How to actual shoot the video in three parts.
- How to use keyframe to mark the clothes magical transition points.
- How to play with speeds of keyframes to make it look seamless.


