
 100% Security Verified | No Subscription Required | No Malware

YouTube is so big that it is hard to comprehend the sheer number of videos uploaded to the platform every second. The competition is so fierce that if you want to stand out from the crowd, you need to go all in right from the get-go. You need a good idea, quality equipment, and flawless execution.
The most common rookie mistake that happens to aspiring YouTubers is not following YouTube's preferred video export settings. If you are new to this, it might seem complicated, but it really isn't. Let's see how to export a video from Premiere Pro so that it is perfect for YouTube.
In this article
How to Adjust Premiere Pro Export Settings for YouTube
First up, we have prepared a short checklist that outlines YouTube's preferred export settings.
- The preferred video format on YouTube is H.264;
- The preferred frame size on YouTube is 128.720 for HD videos, 192.1080 for Full HD videos, and 384.2160 for 4K UHD videos;
- For the frame rate, just match the frame rate in the source video;
- The preferred aspect ratio on YouTube is 16:9 for portrait videos, 9:16 for vertical videos;
- The best bitrate encoding is VBR, 1-pass;
- The target bitrate should be 20 to 30 Mbps for HD video and 60 to 80 Mbps for 4K.
Some of these metrics might not be familiar to you but don't worry. If you are using Premiere Pro to edit and export your video for YouTube, follow these simple steps to export your video. We will assume that the video is ready for export and that you defined the first and last frames.
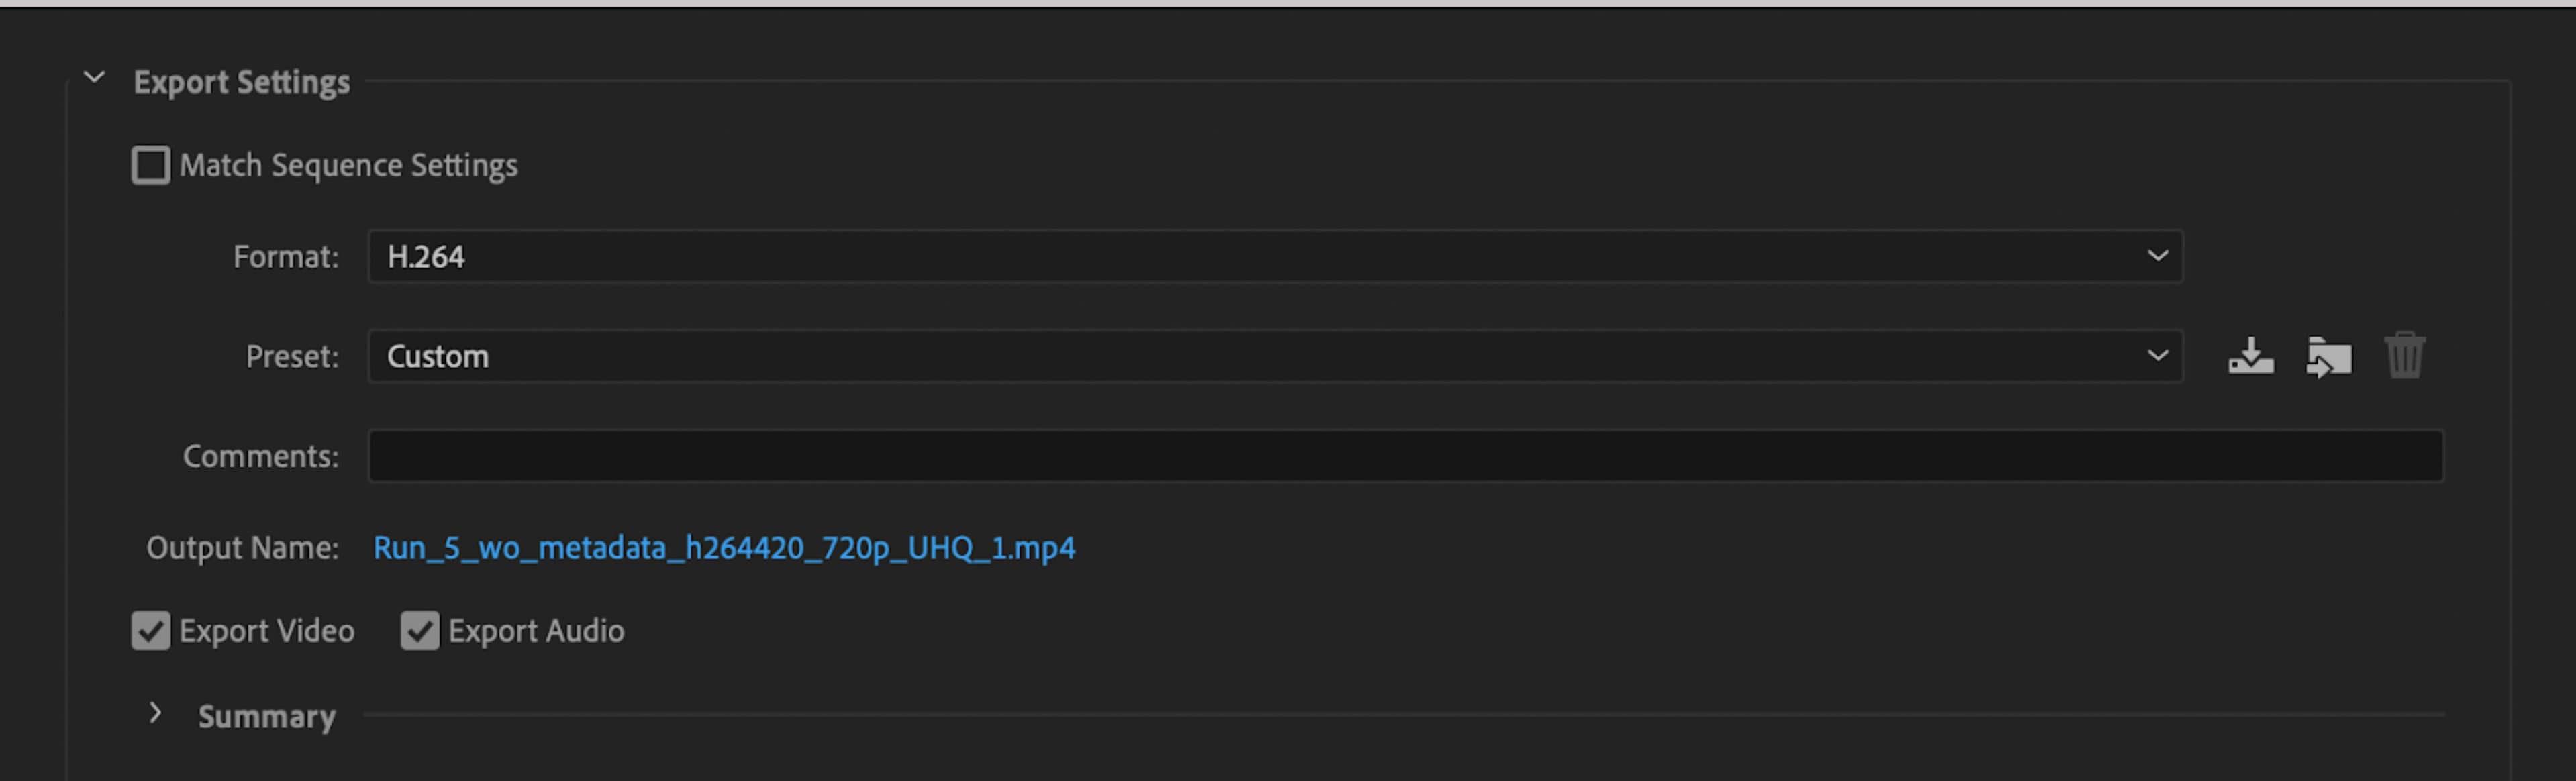
Step 1: Go to File > Export > Media. and you will access the Export Menu.

Step 2: Select H.264 in the Format drop-down menu, and in the Output Name, just add a name for your new file.
Step 3: To better explain everything, we will divide this step into two sub-steps.
- Set the resolution to match the resolution of the source video. If you recorded in 720p, select 128.720, if you recorded in 1080p, go with 192.1080, and if you recorded in 4K, then select 384.2160.
- Set the frame rate to match the frame rate in the source video. If you recorded in 30 FPS, select that; if you recorded in 60 FPS, select that, and so on. Note that Premier Pro will have 23.976 FPS set as the default frame rate, and if you do not have a specific need to change it, then leave it as is.
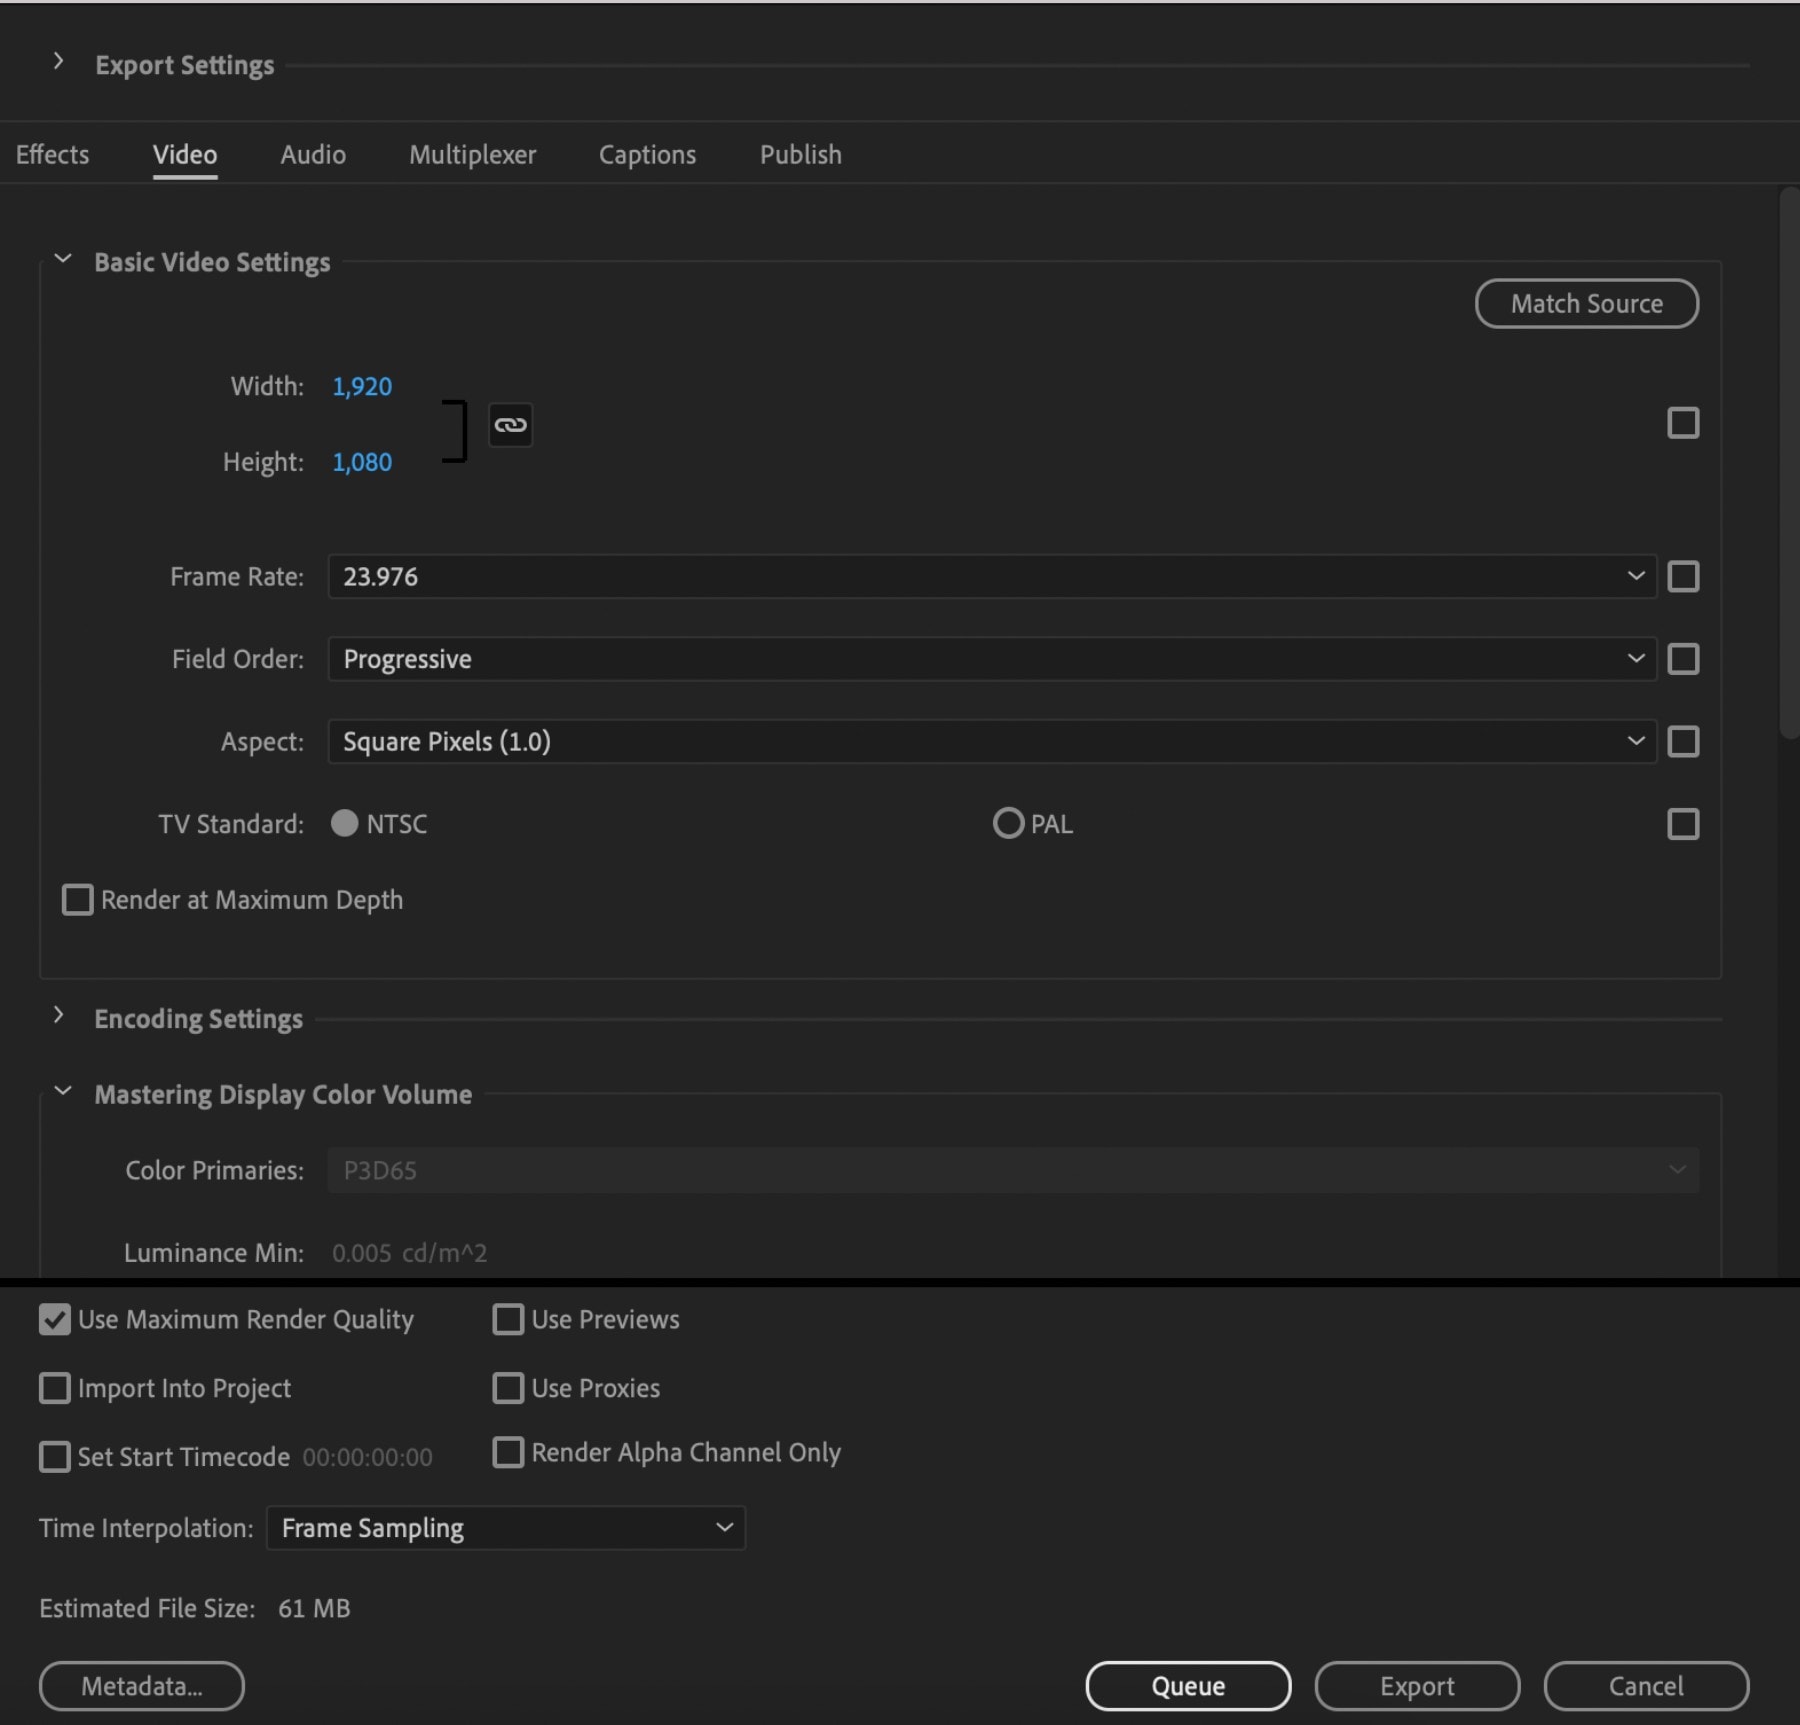
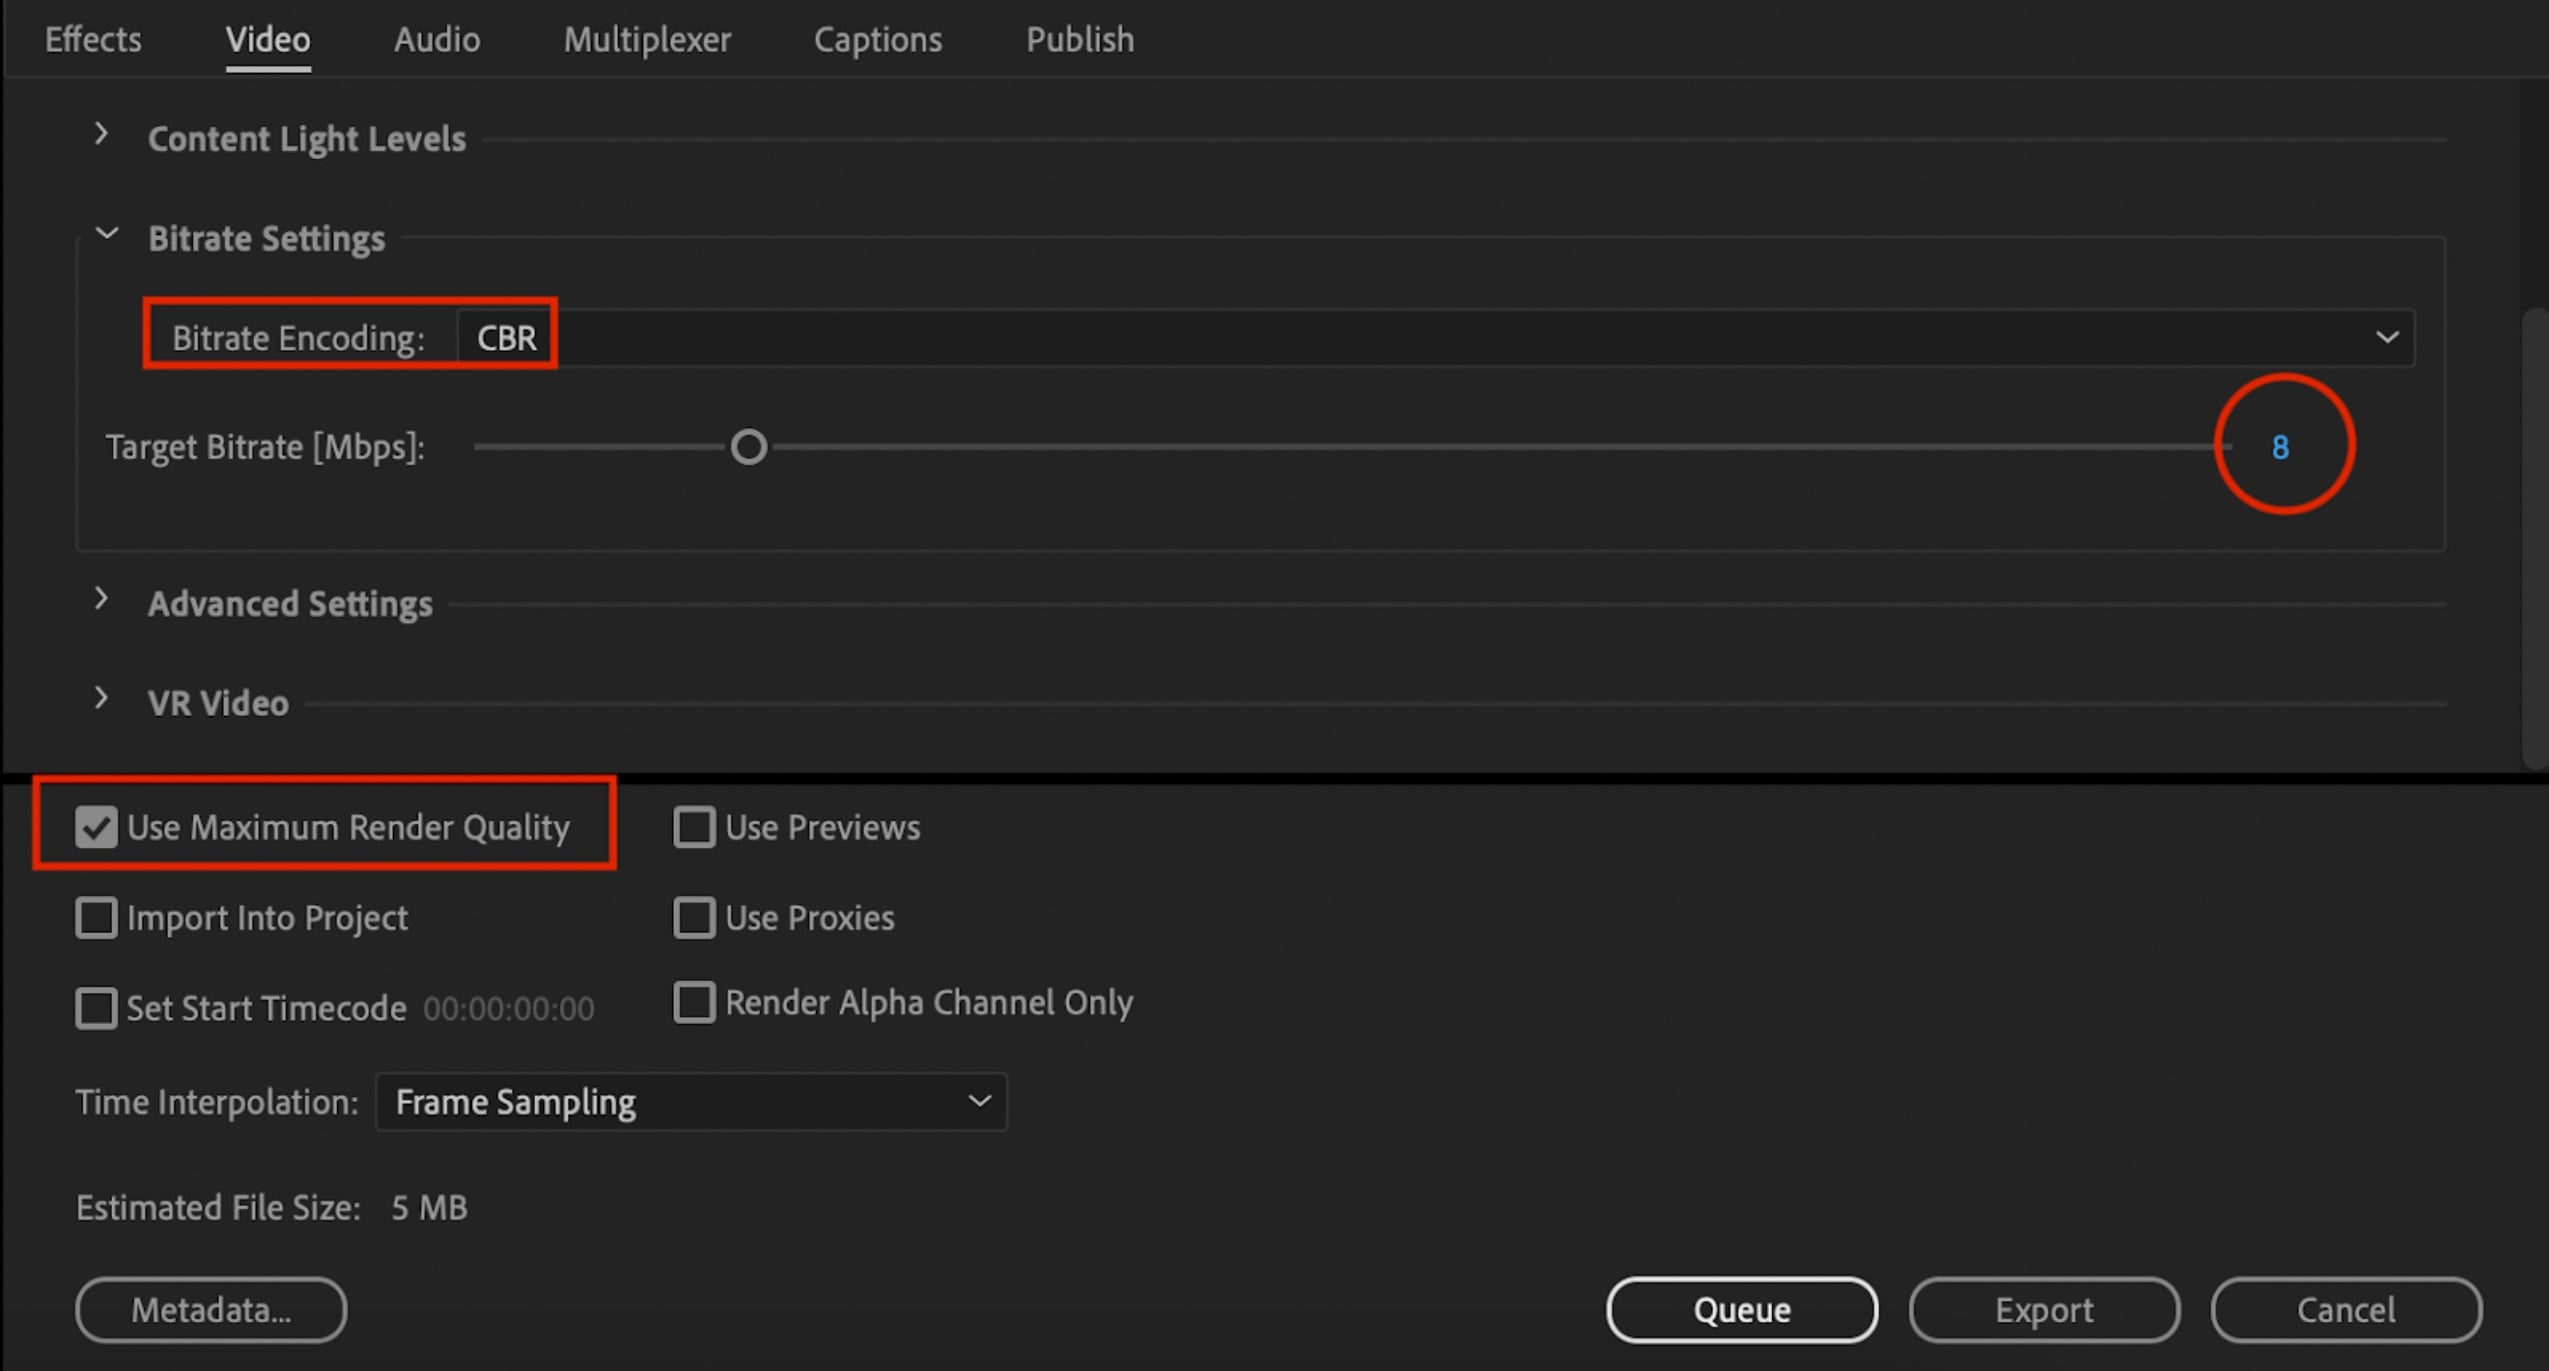
Step 4: Select CBR for Bitrate Encoding. For the Target Bitrate [Mbps], choose 8 if you are exporting a 720p or 1080p video at 30FPS or less, 12 if you are exporting a 1080p video at 60FPS or more, or 45 if you are exporting a 4K video. Finally, make sure that you activate the option to Use Maximum Render Quality.
And there you have it. The process of exporting a video from Premiere Pro to YouTube is not that challenging when you know what you're doing. As a side note, if you are wondering about audio settings, just go with the default settings provided by the Adobe team.
And now, as promised in the title, we will give you an alternative to Adobe's Premiere Pro that is easier to use, has almost the same functionalities, and won't cost you nearly as much. Say hello to Wondershare Filmora, the best video editing tool with advanced AI features designed for beginners and professionals alike.
Edit and Export Your Videos More Efficiently with Filmora
The team at Wondershare has spent years perfecting their flagship video editing product. Filmora comes with an abundance of features you can use to edit your video and make it perfect for your YouTube audience. We'll explore only a fraction of the available features below.
But, first things first, you need to download and install Filmora from Wondershare's official download page.
- Superb video stabilization with low distortion.
- Vast video/audio effects and creative assets.
- Powerful AI for effortless content creation.
- Intuitive, professional yet beginner-friendly.
- Works on Mac, Windows, iOS, and Android.


Generate videos with the fantastic AI Text-to-Video feature
If you need a fast solution for an intro animation or a short promotional clip, you can use the text-to-video feature, where you can simply type in a prompt, and Filmora will generate a video from that prompt. Follow these steps to utilize this feature.
Step 1: When you open Filmora, double-click on "AI Text to Video" below the New Project button.

Step 2: Type a prompt into the Video Text text box. Please note that there is a 1000-character cap. Explore other customization options in the window, and when you're done, click on Text to Video.

Wait for the video to generate and preview the results. If you dislike the results, you can simply try a new prompt.
Split videos to create perfect short clips
If you are working with a long video and you wish to split it into smaller chunks of footage, you can use Filmora's intuitive Split function.
Just find the place where you want to make the split in the timeline, click on it, and click on the Scissors icon. The video will be divided into two parts.
Add Effects to make your video unique
Filmora offers several effects that you can use to improve your video and make it more interesting to your viewers. These effects include but are not limited to Mosaic Blurs, Face-off effects, Masks, Countdowns, Overlays, and so much more.
Adding these effects in Filmora is as easy as one-two-three. Simply navigate to the Effects tab in the top-left of the screen, browse through the options provided in the interface, and drag the one you like down to the timeline. Place it in the adequate spot above the video, and you're done. If you are having issues, follow the screenshot below.

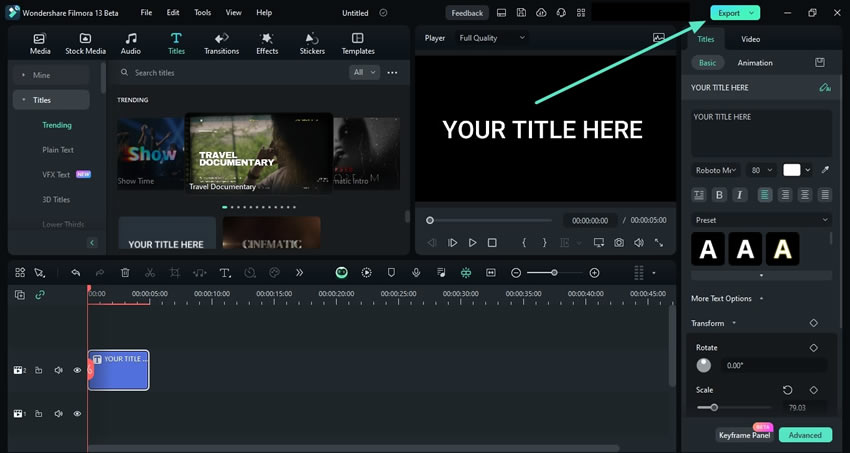
There are many other useful editing features in Filmora, but we'll let you explore them at your leisure. When you are done editing the video, you can export it, and the process is more or less the same as in Premiere Pro.
Step 1: Click on the Export button.
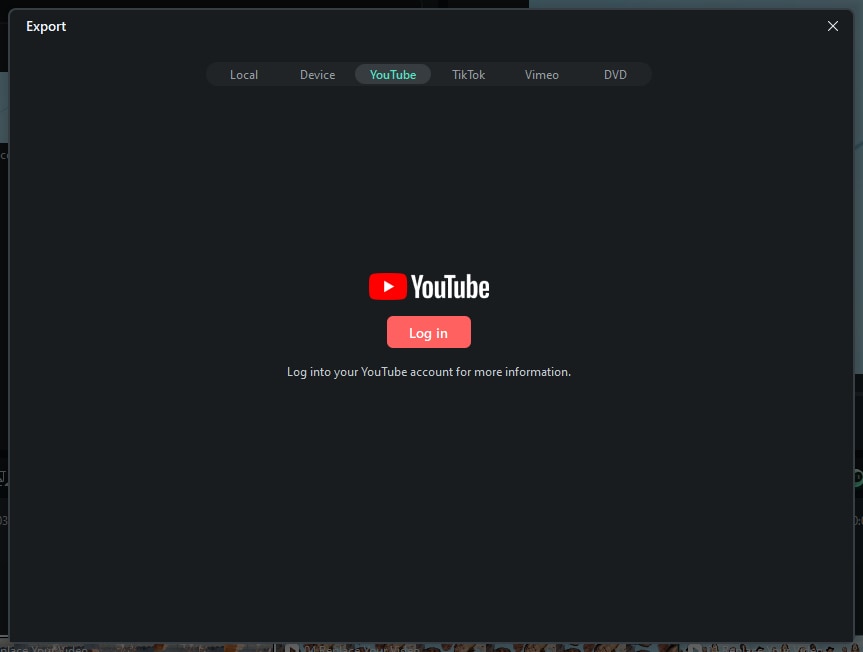
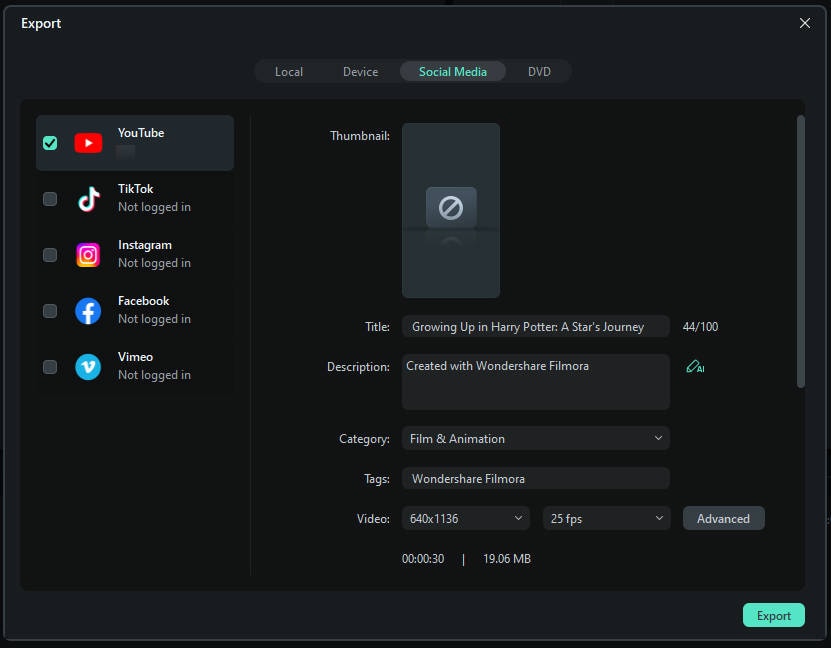
Step 2: Now, click on the YouTube card in the Export window, and log into your YouTube account. Note that, at one point, you will need to give Filmora access to your account.
Step 3: After Filmora is granted permission, you can return to the software and fill in the required boxes, as seen in the screenshot below. When you are done, click Export.
And we saved something for the end. You can use Filmora to improve your workflow and schedule videos for YouTube.
Use Advanced AI Features and Schedule Your Next YouTube Video
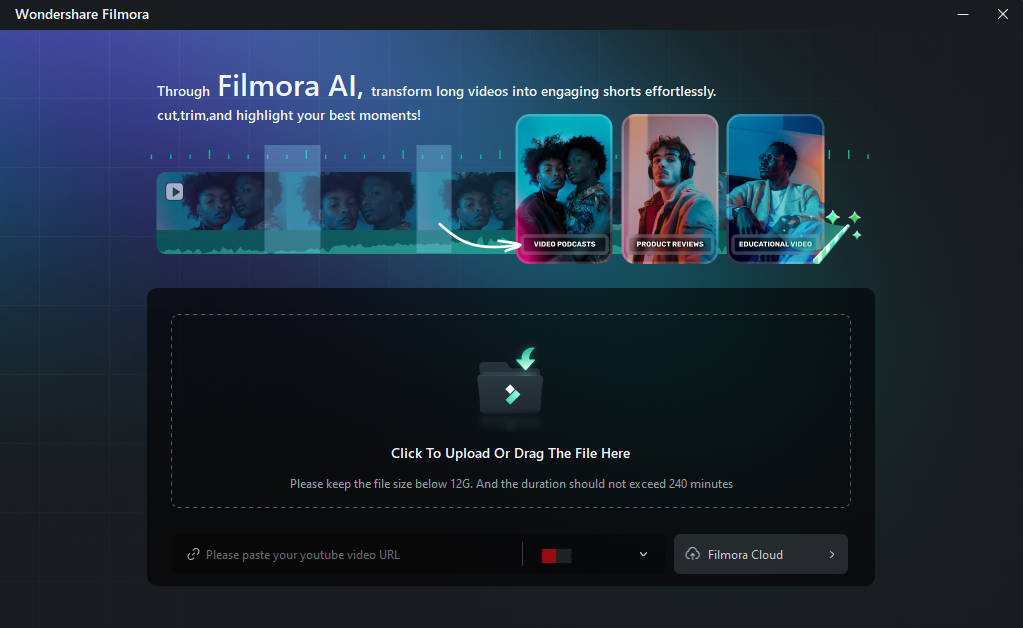
Wondershare developers are constantly developing new features to improve Filmora, and they recently released Smart Short Clips. This feature allows users to cut a long video into shorter clips that can be used on different platforms. If you are wondering how to use Premier Pro to create YouTube shorts, we have a much simpler option for you.
There are a few simple steps to follow to use this feature.
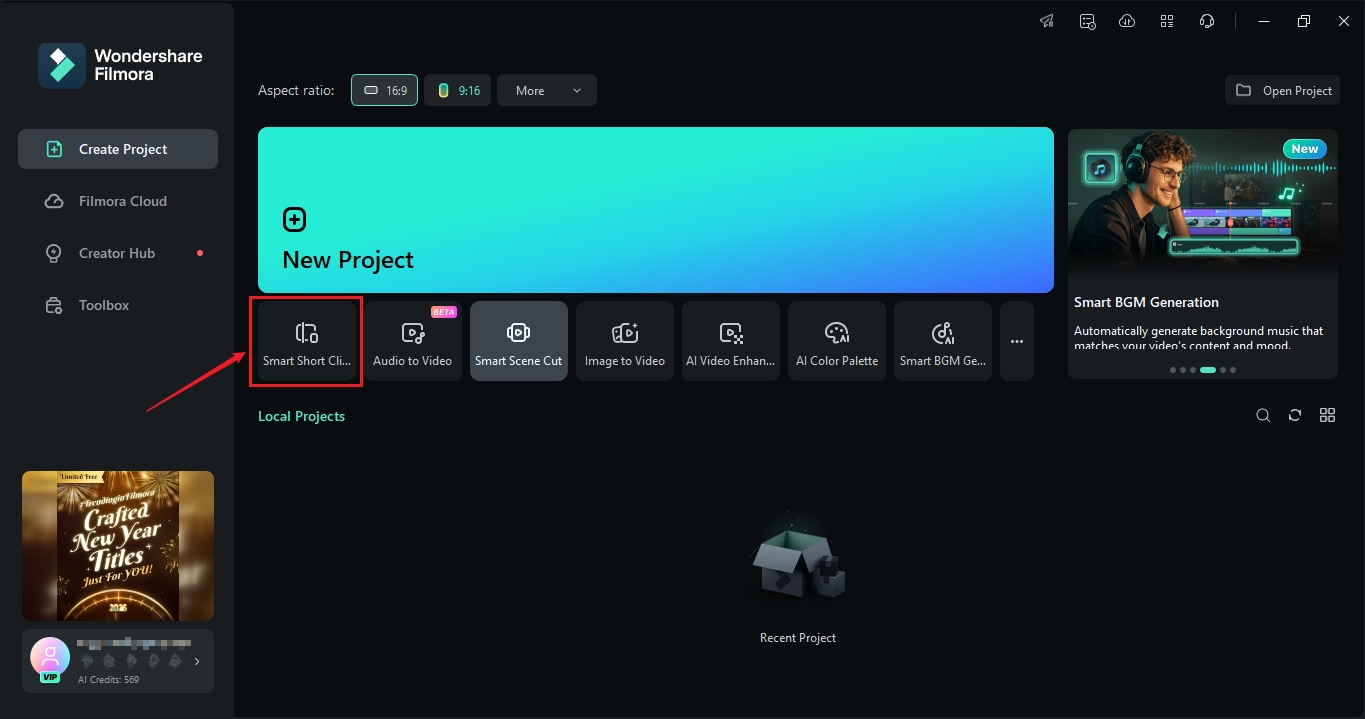
Step 1: As soon as you open Filmora, you will find the Smart Short Clips feature below the New Project button.
Step 2: Upload the video that you want to divide into shorter clips for platforms like YouTube Shorts and TikTok.
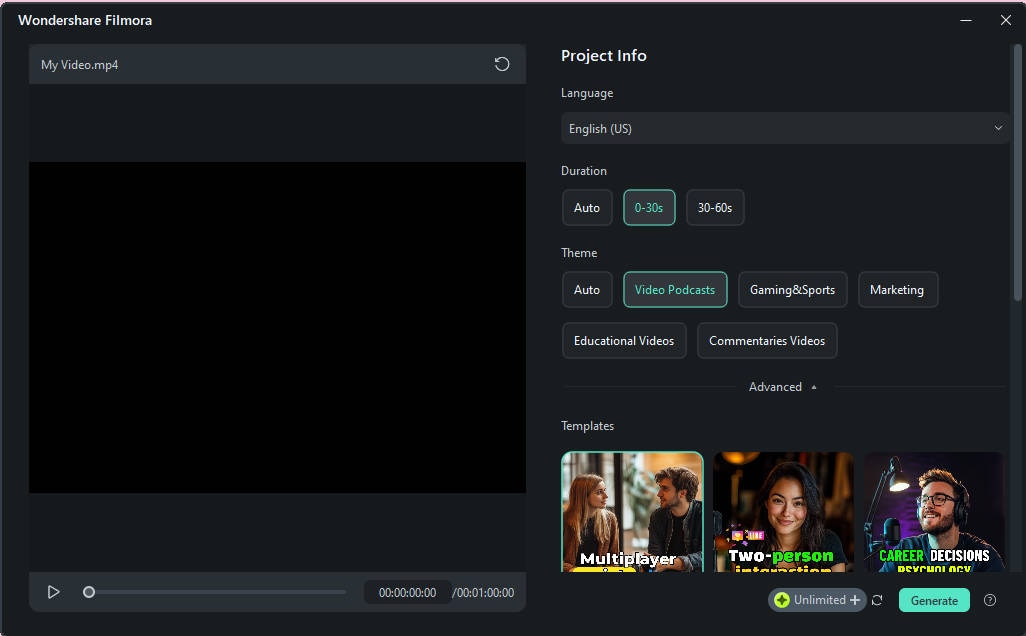
Step 3: Adjust some basic settings like the Duration and Theme of the output shot clips.
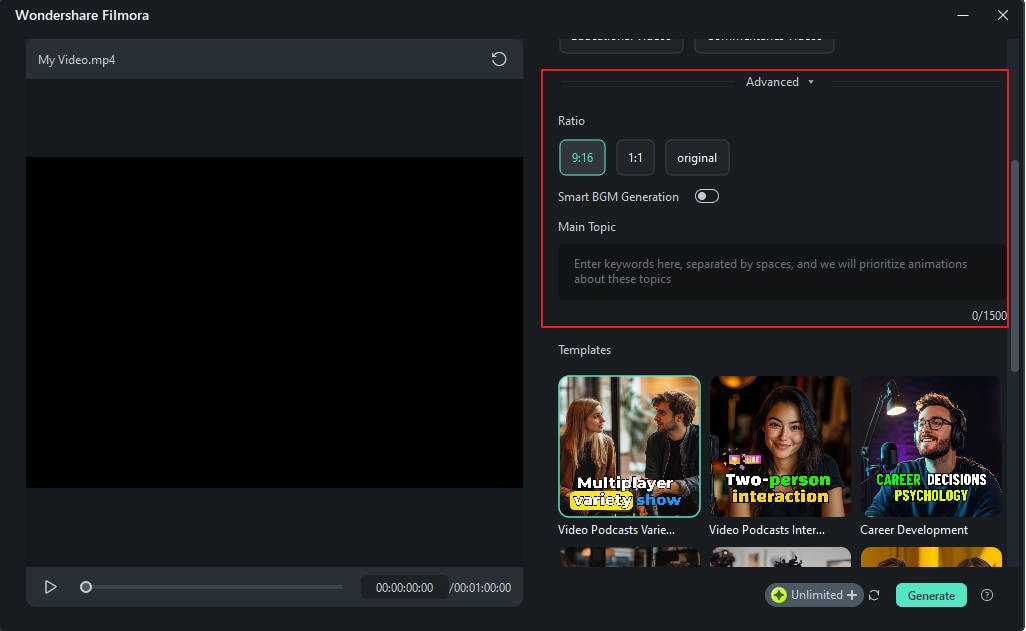
Step 4: Explore some Advanced settings like the Aspect Ratio. When you are done, click on the Generate button. You will see it in the lower-right corner of the screenshot below.
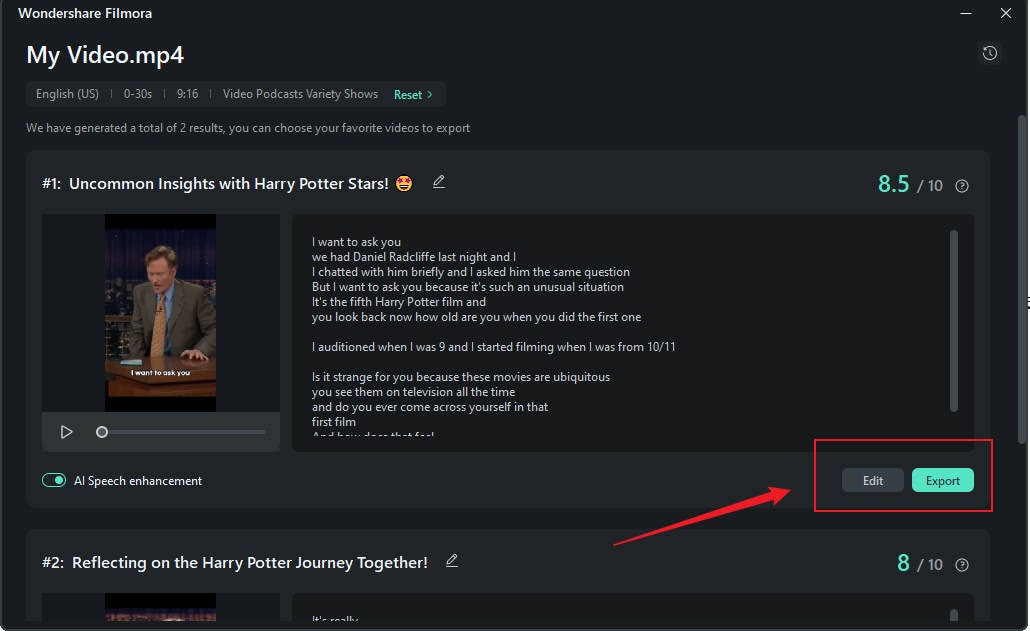
Step 5: All that's left now is to wait for Smart Short Clips to do its job. You will get results where you can explore different short clips created by the software. When you see something you like, just click on Export.
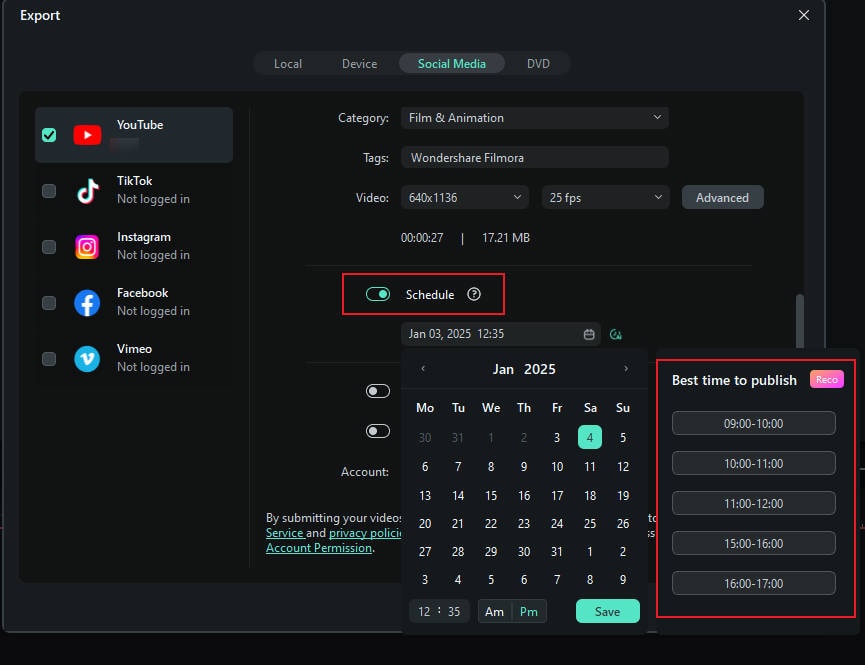
Step 6: A new window will appear. Select the platform where you want to post the clip, and make sure to select the appropriate settings under Title, Description, Category, Tags, and Video.
Step 7: Utilize the brand-new feature of Smart Short Clips that lets you Schedule your post.
With all these functions and perks, the easy conclusion is that trying Filmora and exploring all its features is a must if you want to progress further in your career as a YouTuber.
Conclusion
Making it as a content creator on YouTube is no easy task, but with the right attitude and a will to explore helpful options on the web, the goal becomes closer and closer. Persistence is key in this game, so if you want to succeed, you cannot let some minor or major letdowns get the better of you.
Stay positive and move forward each day, and you will eventually reach your goal of becoming a famous YouTuber.
