Key Steps of This Video Tutorial To Follow
Guide to using Filmora AI Tools
First of all, start the process by dropping the music effect on the audio track on the timeline. Now select the first footage and drop it on the first track. Keep the first footage for a few frames on the timeline and select the second footage and drop it right next to the first footage on the same track. Keep the second footage for a few seconds on the same track.
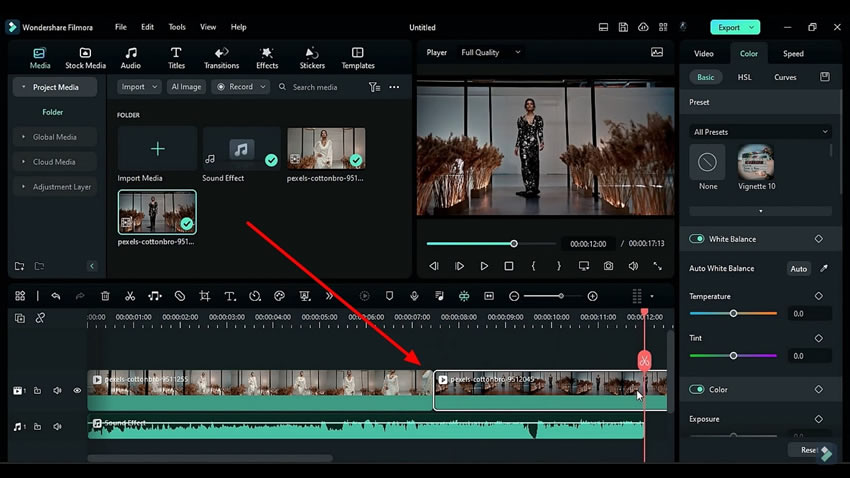
Select both footage from the first track and paste it on the second track. Lock the first track and identify the beats on the first footage. Split the first footage on those beats and delete the rest of the parts that are not on it.
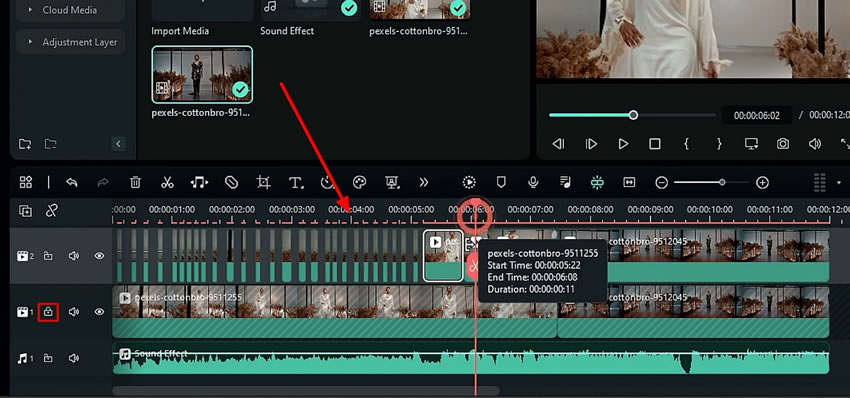
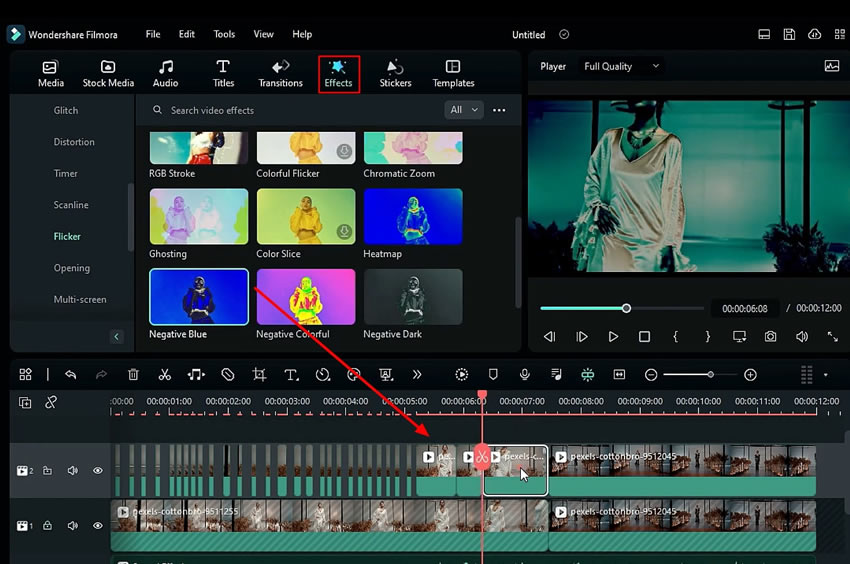
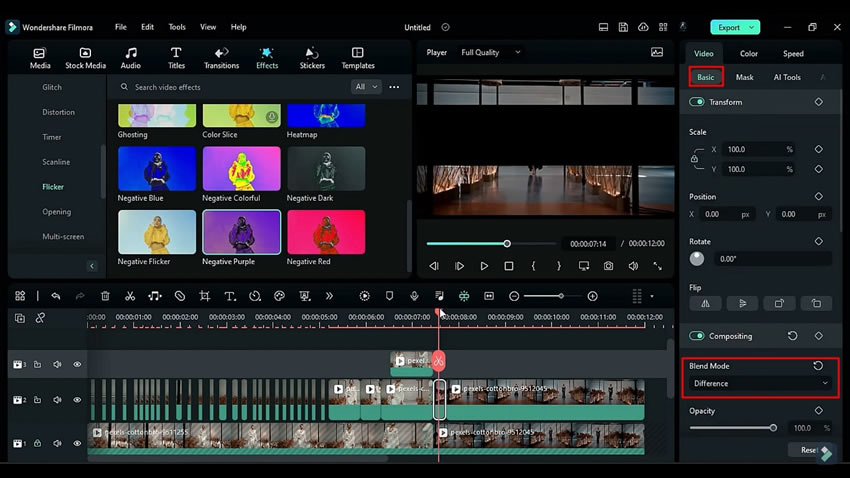
Select the remaining clip part and go to the "Video" tab. From the "Basics" section, you can change the “Blending Mode.” Lead into the "Effects," where you can select any effects of your choice and apply them to the video.
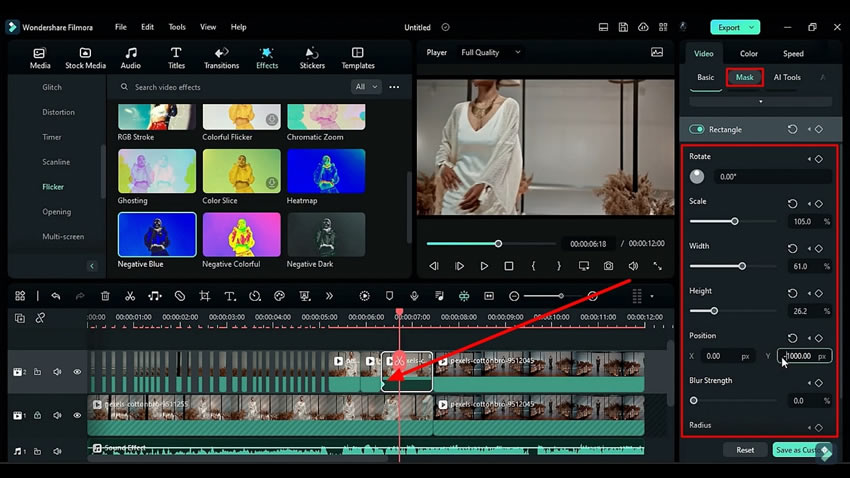
Place your playhead at the start of the clip and find the "Mask" section next to "Basic" in the settings window. Scroll down the "Mask" section, and you can adjust the "Scale,” “Width,” Height, and “Position” at “Y” of the mask you have selected.
Add keyframes at the position from the top right corner under the “Mask” tab. Move your playhead a few frames further and change the “Position” at “Y” into negatives. Now copy this effect and paste it on the third track. Set this “Clip” a few frames back on the new track and shrink it by cutting it.
Adjust the mask on the clip present on the third track by moving one keyframe forward. Lead into the “Effects” tab and apply different effects on the track. Place the playhead at the required footage of the second track and split the footage. Place the playhead at the required part and lead back into the “Mask” tab.
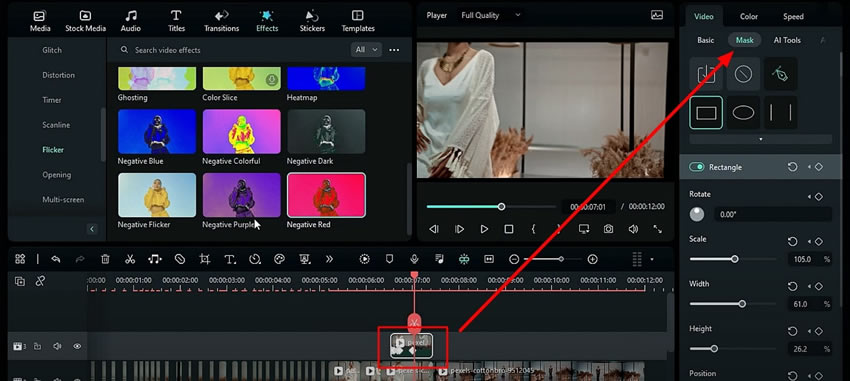
Choose “Parallel Line” from the “Mask” tab. Then, under the “Parallel Lines” section, set the values for “Rotate,” “Width,” and "Position" for the "Y" axis as per requirements. Again, change the "Y" value a few frames forward.
After that, head to the "Basic" tab, and under the "Compositing" section, choose the required "Blending Mode” from the dropdown list and apply effects, if needed. Continue this operation until you are done with the entire video, with the required masking and effects.
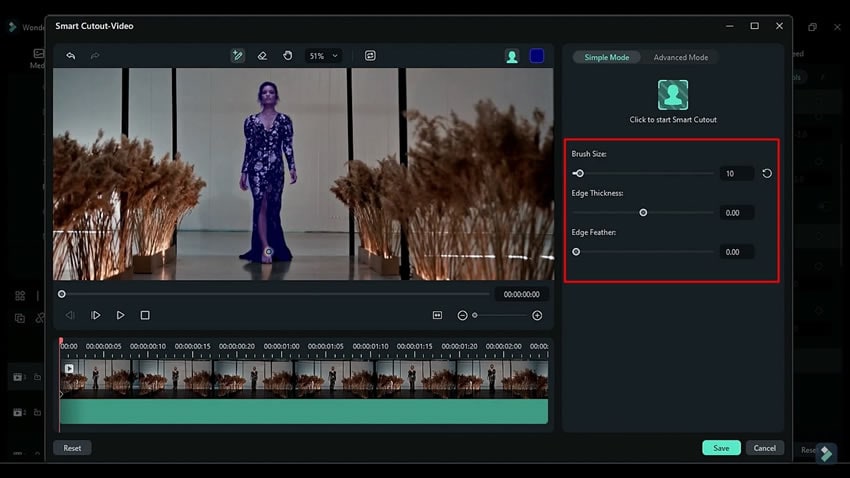
Enter the “AI Tools” tab and select the clip on the third track. Scroll down the section, turn on the "Smart Cutout," and adjust the settings by clicking on it. Set the "Brush Size,” "Edge Thickness," and "Edge Feather" as per requirements. Add more "Effects" on the clip, and blend multiple effects to create new effects.
Enter the "Media" tab from the top left corner and select the "Adjustment Layer" option from the left panel. Then, apply the "Adjustment Layer" on track 3 and keep it till the required timeframe. Split the rest of the parts and set the start time of the last split part at the required timeframe.
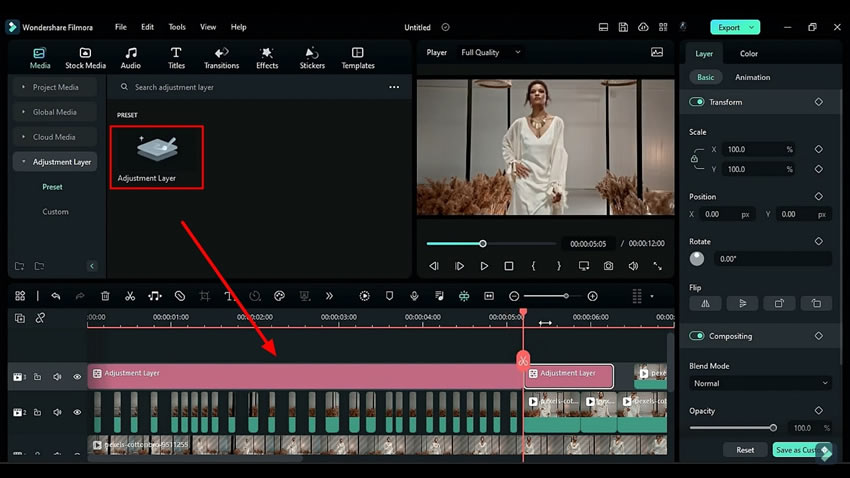
Split the first adjustment layer on the third track according to the clip you’ve split on the second track and delete the non-beat parts of the adjustment layer accordingly. Select the second split part of the adjustment layer and apply the effect on this layer. Double-click the effect you've applied and enter the settings. Here you can adjust the "Duration" of this effect from the "Effects" tab.
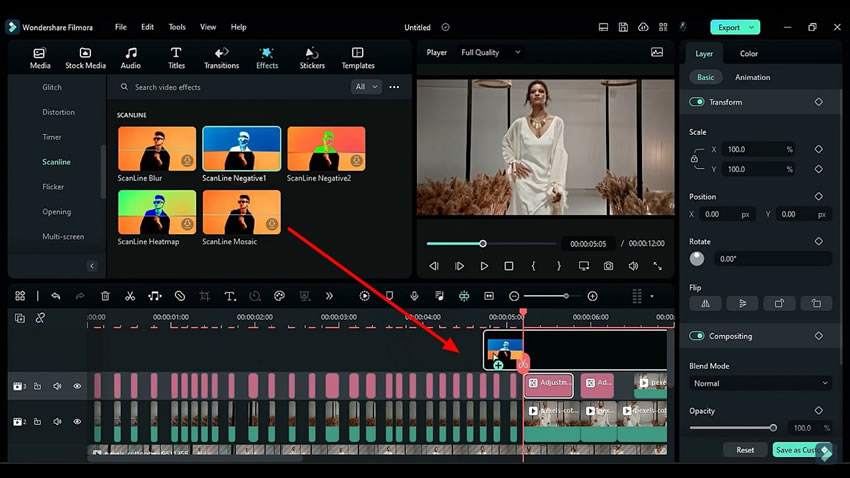
Head towards the last split part and apply the effect on this part from the “Effects” tab. From the settings under the “Layer” tab, look for the "Transform" option, turn on the keyframes, and set the "Position" at "Y" at the end and start of the clip.
You can further split this adjustment layer from the middle to make it more interesting, change the music beat effect from the “Effects” tab for the second half part and adjust the “Position” at “Y.”
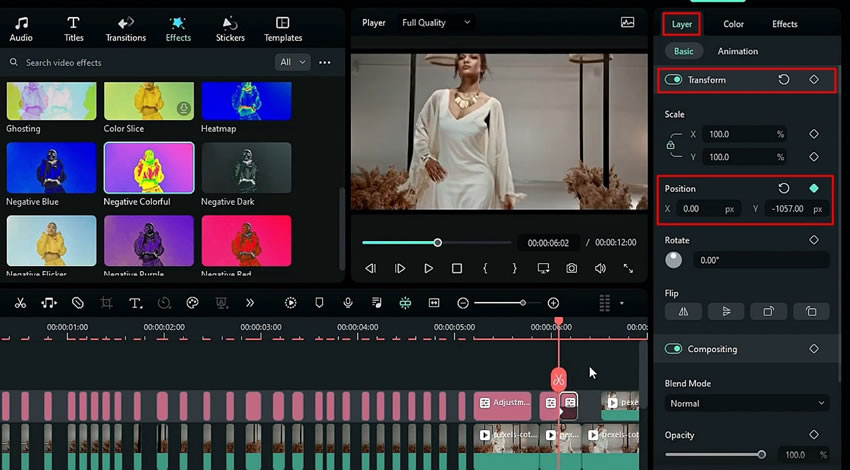
Split the first clip and apply different “Effects” on each split part and adjust the position as needed. Now place your playhead at the start of the frame and apply “Effects” for the first few frames. Copy another effect and apply it anywhere on this video clip. Your video is ready; you can render it to see the final preview.
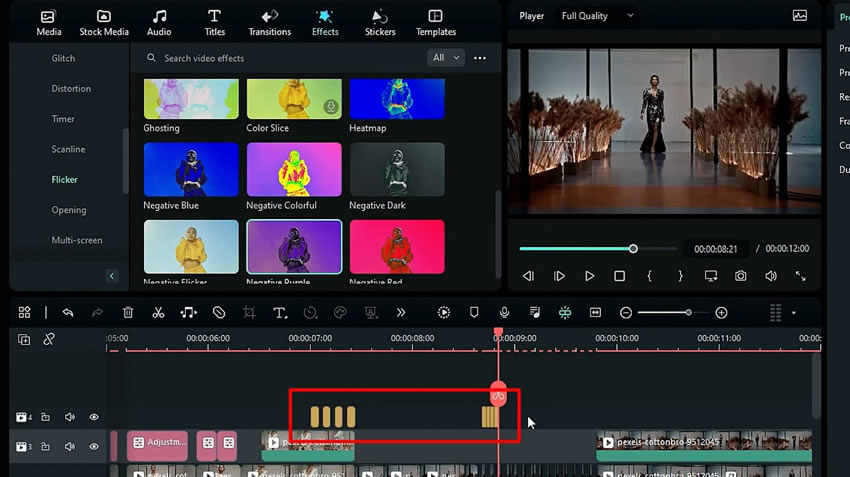
To grab the attention of viewers, it needs to make your videos attractive. This article provides a step-by-step guide on how to add music beat effects to your audio. You can also learn video editing techniques, applying multiple effects to the videos to bring creativity to your videos and make them more engaging using Wondershare Filmora.


