



 100% Security Verified | No Subscription Required | No Malware
 TL;DR:
You can apply custom LUTs in Adobe After Effects by dragging the Apply Color LUT utility from the Effects and Presets panel directly onto your video clip in the timeline.
● Normalize your footage's white balance prior to color grading by creating a solid layer targeting a white section of your image at 100 brightness and selecting Divide from the Transfer menu.
● To permanently install custom LUTs as presets, the primary user must paste the files into C:\Users\yourusername\AppData\Roaming\Adobe\Common\LUTs\Creative for Windows or /Users/yourusername/Library/Application Support/Adobe/Common/LUTs/Creative for macOS.
● To apply a single LUT across multiple clips simultaneously, you must right-click the timeline to generate a New Adjustment Layer and drop the Apply Color LUT utility specifically onto that layer.
Ask AI for a summary
 ChatGPT
 Perplexity
 Gemini
 Claude
 Grok
Grok
Create High-Quality Video - Wondershare Filmora
An easy and powerful YouTube video editor
Numerous video and audio effects to choose from
Detailed tutorials provided by the official channel
Are you looking to add some extra zing to your videos? If you use Adobe After Effects for your video editing, this is for you. The following is a free LUT After Effects guide to making your next video pop. You will discover what makes a great After Effects luts video and how to apply that to your next production.
Additionally, you will find recommendations on where to get the best after effects luts. So, grab your favorite drink, and let your journey to video editing supremacy begin.

Things to Know Before Using LUTs in After Effect
Do you ever wonder why some Adobe After Effects videos look so great? Regardless of your experience with the software, here are the points to consider when using LUTs in After Effects.
1. Check your white balance settings
If you are questioning why there lies your first challenge. You need to check the white balance of your creations because colors appear differently, depending on the lighting you use. As such, you need to adjust your white balance to suit conditions similar to when you made the video. For example, your settings should be between 4000 – 5000K if your light source is fluorescent.
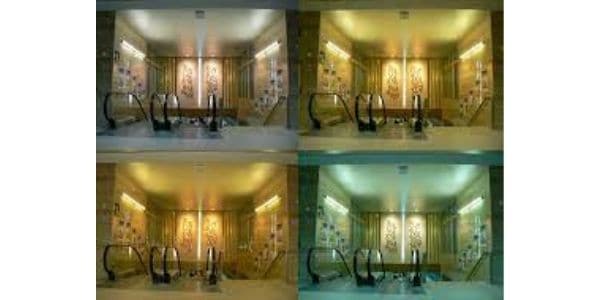
Here is how you get the correct white balance when using Adobe After Effects.
- Open the image you want to edit in the program.
- Next, from the Layer dropdown menu, click on New, and then select Solid.
- Once the menu opens, select a section of your image that should be white, as your solid color, and click Ok. This will only work if your brightness value is at 100. For example, the ceiling in the picture is white.
- Select Divide from the Transfer menu, and the result is an image with a perfect white balance.
2. Match your editing with the source material
Can you get to Mars with $30? Unless you have Martian buddies, it is highly unlikely. You should always consider your equipment’s capabilities when creating photos or videos. Factors like exposure, lighting, and lens type are crucial to producing quality content.
For example, you need a wide-angle lens to have more depth in your videos. Therefore, always ensure you limit your LUT usage to the source material.
Most creators often fail because of after effects luts overuse. Other factors to consider when creating are the location and timing. Your filming environment changes constantly. As such, you should always expect to make adjustments to ensure quality output.
3. Settle on a creative style.
What makes David Fincher famous? His consistent use of desaturated and monochromatic colors in movies to perfection. Similarly, you need to choose a consistent theme for your creations. As such, you get better at it with subsequent creations.
How to import LUTs in After Effect?
Do you remember the thing about being unique earlier? You can import LUTs if you feel the presets are not to your standard. Plenty of custom ones are available as free downloads but more on that later. This is how to import LUTs in After Effects.
- Load the clip you want to edit to Adobe After Effects.
- Then, go to the Effects and Presets menu option on your workspace. In case it is missing, check whether it is active from the Window tab located at the top of your main menu. Alternatively, you can always press CTRL + 5 to open it.
- Next, launch Apply Color LUT to open your File Explorer. It should be one of the options in the Effects and Presets window. Alternatively, you can search for it by typing the same in the text box.
- Once it opens, drag it into your workspace for you to apply the custom LUT to your clip.
- Locate the custom LUT, by navigating to the directory you downloaded the preset.
Alternatively, you can have all your custom LUTs at the ready by adding them to the After Effects LUT directory. Here is the process.
- Open the directory where all your custom LUTs are on your device.
- Then, use the Select All and then COPY functions of your device. Press CTRL + A, then CTRL + X on your keyboard if you are a Windows User. Use the COMMAND - A, then COMMAND – X functions if you use it on Mac.
- Finally, paste the files in your Adobe After Effects installation directory.
For macOS
/Users//Library/Application Support/Adobe/Common/LUTs/Creative
/Users//Library/Application Support/Adobe/Common/LUTs/Creative
For Windows
C:\Users\yourusername\AppData\Roaming\Adobe\Common\LUTs\Creative
C:\Users\yourusername\AppData\Roaming\Adobe\Common\LUTs\Technical - The custom LUT files will be available to you as presets next time you launch Adobe Effects. The process only works if you are the primary user. Furthermore, ensure you put each copy in the relevant directories.
How to use LUTs in After Effects
Now that you have a variety of Adobe After Effects LUTs at your disposal, here is how you apply them.
- Launch the program and select the video or photo you would like to edit.
- Then, open the Effects and Presets panel to launch the Apply Color LUT utility. You should notice a significant increase in LUTs available if you did the above correctly.
- Now, drag and drop the Apply Color LUT utility onto the clip you want to edit. This is the only way your adjustments will work. Additionally, you should make the application on the timeline.
- A dialogue box should now be open, with the location of your LUT presets as the default.
- Choose the LUT you want and press Open to apply the change.
- You can edit the LUT using the Effect Control Panel. The functions you need are on either side of the video.
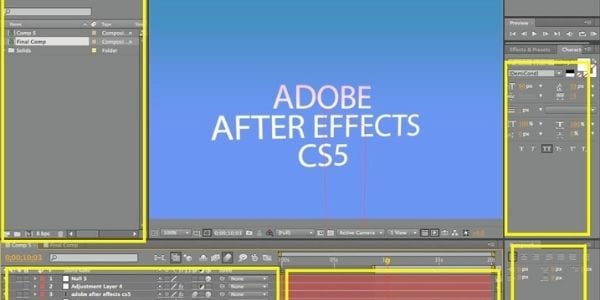
Adobe After Effects allows you to use LUTs on multiple clips. However, you need an adjustment layer for this to work. Here is how you enable the function.
- Right-click on the area of your timeline that you want to edit.
- Select New from the pop-up menu, and click on the Adjustment Layer option.
- Then, follow steps one through five to add the LUT.
● As you can see, Adobe After Effects give you lots of leverage when using LUTs. And with the information above, you are ready to unleash your full creative potential. Keep checking with us for more insightful guides on video and photo editing.
