Ever noticed how some Twitch streams feel more like a party than just a live show? That’s the magic of Twitch Stream Avatars! These tiny, customizable Twitch avatars give your viewers a fun way to interact with your stream—whether it’s making their stream avatar dance, jump, or even battle other avatars on screen.
So, what’s stopping you from jumping in on the fun and adding Stream Avatars to your own Twitch live stream? However, it's understandable if you’re feeling a bit overwhelmed and not sure where to start.
But don't worry! We're here to help you through everything you need to know to set up and use Stream Avatars on Twitch, so you can turn your stream into a lively, interactive experience that stands out from the crowd. Let’s get started!
In this article
Part 1. Why Twitch Stream Avatars Are the Next Big Thing for Viewer Engagement
Before you dig deep and learn how to set Stream Avatars on your Twitch live stream, it’s good to get a clear picture of what they are and why they’re such a big deal for viewer engagement. In simple terms, Stream Avatars are little digital characters that hang out at the bottom of your stream while you’re live. They’re like fun, customizable sidekicks that represent your viewers.
Here’s what makes them so awesome:
- Customizable Personalities: Viewers can personalize their avatars to match their style, making them feel more connected to your stream.

- Mini-Games Galore: From battles and boss fights to duels, these avatars let your viewers jump into fun games right on your stream.

- Interactive Commands: Viewers can use commands like !dance, !jump, or !attack in chat to make their avatars perform cool actions.

- Visual Entertainment: Stream Avatars keep the screen lively, especially during downtime or transitions, so there’s never a dull moment.

As you can see, having Twitch Stream Avatars is like having a mini-game built into your stream where your viewers get to see their avatars in action. Not only does this make your stream more exciting, but it also gives your audience a fun way to interact and feel like part of your community.
Part 2. Setting Up Stream Avatars for Your Twitch Stream
Alright, now that you know how awesome Twitch Stream Avatars can be, let’s get them set up on your stream. Thankfully, it’s a pretty simple process, and you’ll have them running in no time! But to get started, there are a few things that you need to prepare beforehand, here they are:
- Install Stream Avatars (Available on Steam): Stream Avatars is the tool you’ll use to manage and customize your avatars. You can grab it from Steam for $14.99. Once you’ve made the purchase, download and install it, and you’re all set to start using it!

- OBS Studio (or your preferred streaming software): This is where the magic happens. This is where your avatars will show up as an overlay during your live stream.

- Twitch Account Connected to OBS: Make sure your Twitch account is properly linked to your streaming software. This connection allows Stream Avatars to sync with your live stream, making it possible for your viewers to see and interact with their avatars in real-time.

Once you have these things ready, the next step is to bring those little characters to life and start transforming your Twitch stream into an interactive experience.
To make the setup even easier, check out this super helpful video on YouTube: The Ultimate Stream Avatars Setup Tutorial by Trui.
Part 3. Repurpose Your Stream Avatar Clips Using Feature-Rich Video Editor
Once you’ve set up Stream Avatars for your Twitch streams, they’ll definitely add a fun and unique touch to your content. But you don’t have to stop there. Those entertaining clips featuring your avatars can be repurposed into polished videos for YouTube, TikTok, or other social platforms. It’s a fantastic way to grow your audience, expand your reach, and keep your content relevant even after your livestream ends.
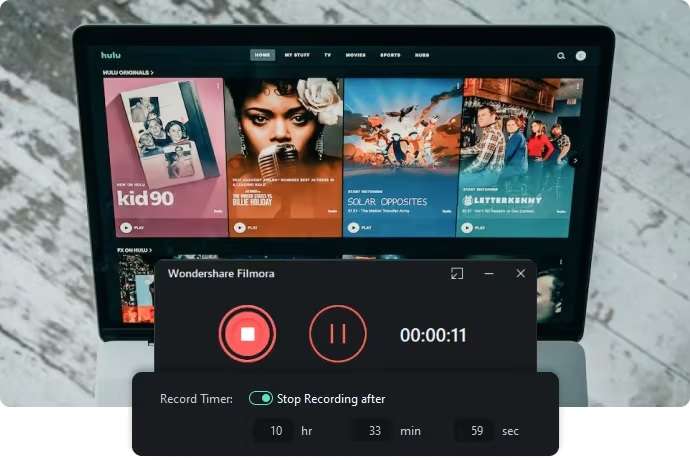
To make your videos stand out, you’ll need a reliable and feature-rich video editor—and Wondershare Filmora is a perfect choice. It has everything you need from capturing your Twitch Avatars Stream to powerful tools for turning your live stream moments into engaging, shareable content.
Why Filmora is worth a try:
- Capture Your Live Stream Moments: With Filmora’s Screen Recorder, you can easily capture your live stream content, including those fun Stream Twitch Avatar moments, and edit them later to perfection.
- Complete Editing Toolkit: Filmora comes with all the tools you need—trimming, cutting, transitions, and more—to turn your clips into polished, professional-looking videos.
- Built-in Media Library: Add some flair to your clips with Filmora’s collection of effects, stickers, and animations.
- Perfect for Short-Form Content: Filmora’s Smart Short Clips feature makes it super easy to create attention-grabbing content for platforms like TikTok, Instagram Reels, or YouTube Shorts.
- Easy Sharing: When your video is ready, Filmora lets you upload it directly to popular platforms like YouTube, TikTok, and Vimeo—no extra steps needed.
Plus, Filmora offers flexible pricing plans and even a free trial, so you can try it out before deciding to buy or subscribe. It’s also available on both Windows and macOS, making it super convenient no matter what platform you’re using.
To get started with using Filmora to capture and edit your live Stream Avatar moments on Twitch, follow this simple guide:
Step 1. Open Filmora and access the Screen Recorder
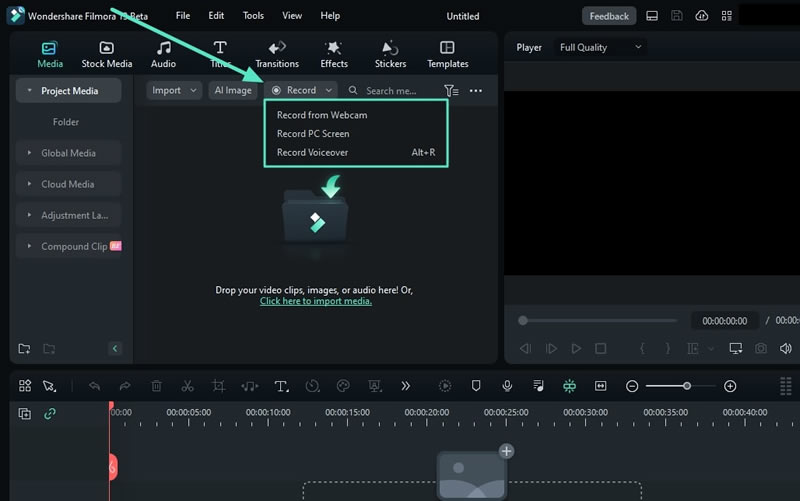
Download and install the latest version of Filmora on your device if you haven’t done so yet. Once installed, open the program and click “New Project” to begin editing. Below the menu bar, click on "Record" and select "Record PC Screen" from the available options.
Step 2. Set up your recording area
Open your Twitch stream on your browser or streaming software. In Filmora’s recording settings, set the recording area to match your Twitch stream window. You can capture the whole screen or just the section where your Stream Avatars are active.

Step 3. Start recording your stream
When you’re ready, hit the red Record button to start. A countdown will appear, but if you’re in a hurry, click "Start Directly" to skip it. While recording, you can easily pause, stop, or restart using the player controls.

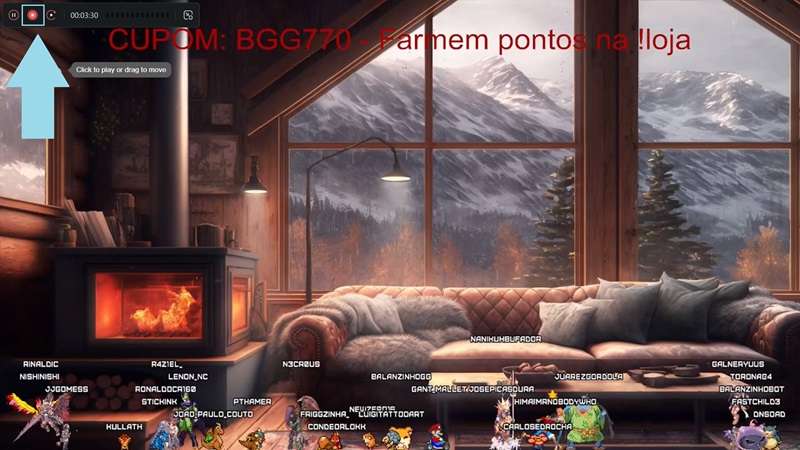
When you’re finished recording, click the red button in the top-left corner of the screen. The recorded video will automatically be added to Filmora’s main timeline, ready for editing.
Step 4. Edit your captured content using Smart Short Clips
There are plenty of ways to edit your live-stream content in Filmora. If you want a quick option, use Smart Short Clips to create highlights and add captions automatically. To use it, you’ll need to Export your recording first.
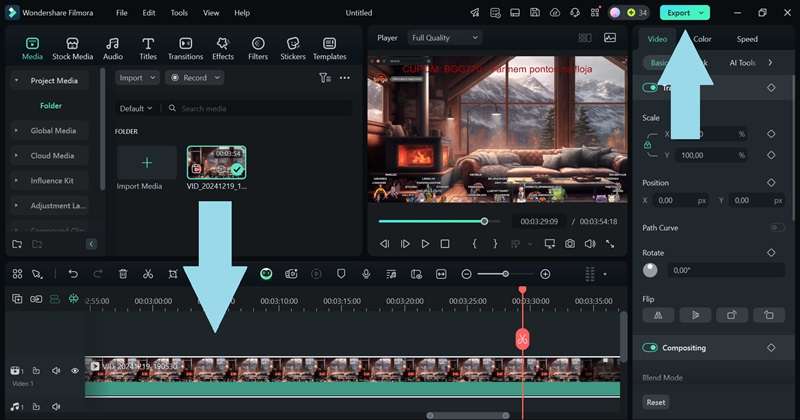
Once that’s done, reopen Filmora and look under "New Project" in the feature list—you’ll see the Smart Short Clips option ready to go!
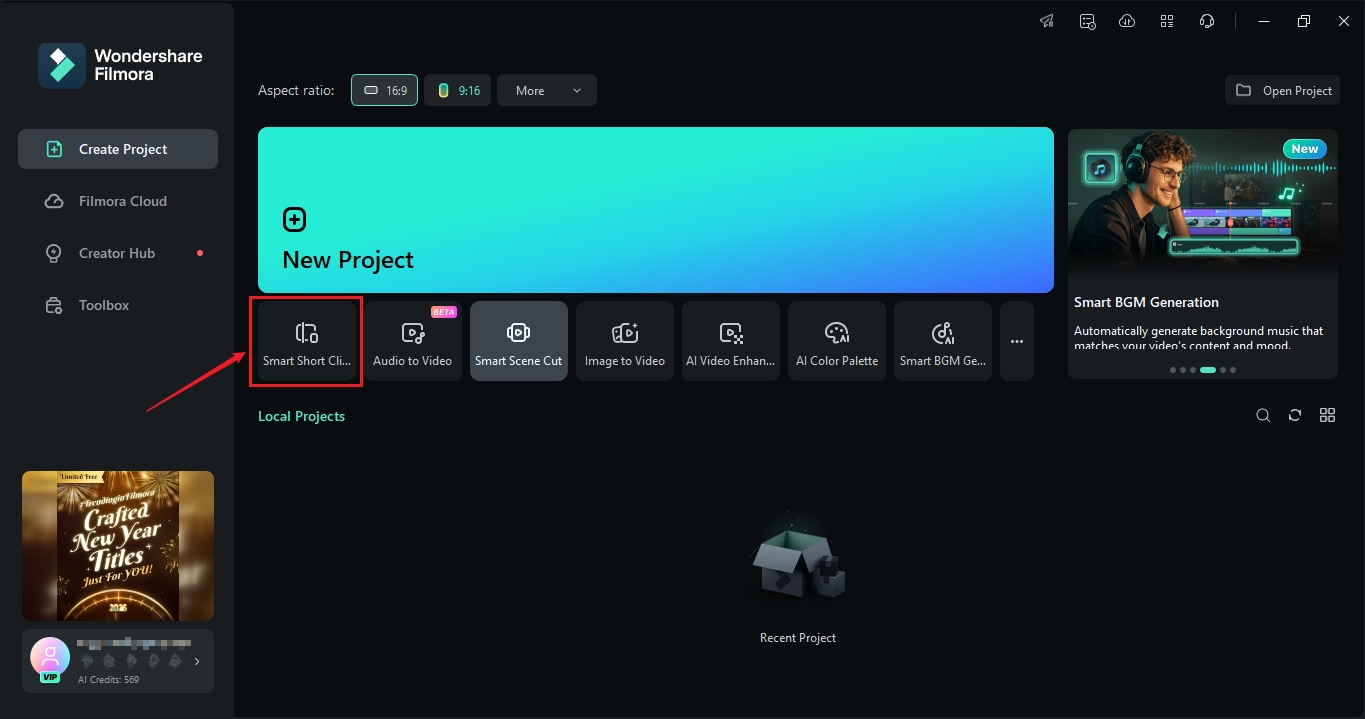
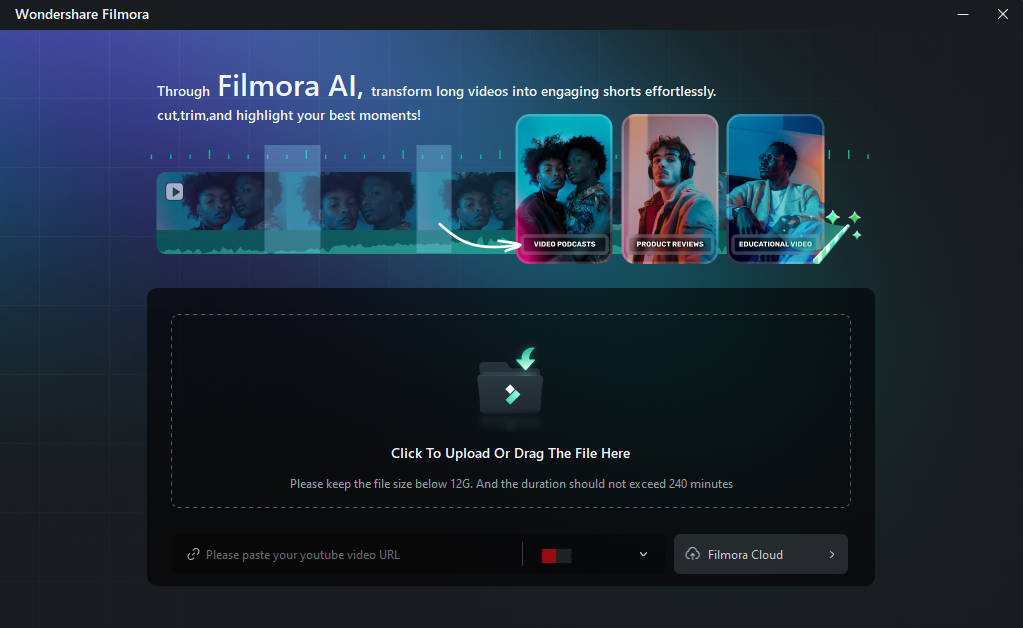
Next, click on the Filmora icon to import your exported live stream recording.
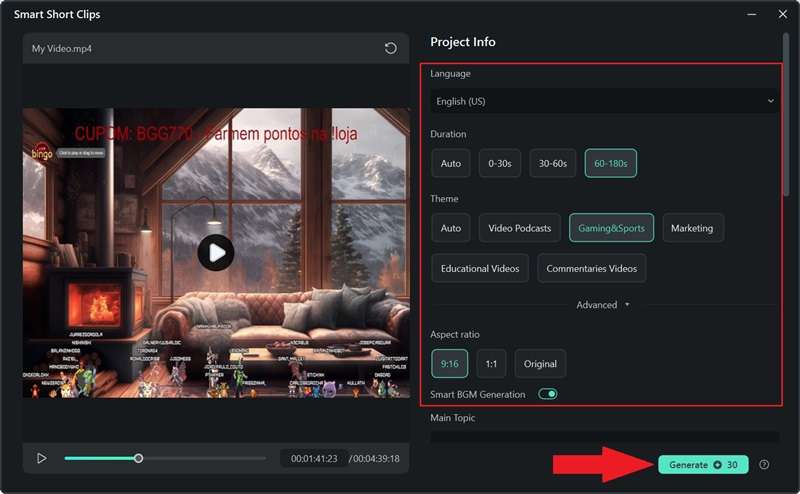
Next, choose the original language of your clip. If you want, you can adjust the Duration and Themes to suit your style. You can also pick your preferred aspect ratio and enable Smart BGM Generation to add music that matches your content. Once everything looks good, click "Generate" to move forward.
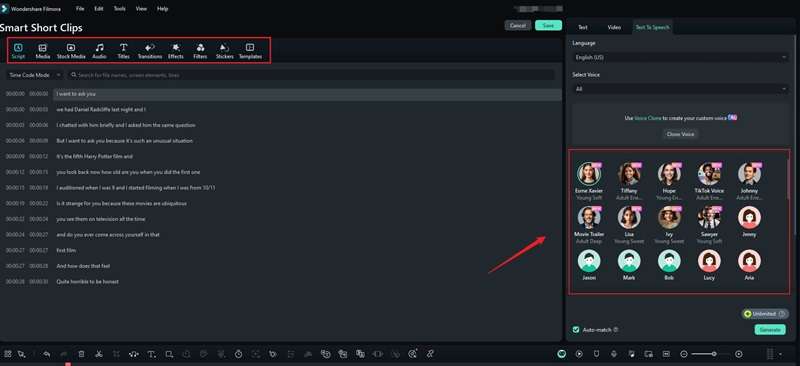
Once the video is generated, you’ll be taken to the Smart Short Clips editing panel. Here, you can make more edits to your video. For example, if you’re not happy with the current speech or want to add more dialogue, you can use the Text-to-Speech feature to create new voiceovers from text.
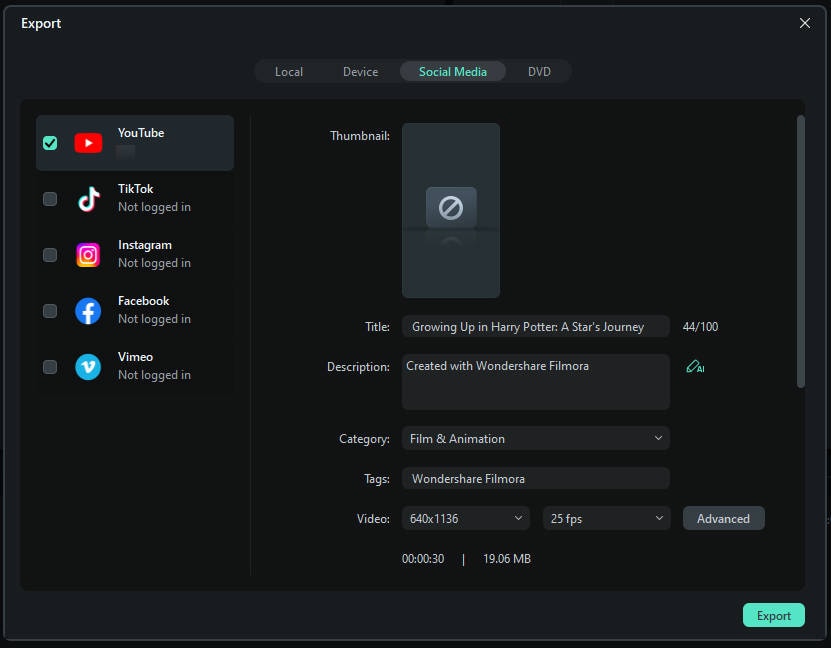
When everything looks good, open the Export window, choose the social media platform you want to upload to (like YouTube, Vimeo, or TikTok), and customize the settings, including the title, description, category, resolution, and more.
Step 5. Edit your captured content manually
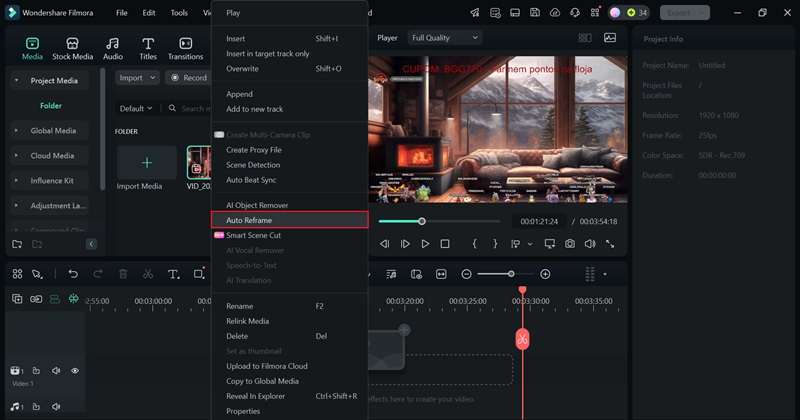
If you don’t want to use Smart Short Clips, you can edit your videos manually. After recording with the Screen Recorder, instead of exporting it right away, just right-click on the video and select the "Auto Reframe" feature from the menu that pops up.
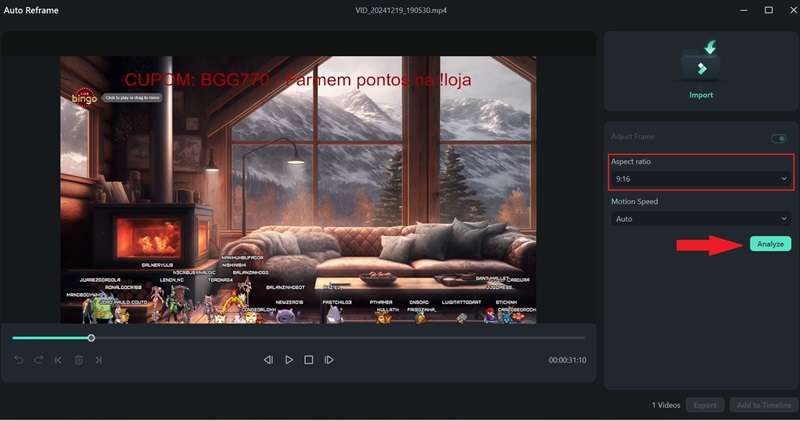
Next, adjust your video’s aspect ratio and dimensions in the Project Settings to match the requirements for short platforms like TikTok or Instagram Reels, usually 9:16. You can also tweak the video speed here if needed. Once everything looks good, click "Analyze" to continue.
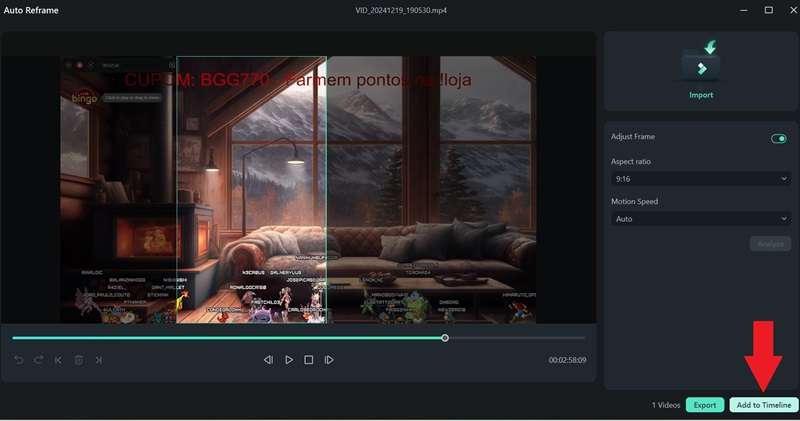
Click play in the preview window to check the result. If it looks good, click “Add to Timeline” to make further edits.
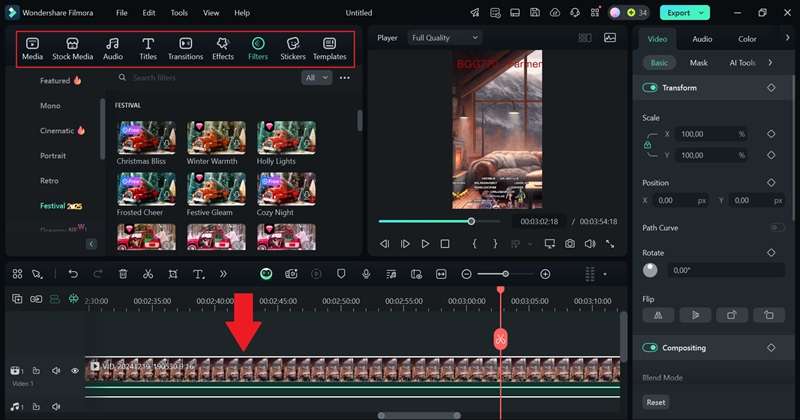
Now it’s time to take your live-stream content to the next level! You can cut out unnecessary parts, add filters, animated stickers, background music, captions, and even translations. Feel free to explore Filmora’s features and get creative with your edits.
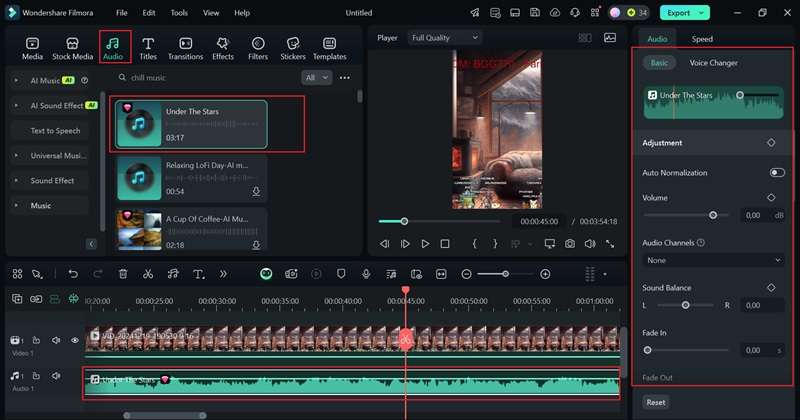
For example, head over to the "Audio" tab to find music that fits your video. Once you find a track you like, drag it to the timeline. From there, you can adjust the volume and fine-tune other audio settings in the property panel on the right.
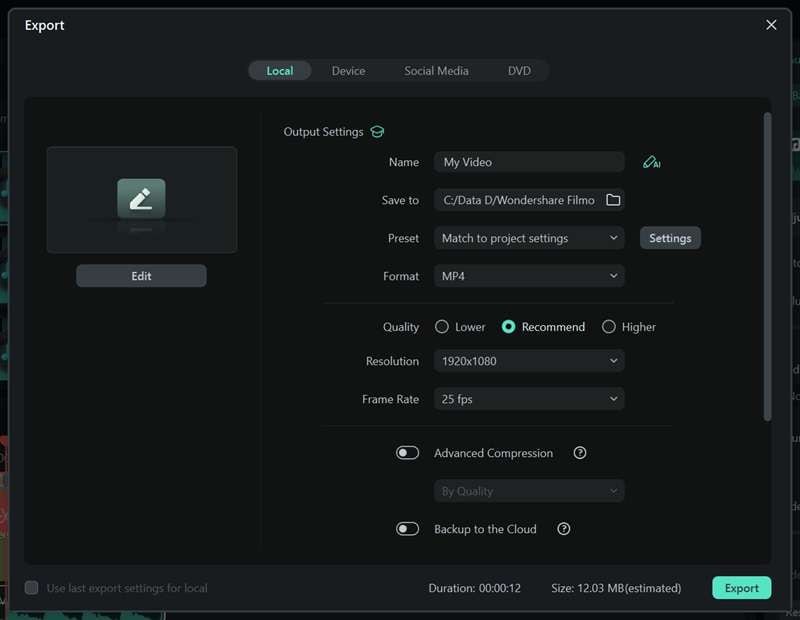
When your video is all set, click “Export” in the top-right corner. Choose “Local” to save it directly to your device. You can customize details like the title, description, format, and resolution to fit your needs before finishing up. Once it’s saved, you’re ready to share it on platforms like Snapchat, Instagram, Twitter, or YouTube!
Conclusion
Adding Avatar Streams to your Twitch live streams is a game-changer! With customizable characters, fun mini-games, and interactive features, Twitch Stream Avatars make your streams more engaging and give your audience a unique way to connect with your community. So, this guide is here to help you set up Stream Avatar on Twitch and make your live streams more exciting.
But don’t stop there—those entertaining moments with your avatars can be turned into polished videos for other platforms. With Filmora, you can easily capture your live stream content using its Screen Recorder tool and edit it right away using Smart Short Clips or manually with its powerful editing tools. It’s the perfect way to repurpose your Stream Avatar Twitch moments and share them across different platforms!


 100% Security Verified | No Subscription Required | No Malware

