
Adobe Premiere Pro has become almost synonymous with video editing. After all, keyframes in Premiere Pro are responsible for many smooth video transitions you see today. So, it’s no wonder editors want to figure out how to add a keyframe in Premiere and take their skill to another level.
Today’s guide is about keyframes, so stay with us to learn what Adobe Premiere keyframes are and what they’re for. We’ll first focus on adding keyframes in Premiere Pro and then show you how to edit and remove these elements. Finally, we’ll provide a powerful yet user-friendly alternative to this Adobe app.
In this article

What Are Keyframes in Premiere Pro & Why Use Them?
In Layman’s terms, Adobe Premiere keyframes are markers that set a particular animation or transition’s beginning and end point. By setting keyframes in Premiere Pro, editors can control various properties of a video they’re working on, including spatial positions, effects, text elements, audio, opacity, etc.
While veteran video editors are likely well aware of Premiere keyframes, beginners might have yet to hear or use these helpful tools. And yet, they’re precious for numerous video editing workflows, including the following ones:
- Animating an object’s movement along a specific path or within a set zone;
- Changing the object’s size over time by zooming, shrinking, and growing it;
- Fading objects in and out by controlling their visibility through opacity settings;
- Adjusting audio levels throughout the video to create a specific mood;
- Creating color transitions and dynamic lighting effects by changing the object’s colors over time.
As you can see, figuring out how to add keyframes in Premiere Pro can be a precious skill for any video editor as it can significantly improve their editing game. With that said, let’s see how you can use keyframes in Premiere Pro to your advantage.
How to Add a Keyframe in Premiere Pro: Step-by-Step
Now that we know a bit about Adobe Premiere keyframes and what video editors primarily use them for, we can move on to setting keyframes in Premiere Pro. The following step-by-step guide with images will teach you how to add keyframes in Premiere Pro, so let’s dive right in:
Step 1: Launch Adobe Premiere Pro, create a new project, and import a video clip into the Project panel.
Step 2: Drag and drop the video clip from the Project panel to the Timeline, and then click it to select it.
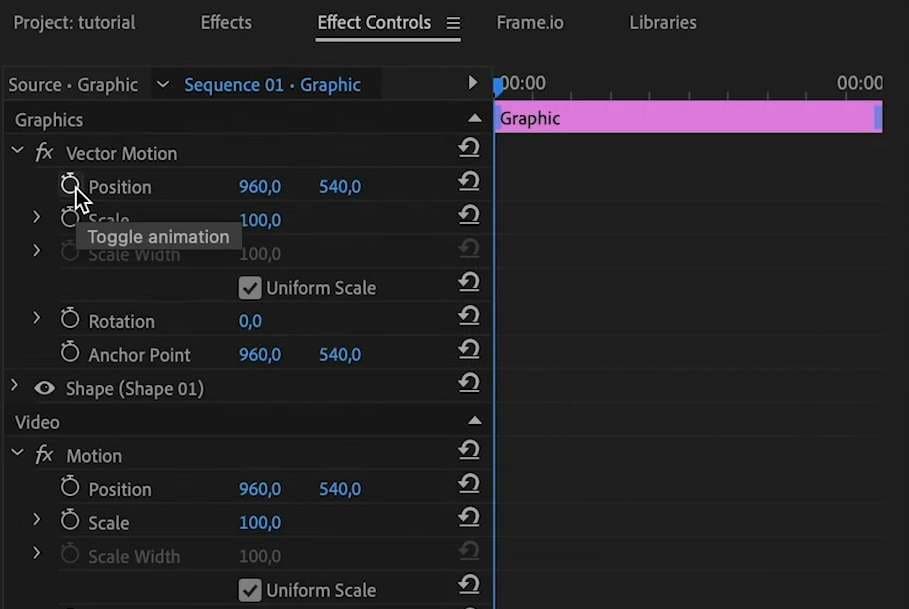
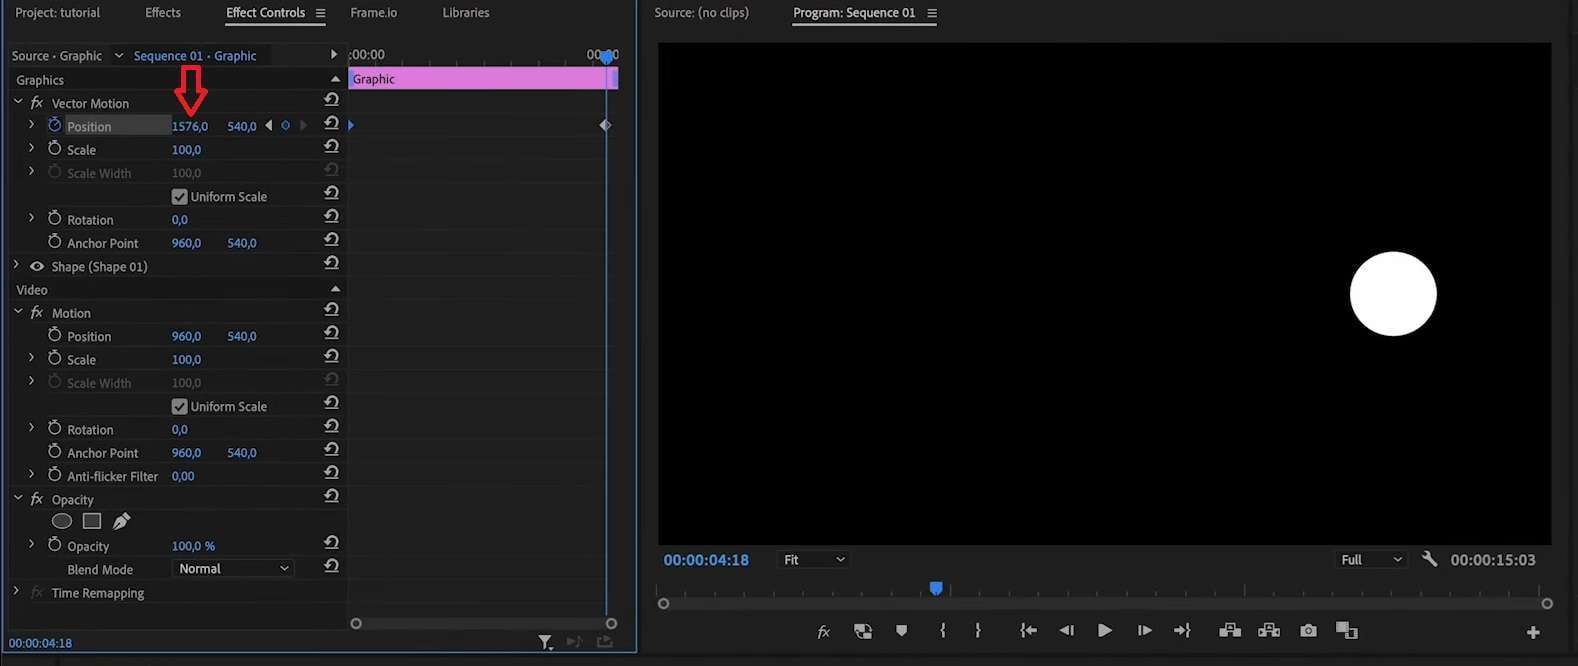
Step 3: Head to the Effect Controls panel in the top left corner and click the Toggle animation button (the Stopwatch icon). We’ll use the Position animation as an example.
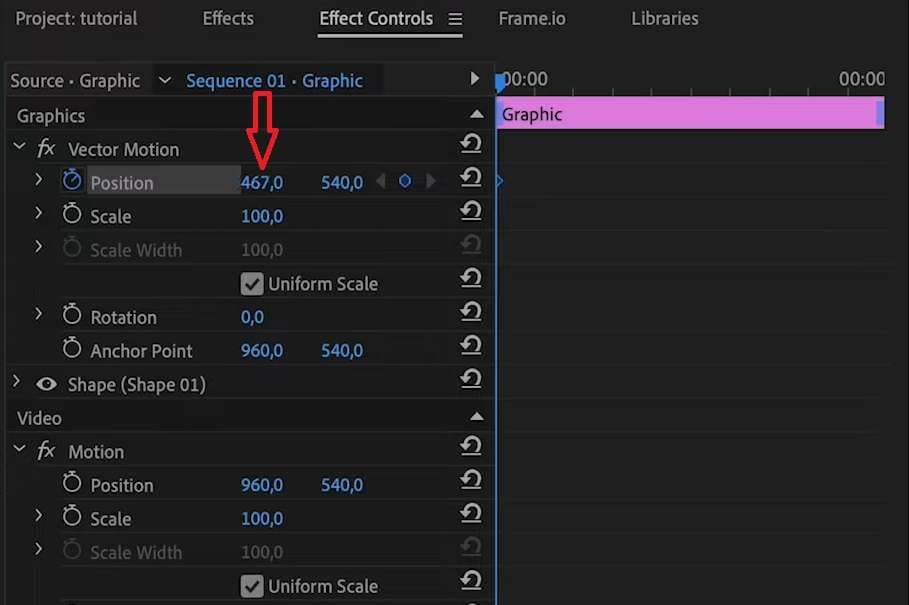
Step 4: Adjust the position of your video’s object by changing the values next to Position in the Effect Controls panel.
Step 5: Move the slider to another part of the clip.
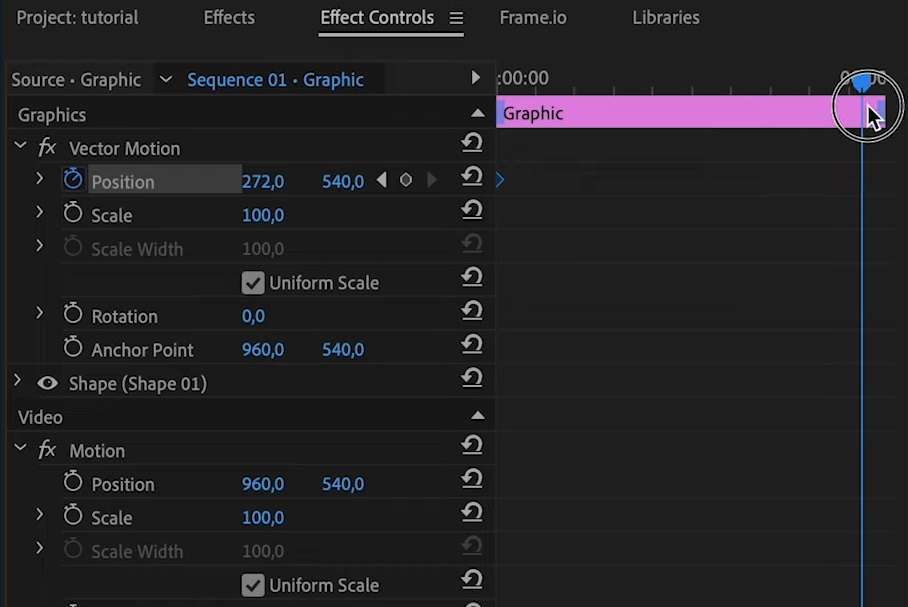
Step 6: Tap the tiny Circle icon in the Position field to add a keyframe in Premiere.
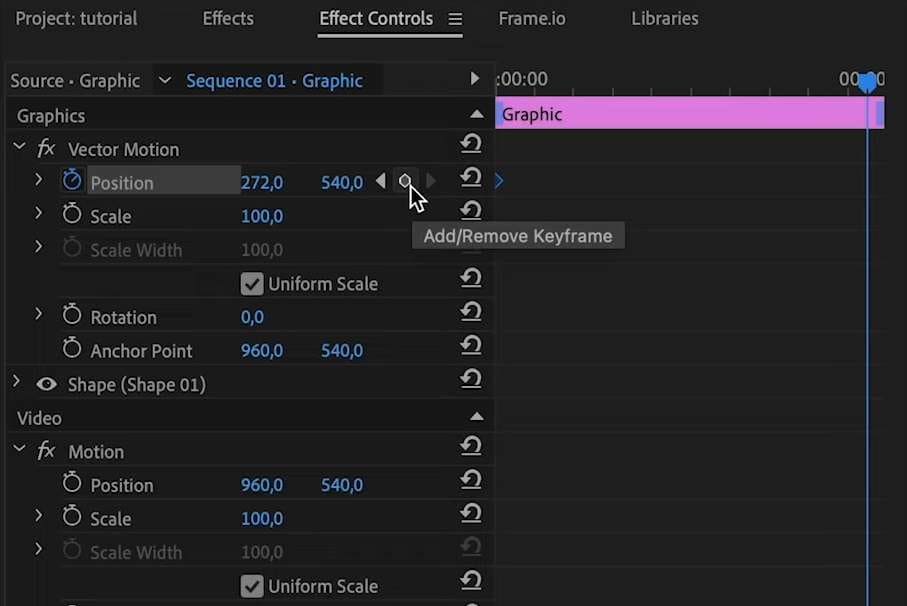
Step 7: Change the values in the Position field to adjust the object’s position for the second keyframe.
You can then play your clip and see the video’s object moving from one position (the position set in the first keyframe) to another (the position set in the second keyframe). You can also move the keyframes from specific video parts by sliding them in the clip (like in step five).
How to Edit and Remove Keyframes in Premiere Pro
With Adobe’s editing software, users can do more than create Premiere keyframes. They can also insert keyframes in Premiere Pro at multiple spots throughout the video and add Premiere keyframes for numerous video effects. These include an object’s spatial positions, size, rotation, text and graphic animations, audio levels, etc.
Adding these small animations will add extra flavor to your clips. However, these steps require a bit of editing, so here’s a quick guide on inserting keyframes in Premiere Pro and adjusting them to your liking:
Step 1: Launch Adobe Premiere Pro, add your video, and move it to the Timeline.
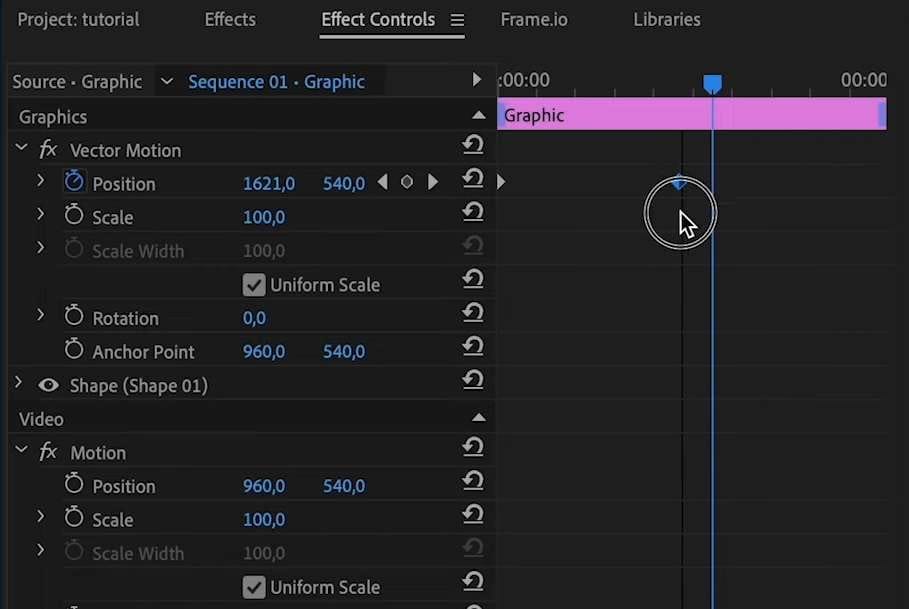
Step 2: Select a video in the Timeline and go to the Effect Controls panel. The added Adobe Premiere keyframes are on the right side of the panel.
Step 3: Drag the keyframes left or right to change their Start, End, and Duration.
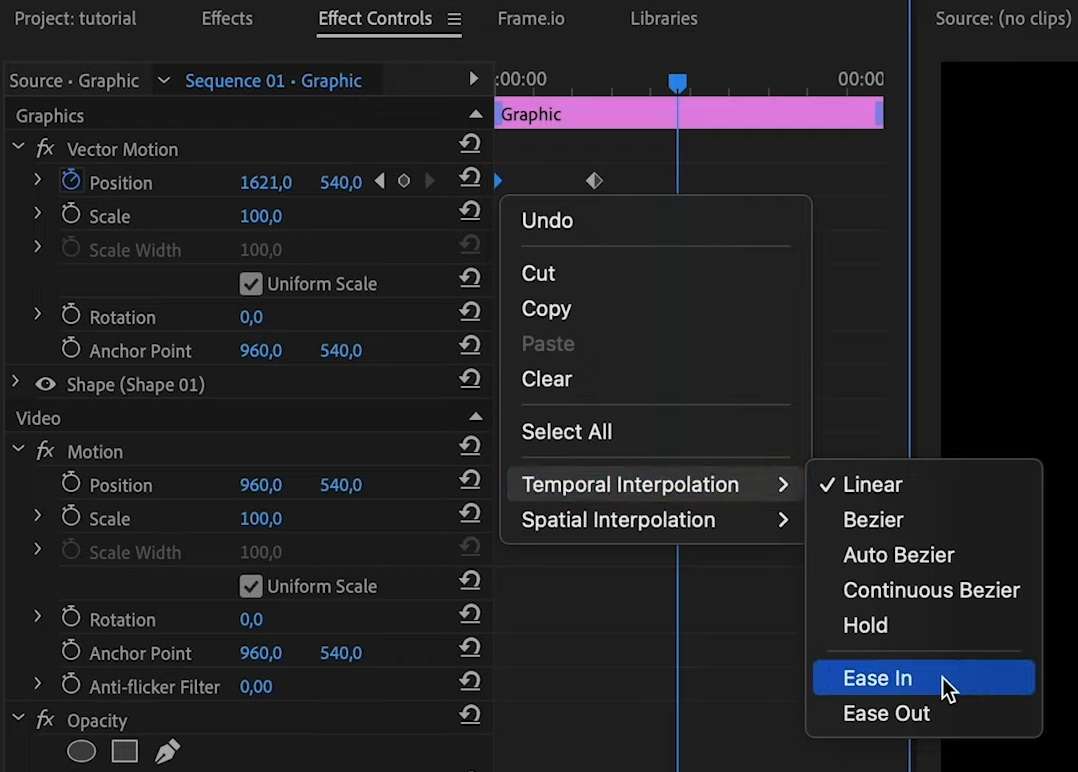
Step 4: Right-click the keyframes and change their Temporal or Spatial Interpolation.
Step 5: Move the beginning and end keyframes closer to each other to make the animations faster, or place them far apart to make your transitions slower.
And if you ever think a particular Adobe Premiere keyframe doesn’t look good in your video, you can quickly remove it by simply right-clicking the keyframe and selecting the Clear option. Just remember to remove both the beginning keyframe and the one at the end.
Tips for Effectively Using Keyframes in Adobe Premiere Pro
To help you get started and become more efficient with keyframes in Premiere Pro, we’ve also included a few valuable tips to help you master these elements. They’ll improve how you insert keyframes in Premiere Pro and how you edit keyframe transitions and animations, so check them out below:
- To avoid unprofessional-looking videos, ensure that your footage fills up the entire screen and has no black sides before you start adding keyframes in Premiere Pro;
- Edit your transitions with Temporal Interpolation and Ease In and Ease Out functions to make Adobe Premiere keyframes nicer and smoother;
- Combine multiple Adobe Premiere keyframes into one video to improve the final product’s overall flow of animations, textual elements, and video objects;
- Copy and paste the already added Premiere Pro keyframes instead of constantly creating new ones from scratch to save valuable video editing time;
- Name and organize Premiere Pro’s keyframes to make your video editing workflow more manageable and efficient.
By following these tips, your editing skills will increase dramatically, and you’ll master keyframes in Premiere Pro in no time.
If You Can’t Master Premiere Pro: Wondershare Filmora
Despite being one of the most popular tools for video editing, Adobe Premiere Pro isn’t exactly known for its intuitive user interface or beginner-friendly features. After all, the tool was made with professional video editors in mind, and its sheer number of features can often feel overwhelming to beginners.
However, these drawbacks aren’t present in Wondershare Filmora, an alternative video editing solution to Adobe Premiere Pro. The app’s much more intuitive user interface, easy-to-learn and apply features, and AI-enhanced video editing workflow make Filmora a better option for keyframing, especially for video editors new to the game.
That’s not even mentioning the significant pricing differences. Unlike Adobe Premiere Pro, which is only available through a monthly subscription, Filmora is much more affordable, making it a far better choice for hobbyists and video editors on a tighter budget.
How to Add and Edit Keyframes in Wondershare Filmora
As it was created with beginners and accessibility in mind, Filmora’s editing workflow is a breeze to master, and that’s also the case with its keyframes. Users can follow these simple steps to add and edit keyframes in Wondershare Filmora:
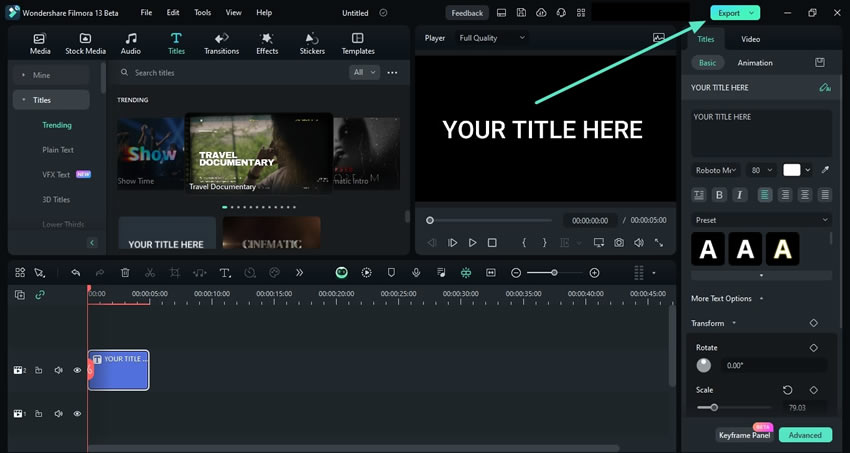
- Launch the app and tap the New Project button on the initial screen.
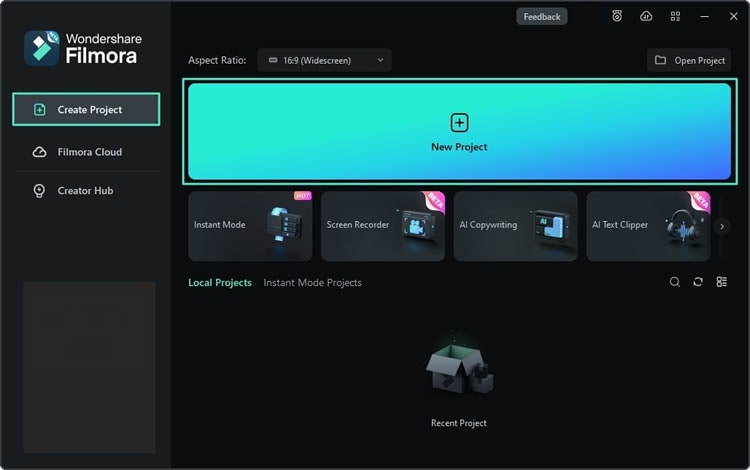
- Click the Import button to add your video.

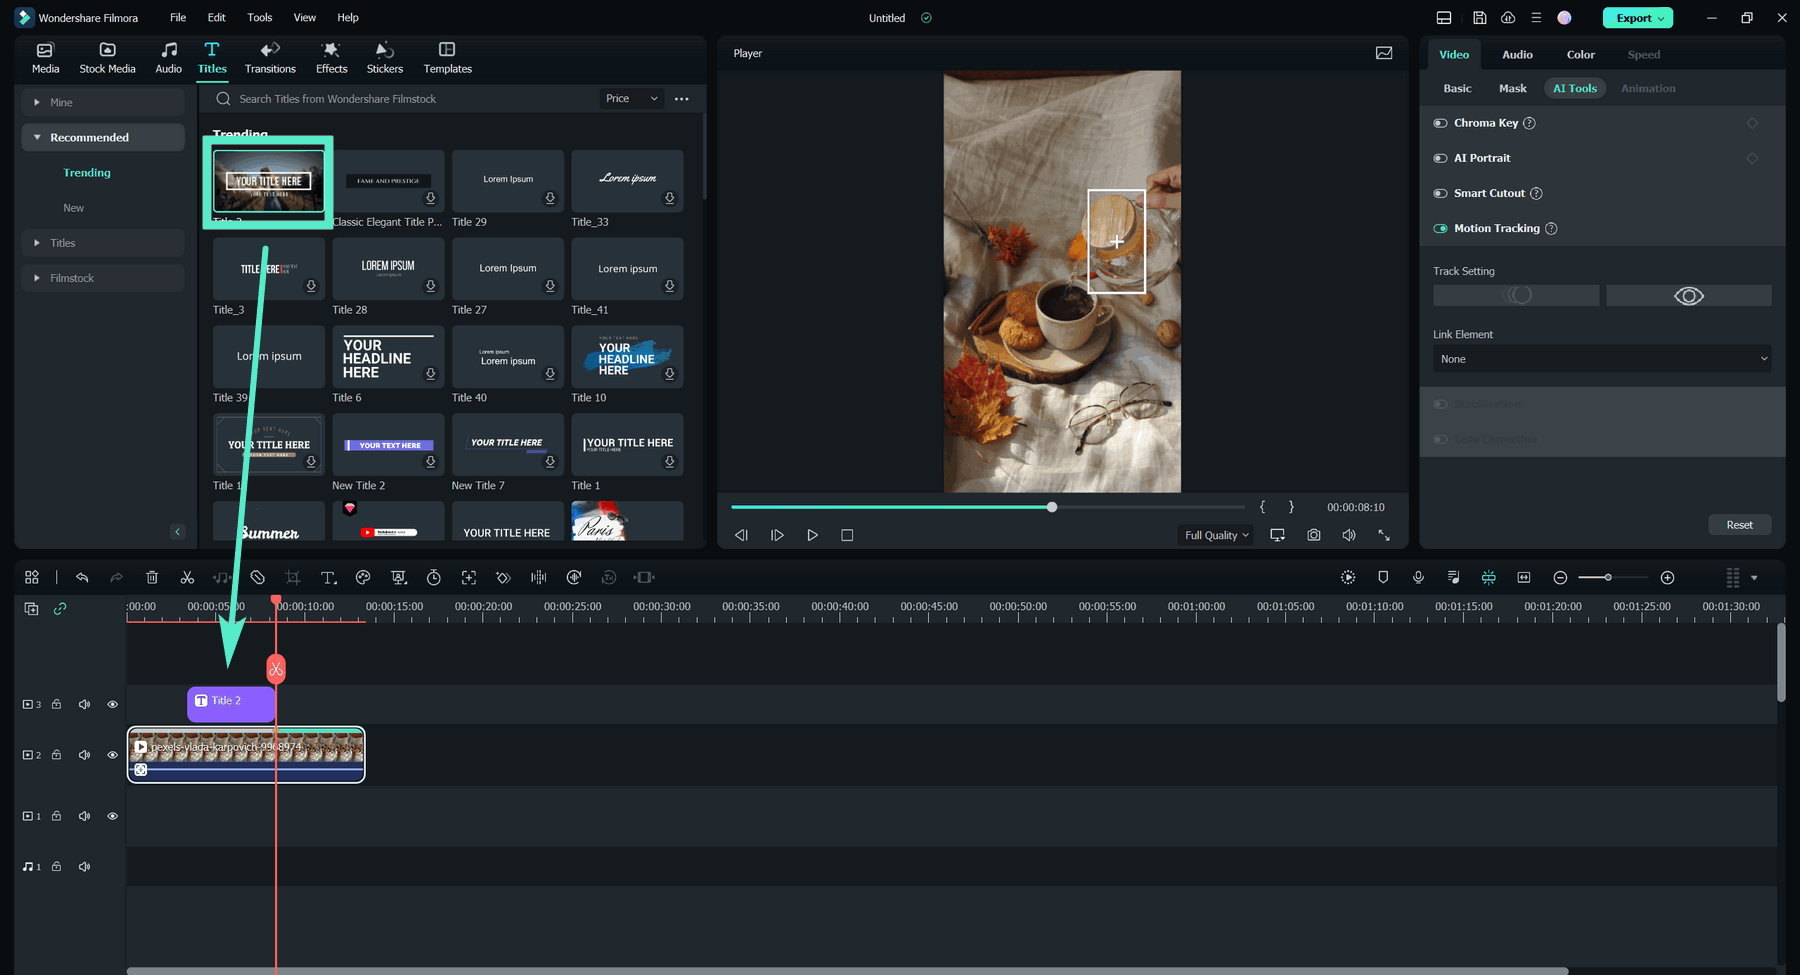
- Drag and drop the video into the Timeline section and click on it to select it.

- Add a video effect, textual element, animation, transition, audio, or another clip you want to edit.
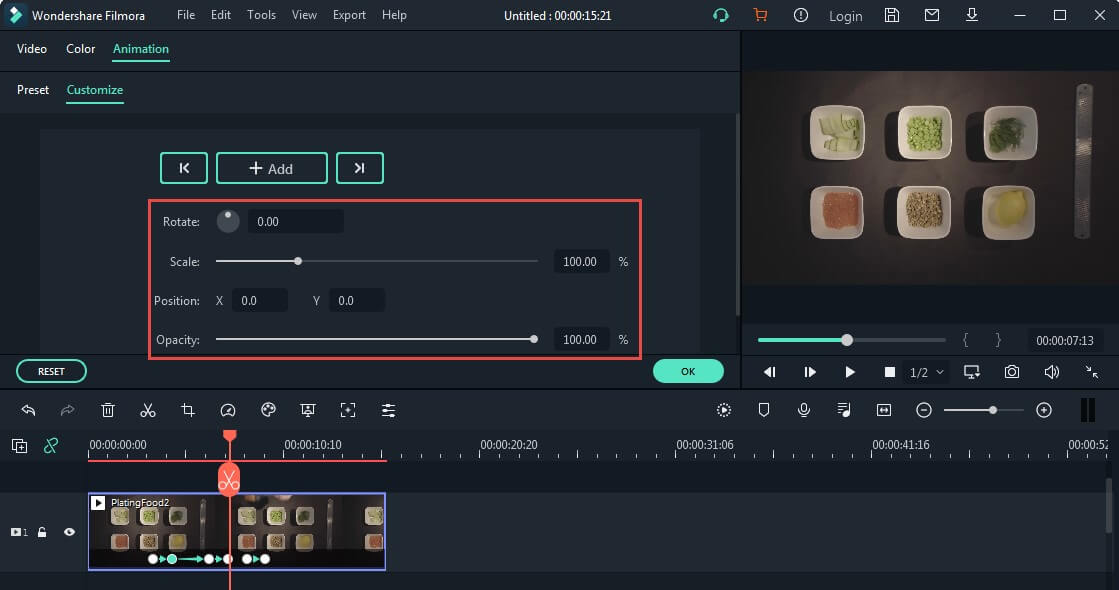
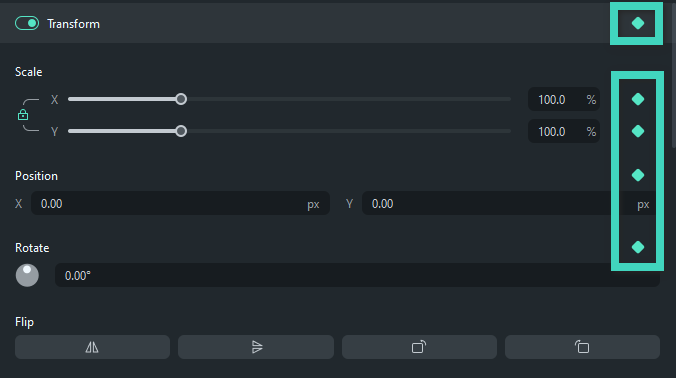
- Go to Video > Basic in the right sidebar and enable the Transform option.
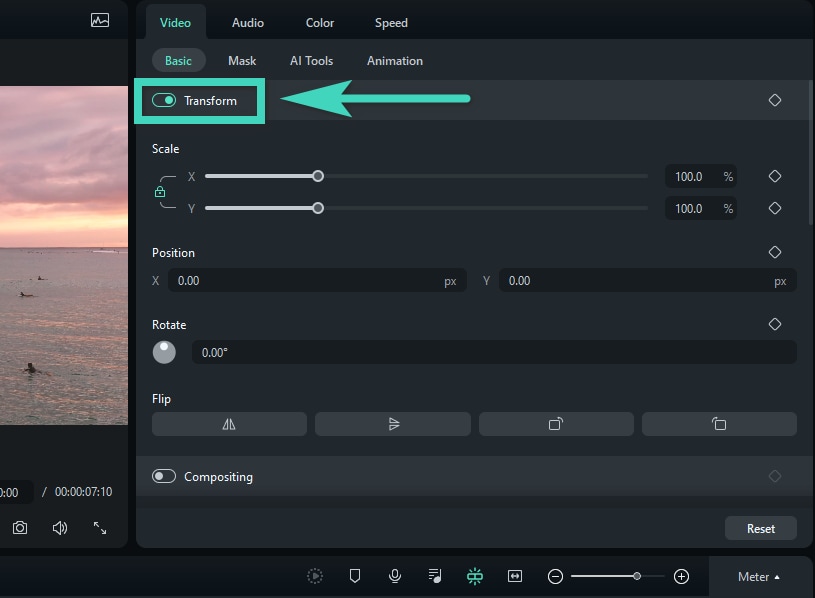
- To adjust the size of your textual element, animation, or video, tap the Rectangle icon in the Scale section to add a keyframe.
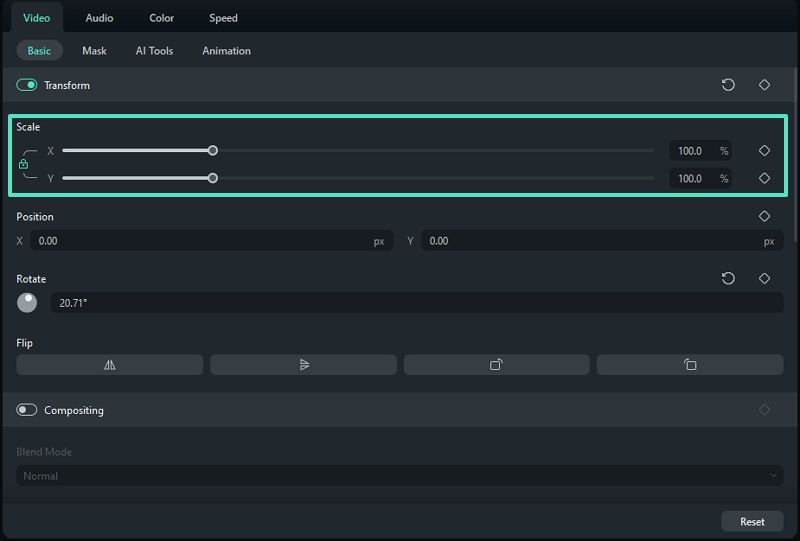
- Drag the slider in the Timeline to place the keyframes where you want them to be.
- Alternatively, do that for the Position or Rotate sections, depending on whether you want to adjust the object’s size, spatial position, rotation, color, or opacity.
- Once you’re satisfied with Filmora’s keyframes and the animations you’ve made, hit the Export button in the top right corner to save the video.
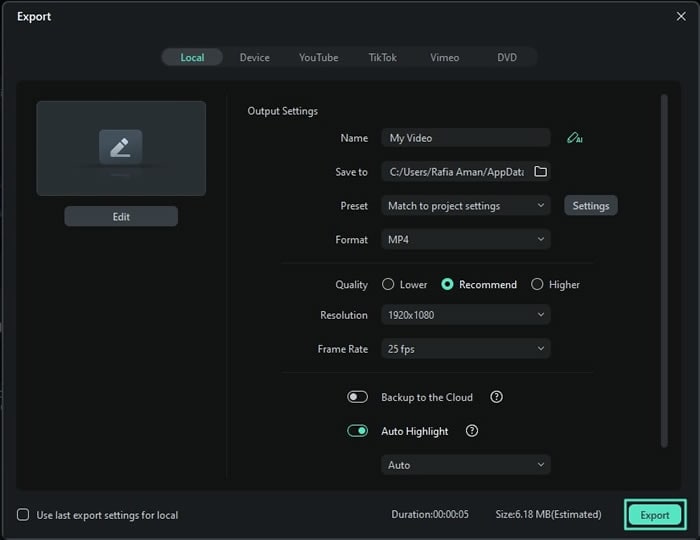
- Then, adjust the export settings by changing the location, quality, frame rate, resolution, etc. Finally, hit the Export button again to save the video.
By modifying the size, rotation, color, and opacity of objects in your clips, Filmora’s keyframes allow users to speed up their animation production, create engaging clips with animated split-screen videos, change the mood of their projects, customize textual elements in a few clicks, and save keyframes as custom presets for future use.
Conclusion
Keyframes have long been the optimal way to animate an object’s movement, change its size, create quick transitions, adjust audio levels throughout the clip, animate textual elements, fade objects in or out, and much more. With Adobe’s popularity in the video editing industry, most editors want to learn how to add a keyframe in Premiere Pro, and that’s what we’ve shown you today.
However, adding keyframes in Premiere Pro isn’t intuitive or user-friendly, and the editing software isn’t affordable. That’s why it’s worth mentioning that Adobe Premiere Pro is by no means the only video editing software capable of keyframes.
Wondershare Filmora can also handle keyframes easily. The app’s effortless and beginner-friendly user interface, easy-to-apply features, and AI-powered editing tools make Wondershare Filmora a better alternative to Adobe Premiere Pro’s keyframe capabilities.
FAQ
-
How do I precisely position keyframes in Premiere Pro?
Making your keyframe transitions smooth will undoubtedly take a lot of time and effort, but adjusting their placement is one way to improve instantly. You can do that by zooming in on the Timeline and moving a keyframe to exactly where you want it to be. -
Can I make my Adobe Premiere keyframe transitions less choppy?
Absolutely! Right-clicking a keyframe will let you access its Temporal Interpolation, which has Ease In and Ease Out options. They’re pivotal to making smooth animations, so try them out by choosing the Ease Out option for the beginning keyframe and Ease In for the end one. -
Are keyframes in Premiere Pro only for video?
Of course not. You can also apply Adobe Premiere keyframes to audio and use them to adjust the volume levels and other audio effects throughout your clip. With these adjustments, your videos can have dynamic audio, and you can also put dialogue in focus when needed.