How to Remove the Filmora Watermark For Free: 3 Proven Methods

Jun 15, 2026• Proven solutions
Exported a great video in Filmora but found an unexpected watermark? You're in the right place. While the Filmora watermark is a feature of the free trial, removing it is possible, and we're here to guide you through every option.
This guide will show you three distinct approaches to get your videos watermark-free. We'll start with two official, 100% free, and safe ways to export without a watermark. Then, we'll examine the popular "online watermark removers" and uncover their hidden risks. Finally, we'll show you the ultimate method to permanently remove the watermark for all your future projects. Let's get started!
Method 1: Get Filmora Filmora Free Download without Watermark (2 Official Ways)
Yes, you can remove the Filmora watermark without paying. Here are two official methods provided by Wondershare that are safe and effective.
1.1 Activate Your Free Trial Access by Logging In
If you've edited your video in the trial version, you don't have to lose your work. By signing up for a Wondershare ID (WSID) and logging in, you may be eligible to export your video without a watermark. Follow these steps.
Note: The method mentioned in this part may not be available on some Filmora versions. If you find it doesn't work, please contact us.
Step 1: Open the Previous Project
Launch the Filmora application on your PC or Mac, here I’m using Windows as an example. In the start interface, you will see the recent project library, and you can click any of them to open the previous project with a watermark.

 secure download


Note: If your video has a Filmora watermark, you should open the project to remove the watermark. Importing the video to Filmora again won’t remove the watermark.
Step 2: Log in to WSID Account
Since you have signed up for the WSID and redeemed the free access to Filmora, it’s time to sign in to your account on Filmora. Now click on the Log into Wondershare ID from the Help menu.
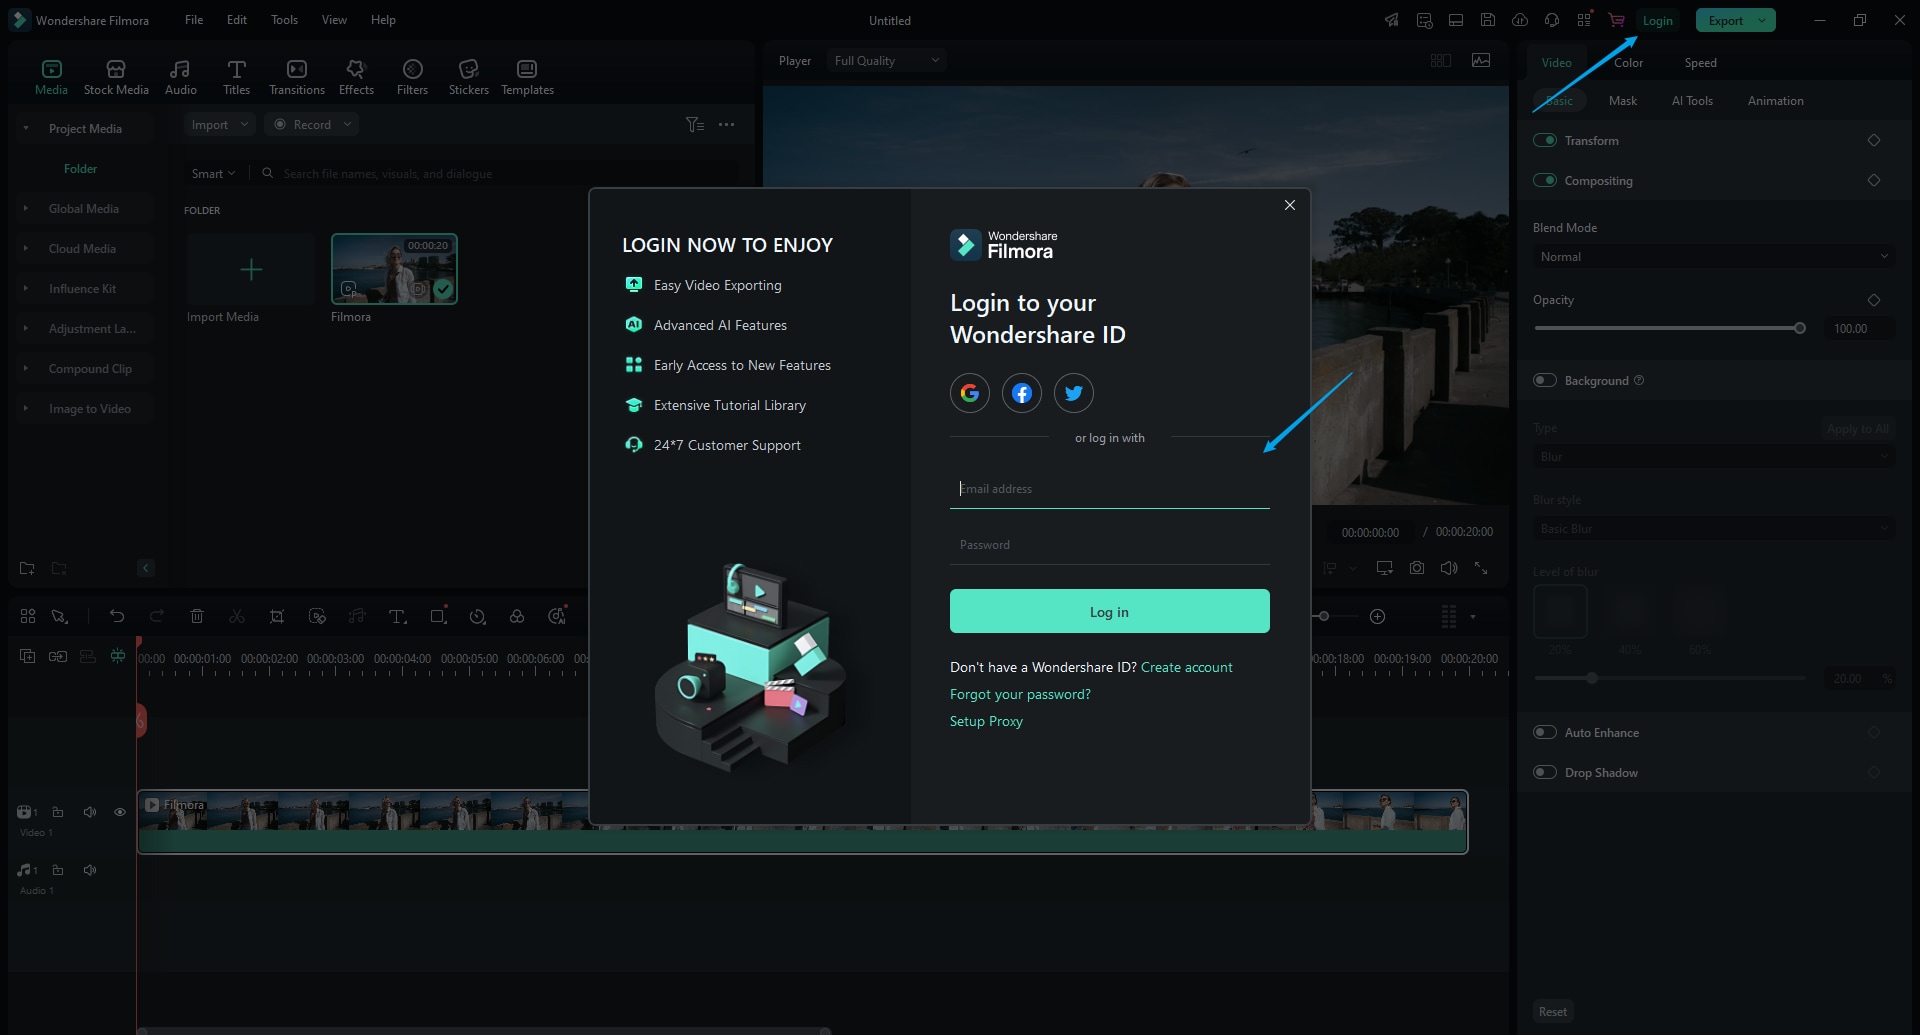
If you are running Filmora V10.5.5 and later versions, you can click the Login button in the upper right corner directly. Next, enter your Email address and Password, then click on the Log in option.
Step 3: Export Video
After activating your trial version, you can enjoy the features of the premium version of Filmora. If you don’t want to edit anymore in this project, click the Export button. You can now export the video.

Note: If you have moved or deleted some files for this video project, you may need to locate the missing files again. Click the Locate Selected button to import the missing files.
secure download
1.2 Earn Free Access with the "Refer a Friend" Program
A fantastic new way to get free access to Filmora's premium features is by sharing it with your friends! With our rewards program, you can earn points for every successful referral and redeem them for watermark-free export days, AI credits, and more.
Here's how to get started:
Step 1: Download Filmora & Sign In
First, ensure you have the latest version of Filmora installed. Open the application and log in with your Wondershare ID.
Step 2: Access Your Referral Link
Once logged in, navigate to the “Refer a Friend” section within your account settings. Click "Invite Your Friends" and copy your unique referral link.

Step 3: Share and Earn Points
Share your referral link via social media, email, or any platform you prefer. When a friend signs up using your link, you both get rewarded!
- When Your Friend Registers: They instantly get a 3-day license for one watermark-free export. You earn 100 points.
- After Their First Export: Your friend earns 100 points to start their rewards journey.
Step 4: Redeem Your Points for Awesome Perks
Accumulate points and exchange them for valuable rewards, including:
- Free access days for Filmora and Creative Assets (3, 7, 14, or 30 days)
- Filmora AI Credits (300, 500, or 1000 credits)
- Discounts on Filmora Products (10%, 15%, or 20% off)
The more friends you invite, the more you earn. It's a win-win! Please note that rewards may take up to 24 hours to appear in your account center.
Invite Friends to Filmora Now!
A cross-platform tool for making videos anywhere for all creators!
Use Wondershare Filmora to Export Videos without Watermark
- Cut, trim, split, and detach audio from YouTube videos
- Edit videos with AI tools, keyframes, motion tracking, green screen, etc.
- Built-in plentiful templates and effects
- Works on Mac, Windows, iOS, and Android.
Method 2: Using Online Filmora Watermark Removers like Apowersoft (And Why It's Risky)
A quick search might show you several "Filmora watermark remover online" tools like Apowersoft. They claim to remove watermarks from videos for free. While they seem like a simple solution, it's crucial to understand how they work and the risks involved.
How They Typically Work (Using Apowersoft as an example):
- You are asked to go to their website and upload your video.
- You use a selection box to cover the Filmora watermark.
- You click an "Erase" or "Remove" button, and the tool processes the video.

The Hidden Risks of Using These Tools
This approach might seem tempting, but it comes with significant downsides that can harm your content and your security. This also applies to any "Filmora mod apk no watermark" files you might find.
- Blurry, Unprofessional Results: These tools don't truly "remove" the watermark. They usually place a blur or a messy pixelated patch over it, degrading your video quality and making it look unprofessional.
- Security & Malware Threats: Uploading your files to unknown online services puts your data at risk. Worse, downloadable "crack" or "mod apk" files are notorious for containing viruses, spyware, and other malware.
- Privacy Invasion: You lose control over your creative work the moment you upload it to a third-party server. Your video could be used or distributed without your consent.
- Waste of Time: The process of uploading, processing, and downloading can be slow, and the final result is often disappointing, forcing you to start over.
For a clean, professional, and safe result, avoiding these tools is your best option.
Method 3: The Official Way - Export Without Watermark by Upgrading Filmora
In the above parts, we have discussed the methods to remove the Filmora watermark for free via earning points to redeem the free access. However, free trials always come with a specific number of limitations. Since you are a content creator, you want to use all the features to make your content look more attractive and pleasing. To do so, you have to purchase Wondershare Filmora.

However, if you are not aware of how to remove the Filmora watermark by purchasing, then we have got you covered. We have listed a stepwise technique you can follow to purchase the premium version of Filmora.
Step 1: Click on Purchase
Launch Filmora on your PC and log into your WSID by clicking on the Login button. If you have not purchased the subscription, you will see the Purchase option in the top right corner. Click on it to buy the full version.
Step 2: Select the Suitable Plan
A window with three different plans offered by the developers will appear. Select the plan that seems suitable and fitting to you and click on the Buy Now option below that plan.
Click to view our pricing plans.
Step 3: Fill the Form
After selecting the plan, a form will appear that requires logging in to your WSID. In the left panel, you will see the product you have chosen, select your payment method, and fill out the form with the correct information. After filling out the form, click on the Security Checkout button.

After purchasing the Filmora plan, go to Filmora again and refresh your account information. Then, you will see that the Purchase button is gone, and there will be no watermark after exporting the video from Filmora.
Apart from exporting videos without watermark, what are the differences between the free and paid versions of Wondershare Filmora? Here are the key differences between the two versions.
| Features | Filmora Free | Filmora Paid Plans |
|---|---|---|
| AI Credits | Paid | 1000/Month |
| Cloud Storage | NA | 10GB |
| Effects and Filters | 1200+ | 12000+ |
| Transitions | 1100+ | 7000+ |
| Titles | 3300+ | 36000+ |
| Music | 2300+ | 22000+ |
| Sound Effects | 3300+ | 10000+ |
| Stock Media | 600+ | 1.5 million |
| NewBlue FX & Boris FX | NA | 200+ |
Along with this, Wondershare Filmora v14 has some brand-new features that are sure to catch your fancy!
Key Features:
- - AI audio to video
- - AI image to video
- - Smart short clips
- - Smart scene cut
- - AI video denoiser
- - AI voice enhancer
- - Multi-camera editing
- - Blur face in video
- - and much more!
There are so many new features added in almost all aspects of the software that Wondershare Filmora V14 feels and operates like a brand-new app that is jam-packed with the latest and greatest features you will ever need, no matter your skill level!
You May Also Like
Different Ways to Remove Watermark from Kinemaster Videos
Conclusion
Although a free version of Wondershare Filmora Video Editor has several valuable features, it comes with multiple limitations, such as a watermark. You can avoid those watermarks for free and also by purchasing the premium version. But most people do not know how they can remove the watermarks. To help them, we came up with three different stepwise methods to remove Filmora watermark. Choose the technique that seems suitable to you, and start editing!
FAQ: Common Questions About Filmora's Watermark
Does Filmora always have a watermark?
The watermark only appears on videos exported using the free trial version. Once you purchase a license, all subsequent exports will be watermark-free.
Can I remove the watermark from a video I already exported?
No. You must re-open the original project file (.wfp) in an activated version of Filmora and export it again. Simply importing the watermarked video into Filmora won't work.
Discover the top 8 free video editors for Chromebook in 2026. Compare browser-based tools and Android apps like Clipchamp, CapCut, and Filmora to find the perfect editing software for Chrome OS.
by Richard Bennett Jun 15, 2026 15:32 PM
Discover the 8 best no-lag screen recorders for PC and Mac in 2026. Compare Filmora, OBS, and ScreenRec to capture high-quality video without lag or frame drops.
by Richard Bennett Jun 15, 2026 15:32 PM
Give your clips a serious upgrade with an anime video enhancer that boosts detail and clarity. See our guide to see simple steps to do it and improve overall video quality.
by Richard Bennett Jun 15, 2026 15:32 PM
Richard Bennett
staff Editor
