
Accused of its spot-on video-cutting quality, Lightworks has many features, including heavily commanding tools that can meet your editing requirements in full. It has an easy-to-navigate and time-based user interface, making it suitable for accurate and intricate editing. Both amateurs and professionals can generate professional-quality video material with Lightworks since it is equipped with the necessary tools and skills. So, let's first understand how to cut videos in Lightworks and what more advanced alternative is available in the market with more accessible yet advanced cutting capabilities.
In this article
Part 1: Lightworks Cutting & Editing Software Review
Lightworks is an audio and video editor regarded for carrying out a professional function, and its versatility makes it acclaimed. Having been in the industry for quite a long time, Lightworks is applied in the editing of famous movies and television programs. It will offer a set of tools necessary to edit both sound and music and video, to mix sounds and choose the right effect for it, so the application is suitable for multimedia projects.
Part 2: How to Mastering Cuts with Lightworks
Lightworks comes with plenty of useful features that make video cutting both precise and flexible. Here's how to cut videos in Lightworks:
Step1Download and Install Lightworks
Make sure you are accessing the latest version. Click on your operating system and choose the packing which is suitable for it, then download and install according to the instructions. Launch Open Lightworks by double-clicking on its shortcut on the desktop and configuring it by selecting the type of project and other options.
Step2Understand the Interface
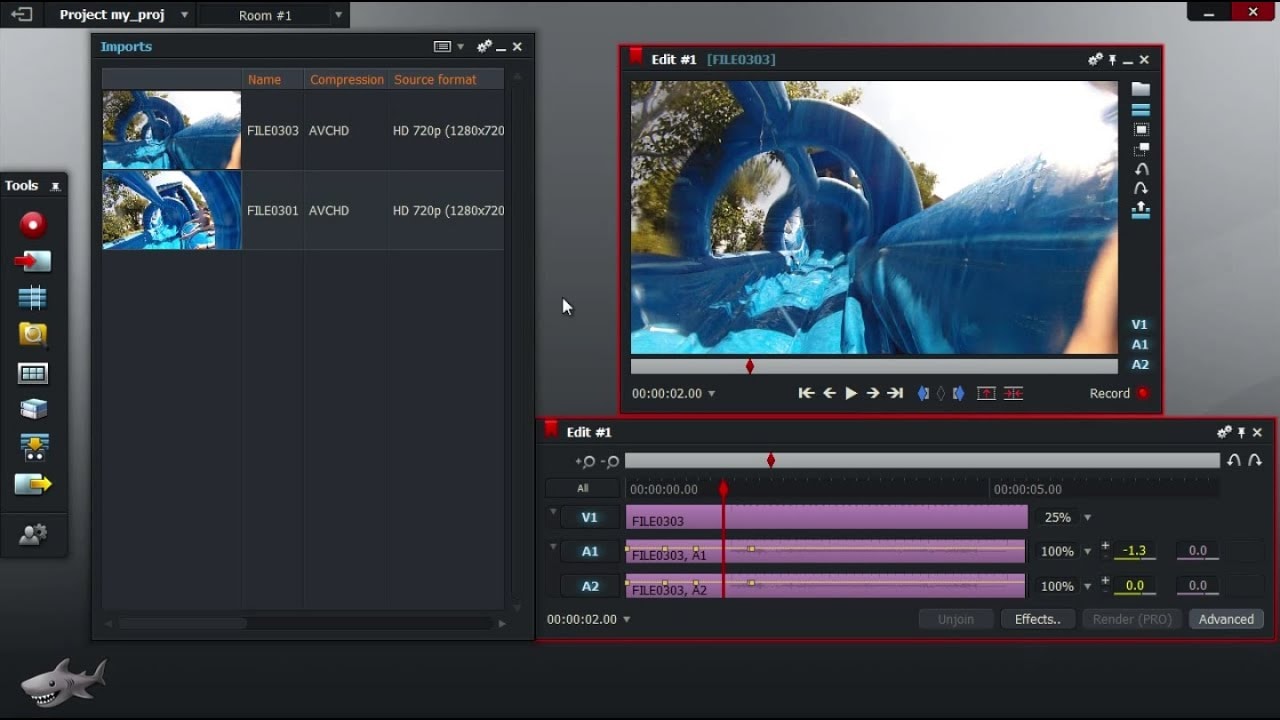
Understand the four main windows as the tool is not very simple. First, there is the Project window for shots and edits, the Toolbar for access to tools, then the Edit List Window for available clips and the Timeline Window to view scenes as they were edited. The Monitor Window displays what is presently running on the screen.
Step3Import Your Movie
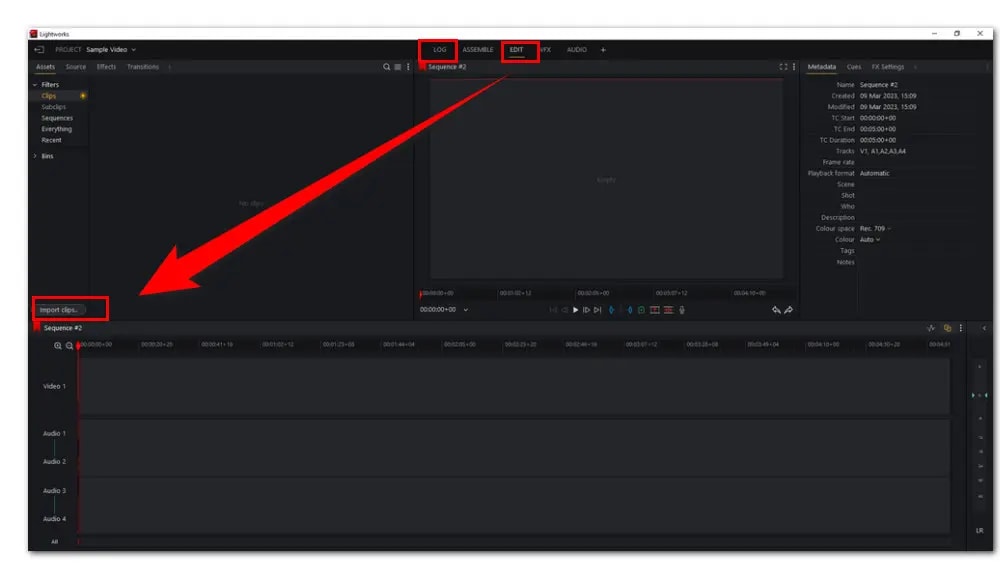
Within either the LOG section or the EDIT section, you have the option of selecting the Import Clips tab. In addition, this editor allows you to add clips by dragging and dropping them into the editor.
Step4Cut and Delete Unwanted Sections
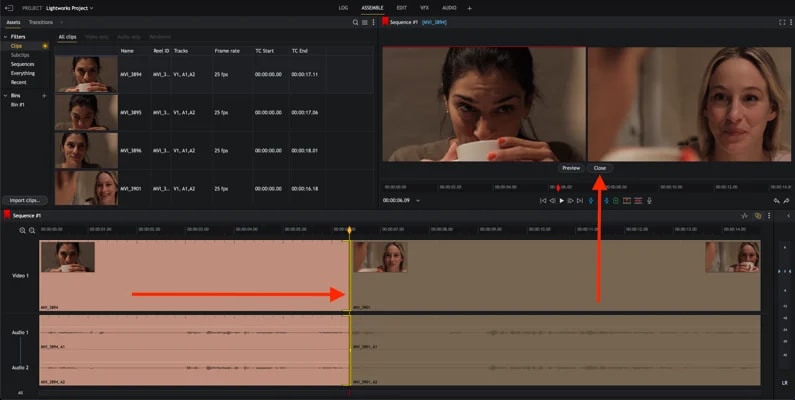
Press the "delete" button on your keyboard or use your mouse to select the undesirable portion of the file, and then select the "Delete" option from the menu that appears.
Step5Export Your Video
The "ALL" option can be found in the bottom-left corner of the Timeline. Right-click on it, and then pick "Export" from the menu that appears. It is recommended that you save your video in a format that is supported, such as AVI, MPEG-1/2/4, MOV, DIVX 1/2/3, WMV9, or MKV.
Step6Share Your Video
Upload your saved video to YouTube or Facebook directly from Lightworks to share with friends and family immediately.
You May Also Like
Steps to Rotate Videos in Lightworks
How to Use Lightworks to Edit Video
How To Speed Up Video With Lightworks Video Editor
Part 3: Alternative & Better Choice: Consider Filmora for a Broader Editing Toolkit
Concerning the people who need an application that could compete with Lightworks in terms of power, Filmora sheds light on the possibilities of video editing. Therefore, Filmora has a simple-design interface as well as many features for efficient video making which makes this tool rather popular among beginners as well as experienced users. Increasing motion tracking, split-screen mode, auto beat detection, presets, speed ramps, basic and advanced keyframing, and many other cool features.
Filmora elevates video editing to the next level. Another great feature of this app is the creation of smooth transitions, captions, and subtitles, as well as unique title creators, and various filters that make it an all-in-one solution for editing any single project. As a filmmaker or a social media guru, Filmora’s full-featured options guarantee your creations attain the right touches and precision that make your vision unique.
How to Cut Video with Filmora without Losing Quality (Step-by-Step Guide)
Using Filmora to cut videos is not a complex process and can be done within several steps. Here’s a detailed guide to help you get started:
Step1Download and Install Filmora
Visit the official Filmora website and download the software for your operating system (Windows or Mac).
Follow the installation prompts to install Filmora on your computer.

 secure download

Step2Import Your Video
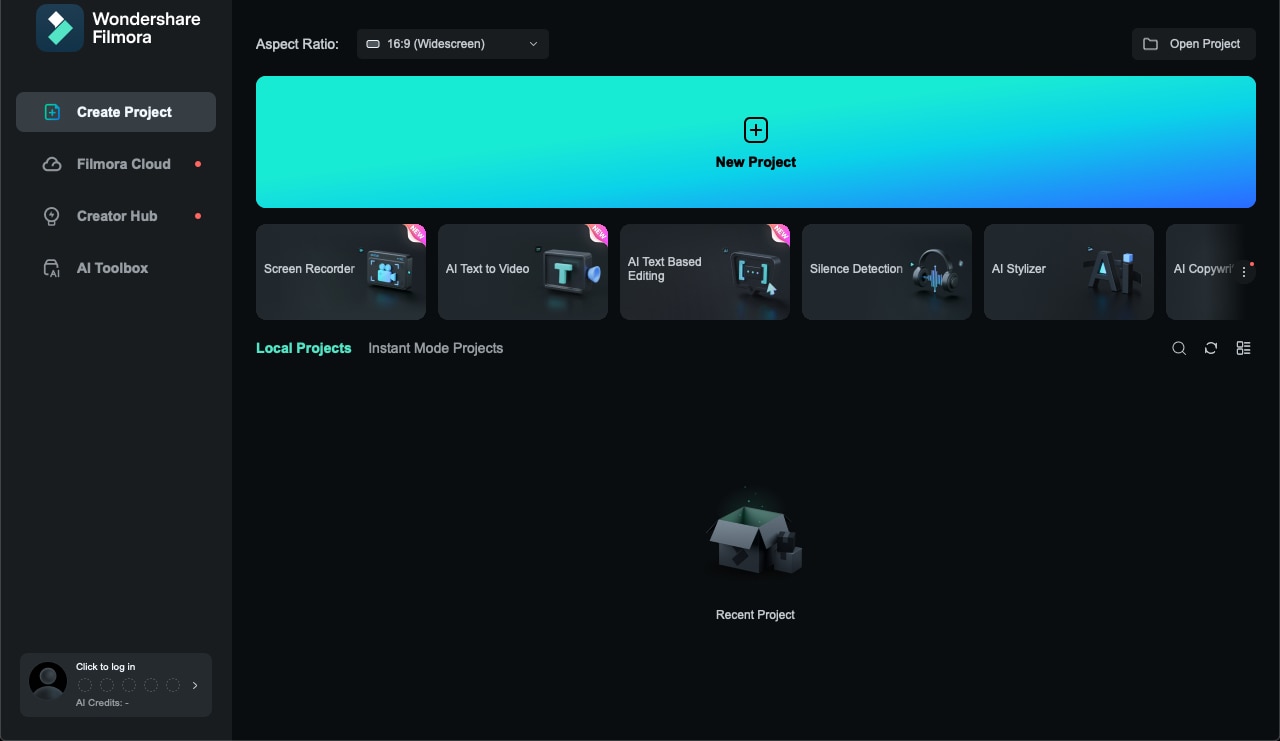
Open Filmora by double-clicking the desktop icon or searching for it in your applications. Click on 'New Project' to start a new video editing project.
Click the 'Import' button located in the media library area and select the video file you want to cut.
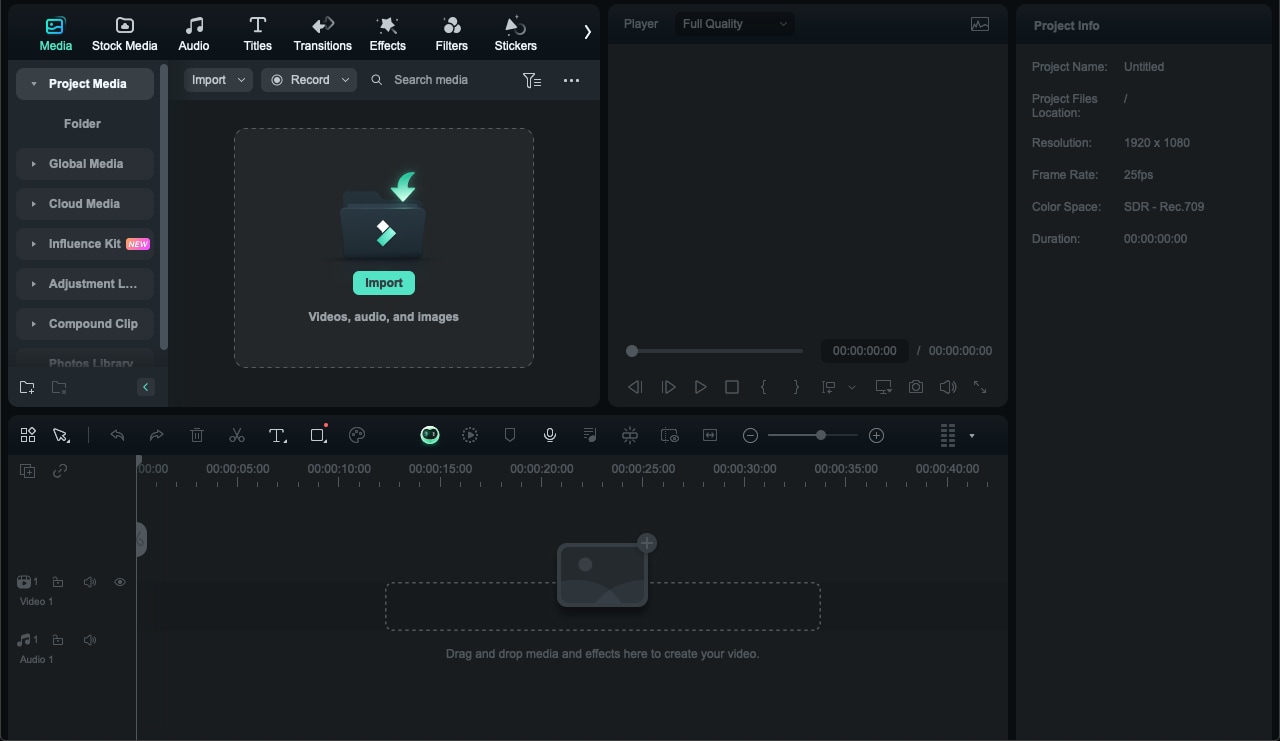
Alternatively, you can drag and drop your video file directly into the media library.
Step3Add Video to Timeline

Drag the video from the media library to the timeline at the bottom of the screen. Ensure the video clip is positioned correctly on the timeline for easy editing.
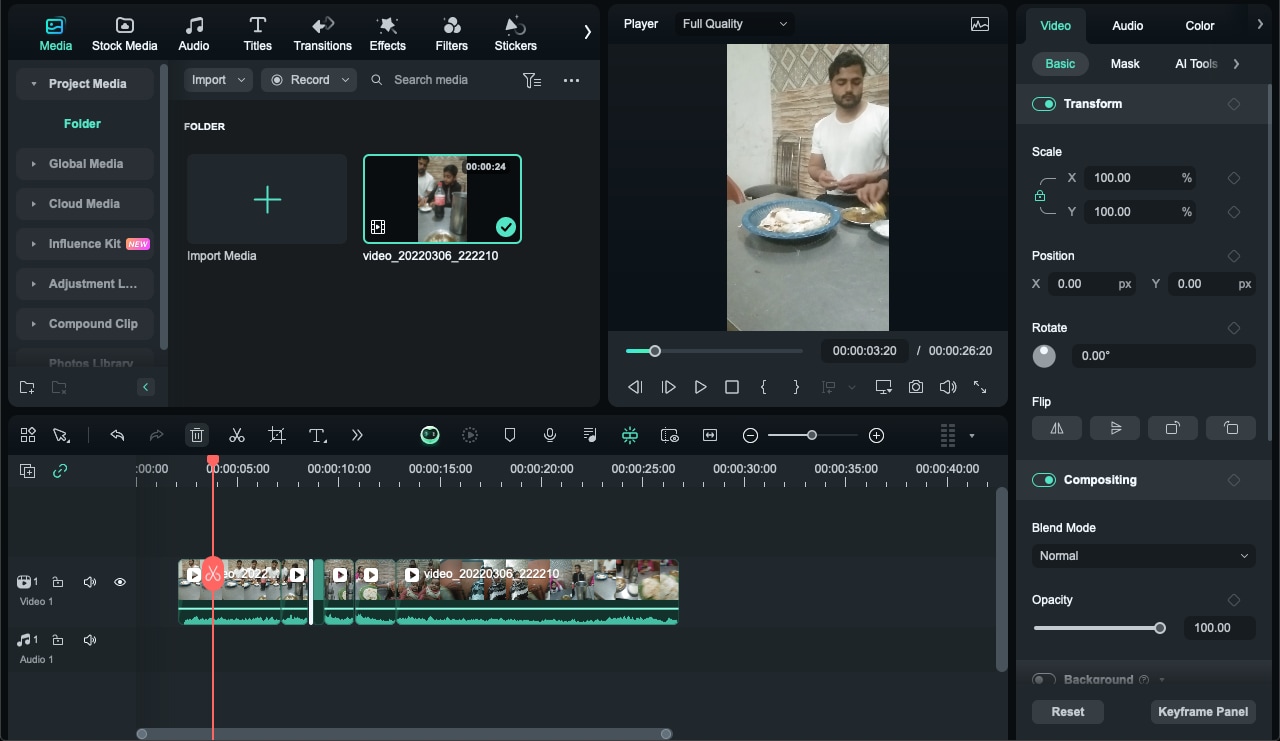
Step4Cut the Video
To use the cutting tool, click the 'Scissors' icon located in the toolbar above the timeline. To make a cut, move the playhead—the red pointer on the timeline—to the desired location.
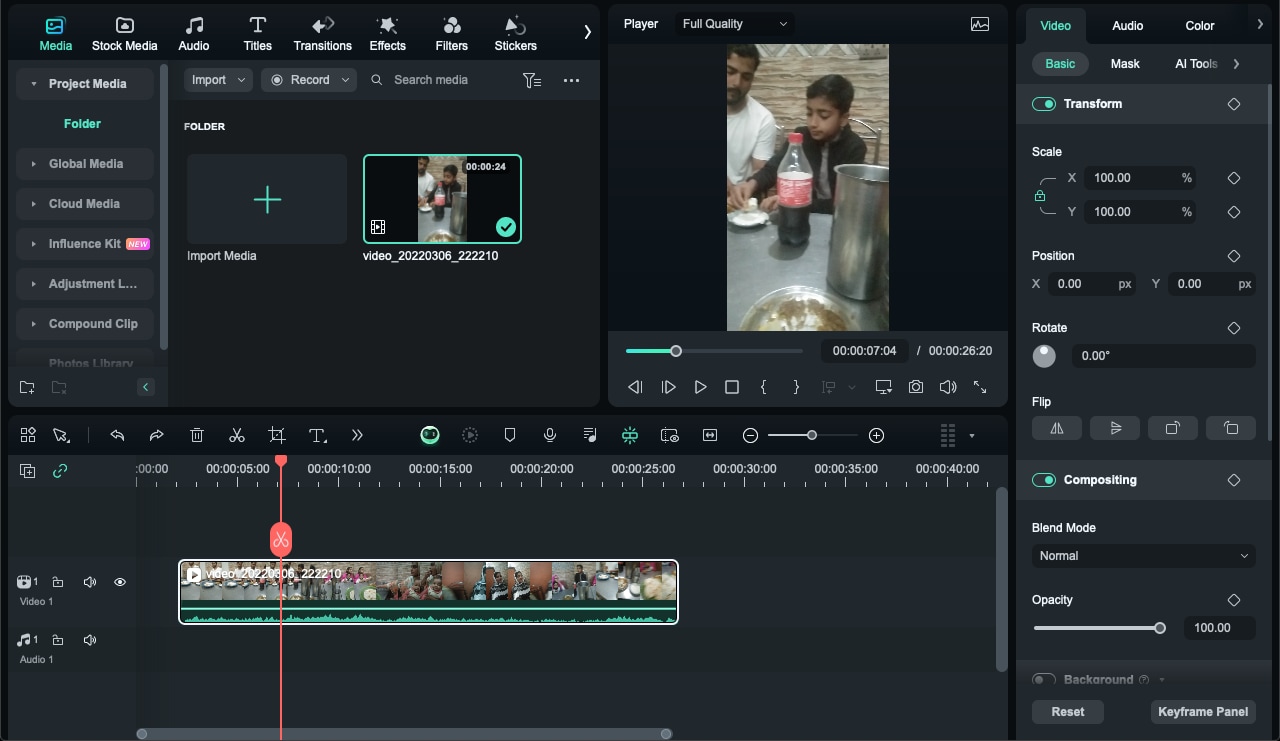
Click the 'Scissors' icon to split the video at this point. Move the playhead to other points where you want to make additional cuts and repeat the process.
You will divide all of the clips under your playhead if you don't choose a specific track in your timeline. You must first choose the track, then click the divide button to divide media inside a single track.
Step5Delete Unwanted Segments
Click on the segment of the video that you want to remove. Press the 'Delete' key on your keyboard or right-click the segment and select 'Cut' from the context menu.
Drag the remaining clips together to remove any gaps left by the deleted segments.
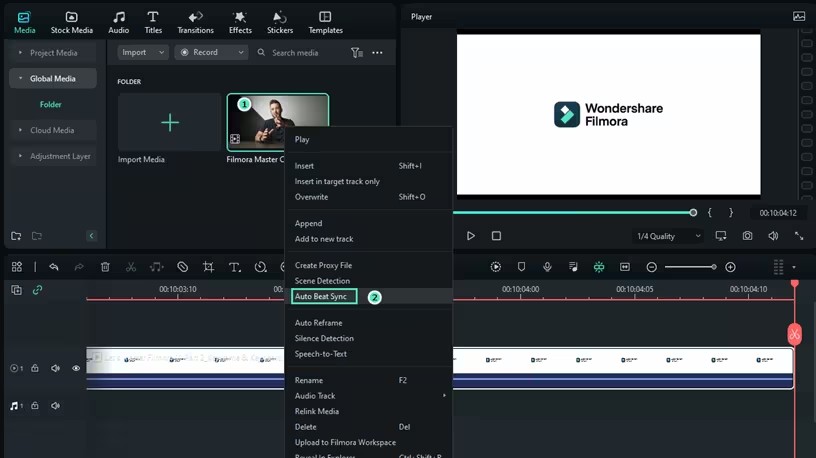
Smart Al Feature to Use Here (Auto Beat Sync):
Use Filmora's Auto Beat Sync to align your cuts with the music's beat, creating a dynamic and personalized video by merging snippets from one or more videos.
Since you're already in the editing interface, you can access the feature by right-clicking on the files in Project Media and choosing Auto Beat Sync from the menu.
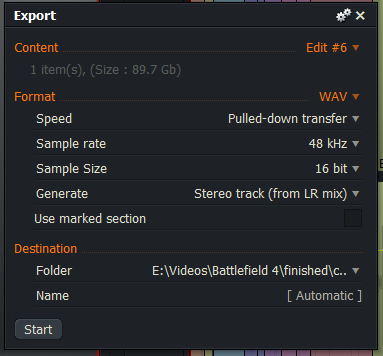
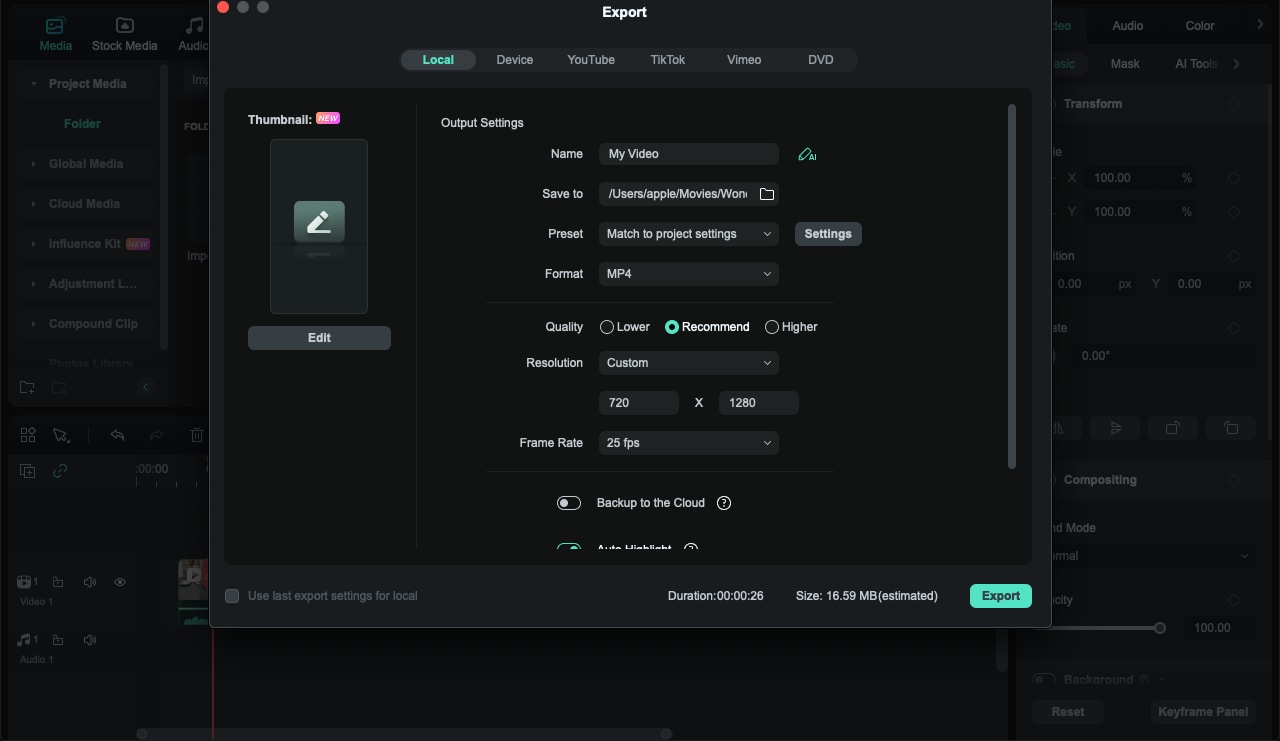
Step6Export the Edited Video
Once you're satisfied with the cuts, click the 'Export' button located at the top right of the interface. Select the desired video format from the export window. You can also adjust other settings such as resolution, frame rate, and bitrate. Click the 'Export' button again to save the edited video to your computer. Choose the location where you want to save the file and give it a name.
Following these steps, you can easily cut videos using Filmora, making it a versatile tool for simple and advanced video editing tasks.
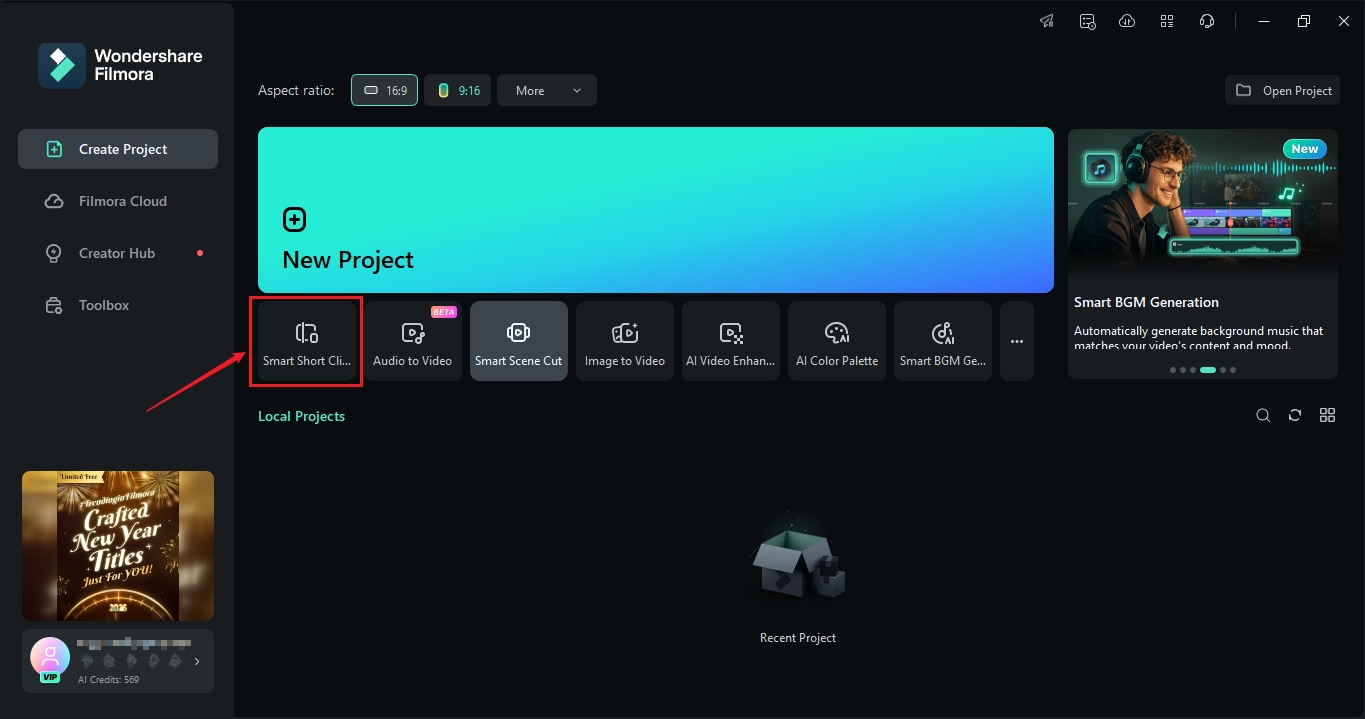
Cutting a Longer Video With Filmora's Smart Short Clips
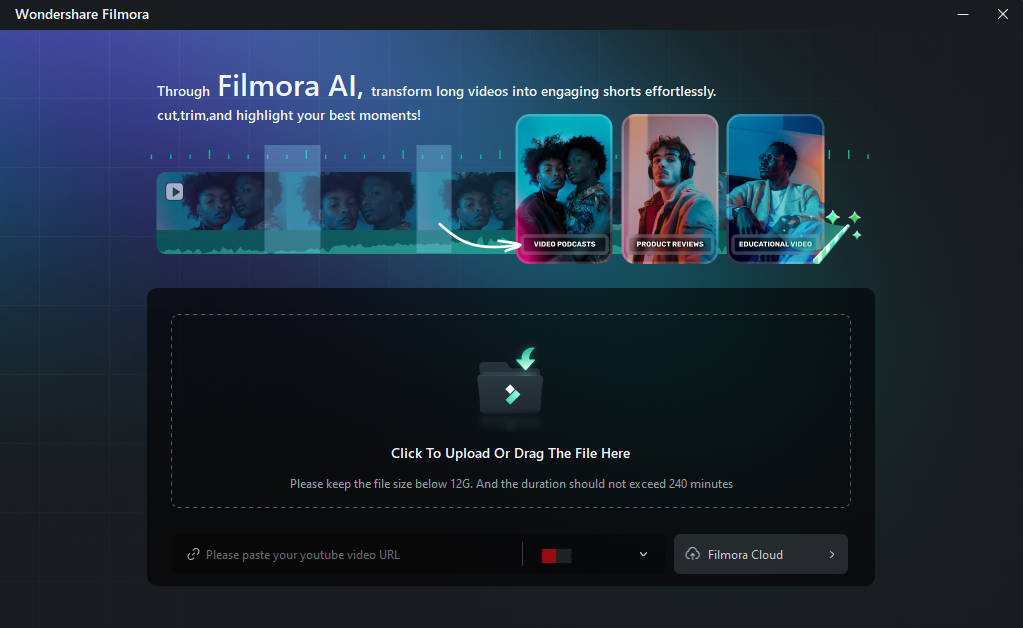
Step 1: Launch Filmora and select the Smart Short Clips feature from the app's startup screen.
Step 2: Upload a video from your device or paste a YouTube URL of your already-uploaded video.
Step 3: You'll then need to select the language, duration, theme, aspect ratio, templates, and other settings and add keywords to instruct Filmora's AI to create the short clips you want.
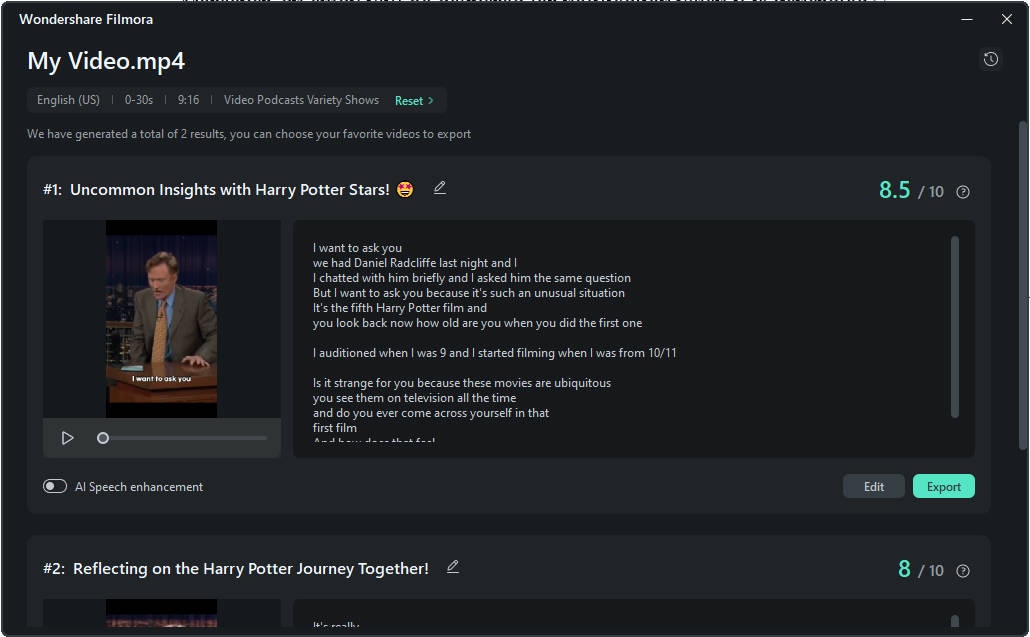
Step 4: Based on your settings in Step 3, Filmora's Smart Short Clips feature will generate several ready-to-export clips with ratings based on the social media platforms they're intended for. You can export these clips directly or tap the Edit button to adjust them further.
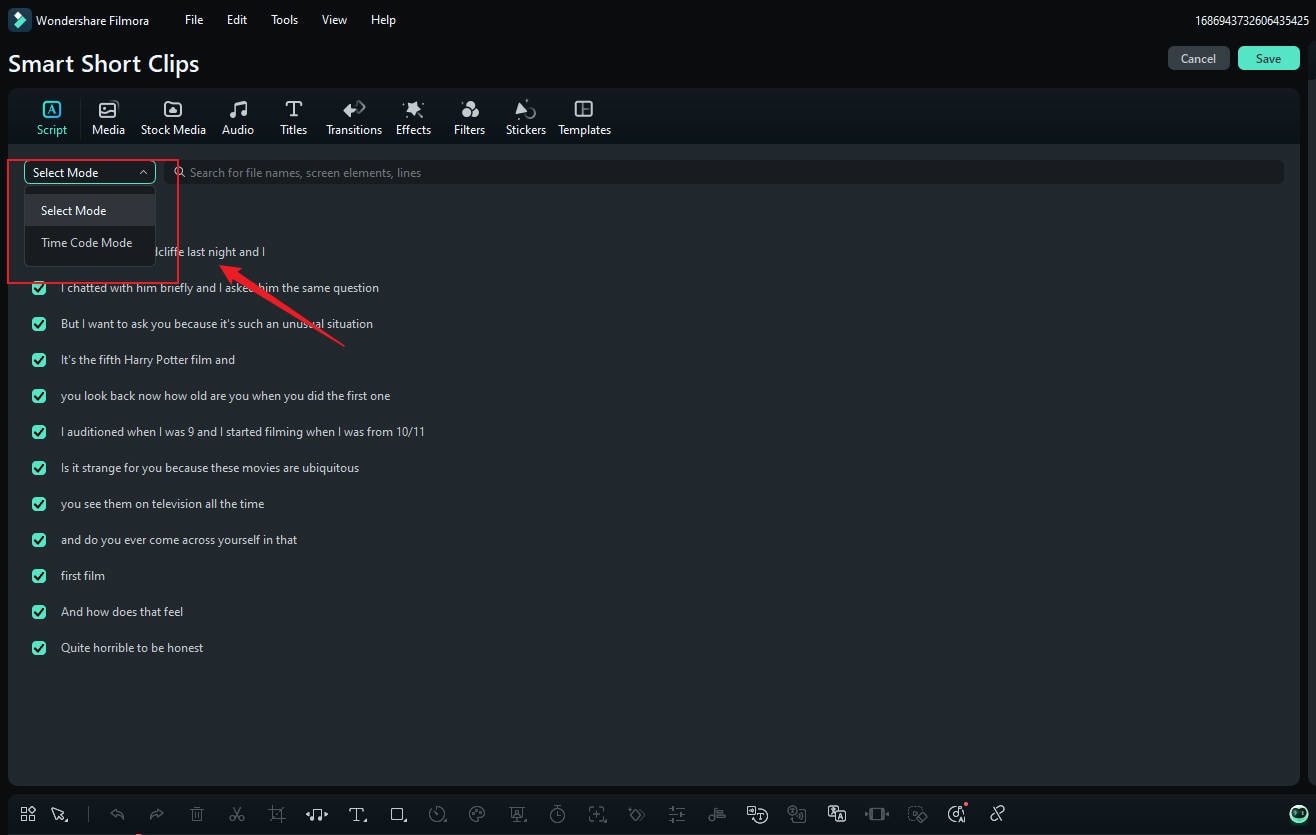
Step 5: If you choose to edit, you'll be met with a distinct Smart Short Clips Editing window where you can edit the generated clips via captions or timecodes. Furthermore, you can explore other tabs at the top and use templates, texts, and other creative assets Filmora offers.
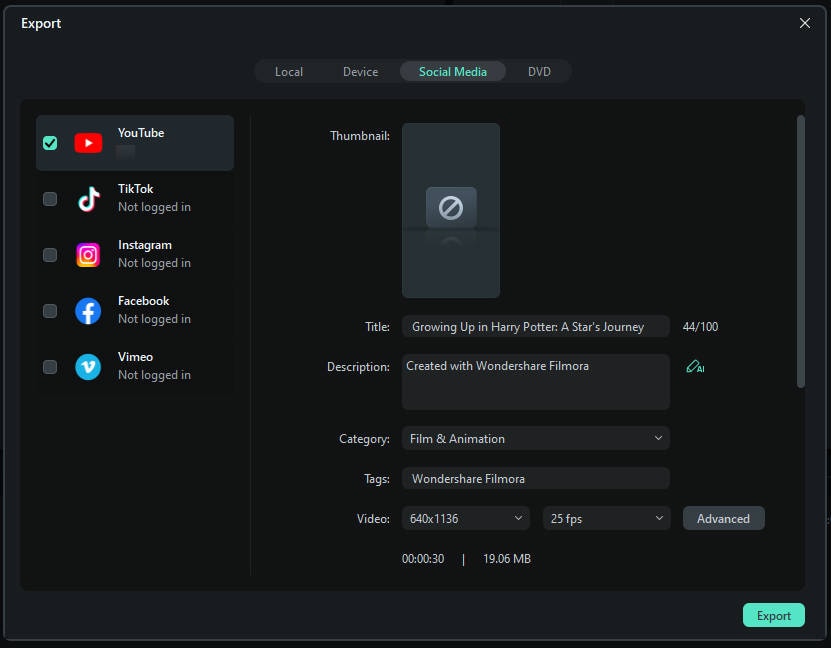
Step 6: Once ready, hit the Save button. You can then adjust your export settings and share these generated short clips directly to social media.
Conclusion
If one wants to produce good videos, then one must learn how to cut them in Lightworks. Its functionality and ability to complete tasks quickly and efficiently make it possible to say that the software is perfect for video editors. However, additional functionalities can be discovered to improve the editing experience using other software like Filmora. Every so often, it would help if you accepted the possibilities of these tools to enhance your video editing work.
secure download 