


Video editing is an essential part of creating content, and there is nothing quite as frustrating as dealing with slow and ineffective applications when composing videos. For economy-wise or just regular users, pre- and post-editing operations where splice, split, and join clips are useful and can boost the effects and quality. Based on the data obtained, Bandicut Video Cutter is an efficient and easily understandable software for fast video cutting on Windows. This article offers information about Bandicut, detailing its features and how to use it, and looks at other software similar to Bandicut, like Filmora.
In this article
Part 1: Comprehensive Overview on Bandicut Video Cutter
1. Core Functionality
One essential feature that makes Bandicut Video Cutter stand out is its ability to cut videos without diminishing quality.
- Fast and Efficient Processing: Bandicut helps users split, trim, and merge videos fast with optional choosing original video quality. The High-Speed Mode guarantees that the system will quickly run through the information and suit those requiring urgent data retrieval.
- User-Friendly Interface: Both the easy-to-use nature and the basic layout of Bandicut suggest this is a tool for all types of users. The program incorporates very simple and easy-to-use buttons that include the video cutting option, splitting, and joining.
- Lossless Video Cutting: When it comes to editing videos without losing their quality, which is always a problem when cutting the materials, Bandicut has a lossless video cutting function, which means the latter is not re-encoded.
2. Key Features
- Cut and Save Specific Parts: This entails slicing a particular section of a video and is excellent since it allows the elimination of unwanted segments such as brief advertisements or moments when the camera was accidentally bumped.
- Split Videos into Multiple Files: It is possible to split a file into many equal segments, which is important if the file originally contains more segments, allowing the user to create new segments from the whole file.
- Join Multiple Videos: Join Multiple Videos: Also, Bandicut can merge several videos which is useful in case if, for example, it is necessary to merge some clips within one project, thus saving time and effort.
3. Supported Formats and Hardware Acceleration
You can use it to convert extensively all types of video files like Avi, mp4, MOV, Mkv, mpeg, and many others. Besides, the software also uses the H. 264 encoder with support for NVIDIA, Intel, and AMD silicon, which guarantees the high speed of video processing while maintaining the best quality.
Part 2: How to Cut Video into Parts Using Bandicut
It is quite easy to use Bandicut for cutting videos and this is because the application has a simple and easy-to-understand interface. Follow these steps to trim your videos efficiently:
- Download and Install: Following the official link available for download there, Bandicut will be on a Windows or Mac computer ready for download and installation.
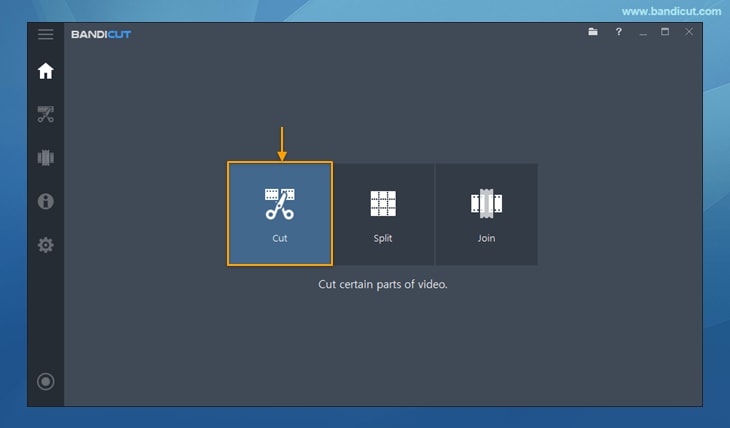
- Open the Bandicut: Start Bandicut and click the 'Cut' button to use the cutting feature.
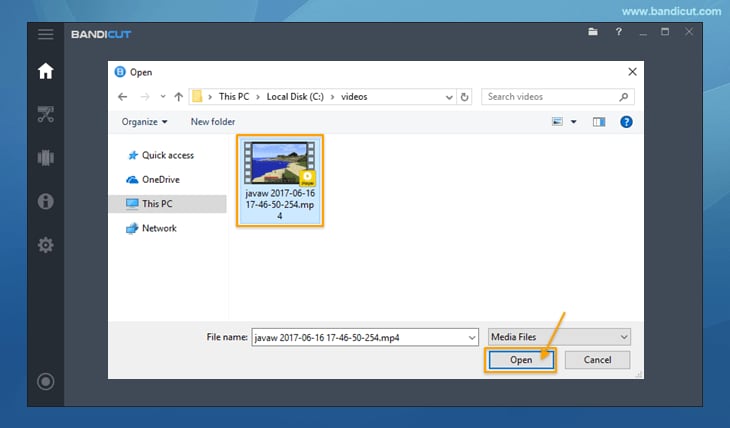
- Import the video clip: Video can be imported from the PC by selecting the clip and clicking on the “open” option that appears as soon as you select the video file.
- Select Cutting Area: There is a slider to navigate to the part that one wants to trim or there are two-time indicators that can be set to the start and end of the segment of the video desired.
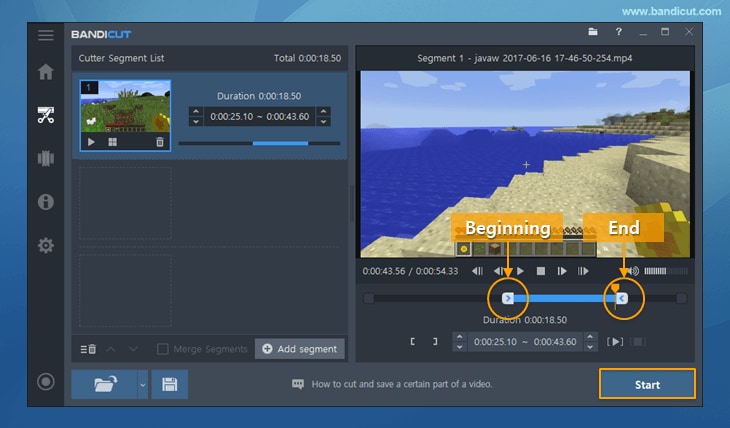
- Choose Cutting Mode: Choose ‘Hi-Speed Mode’ for fast stream without losing its quality or if you want to perform more editing, then ‘Encoding Mode’ is suitable for you.
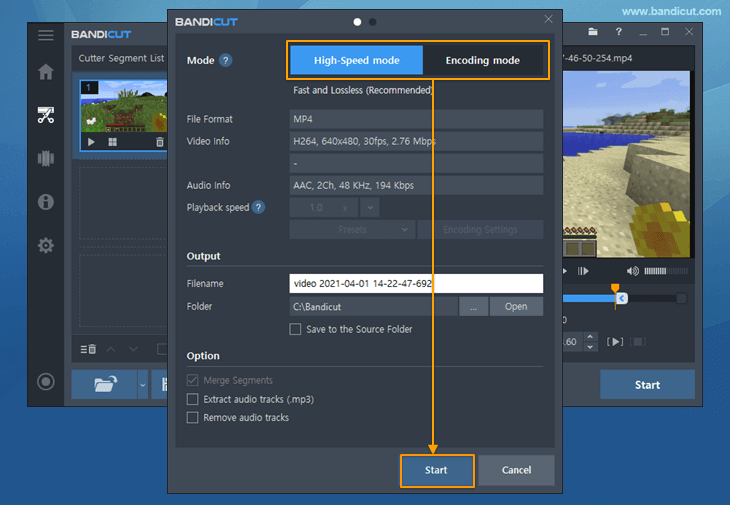
- Cut the Video: To start the cutting process push the ‘Start’ button. After completing the cutting process, you will be able to preview the cut video.
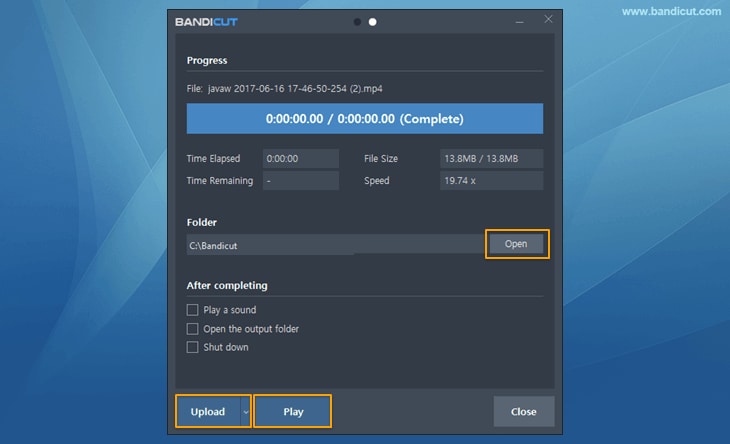
- Save the Edited Video: When the cutting is done, it is recommended to export the edited video to the intended folder or any preferred drive.
Part 3: Explore Filmora for Free Cutting Options (Bandicut Alternative)
Filmora Video Cutter
While Bandicut excels in quick and efficient video cutting, Wondershare Filmora offers a range of free cutting functionalities that cater to different editing needs. It is a top-notch video editing software for both Mac and Windows, ideal for creating high-quality videos.
Wondershare Filmora supports all video types, including AVI, and offers basic to advanced editing tools like cropping, resizing, preset templates, auto beat sync, split-screen, speed ramping, motion tracking, keyframing, and creative transitions.
Key Features:
- Cut/Split/Trim: Filmora provides precise frame-by-frame control, similar to Bandicut, allowing users to cut videos with high accuracy.
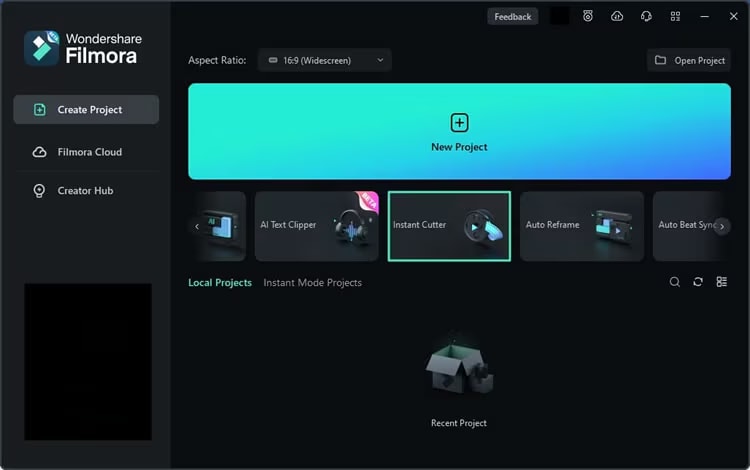
- Instant Cutter Tool: This tool is designed for quick trimming of unwanted footage at the beginning or end of videos. It’s perfect for users who need a fast solution for basic editing tasks.
- Advanced Editing Tools: Beyond cutting, Filmora offers a variety of advanced editing features such as transitions, effects, and audio adjustments, making it a versatile tool for more comprehensive video editing projects.
- User-Friendly Interface: Filmora’s interface is designed to be intuitive and easy to use, making it accessible to both beginners and experienced editors.
- Compatibility: This tool is compatible with major types of videos such as AVI, MP4, MOV, MKV, MPEG, and others. Besides, the software is built with H. 264 encoders from NVIDIA, and Intel, and via hardware to increase video speed with better quality.
Why Consider Filmora Over Bandicut?
While Bandicut is ideal for users who need a straightforward and efficient video cutter, Filmora provides additional functionalities that might appeal to those looking for more versatile editing tools. Filmora’s free features make it an excellent alternative for users who require detailed editing capabilities without investing in paid software. Some other features of Filmora that make video editing easy and give it an edge over software like Bandicut, include:
AI-Powered Features & Advanced Editing Tools
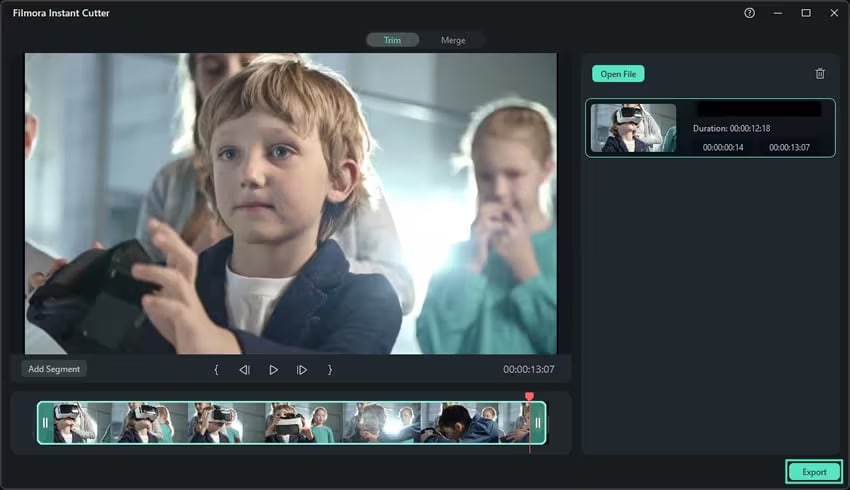
- Instant Cutter Tool: Designed for quick and easy cutting of large 4K and HD videos without quality loss. It lets you quickly import, trim, and merge large video files without re-encoding, making it ideal for high-resolution videos like 4K action camera footage. Supporting MP4/MOV and MTS/M2TS formats, it allows efficient trimming and seamless merging of clips without quality loss.
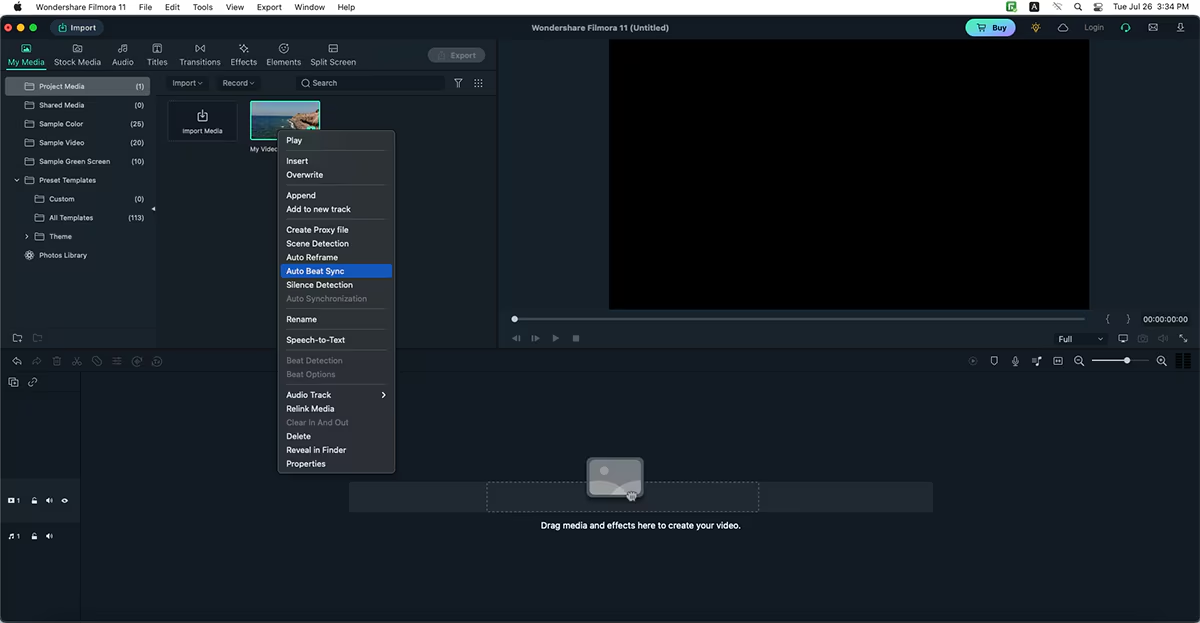
- Auto Beat Sync: Automatically synchronizes video clips to the rhythm of background music, saving time on manual editing.
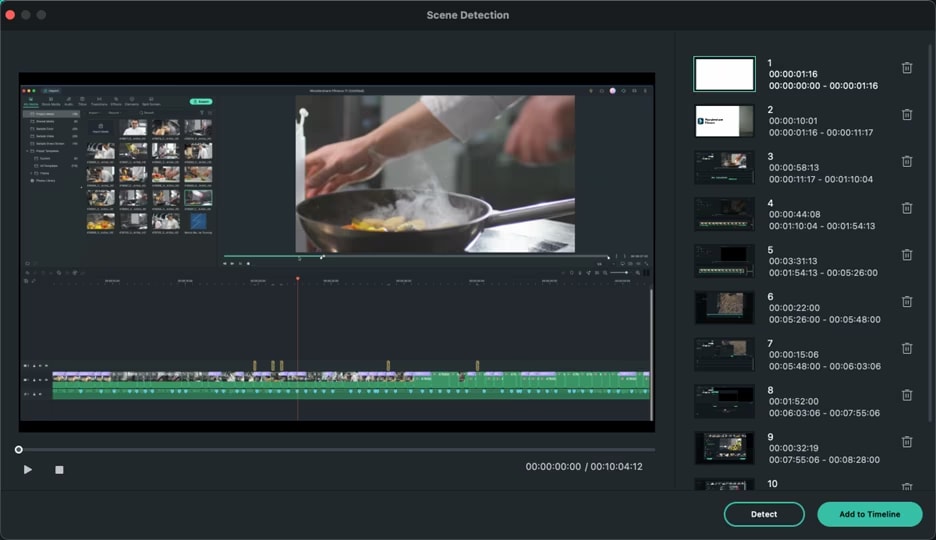
- Scene Detection: Automatically detects and separates scenes in a video, making it easier to organize and edit large projects.
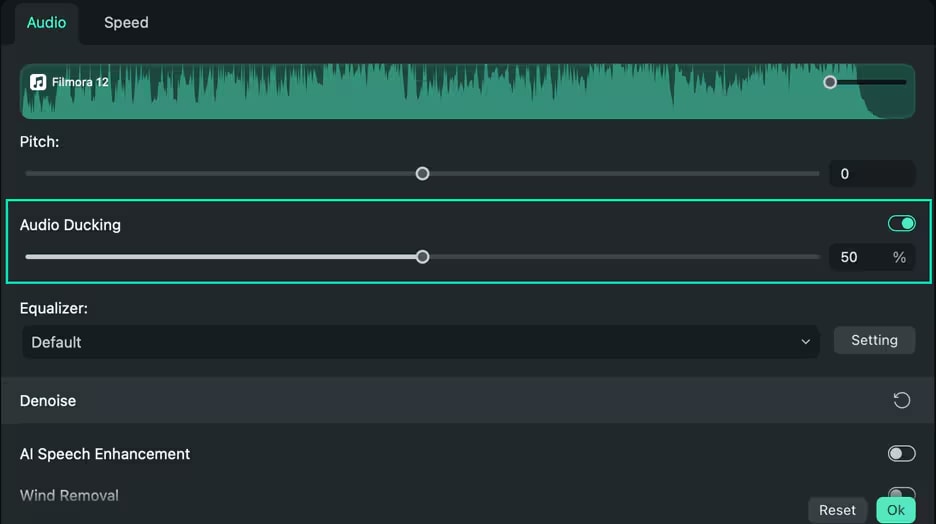
- Audio Ducking: Automatically lowers the volume of background music when dialogue or other important audio is detected, ensuring clear sound balance.
Such innovative and versatile AI editing features make Filmora an amazing video editing software, second to none.
Part 4: How to Cut Videos Using Filmora Without Losing Quality
Cutting videos with Filmora is a straightforward process that can be done in a few simple steps. Here’s a detailed guide to help you get started:
Step1Download and Install Filmora
Visit the official Filmora website and download the software for your operating system (Windows or Mac).
Follow the installation prompts to install Filmora on your computer.
Step2Import Your Video
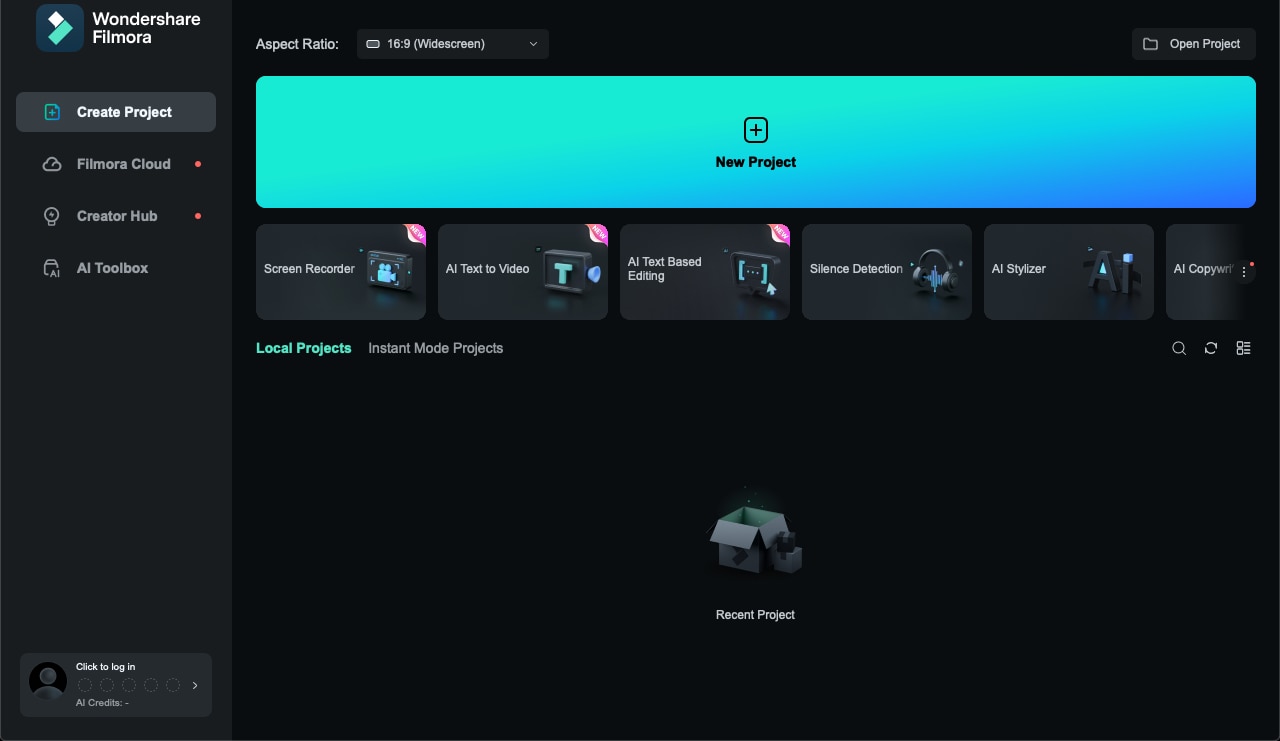
Open Filmora by double-clicking the desktop icon or searching for it in your applications. Click on 'New Project' to start a new video editing project.
Click the 'Import' button located in the media library area and select the video file you want to cut.
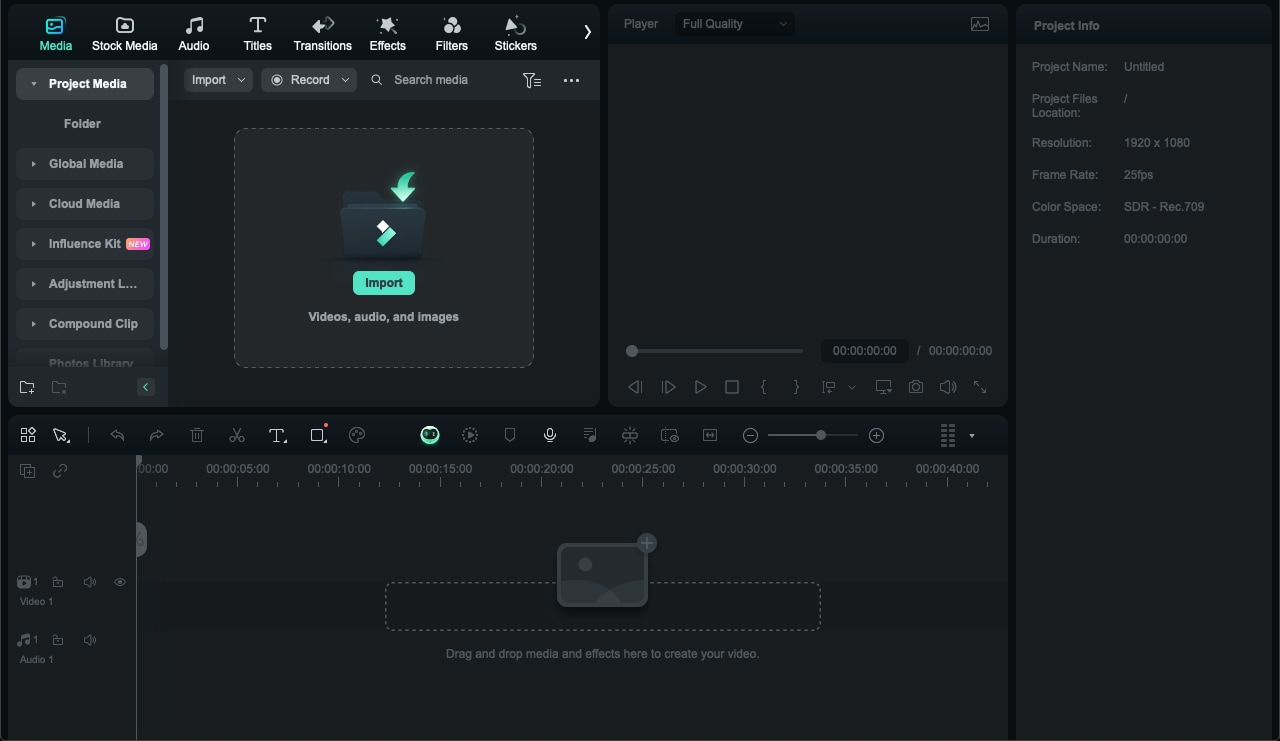
Alternatively, you can drag and drop your video file directly into the media library.
Step3Add Video to Timeline
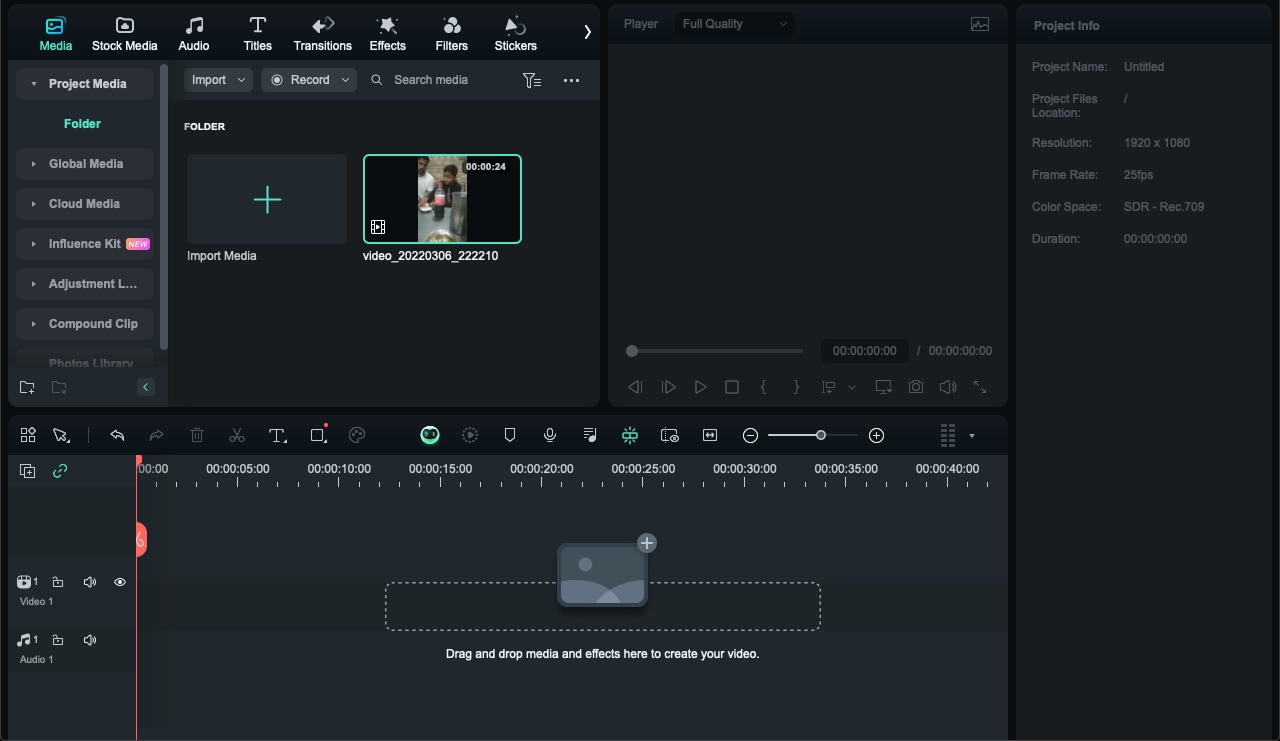
Drag the video from the media library to the timeline at the bottom of the screen. Ensure the video clip is positioned correctly on the timeline for easy editing.
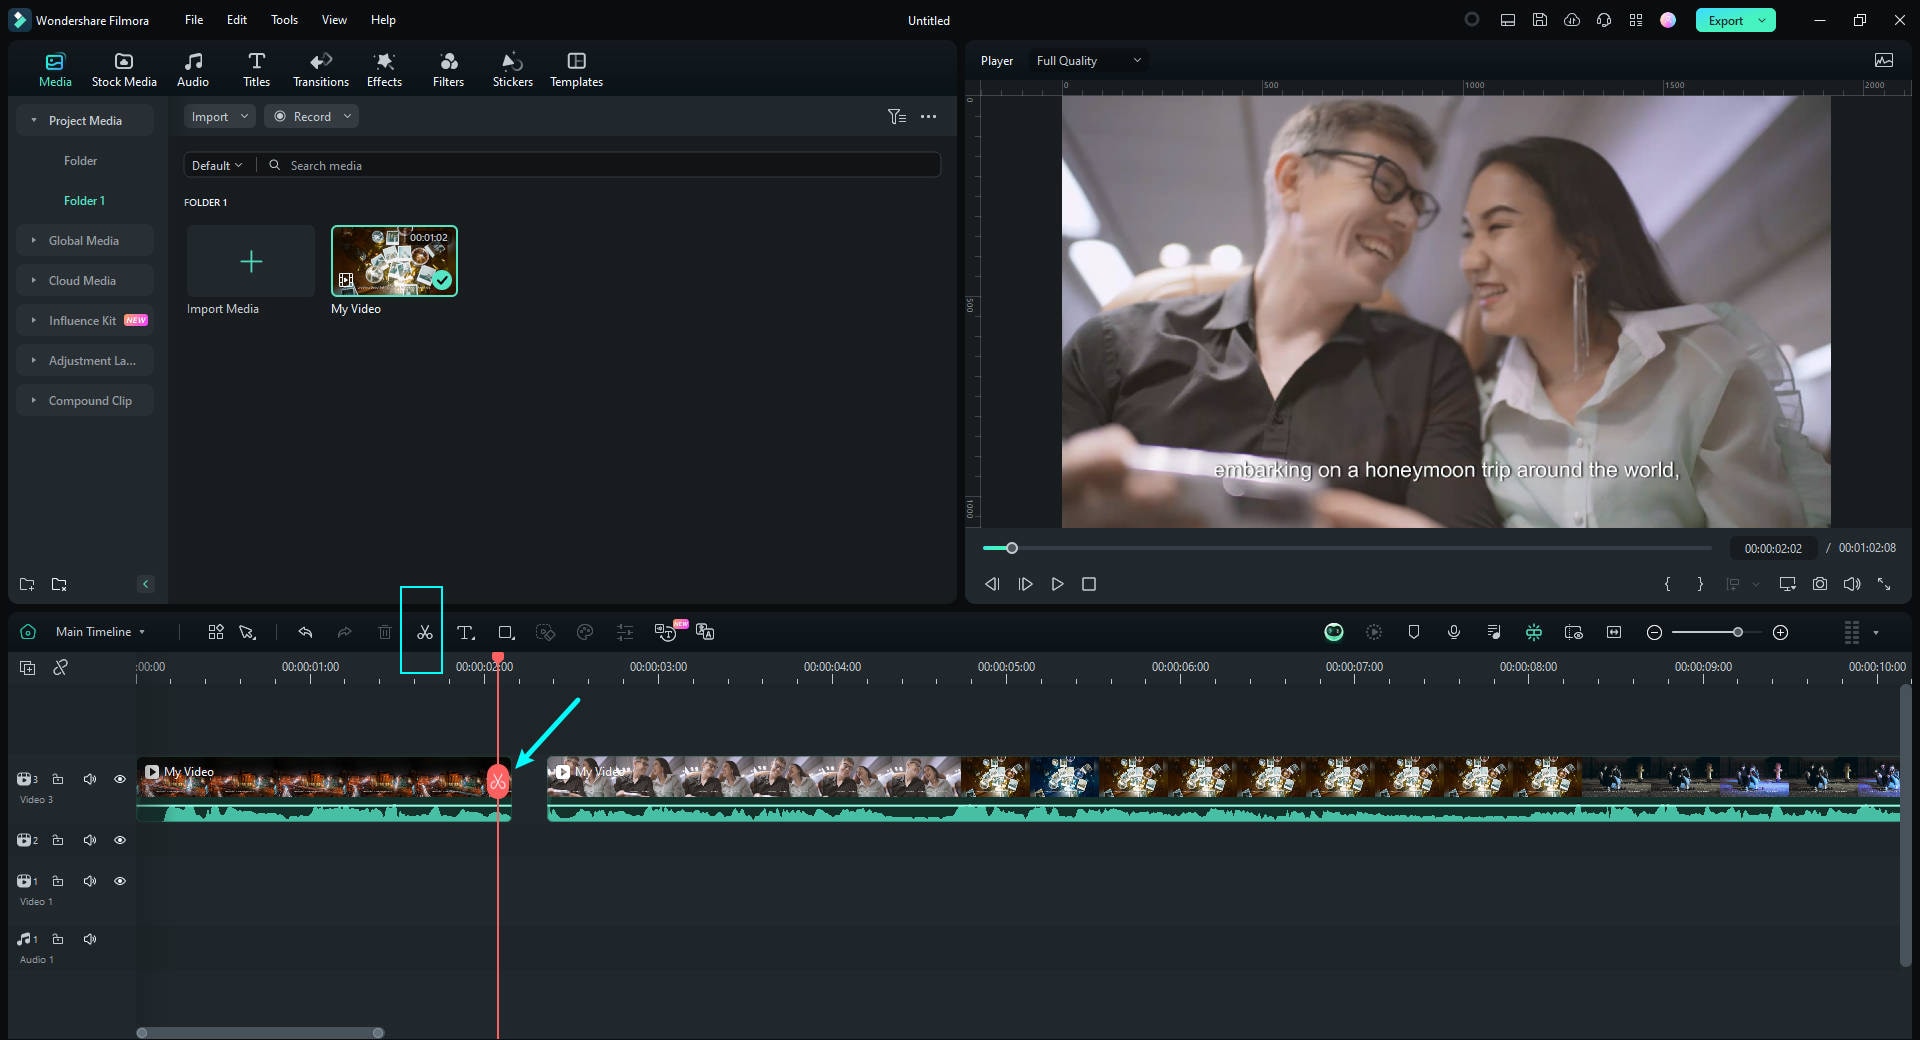
Step4Cut the Video
Click on the 'Scissors' icon on the toolbar above the timeline to activate the cutting tool. Move the play head (the red marker on the timeline) to the point where you want to cut.
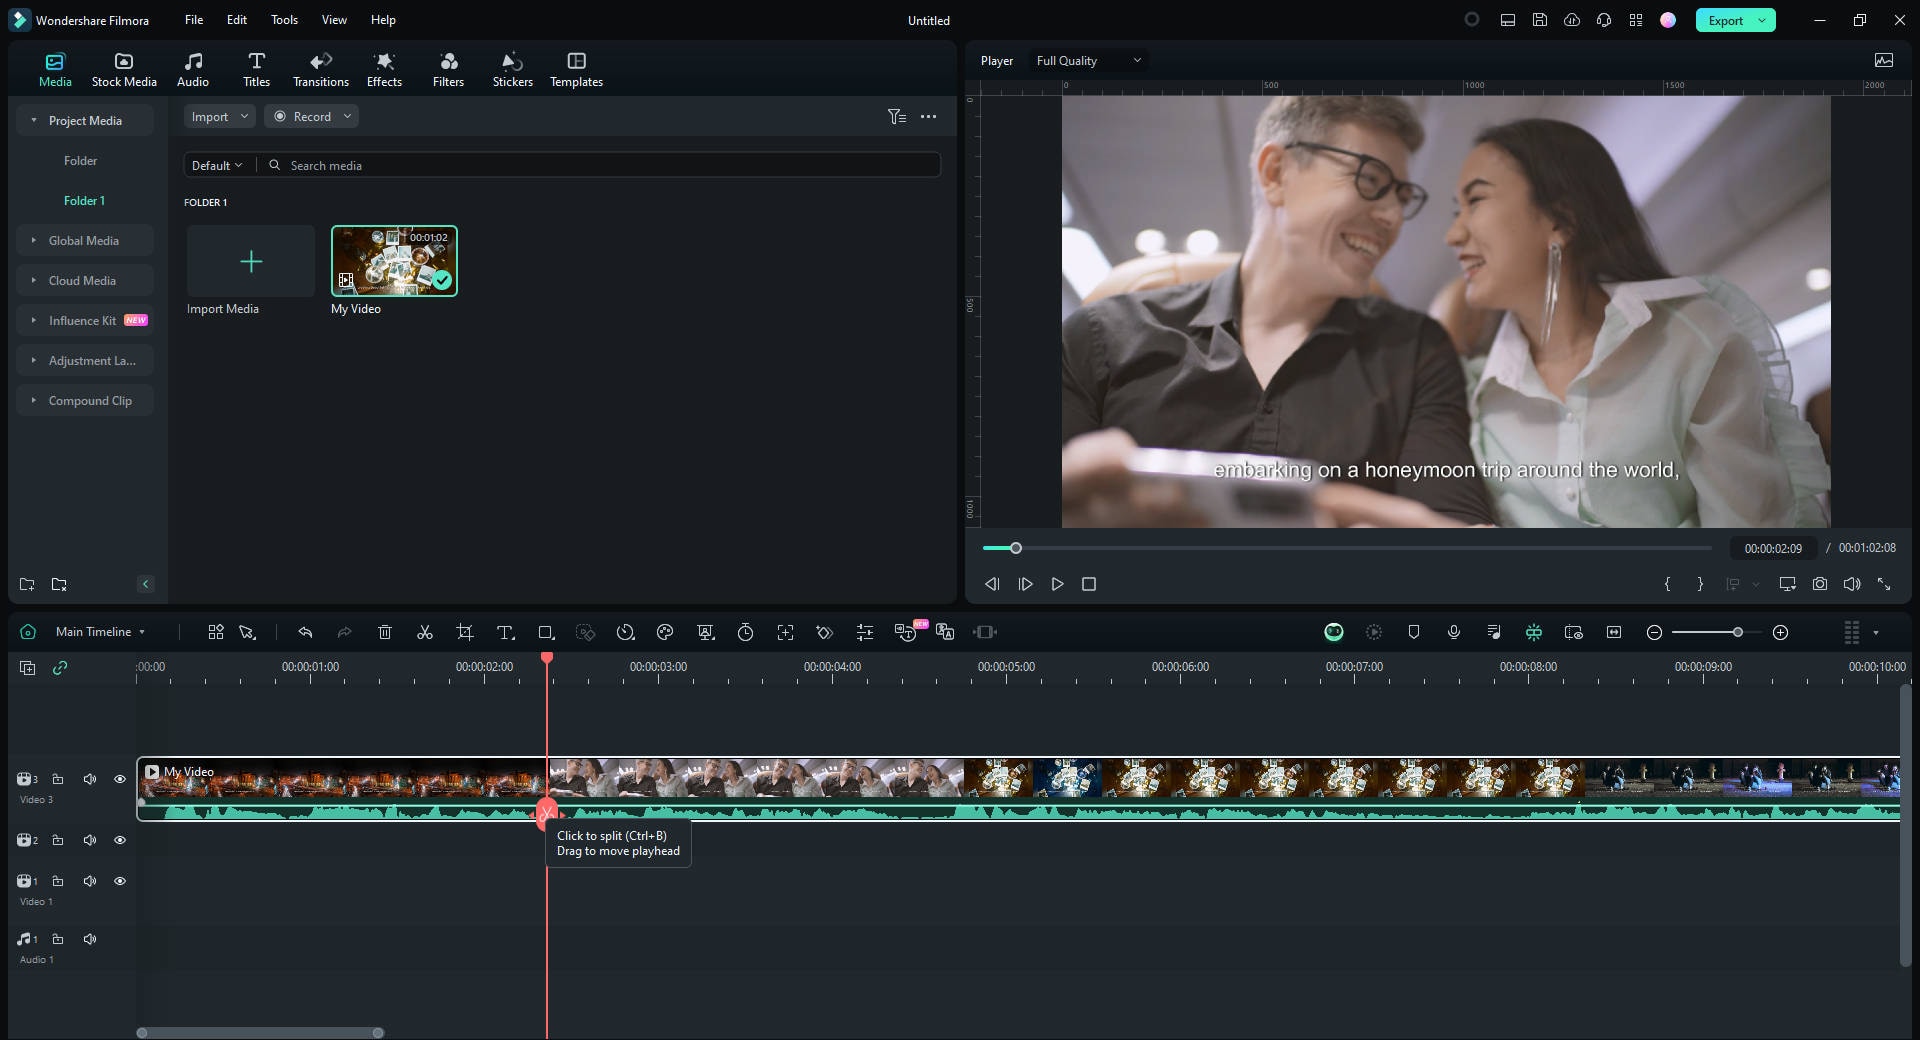
Click the 'Scissors' icon to split the video at this point. Move the play head to other points where you want to make additional cuts and repeat the process.
You will divide all of the clips under your playhead if you don't choose a specific track in your timeline. You must first choose the track, then click the divide button to divide media inside a single track.
Step5Delete Unwanted Segments
Click on the segment of the video that you want to remove. Press the 'Delete' key on your keyboard or right-click the segment and select 'Cut' from the context menu.
Drag the remaining clips together to remove any gaps left by the deleted segments.
Smart Alternative Method: Find the instant cutter tool within your editing software. This tool is usually available in the toolbar or under the editing tools menu.
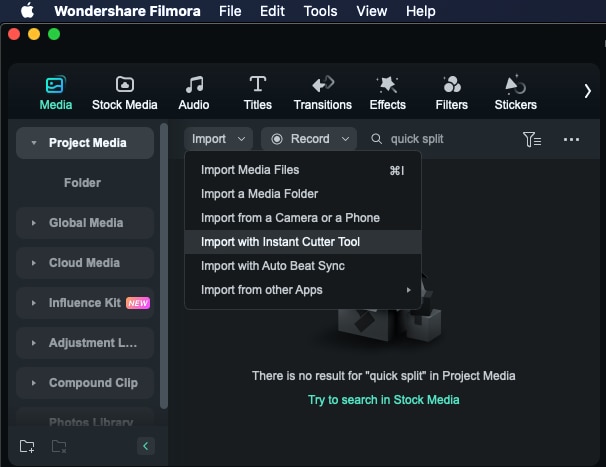
Use the timeline to navigate to the part of the video you want to cut. Set the starting (In) and ending (Out) points for the segment you want to cut. This is usually done by dragging markers or using keyboard shortcuts.
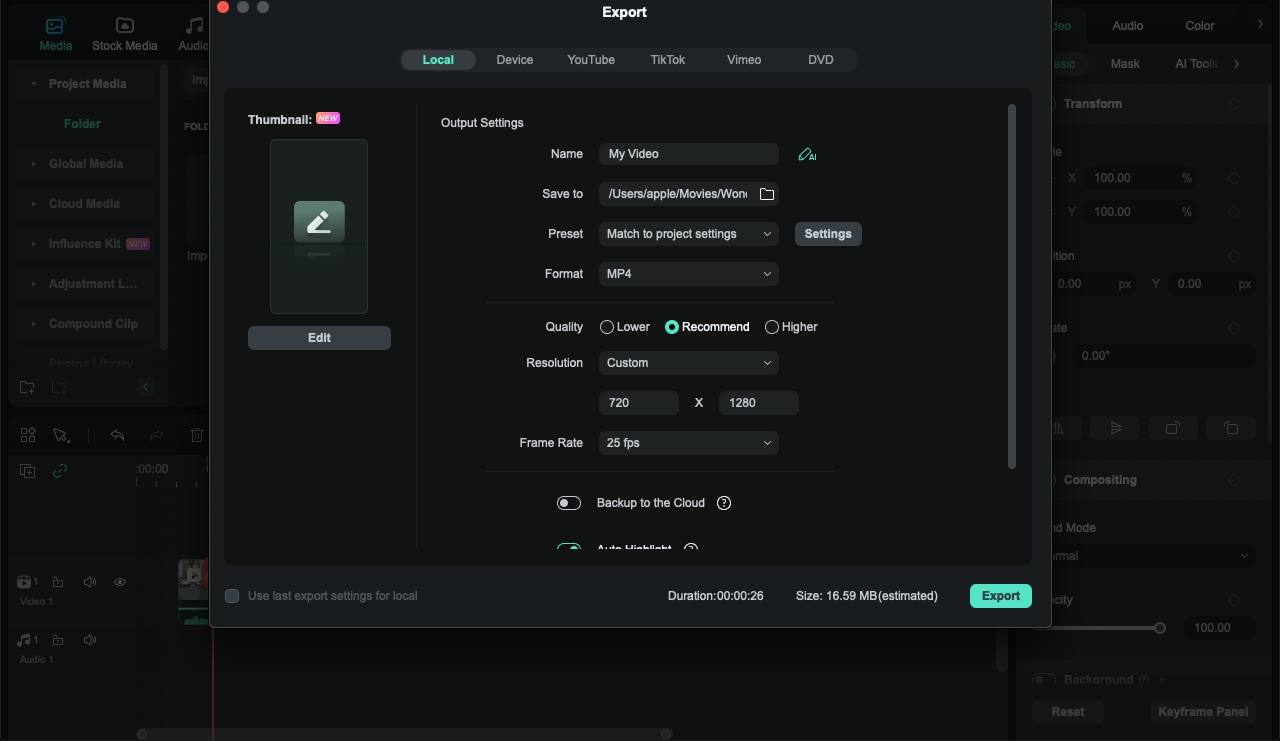
Step6Export the Edited Video
Once you're satisfied with the cuts, click the 'Export' button located at the top right of the interface. Select the desired video format from the export window. You can also adjust other settings such as resolution, frame rate, and bitrate. Click the 'Export' button again to save the edited video to your computer. Choose the location where you want to save the file and give it a name.
By following these steps, you can easily cut videos using Filmora, making it a versatile tool for both simple and advanced video editing tasks.
Conclusion
Bandicut Video Cutter is one of the foremost tools due to its helpful interface, cutting work, and fast operation. It is recommended among users who are in search of a stable solution for basic video-cutting needs. That being said, if you want to enjoy more editing features, Filmora is worth considering. Each has its benefits, so learning about them will allow you to choose the most suitable software for video editing.
To summarize, if you prefer a fast and straightforward video cutter like Bandicut or a famous video editor offering more options and additional capabilities like Filmora, both programs will allow you to work effectively and receive quality results. You should sample various ones and notice the one most relevant to you.
