Create High-Quality Video - Wondershare Filmora
An easy and powerful YouTube video editor
Numerous video and audio effects to choose from
Detailed tutorials provided by the official channel
PowerPoint allows you to trim or crop the length of your video and save it as a separate media file. Trimming/cropping video is a great way to remove distracting or unnecessary parts of your video or change its dimensions so that it fits within a certain area. Doing this will make your videos captivating, and more people will want to watch them. Keeping that in mind, we'll explain how you can crop or trim video in PowerPoint. You will also learn some helpful tips that you can use when editing videos on this presentation program.
How to Trim Videos in PowerPoint
Many people use Microsoft PowerPoint to prepare basic animated explainers and presentations, but you can learn how to trip or crop videos in this program with the tools that it provides. With that in mind, here is how to trim, reset, or edit videos in PowerPoint.
How to Trim a Video in PowerPoint
You can trip unnecessary content at the start or end of your video clip. However, you can only trim videos you have inserted from your PC, as this feature is not yet available for videos on the web. Follow the steps below to learn how to trim video in PowerPoint.
- If you are in a slide containing a media placeholder, click on Insert Video from File. A window will open; select the From a File option.
- Find the video file on your PC and select it. Then, click the arrow that's right next to the Insert button. Choose either the Link to File or Insert option and your video will appear on the slide.
- If you are not using a slide that has a media placeholder, find the Insert tab and click Video on My PC. You will be able to locate the video file on your PC.
- You are now ready to trim video PowerPoint.
- Select your video, and the Playback tab will appear. Navigate to the Editing area of the ribbon and hit the Trim Video button.

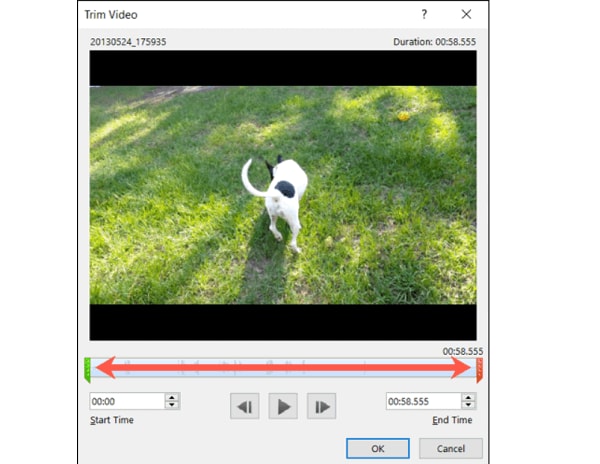
- You'll see a small editing window that allows you to trim video in PowerPoint.
- Enter the end and start times for the sections of the video you would like to keep. Alternatively, you can use the markers to choose the start and endpoints.
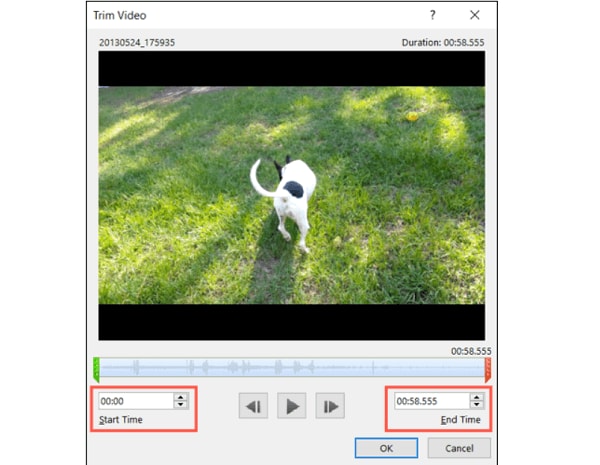
- To adjust the start and end times in smaller increments, you can use the arrows you see on the sides of those boxes. If you know the exact times, enter them into the corresponding boxes.
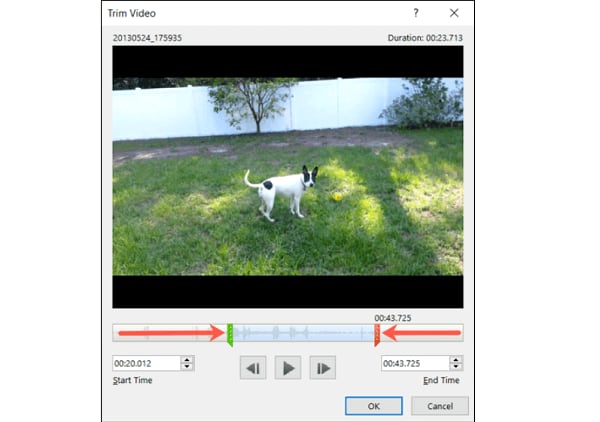
- You can also select the portion you would like to keep using the end and start time markers. In this case, sliding the red marker allows you to the end time while the green one lets you set the start time.
- If you want to use a combination of the tools above to pinpoint where to start and end the video, hit the Play button, then click the Pause button when you reach the time you want.
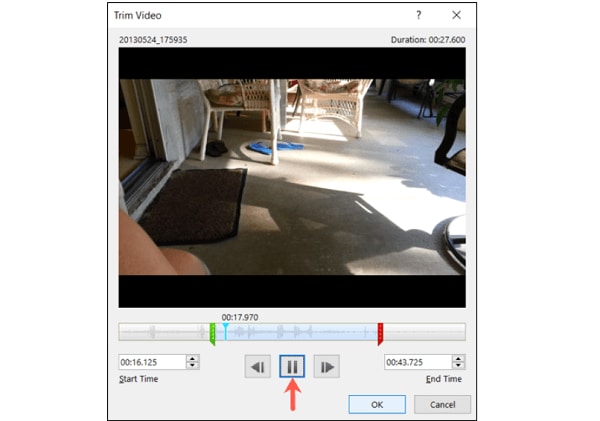
- Enter this time into the End Time or Start Time box, depending on the portion you would like to keep. Or you can move any of the markers to this spot.
- Hit the OK button once the portion of the video clip you want is all set. The video will appear on your slide update, and it will only play the section that you kept when trimming the video.
How to Reset or Edit a Trimmed Video in PowerPoint
If you trim video in PowerPoint and change your mind, you can always edit where you have trimmed it or reset the trimmed video back to its original state. Follow the steps below to learn how to edit to reset a trimmed video in PowerPoint.
- Select your video, and then find the Playback tab.
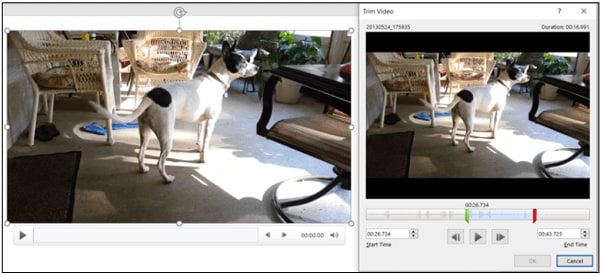
- Hit the Trim Video button, and the Trim Video Settings will be as they were when you were trimming the video. That means you can make the necessary adjustments.
- To reset a trimmed video back to its original length, slide the red end marker to the right and the green start maker to the left. The OK button allows you to play the whole video in your presentation.
How to Save a Trimmed Video
Now that you have trimmed your video in Microsoft PowerPoint, you might want to save it to use it outside this program. You can only save the video file after compressing it, then you can use the trimmed video as you want.
After compressing your trimmed video, only the trimmed section will show up on your slide. That said, follow the steps below to save your trimmed video:
- From the PowerPoint menu, select File > Info
- Next, select the Compress Media option.
- Next to Compress Media, you will see all media that are in your slideshow, including your trimmed video. If you've got other video files here, the compression process will apply to these files.
- Choose the suitable level of compression. A dialog box will pop up as the compression process takes place. Hit the Close button when this process completes.
- Go back to the slide that contains your trimmed video, which has now been compressed.
- Right-click the compressed video, and select the Save Media As option.
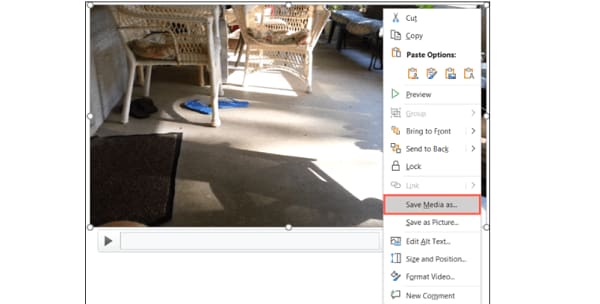
- Choose the location where you want to save your video. You can change its name if you want and click the Save button.
You have now successfully saved your trimmed video.
Bonus! Tips on Editing Videos in Powerpoint
Now that you know how to trim video PowerPoint, here are some helpful tips on editing videos on this application.
How to Crop Videos in PowerPoint
Once you have inserted your video in the slide, you have the option of cropping it. Follow these steps below to learn how to crop video PowerPoint.
- Open your presentation and then go to the slide where you have inserted your video clip.
- Double-click or select the video, and the two Video Tools tabs will appear in the ribbon: Playback and Format. Hit the Format tab option to activate it.
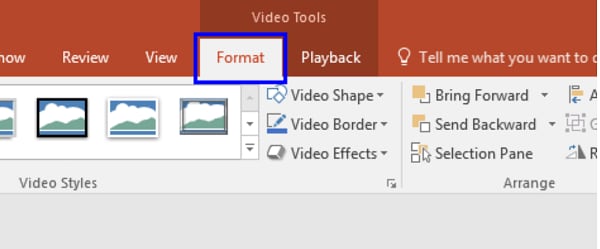
- Your slide may show a black rectangle after you insert your video.
- Add a Poster Frame to the video clip to get rid of the black rectangle.
- Click Crop in the Video Tools Format tab.
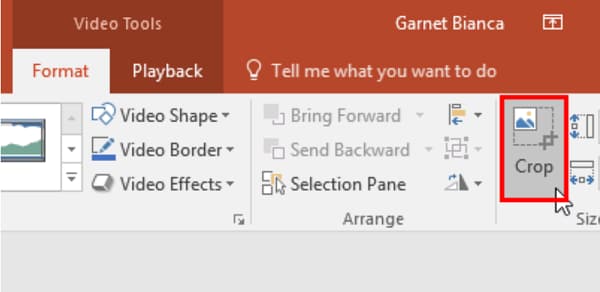
- On the edges of your video clip, you'll see dark crop handles. If you use the Video Shape option, the crop handles will appear on the edge of that shape.
- Pressing the Ctrl key on your keyboard while you drag allows you to alter how you crop. Pressing Ctrl plus dragging the side cropping handles resizes two opposite sides, while Ctrl plus dragging the corner cropping handles resizes all the four sides.
- Pressing the Shift key on your keyboard while dragging will give you different results. You can also use the Shift and Ctrl keys simultaneously to combine both capabilities.
- You can reposition the crop by either moving the video itself or the crop area.
- Crop the unwanted portion by hitting the Crop button again or pressing the Enter key. You can also click on the Slide Area to apply the cropping changes.
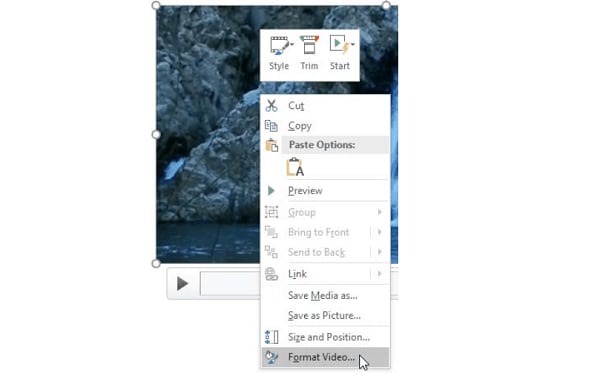
- You can access more crop options by right-clicking the video, where a contextual menu will appear. Select the Format Video option.
- You'll see the Format Video Task Pane; select the Crop option.
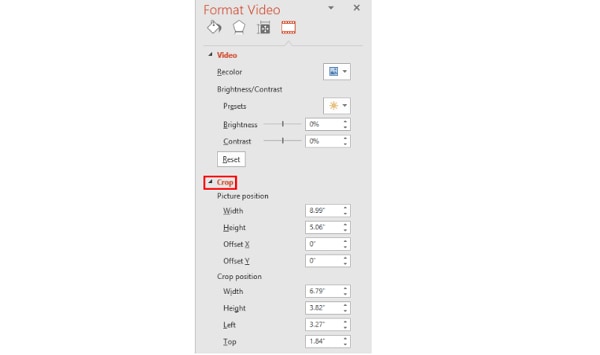
- You can crop sections of the video by specifying the Picture or Crop Position. You can also change other crop parameters, such as Top, Left, Offset Y, Offset X, Height, and Width.
How to Play Video Inside a Shape
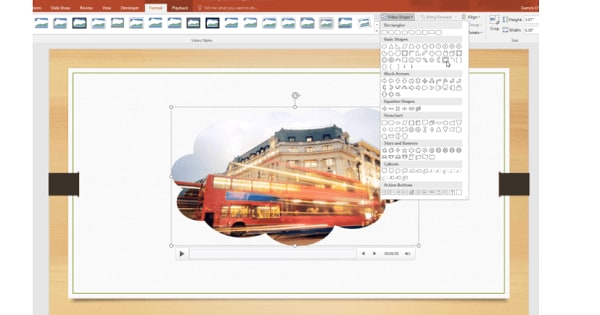
If you want to edit your video and enhance its appearance, you can have it play inside a unique shape instead of the usual rectangle format that videos play in. In turn, you'll draw attention to your video.
To play your video in an unusual shape, select your video and navigate to the Format tab. Then, go to the Video Shape menu, where you'll see multiple shapes to choose from.
How to Apply Preset Video Styles
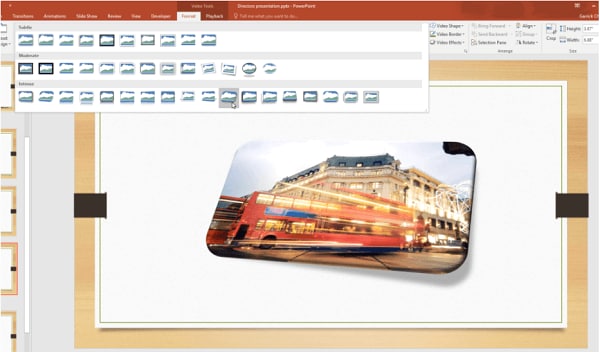
You can also liven up your video by applying one of the pre-designed styles that PowerPoints provides. These styles combine various effects, including bevels, reflections, shadows, tilts, and frames.
Applying preset video styles is a simple process. Select the video, then navigate to the Format tab. Click More under the Video Style section. You'll see a gallery of preset styles; roll your mouse over it and hold the cursor over any style type. The program will apply a live preview of this style to your video.
Conclusion:
● You can use PowerPoint to crop, trim, and add video styles to your videos to make them more attractive to your audience by following the steps above. In turn, they will get more views and attract more attention.


 100% Security Verified | No Subscription Required | No Malware

