

 TL;DR:
Adobe Premiere Pro is a professional, subscription-based video editor requiring high system resources and a steep learning curve, making it best for advanced users needing precise control, while beginners may prefer the AI-assisted, template-rich Wondershare Filmora.
● Premiere Pro relies on customizable workspaces and specialized panels like Lumetri Color for grading, but demands updated graphics drivers, regular media cache clearing, and proxy creation to prevent freezing during high-resolution playback.
● While Premiere Pro starts at $22.99 per month and excels in deep manual control and third-party plugin integration, Filmora provides a free version, built-in templates, and automated AI tools tailored for fast content creation without manual setup.
● To prevent common export failures and missing audio in Premiere Pro, users must strictly match project sequence settings to the original video frame rate and render using the universally supported H.264 MP4 format.
Ask AI for a summary
 ChatGPT
 Perplexity
 Gemini
 Claude
 Grok
Grok
Don't let your first impression of Adobe Premiere Pro stop you from trying it out. Premiere Pro video editing software might look intimidating when you first open it. This detailed tutorial will show you how to use Adobe Premiere Pro, covering everything from project setup to advanced features. You will quickly learn how to use Adobe Premiere Pro for all your video editing needs.
To help you from feeling overwhelmed, we are going to break everything down into easier bits. We will show you how to use Adobe Premiere Pro, starting from the basics. And if you end up feeling that it's still too complex, we also have an easier recommendation you can try for your project.
Part 1. Getting Started: How to Use Adobe Premiere Pro Basics
Before jumping into Premiere Pro, you need to really understand what the editor is all about and what it can actually do. So, let's start with what Premiere Pro is and why it's widely used in the industry.
What is Adobe Premiere Pro?
Premiere Pro is an Adobe video editing program that stands as one of the industry-standard tools trusted by professionals worldwide. Most people choose it not only for its powerful editing tools but also for its seamless integration with other Adobe products, like:
- After Effects for motion graphics
- Photoshop for photo editing
- Audition for advanced audio editing
Premiere Pro's Pricing Plans
To use Premiere Pro, you need to pay for a subscription, though a free trial is usually available for new users. You can choose to subscribe to Premiere Pro alone, starting from $22.99/mo. Or, subscribe to the full Creative Cloud plan, starting from $59.99/mo, which gives you access to other Adobe apps as well.
Is Adobe Premiere Pro Good for Beginners?
Premiere Pro is mainly built for users who already have some knowledge of video editing. It's a professional tool with advanced features and settings. Not to mention that it requires a subscription to use, which can be expensive if you're just starting.
However, every master was once a beginner. Even if you are new to the software, you can still learn on Premiere Pro, though it may take more time before you can fully be comfortable with it. Many find it easier to start with more accessible editors that offer simpler workflows and lower costs before moving up to a professional platform like this.
Part 2. Premiere Pro Interface Basics
Learning how to use Premiere Pro will be much harder if you don't first understand how to navigate the interface. Once you know what each part is for, everything will become more manageable.
Workspaces Overview
In Premiere Pro, workspaces are basically ready-made layouts that arrange the panels you need for a specific task. Instead of dragging things around every time, you can just pick a workspace and get right to work.
There are about 15 default workspace options in Premiere Pro, each built for a different part of the editing process. Some of the essential ones are:
- Essentials: An all-in-one layout that keeps the most important panels within reach. It's especially handy if you're editing on a single monitor.
- Starter: A beginner-friendly setup that helps new users find their way around without feeling overwhelmed.
- Vertical: Ideal for creating vertical videos for social media platforms like TikTok or Instagram Reels. In this workspace, the Source Monitor and Program Monitor share the same space, so you can switch between them quickly.
- Learning: Built for those who want to use Premiere Pro's in-app tutorials and learn while editing.
- Color: Designed for color correction and grading. It highlights the Lumetri Color panel and scopes so you can fine-tune exposure, contrast, and overall tone.
- Production: Best for team projects where multiple editors are working together in a shared Production workflow.
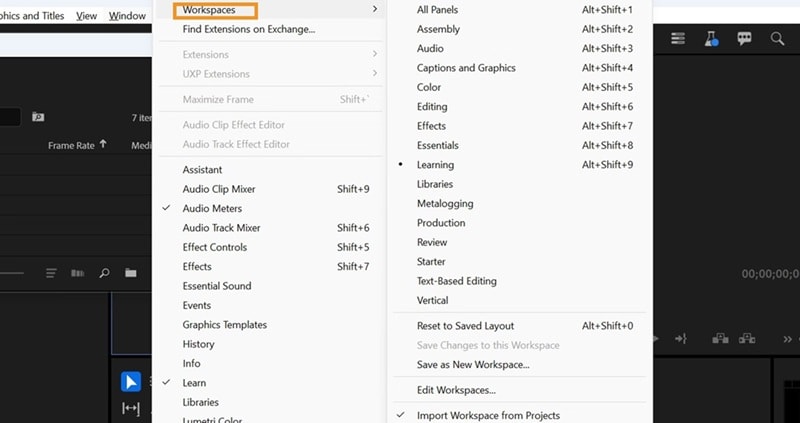
You can easily switch between these layouts from the top menu depending on what stage of editing you're in. Open Window > Workspaces (Alt + Shift + 1–9), and pick the layout that matches the task you're working on.
Panels & Frames Explained
Inside the interface, the Premiere Pro editor also contains a variety of panels. These panels give you access to specific tools for editing.
- Project Panel is where you import, organize, and manage your media files.
- Timeline Panel is the main workspace for arranging clips, trimming, and building your sequence.
- Program Monitor shows a preview of your final edit as you work.
- Source Monitor lets you review and mark clips before adding them to the timeline.
- Tools Panel contains editing tools like the Razor, Selection, and Pen tools.
- Effects Panel gives you access to transitions, video effects, and presets.
- Lumetri Color Panel isused for color correction and grading.
- Audio Track Mixer helps balance sound levels and apply audio effects.
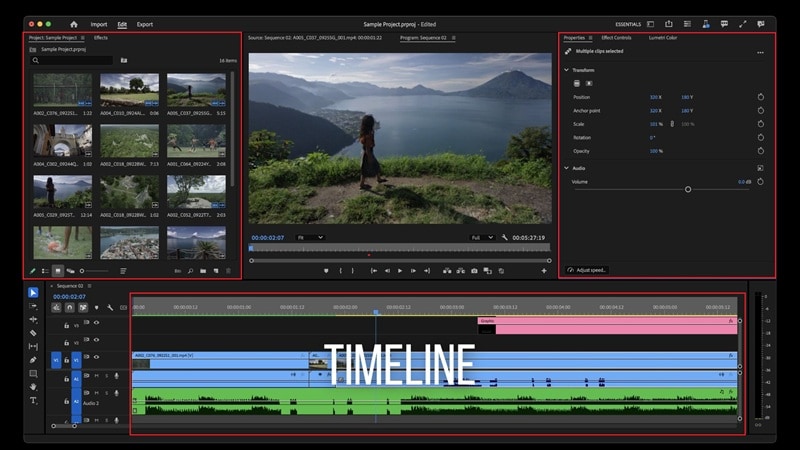
All of these panels sit inside frames (the containers that hold one or more panels). You can resize, rearrange, or stack the frames into tabs, depending on how you like to work.
How to Customize and Reset Panels
Although Premiere Pro is kind of hard to navigate, the interface is actually flexible. Panels can be opened, closed, resized, or rearranged to create a workspace that fits your editing style. And, you can reset everything back to its default setup with just a click.
How to open, close, and move panels in Premiere Pro:
- To open a panel, go to the Window menu and select the name of the panel you want.
- To close a panel, press Ctrl+W (Windows) or Command+W (macOS), or simply click the Close button on the panel.
To rearrange panel tabs, click and drag them horizontally to change their order. Selecting a tab will bring that panel to the front of the group.
Note: When you close a panel group within the main window, the remaining groups will automatically expand to fill the extra space. Closing a floating window, however, removes all the panels contained in it.
Part 3. Step-by-Step: How to Use Adobe Premiere Pro
With your workspace ready, let us show you how to learn Adobe Premiere Pro for beginners.
1. How to Create a Project
When you open Premiere Pro and click on New Project, it will prompt you to name your project first and locate where you want to save it later. You can also opt for whether you want to use a template, which comes with preset settings tailored to different types of videos.
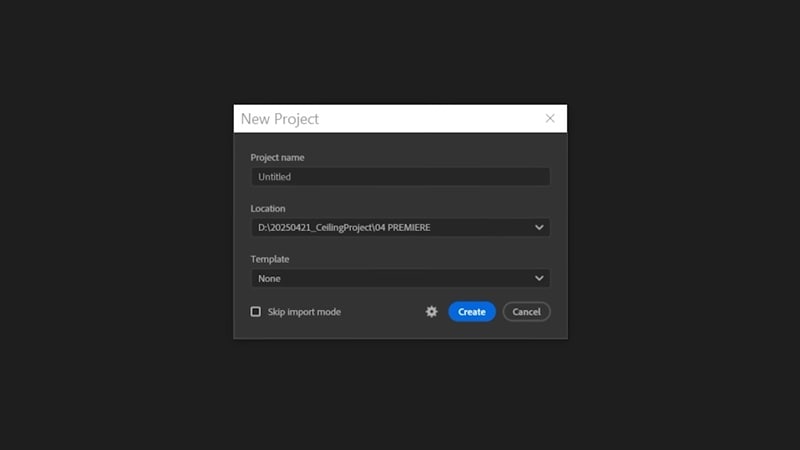
The default options include:
- Broadcast template: set up with standard broadcast formats.
- Social media template: optimized for platforms like Instagram, TikTok, or YouTube Shorts.
- Standard template: a general setup for most editing projects.
If you need more options, you can add your own templates or open a saved template folder.
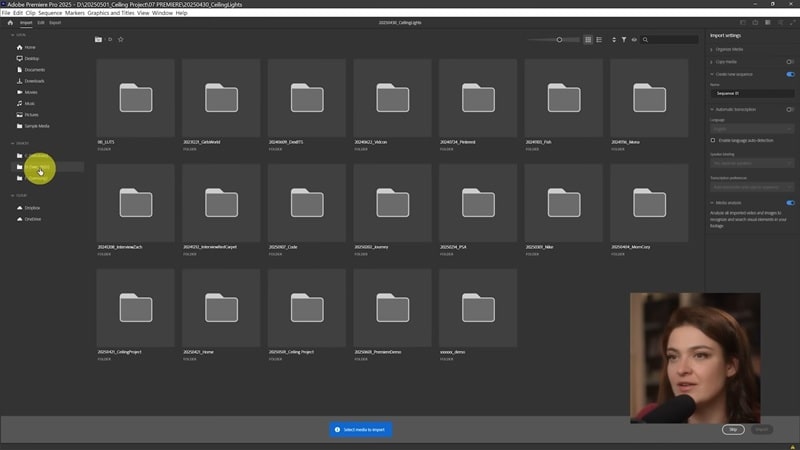
2. How to Import Media
The easiest method to import media to the Premiere Pro editor is to drag and drop your video files directly into the Project panel. However, you can also do it by:
- Go to the Import panel and select your clips, or
- Go to File > Import, then select the files you want to bring into your project.
After that, you can drag the video clips to the timeline.
3. How to Use Effects in Adobe Premiere Pro & Add Transitions
There are multiple ways to add transitions and effects in Premiere Pro. But the simplest is through the Effects panel, where you'll find organized categories for transitions, video effects, and audio effects.
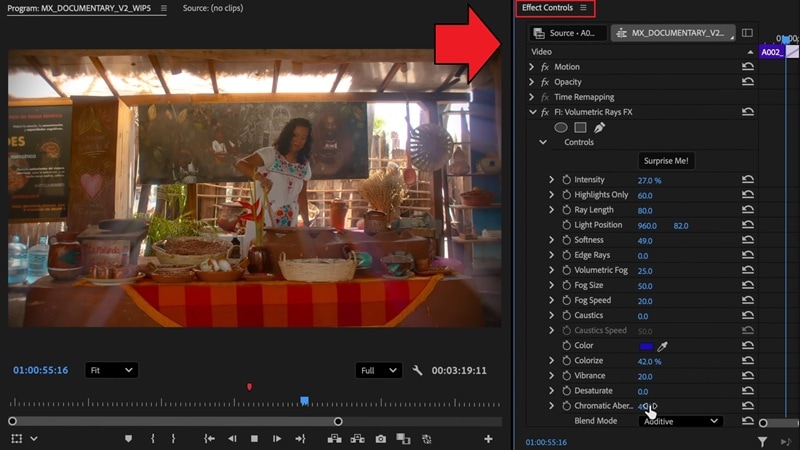
To add a transition and effects in Premiere Pro, you can type its name in the search bar inside the Effects panel. Then, drag it onto the timeline. You can adjust it in the Effect Controls panel.
4. Adjust and Edit Audio
Start by opening the Audio Clip Mixer or the Essential Sound panel. Here, you can adjust volume levels, remove background noise, or apply presets like Dialogue, Music, SFX, or Ambience.
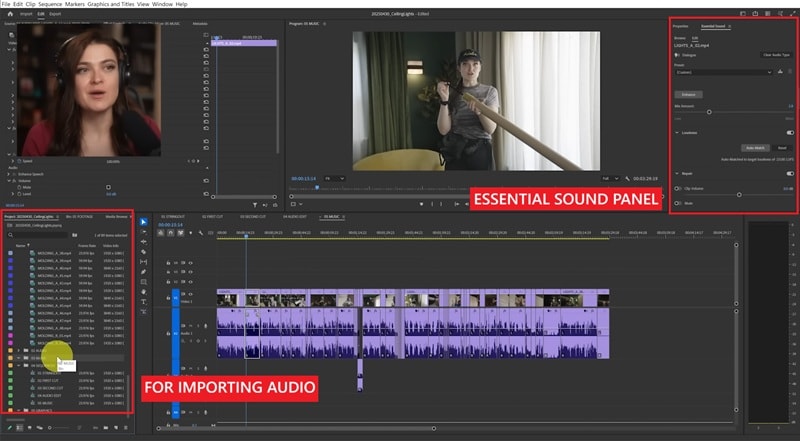
You can also keyframe audio levels directly in the timeline to smoothly fade sounds in or out. For more advanced adjustments, apply audio effects from the Effects panel, like EQ, reverb, or compression, to refine the mix.
5. How to Do Color Correction
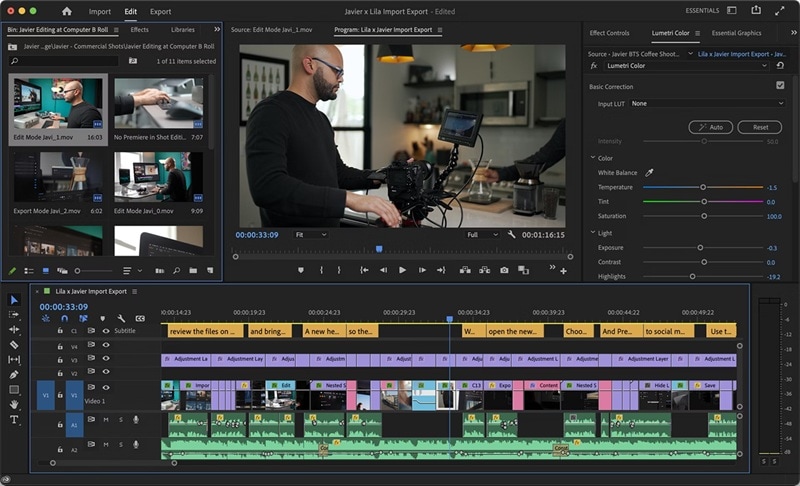
To do color correction or color grading in Premiere Pro video editing software, you need to open the Lumetri Color panel.
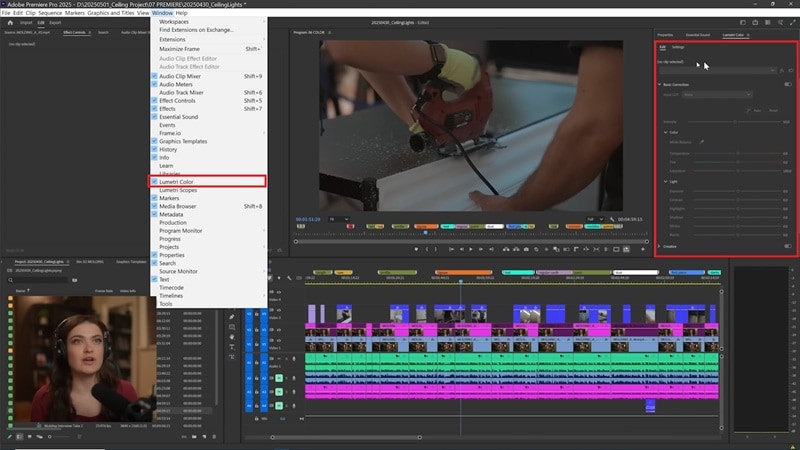
The Lumetri Color panel will give you access to tools for adjusting exposure, contrast, highlights, shadows, and saturation that help refine your footage:
- Basic Correction: Fix white balance, adjust temperature and tint, and make quick adjustments to exposure, contrast, highlights, shadows, whites, and blacks.
- Creative: Apply LUTs (Look-Up Tables) to give your video a specific style, as well as tweak vibrance and saturation.
- Curves: Use RGB curves to fine-tune brightness and contrast, or adjust specific color ranges.
- Color Wheels & Match: Balance shadows, midtones, and highlights individually, or use automatic color matching between clips.
- HSL Secondary: Isolate a specific color in your footage and refine it by adjusting hue, saturation, and lightness for precise corrections.
6. Export Your Video
Once you are done with your editing, it's time to export and save it to your device:
- Head to the Export tab or press Ctrl+M (Windows) / Command+M (Mac) to open the export settings.
- In the export window, you will get to customize the export settings.
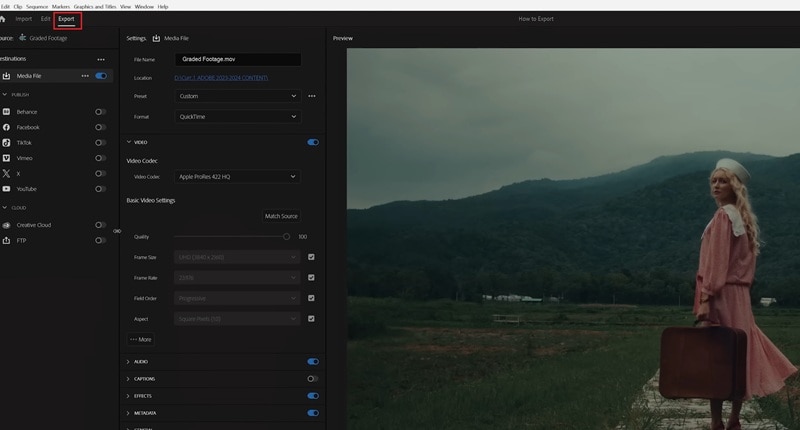
For video format, choosing H.264 (MP4) is a safe option since it's widely supported and works well across devices and platforms. Then, pick a preset that matches your platform, like YouTube 1080p.
You can also customize the resolution, bitrate, and frame rate if needed. Finally, hit Export to render your video, or use Queue to send it to Adobe Media Encoder for background processing.
Part 4. Common Problems Beginners Face in Premiere Pro
Many beginners often fall into similar problems when trying to use the Adobe video editing program, Premiere Pro. No need to worry, yet. You can address the issue quickly using our tips below.
1. Premiere Pro Crashes / Freezing / Not Responding
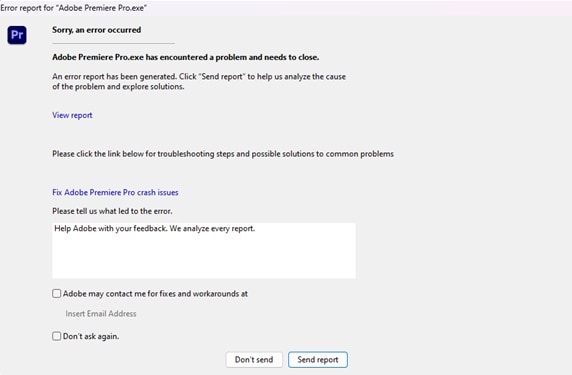
Premiere Pro is a video editing software that uses a lot of system resources. Crashes or freezing can happen if your computer doesn't meet the recommended hardware specs, if your project file is too large, or if plugins conflict with the software.
To reduce these issues, you can do the following tips:
- Keep your graphics and audio drivers updated. Updated drivers make sure your hardware communicates properly with Premiere Pro, which prevents crashes and improves overall stability.
- Clear your media cache regularly. Doing this helps free up storage and prevents errors that can slow down your workflow.
- Avoid running heavy background programs while editing. Since Premiere Pro demands a lot of system resources, freeing up CPU and RAM will help it run more smoothly.
2. Laggy or Choppy Playback in the Timeline
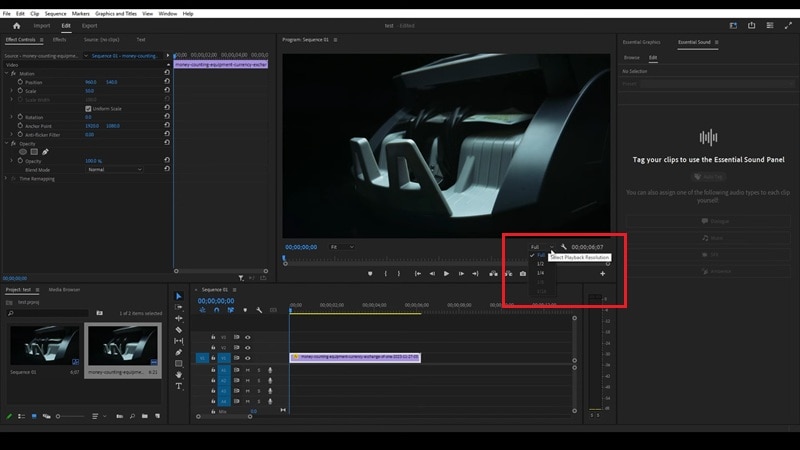
Playback issues usually come from working with high-resolution footage. To address this issue, you can lower the preview quality using the Playback Resolution dropdown, setting it from Full to Half or Quarter. Or, you can create proxies to make editing smoother without affecting your final export quality.
3. Importing Footage Doesn't Work
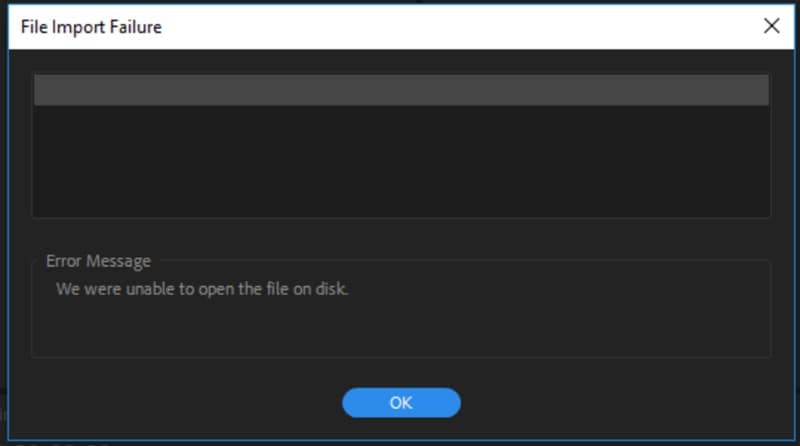
If your video won't import, the file format might not be supported. Premiere Pro supports most video formats, except some uncommon codecs or files with variable frame rates.
Converting your footage to a common format like MP4 (H.264) or MOV usually solves this issue. Also, make sure the file path doesn't have unusual symbols or unsupported characters. It can prevent Premiere Pro from reading the file correctly.
4. Audio Out of Sync or Missing Audio Issues
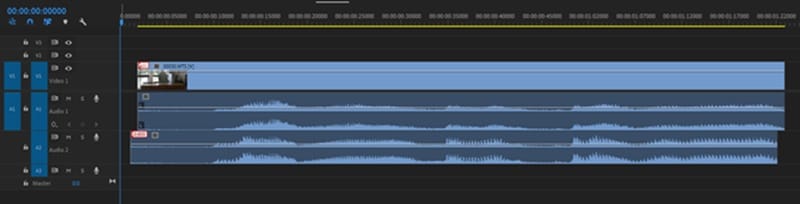
Out-of-sync audio can happen if the project frame rate doesn't match the footage. Double-check your sequence settings and match them with your video's frame rate. If audio is missing, try re-linking the files.
5. Export Failures or Problems
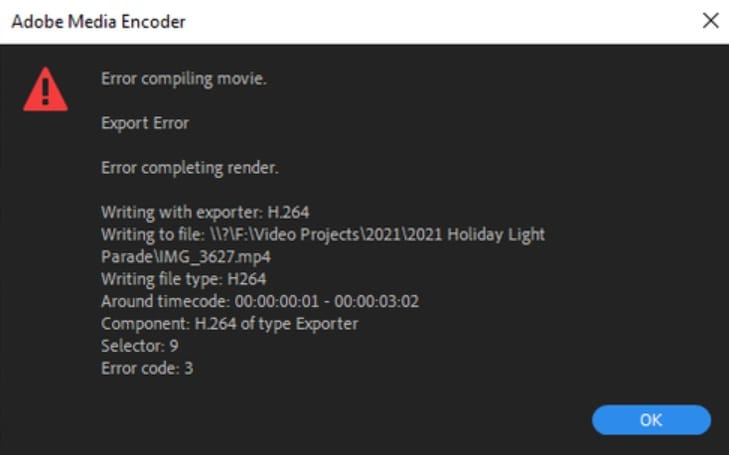
Failed to export a video in Premiere Pro might be caused by incorrect settings or a lack of storage space. Make sure you've selected the correct format (H.264 for MP4 is the safest one), and check that your output folder has enough free space.
If the problem continues, try exporting through Adobe Media Encoder.
Part 5. Easier Alternative to Premiere Pro: Wondershare Filmora
After going through our Adobe Premiere Pro tutorial and review, what was your impression? If you still think that the steep learning curve isn't worth the hassle right now, you can consider a more beginner-friendly option like Wondershare Filmora first.
We recommend Filmora because this video editor is the perfect middle ground for beginners while still giving you room to experiment with your projects. Its features range from basic to more advanced options, built to be straightforward and easy to use.
Ease of Use: Premiere Pro vs Filmora
For this aspect, Filmora offers more simplicity and accessibility compared to Premiere Pro. Most Filmora's tools require minimal manual setup, so you can edit and get started quickly without getting lost in complex menus. And yet, the editor still provides enough advanced options to refine your projects.
Editing Features Comparison
Most basic and advanced tools in Premiere Pro are also available in Filmora. The difference lies in the level of control.
Premiere Pro provides deeper settings and customization options, so you can get more professional and personalized results. Meanwhile, Filmora focuses on simplifying the video editing process with one-click features and AI assistance.
| Features | Premiere Pro | Filmora |
| Multicam Editing | ✅ | ✅ |
| Chroma Key | ✅ | ✅ |
| Motion Tracking | ✅ (Mocha Supported) | ✅ (Mocha Supported) |
| Masking | ✅ | ✅ |
| Content Scheduler | ❌ | ✅ |
| Screen Recording | ❌ | ✅ |
| Auto Caption | ✅ | ✅ |
| Dynamic Caption | Manual Keyframe | Automated |
| Color Correction | ✅ | ✅ |
| Keyframe Animation | ✅ | ✅ |
Extra Features: AI, Templates, and Plugins
Next, what about the extra features beyond the usual editing tools? AI-powered tools, pre-designed templates, and plugin library support have become essential parts of modern editing workflows, as they can add even more capabilities and simplify your overall process.
AI Features:
- With most editors now adopting AI, Premiere Pro still keeps its AI tools fairly limited, mainly focusing on transcription, text-based editing, and scene detection.
- Filmora, on the other hand, is backed strongly by its AI features that speed up the process, including generative AI that can create videos from text prompts or images in a few clicks.
Templates:
- Premiere Pro doesn't come with a large stock of ready-made templates. Most users rely on Adobe Stock or third-party sources for transitions, titles, and effects.
- Filmora comes with hundreds of ready-made templates for intros, titles, lower thirds, and transitions right inside the program. You can quickly drag and drop professionally designed assets without browsing external stores.
Plugins:
- As a professional, industry-leading video editor, Premiere Pro have access to an extensive range of third-party plugins that enhance everything from color grading to motion graphics and audio mixing.
- Filmora, meanwhile, has been steadily expanding its own plugin ecosystem. It now supports popular plugin formats such as NewBlue FX, Boris FX, OpenFX, and VST audio plugins, which also gives editors access to a much broader creative toolkit.
Best for Beginners vs Professionals
- If you're a professional editor or filmmaker who needs frame-by-frame precision, advanced color grading, or complex multi-camera timelines, Premiere Pro remains the stronger choice.
- If you're a beginner, YouTuber, or casual creator, Filmora offers the fastest route to polished videos without getting lost in technical settings. It's built to make editing fun, not frustrating.
Comparison Table
| Features | Premiere Pro | Filmora |
| Free Version | ❌ | ✅ |
| Target Users | Professionals | Beginners, Content Creators |
| AI & Automation | Limited | Extensive |
| Templates | Limited | Extensive |
| Plug-ins | Extensive | Limited |
| Performance | High | Moderate |
| Best For | Professional editors and filmmakers who need advanced control and precision | Beginners, casual creators who want fast, creative, and AI-assisted editing |
Conclusion
Getting started with video editing software Premiere Pro might feel confusing at first. But once you get the hang of it, you'll see why so many professionals rely on it. It's powerful, flexible, and can handle almost any kind of project. But for beginners, that same depth can feel a bit overwhelming at first.
If you're looking for a simpler starting point that still lets you make professional, high-quality videos, Filmora is a great choice. It's designed to make video editing easier and more enjoyable, with built-in templates, AI tools, and an intuitive interface that helps you finish projects faster.
You can always move to more advanced software later. But with Filmora, you'll be able to create professional-looking videos right away.
Frequently Asked Questions
-
I want to learn how to use Premiere Pro, where should I start?
If you are learning how to use Premiere Pro for the first time can start with the basics, like how to navigate the interface, import clips, and use the timeline. Adobe's official tutorials and YouTube channel are great starting points. You can also follow step-by-step guides like this one to gradually build your skills through small editing projects. -
Where can I find Premiere Pro tutorials online?
You can find plenty of free Adobe Premiere Pro tutorials on Adobe's official website, YouTube, and learning platforms like Udemy, Skillshare, and LinkedIn Learning. For practical lessons, you can also try Adobe's Learning workspace inside Premiere Pro. -
What is the difference between Adobe Premiere Pro and Filmora?
The main difference between Premiere Pro and Filmora is the level of complexity and target users. Premiere Pro is a professional-grade video editor built for advanced users who need full control over every detail. Meanwhile, Filmora is designed for beginners and content creators who want a faster, easier workflow. -
How long does it take to learn Adobe Premiere Pro?
It depends on your experience and how often you practice. Most beginners can learn the basics in a few days, but mastering advanced features like color grading, masking, or motion tracking can take several weeks or months. You need to practice consistently if you want to understand how to use Premiere Pro fast! -
What is the best Adobe video editing program for beginners?
If you want something simpler than Premiere Pro, Adobe offers Adobe Premiere Elements that you can try. It's designed for beginners, featuring guided edits, automatic video generation, and AI-powered tools that help you create videos with ease.
