

 TL;DR:
Adobe Premiere Pro's Lumetri Curves allow editors to manipulate video exposure and color balance through a Master contrast curve and individual RGB channels, requiring specific tool sequencing and scopes for accurate grading.
● Shape a subtle S-curve on the Master line to deepen shadows and brighten highlights, always validating exposure accuracy using Lumetri Scopes like the Waveform, Histogram, or RGB Parade to ensure cross-screen consistency.
● Restrict curve manipulations to three or four anchor points and strictly apply them before LUTs or filters to prevent distorted color data, crushed shadows, or unnatural oversaturation from extreme RGB shifts.
● Apply curve adjustments via Adjustment Layers to unify multiple clips in complex Premiere Pro timelines, or switch to Filmora's AI Color Palette and drag-and-preview curves if you require automated color correction without manual anchor point plotting.
Ask AI for a summary
 ChatGPT
 Perplexity
 Gemini
 Claude
 Grok
Grok
Getting the right look in video often comes down to how you handle color and light. Adobe Premiere Pro includes the Curves tool, which gives you precise control over brightness, contrast, and color balance.
You can use Lumetri curves in Premiere Pro to fix exposure, remove color casts, and add cinematic styles. Mastering RGB curves Premiere Pro offers precise control over color balance, while understanding animation curves can enhance motion effects. These adjustments are accurate and transform any project's mood.
In this comprehensive guide, you will learn exactly where to find Lumetri Color Curves in Adobe Premiere Pro, how to use them for precise color correction, and pro techniques to avoid common mistakes. For editors seeking faster results, we also introduce an easier alternative with AI tools.
Part 1. Mastering Color Curves: How to Use RGB Curves in Premiere Pro
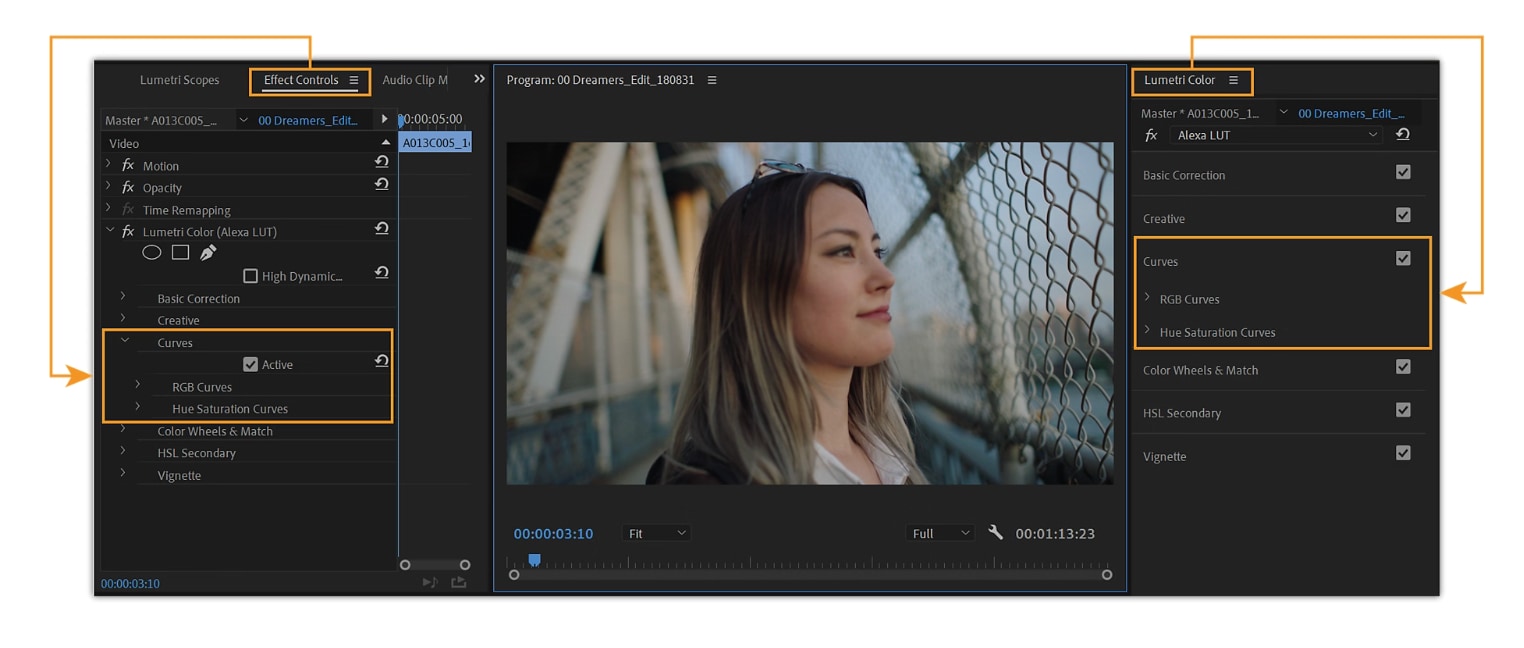
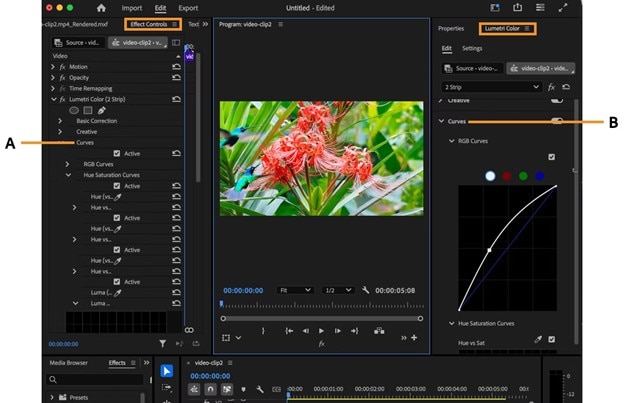
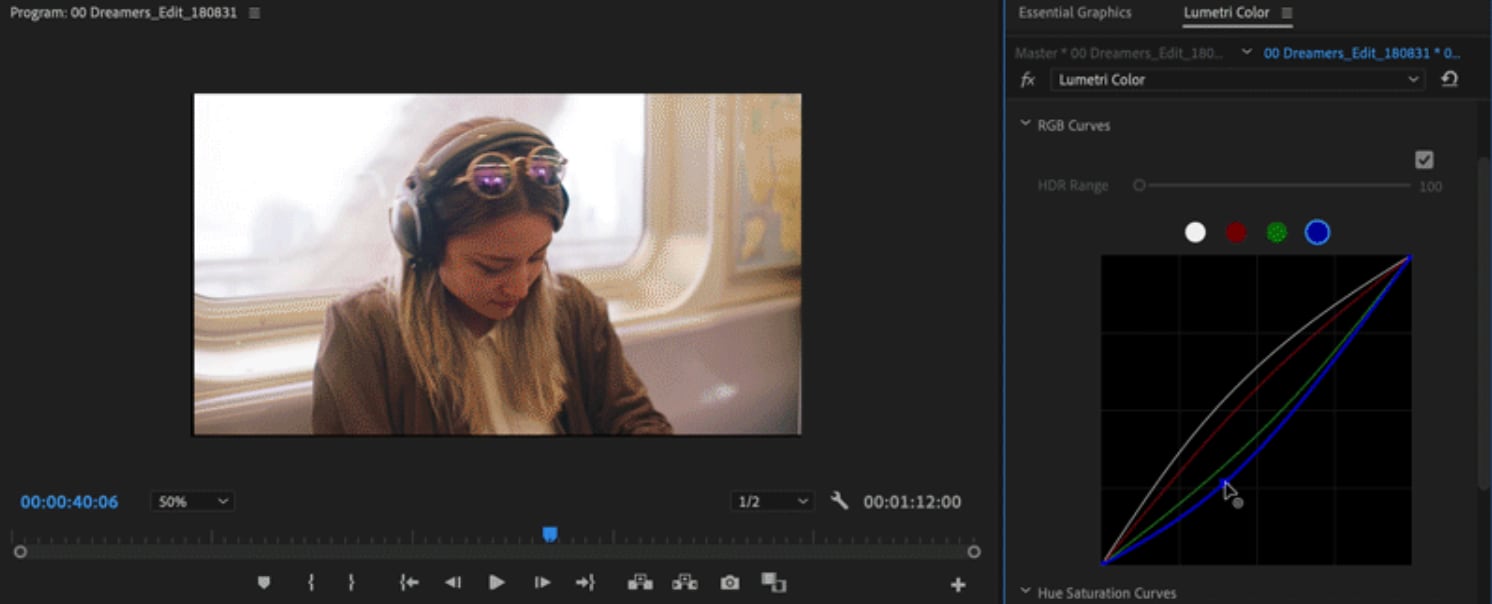
Curves are located in two places inside Adobe Premiere Pro. The first is the Lumetri Color panel, under the Curves section, where you can find the Master curve and individual RGB curves:
- The Master curve adjusts overall exposure.
- Meanwhile, the RGB curves target Red, Green, and Blue channels separately.
The second is the RGB Curves effect, which you can add through the Effects panel. Both options provide the same controls, but using Lumetri gives access to scopes and additional color tools. So, it is the preferred method for most editors.
Premiere Pro Curves Step-by-Step Guide: Lumetri & Hue Saturation Curves
Part 2. Essential Techniques & Practical Examples of Curves in Premiere Pro
Using curves in Premiere Pro goes beyond simple brightness fixes. With the right approach, the Master curve and RGB curves can solve common problems and create professional looks.
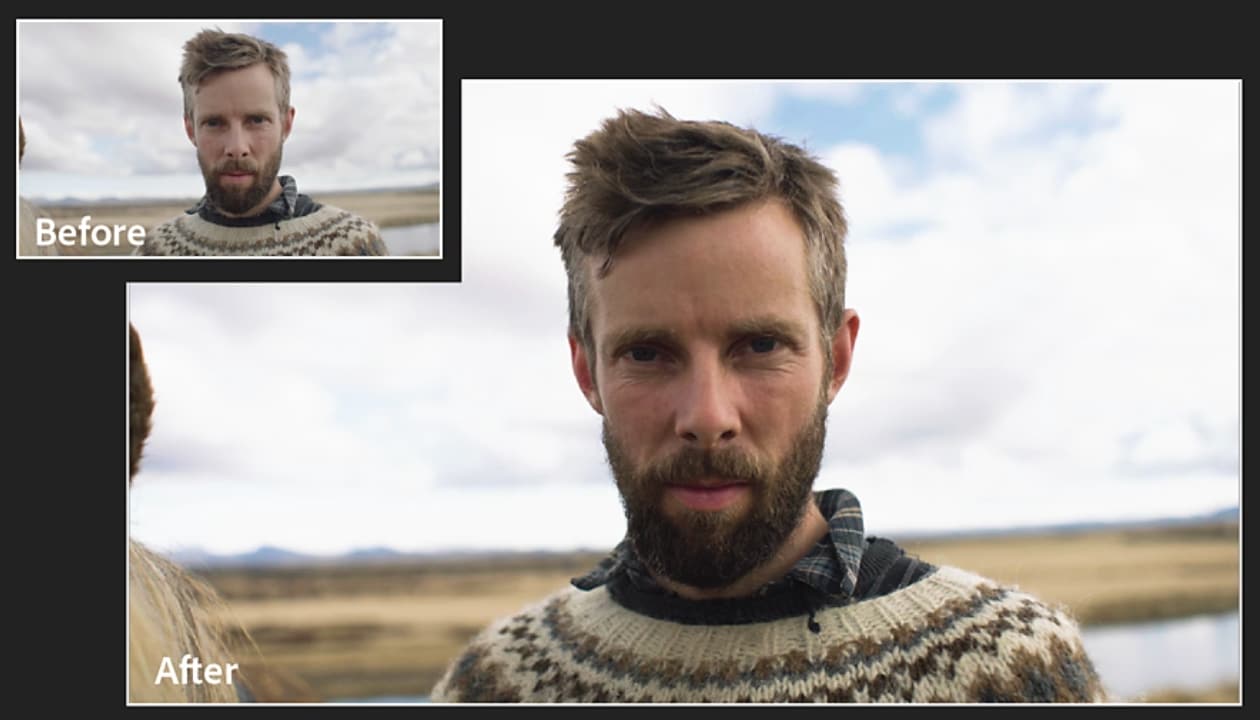
1. Balancing Exposure
The Master curve is the first step when correcting exposure. If your footage is too dark, raise the midtone section of the curve to bring out details without washing out highlights. For overexposed footage, lower the highlight section to recover texture in bright areas while keeping shadows intact.
Using curves in Premiere Pro this way gives more control than basic exposure sliders.
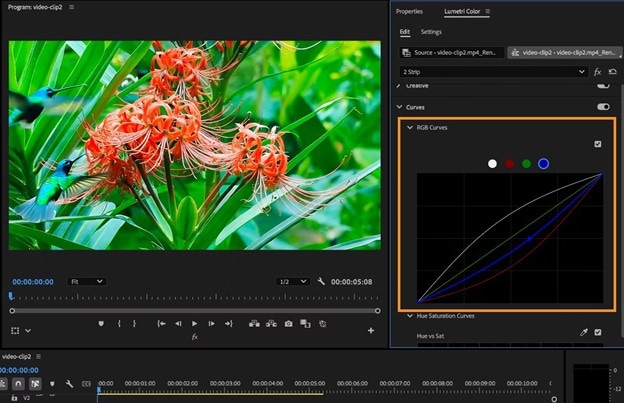
2. Removing Color Casts using RGB Curves Premiere Pro
Color casts are common when shooting in mixed lighting. The RGB curves in Premiere Pro make it possible to target specific channels. For example, if your clip looks green, lower the Green curve in the midtones to bring back natural colors. If shadows look too blue, reduce the Blue curve in darker areas. These precise corrections keep the rest of the image balanced.
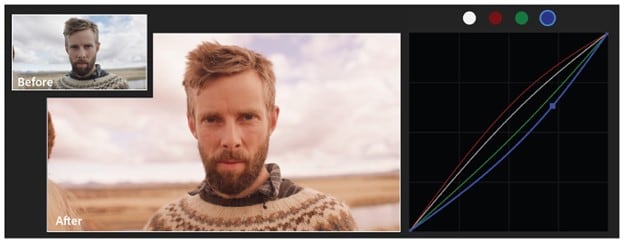
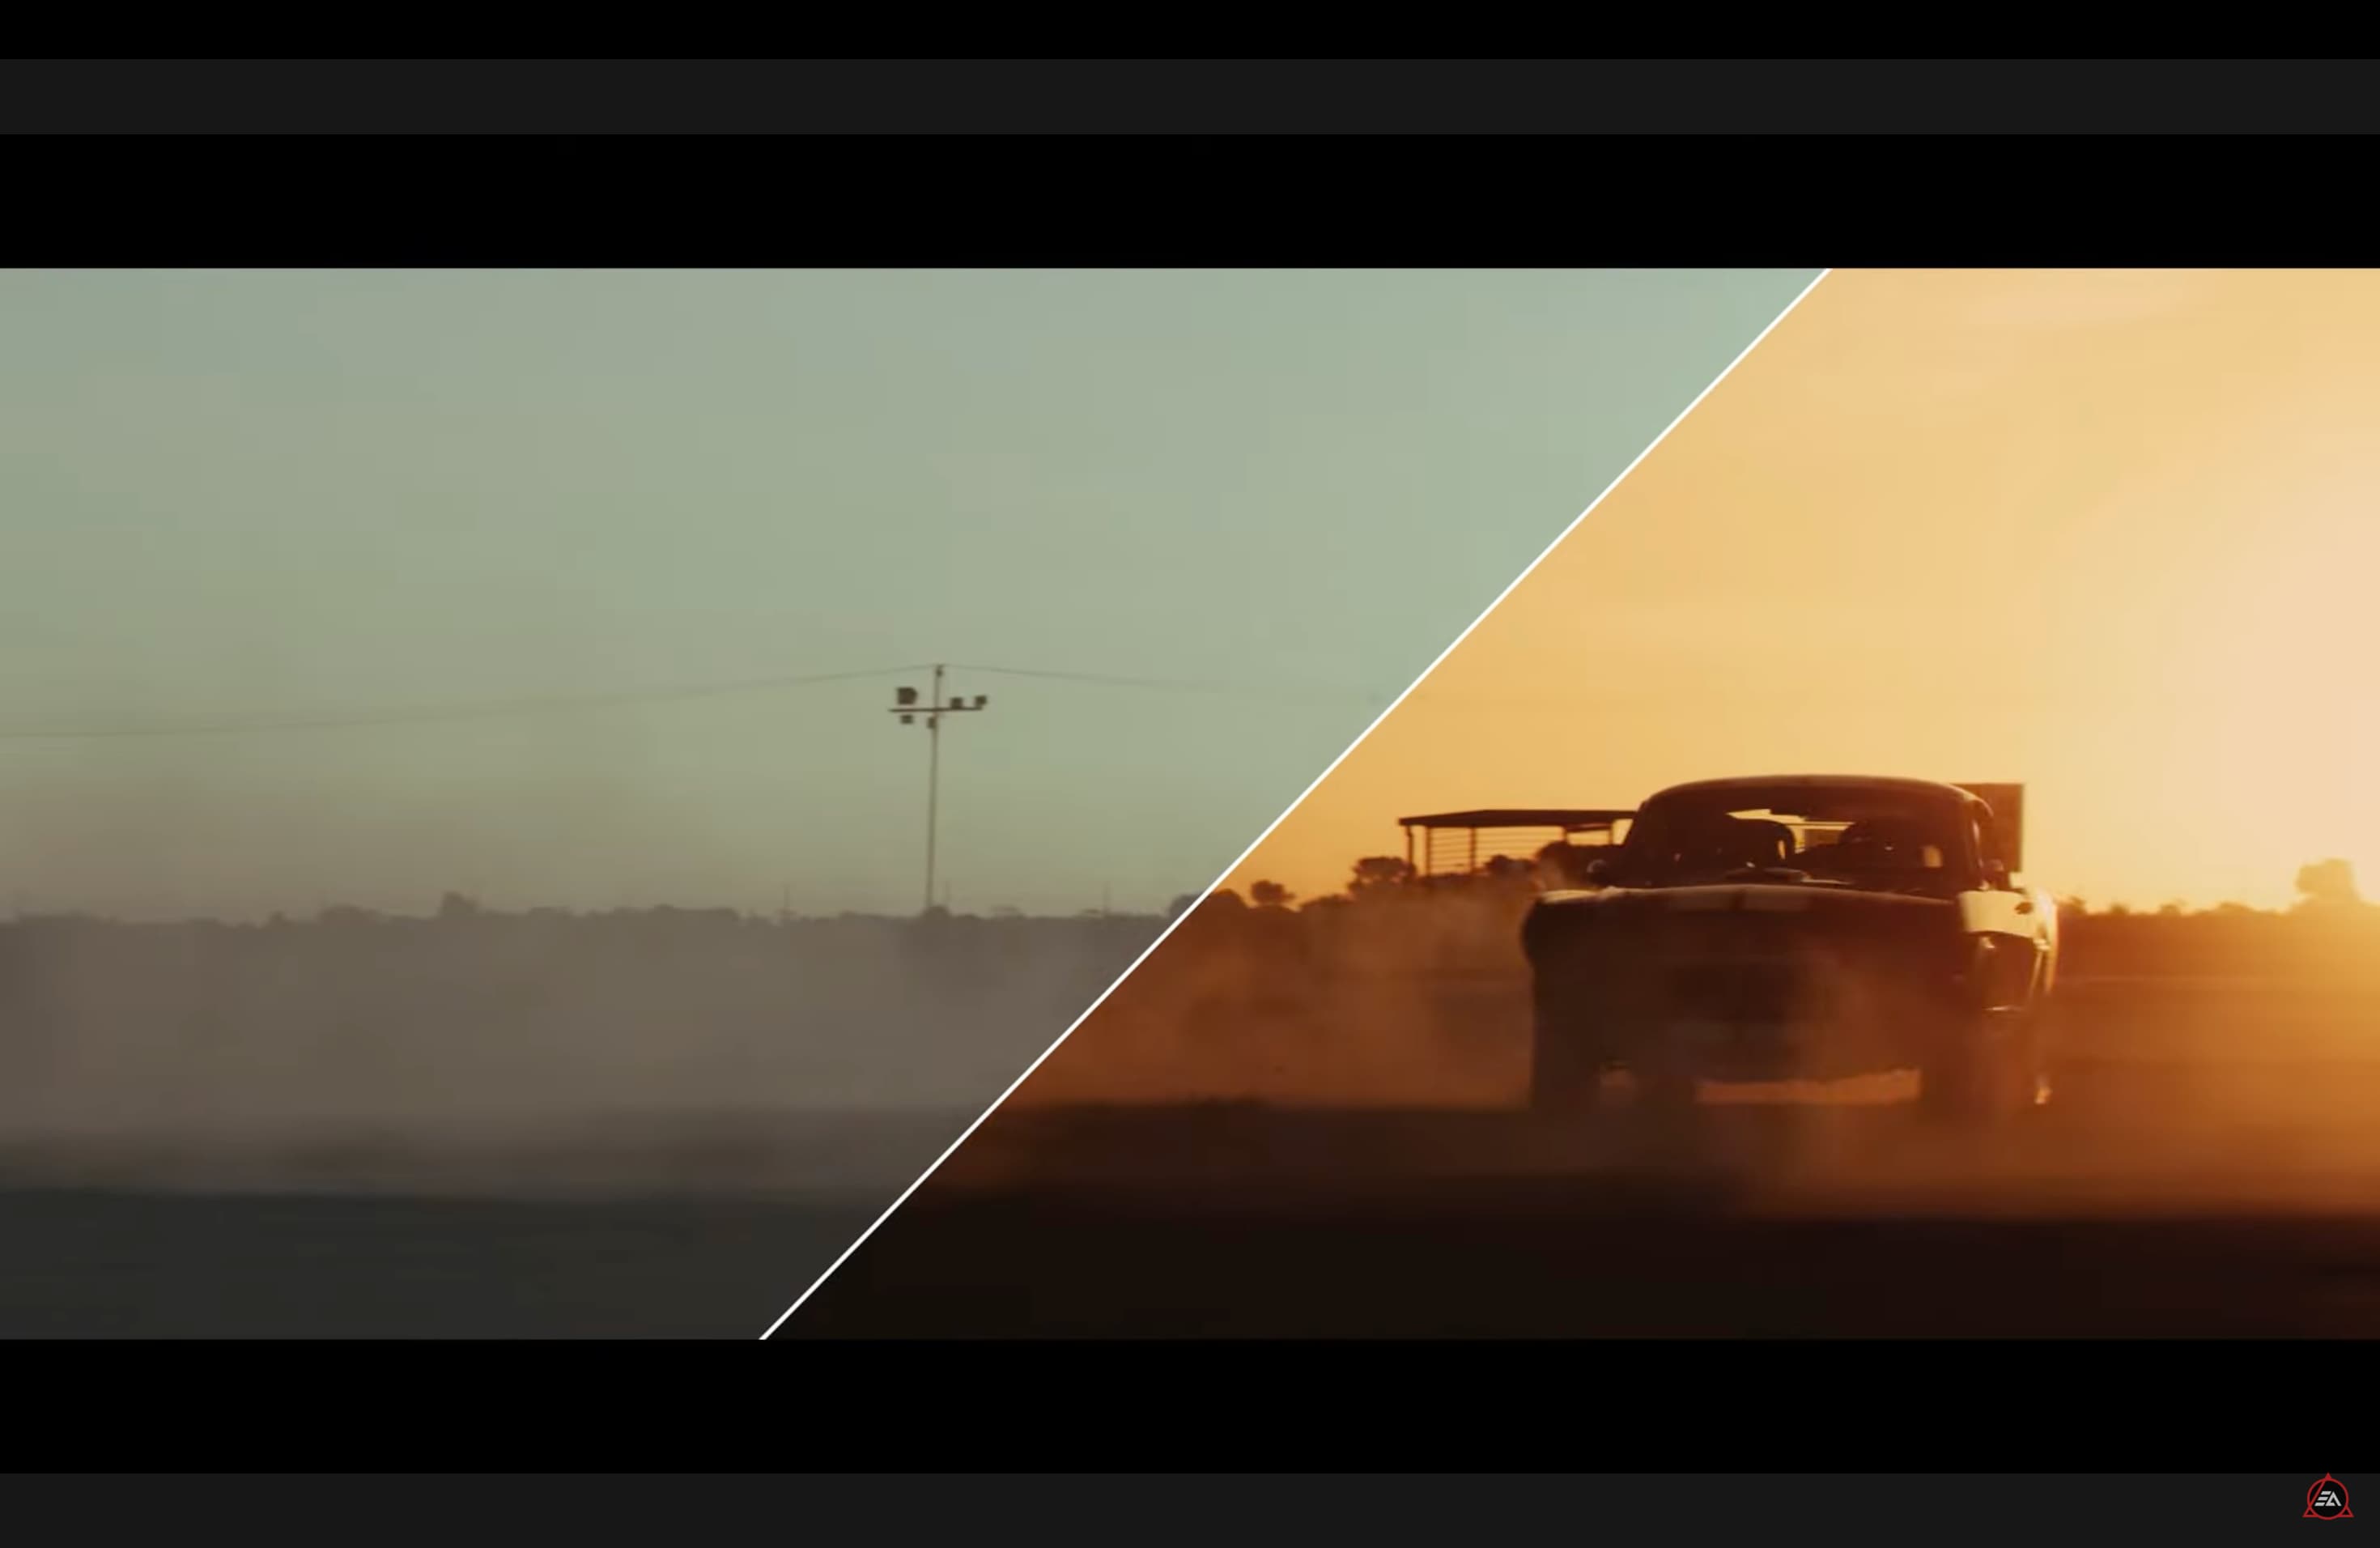
3. Creating Cinematic Looks
RGB curves are also useful for building stylized grades. A popular approach is the teal-and-orange look, which makes skin tones stand out against cooler shadows. This can be achieved by lowering the Blue curve in shadows and raising the Red curve in highlights.
Small changes in Premiere Pro curves can produce a strong visual impact, making your footage look more cinematic.
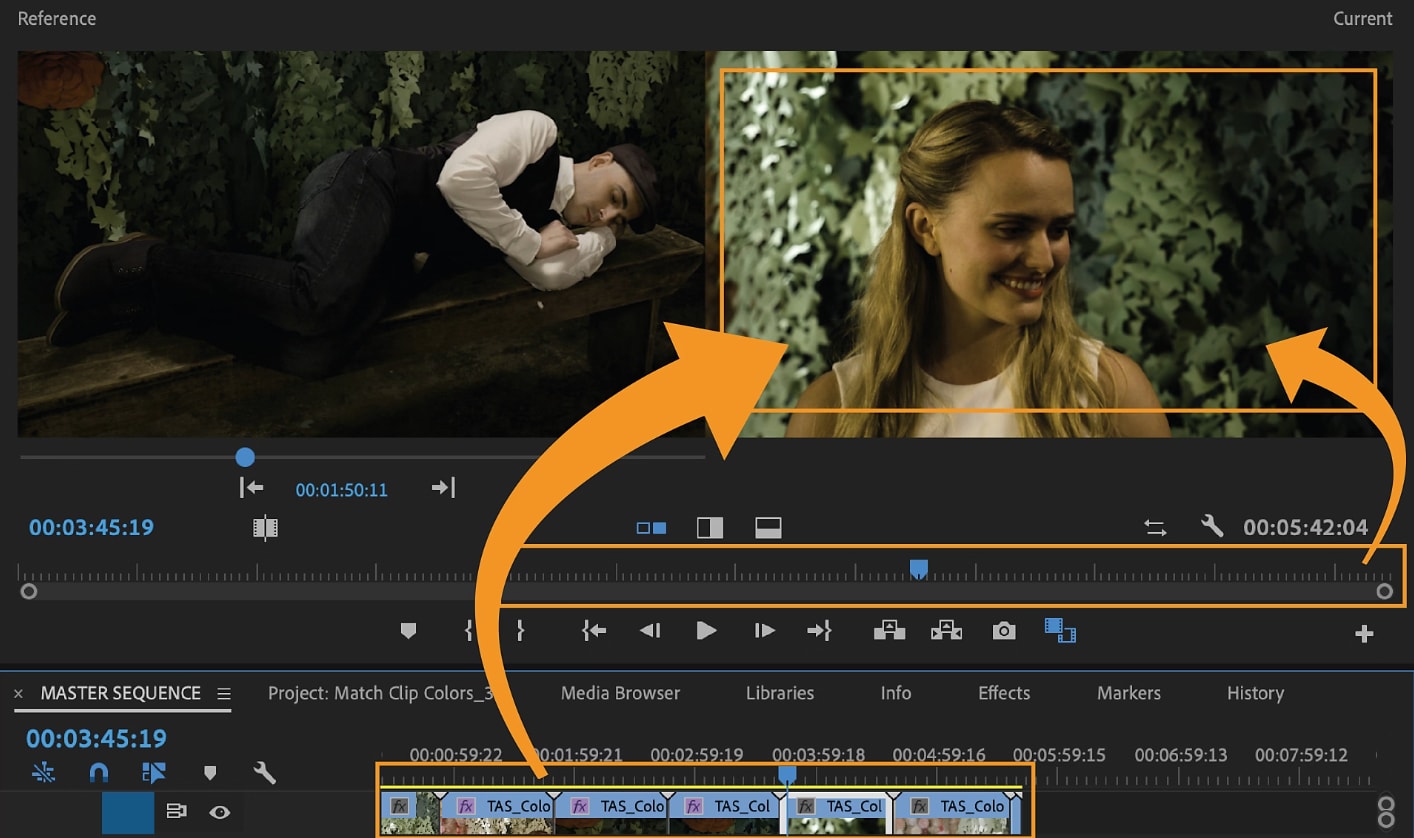
4. Matching Footage
When editing a sequence with multiple cameras or lighting conditions, consistency is key. Adobe Premiere curves allow you to adjust exposure and color balance so all clips share a unified look. Using the Master curve and RGB curves together ensures transitions between shots feel natural instead of distracting.
Common Mistakes to Avoid
- ❌ Overdoing the S-curve. It can crush shadows or blow out highlights.
- ❌ Ignoring Lumetri scopes. This leads to inaccurate results on different screens.
- ❌ Making extreme RGB shifts. Doing this can cause oversaturated or unnatural colors.
- ❌ Applying curves after LUTs or filters. This can cancel or distort your adjustments.
Part 3. Pro Tips to Get Better Results Curves in Premiere Pro
Once you understand the basics of using curves in Premiere Pro, a few advanced practices can help you achieve more consistent and professional results. These tips apply to both the Master curve and RGB curves, and they are especially useful when working on projects with multiple clips or specific color goals.
- Make Subtle Adjustments: Curves in Premiere Pro are very sensitive. Even small movements can create a noticeable difference in exposure or color. Avoid large shifts unless you are intentionally applying a strong style. Subtle corrections usually give a more natural look and preserve detail.
- Use Multiple Points Sparingly: It can be tempting to add many points along the curve, but this often creates uneven tonal transitions. Focus on three to four anchor points at most, targeting shadows, midtones, and highlights. This keeps your adjustments smooth and easier to control.
- Combine Curves with Other Lumetri Tools: RGB curves are powerful, but they work best when used alongside other tools in Adobe Premiere Pro. After making initial curve adjustments, refine specific areas with Color Wheels, HSL Secondary, or Lumetri sliders. This layered approach ensures precise results without overloading the curves.
- Save Presets for Efficiency: If you often use the same adjustments, save them as Lumetri presets. For example, a subtle S-curve or a custom teal-and-orange grade can be stored and applied instantly to new clips. Using presets speeds up workflow and maintains a consistent look across different projects.
Part 4. An Easier Alternative: Using Filmora's Curves & AI Tools
While Adobe Premiere Pro curves provide precise control, the process can be technical and time-consuming for many editors. We would like to recommend Wondershare Filmora as an alternative. This tool offers a simpler approach, combining easy-to-use curves with AI-powered tools that make color correction faster and more accessible.
Filmora's Features Highlight
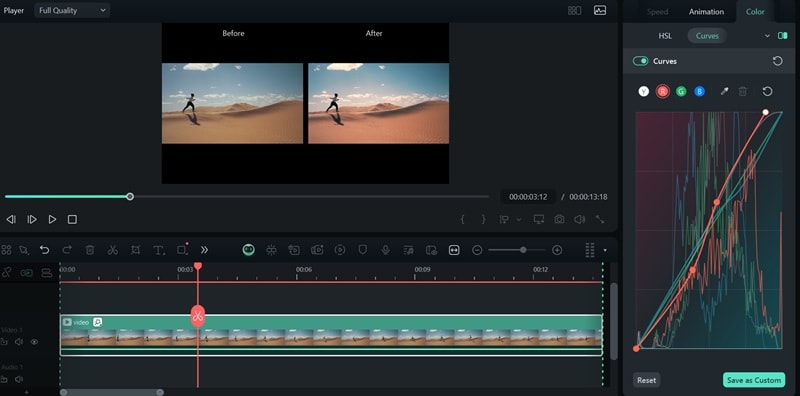
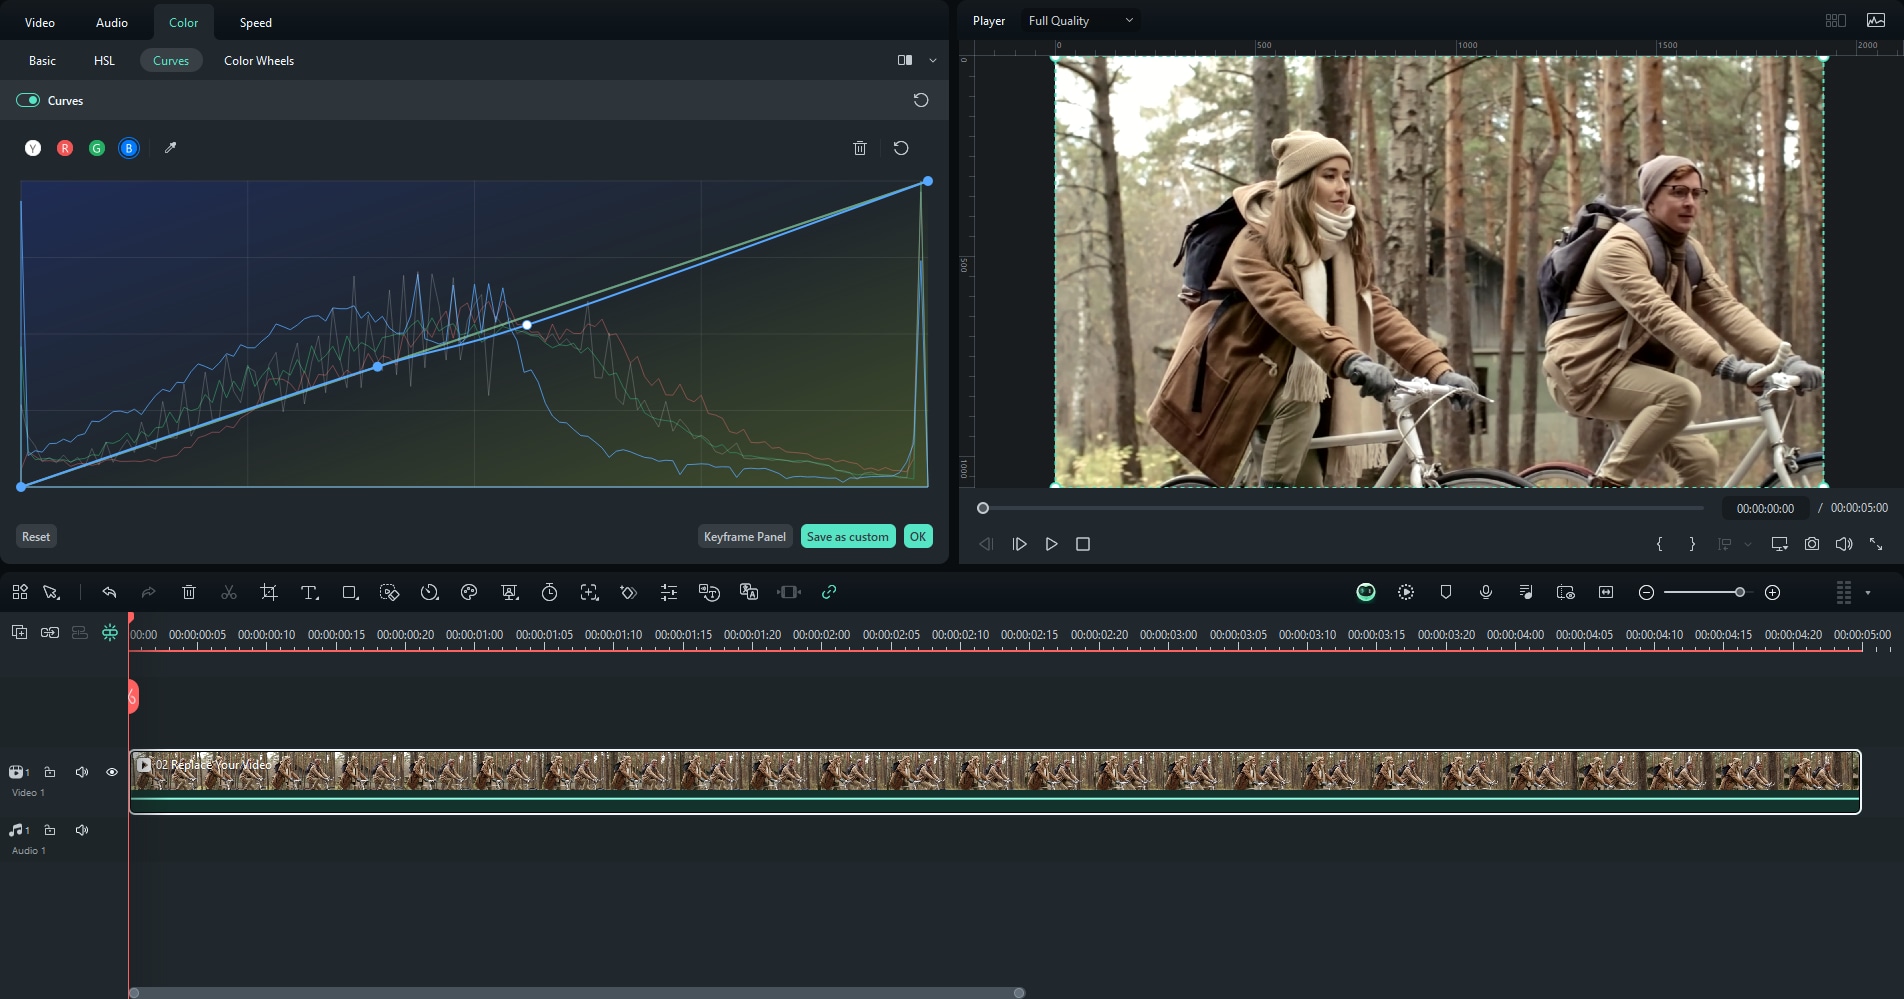
Color Correction Curves
Filmora includes its own curve controls, but the interface is designed for ease. Instead of setting multiple anchor points manually, you can drag the curve directly and preview the effect in real time. This makes it simple to correct exposure or adjust tones without navigating complex panels.
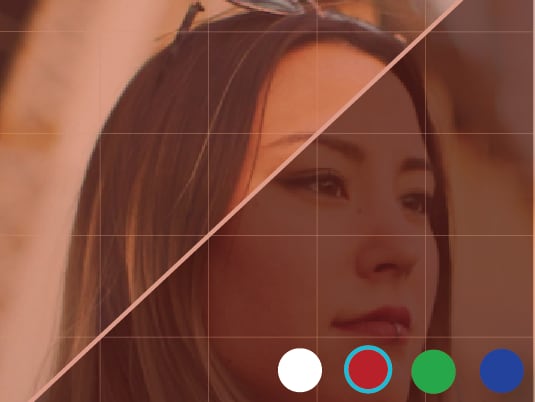
AI Tools for Automatic Adjustments
Filmora also provides features like Auto Color Correction and AI Color Palette. These tools analyze your footage and apply intelligent fixes, improving brightness, contrast, and clarity with minimal input. This is particularly helpful when you need quick results without spending time on detailed grading.
Instant Mode and Presets
For creators who prefer ready-made looks, Filmora includes Instant Mode and one-click presets. These apply cinematic styles such as warm tones or cool shadows instantly, removing the need to build curves from scratch.

Integrated Workflow
Unlike Premiere Pro, where color correction often feels separate from editing, Filmora integrates curves and AI adjustments directly with transitions, titles, and audio tools. This allows editors to grade footage and build creative edits in a single streamlined workflow.
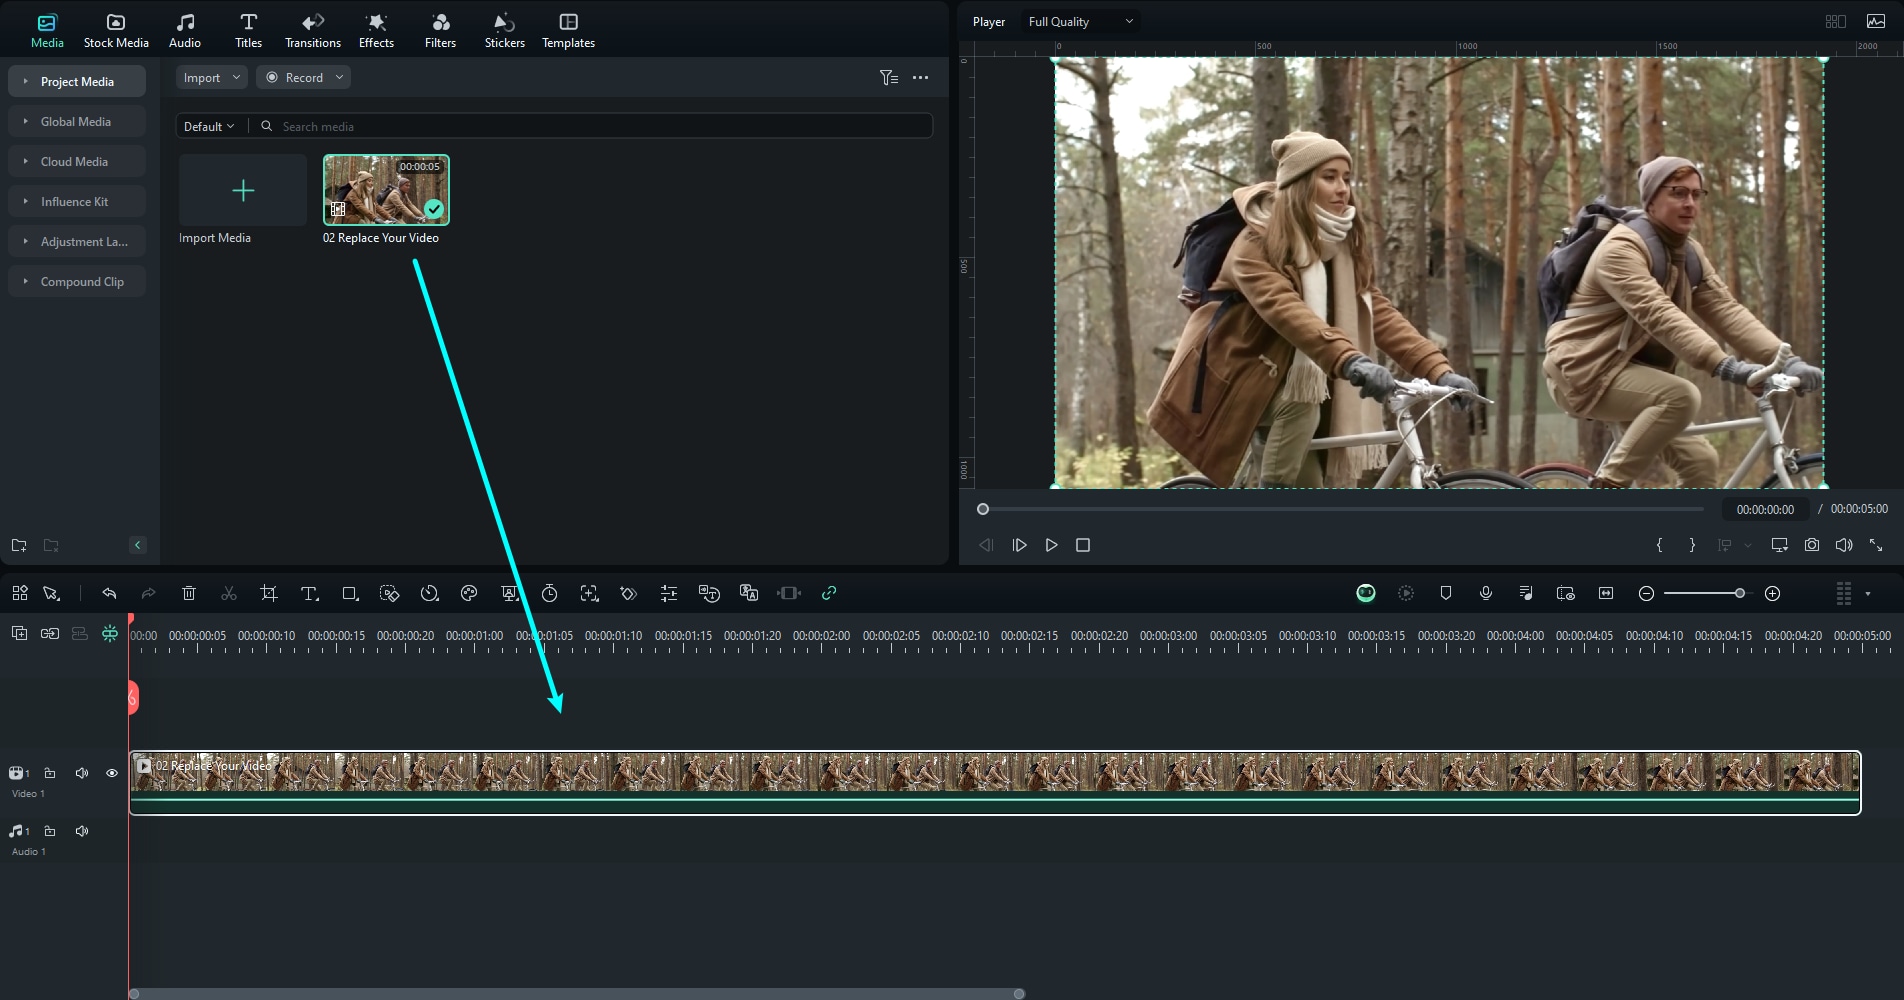
Filmora Curves Step-by-Step Guide

Conclusion
Curves in Premiere Pro are powerful tools for adjusting exposure, correcting color, and creating cinematic looks. The Master curve controls overall brightness and contrast, while RGB curves allow precise channel-based adjustments. With careful use and scopes for accuracy, curves can transform the quality of your video.
For editors who prefer a faster, easier approach, Filmora offers simplified curve controls, AI-powered corrections, and ready-made presets. Both tools help achieve polished and professional results, but the choice depends on how much time and precision you want to invest in your edits.
