

 TL;DR:
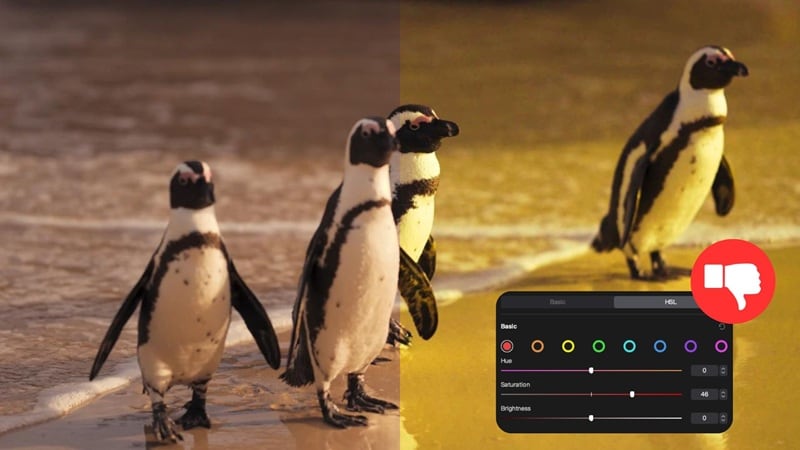
Editing HSL in CapCut requires navigating to the Adjust panel to tweak Hue, Saturation, and Luminance for fixed color channels, which is effective for quick edits but often causes unwanted color shifts across shared hues in the frame.
● CapCut mobile relies on manual color channel selection, while the desktop version adds a color picker, though both versions apply edits globally across grouped color ranges rather than isolating specific objects.
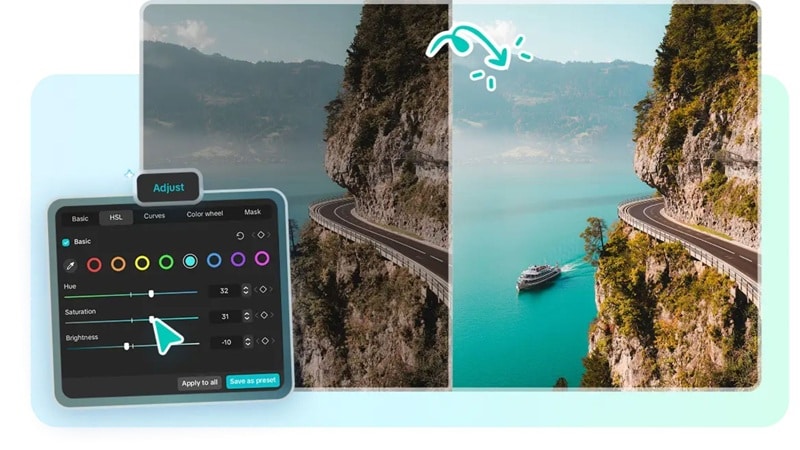
● Wondershare Filmora V15.2.1 resolves these grouping limitations by introducing an HSL Eyedropper tool that creates a custom matching color swatch based on precise pixel sampling directly from the footage.
● CapCut is best suited for basic social media adjustments and quick cinematic looks, whereas Filmora provides the exact targeting necessary for professional creators managing skin tones, mixed lighting, and precise brand colors without bleeding.
Ask AI for a summary
 ChatGPT
 Perplexity
 Gemini
 Claude
 Grok
Grok
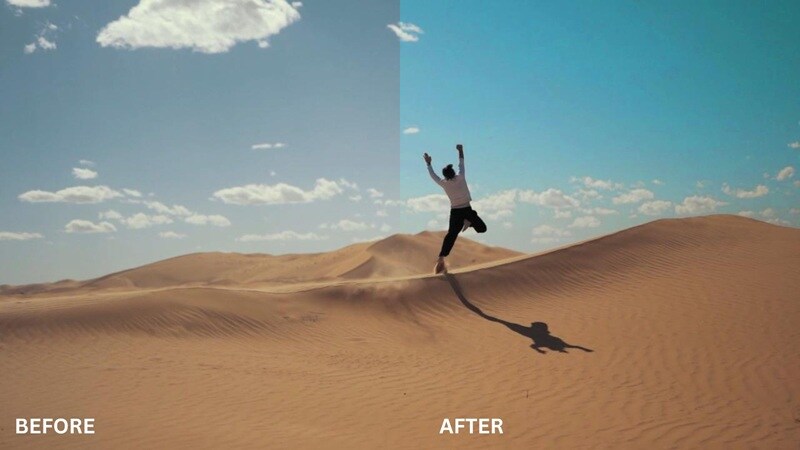
Color grading is essential for creating professional videos in 2026. Whether you're fixing skin tones or making skies pop, understanding how to get HSL in CapCut is the key to precise editing. In this HSL CapCut tutorial, we'll show you how to control Hue, Saturation, and Luminance like a pro. However, if you find CapCut's sliders limiting, we'll also introduce the Filmora HSL Eyedropper—a more precise tool for advanced color targeting.
Part 1. How to Get HSL in CapCut and Use It (Step-by-Step)
HSL in CapCut is best for targeted fixes. For example, you can use it to warmer skin, deeper blues in the sky, or toning down neon greens without changing everything else. The exact layout can vary a bit by device and app version, but the workflow stays the same.
Tutorial: How to Use HSL in CapCut
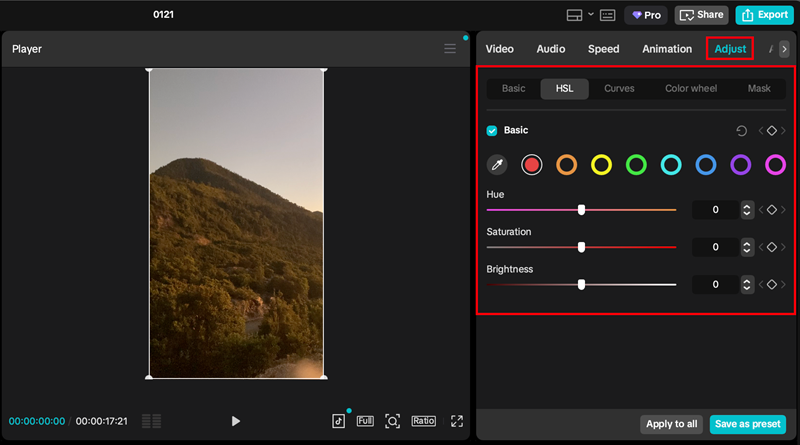
- Saturation to control intensity
- Luminance to brighten or darken that color
- Hue to shift the color direction.
Part 2. Pro Tips for HSL CapCut Tutorial: Getting the Cinematic Look
A cinematic grade in CapCut is about control. HSL helps you shape specific colors so the image looks intentional, skin stays natural, and the scene feels cohesive.
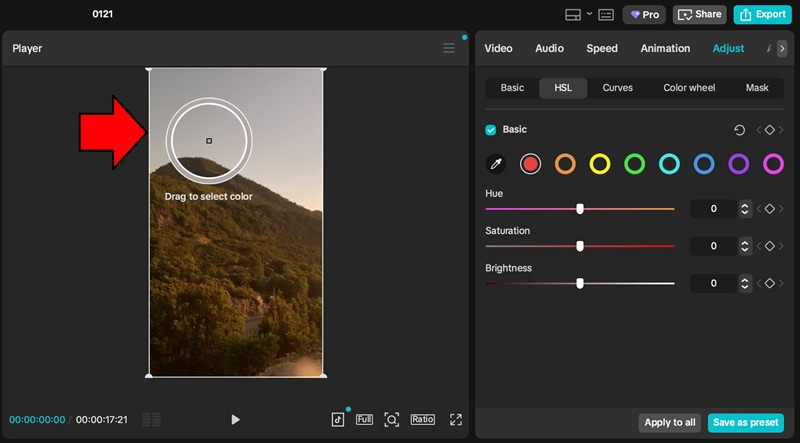
Using HSL on CapCut for Specific Object Color Changes
HSL in CapCut targets a color range across the whole frame. It works great when the object color is unique, like a bright blue car in a neutral street. It gets harder when the background shares the same hue, like a red jacket near red signage or skin tones next to warm wood walls.
To make object changes look cleaner, keep your HSL moves small and check the entire frame, not just the object. If multiple items shift at once, you've hit a shared color range. In those cases, it's often better to reduce the adjustment intensity and combine it with other tools, like selective overlays or masks, if your version supports them.

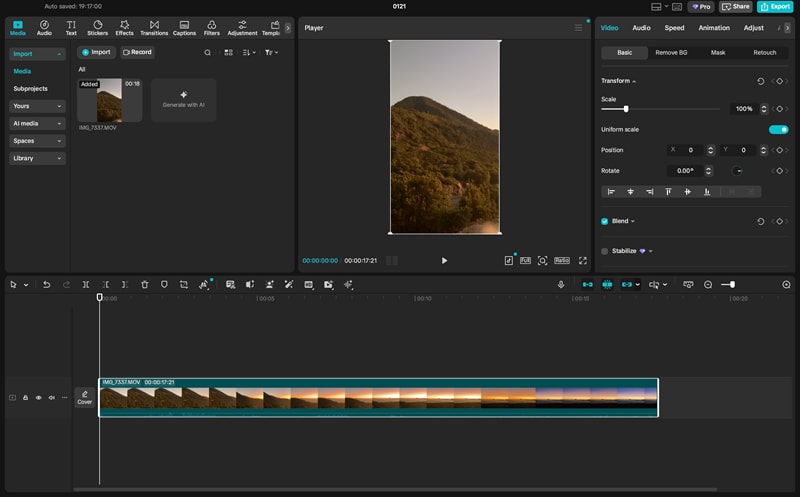
How to Get HSL in CapCut PC vs. Mobile: The UI differences
CapCut PC and mobile offer similar HSL logic, but the workflow feels a bit different. The mobile version often relies on selecting a color channel and adjusting sliders, unlike CapCut for desktop.
- On mobile, HSL is usually found under Adjust. It's fast, but the smaller screen makes precision harder, and it's easier to overdo the sliders.
- On desktop, HSL typically lives in a more spacious adjust or color panel, so it's easier to preview changes and fine-tune without mis-clicks. This is also where CapCut offers a color picker for HSL, which lets you sample a color directly from the footage.

Limitation: Why the Fixed Color Wheels Might Limit Your Creativity
The desktop color picker helps you start in the right place, but HSL CapCut still relies on grouped color ranges, which can feel like fixed "buckets" in real-world footage. Colors often sit between channels, teal can hover between blue and green, and skin tones can drift between orange and red depending on lighting.
On mobile, this limitation shows up as extra trial and error because you're choosing channels manually. On desktop, the picker reduces the guessing, but the underlying limitation remains: HSL edits a range of pixels across the frame, not a single isolated object.
However, these limitations don't make HSL in CapCut useless. They just explain why creators hit a ceiling when they want tighter control and cleaner targeting, especially for skin tones, product videos, and branded colors.
Part 3. Beyond HSL CapCut: Introducing Filmora New HSL Eyedropper
HSL CapCut is great when you want quick improvements, but the challenge starts when the color you want to fix sits in an in-between zone. Although CapCut desktop helps with its color picker tool, the workflow still depends on grouped color ranges.
When a scene has mixed lighting or overlapping tones, you can still end up chasing the result across multiple adjustments just to keep the rest of the frame stable. Wondershare Filmora tackles that frustration in a more direct way.
The Filmora Solution: Smarter HSL Color Picking
In Filmora's V15.2.1 update, the HSL Color Picker works like an eyedropper. You click the exact color in the preview, and Filmora will map that choice into the correct HSL range. This way, you can start from the right color immediately, not hunting for it.
That one change makes grading feel more predictable. After picking the color, you can tweak Hue, Saturation, and Luminance with more confidence because you're refining a known target. This is especially helpful in complex scenes where lighting shifts across the frame, or when multiple colors are close together and small changes can look messy fast.
Comparison Table: HSL CapCut vs. Filmora HSL Eyedropper
| Category | HSL CapCut Mobile | HSL CapCut Desktop | Filmora HSL Eyedropper |
| Color targeting | Pick a color channel manually | Pick a fixed color channel, then adjust sliders | Sample the exact color from the frame, then refine with HSL sliders |
| Accuracy on "in-between" hues | Lower, often needs trial and error | Better, picker helps you start closer | Highest, direct sampling reduces guessing |
| Precision tuning | H/S/L sliders per channel | H/S/L sliders per channel | Sample + fine-tune Hue/Sat/Luma for tighter isolation |
| Skin tone work | Good for quick fixes, can affect warm backgrounds | Better control than mobile | Best control when you need one specific shade range |
| Workflow speed | Fast, but more re-checking | Faster and easier to fine-tune | Fastest for complex scenes and targeted fixes |
| Best for | Quick social edits and basic cinematic looks | More controlled grading on desktop | Product colors, brand tones, tricky lighting, targeted cinematic polish |
|
Show More
Show Less
|
|||
While HSL on CapCut is sufficient for basic mobile edits, professional creators often require more granularity. CapCut's fixed color wheels can sometimes lead to "bleeding" where similar colors are accidentally altered. This is where Wondershare Filmora excels. Its new HSL Eyedropper allows for pixel-perfect sampling, ensuring that your edits only affect the intended area—making it the superior choice for high-end color grading.
Part 4. How to Use HSL with Eyedropper in Filmora for Pro Grading
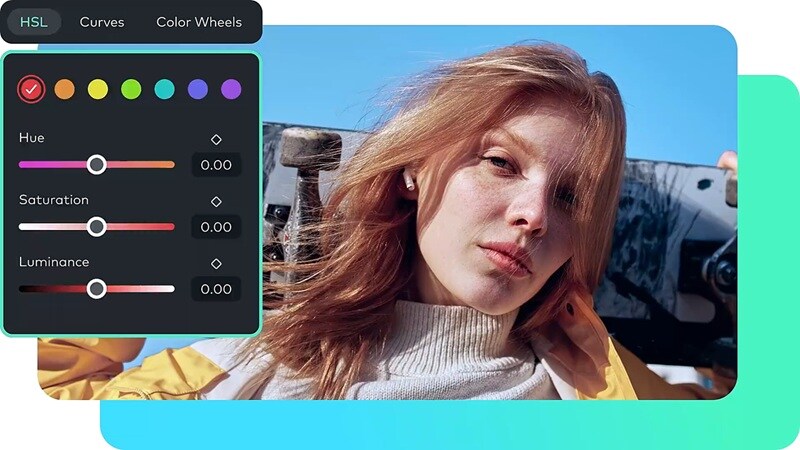
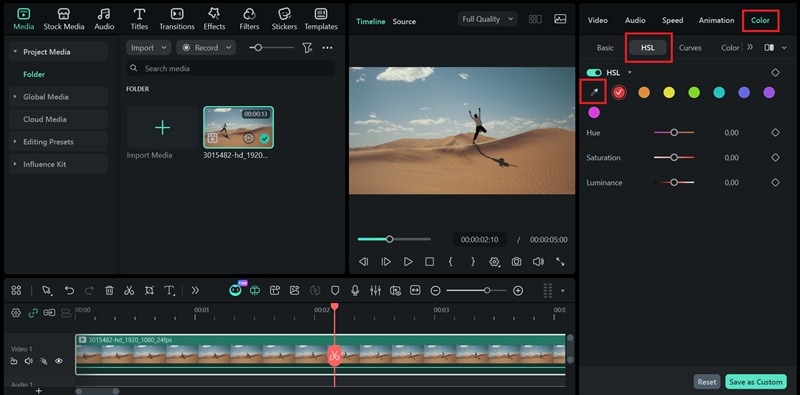
Filmora already lets you adjust HSL from the HSL panel. Then, you can fine-tune Hue, Saturation, and Luminance per color range, and save the look as a custom preset. In its latest version, you can sample the exact color you want first (with an eyedropper-style picker), then grade just that slice.

Conclusion
HSL in CapCut is a great starting point for quick color fixes and simple cinematic grading. The downside is precision; fixed color channels can miss in-between shades and cause unwanted shifts in similar colors.
Filmora 15.2.1 solves that pain with the new HSL Eyedropper, letting you pick the exact color from your footage, then fine-tune Hue, Saturation, and Luminance with more control. If you care about clean skin tones and accurate brand colors, Filmora makes grading feel more intentional.
