

 TL;DR:
Premiere Pro provides professional-grade AI auto-captioning with granular manual control for complex edits, while Wondershare Filmora serves as a faster, cross-platform alternative featuring built-in translation for social media content.
● Premiere Pro generates subtitles via the Text panel into formats like CEA-608 and SRT, but users may need to manually fix timecode sync delays and install missing language packs.
● Filmora bypasses Premiere's third-party plugin requirement for translation by utilizing a built-in AI translator, alongside a "Dynamic Captions" option that automatically animates text for mobile viewing.
● Choose Premiere Pro ($20.99/month) for exact timing corrections and format control on Windows or macOS, or select Filmora for seamless batch processing and multi-language exports across desktop, iOS, and Android devices.
Ask AI for a summary
 ChatGPT
 Perplexity
 Gemini
 Claude
 Grok
Grok
Captions and subtitles have become more than just optional features. They are now a key part of making successful videos. You can use it to enhance video accessibility, boost engagement, and improve SEO. Also, it reaches a broader audience: to people who are hard of hearing, and to the many people who watch videos with the sound off.
We know that generating accurate subtitles was time-consuming with its manual process. Thankfully, features like auto captions in Premiere Pro can simplify the process.
This article dives deep into how to use Premiere Pro's auto captions and guides you through editing them by hand. We'll also fix common problems and look at another program to create captions automatically, but also translate them into other languages.
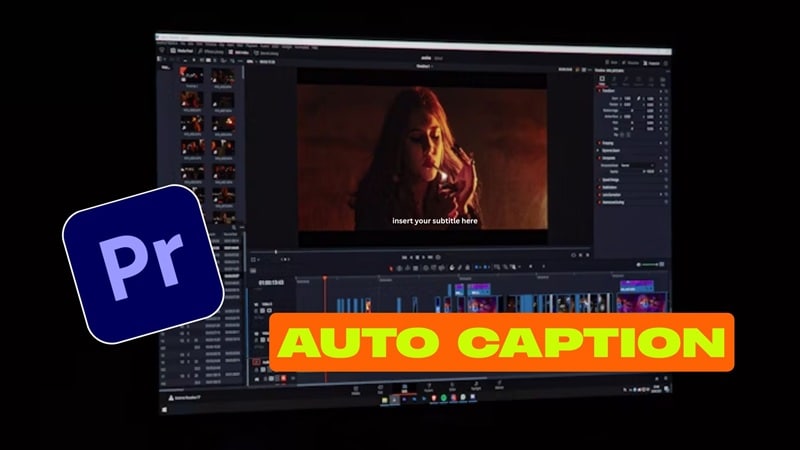
Part 1. How to Auto-Generate Captions in Premiere Pro (Step by Step)
Let's talk about one of Premiere Pro's biggest time-savers: the built-in auto-captioning feature. Powered by Adobe's AI, auto subtitles in Premiere Pro automatically transcribe the dialogue in your clips and generate perfectly synced captions.
Since it's all done within Premiere Pro, you have full control to refine the text and style your captions to match your video's look and feel.
How to Auto-generate Captions in Premiere Pro
Step 1: Import Your Video
Open your project and drag your video clips into the timeline.
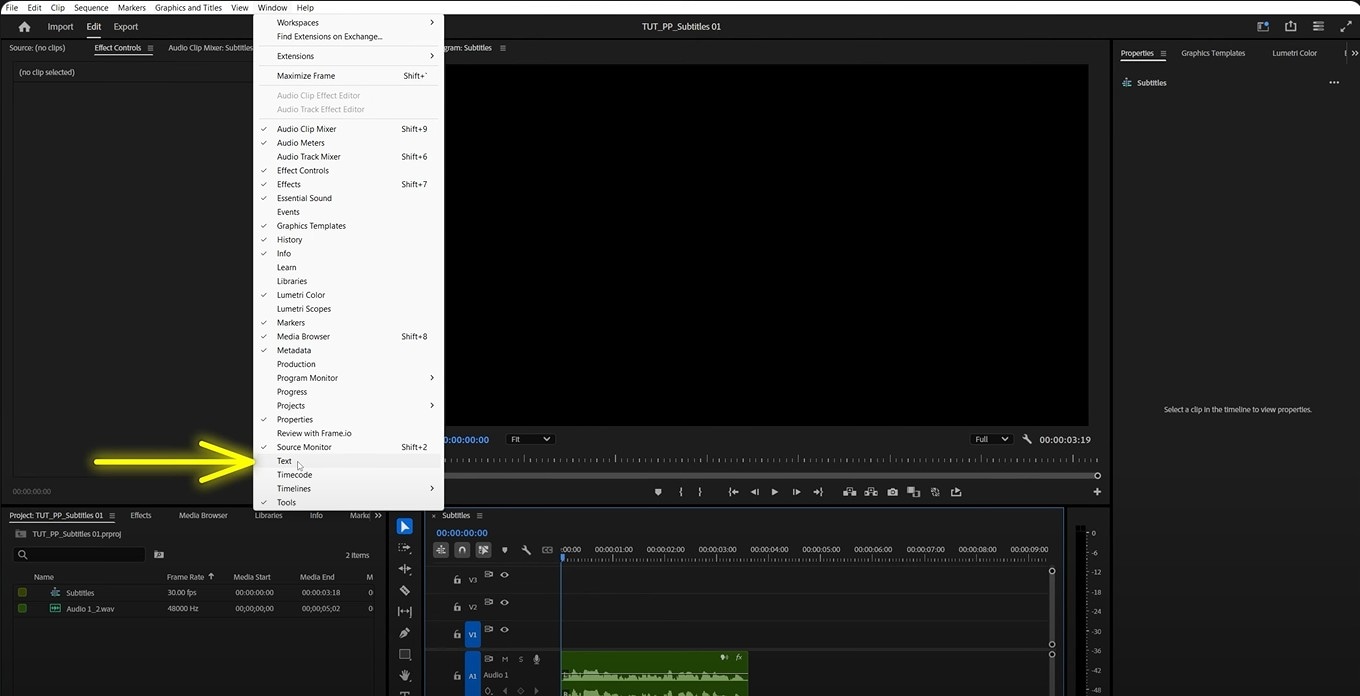
Step 2: Open the Text Panel
Navigate to Window > Text to open the workspace where you will find transcription and captions tools.
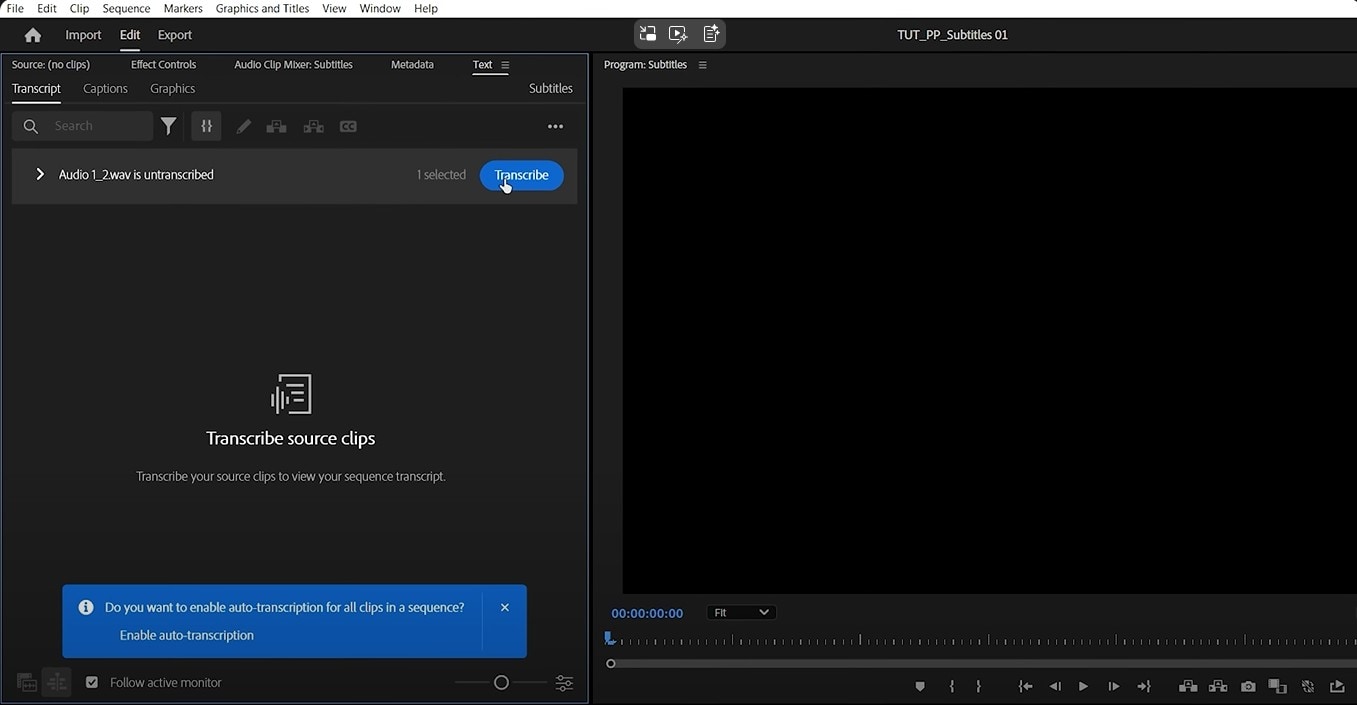
Step 3: Transcribe the Sequence
Click the "Transcribe" button. Select your transcription preferences: the language, audio track, and in/out range. Premiere Pro will then process the audio to generate a transcription.
Step 4: Review the Transcript
Once the transcription is complete, the script appears in the Text Panel. You can play back your video and correct any errors that automatic transcription might have missed.
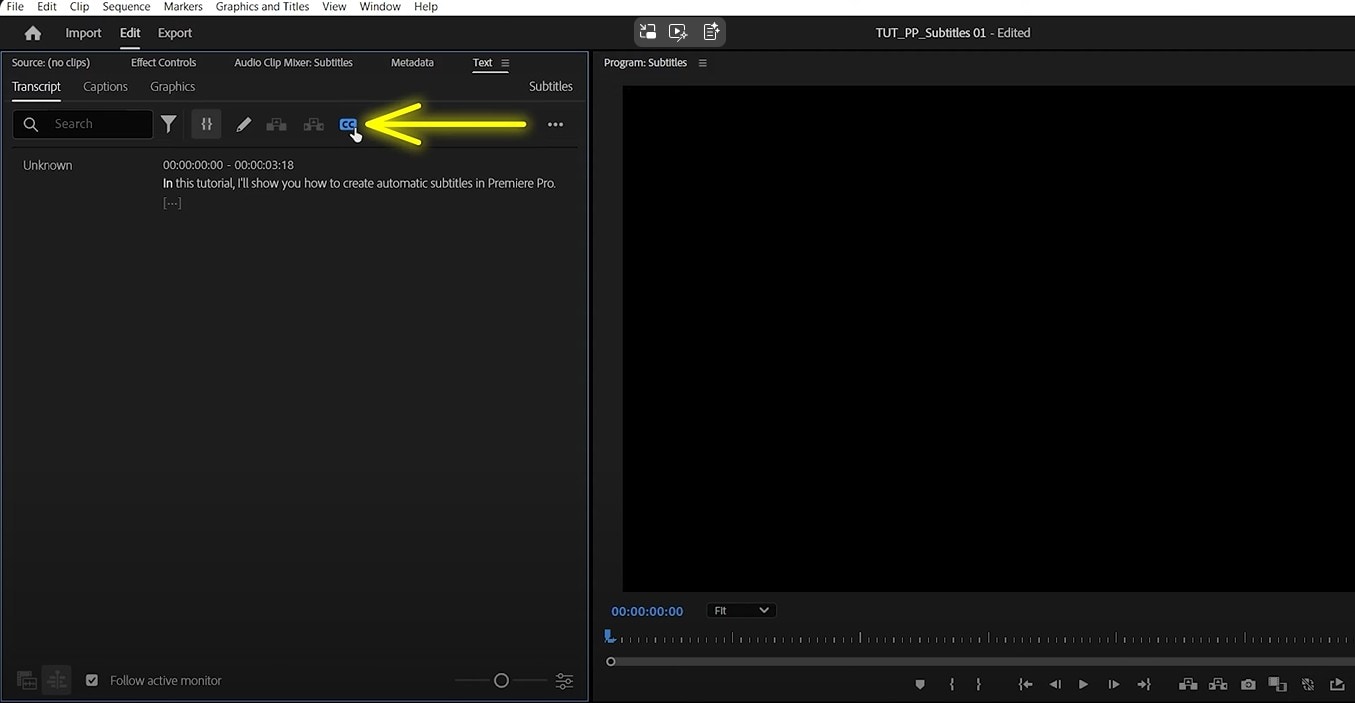
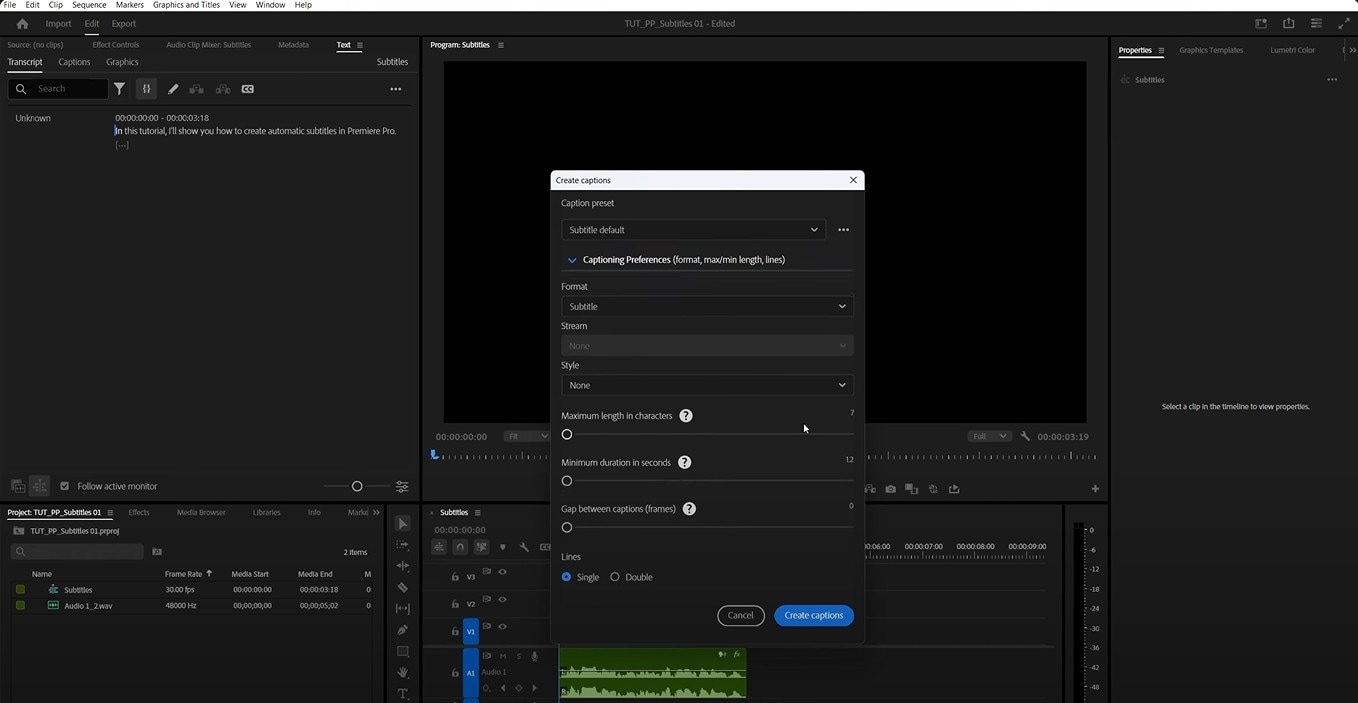
Step 5: Create Captions
If you're happy with the text, click "Create Captions" in the Text Panel. You'll get a few format options. Choose the caption format best suited to your distribution platform:
- CEA-608
- CEA-708
- Open Captions
- SubRip Subtitle (SRT)
Customize caption settings like presets, style, lines, and more.
Now, your captions are automatically added to your sequence as subtitles. It's now perfectly synchronized with the spoken words in your video.
And that's it! In just a few clicks, you've made your video more accessible and engaging for everyone
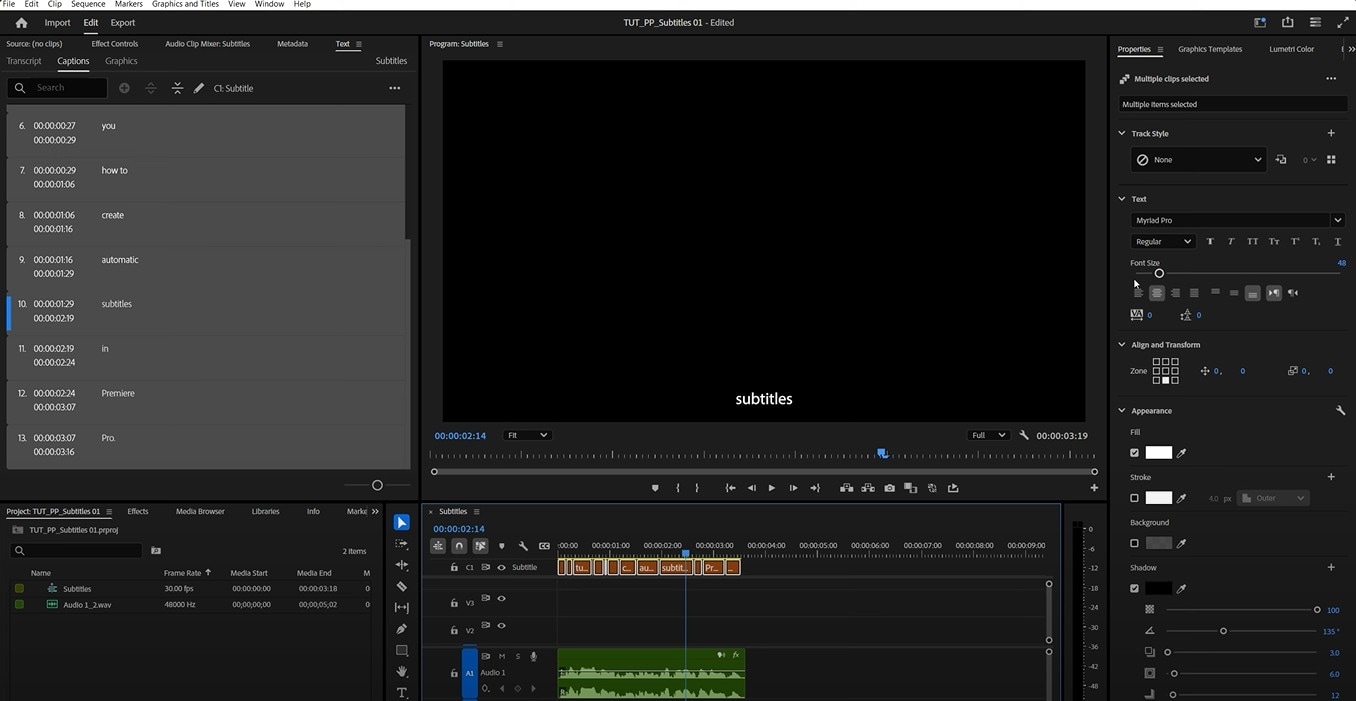
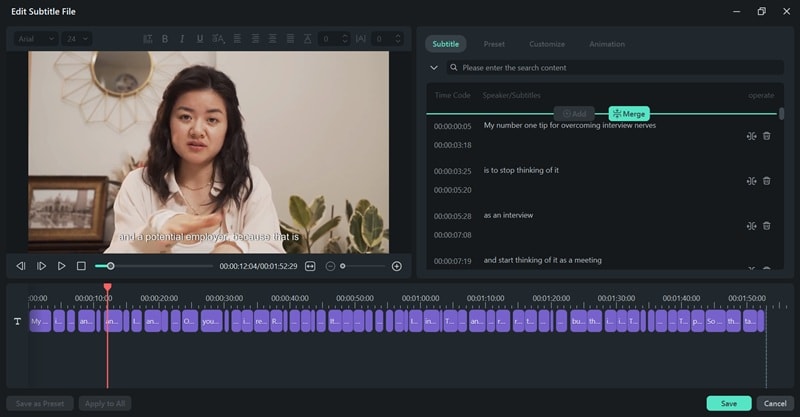
Customize the Captions
Once your captions are on the timeline, the real fun begins. It's time to make them your own to match your style. Auto Transcribe in Premiere Pro still offers total creative control options to help you style the captions:
- Select one or more caption clips on your timeline.
- Open the Essential Graphics panel by selecting Window > Essential Graphics. If you are using the newer version, you can customize your caption on the Properties panel.

In the panel, you can adjust font size, type, color, background opacity, and positioning to ensure readability and brand consistency. Otherwise, you can even add animation or effects to captions for a pro look.
When Auto Captions Aren't Perfect: Quick Manual Adjustments
Manual editing is your secret weapon for achieving ideal timing, adding creativity, or handling tricky audio that the AI may miss.
While using Adobe Premiere Pro's auto-caption is the fastest way to get a base layer of text, sometimes you need to fine-tune things by hand. So, think of automatic captions as a fantastic starting point, and manual adjustments as the final touch that ensures everything is synced and styled.
How to manually add captions in Premiere Pro:
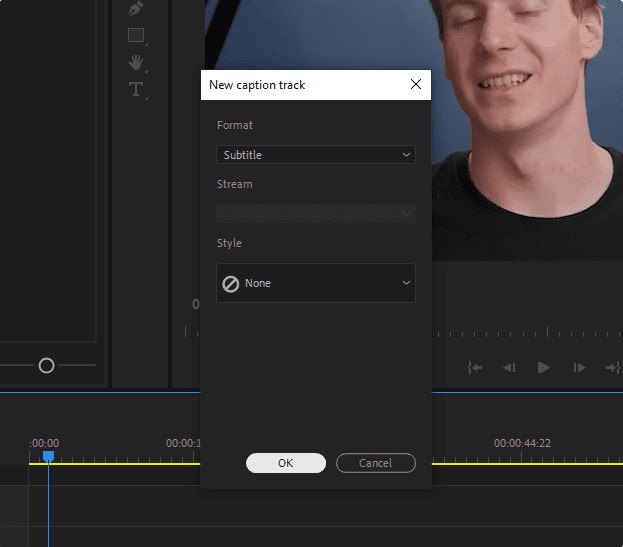
Step 1: Create a New Caption File
Go to Window > Workspaces > Captions and Graphics. Choose your caption type.

Step 2: Add Caption Clip to Timeline
The new caption clip appears after you select Create New Caption Track on your panel. Drag it onto a track above your video clips in the timeline.
Step 3: Set Timing Manually on Caption Panels
Click and drag the start and end points of the caption segment on the timeline to perfectly match the spoken dialogue.
You can add, edit, and time your captions exactly to your spoken content. You can use the Up and Down arrow keys to jump between caption segments for quick timing adjustments.
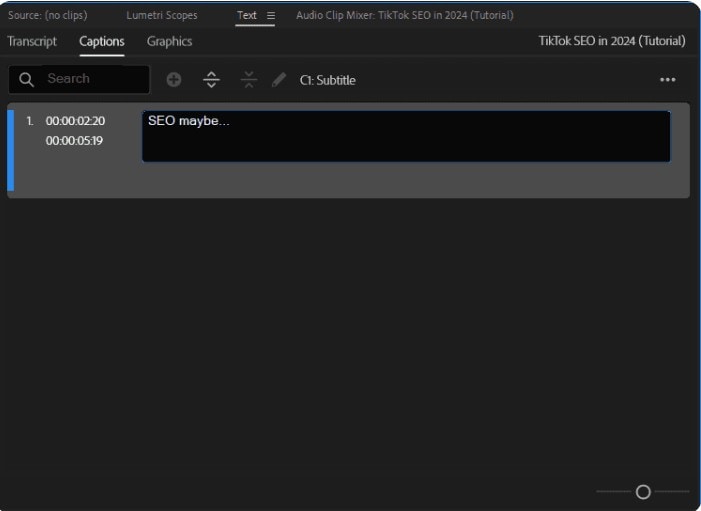
Step 4: Type the Text
With the caption segment selected, type the corresponding dialogue into the Text panel.Repeat this process for every line of dialogue in your video.
Part 2. Common Issues with Premiere Pro's Auto Captions
Despite its power, auto subtitles in Premiere Pro can occasionally present a few challenges. Here's a breakdown of the most common issues and how to smoothly resolve them:
- Captions Not Syncing Properly: Auto-transcribed captions slightly delay where the text doesn't match the spoken words. This happens due to audio complexity or unclear speech. You can head to the Text panel to manually fix the time codes in the caption track.
- Limited Language Support: Premiere Pro doesn't install all language packs by default. If you happen to transcribe a video in another language that Adobe doesn't have, add the language pack you need.
- Importing SRT Files: An external subtitle file (.srt) sometimes has messed-up formatting or incorrect timing. This is almost always due to an encoding or formatting error in the SRT file itself, like using the wrong character set or incorrect timecode punctuation. Troubleshooting file encoding and formats may be required.
Auto-captioning is a powerful starting point. But a quick manual review and these troubleshooting tips are your best bet.
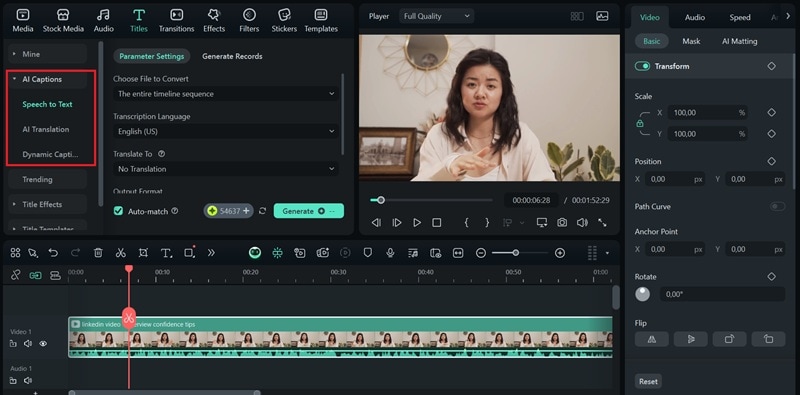
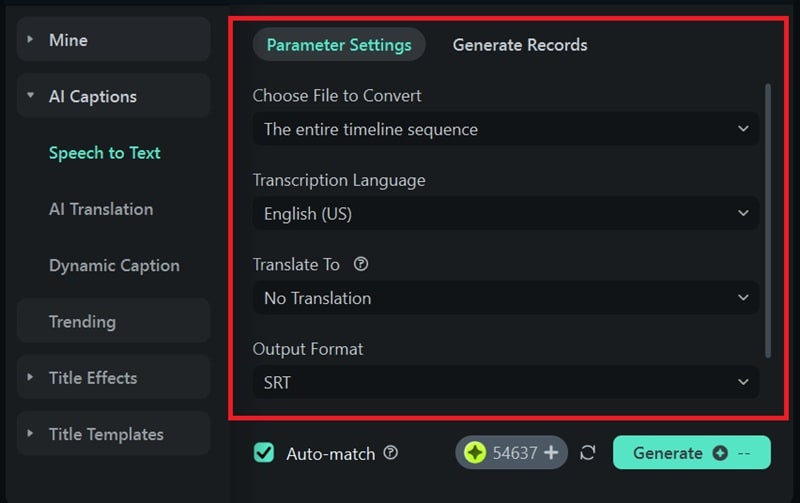
Part 3. AI-Powered Solution to Generate Auto-Caption in a Video
If you're the creators who fast-produce engaging, accessible content,Wondershare Filmora is a great alternative.
Filmora presents a powerful and user-friendly alternative to more complex professional suites. It incorporates AI technology that seamlessly helps the workflow in AI translation. It's nice if you're currently expanding your video's accessibility across languages and markets.

Why Use Filmora to Add Auto Caption
- Auto Subtitle Generation: Accurately transcribes dialogue and automatically syncs subtitles within clicks.
- Dynamic Captions: Generate animated captions tailored for mobile and desktop to boost engagement.
- AI Video Translation: Instantly translate captions to any language on the built-in AI translator.
- Easy Customization: Style your caption fonts, colors, size, and position with an intuitive interface.
- Batch Processing: Manage your multiple editing and content libraries at one time.
How to Use Filmora's Auto Captions:

- For standard subtitles, use the "Speech-to-Text" feature.
- For animated captions, select the "Dynamic Captions" option.
Part 4. Auto-Generate Captions in Premiere Pro vs Filmora
So, which platform is right for you? The choice between auto caption in Adobe Premiere Pro and Filmora ultimately comes down to your workflow and goals. Let's compare their auto captioning capabilities:
| Premiere Pro | Filmora | |
| OS Support | Windows, macOS | Windows, macOS, Android, iOS |
| Pricing | $20.99/month (with Creative Cloud subscription) | One-time purchase or subscription options |
| Supported Languages | Supports around 18 languages | Supports 20+ languages |
| Export Subtitles | Embedded captions, sidecar files (SRT, SCC) | Embedded captions, SRT, and ASS |
| Import Subtitles | Supported | Supported |
| Auto-Captions | High, with manual corrections needed | High, fast, with automatic translation |
| Customization | Limited | Robust customization, available with Dynamic Styling |
| Translation Option | Requires third-party plugins | Use built-in AI translation |
In short, the best program for you depends on your needs.
- Premiere Pro is the top choice for professionals. It's like a professional workshop, full of advanced tools for editors who need total control and work on complex, high-quality projects.
- Filmora, however, is perfect for content creators like YouTubers and social media managers. It focuses on being fast, user-friendly, and affordable. It uses AI to quickly create stylish captions and can even translate them for viewers around the world.
Conclusion
In the end, it's a tool that makes videos more accessible and interesting for everyone. There are a lot of tools that can deliver your needs. Yet, the best software for you depends on what you need.
Auto-generating subtitles in Premiere Pro is now simple using its transcription feature. But it's also full of advanced tools for editors who need perfect control and work on big projects. Filmora, on the other hand, is designed for speed and ease. It's perfect for anyone who wants to quickly add captions and even translate them into other languages for social media.
No matter which you pick, adding great captions to your videos has never been easier.
