

 TL;DR:
You can create motion blur on an iPhone natively by shooting a Live Photo and changing its effect to Long Exposure in the Photos app, or by applying it to existing media using third-party editing software.
● The native Long Exposure method requires shooting a stabilized Live Photo to blend movement data, as the default iOS Camera app does not support manual shutter speed adjustments.
● Adding motion blur to already captured images requires apps like Picsart, though its specific motion blur filter is limited to still photos and restricted to Pro subscription accounts.
● Wondershare Filmora serves as an alternative for processing both photos and videos, with its desktop version providing an auto-detecting motion blur tool that allows manual adjustments for range, intensity, and direction without requiring masking.
Ask AI for a summary
 ChatGPT
 Perplexity
 Gemini
 Claude
 Grok
Grok
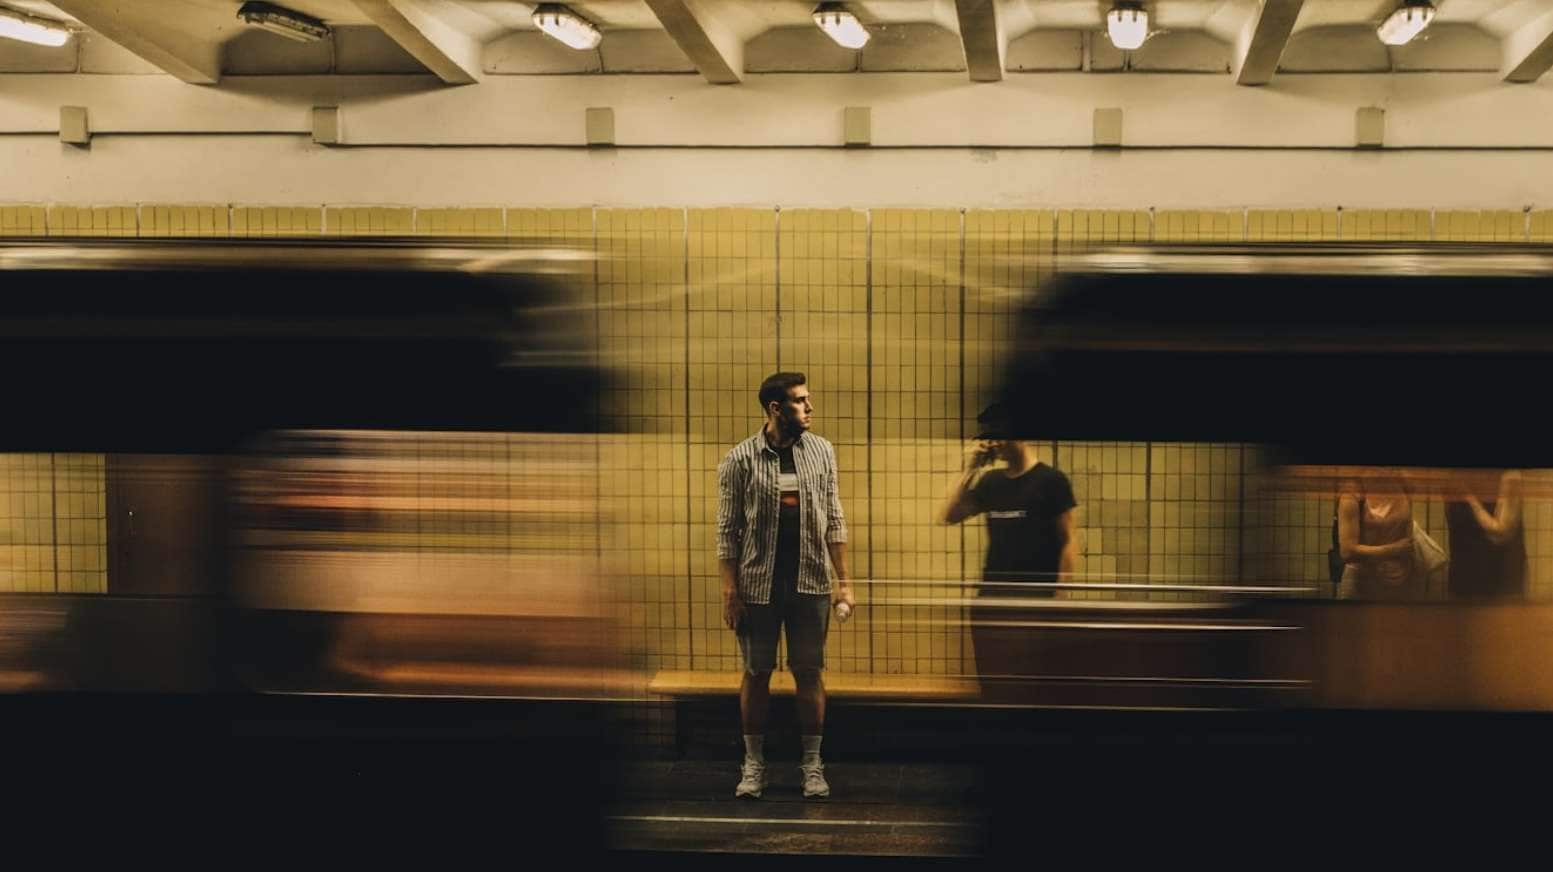
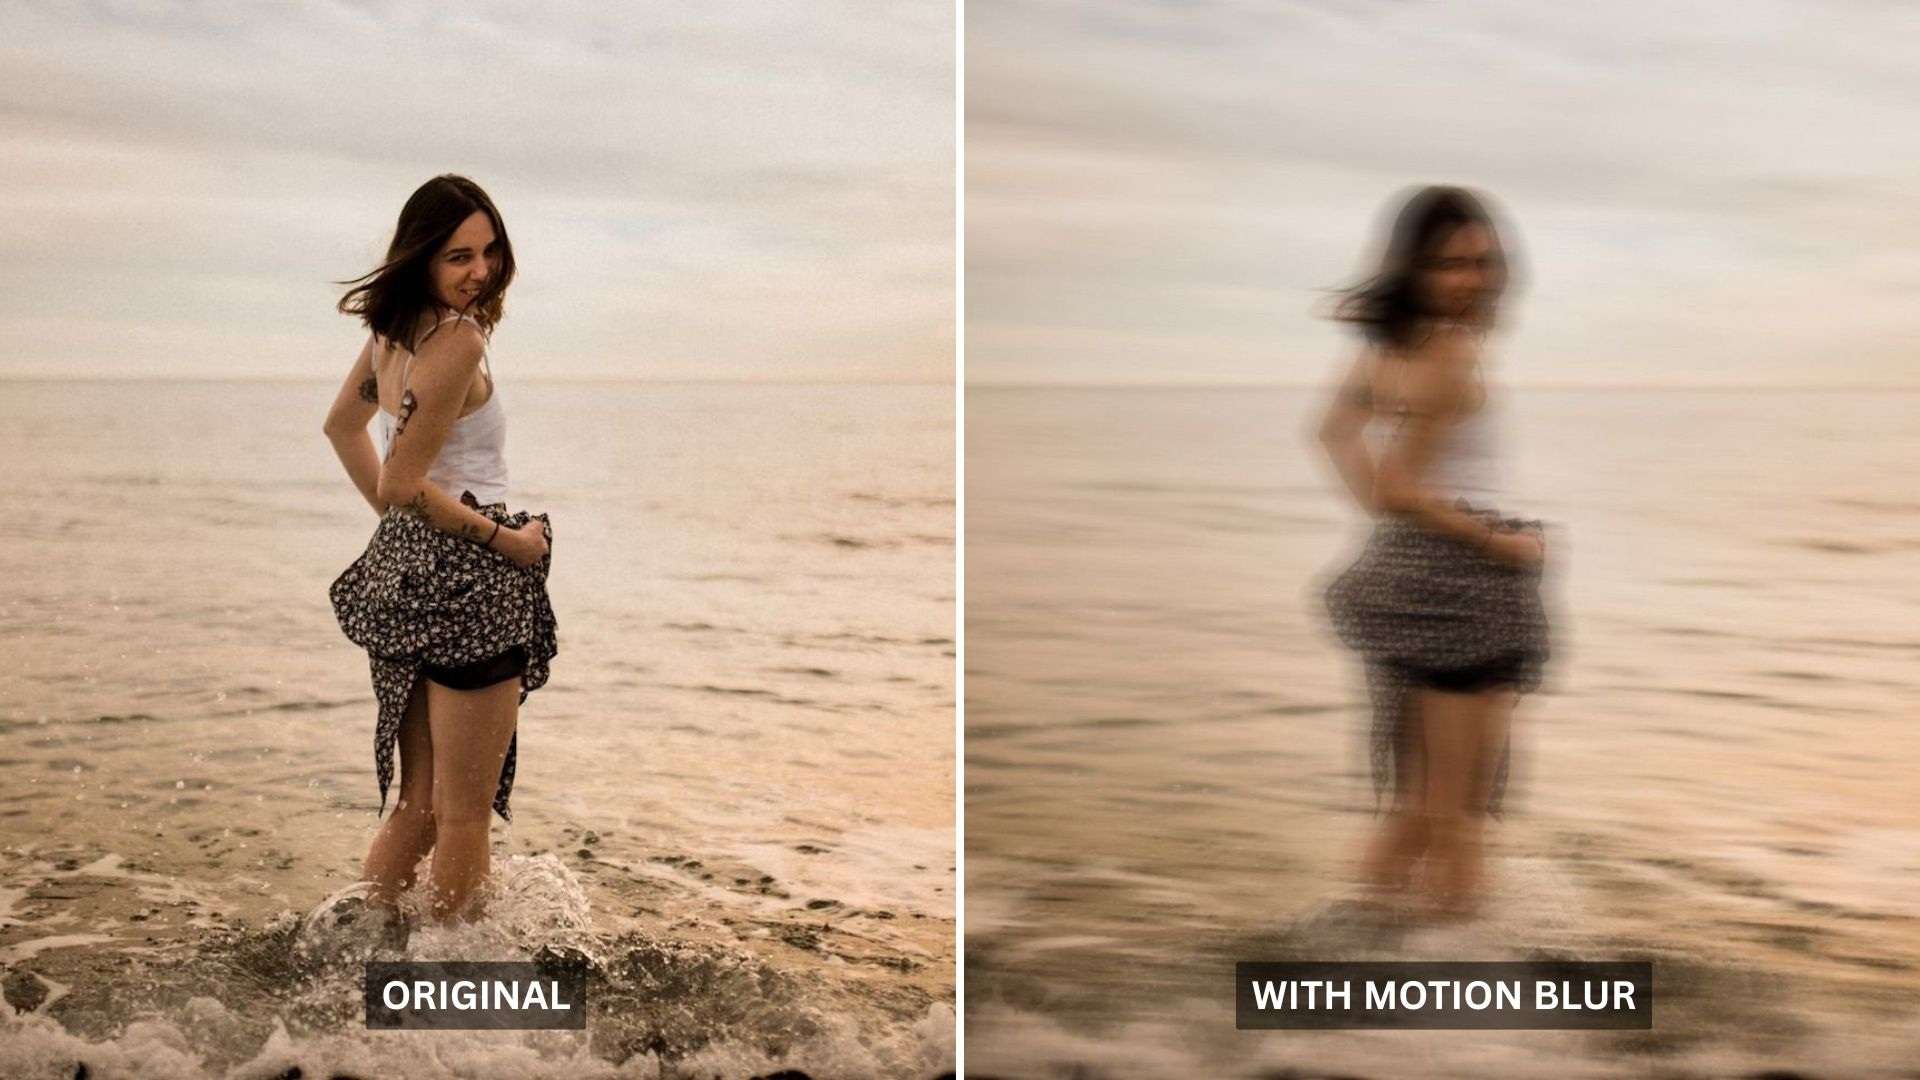
Capturing or adding motion blur to a photo is not something only professional photographers can do. With just your iPhone, you can make moving water look silky, turn passing cars into light trails, or give action shots a stronger sense of speed and movement — something that a still frame can't capture on its own.
In this tutorial, we'll share how to create motion blur on iPhone and make your photos look more dynamic without making the process feel complicated.
Part 1. What is iPhone Motion Blur?
Motion blur in photography actually happens when a subject (or the camera) moves while the shutter is open. The longer the shutter stays open, the more movement gets recorded as a streak or blur.
On a professional camera, you'd control this by adjusting shutter speed manually. On iPhone, Apple handles most of that automatically, but the camera does give you ways to work with motion blur while shooting or add it later during editing.
To achieve motion blur on iPhone, there are at least a few ways it can happen:
- In-Camera Motion Blur: Captured intentionally while shooting, using Live Photos and the Long Exposure effect.
- Motion Blur Added in Editing: Applied to your existing images using a third-party app, since the native Photos app doesn't have a dedicated motion blur tool.
Part 2. How to Take Motion Blur Photos on iPhone
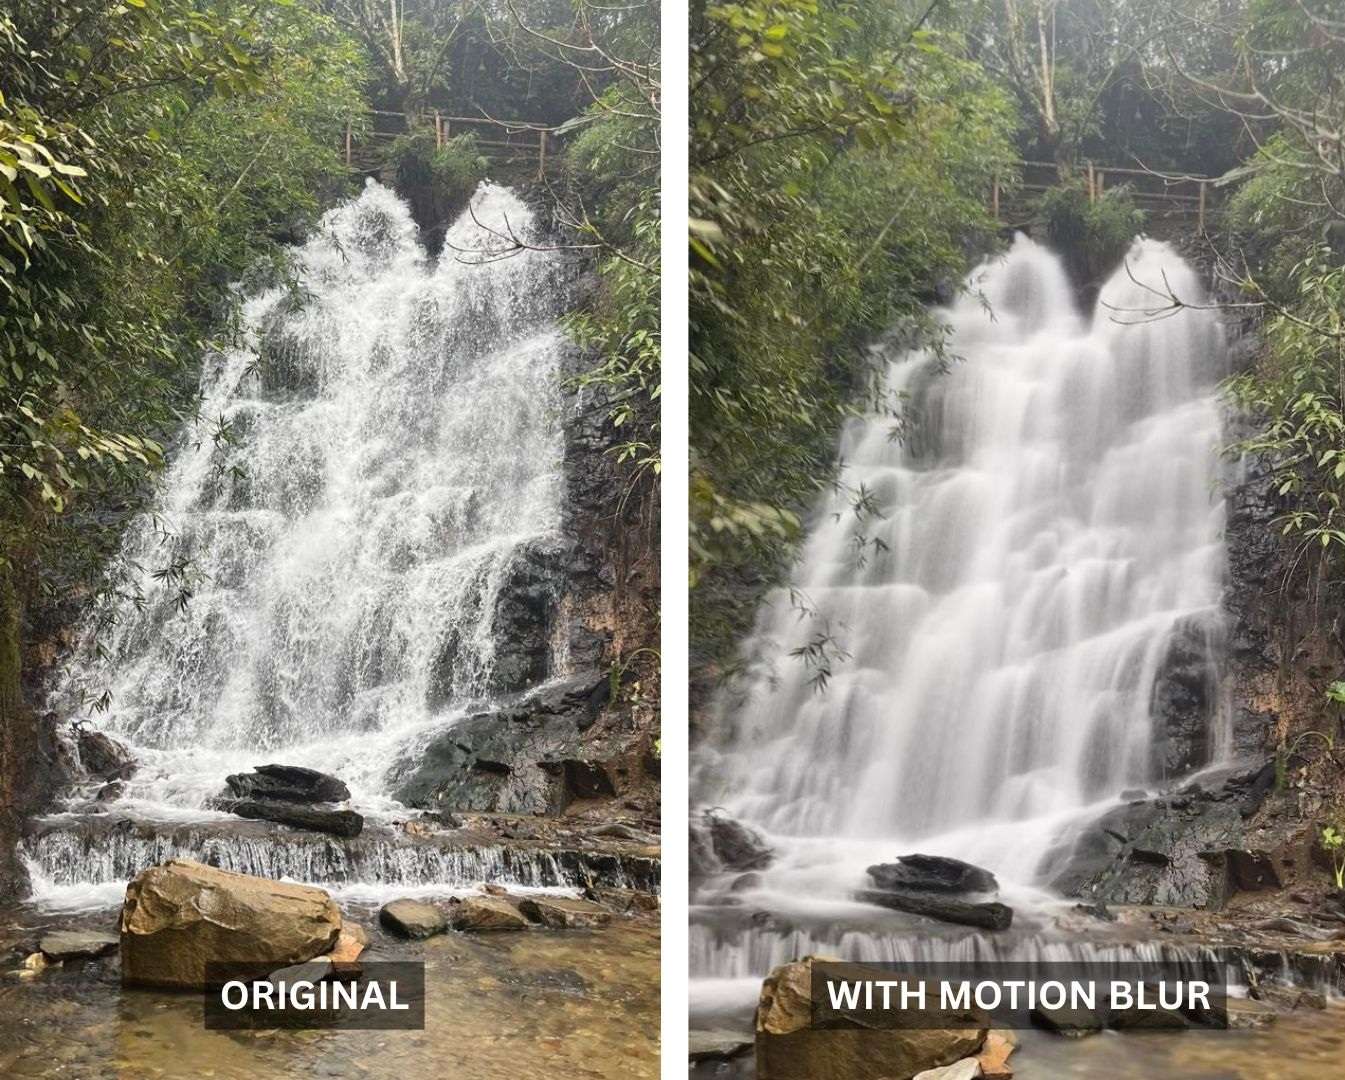
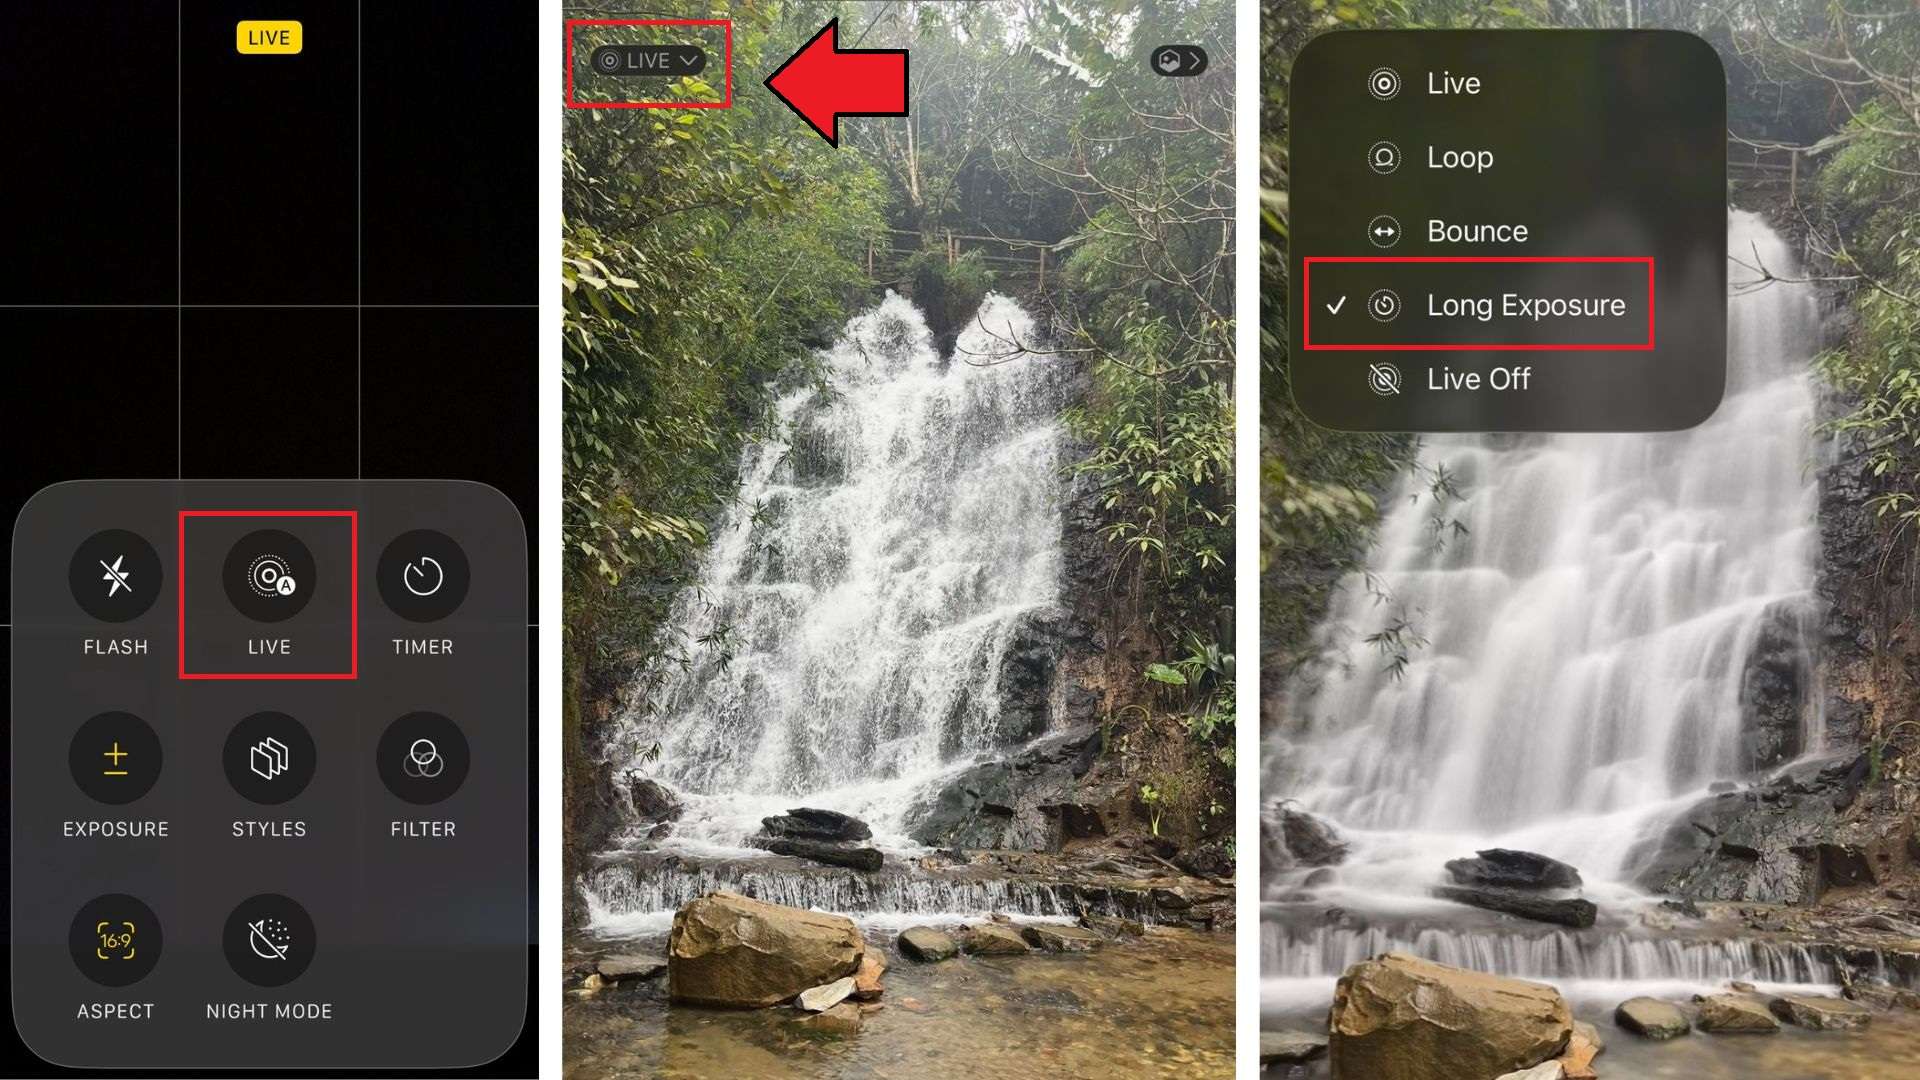
The easiest native way to capture the motion blur effect on iPhone is by using Live Photos with the Long Exposure effect. Live Photos captures a short moment before and after you press the shutter, giving your iPhone enough movement data to create different effects afterward.
To blend that movement into a motion blur effect, you need to change the Live Photo effect to Long Exposure. The result makes moving areas look smooth and blurry, while the still parts of the image stay more stable.
How to Take Motion Blur Photos on iPhone
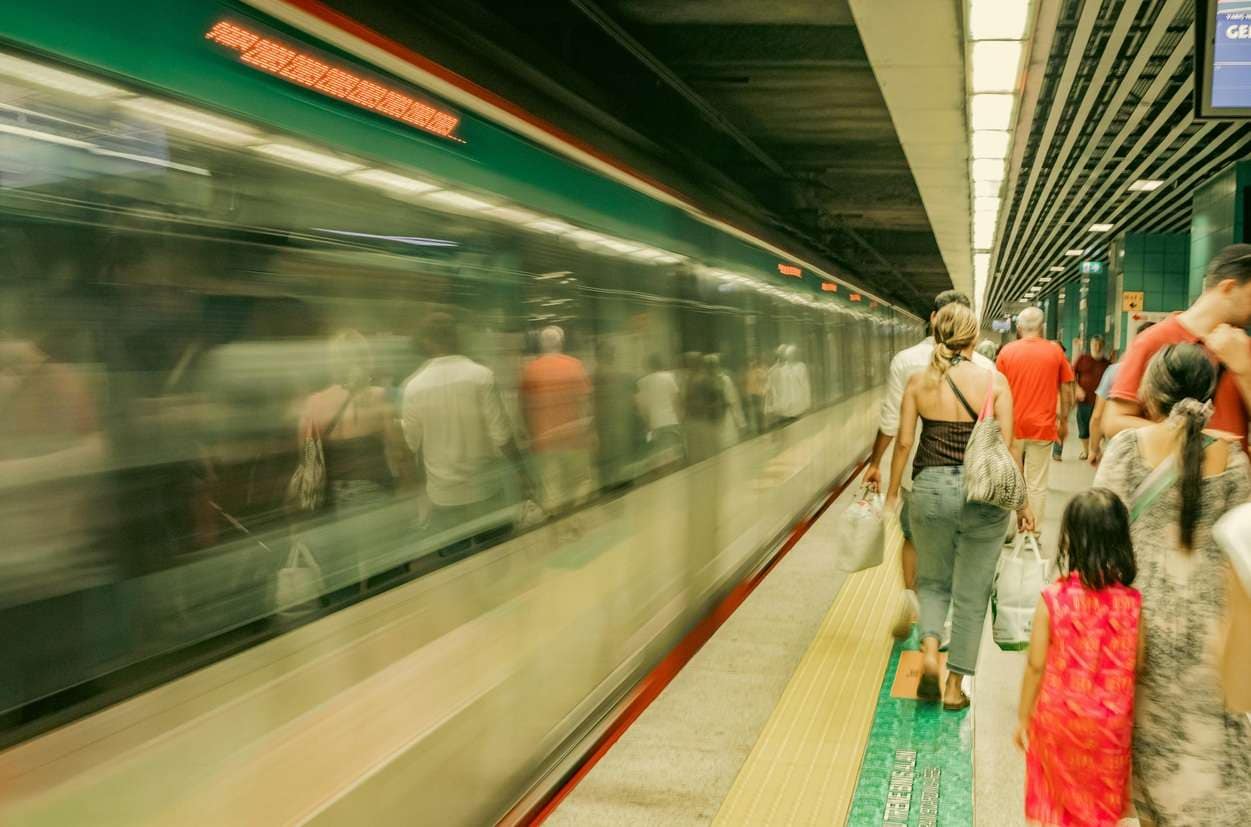
Your iPhone will blend the motion from the Live Photo and turn it into a smoother blur effect. It works especially well for:
- Waterfalls
- Rivers
- Moving traffic
- Crowds
- Light trails
- Busy streets
💡Tips: If you have a tripod, use it while capturing. If not, lean your phone against a wall, railing, table, or any stable surface. Tap to focus before taking the shot.
Part 3. How to Add Motion Blur to Existing Photos on iPhone
If you already took the photo, you can still add a motion blur on iPhone through editing apps. This is the better option when you want more control over how the blur looks. Some apps that can help with this include Picsart and Bluur Cam.
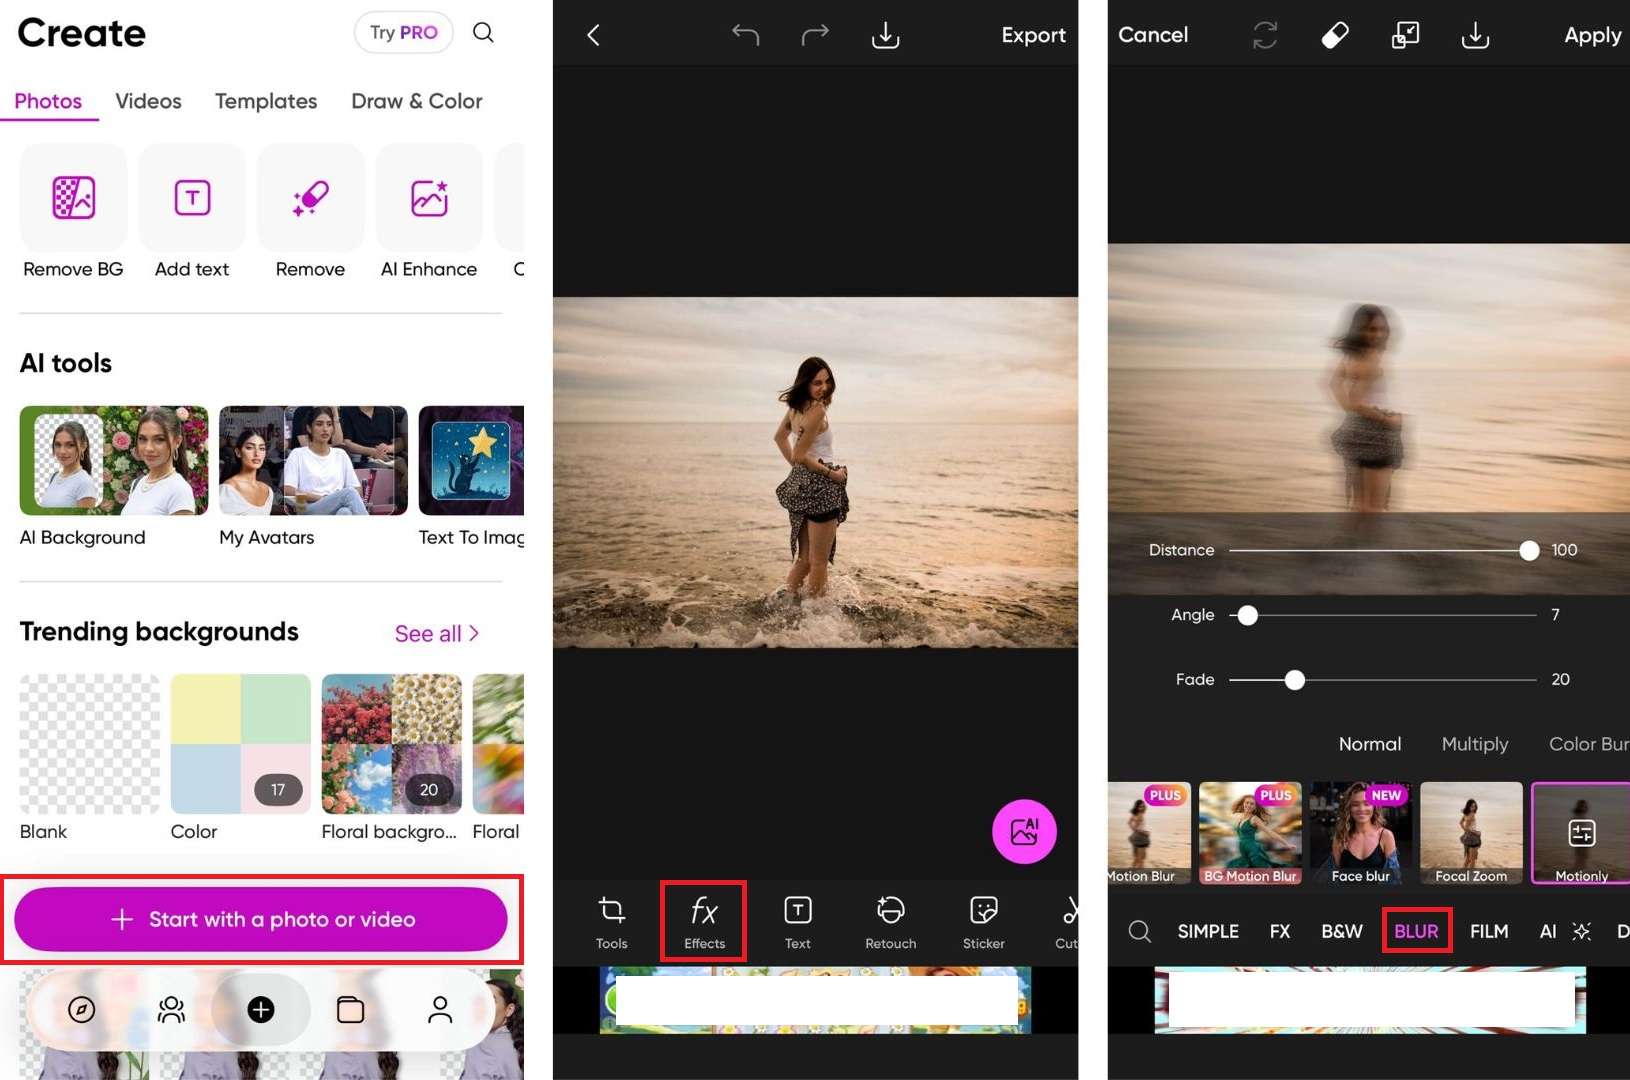
The exact steps depend on the app you use, but the basic workflow is usually similar. The key is to find the Motion Blur effects inside the app. For this tutorial, we'll demonstrate using Picsart.
How to Add Motion Blur to a Photo on iPhone
Limitations
- ❌Free users may see on-screen and banner ads.
- ❌Some blur effects (including motion blur) are only available for Pro users.
- ❌The Motion Blur effect is available for photos only, not videos.
Bonus. Best Alternative for Easier Motion Blur Editing
Most photo editing apps like Picsart are limited to still photos, so if you're working on adding iPhone motion blur to a video too, you can consider using Wondershare Filmora. Filmora handles both, and since it comes as a mobile app and a desktop software, you can edit on whichever device suits you.
How to Add Motion Blur in Filmora App
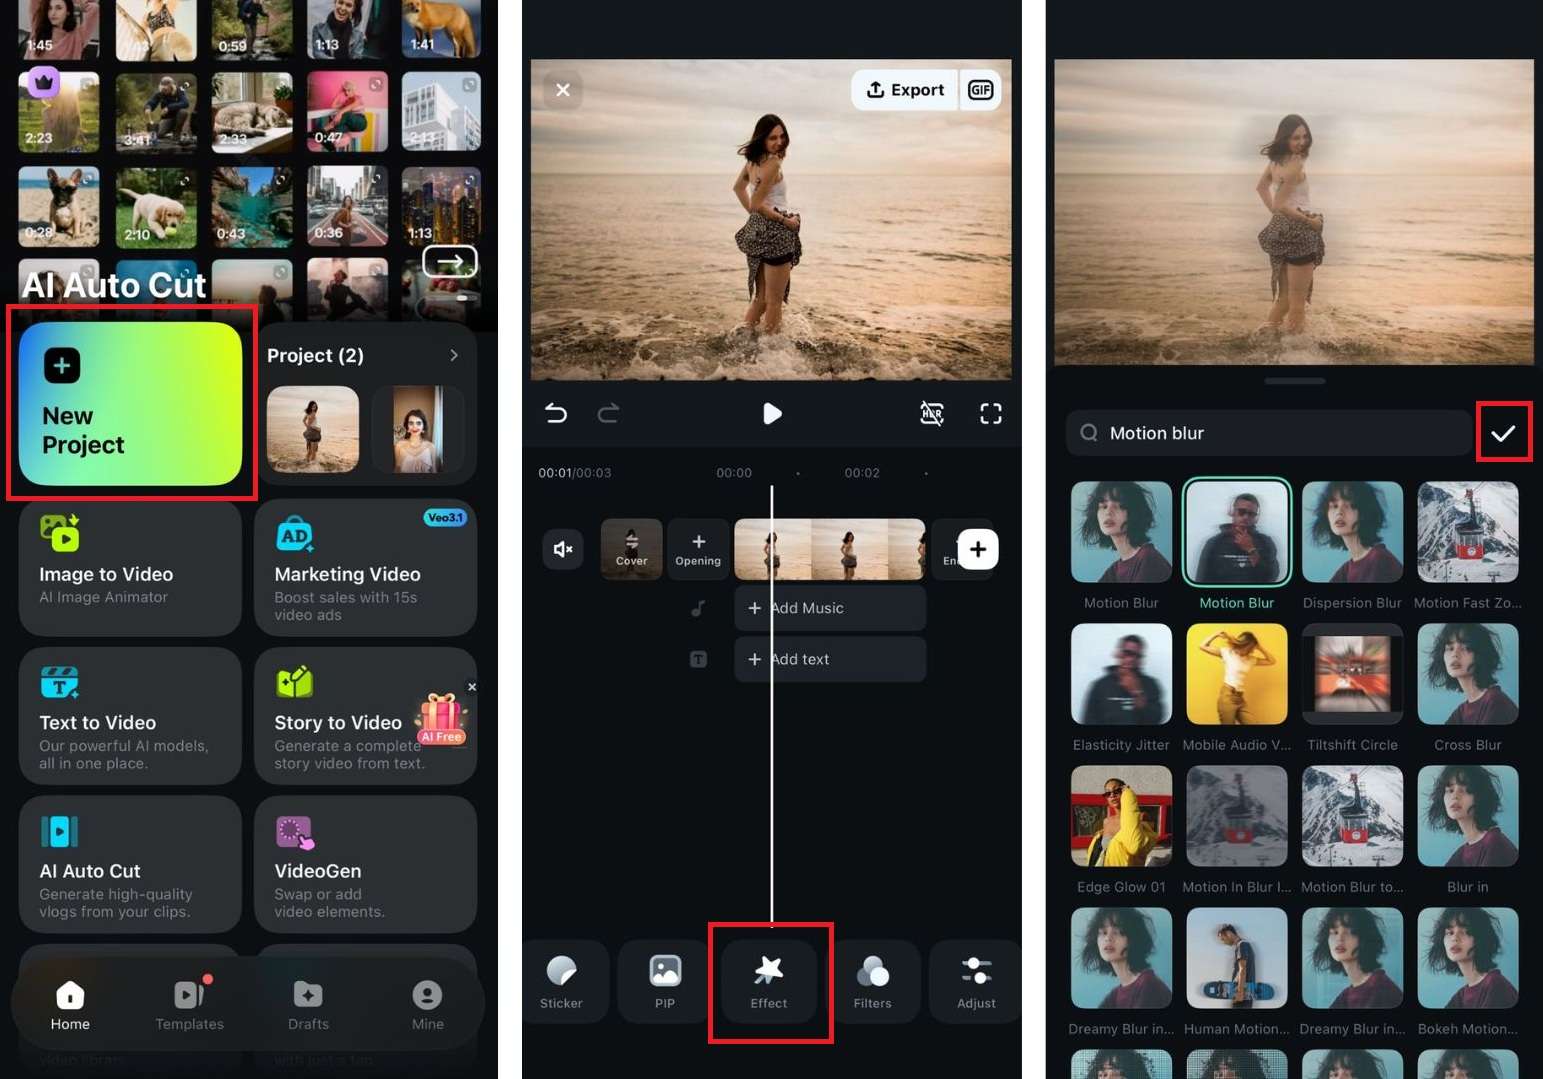
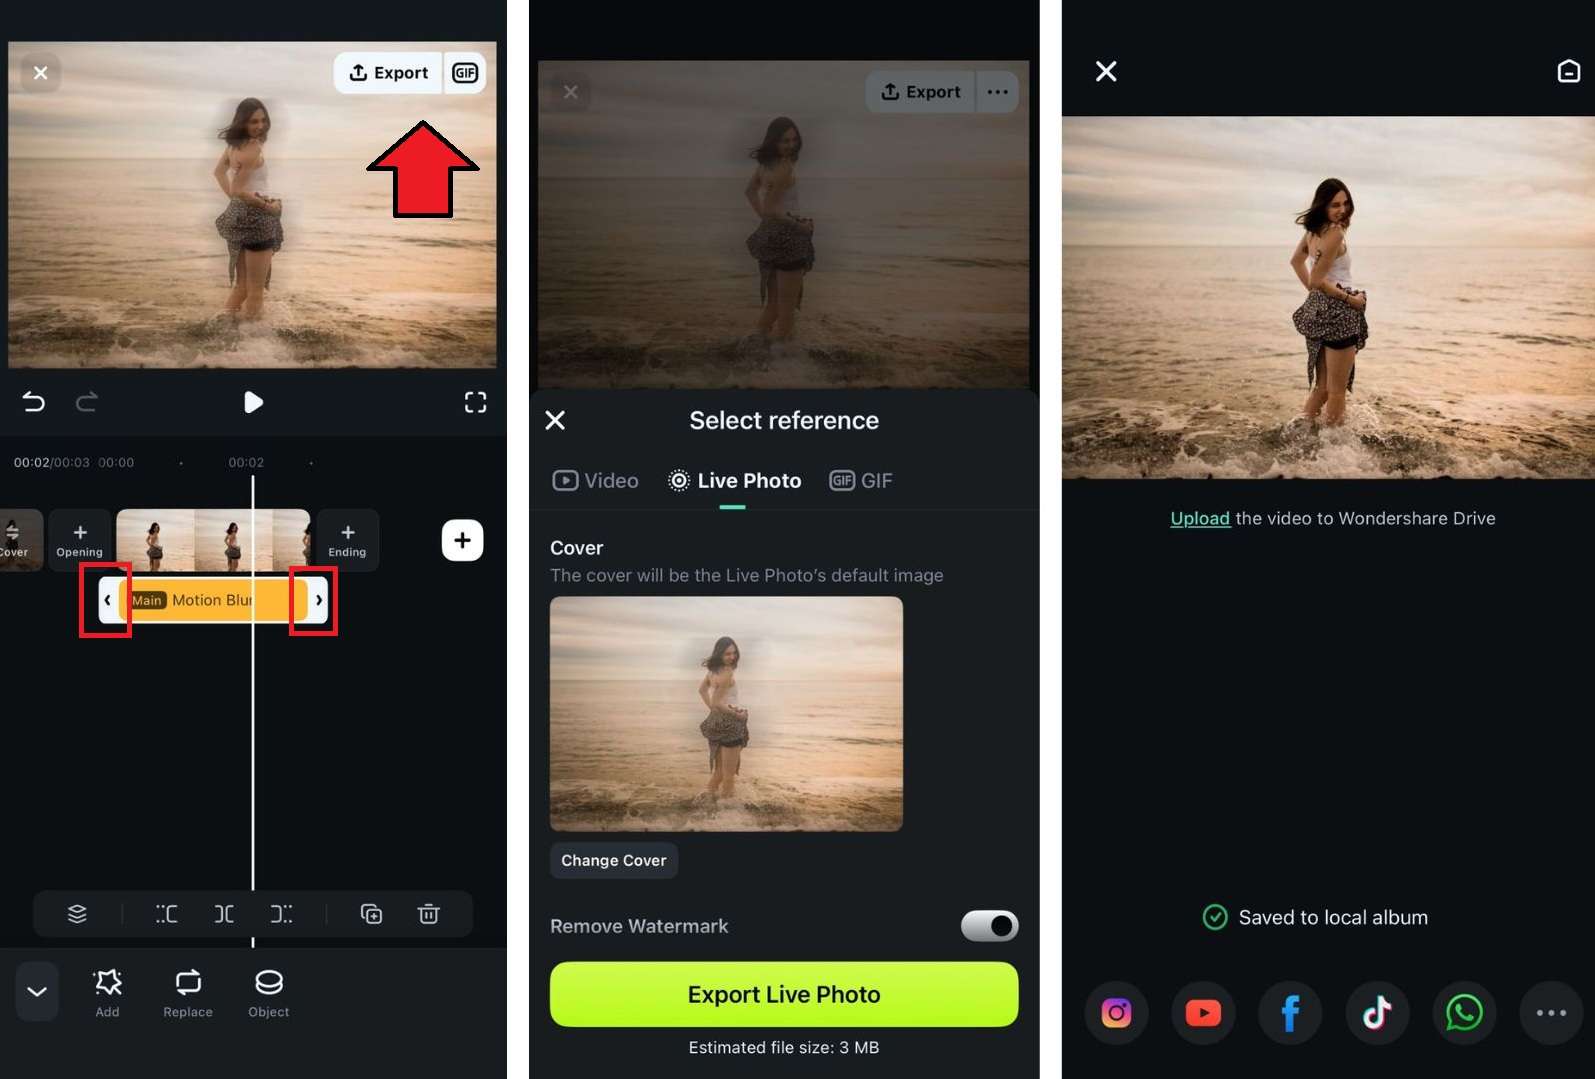
The motion blur effect in Filmora mobile works best for giving your photo or video a bit of style. But for more complex work that requires more control, the desktop version gives you more to work with.
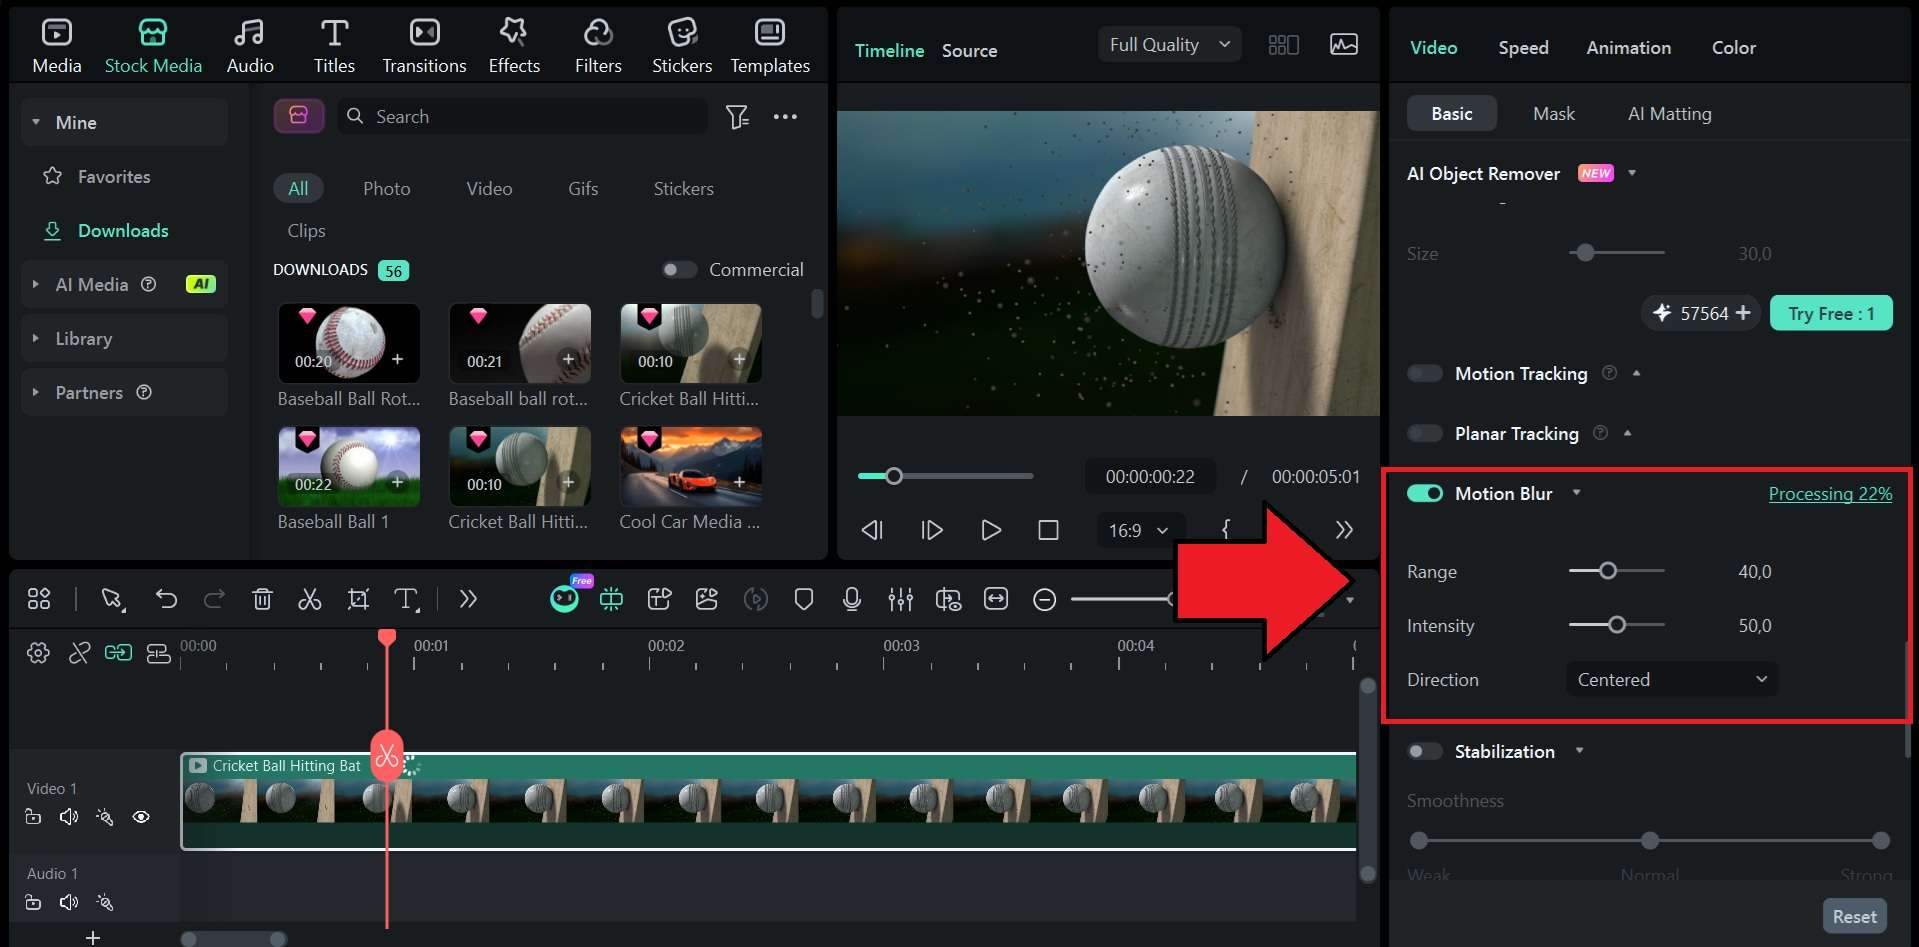
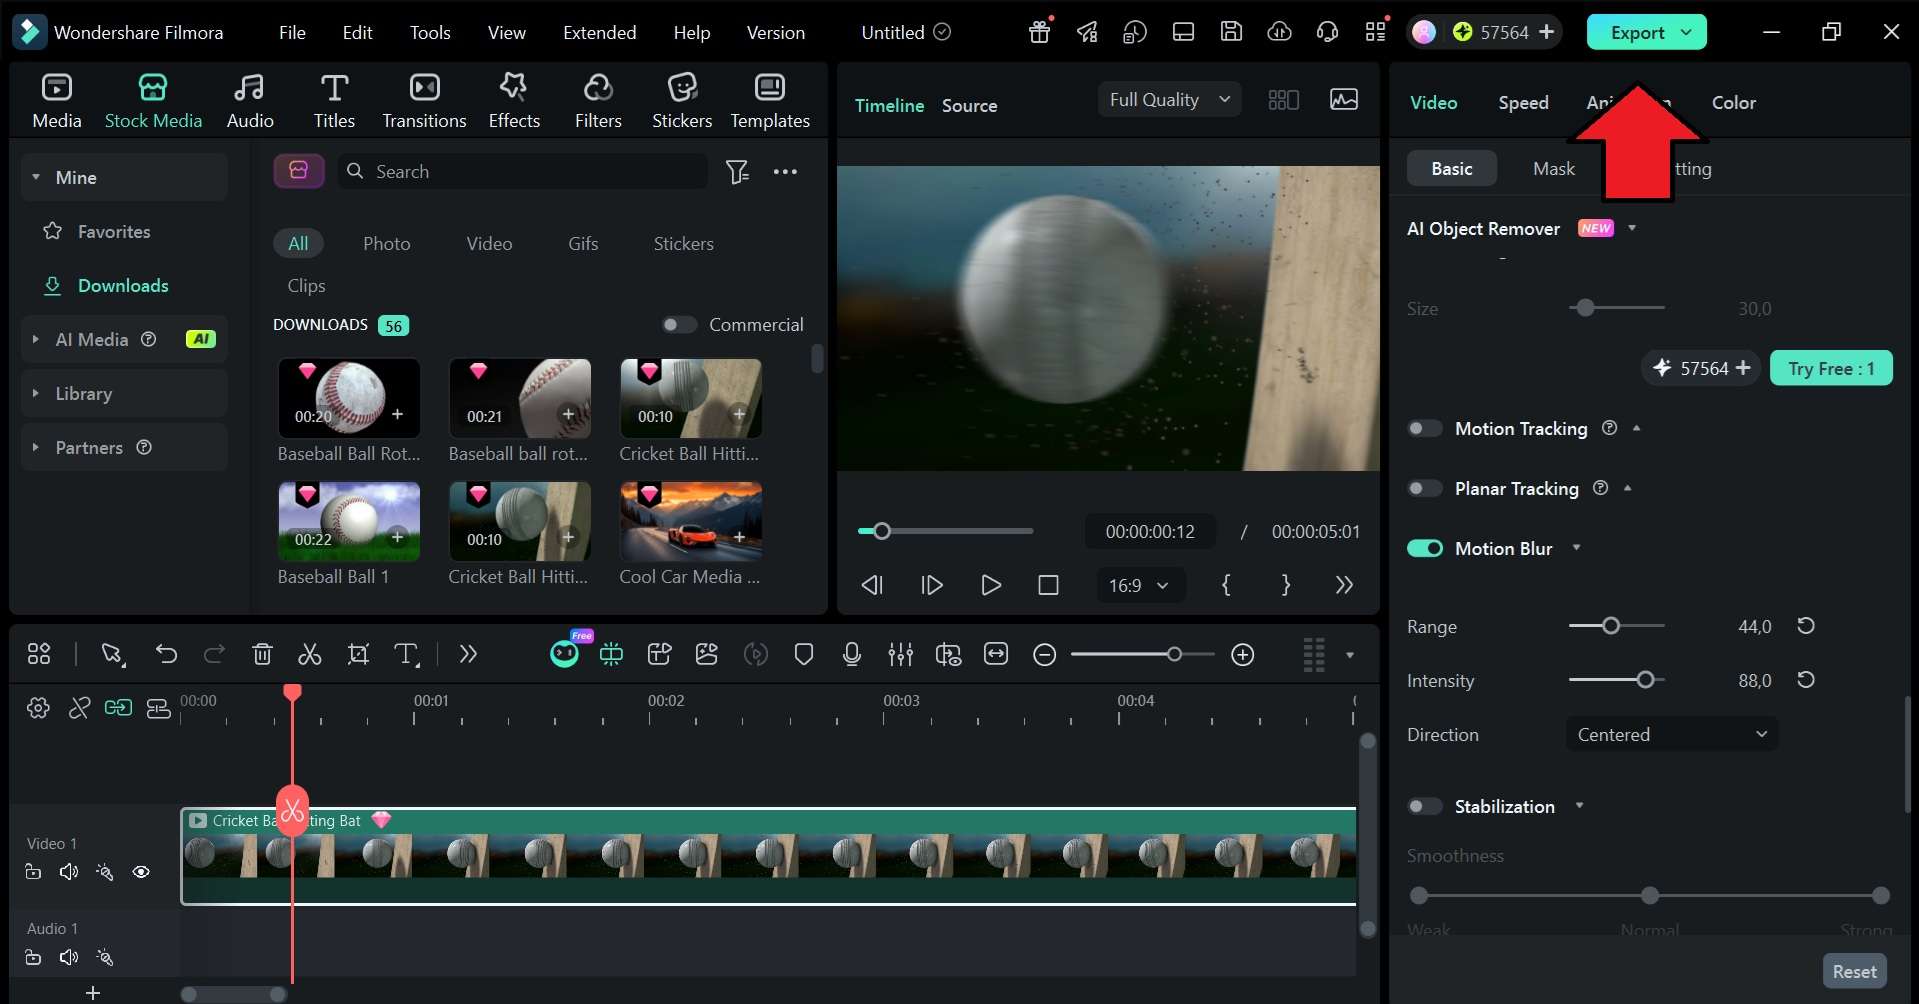
How to Add Motion Blur in Filmora Desktop
Filmora for desktop has a dedicated motion blur tool that detects which parts of the frame should carry the blur, so the result looks natural without any manual masking. You just enable it, then adjust the range, intensity, and direction.

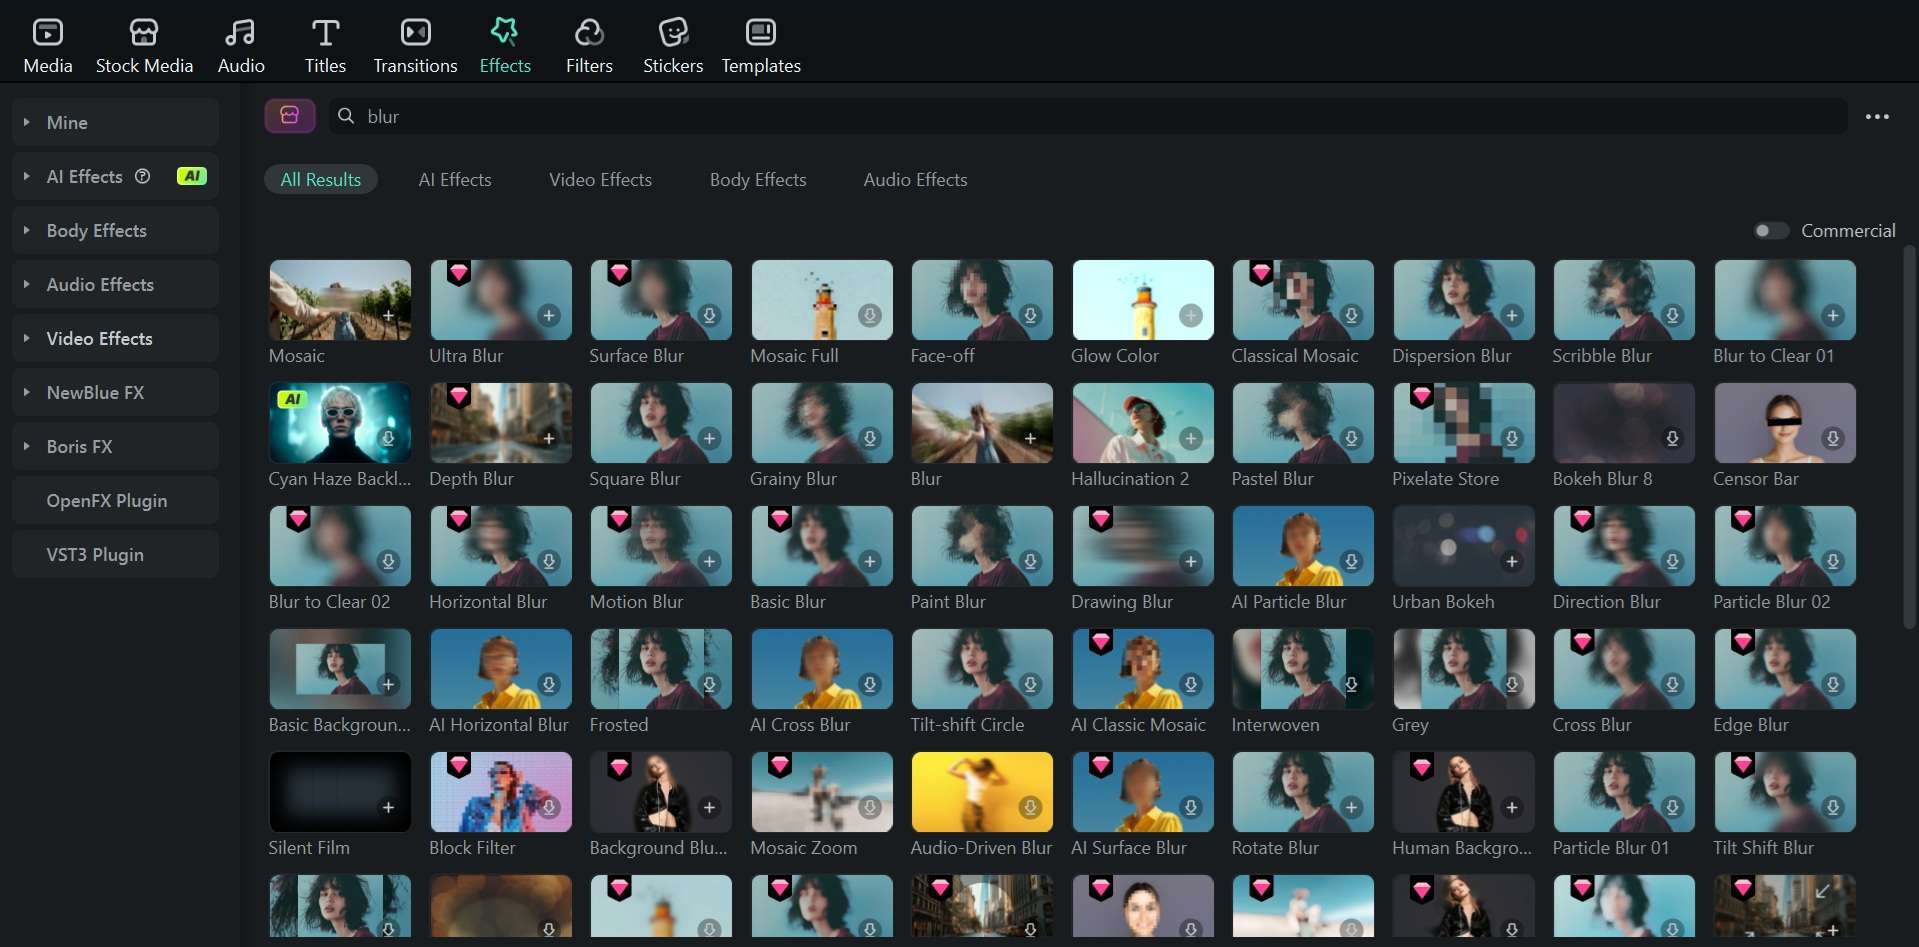
💡Tip: You can also find and apply many different blur effects in Filmora's Effects library. Just search for the type of blur you want, and drag it to the timeline.
Conclusion
You don't need a professional camera to create a motion blur effect. Your iPhone already gives you a few good ways to capture movement and give your image more energy. The Long Exposure method through Live Photos is the quickest way to get the motion blur effect on iPhone. For photos you've already taken, apps like Snapseed or Picsart get the job done.
If you want one tool that covers both photos and videos with more control, try Filmora. The mobile app handles quick edits, while the desktop version gives you more room to adjust the effect, refine the motion, and polish the final result.
FAQs
-
Does iPhone have a manual shutter speed setting?
The native Camera app doesn't currently support manual shutter speed, so you can't dial it in yourself to control how much iPhone motion blur gets captured. To control it yourself, you need a third-party app. -
Can I add motion blur to a video on iPhone?
The native Photos app doesn't support motion blur for video. You'll need an editing app for that. Filmora is one option that works for both photos and video clips. -
Can I remove motion blur from an iPhone photo?
It's possible, but the results are not always good. Apps like Remini or Topaz AI offer an Unblur tool that can recover some sharpness from a blurry photo, though heavily blurred images are harder to fix. -
Can I blur only parts of a photo on my iPhone?
Yes. Some apps like Lightroom Mobile let you apply blur to specific areas using masking tools. The native Photos app, however, doesn't have this capability for motion blur specifically, though Portrait Mode does apply background blur automatically at the time of shooting.
