

 TL;DR:
Kazam is a completely free, watermark-free screen recorder exclusive to Linux distributions like Ubuntu, Linux Mint, and Debian, best suited for basic desktop and audio capture despite its lack of active development.
● Linux users can install the base tool via the sudo apt install kazam terminal command, though utilizing Kazam 1.5.3 adds direct Twitch and YouTube broadcasting, and Kazam 2.0 introduces Optical Character Recognition for text extraction.
● The software restricts video exports to MP4, WebM, RAW, or AVI formats and lacks any built-in editing features, while its discontinued development frequently necessitates workarounds or PPAs to resolve compatibility issues on newer Ubuntu releases.
● Wondershare Filmora serves as the recommended alternative for Windows and macOS users who require cross-platform compatibility, simultaneous camera track recording, and integrated video editing capabilities.
Ask AI for a summary
 ChatGPT
 Perplexity
 Gemini
 Claude
 Grok
Grok
In this day and age, creating content is as easy as recording your desktop screen. You can use it to film a quick tutorial, capture gameplay, or share your screen while you talk to viewers in real-time. Whatever it is, screen recording does the job.
And if you start searching for a screen recorder online, you will see a long list of tools. But if you are on Linux or Ubuntu, there is one name that should definitely be on your radar: Kazam Screen Recorder. So, we will walk through what Kazam can do, how to install Kazam, what to expect from the Kazam recorder, and some Kazam alternatives for Windows and macOS users.
Part 1. Get To Know Kazam Screen Recorder
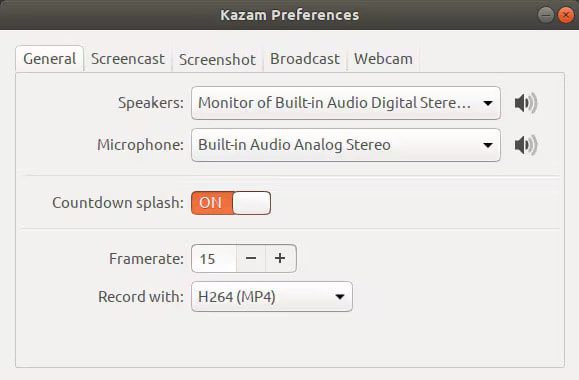
Kazam Screencaster is a program to record your desktop screen. It is equipped with the option to record sounds from your microphone or speaker as background music. The interface is clean and easy to understand, so even if you are new to screen recording, you will not feel lost.
You can install Kazam screen recorder for free. However, Kazam Screencaster is only compatible with operating systems like Ubuntu, Linux Mint, and Debian.
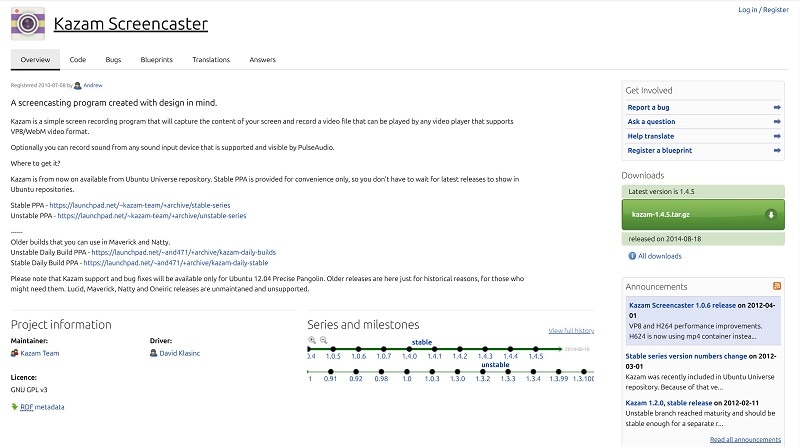
Several versions of the Kazam Screencaster are available for download and use.
| Kazam 1.4.5 | Developed and Maintained by Kazam Team via Launchpad |
| Kazam 1.5.3 | Maintained by Kazam Team and community contributors via Launchpad |
| Kazam 2.0 | Maintained by community contributors via GitHub |
Part 2. Key Features of Kazam Screen Recorder
As one of the most popular screen recorders on Ubuntu and Linux, Kazam has several functional features offered on all versions:
- Customize your preferred window to record, whether you want to record multiple screens, a single full screen, or just a selected area of your screen.
- Take screenshots of the area you like.
- The option to capture mouse cursor, key presses, and mouse clicks in the videos.
- Capture your webcam separately or as a picture-in-picture window.
- Save recordings to MP4, WEBM, and RAW file formats.
On top of that, these versions include an extra feature.
| Kazam 1.5.3 | Broadcast your livestream screen to Twitch or YouTube |
| Kazam 2.0 | Optical Character Recognition (OCR) to detect and extract text from the recorded videos |
Part 3. How to Install and Use Kazam Screen Recorder
Before jumping into tutorials, make sure the OS on your PC is capable of downloading a Kazam screen recorder. If you are ready to get Kazam running on your system, here is what you need to know.
How to Install Kazam Screen Recorder
The installation process differs slightly depending on the operating systems and Kazam versions, but typically only requires one or two commands. You can download Kazam directly from the Ubuntu, Linux Mint, or Debian software repositories.
Based on the Short Solution video tutorial, here is how you can install Kazam on your system:
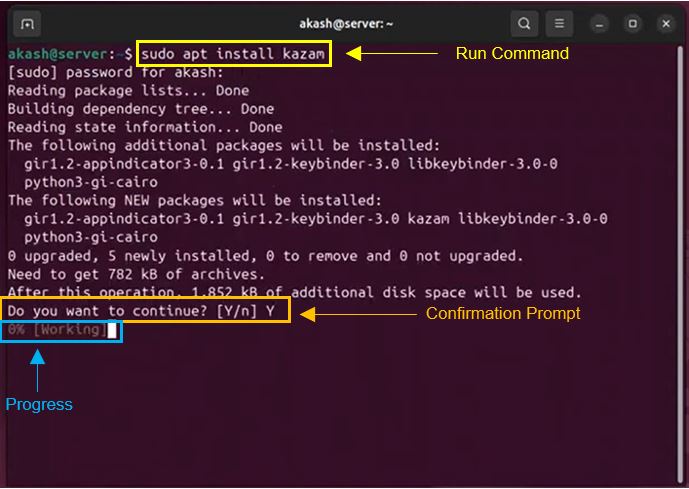
- Open the terminal.
- Run this command: sudo apt install kazam
- When the confirmation prompt appears, “Do you want to continue?”, type “Y”.
- Once the progress hits 100%, the Kazam screen recorder is installed.
- Access the Kazam screen recorder from your search box.
How to Use Kazam Screen Recorder
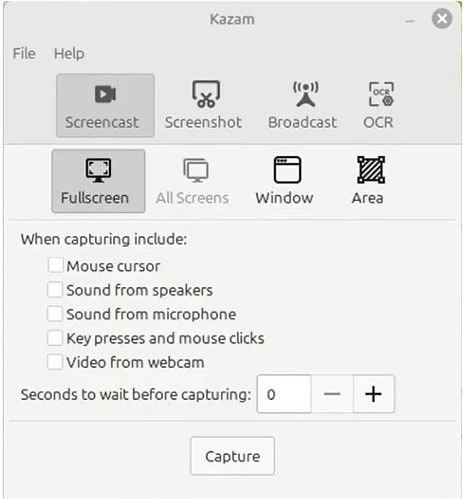
1. Record and Input Sounds
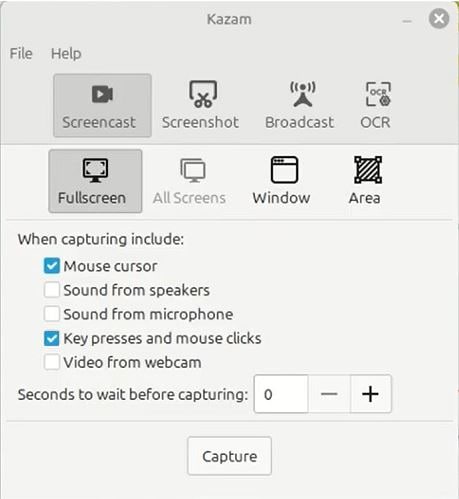
When opening the Kazam screen recorder, you will be directed to the recording window. Select the area that you want to display. Click on Capture to record your screen.
Don’t forget to check on the sound boxes to include background audio for your video. Choose the Microphone Box to record your voice. If you are hesitant, then check the Speaker Box to include any sound you like.
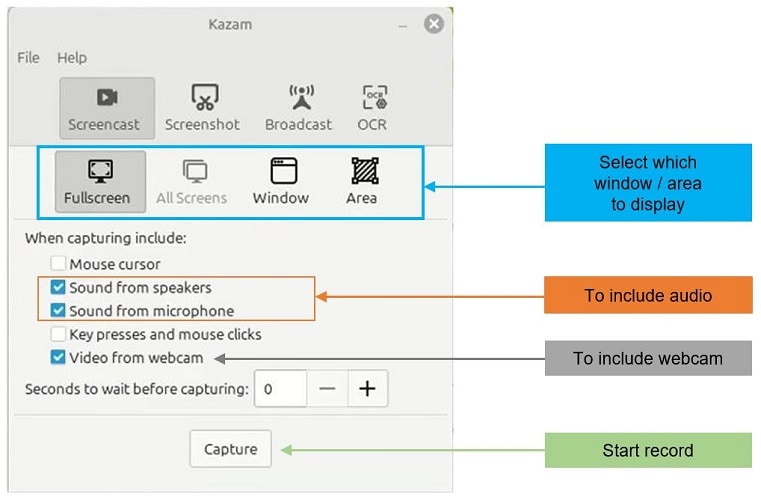
2. Include Decorational Features
These visual effects aren’t just for style. They make your tutorial videos easier to follow by adding a visual cue, like a mouse cursor. Also, key press and mouse click help viewers to keep up with your actions on screen.
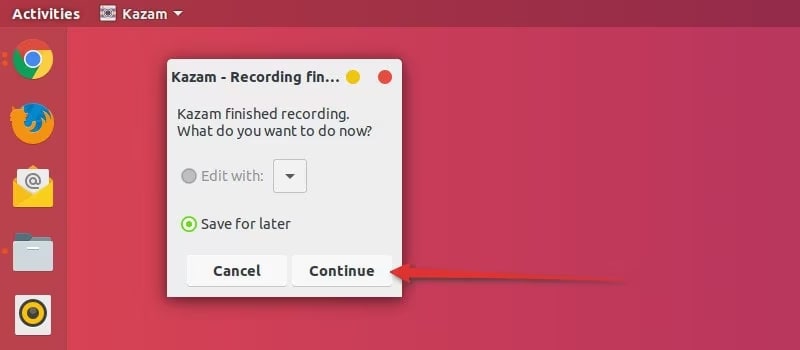
3. Save Recording
When the recording ends, you’ll see an option to “Save for Later”. If you have installed a video editor on Linux, Kazam screen recorder gives the option to jump straight into editing.
Recordings are typically stored in the Videos folder, but feel free to choose a new file location.
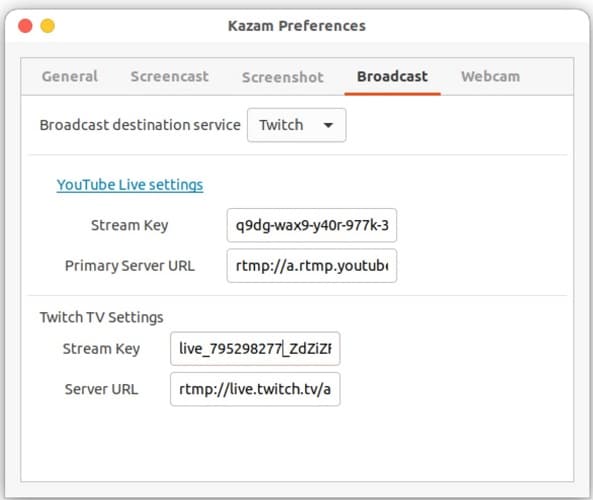
4. Broadcast to Twitch and YouTube
Demonstrate educational content or showcase your gameplay skills to your viewers in real-time through famous platforms. Log in to your Twitch or YouTube Account, copy the Stream Key you get from the platforms, then paste into the Kazam screen recorder to go live.
5. Set Your Preferences
Adjust everything about the recording settings to your preferences. This gives you the freedom to optimize performance based on your device and the type of content you’re capturing.
Want to get things done faster? Check out these keyboard shortcuts to speed things up on Kazam Linux:
- Windows Key+CTRL+W: Show / Hide main window.
- Windows Key+CTRL+R: Start recording.
- Windows Key+CTRL+P: Pause / Resume recording.
- Windows Key+CTRL+F: Finish recording.
- Windows Key+CTRL+Q: Quit window.
On some PCs, Windows Key is SUPER.
Part 4. Kazam Screen Recorder Review for Linux / Ubuntu Users
We tried using a Kazam screen recorder on Linux and Ubuntu, and our experience was pretty much what you would expect from a simple, lightweight recorder. It works well enough for everyday screen capture, but just like any program, it has its good sides and its not so great sides. Let's break it down!
- Completely free with no watermarks: You can record as much as you want without paying or dealing with branding on your videos.
- Offers simple region selection tools: You can record the full screen, a specific window, or a selected area.
- Flexible: You can decide which version of Kazam to install based on your needs, device, and OS compatibility.
- No longer actively developed: The original Kazam developers have stopped updating it, so new features are unlikely.
- Occasional compatibility issues on newer Ubuntu versions: Because development stopped, some users need workarounds or PPAs to install Kazam on the latest releases.
- Limited output formats and no built-in editing: Kazam exports mainly to MP4, WebM, or AVI and does not include trimming or editing features.
Part 5. Best Screen Recorder Alternative for Windows and macOS: Filmora
Unfortunately, Kazam is built exclusively for Linux systems. So if you are on a search for a Kazam screen recorder for Windows or macOS, you will need a solid alternative that gives you the same simplicity but with more features.
Don’t worry, though, you are right on the spot! We have a Kazam alternative, which works on both Windows and macOS: Wondershare Filmora.
Filmora isn’t just an ordinary editing tool; rather, it’s an all-in-one package. Capture anything happening on your screen, be it learning material, work project, or game content. If you haven’t tried it yet, let’s dig into Filmora’s screen recording features.
One Stop Solution: Record and Edit
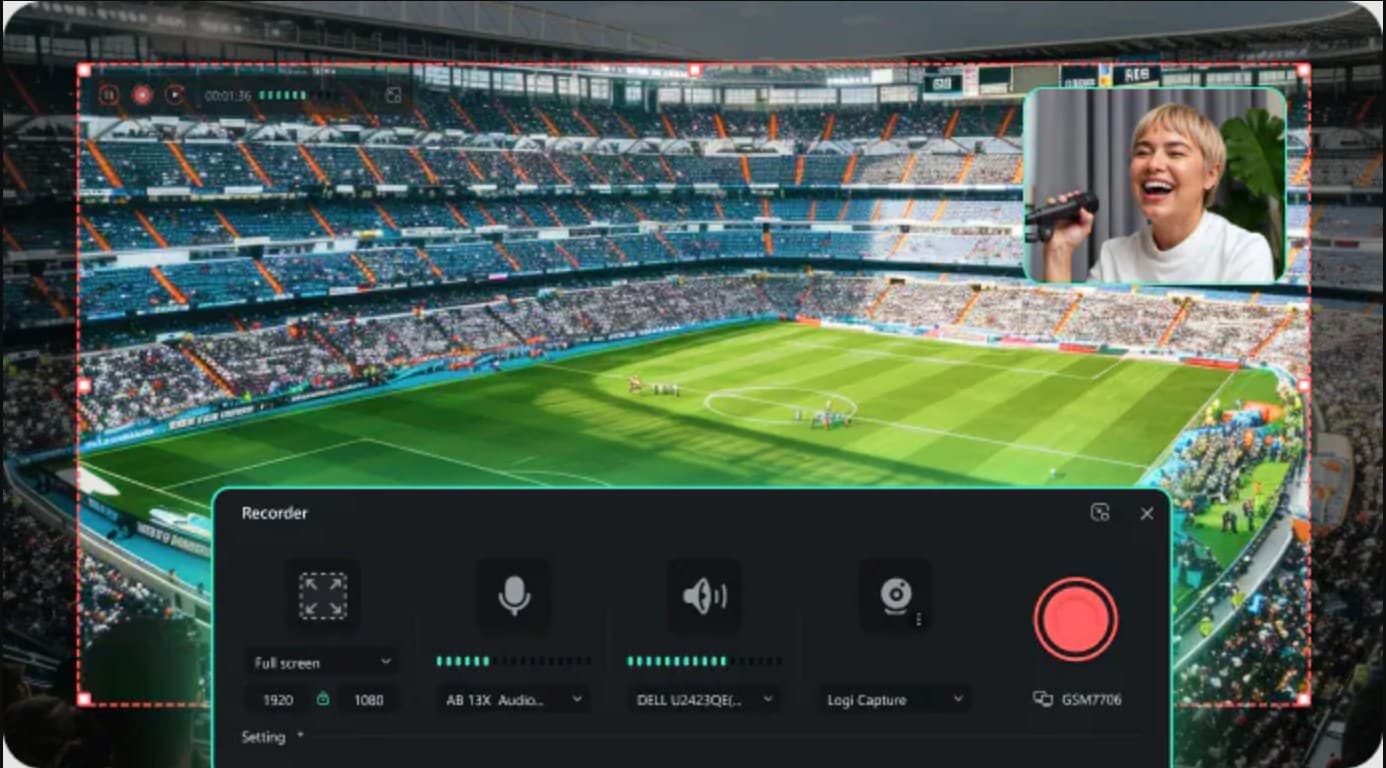
As a Kazam alternative, Filmora goes beyond just a screen recorder. Filmora makes the process seamless from start to finish. The record and stop button is easy to find. Click on each icon to enable or disable the feature, according to your needs.
Once you’re done recording, Filmora automatically opens the built-in editor. Enhance your recording by exploring the creative tools and adding your personal touch. Voila! Your video is ready in one go without switching apps.
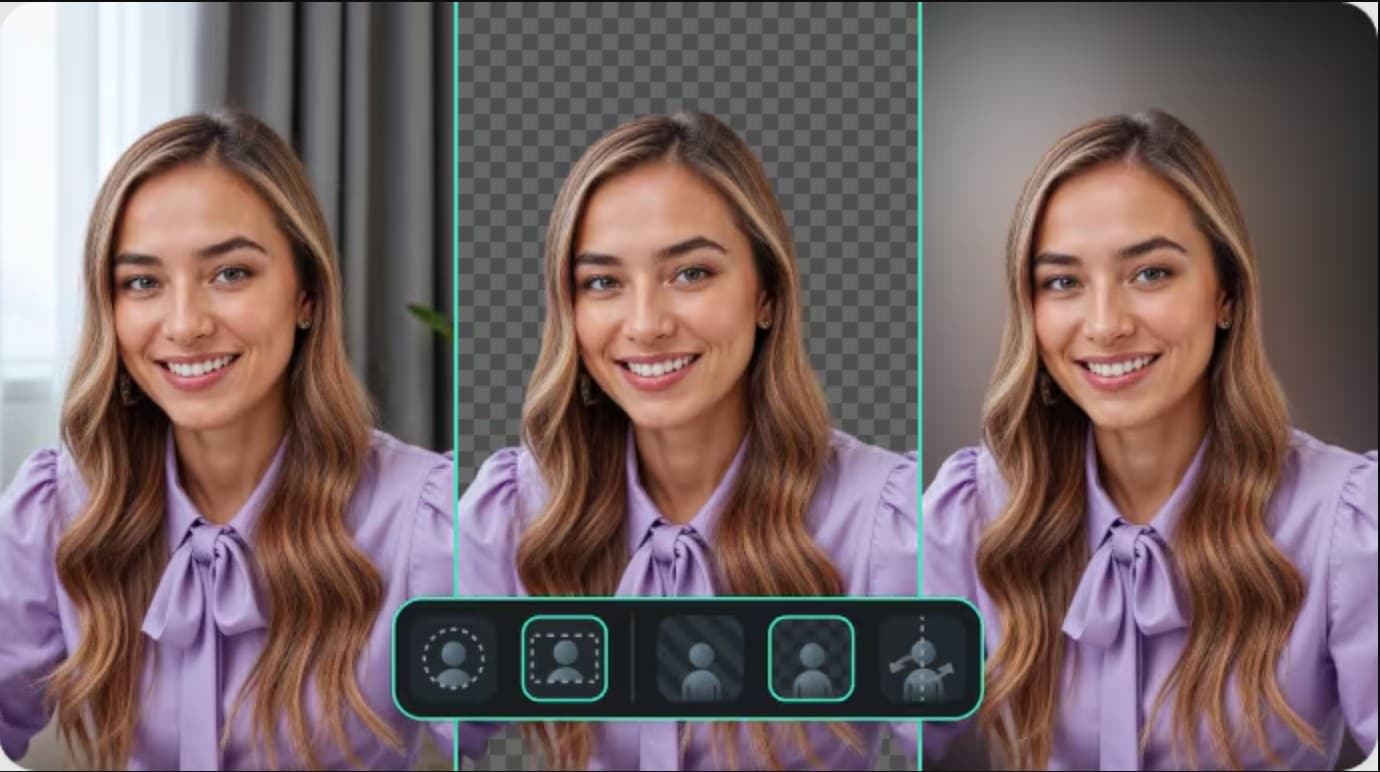
Customize Your Background
When capturing the webcam, feel free to adjust the background based on your preference. Blur your background or remove it for a distraction-free video. Want to keep it natural? Just mirror the webcam. Choose the webcam frame to your liking, whether it’s circular or rectangular. Everything is just one click away.
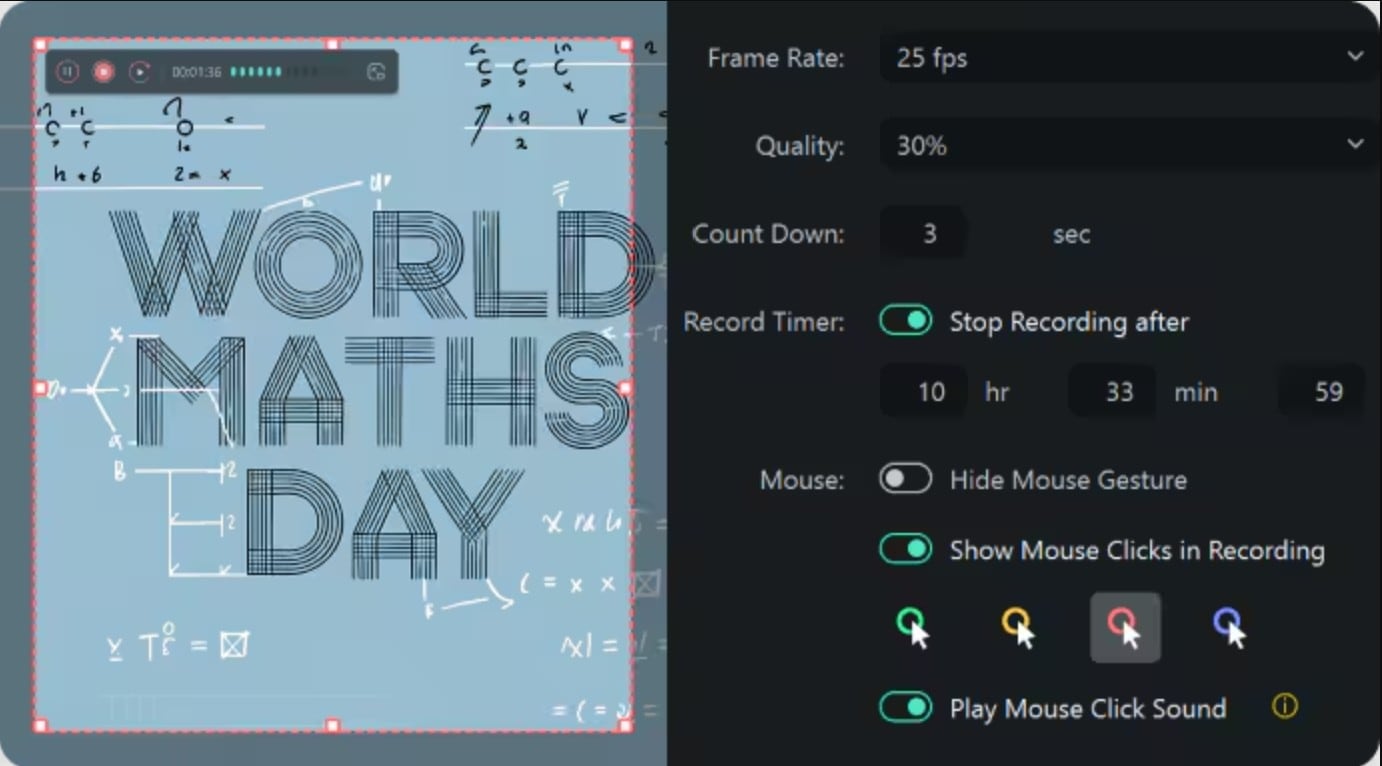
Full Recording Control
Personalize your recording setup with detailed control in Filmora’s screen recorder. Modify the frame rate and quality of video to match your project. Need extra seconds before recording starts? Just set the countdown timer. Schedule recording to end exactly when you want. Include your mouse–or not. Decide everything on your own.
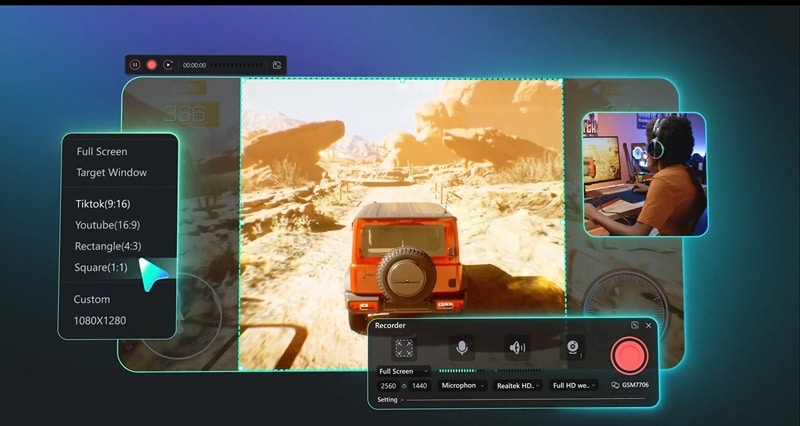
Match Ratio Format to Your Needs
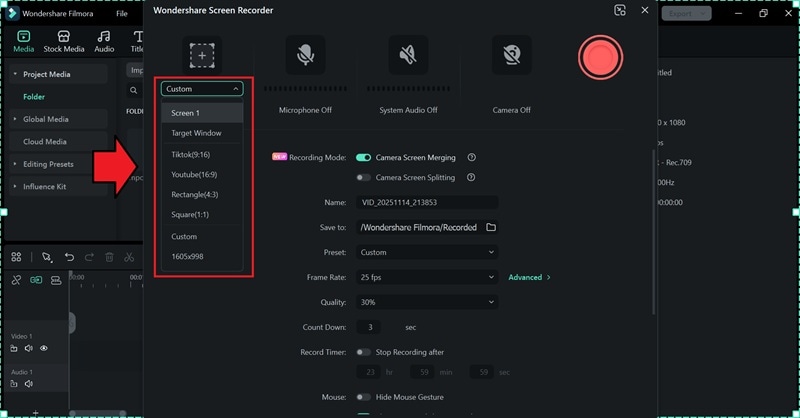
Filmora offers various ratio formats to match your project requirements. For content creators, Filmora provides formats tailored for YouTube and Tiktok. Can’t find what you need? You can always customize the ratio or the area you want to record.
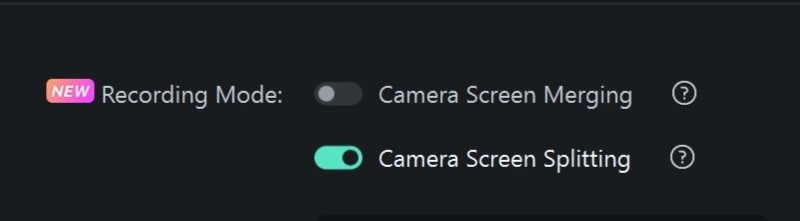
Camera Recording Mode
Edit your recordings more efficiently by setting up the Camera Recording Mode beforehand.
- When using Camera Screen Merging, your screen and webcam are recorded as a single track.
- Meanwhile, Camera Screen Splitting creates two separate tracks, giving you more flexibility in editing.
This way, you can have full control of screen and webcam recordings, even when capturing them simultaneously.
How to Use Screen Recorder in Wondershare Filmora
Despite its advanced features, Filmora stays easy enough for anyone to use. To start using it, make sure you have installed Filmora on your Windows or macOS desktop. If it’s done, here’s a simple way to start screen recording.
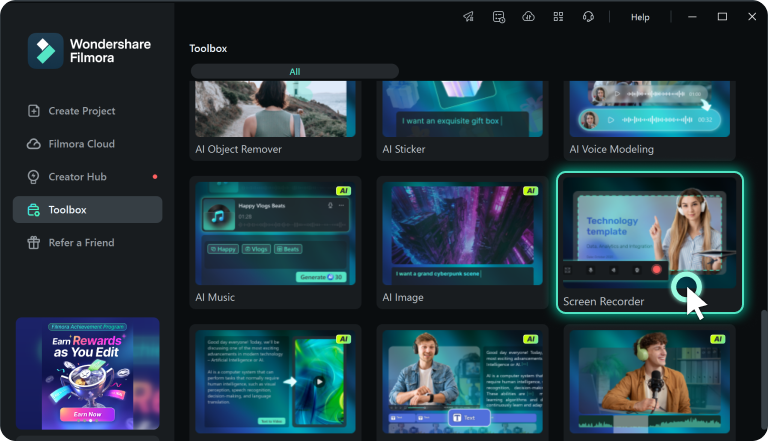
Step 1. Locate the Screen Recorder Option on Filmora
Open the Filmora application on your desktop. Find Screen Recorder in the Toolbox window. Click on it.
But if you are already on the editing workspace, you can access the screen recorder tool in Filmora by following the steps below:
- Click File to find the Record Media.
- It will expand three options: Record from Webcam, PC Screen, or Voiceover.
- To capture screen recordings, click on Record PC Screen.

Step 2. Adjust the Settings
Before you start recording, set up the recording settings that work best for you.
- Start by selecting the window or area that you want to capture.
- Click on the microphone or speaker to include audio.
- Click the camera icon to enable the webcam.
For more advanced settings, configure your preferred output, quality, and control options.

Step 3. Begin Screen Recording
When you are ready, press the red button to start recording. A short countdown will appear. Click on Start Directly to skip it.

While recording, a small pop-up window will appear on the top left of your screen.
- To pause, click on the Pause icon in the pop-up window.
- To stop, click on the Stop icon or press your designated hotkey.
Step 4. Edit Recording
Once the recording ends, Filmora automatically launches the editing window. Give your final touch to the video, such as crop, trim, merge, speed up, or combine it with other videos in your library.

Conclusion
No wonder the Kazam screen recorder has been very popular among Linux users for years. Its simple and clean interface makes it easy for anyone who wants to screen record. Not to mention the feature to broadcast live videos to streaming platforms. That said, Kazam is only available on Linux, which makes it hard to access for a lot of people.
Fortunately, Windows and macOS users have Wondershare Filmora as the best alternative to Kazam. Filmora keeps your workflow smooth and efficient. No need to switch between apps, record and edit the video right away. Filmora also hands you full control. Option you won’t find in most recorders, including Kazam screen recorder.
FAQs
-
Does the Kazam screen recorder use a watermark?
No, videos by Kazam screen recorder are free of watermarks. -
Can I edit the recording videos with Kazam?
No. You can’t directly edit videos using the Kazam screen recorder, as it is only a screen recording tool. However, after the recording is done, there is an option that leads you to edit the videos on the installed video editor on your desktop. As an alternative to Kazam, Wondershare Filmora supports you to directly edit the screen-recorded videos after they finish. -
Can I record sounds only using Kazam?
Yes. You can record your own voice from the microphone or sounds from the speaker.
