

 TL;DR:
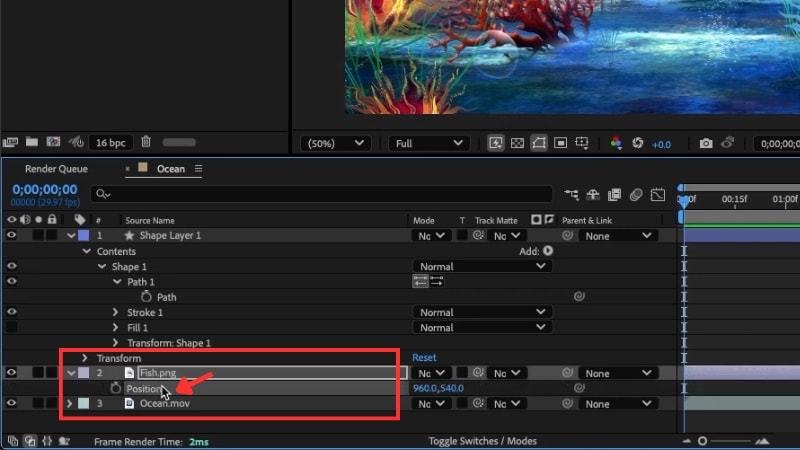
To animate an object along a custom path in After Effects on Mac, draw a route using the Pen Tool on a new Shape Layer, copy the path data using Command + C, and paste it directly into your target object's Position property using Command + V to generate movement keyframes automatically.
● To keep the object facing the correct direction of travel throughout the animation, apply the Auto-Orient Along Path setting, keeping in mind that sharp corners on your drawn curves can cause the object to spin.
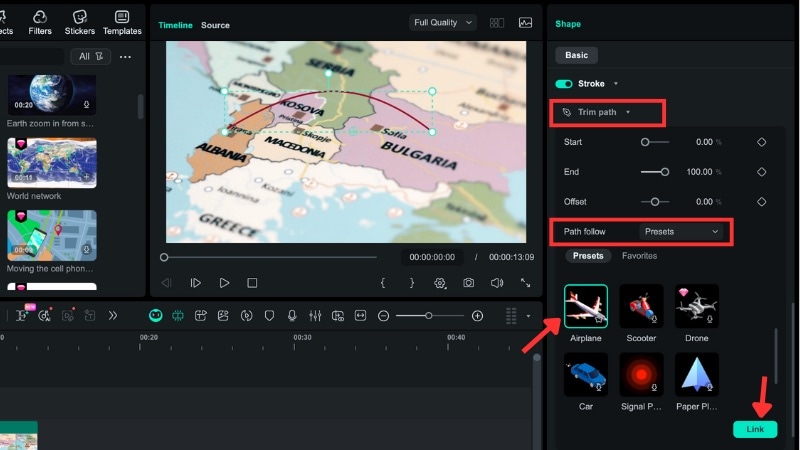
● Wondershare Filmora Version 15 provides a simpler alternative for beginners by allowing users to link built-in preset objects directly to a drawn route within the Shape editing panel, bypassing the need to open multiple panels or manually transfer path data.
● While After Effects relies on pasting data into Position property keyframes, Filmora controls the animation using Trim Path End value keyframes progressing from 0% to 100%, offering a Follow Path toggle and manual preview window rotation to manage orientation.
Ask AI for a summary
 ChatGPT
 Perplexity
 Gemini
 Claude
 Grok
Grok
Path animation is a powerful way to bring motion graphics to life—like animating logos, guiding arrows along a route, or making icons float naturally across the screen.
In After Effects, you can build these smooth curved movements using the Pen Tool, which lets you draw custom paths and attach objects to them.
In this guide, you'll learn how to animate along a path step-by-step, plus an alternative editor that delivers the same result with fewer steps. Let's get started..
Part 1. Before Making an Object Follow a Path in After Effects
When setting up an animation, you need to understand the workflow that makes an object to follow a path in After Effects. Begin by determining what type of content you want to create. Then, plan your path and the object that will move along it.
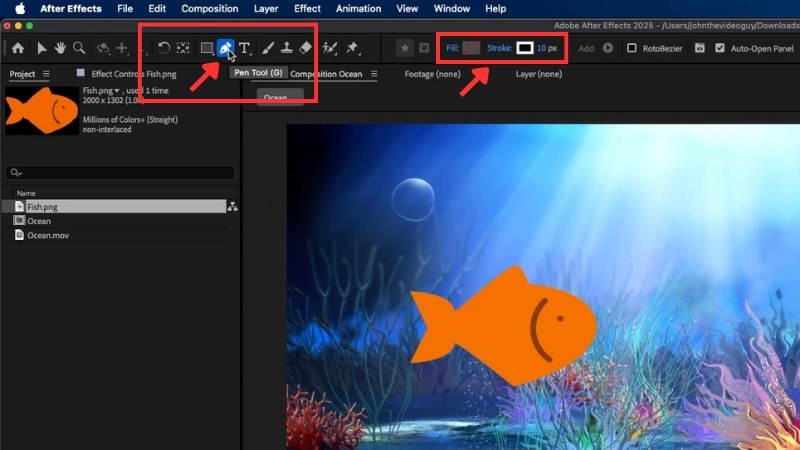
1. The Main Tool: Pen Tool
The Pen Tool is the main tool for drawing motion paths in After Effects. You can also access it by pressing G on your keyboard. The Pen Tool lets you plot anchor points that shape how the object travels when After Effects animates along a path.
Each point defines part of the path, and understanding how each click works will make the animation process smoother. Here are the three main click modes to know:
- Single Click: Adds straight anchor points for linear paths. This works well when you want steady or mechanical motion, such as a car driving on a straight road.
- Click and Drag: Creates curved anchor points for smoother arcs. Dragging adjusts the direction handles, giving you more control over how the path bends between points.
- Hold Option (or Alt on Windows): Adjusts the curve handle or changes the curve into a pointed corner. This helps you control how the path bends or turns.
As you draw, try to visualize how your object moves through the space. Once the path looks right, you'll use it to make After Effects move an object along a path (this will be explained in Part 2).
After Effects also has an Auto-Orient option that you can enable to make the object face the direction of movement. It keeps the motion smooth and helps every turn or curve flow naturally along the path.
2. Prepare the Object to Animate
Before making the object follow a path in After Effects, set up the object you want to move. You can animate any element, like an arrow, plane, car, or text icon, as long as it fits your scene.

Use a simple graphic that fits your project's style. For clear results, use a .PNG file with a transparent background so it blends neatly with your footage. If you don't have the right icon yet, you can find plenty of free and high-quality assets online.
Here are a few trusted sources:
- Flaticon - Great for flat-style icons, symbols, and simple illustrations.
- Pixabay - Offers many photos, icons, and transparent PNGs suitable for various themes.
- Freepik - Great for editable vector graphics, icons, and design packs that work well in After Effects.
Always check each site's license terms before using the assets in your video. Once your object is ready, let's continue to Part 2, where you'll move it along a path in After Effects.
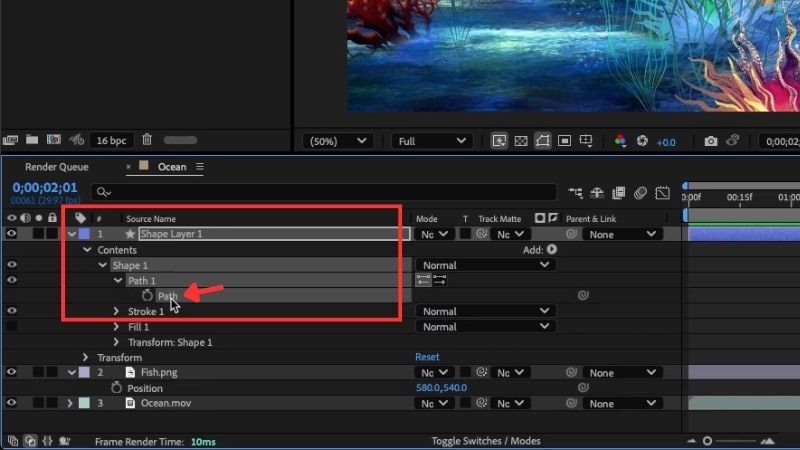
Part 2. How to Animate an Object Along a Path in After Effects
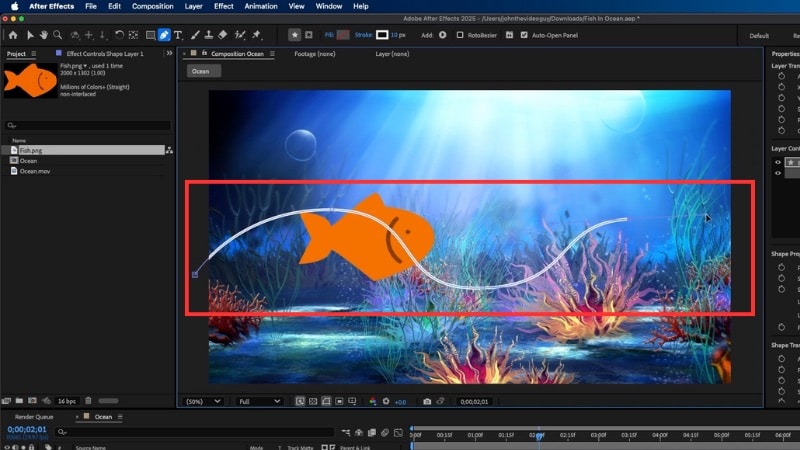
Now that you've prepared your icon or object, let's animate it along a path in After Effects. In this section, you'll learn how to draw the motion path with the Pen Tool. Plus, how to control the way your object travels across the scene.

Follow the instructions below to make an object move along a path in After Effects:
- Click on the composition to place anchor points and draw your path.
- Click once to make straight points, or click and drag to create curves for smoother turns.
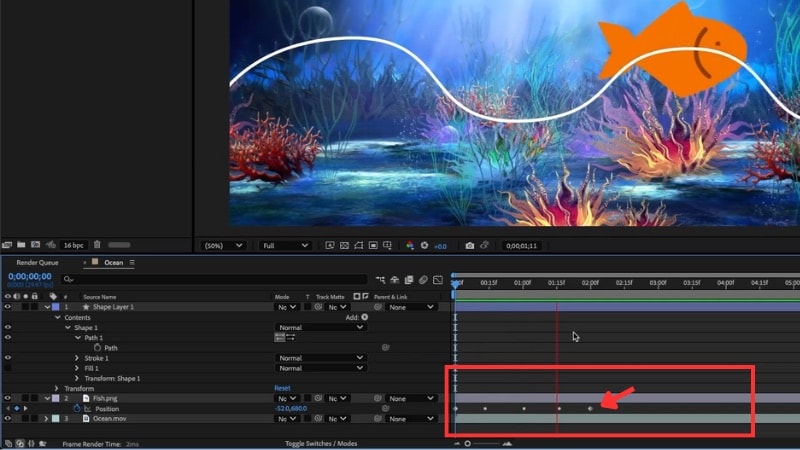
- Move the last keyframe farther along the timeline to slow down the motion.
- Move it closer to speed up the animation.
- Right-click the object layer and choose Transform > Auto-Orient.
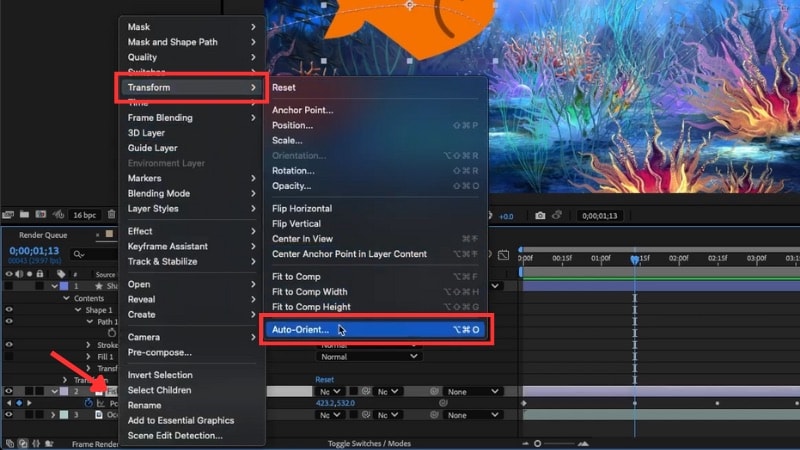
- In the pop-up window, select Orient Along Path and click OK.
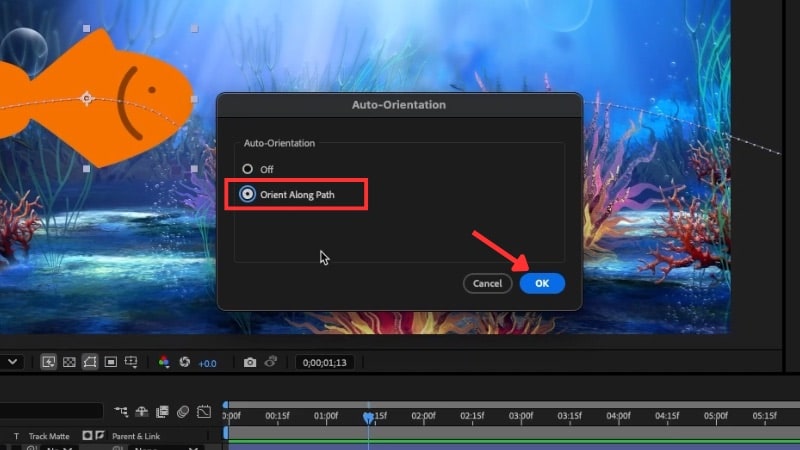
Once you complete these steps, you've successfully made the animation of an object follow a path in After Effects. You can use the same technique to animate icons, text, or other design elements for titles, maps, or motion graphics sequences.
Bonus: Alternative Editor for Animating an Object Along a Path
Have you tried to animate an object along a path in After Effects but ran into problems? The Adobe ecosystem has long been a benchmark in the design world. But for beginners, it can feel complex and hard to learn.

Here are some common issues people face when making an object follow a path in After Effects:
- Anchor points land in the wrong place,
- Bezier handles make turns hard to control,
- Auto-Orient points the icon in the wrong direction,
- The object spins at sharp corners, and
- Too many adjustments are needed for a simple route animation.
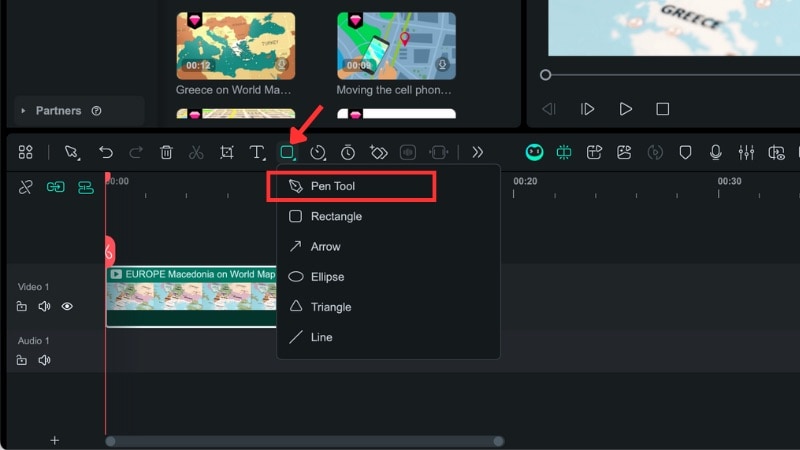
If these problems sound familiar, try an easier option. Wondershare Filmora now includes a Pen Tool in Version 15. It lets you create and animate motion paths like you would when you animate an object along a path in After Effects, but with fewer steps.

Why Choose Filmora for Path Animation
Here's how Filmora compares with the typical object follow path After Effects workflow:
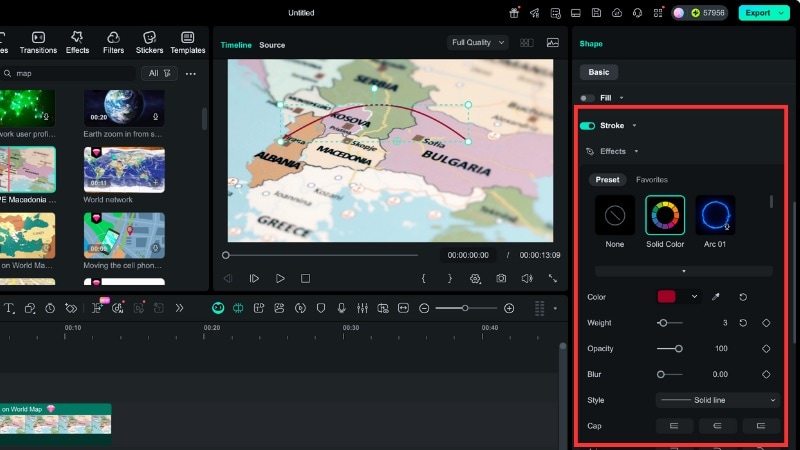
- Simple Setup: In After Effects, you need to draw, copy, and paste the path before linking it to the object. In Filmora, you can connect the object right from the path settings in the Shape editing panel.
- Built-in Preset Objects: Filmora includes ready-made objects that fit path animations, such as planes, cars, scooters, and map markers.
- Easy to Learn: Filmora keeps all controls, strokes, effects, and trim path settings in one panel. You can see everything while working instead of jumping between menus.
- Organized Timeline Editing: Filmora has a simple timeline where you can draw, animate, add text, and apply effects in one place. You don't need to pre-compose or open multiple panels like in After Effects.
- Auto Face Direction: Turn on Follow Path to make your object face the right way as it moves. It's one-click instead of several menu steps.
How to Make an Object Move Along a Path in Filmora
Follow the steps below to learn how to use Filmora's Pen Tool to draw and animate a path like this:


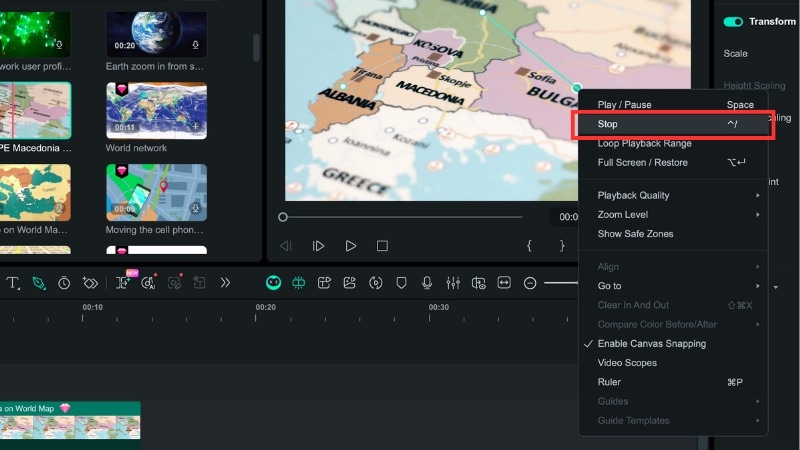
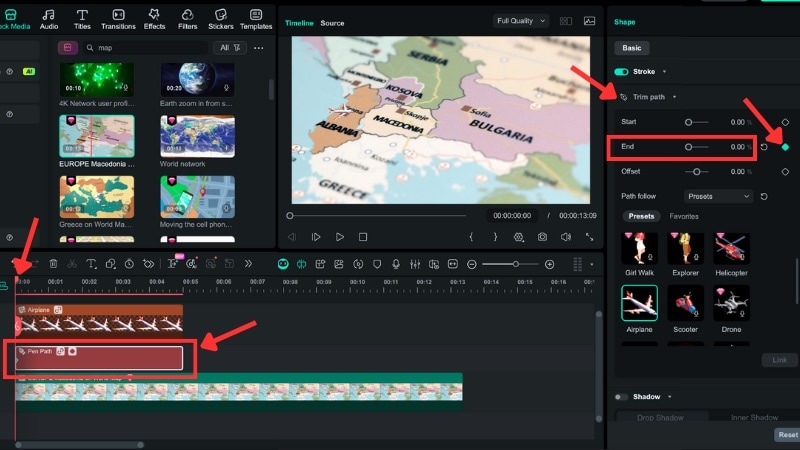
- Move the playhead to the start of the clip and set the End value to 0%, then add a keyframe.
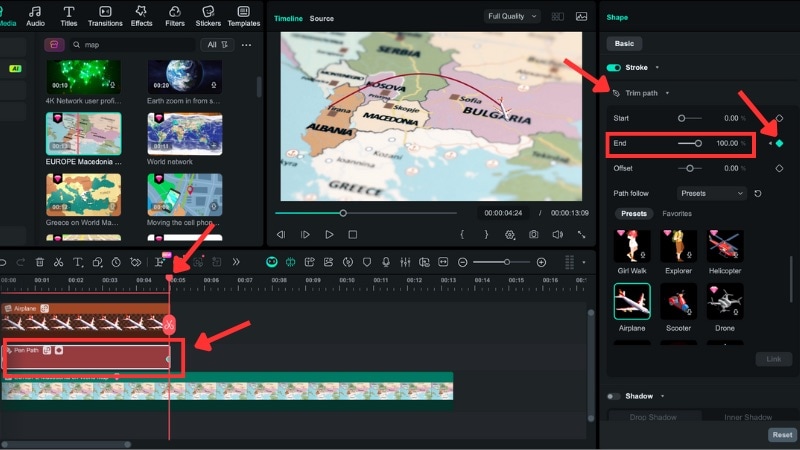
- Next, move the playhead to the end of the clip, change the End value to 100%, and add another keyframe.
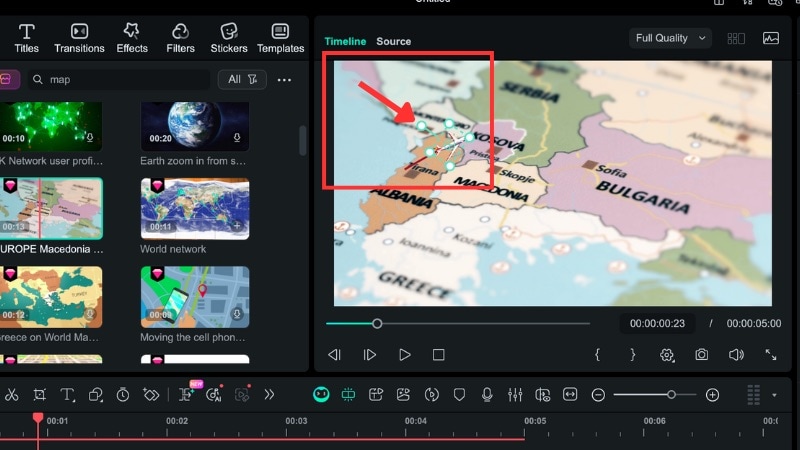
- Play the video to preview the motion.
Conclusion
Animating an object to follow a path in After Effects is a useful skill for creating smooth movement in your projects. With the Pen Tool, you can design routes, curves, or shapes and make icons, arrows, or text move precisely where you want.
If the After Effects animate along path process feels too complex, Filmora offers a simpler approach. You can achieve similar results without handling multiple layers or detailed setups.
Try Filmora first and see if you really need the After Effects move along path for your next animation.
💬 FAQs About Animating Objects Along a Path
-
1. Can I animate text to follow a path the same way?
Yes. You can use the same steps as you would for an object follow path in After Effects. Just select your text layer, copy the path you drew with the Pen Tool, and paste it into the text's Position property.
-
2. Why does my object spin at corners with Auto-Orient?
The spinning happens when your anchor points or curve directions don't line up properly. To fix it, adjust the path's direction handles or disable Auto-Orient and keyframe the object's rotation manually. This keeps the motion clean without sudden flips when you animate along a path in After Effects.
-
3. Is Filmora's Pen Tool workflow different on Windows vs Mac?
No. The workflow is the same across both systems. You'll find the Pen Tool under Drawing Tools, and all editing panels, path settings, and keyframe controls work identically. So, you can make an object follow a path in Filmora without worrying about OS differences.
