

 TL;DR:
Choose Canva to apply static outlines using standard strokes or shadow effects, but switch to Wondershare Filmora if your video project requires animating a custom path that draws itself around a subject.
● Canva's Stroke Style creates an inward-expanding border strictly for square or rectangular photos, while its Outline shadow effect accurately traces the exterior contours of irregular cut-outs and transparent stickers.
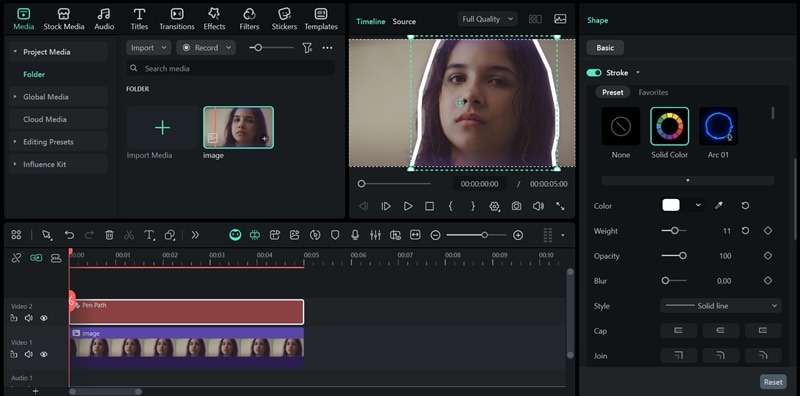
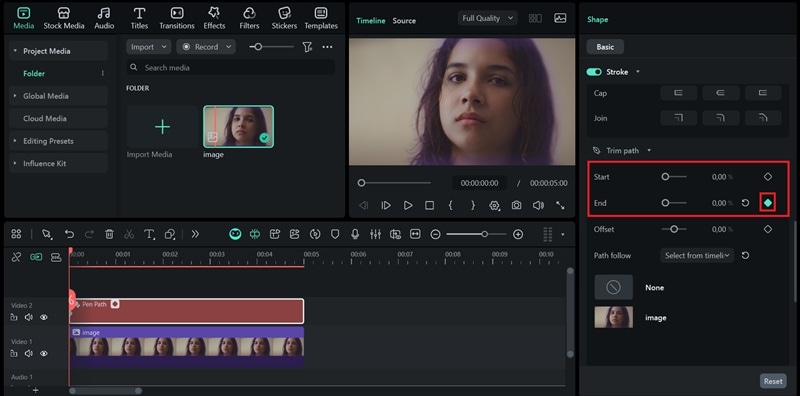
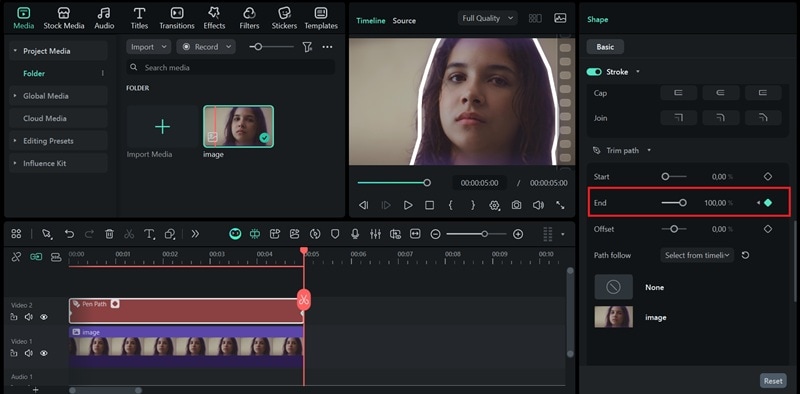
● Wondershare Filmora enables animated draw-on effects by requiring users to manually trace the image with the Pen Tool and animate the stroke's appearance using the Trim Path effect with start and end keyframes.
● Canva is best suited for generating static social media graphics in under five minutes, whereas Filmora is required when visual outlines must move, pulse, or synchronize precisely with moving video scenes.
Ask AI for a summary
 ChatGPT
 Perplexity
 Gemini
 Claude
 Grok
Grok
Adding an outline to your images and stickers is one of the easiest tricks to make your Canva designs really stand out. It's a simple effect, but it makes a huge difference when you want your visuals to pop against busy backgrounds or just look more polished overall.
Canva actually gives you a few different ways to do it, depending on what kind of image you're working with. Got a regular photo or shape? There's a method for that. Working with cut-out images or stickers? There's a different approach that works better.
We'll walk through the different methods of how to outline an image in Canva. By the time you're done reading, you'll know exactly how to make your designs look more eye-catching!

How to Add an Outline to Images in Canva
Canva gives you two main approaches for adding outlines, and picking the right one depends on what kind of image you're working with.
Method A: Basic Border or Stroke for Simple Shapes
This method works best when you're dealing with standard shapes like rectangles or squares. It's the most straightforward way of how to outline a photo in Canva, and you can adjust the border thickness and color to match your design.

How to Add an Outline in Canva:

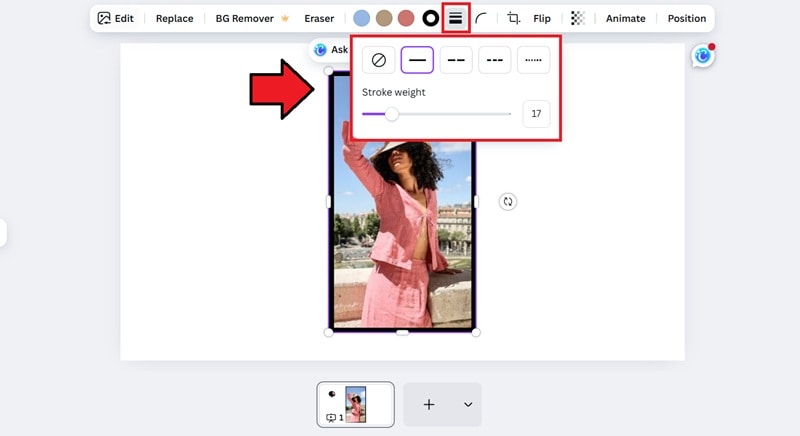
Limitation:
- Only works for images that already have regular shapes (square or rectangle).
- If you're working with irregular cut-out images or stickers with transparent backgrounds, the border will create a box around the entire element rather than following the shape's edges.
- The border actually sits inside the photo. When you increase the thickness, the line expands inward and takes up more space in the image.
If this method doesn't cut it, try the next option.
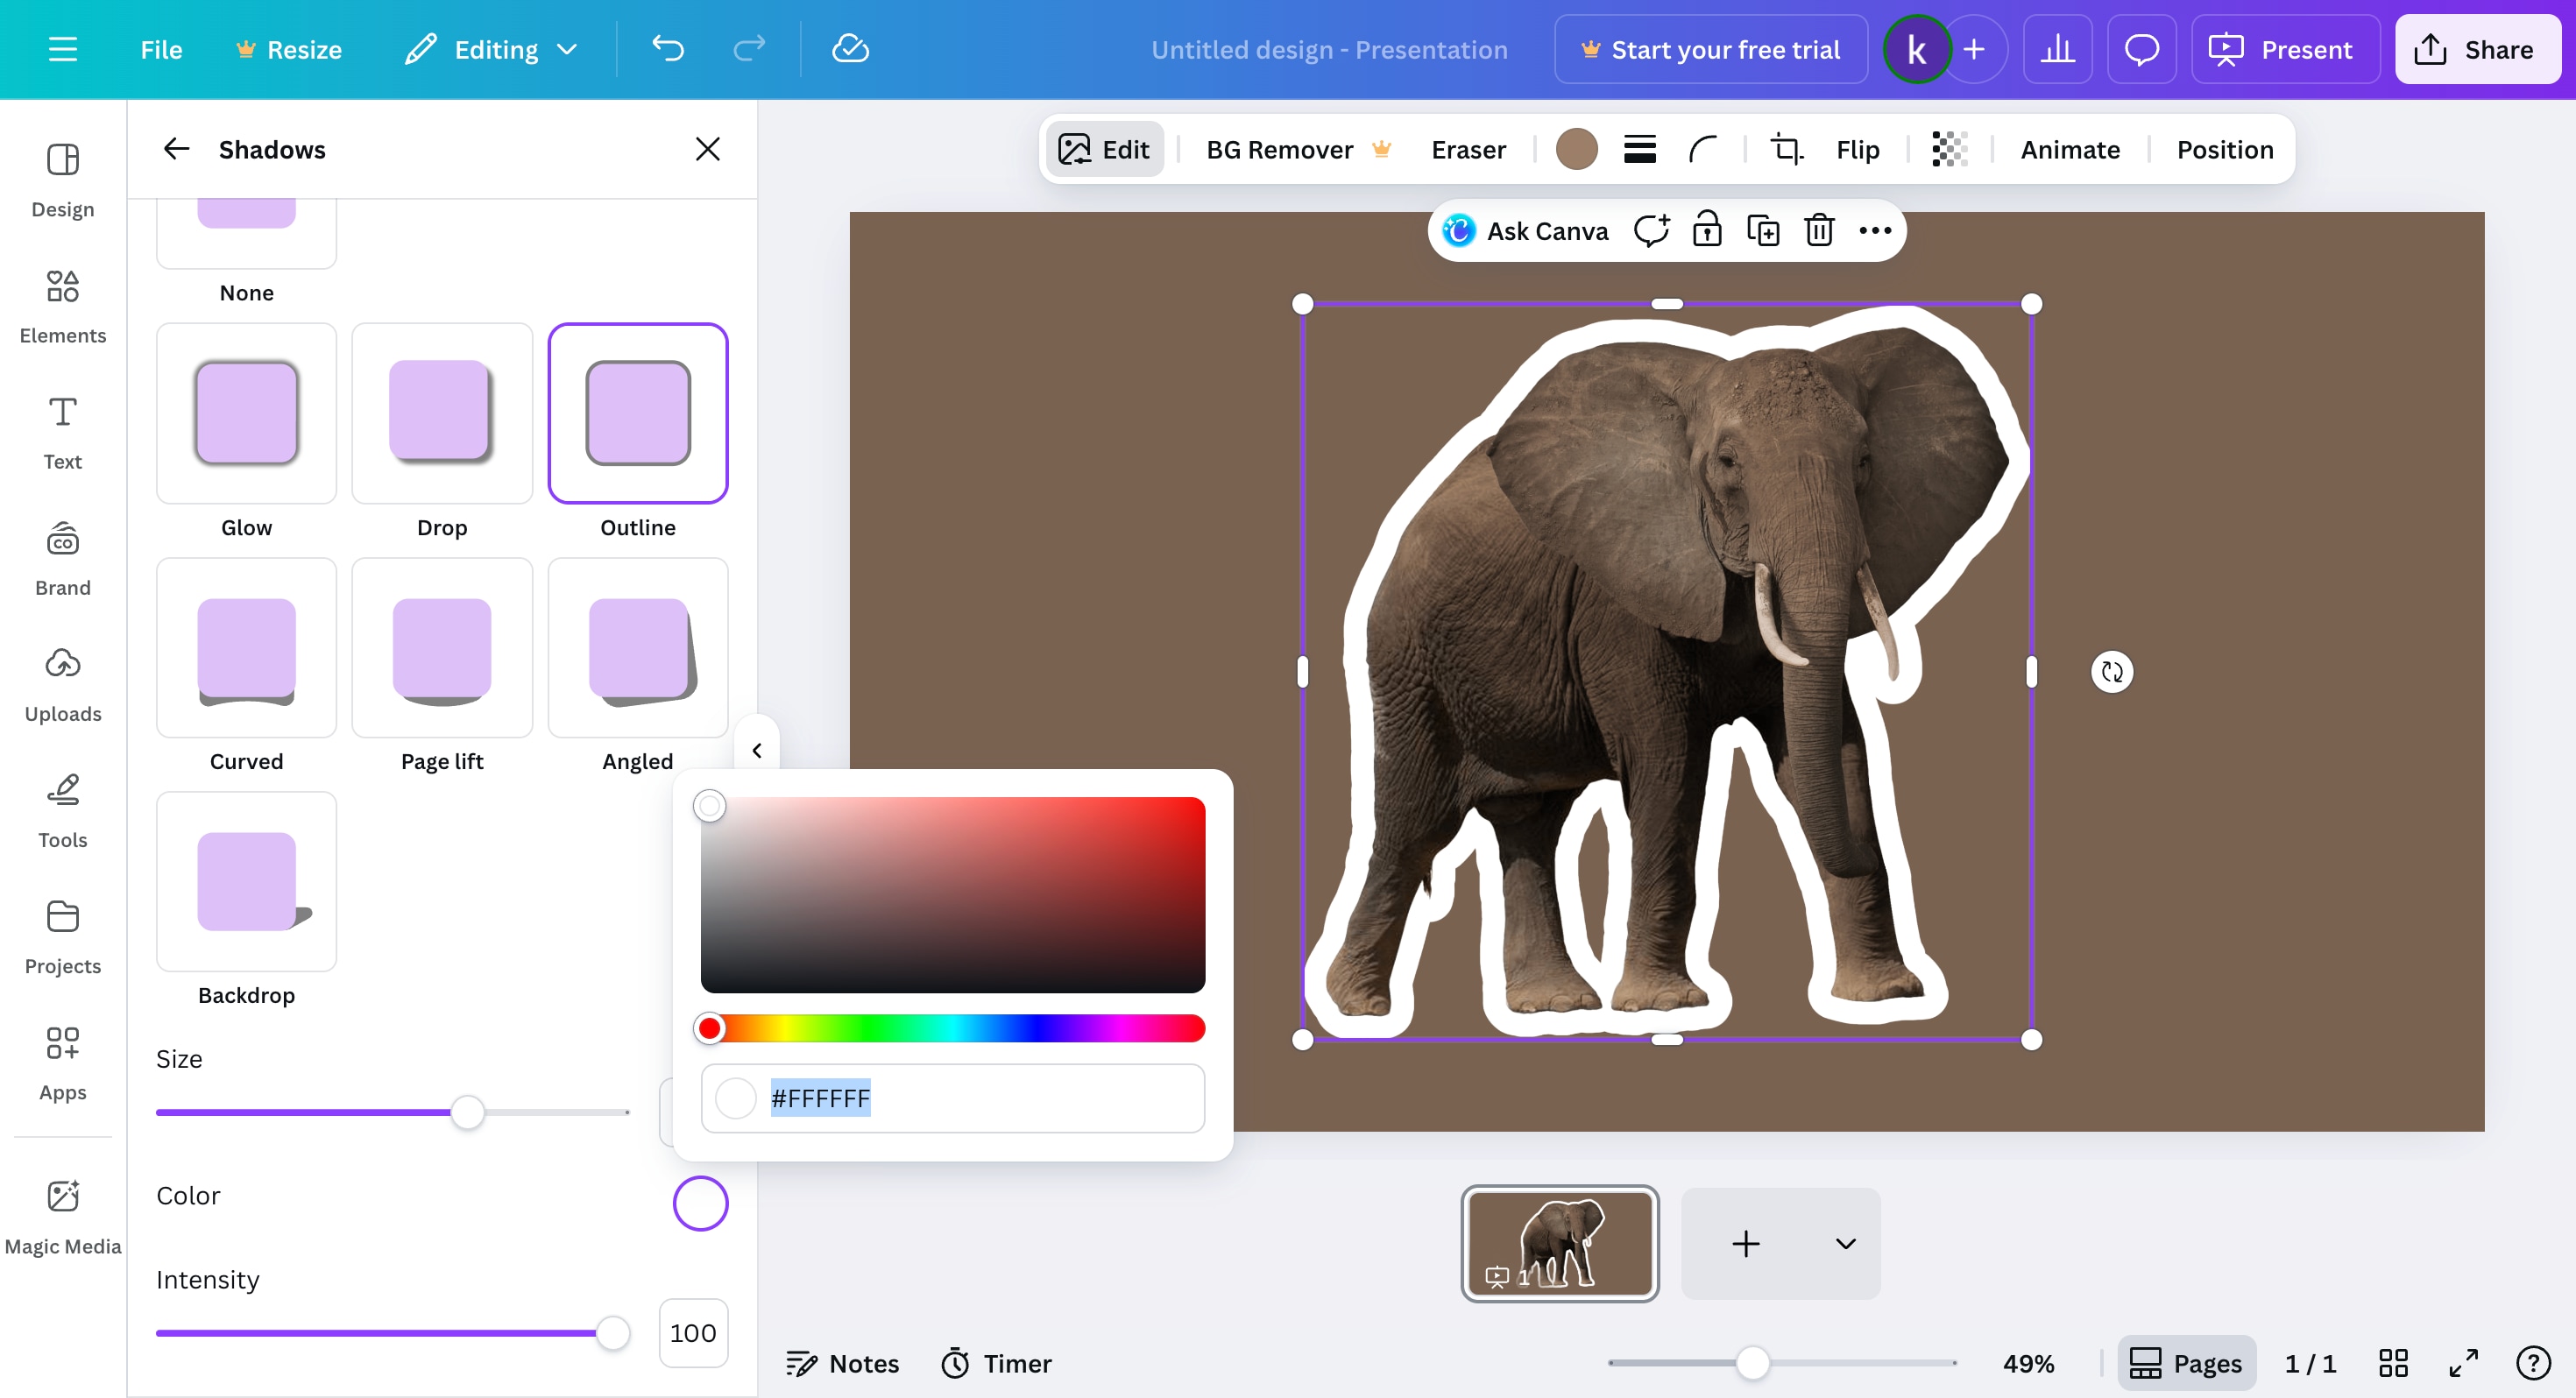
Method B: Shadow Outline for Cutout Images
When you need to outline irregular shapes, stickers, or images with transparent backgrounds, the shadow effect is your best friend. This technique creates an outline that follows the actual contours of your image, regardless of its complexity.

How to Make an Outline in Canva with a Shadow Effect:


Pro Tip: Creating a White Outline
Wonder how to add a white outline to an image in Canva? Simply follow Method B above, but when adjusting the color in Step 3, select white as your shadow color. This technique works great for any design where you need your subject to really pop off the background.
How to Outline an Image and Animate It for Dynamic Results
Static outlines work perfectly fine for most design projects, but they start to feel limiting once you move into video content. Movement naturally catches the eye, and a static border just sits there.
Canva doesn't really have tools for animating custom outlines. You can add some basic animations to elements, but you can't outline-draw itself on screen or pulse with your video's beat. For that kind of effect, you'll need Wondershare Filmora.
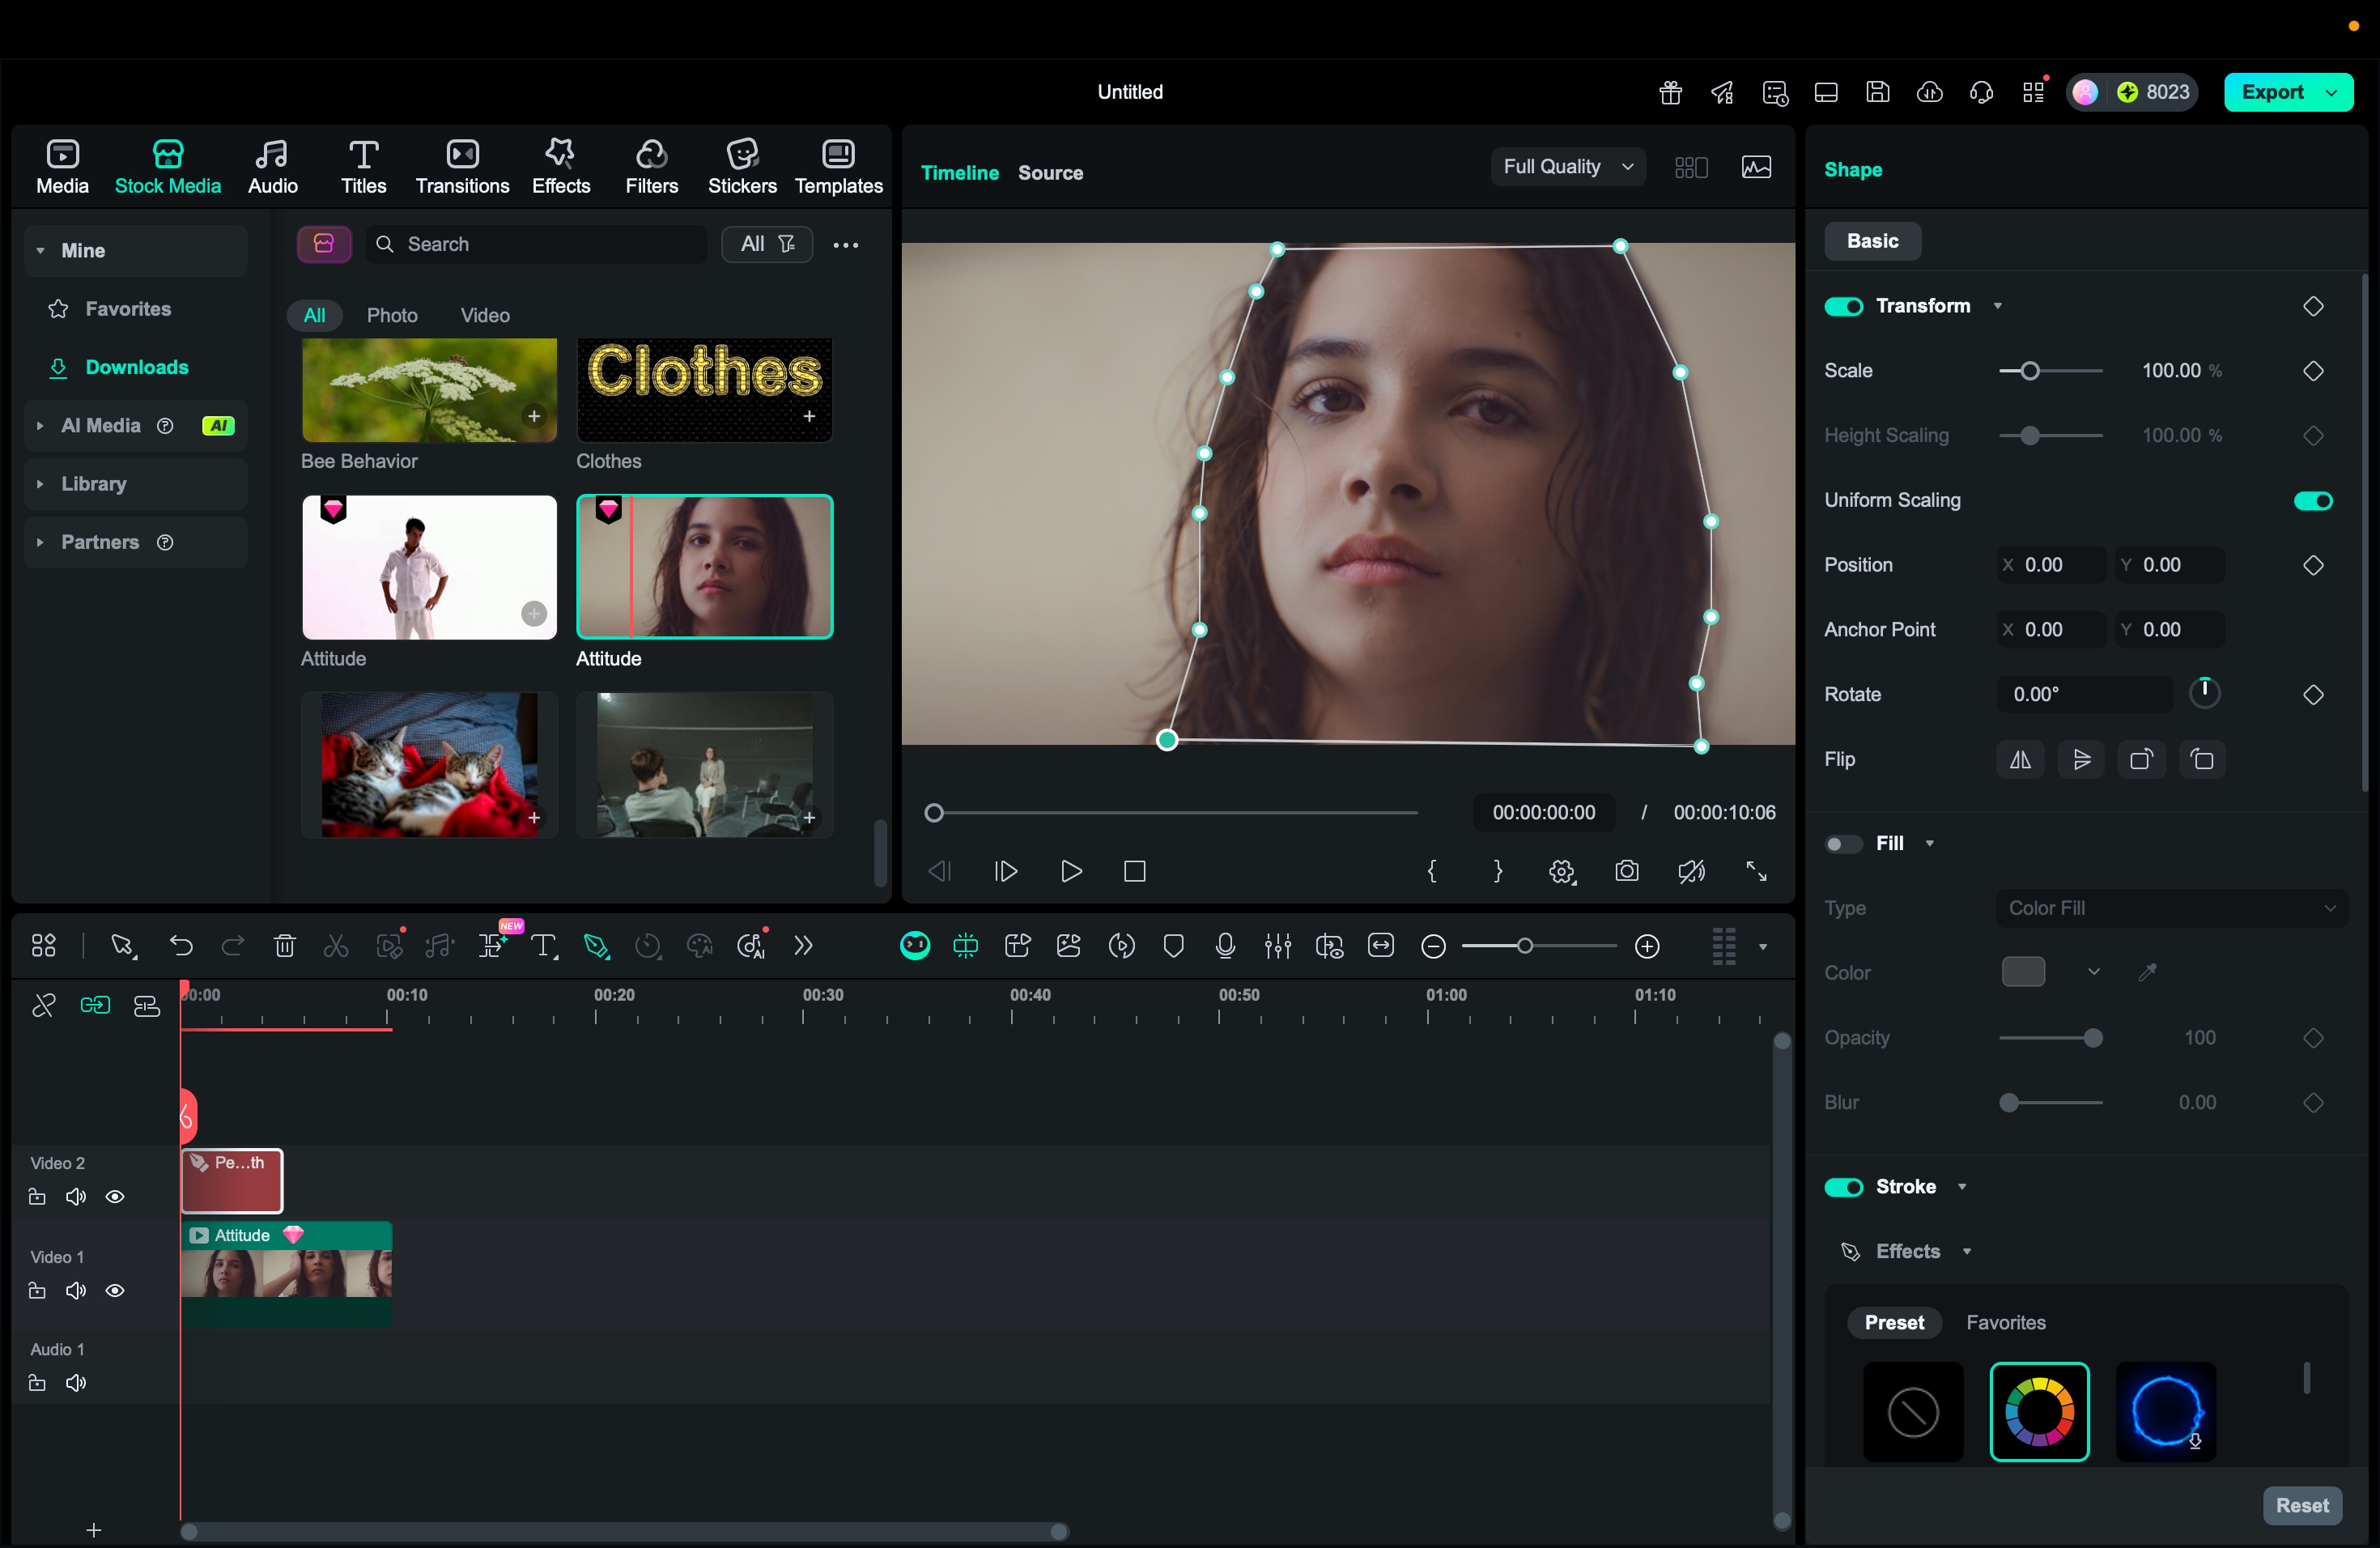
Filmora gives you full control over how your outlines animate using the Pen Tool. You can create smooth draw-on effects that are useful for YouTube intros, product highlights, tutorials, or social media posts. The workflow is direct and beginner-friendly, and you don't need any extra plugins or complex setup to achieve the effect.

Why Upgrade from Canva to Filmora
Canva works very well for static outlines and simple visual layouts. However, when you need to draw a custom line path, or your design needs animation or needs to fit into a moving scene, Filmora becomes a more suitable choice.

Filmora is built for video editing from the start, so it handles timing, motion, and keyframes naturally. This allows your outlined images to move, highlight, and interact within your video instead of staying flat.
Key Advantages of Using Filmora for Animated Outlines
- Designed for video and motion: Filmora provides tools that understand how visuals should move. When you want your outline to appear, fade, trace, or pulse in sync with the scene, Filmora gives you the controls to do that smoothly.
- Precise animation control: Instead of relying on a few preset animations, you can control how your outline appears frame by frame. You can create quick highlight traces, slow draw-on reveals, or outlines that pulse with background music.
- No switching between programs: In Canva, you would outline the image, export it, and then switch to a video editor to animate it. If something needs adjusting, you go back and forth. Filmora lets you outline and animate directly in the same workspace, which saves time.
- Professional results, accessible to beginners: The animated outline effects created in Filmora match the style used in modern marketing videos and popular YouTube channels. You do not need advanced software or motion graphics experience to achieve this look.
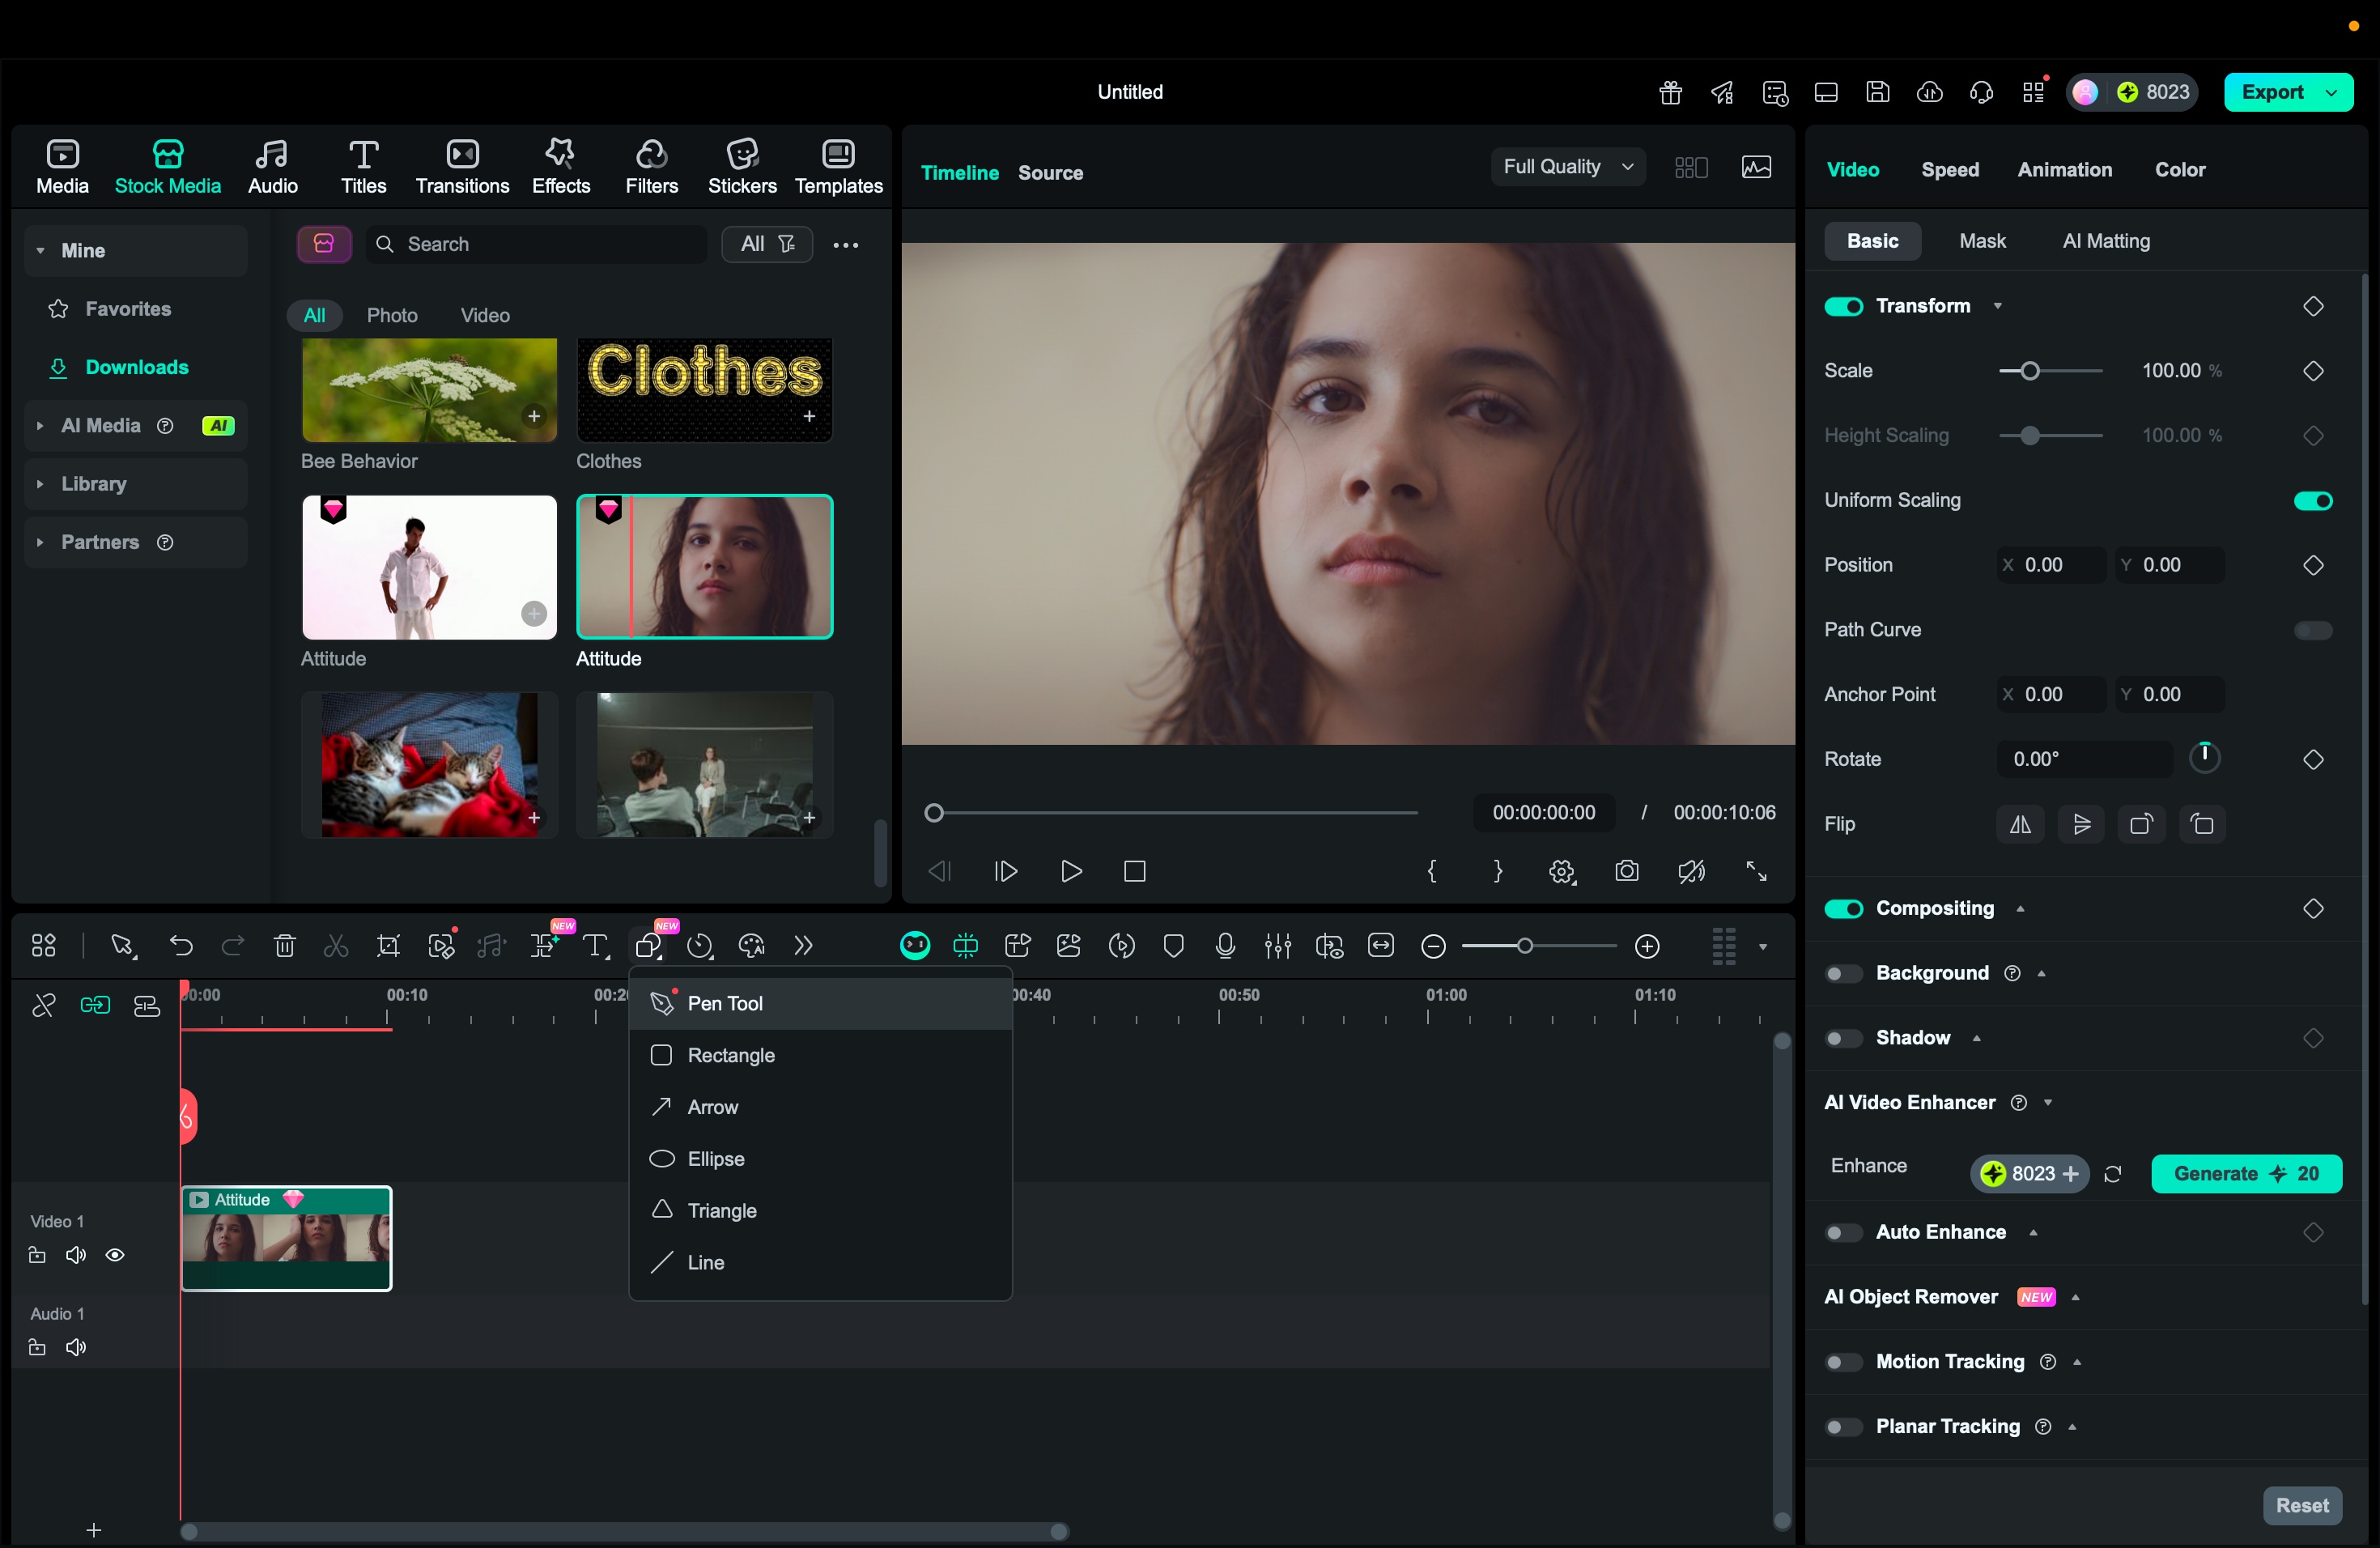
How to Create Animated Outlines in Filmora
Filmora uses two features for this: the Pen Tool to trace your outline, and the Trim Path to animate it. It sounds technical at first, but the workflow is straightforward once you try it.
Comparison: Canva vs Filmora for Outline Effects
| Feature | Canva | Filmora |
| Best For | Static images, social media graphics, quick designs | Video content, animated effects, motion graphics |
| Outline Options | Basic borders, shadow-based outlines | Custom outline paths with the Trim Path effect animation |
| Animation Capabilities | Preset animations only (fade, slide, etc.) | Full keyframe control, custom timing, complex movements |
| Learning Curve | Straightforward and beginner-friendly | Beginner-friendly, with more control options |
| White Outline Creation | Yes (using shadow effect) | Yes (direct stroke color and thickness settings) |
| Shape Handling | Works best with regular shapes or cut-out PNGs | Works with any shape and can trace custom paths |
| Pricing | Free version available, Pro starts at $13/month | Free trial available; subscription and perpetual license options vary by region |
| Export Options | PNG, JPG, PDF, basic MP4 | High-quality video export, including 1080p and 4K |
How to choose:
- If your final output is a still image or you need something designed in under 5 minutes, stick with Canva.
- If you're making video content and want outlines that move, pulse, or draw themselves on screen, Filmora is worth learning.
Most content creators end up using both tools; they just use each one for what it's actually good at.
Conclusion
Learning how to outline a picture in Canva is a simple way to make your designs stand out. Canva gives you simple, effective tools to create clean sticker-style outlines for static graphics, social posts, and presentations.
When your project moves into video or you want the outline to animate and guide attention, Filmora offers the control and motion tools needed to make that happen smoothly. Use Canva for quick, polished still visuals. Switch to Filmora when your outline needs to move with your story. Both tools work well, depending on what you're creating.
