

 TL;DR:
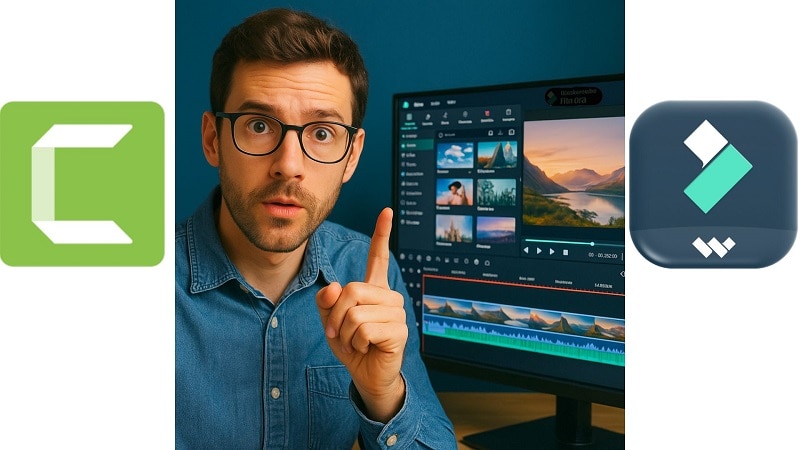
Filmora is the recommended video editing software for creators requiring AI-driven tools and multi-platform support, whereas Camtasia is best reserved for corporate training teams and educators focused on straightforward screen recording and tutorials.
● Camtasia 2025 lacks modern artificial intelligence capabilities such as AI text-to-video, smart object removal, and voice cloning, which are built directly into Filmora alongside advanced asset integrations like NewBlue FX and Boris FX.
● While Camtasia requires a minimum of 8 GB RAM on Windows 10 or macOS 11 and frequently lags when processing 4K footage or large project files, Filmora is optimized for stable performance on mid-range computers.
● Filmora offers cross-platform accessibility across desktop, iOS, and Android devices, whereas Camtasia is restricted solely to desktop environments and carries a steep annual starting price of US$179.88 for its Essentials plan.
Ask AI for a summary
 ChatGPT
 Perplexity
 Gemini
 Claude
 Grok
Grok
Camtasia has long been a trusted name in screen recording and basic video editing, especially in training and educational content. But in 2025, creators demand more—faster workflows, built-in AI tools, and affordable access to pro-level effects. In this in-depth Camtasia vs Filmora comparison, we’ll review Camtasia’s strengths and weaknesses and explain why Filmora is the smarter AI-powered alternative for modern video editors.
Part 1. What is Camtasia?
A popular screen recorder and video editor, Camtasia has been around for many years. TechSmith enables you to record your screen and create a variety of video materials, including how-to videos, online courses, product demos, and gaming modifications. Camtasia is easy to understand because the software has a straightforward layout. People generally choose it because they want solid tools that aren't too hard to master.
Camtasia remains popular for corporate training, tutorials, and screen recording. It offers simple editing tools and stable performance for smaller projects. However, compared to AI-powered video editors like Filmora, Camtasia lacks modern features such as AI object removal, voice cloning, or advanced motion tracking—tools that are now standard for competitive creators.
Key Highlights
- Camtasia Essentials: US$179.88 / year
- Camtasia Create: US$249.00 / year
- Camtasia Pro: US$599.00 / year
The latest Camtasia video editor update adds several cursor and visual effects. New Zoom Click and Burst Click effects make mouse actions easier to follow. Gradient, Negative, and Lens cursor styles provide additional options for highlighting movement.
For styling, the Torn Edge effect creates a paper-ripped look. CRT Monitor and Static Noise filters bring retro screen effects with scanlines and glitchy textures.
Zoom and pan animations are now more precisely placed by SmartFocus. You can also isolate your mouse cursor, making content swaps easier without needing to re-record.
Part 2. Features and Usability
The core appeal of Camtasia editing software lies in its simplicity. To begin creating, you don't have to be an expert in video editing.
Core Features
- Split/Merge: Easily break clips or stitch them together
- Text Overlay: Incorporate straightforward text annotations or titles
- Video Capture: Built-in capabilities for recording the screen and webcam
- Audio Capture: Record voiceovers or internal system audio
- Media Library: Reuse past projects, images, and music
System Requirements
| OS | Windows | Mac |
| Version | Windows 10 (64-bit) or later | macOS 11 or later |
| CPU | Intel 8th gen or newer, or AMD Ryzen 2000 | Intel Core i5 (4-core CPU) or Apple M1 or later |
| RAM | 8 GB (16 GB recommended) | 8 GB (16 GB recommended) |
| GPU | 2 GB (4 GB or more recommended) | - |
| Storage | SSD with at least 4 GB of free space | SSD with at least 4 GB of free space |
|
Show more
Show less
|
||
Part 3. What It's Like to Edit with Camtasia Video Editor
Camtasiamakes editing feel natural, but it has limitations. The user interface is simple. It has a timeline panel, a preview window, and a setup for effects.
Hands-On Feedback
Clips can be quickly trimmed and callouts added. Recording works smoothly. However, heavy edits, like layering effects or adjusting audio sync, can slow things down. There's no dynamic keyframe support, which restricts creative flexibility.
Performance Testing
While stable for basic edits, the software begins to lag with longer videos or 4K footage. Preview rendering takes time. Exporting is fast for 1080p but inconsistent for higher resolutions.
Part 4. A Closer Look: Strengths and Weaknesses of Camtasia Editing Software
Even with some fresh additions, the real value of the Camtasia video editor still depends on what you need it for. Let's break down the key strengths and where it falls short.
- As a beginner, you will find the interface neat and simple to understand.
- For the purpose of tutorials and demos, screen recording is both sharp and smooth.
- Editing tools cover most basics: trimming, audio, overlays, and callouts.
- Voice cleanup and background noise removal work well.
- Works well with other TechSmith tools, such as Snagit.
- The price is high compared to other editors with more features.
- Struggles with large files; may lag or crash at times.
- Transition and template options are limited.
- Exporting long videos can be time-consuming.
- No mobile editing app (Filmora works on desktop + iOS + Android).
- No support for 3D video editing.
- No built-in video stabilization feature.
- No built-in modern AI tools like auto-captions or smart object removal.
Part 5: Who Is It For?
The simplicity of the Camtasia editor makes it great for certain use cases, but not all.
Recommended For:
- Corporate training teams
- Software product walk-throughs
- Customer support videos
- Teachers creating classroom content
- HR departments building onboarding guides
Not Ideal For:
- TikTok or YouTube Shorts creators
- Editors looking for rich visual effects
- Anyone working with multi-camera footage
- Film-level or commercial-grade production
Part 6: Filmora: A Smarter AI Alternative to Camtasia Editor
If Camtasia editing software feels restrictive in 2025, you're not alone. Today's creators expect tools to be more than just functional; they should be fast, flexible, and smart.

A modern video editor must:
- ✅ Offer intuitive UI + deep features
- ✅ Handle screen recording and timeline editing fluidly
- ✅ Include AI-assisted capabilities
- ✅ Provide rich effects, filters, and media assets
- ✅ Be affordable and updated regularly
Why Filmora is the Smarter Alternative
If you love Camtasia’s simplicity but need AI tools and a richer creative toolkit, Wondershare Filmora is your answer. It offers all of Camtasia’s core strengths—plus AI-powered editing, richer effects, and cross-platform support. From auto subtitles and AI portrait cutout to motion tracking and AI voice cloning, Filmora delivers speed, flexibility, and pro-level results without the high hardware requirements or pricing of Camtasia.
Filmora is made for people who are just starting out and others who are more experienced. The layout is organized, and it operates well even on average PCs. It's available for desktop and mobile, and the pricing is more affordable.
A Look at a New-Gen Editing Solution
Everything from speed ramping, green screen, auto-reframe, to motion tracking and audio beat sync is built in. Filmora also includes:
- AI Vocal Remover
- AI Voice Cloning
- Auto Captions
- Smart Cutout and Masking
- AI Thumbnail Generator
Free version available, the premium version includes constant updates, AI credits, and cloud storage, a much better value compared to Camtasia's one-time but limited license.
- Capterra: Also maintaining an average of 4.5, it received numerous accolades for “ease of use” and “value for money.”
- G2: Praised for balancing simplicity with sophistication, strong AI features, and an easy-to-use interface.
- TechRadar (mobile app): Notes Filmora's effective basic tools and user-friendly design, while pointing out limitations in the free version due to export resolutions.
Camtasia vs Filmora – Feature Comparison Table
| Feature | Camtasia 2025 | Filmora 2025 |
| Screen Recording | ✅ Yes | ✅ Yes + AI Enhancements |
| AI Tools | ❌ None | ✅ Auto Captions, AI Object Removal, AI Voice Cloning |
| Effects Library | Basic | Advanced, regularly updated |
| Performance on Mid-Range PCs | Average | Optimized |
| Mobile App | ❌ No | ✅ Yes (iOS & Android) |
| Price | Higher | Lower & Flexible |
Conclusion
Camtasia is still a solid option for simple training videos, but it struggles to meet the creative demands of 2025. Filmora, with its AI-powered editing tools, intuitive interface, and budget-friendly plans, offers a more complete solution for both beginners and pros. If you’re deciding between Camtasia vs Filmora, the choice is clear—Filmora is the future of AI video editing.
