
 100% Security Verified | No Subscription Required | No Malware


 ChatGPT
 Perplexity
 Gemini
 Claude
 Grok
Grok
Sourdough bread is a rustic, flavorful bread made from a fermented dough using a sourdough starter. This starter is a mix of flour and water that captures wild yeast and bacteria to help the bread rise. For beginners, watching a sourdough bread video tutorial makes it easier to understand the steps. It shows you each step so you can bake with confidence.
This tutorial is here to guide you from preparing your sourdough starter to baking your first loaf. You'll find a video on how to make sourdough bread and the recipe itself. Keep reading to learn the basics, watch the videos, and bake your own sourdough bread at home.
Before you dive into the sourdough bread recipe, take a minute to prep everything you need. It's easier when you're not scrambling for tools or ingredients in the middle of mixing. This part is for you if you're new to baking sourdough bread.
You'll walk through the basics, tools, and ingredients to use. Each section has a short YouTube video about sourdough bread to help you feel more confident before you even touch the flour.
Equipment You'll Need to Bake a Sourdough Bread
You don't need fancy stuff, but the right baking tools can make your life easier. Watch Sourdough Bread Baking Equipment | Sourdough for Beginners for a quick look at the basics of your first sourdough loaf.
Here's a simple list to get you started:
- Mixing bowl: Large enough to hold your dough without it spilling over. A glass or stainless one works best.
- Digital kitchen scale: This helps you measure ingredients accurately. Sourdough needs that kind of precision.
- Bowl scraper: Helps handle sticky dough and clean up after.
- Bench scraper: This makes handling sticky dough easier and keeps your counter clean.
- Dutch oven: This traps steam while baking and gives you that crisp crust.
- Bread lame or sharp knife: It's used to make shallow cuts on the dough. Those cuts help the bread rise nicely in the oven.
- Proofing basket: Also called a banneton. It helps your dough hold shape during its final rise.
- Clean towel: You'll use this to cover your dough as it rests.
- Spatula and spoon: For mixing and folding your dough.
Still figuring out which baking tools are worth getting? This video, 10 Sourdough Tools For Life Changing Bread, shows 10 sourdough tools bakers love.
Ingredients for Sourdough Bread Recipe
Sourdough is simple, but each part plays a big role in the final bread. The ingredients matter, and so does how fresh they are. Here's what you'll need.
- Bread flour: Stick to white bread flour for starters. It gives your dough the structure it needs. You can experiment later, but this one's a safe choice for your first loaf.
- Fine sea salt: It helps control fermentation and brings out the flavor.
- Filtered water: Use filtered or boiled and cooled water.
- Active sourdough starter: It's essential.
If you're a beginner, watch How to Make a Sourdough Starter From Scratch to see how to make it easily:
Once you've got your baking tools and ingredients ready, you're set to move on. The next part will walk you through the sourdough-making process.
Part 2: How To Make a Sourdough Bread: Step-by-Step (Video Included)
Now that you have your tools and ingredients ready, it's time to bake your first sourdough loaf. This part will guide you through each step, from feeding your starter to baking the bread.
Watch this beginner-friendly YouTube tutorial on how to make sourdough bread (Amazing Sourdough Bread Recipe) before or while you follow the steps.
Follow these steps to make a sourdough bread:
01of 10Feed Your Sourdough Starter
Give your sourdough starter some bread flour and water. This wakes it up and gets it bubbly and active.
- Use equal parts starter, flour, and water.
- For example: 50g starter + 50g flour + 50g water.
- Mix it in a clean jar, cover it loosely, and let it sit at room temperature.
- It usually takes 4 to 6 hours to double in size and get bubbly.
Watch How to Feed Sourdough Starter for the basics of feeding.
How do you know it's ready to use? Check your sourdough starter and see if there are lots of bubbles and if it's grown twice as big. Try the float test to be sure.
02of 10Mix the Dough
Start by mixing the flour, salt, water, and starter in a large bowl. Mix well with your hands or a dough scraper, then let it rest for 30 minutes to an hour. This is called autolyze, which helps the dough to be softer.
Here's a basic recipe:
- 500g bread flour
- 150g active sourdough starter
- 250g water (start with less, add more as needed)
- 10g fine sea salt
03of 10Bulk Fermentation
Let the dough rise at room temperature for about 4 to 12 hours, depending on your room temp. During this time, you'll do a series of stretches and folds to build structure.
Do it like this:
- Wait 30 minutes
- Wet your hand, stretch one side of the dough up, and fold it over
- Turn the bowl and do it 3 more times
- Do 4 sets spaced out every hour
You'll see the dough become smoother and puffier. Cover the bowl after each set.
04of 10Shape the Loaf
The dough is ready when it appears airy and has increased in volume twice. Lightly flour your work surface, then ease the dough onto it. Then, pull the edges into the center and flip it over. Use a bench scraper if needed. Tuck the dough under itself to create tension on the surface. It should feel firm, not loose.
For a detailed guide on shaping a round sourdough bread, watch this YouTube video: For Beginners: Shaping A Round Sourdough Boule.
If you prefer to make oval sourdough bread, here's a tutorial: Sourdough Baking 101: Master Our Pre-Shaping and Shaping Method.
05of 10Bench Rest
Cover and rest the dough seam-side down on a lightly floured area for 20 minutes. If it spreads out too much, reshape it using the same method as above.
06of 10Tighten the Loaf
Flour your hands and gently cup the sides of the dough. Shape it by folding the edges down and under. Slide the dough in a circular motion on the counter to tighten it further. Avoid over-flouring the surface to maintain some stickiness, which helps in shaping.
07of 10Cold Fermentation (Overnight Proof)
Place the dough seam-side up in a proofing basket or any bowl lined with a floured towel. Cover the bowl with a tea towel and place it in the fridge for at least 8 hours. The dough will rise a bit more and feel firmer.
08of 10Preheat Oven and Pot
Place your Dutch oven (or other oven-safe pot with a lid) inside your oven. Preheat it at 500°F (260°C) for 30 to 60 minutes.
09of 10Score the Dough
Remove the dough from the fridge. If using a Dutch oven, place the dough on a piece of parchment paper. Using a bread lame or sharp knife, score the top of the dough with a shallow cut at a 45-degree angle.
10of 10Bake the Bread
Place the dough into the preheated pot. Cover and bake at 450 degrees (F) for 20 minutes. Then, remove the lid and continue to bake the sourdough bread (uncovered) for 40 minutes or until golden brown. Take it out and let it cool on a rack for at least 1 hour before slicing. This helps finish the baking inside.
Part 3: How To Make a Sourdough Bread Video Tutorial
So, you've baked a few loaves. And now you're thinking of sharing your sourdough process on video. It makes sense. People look up a sourdough bread recipe video when they want to start baking.
However, making a good sourdough video tutorial needs more than just a camera. You'll want your video to be easy to follow, clear to watch, and helpful for beginners. Wondershare Filmora has several tools to help you polish your video and keep things simple for your viewers.
 secure download

Fix the Lighting and Make It Look Better
Baking at home doesn't always come with the ideal lighting. You could have shadows, dull colors, or overexposed shots. With Filmora tools for color correction, you can adjust how your sourdough recipe video in a few steps:
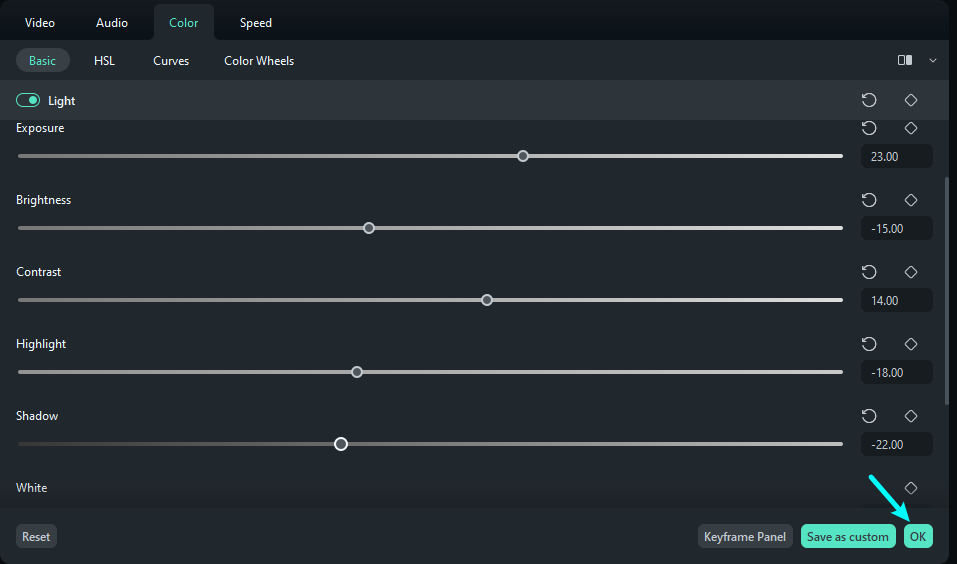
01of 03Access Color Settings
Click your sourdough video tutorial in the timeline, then go to the Color tab on the left.
02of 03Enable Light Adjustments
Under the Basic tab, enable the Light option.
03of 03Adjust Visuals
Use the sliders to tweak exposure, contrast, and brightness.
Add Captions So People Can Follow Easily
Use the AI speech-to-text tool in Filmora to create captions for your baking tutorials. Here's how to add captions to your video before posting your sourdough bread recipe on YouTube:
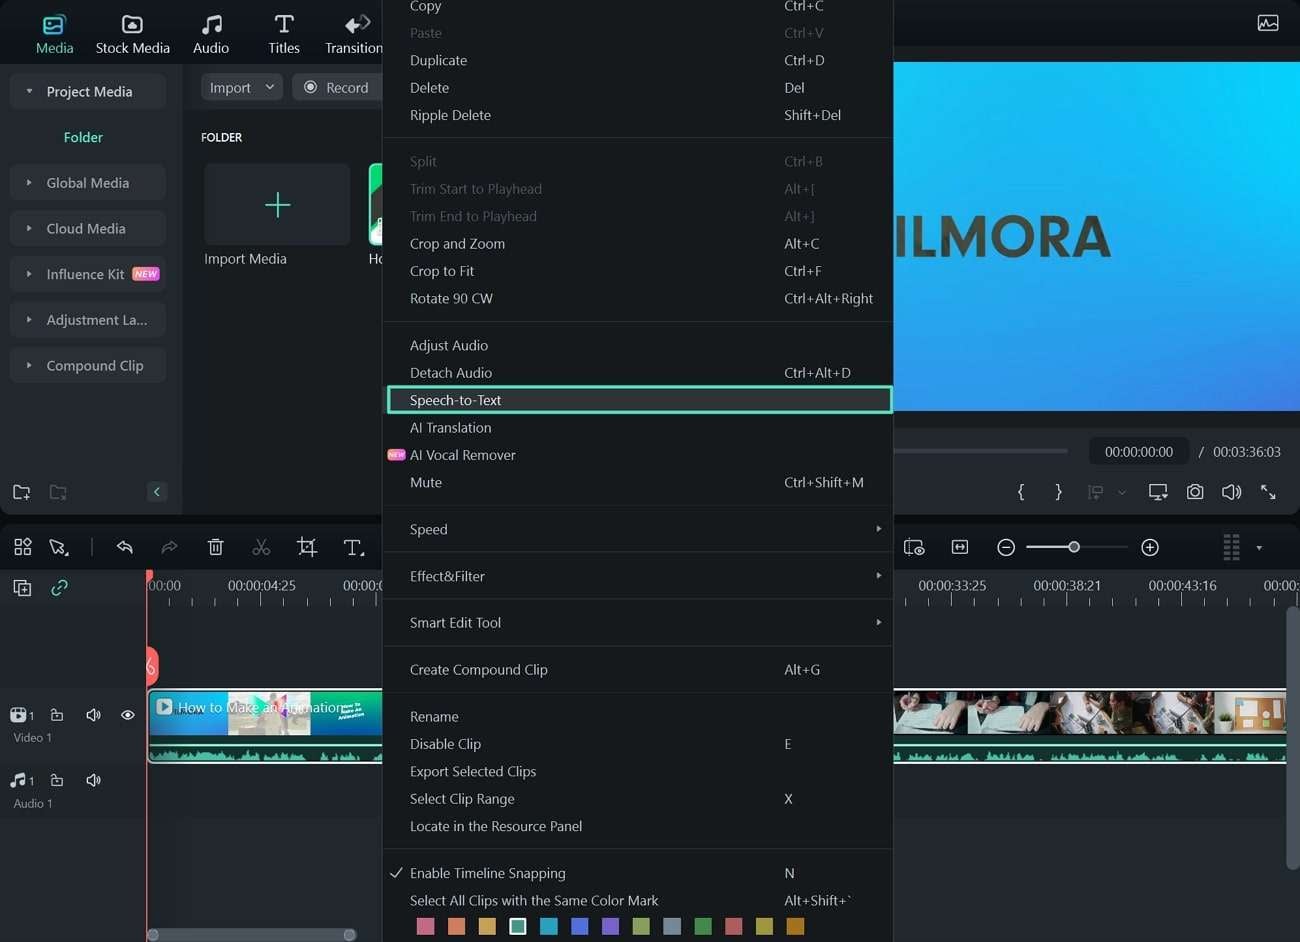
01of 03Generate Auto-Captions
Right-click your video clip, then choose Speech-to-Text.
02of 03Enable Active Words
Turn on the setting for "Add automatic active words."
03of 03Review Captions
Once it finishes, you'll see the captions appear.
Add an AI Voiceover or Use Text-to-Speech
Some people don't love recording their voices. Or maybe you forgot to explain something while filming. No problem. You can use Filmora's AI text-to-speech tool to add your thoughts later.

01of 03Access Text-to-Speech
Go to the Audio tab from the top menu, then choose Text-to-Speech.
02of 03Enter Your Script
Type in your lines. Choose an AI voice and language.
03of 03Generate Voiceover
Click Generate, and it will add voice to your video.
Use Animated Stickers To Make It Fun
Let's say you want to point out rising time or a baking tip. You can do that with animated stickers or small text bubbles. Little things like this keep your sourdough bread recipe video from being boring. You can even add a follow reminder or a timer sticker.

01of 03Browse Stickers
Go to the Stickers tab on the upper left side navigation pane.
02of 03Add Sticker
Drag the one you like into the timeline.
03of 03Customize Placement
Resize or move it wherever you want.
Conclusion
Baking sourdough bread takes time, and so does learning how to get it right. You'll second-guess your starter and wonder why it's not rising.
But once it clicks, it's worth it. You'll want to save your steps or share your process. Making a sourdough bread video for YouTube, Facebook, Instagram, or TikTok helps you do both. You get to track your progress and help others, too. Try Filmora today for free and import your clips. It's beginner-friendly and has tools that make your sourdough video easy to follow and nice to watch.
secure download 