
 100% Security Verified | No Subscription Required | No Malware


 ChatGPT
 Perplexity
 Gemini
 Claude
 Grok
Grok
In today’s world, making videos with a phone is very common, but they can be shaky due to body movements. Apparently, there is no solution to disturbed footage, but we can use stabilization tools to refine the visual presentation. For better framing and smooth videos, we can use the Adobe After Effects tool. Therefore, this article discusses how to stabilize video in After Effects, and we will study another efficient tool later.
In this article
Adobe After Effects is a motion graphics and visual effects application. You can apply 2 methods of video stabilization to get a professional-grade video. Besides using the all-new feature to create a steady motion in the footage, users can apply the conventional method of the Tracker panel. If you want to learn both these methods of After Effects stabilize video, follow the section below:
Method 1. Using the Warp Stabilizer Effect
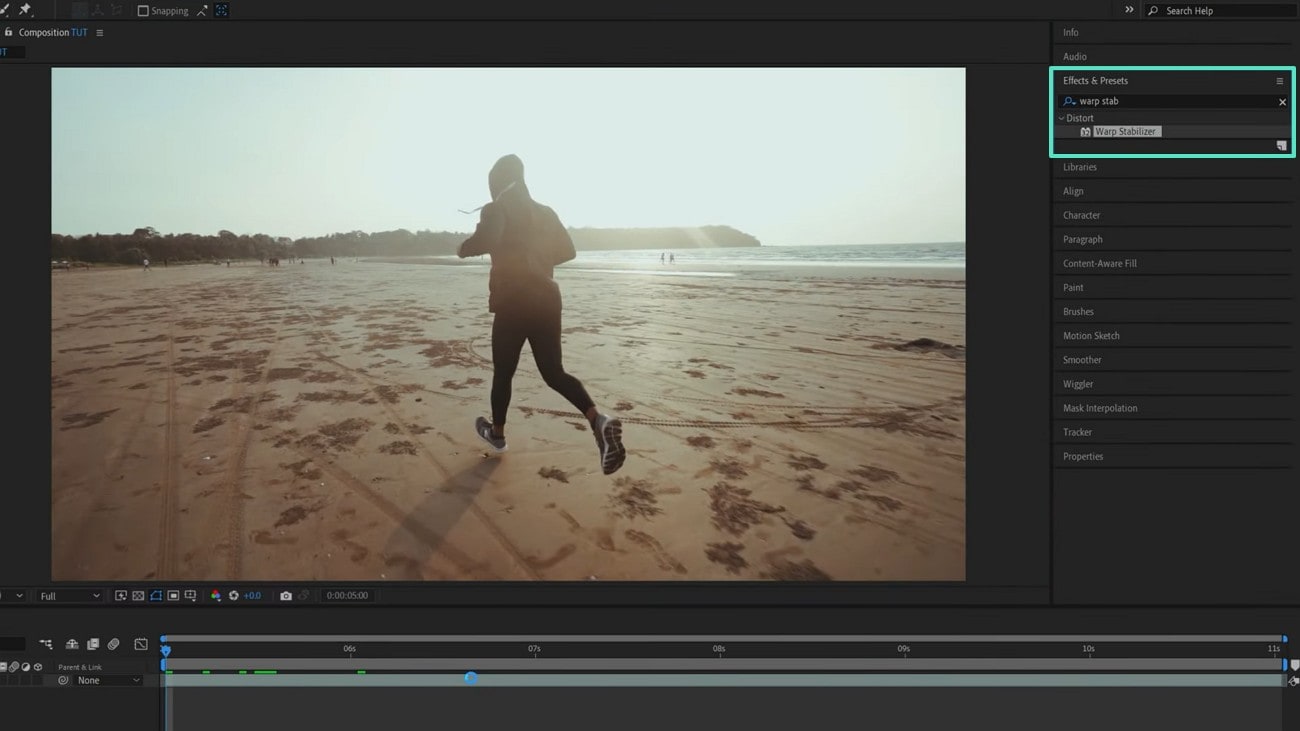
The first method of video stabilization in After Effects is using the Warp Stabilizer effect. It is located under the Effects & Preset tab on the right panel. The following steps feature a guide on using this effect to smooth the video:
- Step 1. After importing a video into Adobe After Effects, select the video timeline. When the “Effects & Presets” section is in the right panel. Now, search for the “Warp Stabilizer” effect and drop it to the timeline. Using this effect will help analyze the video to remove the shakiness.
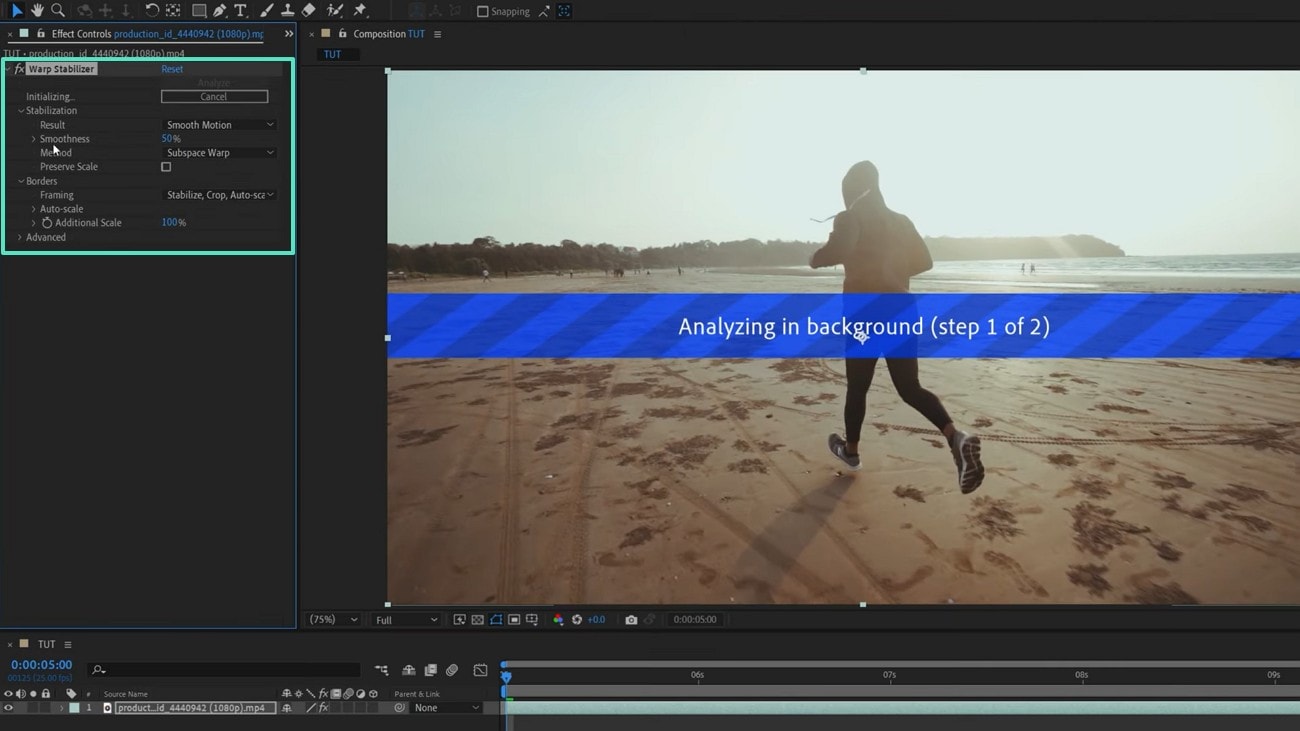
- Step 2. After the system analyzes your video, open the “Effect Controls” panel on the left. As the warp stabilizer customization option appears, apply your desired settings. This section allows you to select the “Smoothness” of the footage. After the video is stable, export it to your device, as it makes the video smooth but crops the corners of the footage.
Method 2. Using the Planar tracker with Mocha AE Integration
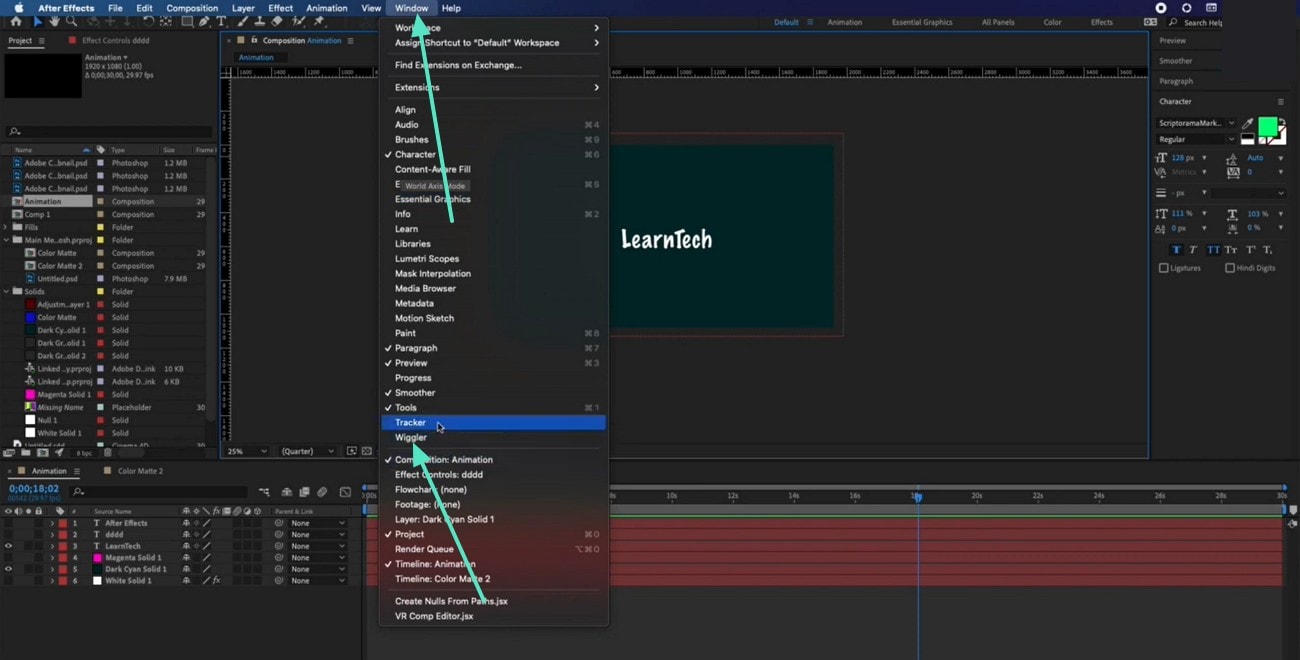
Adobe After Effects comes with a built-in Tracker panel for supporting video stabilization. This panel offers all types of motion stabilization options to help you achieve steady motion. Although this panel is initially hidden, it can be activated from the Window menu. If you want to learn how to stabilize video in After Effects using the Tracker Panel, follow this guide:
- Step 1. To begin with, enter the “Window” menu from the top toolbar and enable the “Tracker” option to open its panel on the right.
- Step 2. Using the “Tracker” panel, you can select the “Stabilize Motion” option to have a steady video.

Part 2. Elevating the Video Stabilization Features with After Effects Plug-Ins
Having a stabilization plug-in helps you enhance the effect within After Effects. Go through the following part to learn about the most used stabilize video After Effects plug-ins:
Red Giant Stabilizer
Red Giant Stabilizer is a professional-grade motion tool used for correcting shaky, unstable footage. It integrates with Premiere Pro and Adobe After Effects for cinematic quality results.
Mercalli V6 SAL
It is a stabilization plug-in that helps in advanced correction for unsmooth videos. It compensates for camera shakes with a natural look. It comes with an enhanced GPU, showing real-time preview capabilities. The Mercalli V6 SAL is a professional gimbal stabilizer designed for precise motion and smooth video editing.
Mocha Pro
Mocha Pro is a post-production plug-in that delivers superior accuracy for complex backgrounds. It also provides advanced features like planar tracking. Although this feature does not directly offer stabilization, it offers an Inverse Motion utility for assistance.
Part 3. Introducing Filmora as an Alternative to Adobe After Effects Video Stabilization
After learning how to stabilize footage in After Effects, we have observed that the methods discussed above could confuse users. While seeking an alternative, Filmora turns out to be a better option than Adobe After Effects, as it offers a comprehensive method for making a steady video. This utility requires a single click to turn your amateur and shaky video into a professional watch.
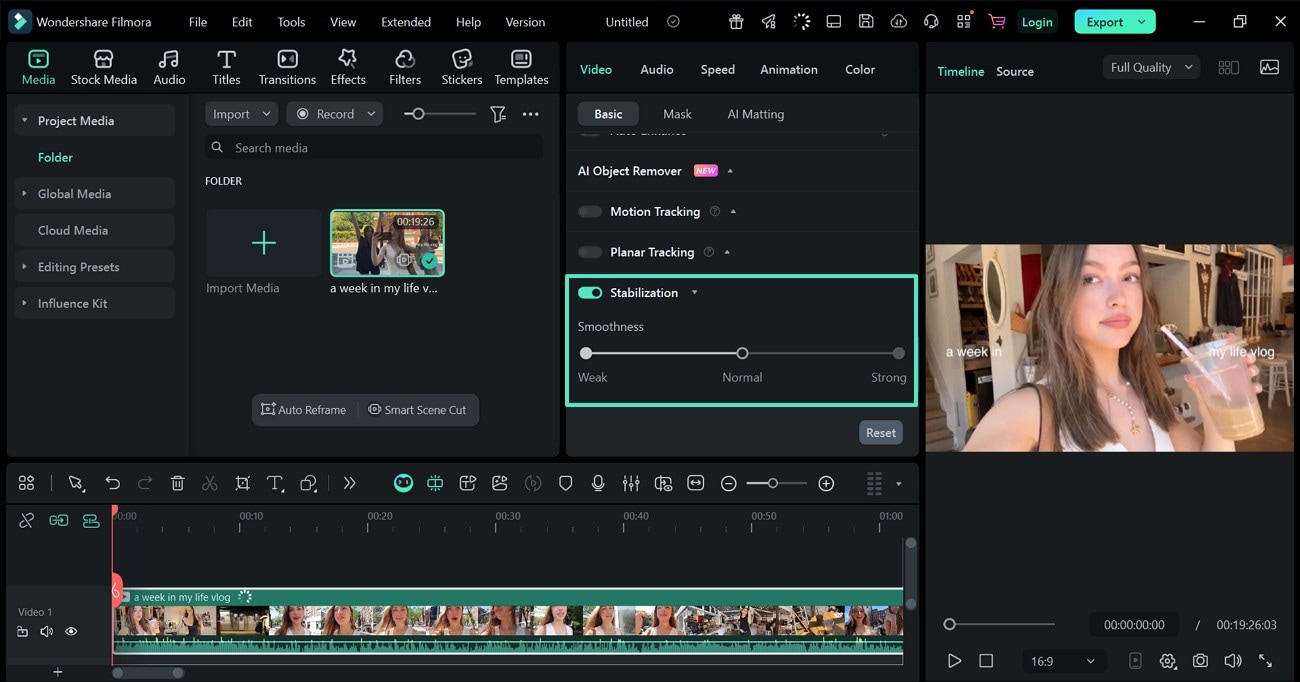
Once you have enabled the Stabilization utility, you can adjust the smoothness levels as needed. Users can pick from weak to normal and strong smoothness depending on the shakiness of their footage. Beyond that, Filmora offers real-time preview options as you remove the shakiness from the footage. To begin applying stabilization on Filmora, follow these simple steps:
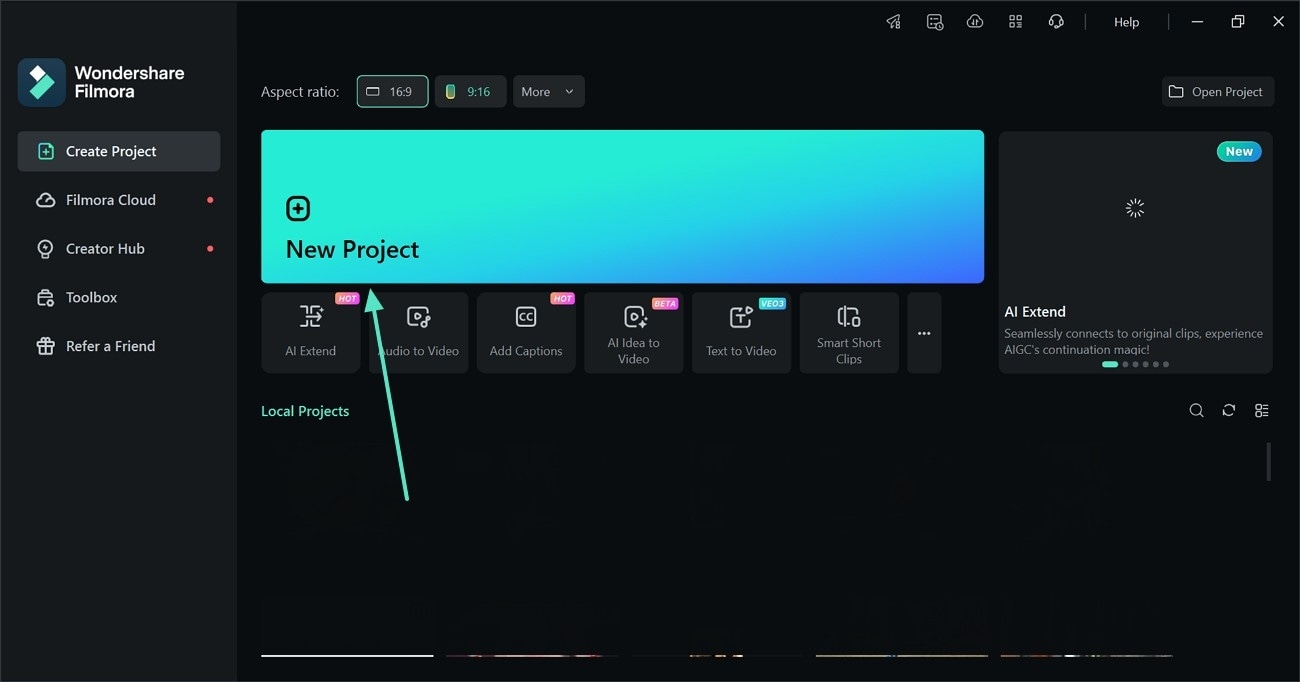
- Step 1. Select the New Project Button. Start by opening the “New Project" button and import a video on the following window that opens up.
- Step 2. Stabilize the Video. After dragging the video into the timeline, select it and enter the “Basic” panel. Next, enable “Stabilization” and set the intensity as weak, normal, or strong.
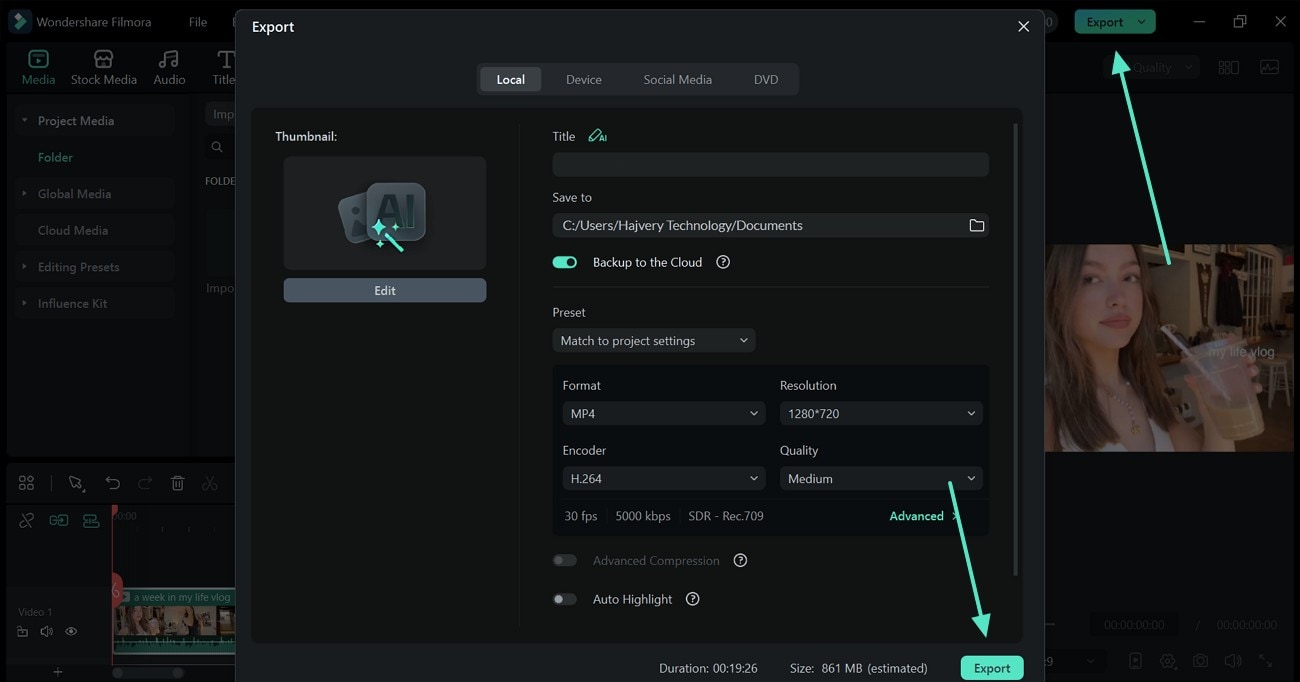
- Step 3. Save the Stabilized Video. When the video is finally stable with this one-click solution, tap “Export” and save the footage in your desired settings.
 secure download

Conclusion
In conclusion, video stabilization is an integral part of editing a video. This article explained how to stabilize video in After Effects using 2 different methods. After exploring the shortcomings of this tool, we introduced Filmora as a more practical option, as it offers a single-click, user-friendly solution for stabilizing videos.
