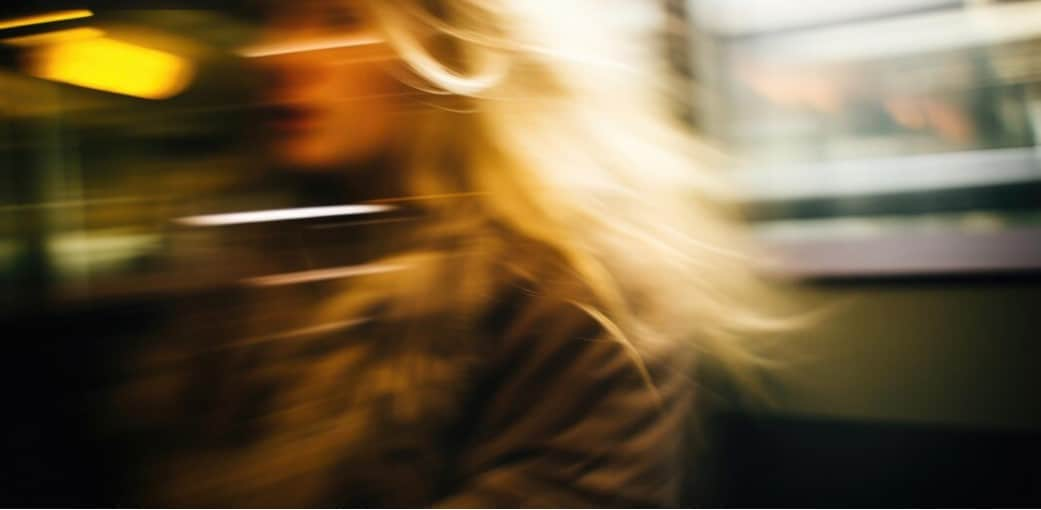
It’s very likely that you’ve seen those dramatic light trails in a city at night or the flowing blur of a waterfall in motion? That streaky, fast-moving effect is called motion blur—and it’s not just for landscapes. When applied to a face, it creates a unique look that’s both artistic and functional.
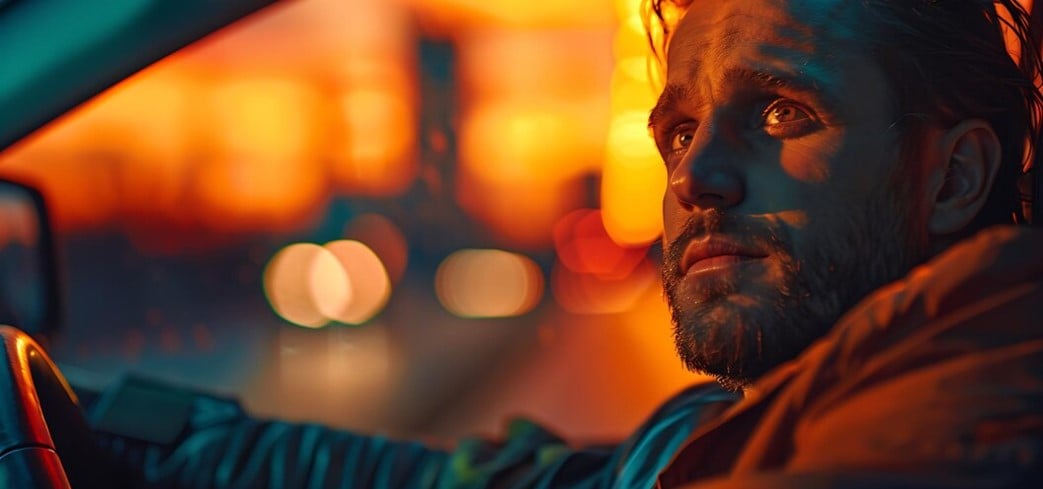
So, you want to blur a face with style instead of just hiding it? The motion blur face effect is your go-to trick. Unlike basic blurring or pixelation, this effect creates the illusion of fast movement— like the person is moving quickly through the frame. It’s great for hiding identities while adding visual energy to your photo or video. It’s a favorite in creative videos, stylized photography, and cinematic edits.
In this tutorial, we’ll show you how to easily add the face motion blur effect in just minutes using simple tools—no editing background needed.
In this article
Part 1: Two Ways of Achieving Motion Blur Face Effect
You can achieve motion blur on face during photography by setting your camera up adequately, or during post-production editing using video editing tools. Whether you’re a photographer looking to take beautiful face blur shots or a video editor aiming for a realistic motion face blur effect, both methods can help you achieve this look effectively.
Way 1. Get Face Motion Blur Effect During Photography
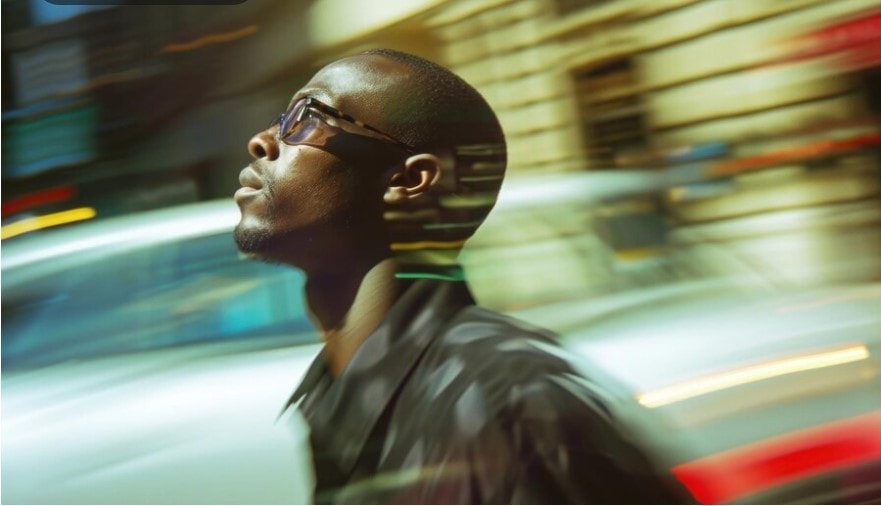
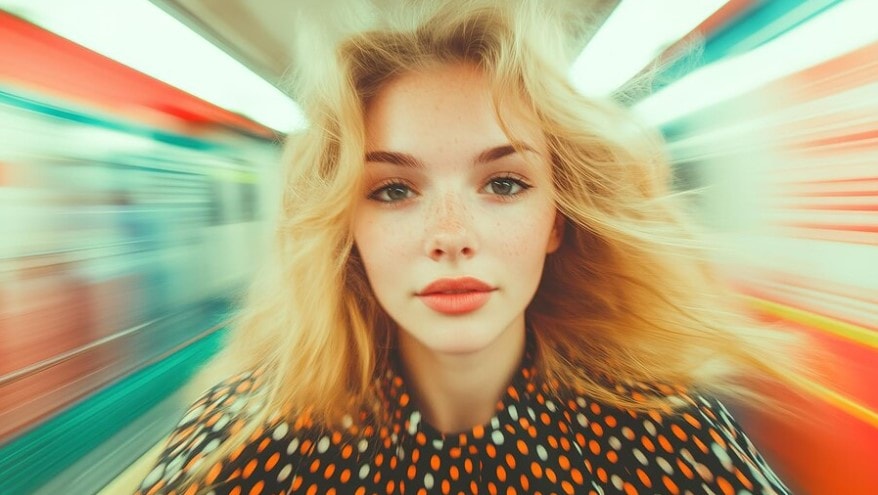
Capturing a motion blur face requires the classic photography technique where a scene is captured over a long period—long exposure photography technique. This photography technique causes movements in the scene to be recorded as a blur.
With the right camera settings, you can create this natural motion blur effect in-camera, without the need for post-capture editing.
- Use a Slower Shutter Speed
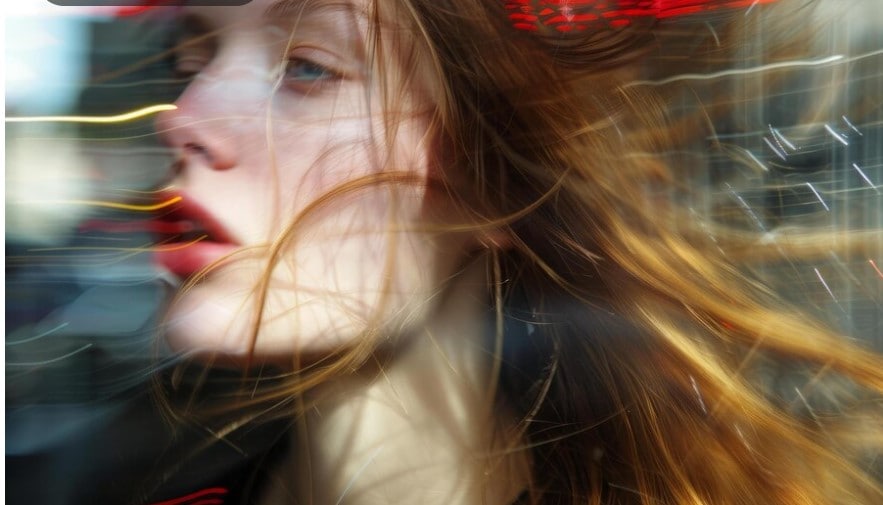
Your shutter speed is how fast your camera shutter opens and closes to capture a scene. Set your camera to a slower shutter—ideally 1/60 of a second. The right shutter speed for the perfect blur depends on how much blur you want, how fast your subject is, and how much available light there is. The slower the shutter speed, the more pronounced the blur effect will be.
- Select the Right Aperture
A smaller aperture (higher f-stop number like f/8 or f/11) allows less light in, balancing the exposure with the slower shutter speed. However, depending on your lighting conditions, you might need to adjust this; a larger aperture works better for low lighting.
- Decrease your ISO
Your ISO is your camera’s light sensitivity. A lower ISO means less light and a photo that is not too grainy. However, do not hesitate to increase your ISO if you’re working in the dark and could use more light.
Digital Single-Lens Reflex Cameras (DSLRs) and mirrorless cameras with manual settings are ideal for capturing face motion blurs because of their ability to control shutter speed and aperture. Popular DSLRs include Canon EOS R6, Sony Alpha a7 III, and Nikon D850. These cameras offer excellent low-light performance, crucial for long-exposure photography.
Way 2. Achieve Motion Face Blur Effect During Editing
Even if you've already taken photos or videos, you can still achieve the motion blur face effect easily during post-production editing. Many video and image editing tools offer features that allow you to add motion blur to faces after filming or photographing.
One example is Wondershare Filmora, a user-friendly video editing software perfect for beginners and experienced editors. Filmora provides a range of motion blur effects and tools, allowing you to apply and customize motion blurs to your liking. With Filmora, you can create realistic face motion blur effects without extensive technical or photography knowledge.
- Intelligent Motion Tracking With AI
- Add Dynamic Text That Moves With Your Video
- Blur Moving Objects with a Single Click
- Transform Emojis and Graphics into Visual Magic

Part 2: How to do Motion Blur Face Edit in Photos and Videos Using Filmora
Filmora offers multiple ways to achieve the motion blur face edit—whether you prefer a manual, hands-on approach or want something more automated. Below, we'll walk you through two effective methods.
Method 1: Use Horizontal Blur Effect or Drawing Blur
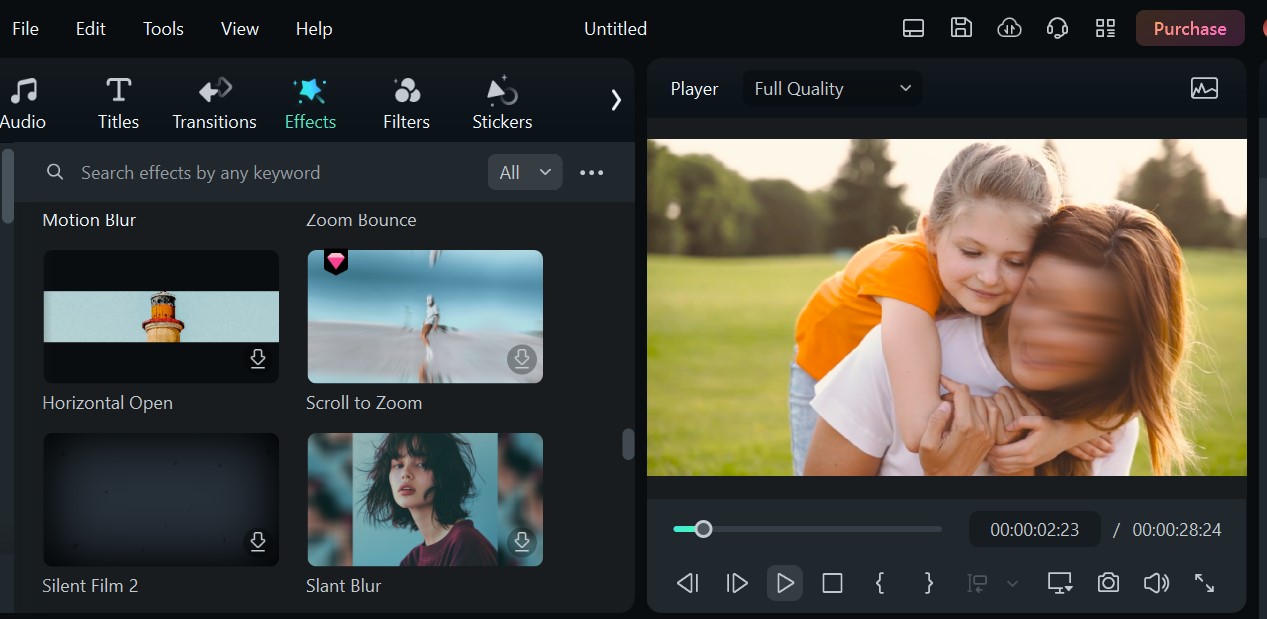
Filmora’s built-in blur effects like Drawing Blur and Horizontal Blur let you manually apply motion blur to faces with detailed control over placement and movement. Below is an example of the horizontal blur effect:
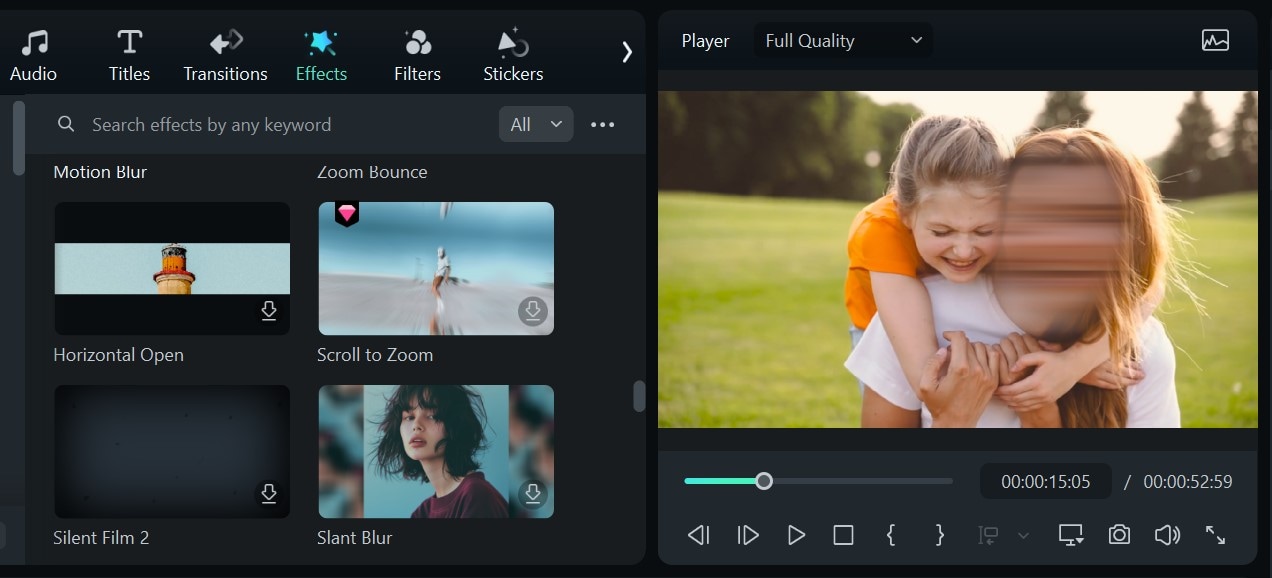
While below is an illustration of how the drawing blur effect looks like:
Steps to Achieving Motion Face Blur in Filmora Using Drawing Blur or Horizontal Blur Effect
Here’s how to do it:
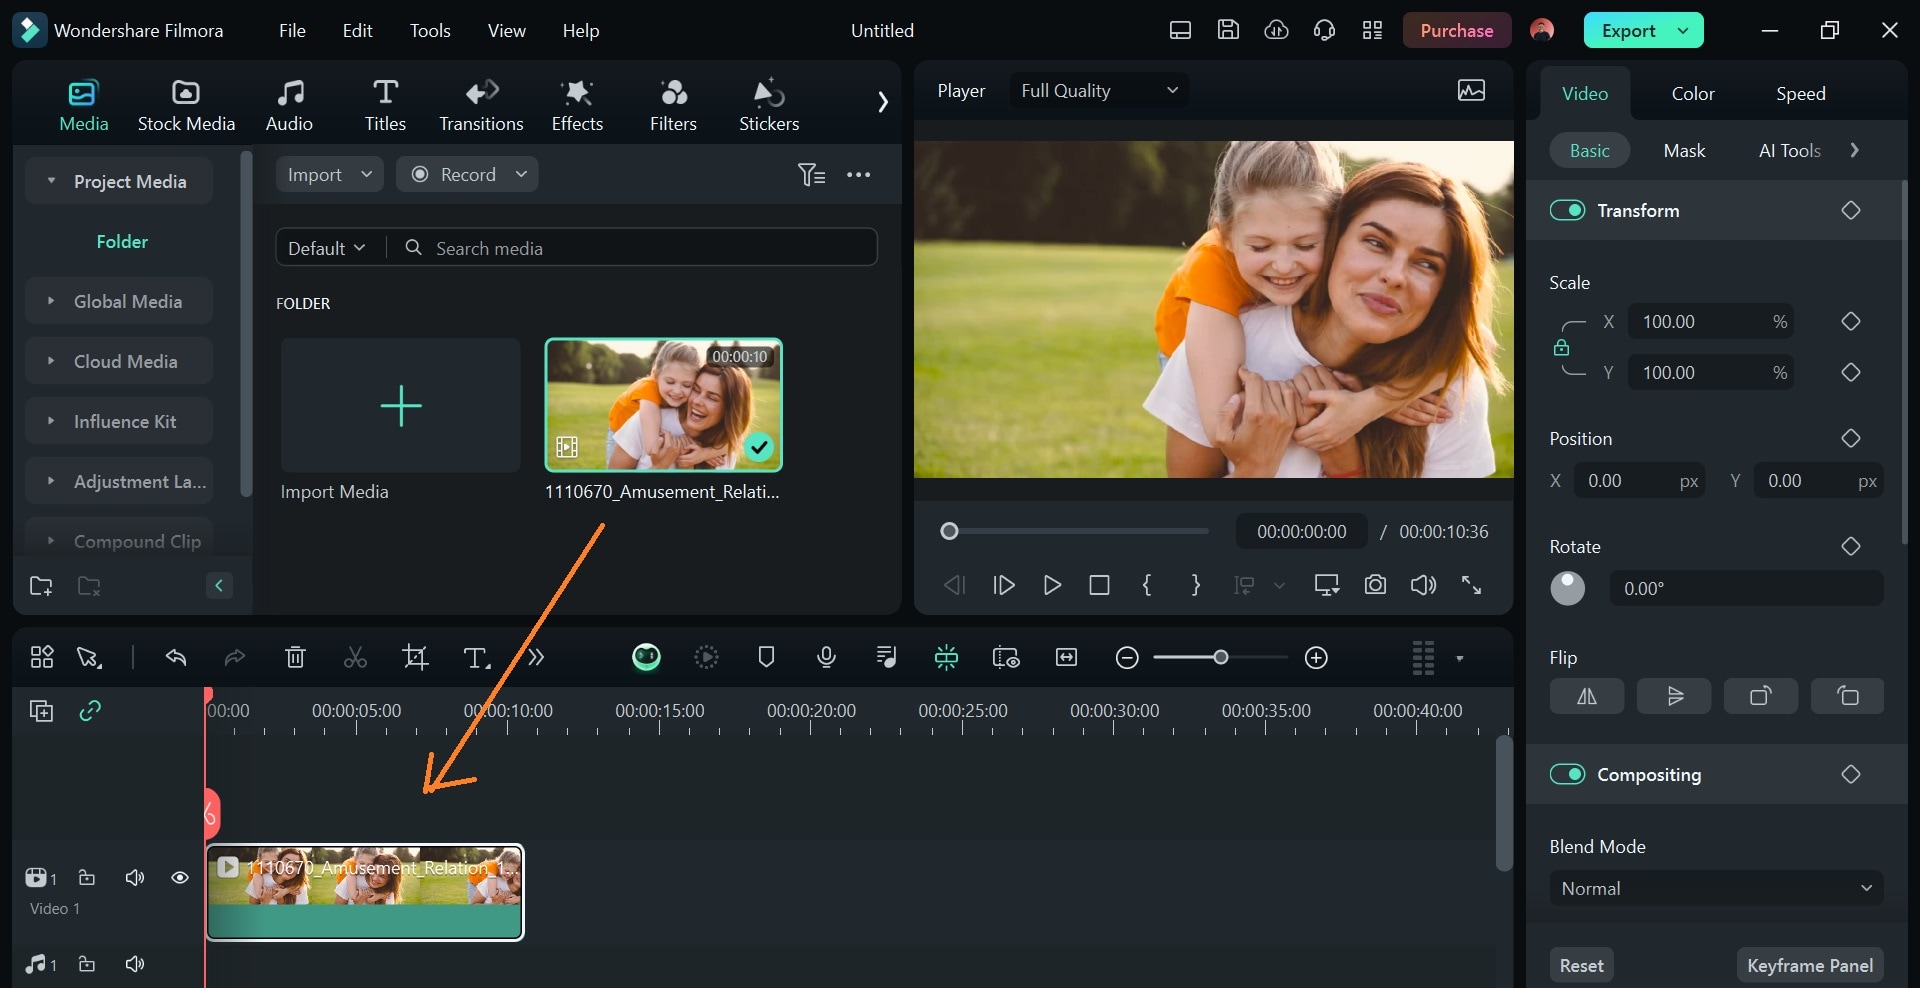
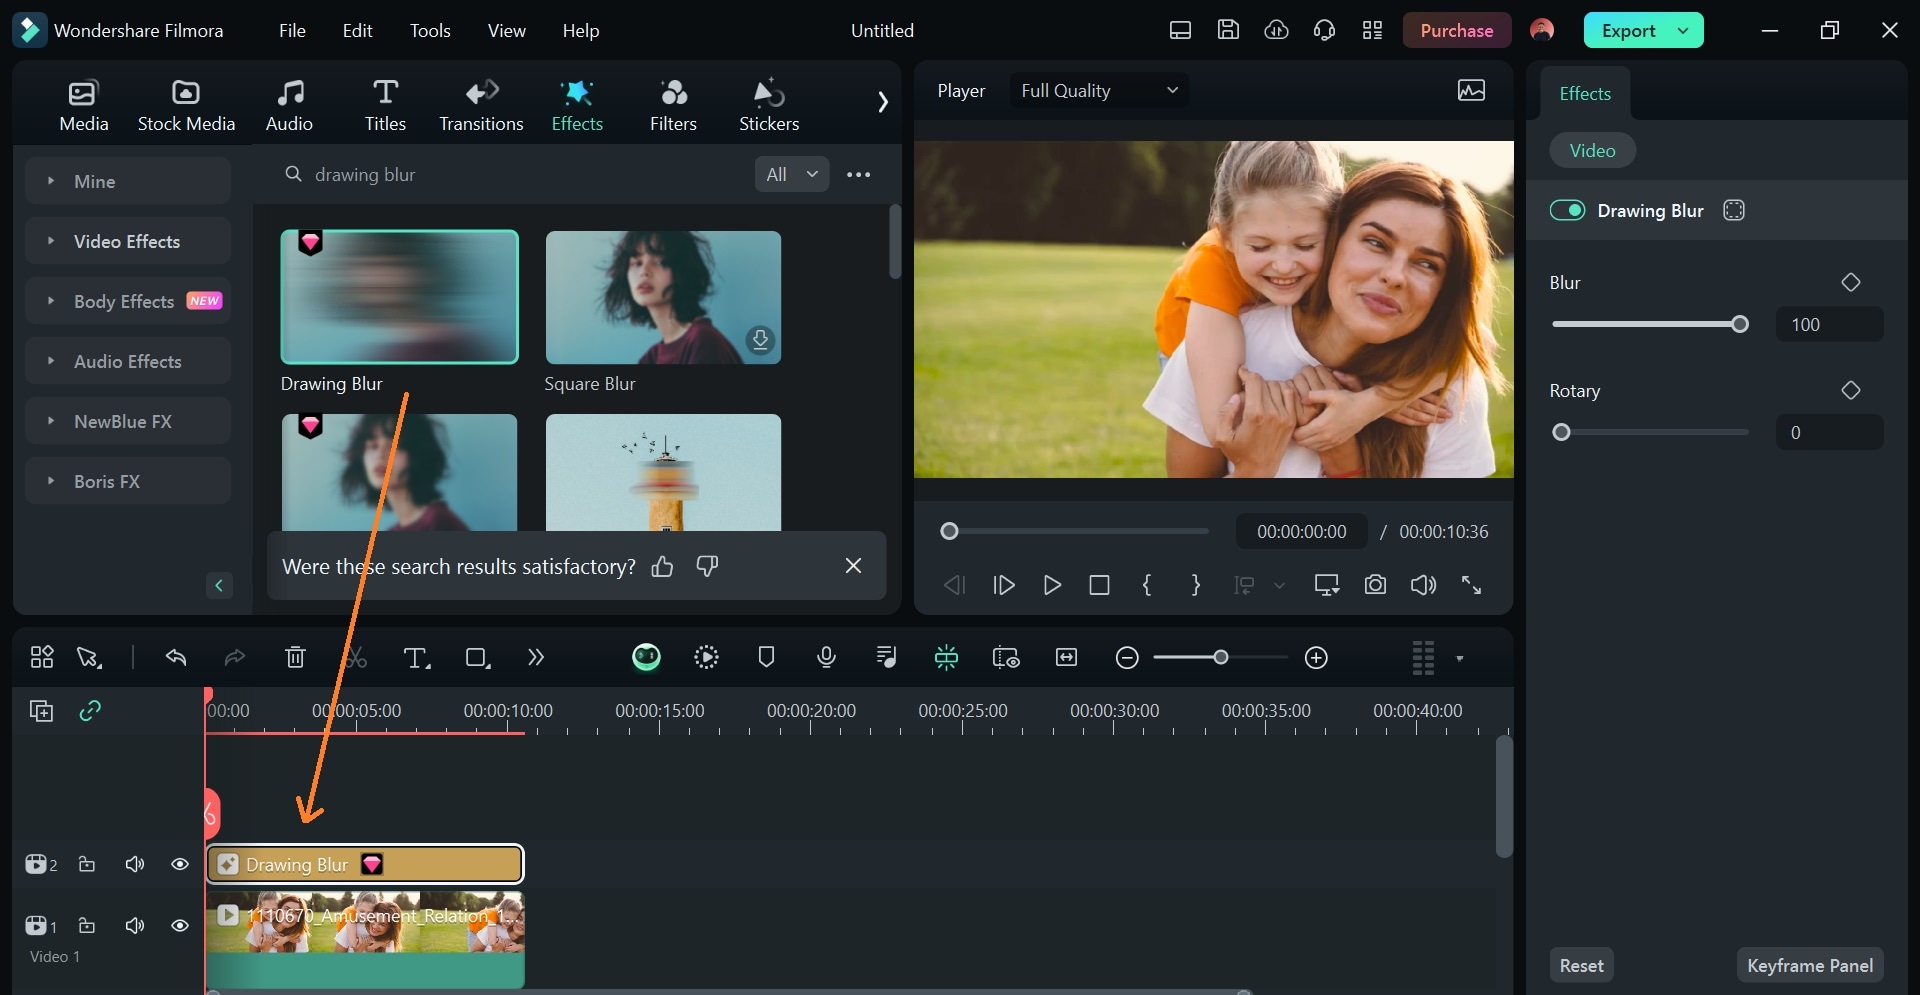
- Step 1: Import your video to Filmora. Drag and drop the video on the timeline.
- Step 2: Go to the Effects tab and search Drawing blur or Horizontal blur. Drag the selected blur effect to the timeline and place it just above the video clip. Adjust it to match the duration of your video.
If you do not want to add a motion blur effect to the face throughout the video, place the blur clip directly above the part of your video clip you want to add the effect.
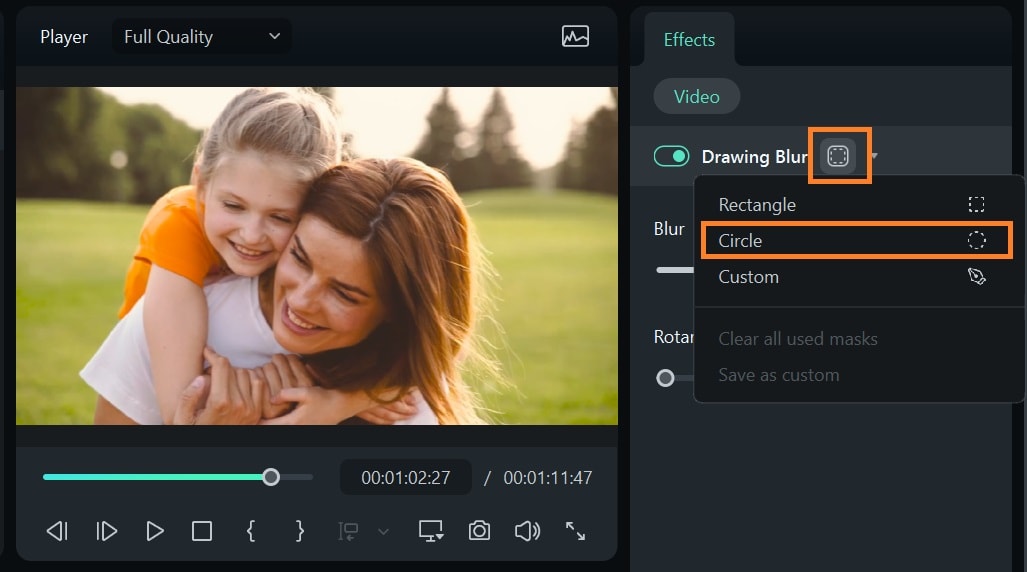
- Step 3: Move the playhead to where you want your motion face blur to begin. Then select the blur clip on the timeline to open the blur editor panel. Click the Add Effect Mask icon on the editor panel and choose a mask shape. Usually, Circle fits the human face.
A mask shape will appear on the preview screen.
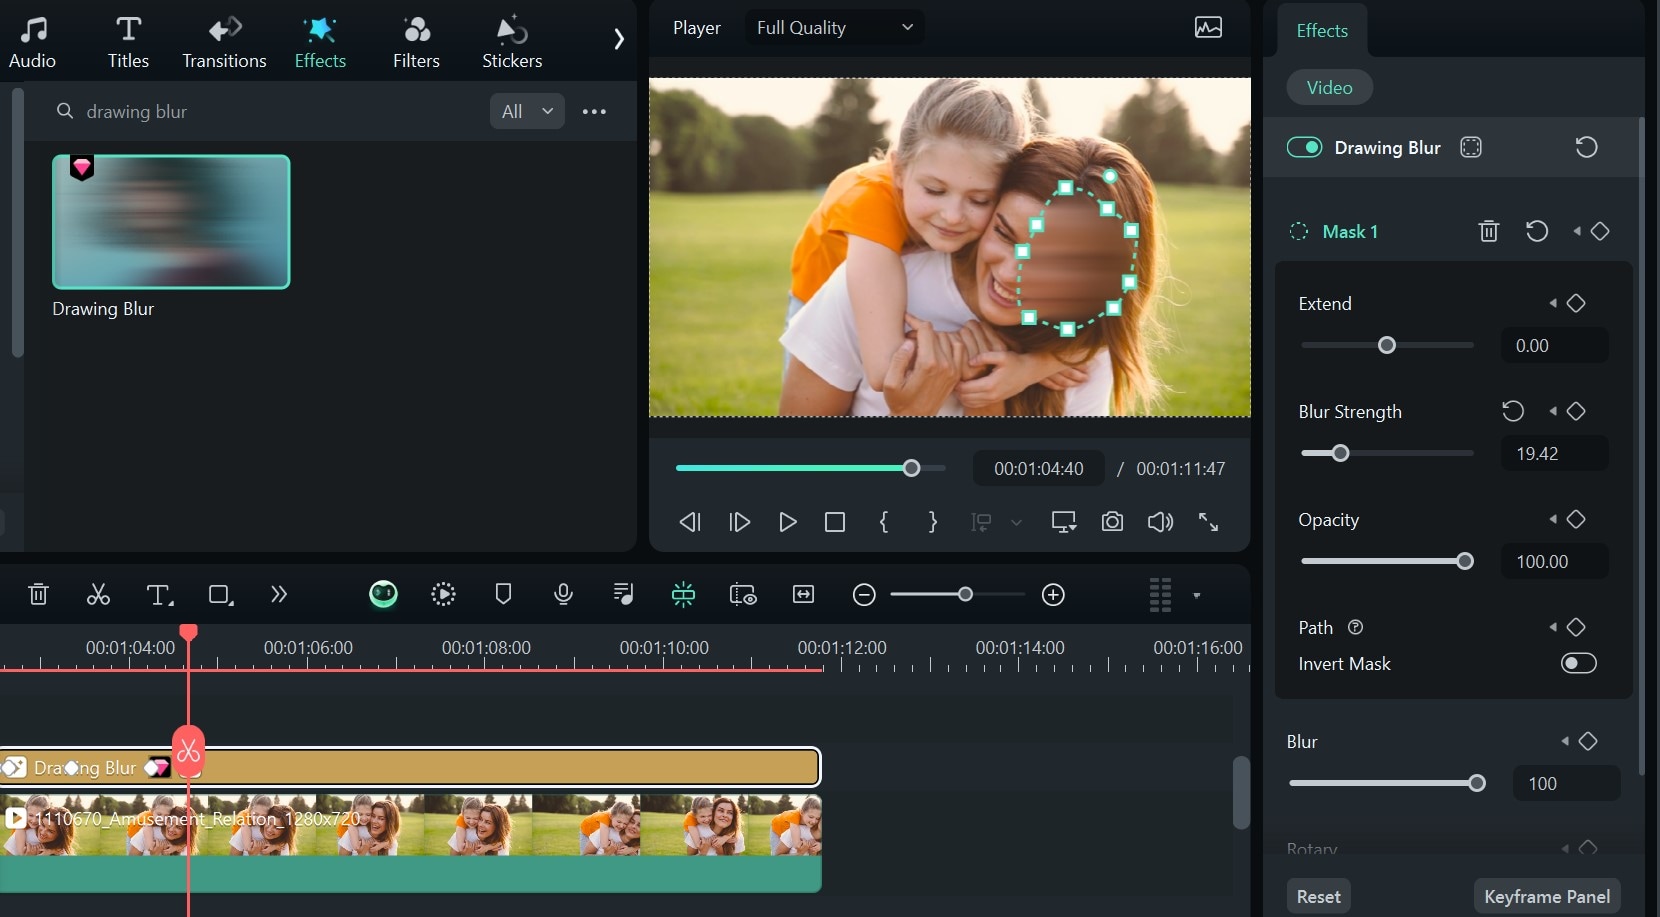
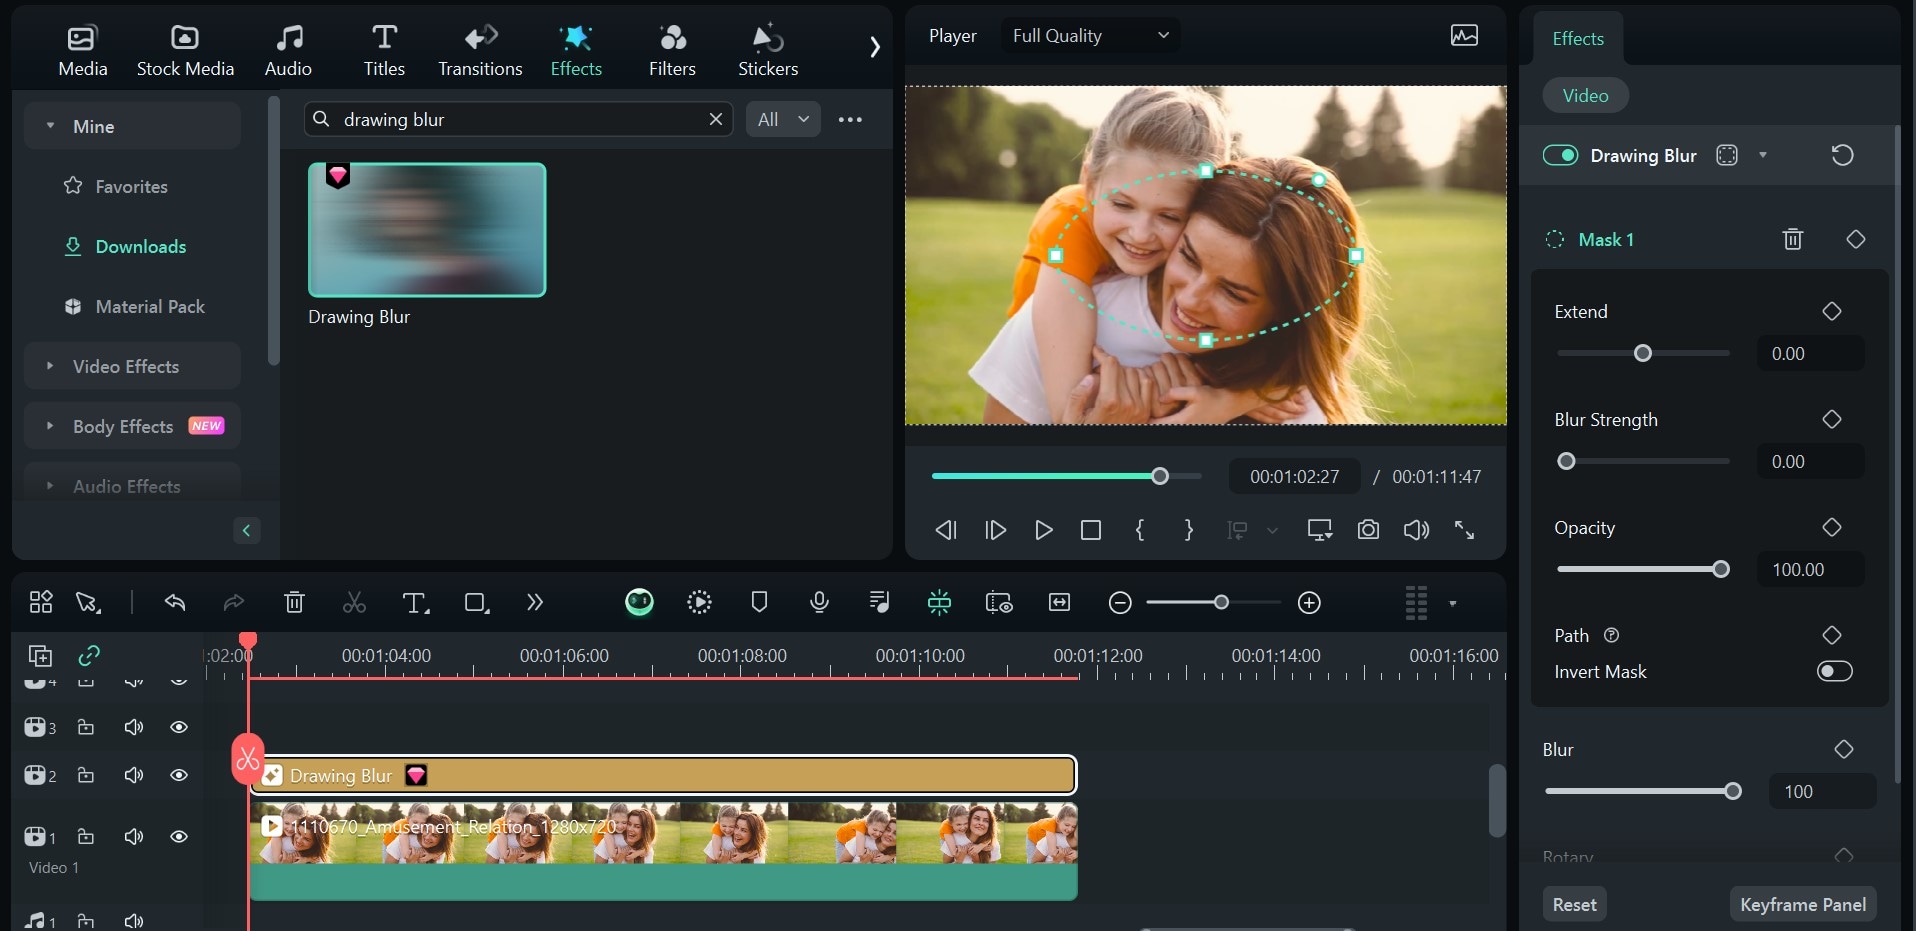
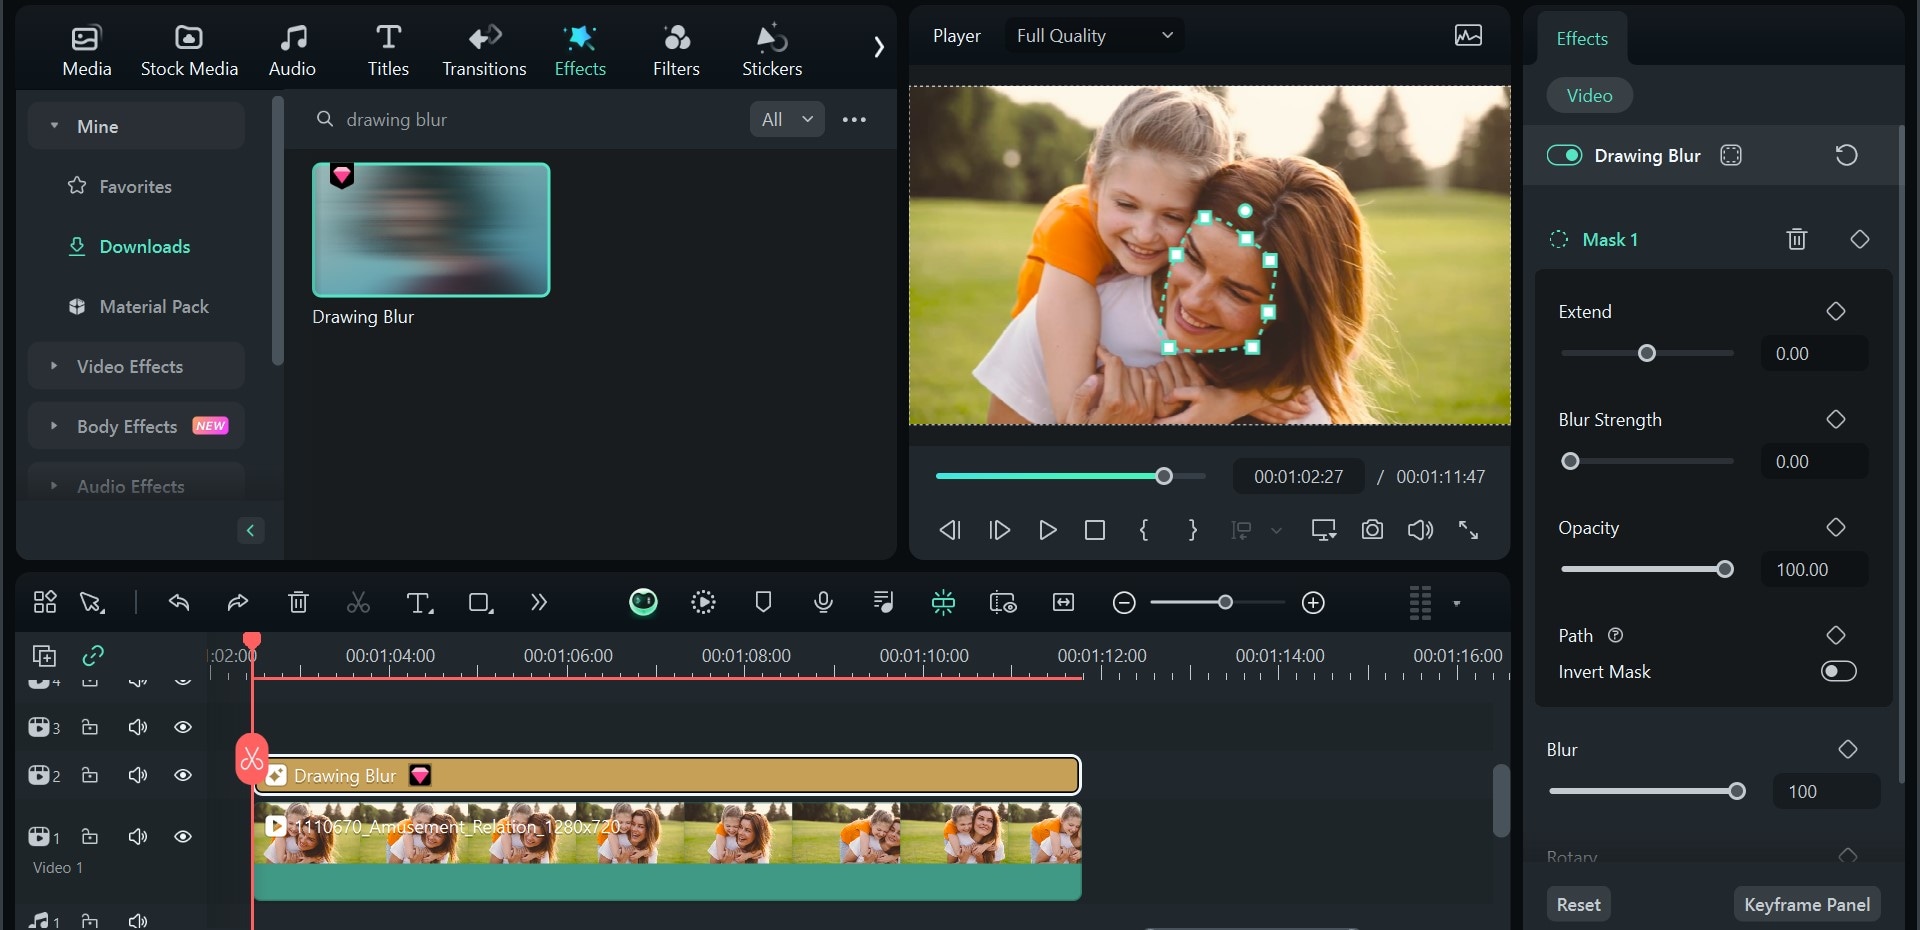
- Step 4: Map out the face you want to blur with the blur mask. Using the anchor points, adjust the mask shape to fit the face you want to edit.
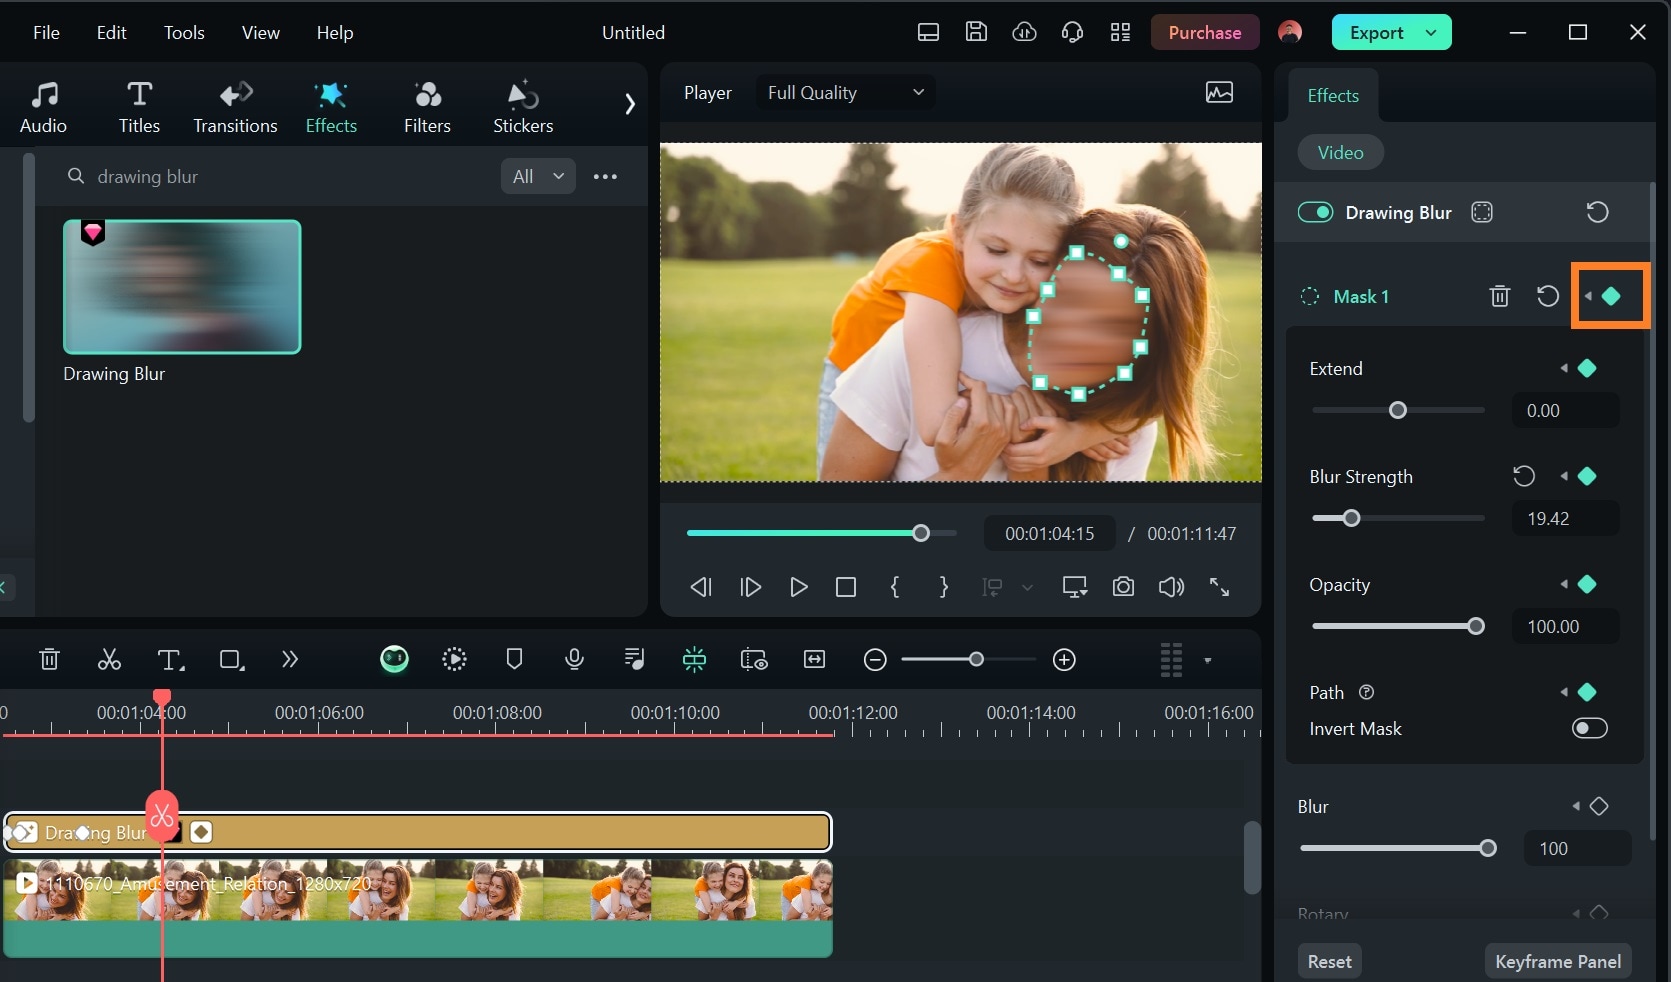
- Step 5: Add keyframes to a well-placed blur mask on the face to give you more precise control over the motion blur effect.
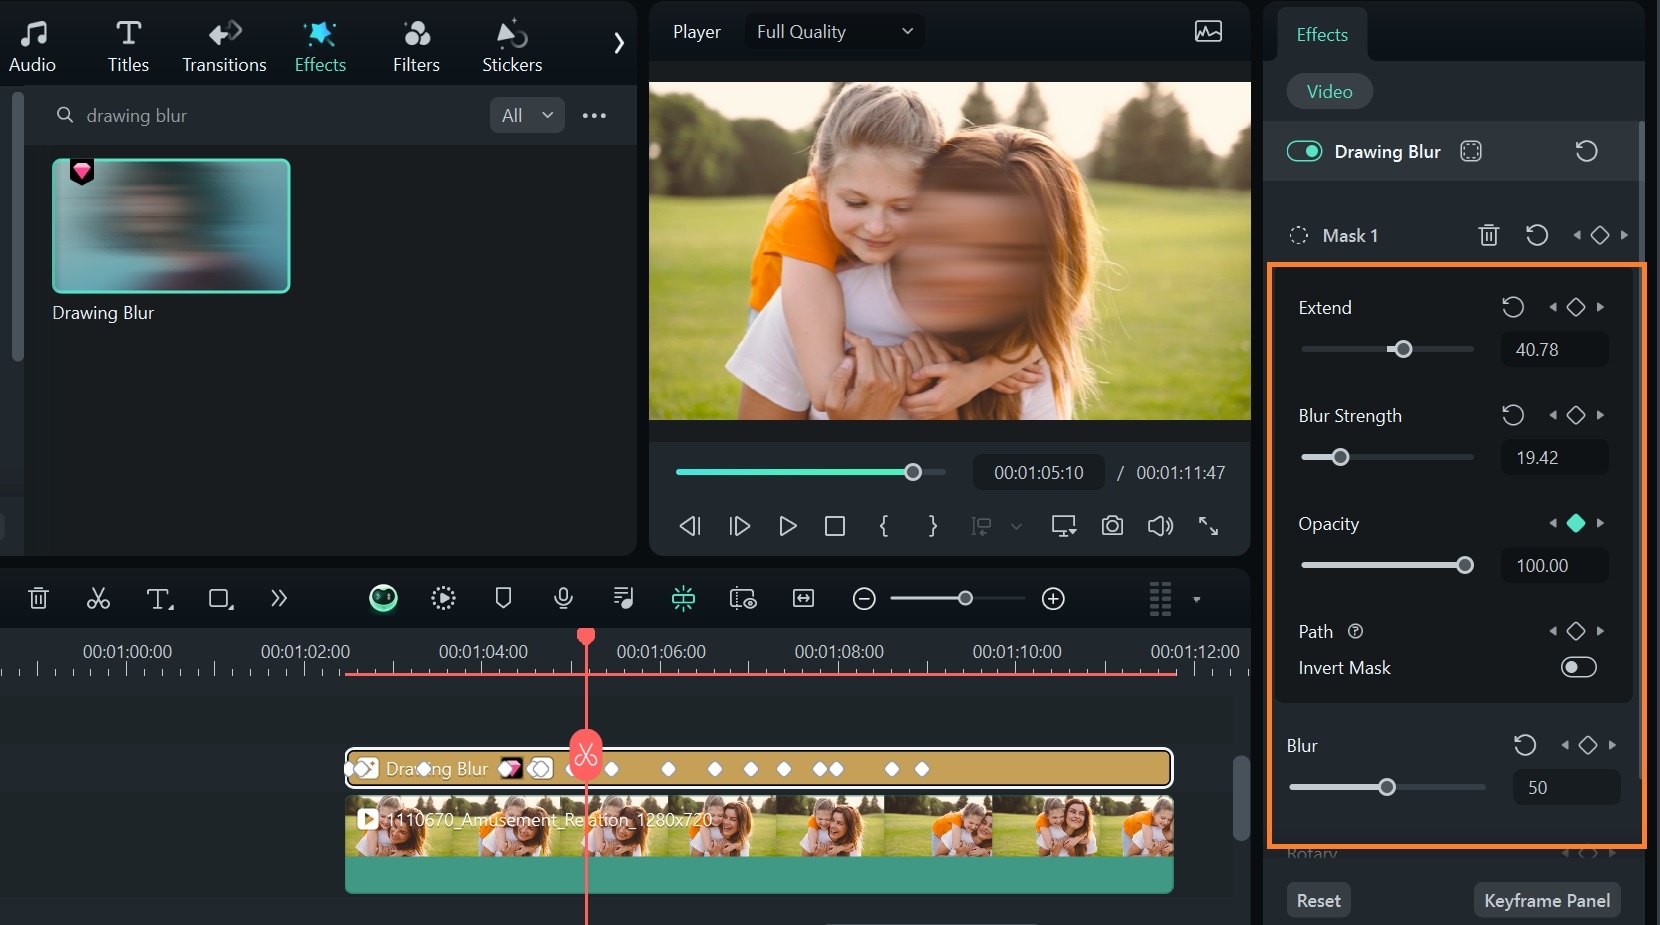
Move the playhead to the next scene where the face moves, adjust the blur mask to match the new position of the face, and add a keyframe. Repeat the process until you get to the end of the video.
- Step 6: Play around with the blur settings to get your preferred motion face blur effect. Adjust Extend to extend the blur effect slightly over the edges of the blur mask. Adjust Opacity to change blur transparency. Adjust Blur strength to increase or decrease blur intensity.
Method 2: Use Filmora’s AI Face Mosaic for Automatic Motion Blur Face Effect
While the Drawing and Horizontal blurs give you the perfect face blur on par with the traditional motion blur effect. However, they all require manual adjustments and tracking using keyframes to maintain a consistent face blurring across the video.
If you’re short on time or prefer a simpler approach, Filmora’s AI Face Mosaic tool offers a quick way to blur faces automatically—with movement tracking included.
Unlike the manual method, this tool uses AI to detect faces and apply a mosaic blur that follows facial movement throughout the video. It's fast, beginner-friendly, and works well for videos with multiple faces or complex movements.
Here's a step-by-step guide on how to use this feature to blur faces:
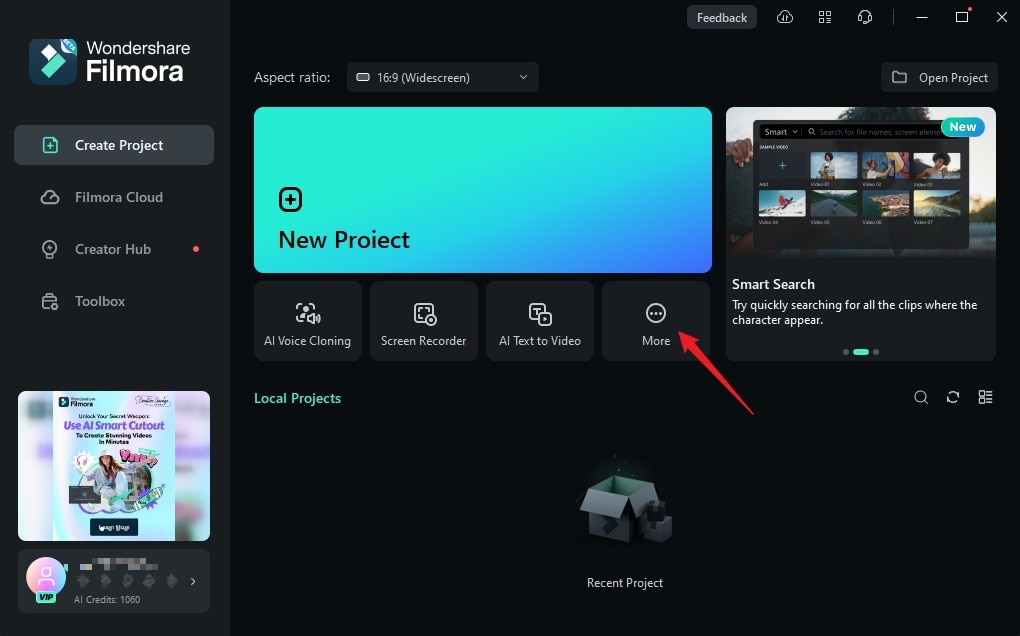
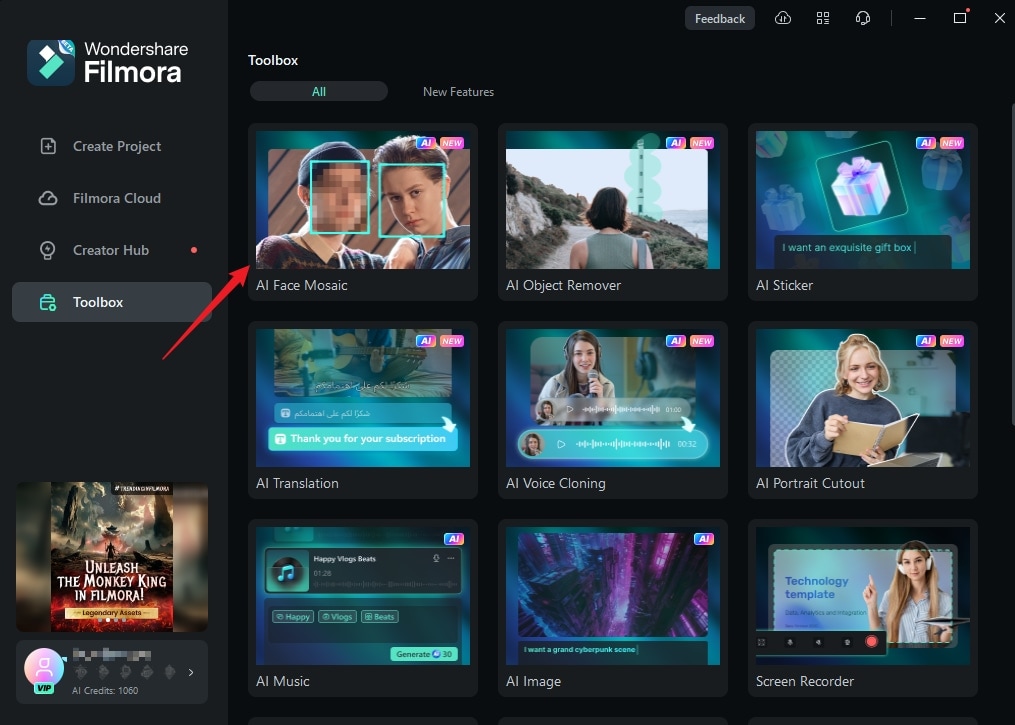
- Step 1: Open Filmora and click More to access the toolbox.
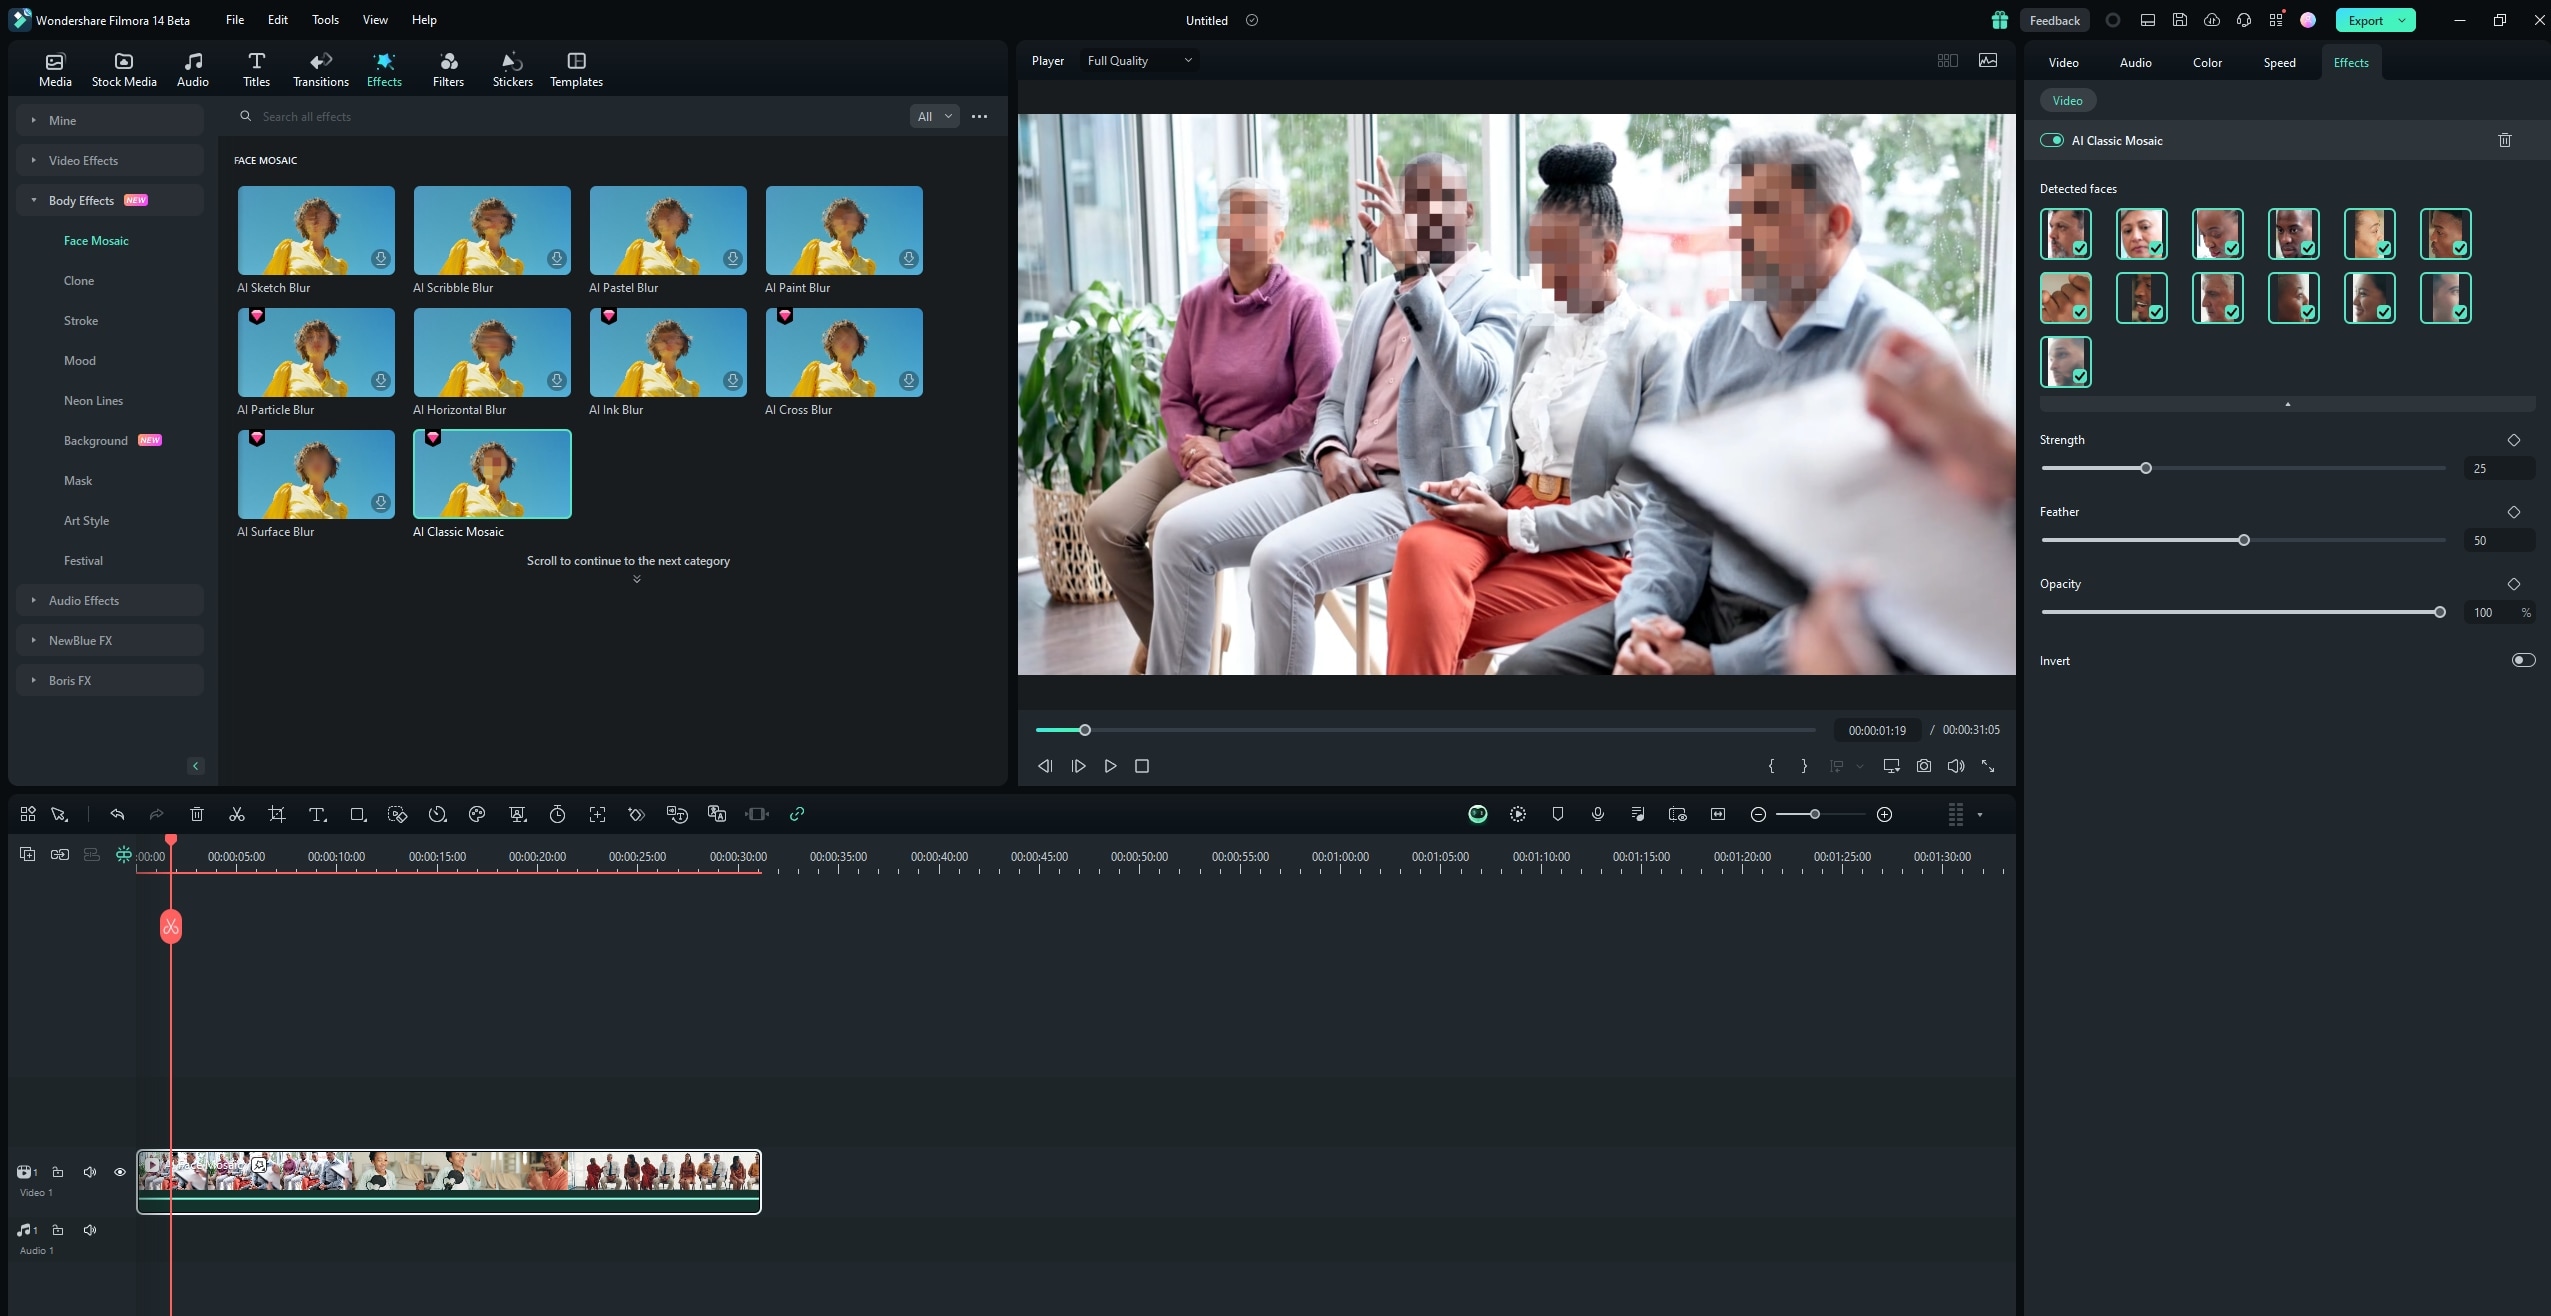
- Step 2: Click on AI Face Mosaic, and import your desired video.
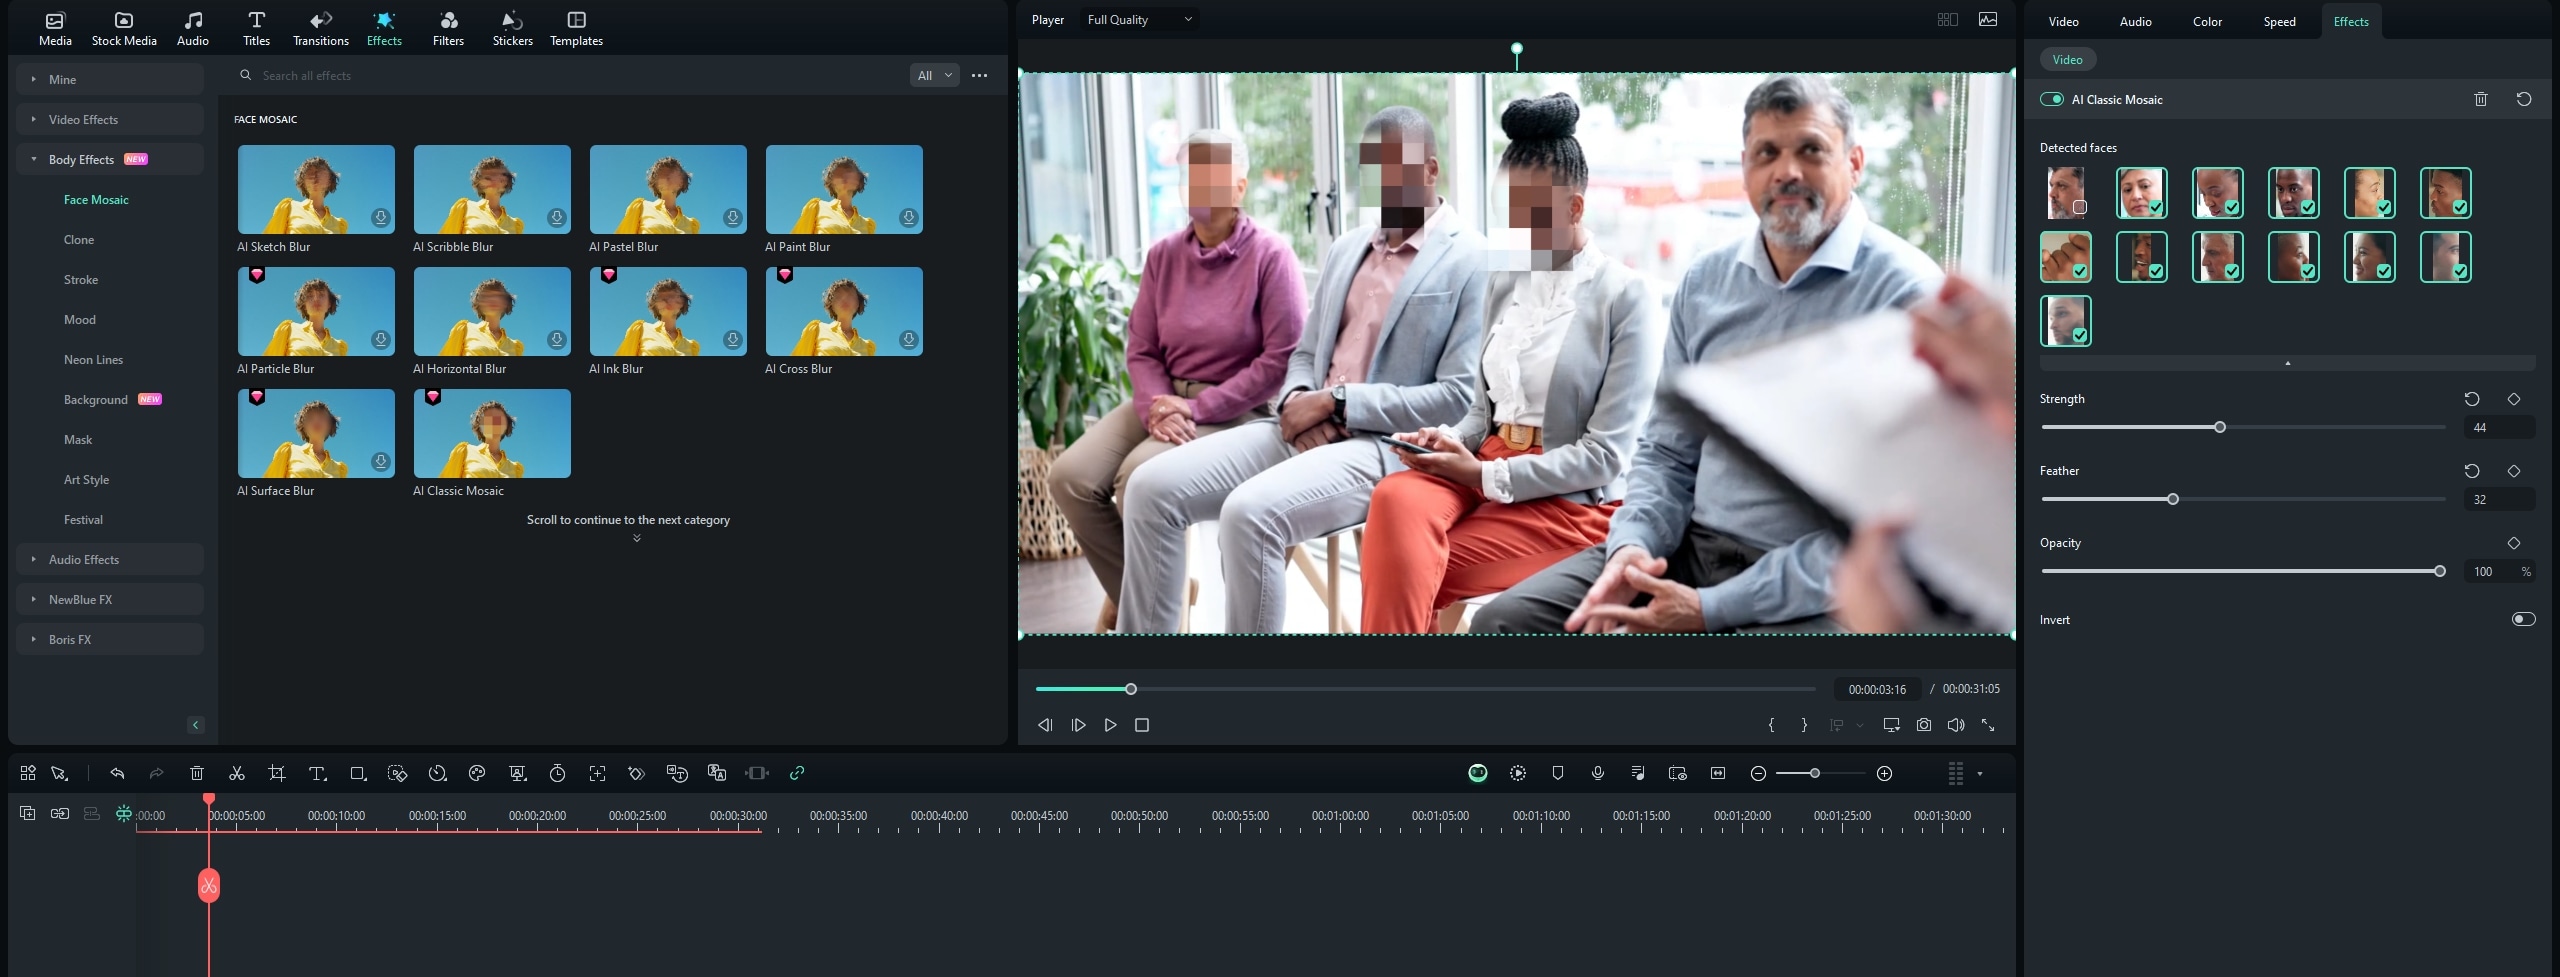
Filmora will analyze the video, and automatically add mosaic to every face in the video.
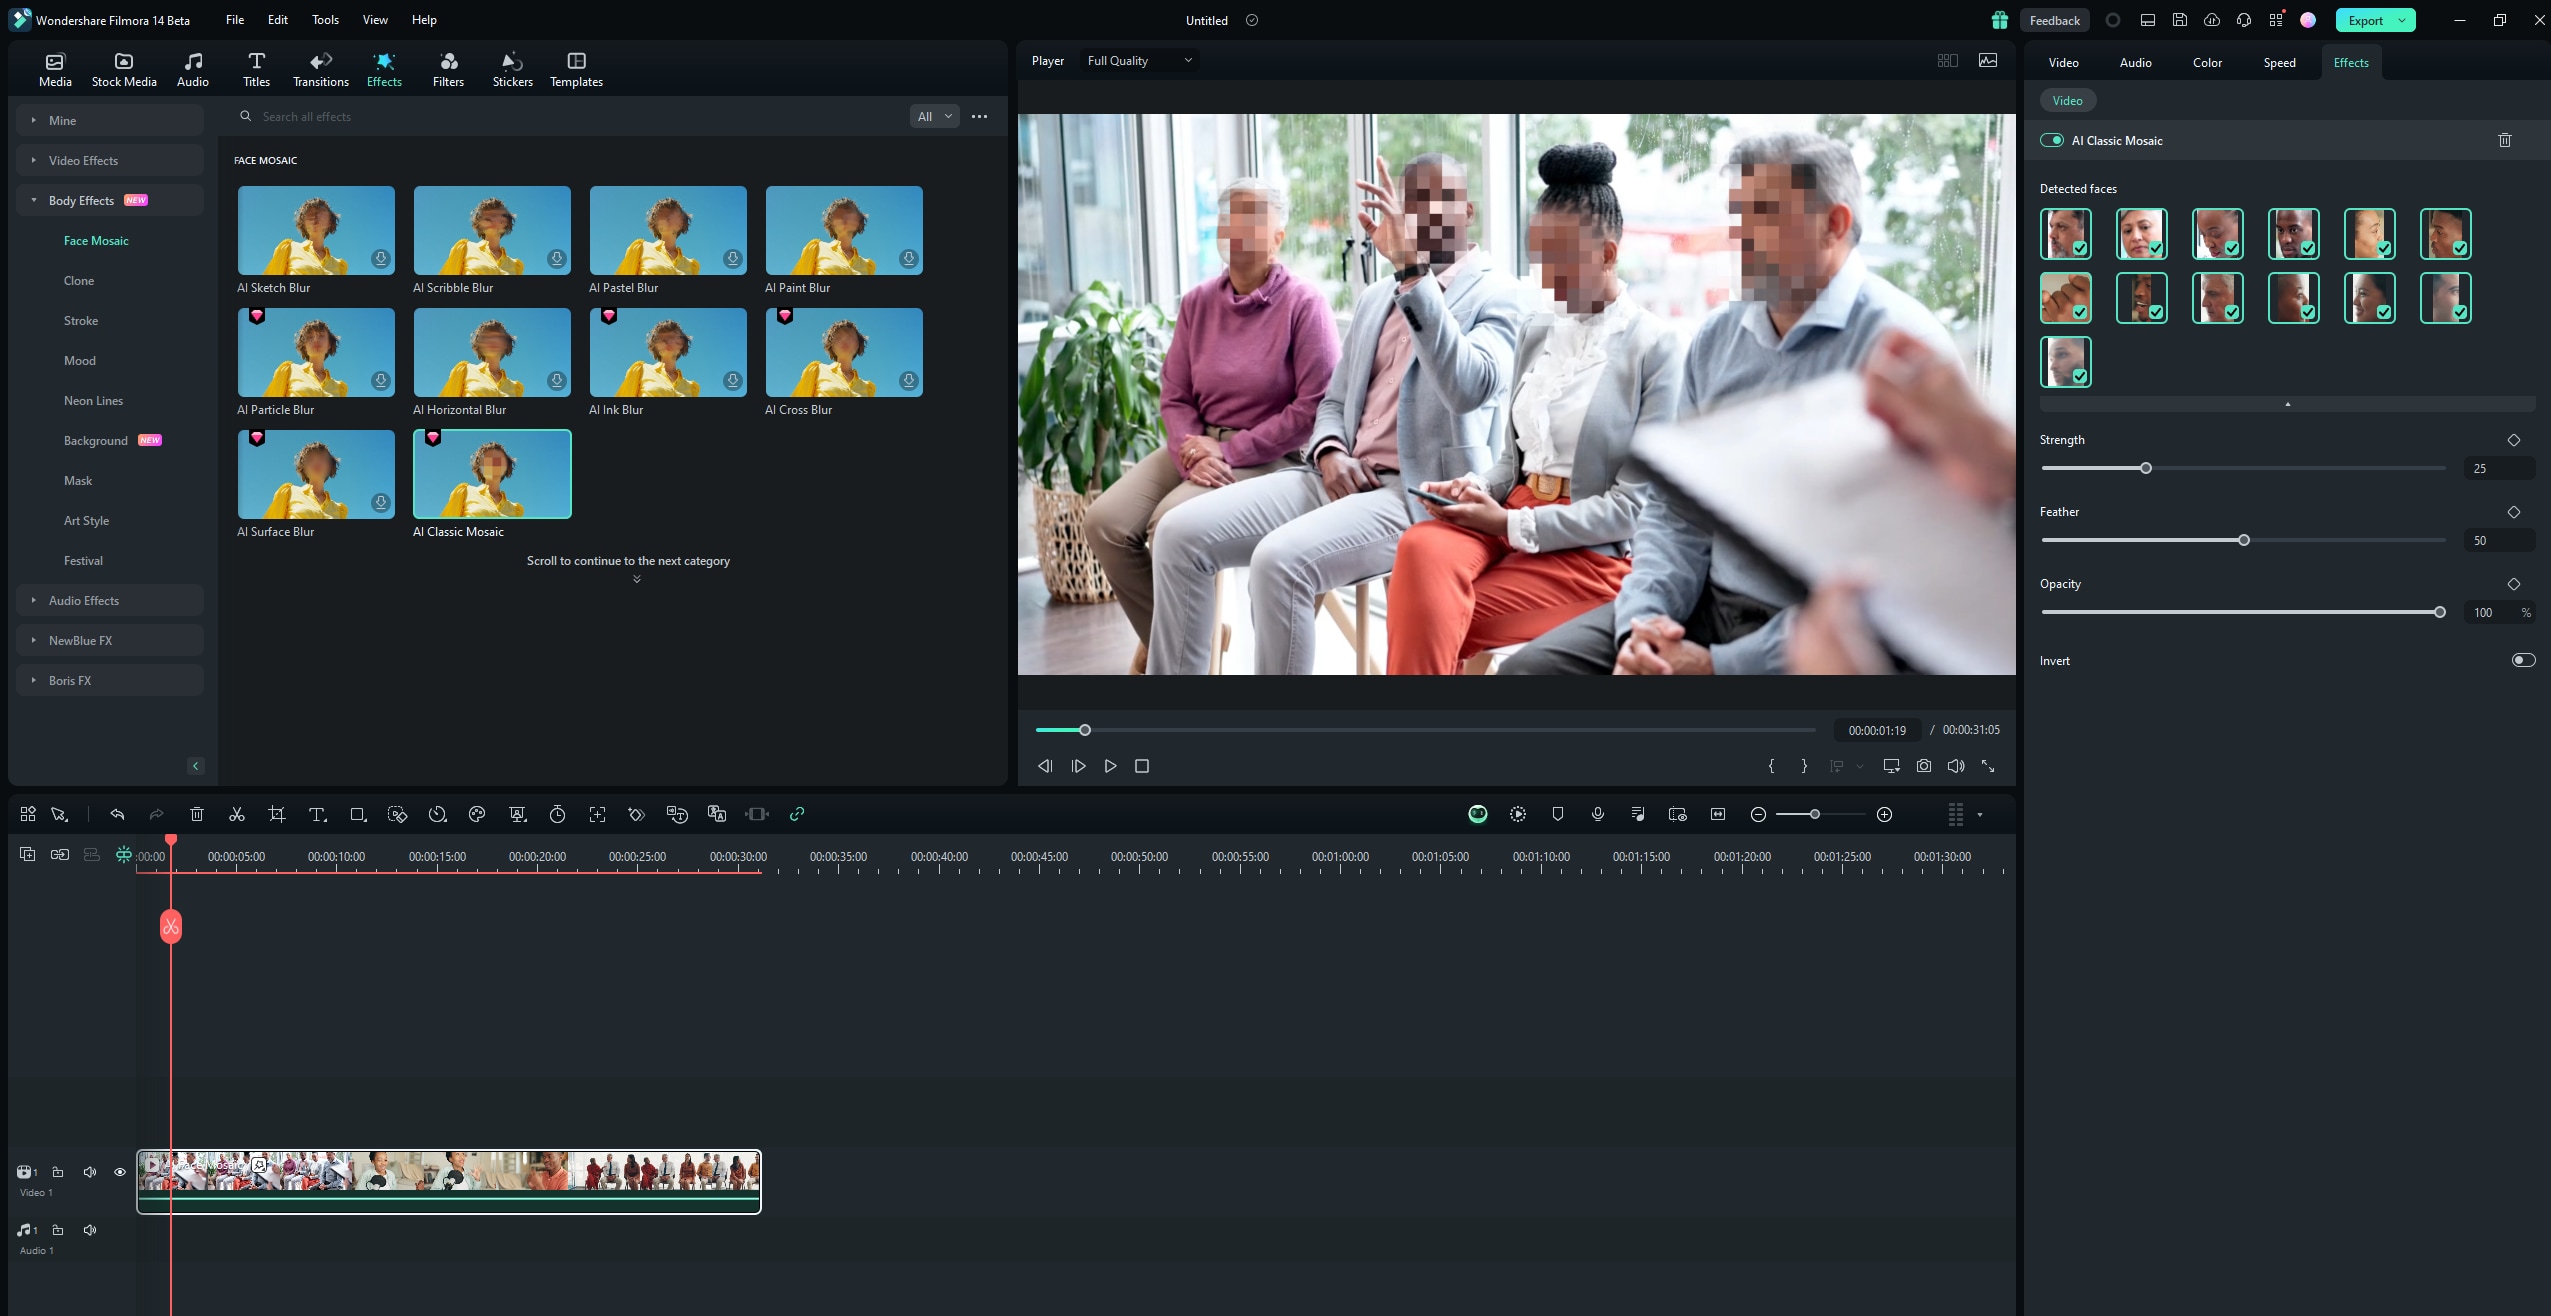
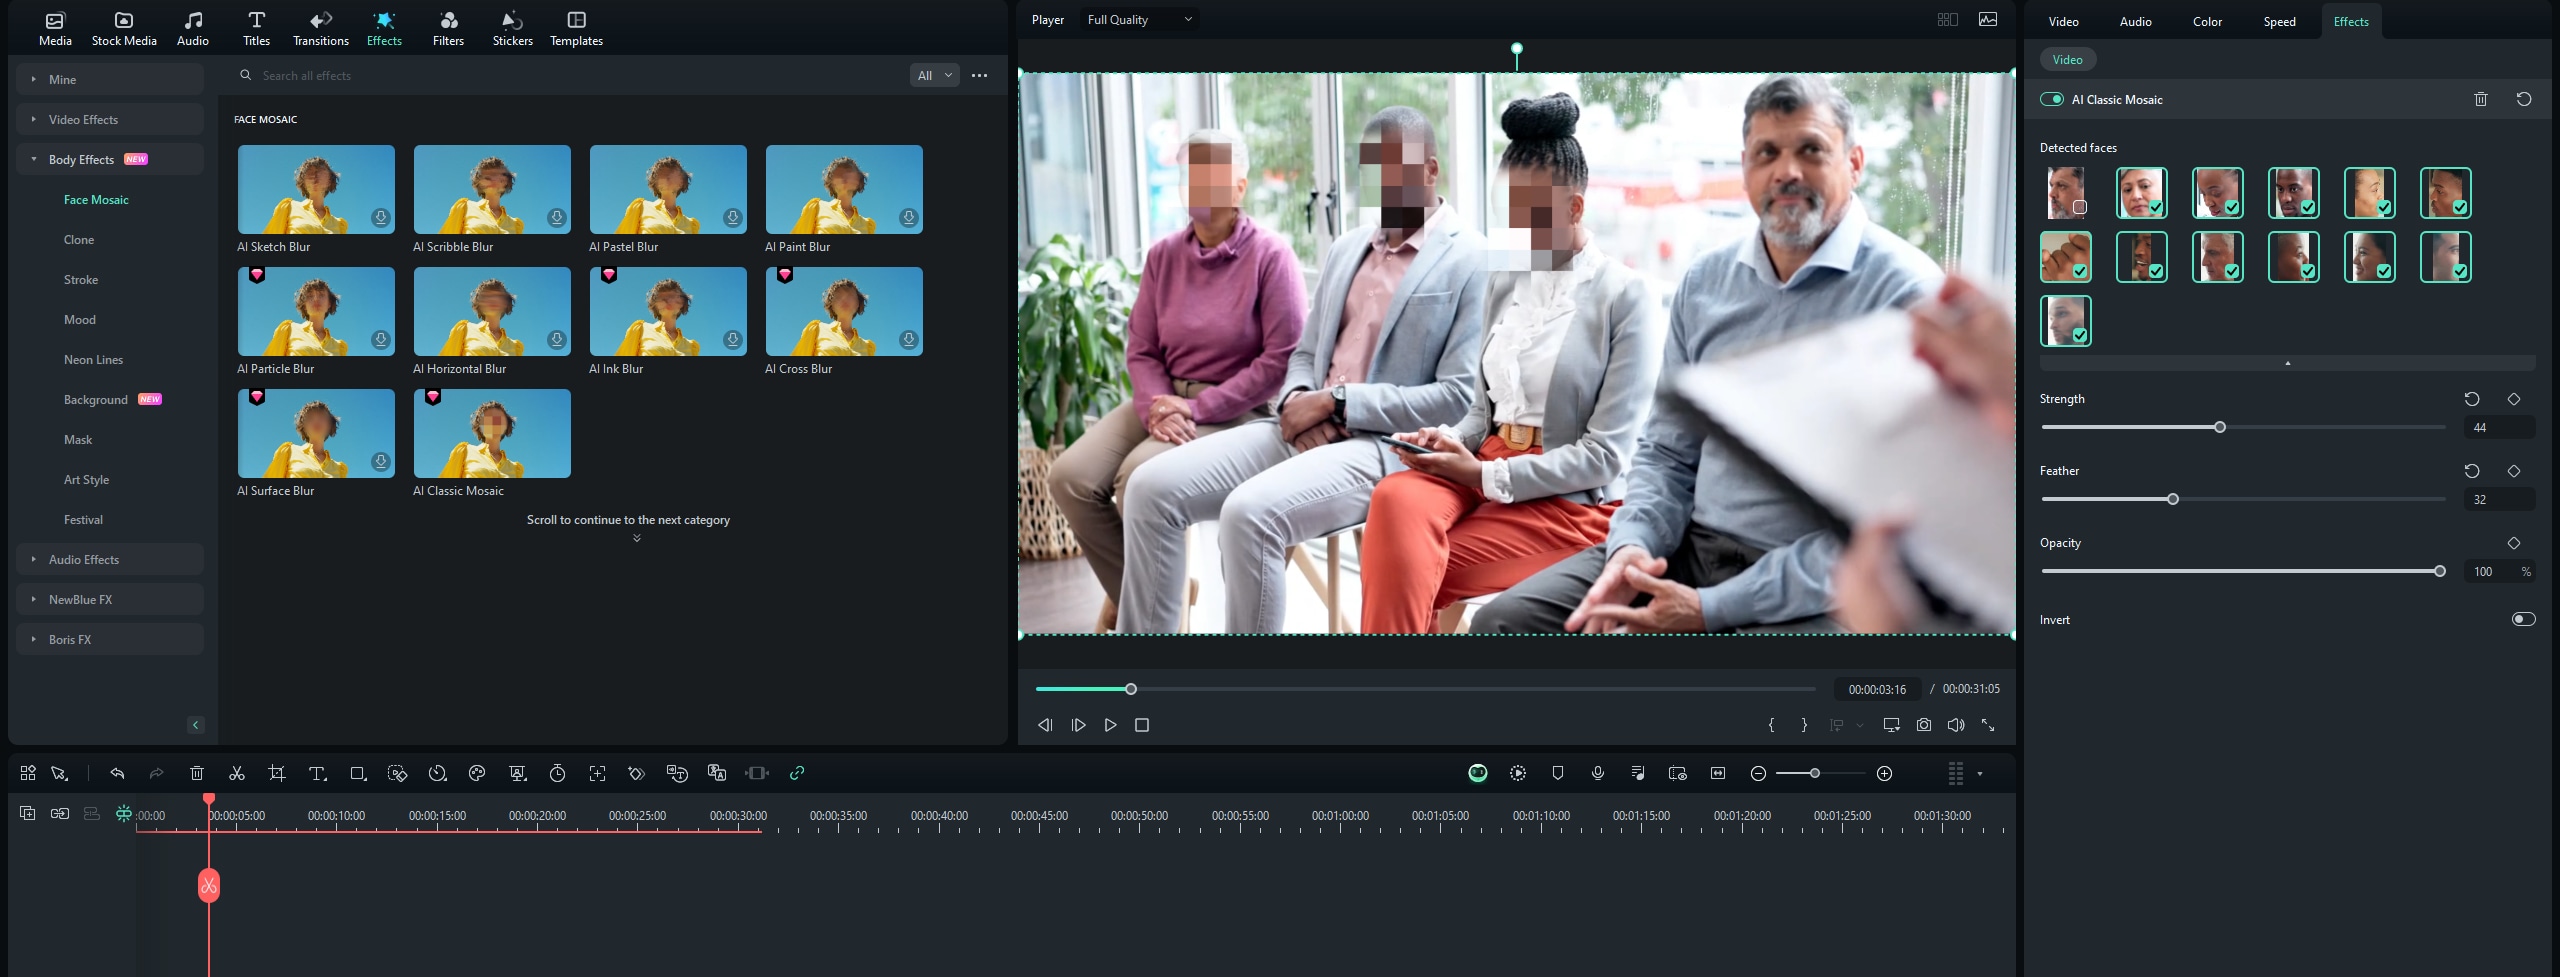
- Step 3: On the editor panel, deselect the faces you don’t want to apply face blur to.
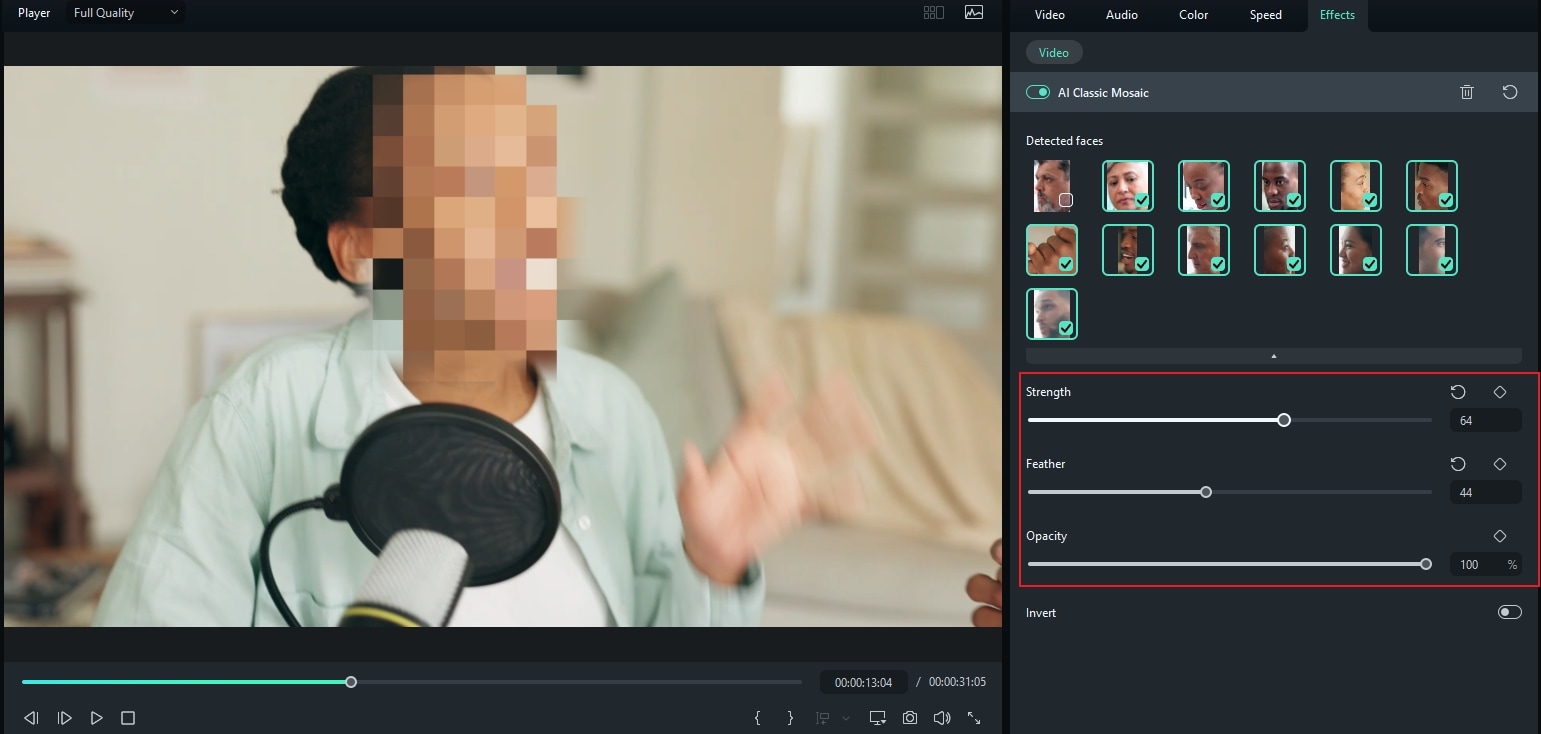
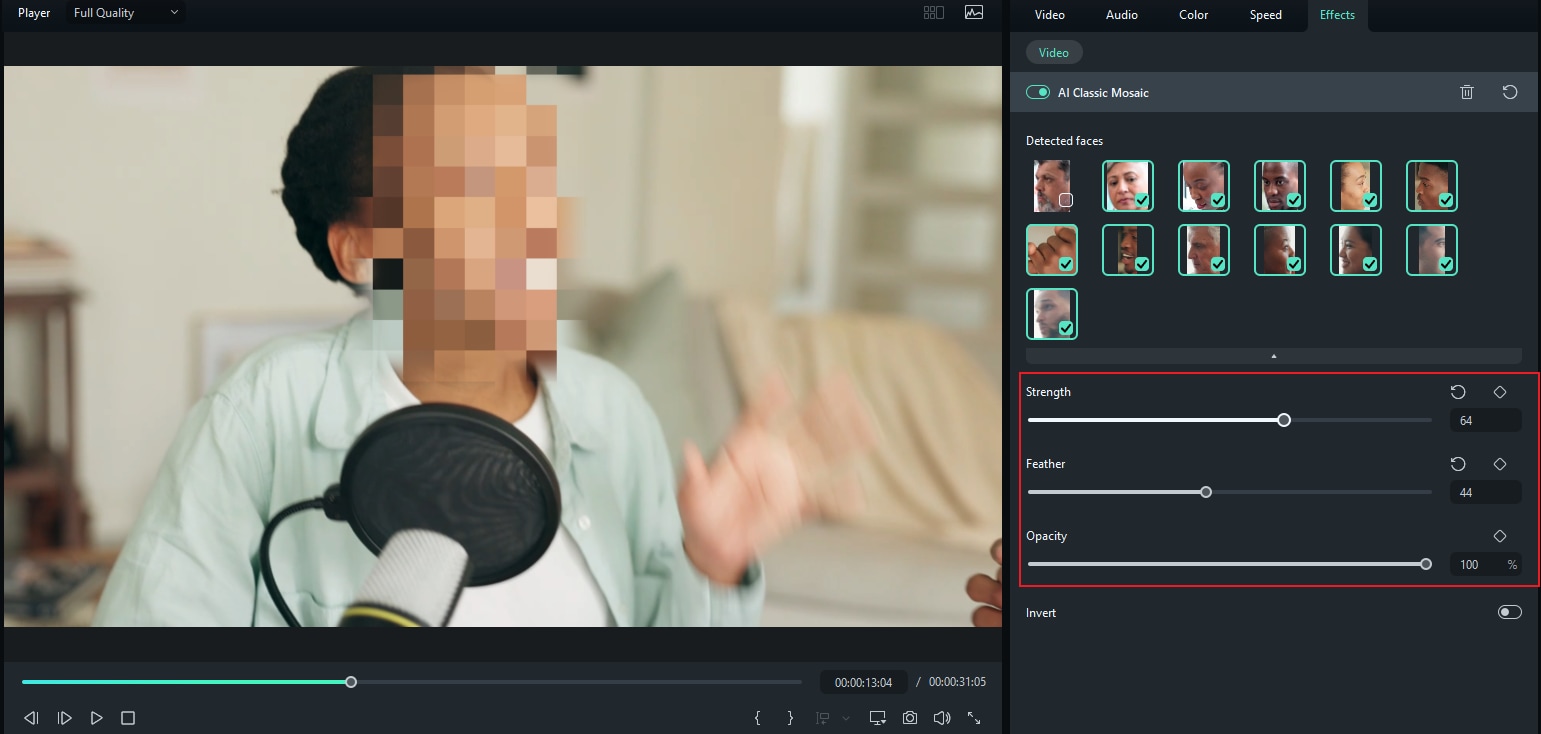
- Step 4: Adjust blur Strength, Feather, and Opacity in the Property Panel.
Conclusion
Motion blur isn’t just about creating cool visuals—it’s a powerful way to add energy, movement, and a cinematic touch to your videos. Whether you're going for a stylized look or want to draw attention to fast-paced action, the motion blur face effect delivers both impact and creativity.
You can achieve this effect by adjusting camera settings as outlined in this guide, or take the easier route with editing software. Filmora makes it simple to apply face motion blur using built-in effects or the AI Face Mosaic, which can intelligently blend blur with movement for a seamless result.
With just a few clicks, you can turn an ordinary shot into something unique and visually striking.


