
 100% Security Verified | No Subscription Required | No Malware


 ChatGPT
 Perplexity
 Gemini
 Claude
 Grok
Grok
X, formerly known as Twitter, remains one of the top social platforms today, and it has officially entered the AI creation space with Grok 3, a powerful Grok AI video generator designed for modern creators.
For those unfamiliar, Grok AI video tools go beyond smart replies or news summaries. They help creators generate video scripts, visualize scenes, and build short-form or long-form content faster. Combined with the Grok AI video creator workflow, users can move from idea to video with far less effort than traditional editing methods.
In this article
Part 1. Meet Grok 3: The Powerful AI from X (Formerly Twitter)
Developed by xAI and backed by Elon Musk, Grok 3 AI is fully integrated into the X platform, making it easy to access where people already scroll and post. Users are leveraging Grok 3 AI for all kinds of tasks — from checking facts on tweets in real-time to summarizing breaking news or long threads into short, readable updates. It's also great for writing captions, generating memes, and even asking for TV show recommendations.
But Grok 3 goes beyond social media. You can access it via the Grok app on iOS and Android or through its official site at Grok.com, where everything runs smoothly. Behind the scenes, the creative engine powering Grok AI video generation is Grok Imagine. This system works as both a Grok AI video generator and an image-to-video solution, allowing users to transform text prompts or images into animated clips.
Through the Grok Video Generator interface, creators can easily experiment with text-to-video, Grok AI image to video generator features, and multiple visual styles, making Grok a flexible AI video creation tool.
Grok Imagine Features Overview:
- Text-to-video generation: Convert written prompts into dynamic video clips.
- Image-to-video conversion: Upload an image and let AI animate it into a short video.
- Audio generation: Automatically add music or sound effects.
- Multiple modes (Normal, Fun, Spicy): Control the style and tone of your videos.
Grok 3 AI is designed to work smarter, faster, and help creators keep ideas flowing, making it a versatile tool for social media content, marketing, or personal projects.
Is Grok Video Generator Free? Pricing & Limits Explained
Many users ask whether Grok AI video generator free options are available. Currently, free users can generate up to 20 AI videos every 24 hours using the Grok AI video generator, which is more than enough for casual creators or first-time users.
Premium and Premium+ plans unlock higher limits, faster generation speeds, and smoother access to advanced Grok AI video creation features. According to community feedback, the free Grok AI video generator is a great starting point, while paid plans better suit high-volume creators.
Part 2. How Grok 3 Can Boost Your Video Editing Workflow
With all those smart capabilities packed into Grok 3 AI, it's easy to get creative and start using it in unexpected ways. One of the coolest things you can do is turn it into your own video editing assistant.
That's right, when you pair Grok 3 with your favorite video editing software, your workflow instantly feels smoother and more organized.
Here's how Grok 3 AI can seriously boost your editing game:
Method 1: Text-to-Video with Grok Imagine
- Open Grok: Visit the Grok website or launch the Grok app on iOS or Android.
- Enter a text prompt: Describe the video you want to create, such as a short promo, vlog intro, or cinematic clip.
- Generate visuals: Let Grok Imagine create an image or storyboard based on your prompt.
- Convert to video: Use the Grok Video Generator to turn the generated image into a short video.
- Select a mode: Choose between Normal, Fun, or Spicy mode to control the video style.
- Download or share: Export the final video or share it directly on social platforms.
Method 2: Image-to-Video Conversion
- Upload an image: Select a JPG or PNG image with good resolution for best results.
- Choose animation effects: Pick motion styles or transitions to bring the image to life.
- Adjust video settings: Fine-tune duration and motion intensity if available.
- Generate the video: Let Grok Imagine animate your image into a short video clip.
- Export the result: Download the video or move it into your editing workflow.
Part 3. Turn Grok 3 Scripts into Amazing Videos
With all those standout features, it's easy to see why Grok 3 earns a spot as your video editing assistant. So now it's time to turn those ideas into something real.
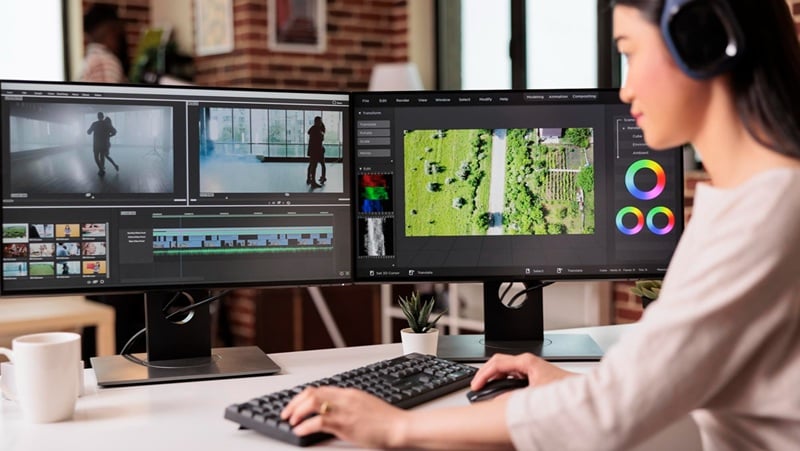
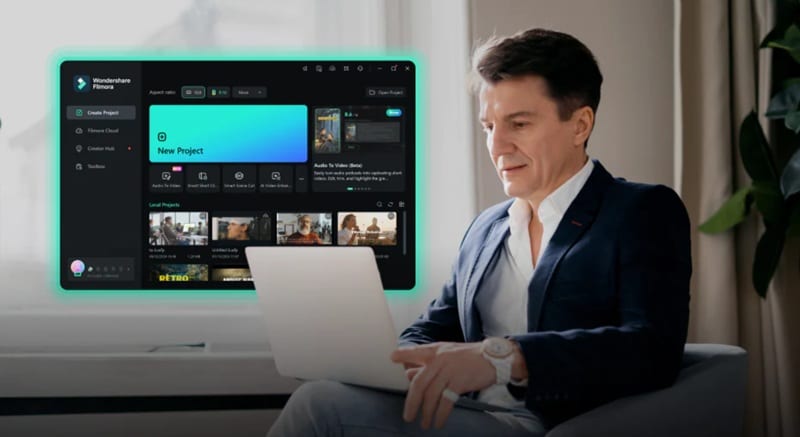
To make the whole process smooth and actually fun, you'll want a video editor that's both powerful and easy to use. Wondershare Filmora fits that vibe perfectly with its clean interface, smart editing tools, and built-in AI features.
 secure download

Here's how Filmora works perfectly with Grok 3 AI to bring your ideas to life:
When you team up Grok 3 AI with Filmora, your video can go from idea to something that looks clean, creative, and fully thought out. Grok 3 handles the planning side while Filmora turns those ideas into a video that actually looks and sounds great.
Step-by-Step Guide to Create Videos with Grok 3 and Filmora
Here's a quick and easy guide to help you make it all come together:
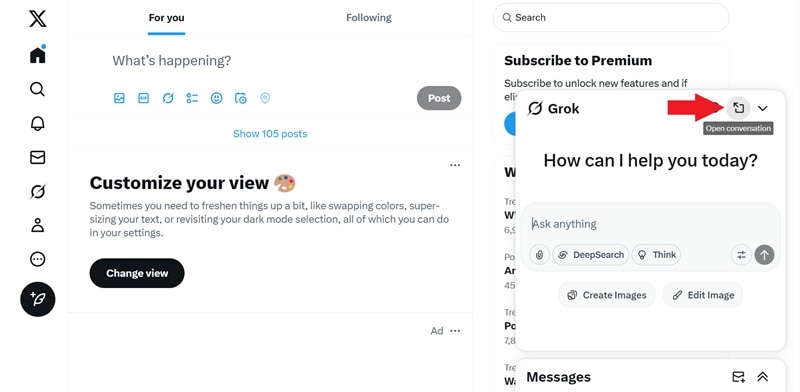
01of 05Access Grok from your X account
First things first, head over to Grok's website and log in with your email. You can also access Grok directly from X if that's easier. Once you're signed in, just tap the Grok icon at the bottom right of your screen.
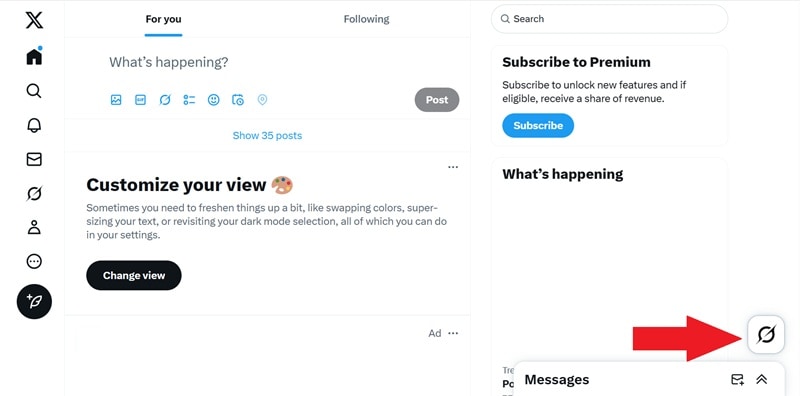
Then go ahead and expand the window to open it in full view.
02of 05Use Grok to Generate a Video Script
Now go ahead and type what you want into the description box. For example, you can ask Grok 3 AI to help you write a video script from scratch. Take a look at the sample prompt below for a quick idea. Once you're happy with it, press enter and let Grok handle the rest.
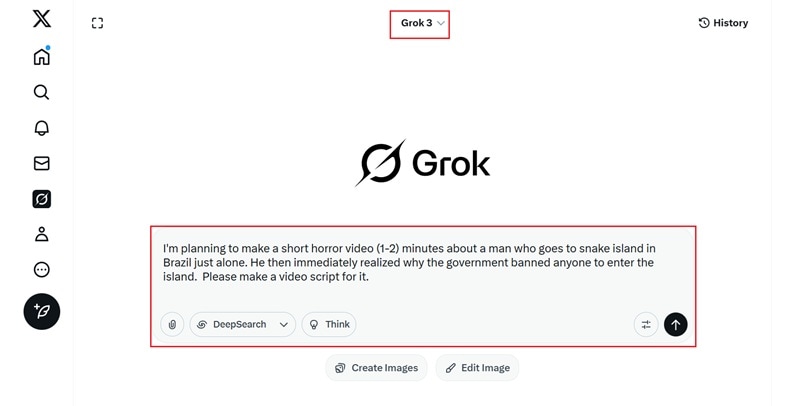
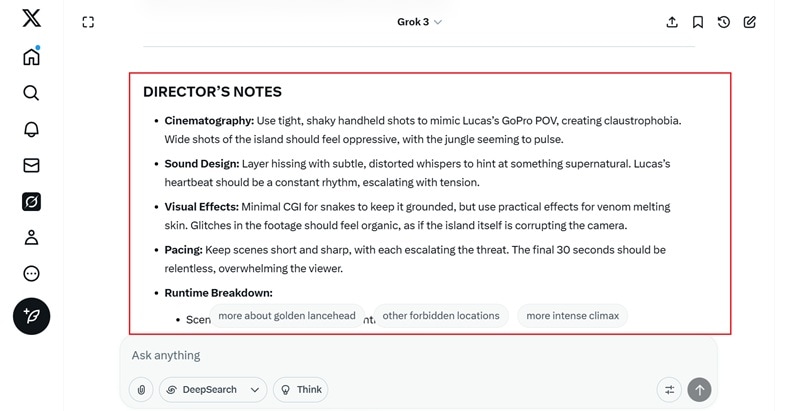
Once Grok 3 AI finishes generating, you'll get a complete video script ready to work with.
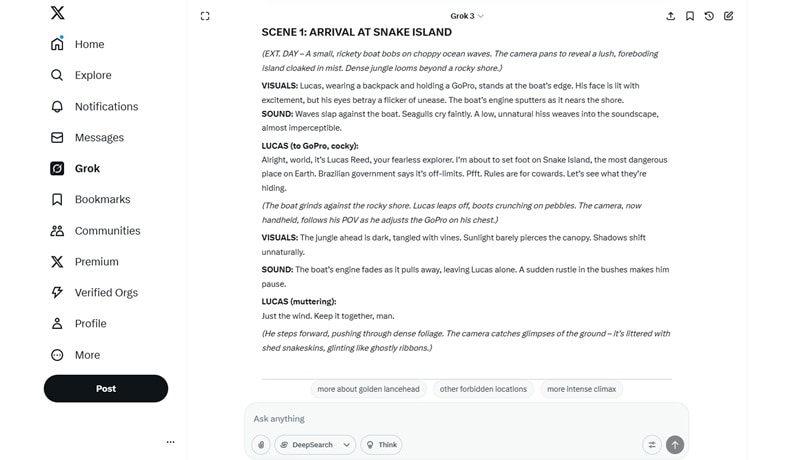
If you scroll down, it even includes helpful notes on things like camera angles, sound ideas, visual effects, and how to pace the scenes just right.
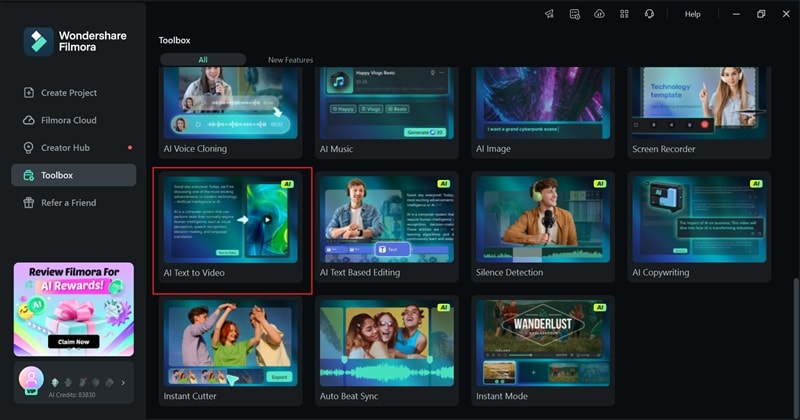
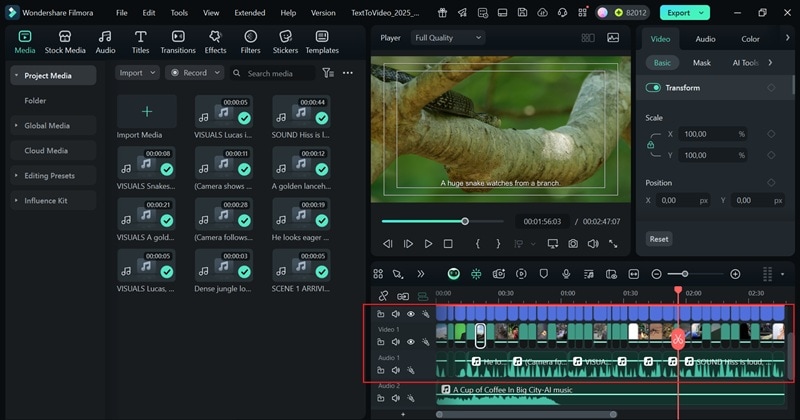
03of 05Open Filmora and Use the Text-to-Video Feature
Now it's time to turn that Grok 3 script into a real video using Filmora's built-in Text to Video feature. The process is quick and beginner-friendly:
- Open Filmora and navigate to the Toolbox tab.
- Select Text to Video from the available tools.
- Make sure you have the latest version of Filmora installed.
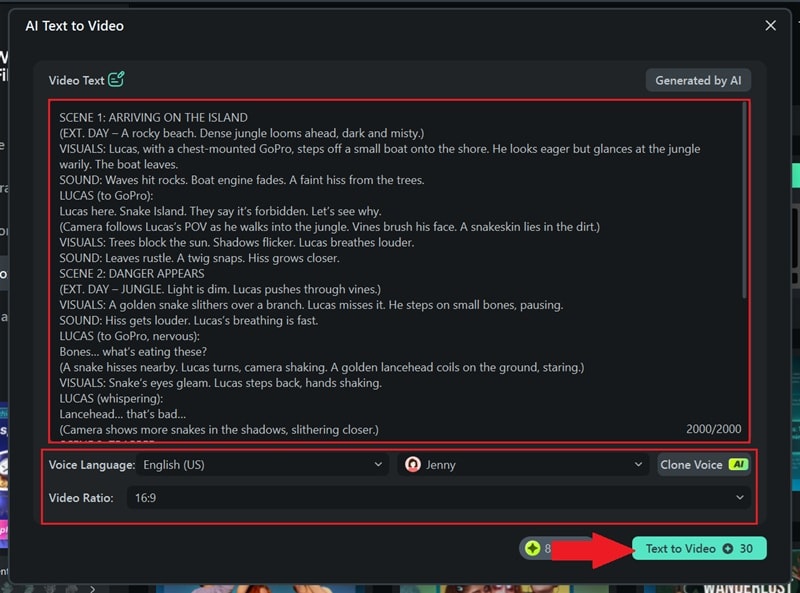
Once inside the Text-to-Video panel, paste your script from Grok 3. Then configure the following settings to customize the result:
- Language: Choose the voiceover language.
- Video Size: Set the aspect ratio for your target platform (e.g., YouTube, Instagram, TikTok).
- Voice Style: Select a narration tone that fits your theme.
04of 05Edit the Video Based on Grok's Suggestions
After generation, your video will appear on the Filmora timeline. Preview it and start making creative adjustments:
- Review and refine music, voiceovers, and visuals that Grok suggested.
- If needed, go back to Grok 3 for more ideas or variations.
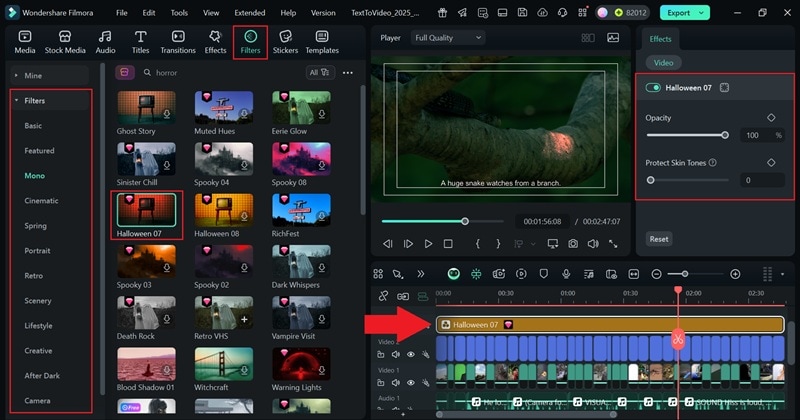
To enhance the visual style:
- Go to the Filters tab.
- Choose a filter that fits your mood—cinematic, vintage, spooky, etc.
- Drag it onto the timeline and adjust the intensity on the left panel.
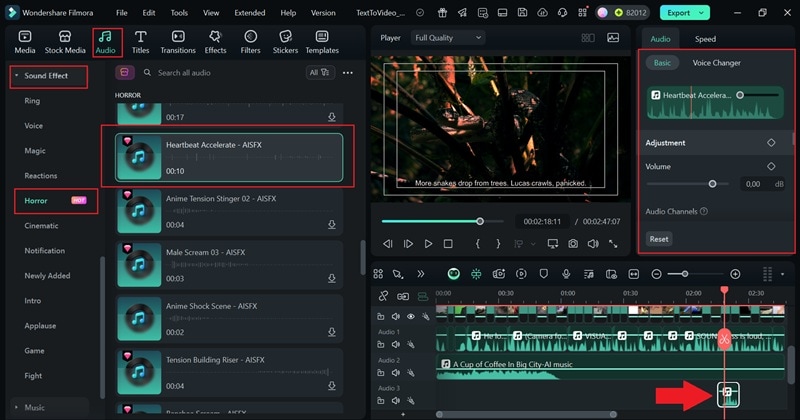
To add immersive sound effects:
- Navigate to the Audio tab → Sound Effects.
- Select a category like "Horror" or "Nature".
- Drag your chosen effect to the timeline and adjust volume and duration.
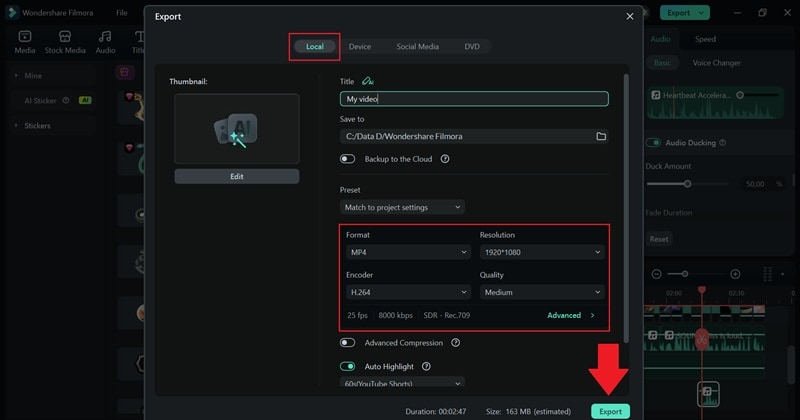
05of 05Polish and Export
With your edit complete, it's time to polish the audio and export the final version:
- Use Audio Ducking to balance voiceovers and background music.
- Select the audio track, open the settings panel on the left, and enable "Audio Ducking".

When everything looks and sounds right:
- Click Export in the top-right corner.
- Choose Local to save to your device or Social Media for instant sharing.
- Select the desired format, resolution, and name your video.
Traditional Workflow vs. Grok 3 AI Assisted Editing (Comparison Table)
After trying out Grok 3 AI as your video editing assistant, it's clear how much easier and faster the creative process can be. Compared to the traditional way of doing everything manually, using Grok 3 alongside tools like Filmora can save time and boost creativity. Here's a quick comparison to show the difference:
| Step | Traditional Workflow | Using Grok 3 AI Assistance |
| Idea Generation | Brainstorming on your own or with a team. | Instantly get ideas and concepts with Grok prompts. |
| Scriptwriting | Writing from scratch, often time-consuming. | Grok 3 creates full scripts with scene-by-scene structure. |
| Editing Timeline | Manual scene arrangement and pacing. | Use Grok-generated scripts in Filmora's AI Text to Video. |
| Sound & Music Choices | Browsing libraries, testing what fits. | Grok gives sound ideas and Filmora offers royalty-free audio. |
| Finishing Touches | Final edits take extra time and trial and error. | Faster review with Grok's feedback and Filmora's smart tools. |
Bonus: From AI-Generated Prompts to Dynamic Videos
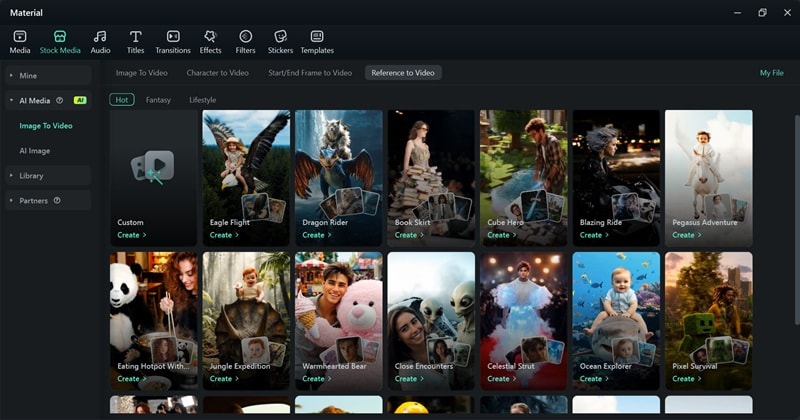
Beyond scripting, Grok 3 can also help you generate creative image prompts that spark visual ideas for your projects. Using these prompts, you can leverage Filmora's AI-powered image generation tools to quickly create unique visuals tailored to your concept.
But it doesn't stop there — with Filmora's AI Image to Video feature, you can easily animate those generated images, turning static pictures into engaging short videos. This creates a smooth workflow from Grok 3's imaginative prompts to vivid, moving content, perfect for social media, promos, or storytelling.
Combining Grok 3's creativity with Filmora's AI tools gives you a powerful and streamlined way to bring both your video scripts and visuals to life.
If you want to see how it's done, check out our official video tutorial below.
secure download Conclusion
Grok 3 is quickly becoming a standout Grok AI video creator for modern content creation. From generating scripts to powering Grok AI video generator workflows, it helps creators move faster and stay creative.
When paired with Wondershare Filmora, Grok AI video ideas transform into finished content using AI Text to Video and Grok AI image to video generator workflows. Together, they create a smooth, efficient, and scalable AI video creation experience.
