Keyframe Animation for Beginners and Pros
Keyframing is a fundamental editing technique and a pivotal element for most modern animations, video effects, and motion graphics. Learn what keyframes are and what you can do with them, and master the art of keyframing in Filmora.
 4.7
(15746 reviews)
4.7
(15746 reviews)
Keyframing is a fundamental editing technique and a pivotal element for most modern animations, video effects, and motion graphics. Learn what keyframes are and what you can do with them, and master the art of keyframing in Filmora.
Keyframe Basics What Is Keyframing
Keyframing is a technique used in animation and video editing, in which certain points or "frames" within the animation or video are designated as key points. These key points define the beginning and end of a specific action, movement, or transformation. Video editing software, such as Filmora, automatically generates the in-between frames, creating a smooth transition from one keyframe to another. Keyframing can be applied to various properties, including position, scale,path curve,rotation,motion blur, and opacity.
Keyframe Example
Suppose you've recorded a video of river transport and want to focus on a specific ship. In that case, creating a slow Zoom-in effect with keyframes is the perfect way to go about it. You can start by placing a keyframe at a point in a clip where you want the zoom effect to begin. Then, place another point where you want the zoom effect to end. From there, all you need to do is adjust the scale to change the zoom level of the second keyframe, and Filmora will automatically create a smooth zoom-in transition between these two points in the clip.
Changes You Can Make With Filmora Keyframes
While keyframing's primary purpose involves motion graphics and animation, it's not strictly related to these types of videos. It also has a significant role in numerous video editing tasks, allowing you to adjust various aspects of your footage. These aspects are called parameters, and in Filmora, they include the following elements:
- Video: Position, Scale, Path Curve,Rotation, Motion Blur,Opacity, Mask, Color, etc.
- Audio: Volume, Fade in/out, Pitch, Equalizer, etc.
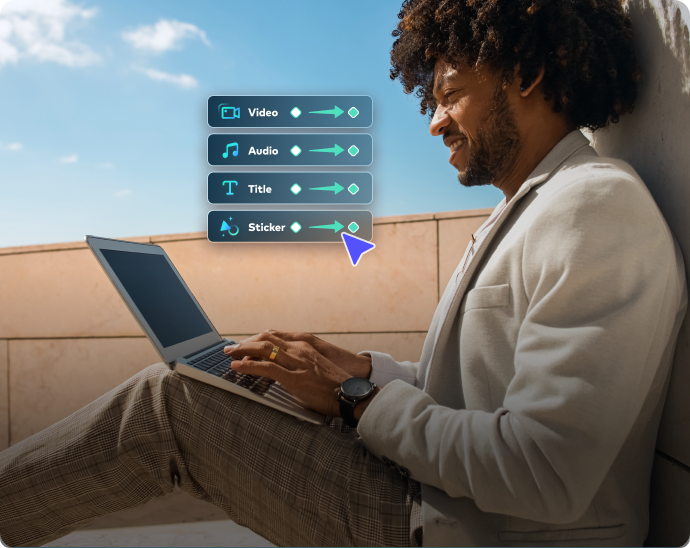
- Others:Text & Titles, Effects, Stickers, Split-screen, etc.
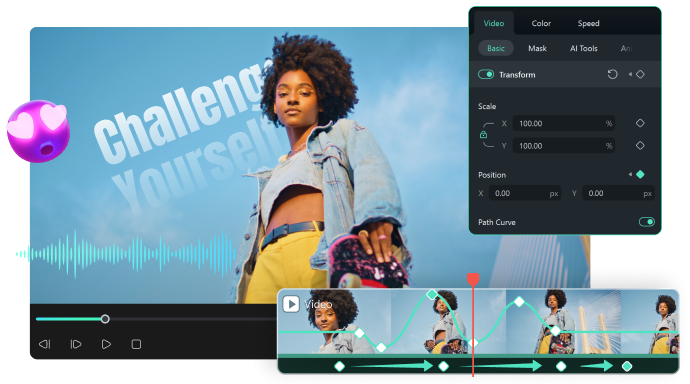
Keyframe Interpolation
Both Temporal and Spatial Interpolations
Are Supported in Filmora Keyframe
In video editing and animation, spatial and temporal interpolation define an object's movement between two keyframes. While both control different aspects of motion, depending on what you're trying to do, Filmora can calculate values between two points and determine whether you want to create a spatial or a temporal interpolation.
Keyframe Types Understanding the
Keyframe Types in Filmora
Flexible Control Over Keyframe Properties
Easily create diverse animations by keyframing properties such as scale, position, rotation, corner radius,
and shadow.
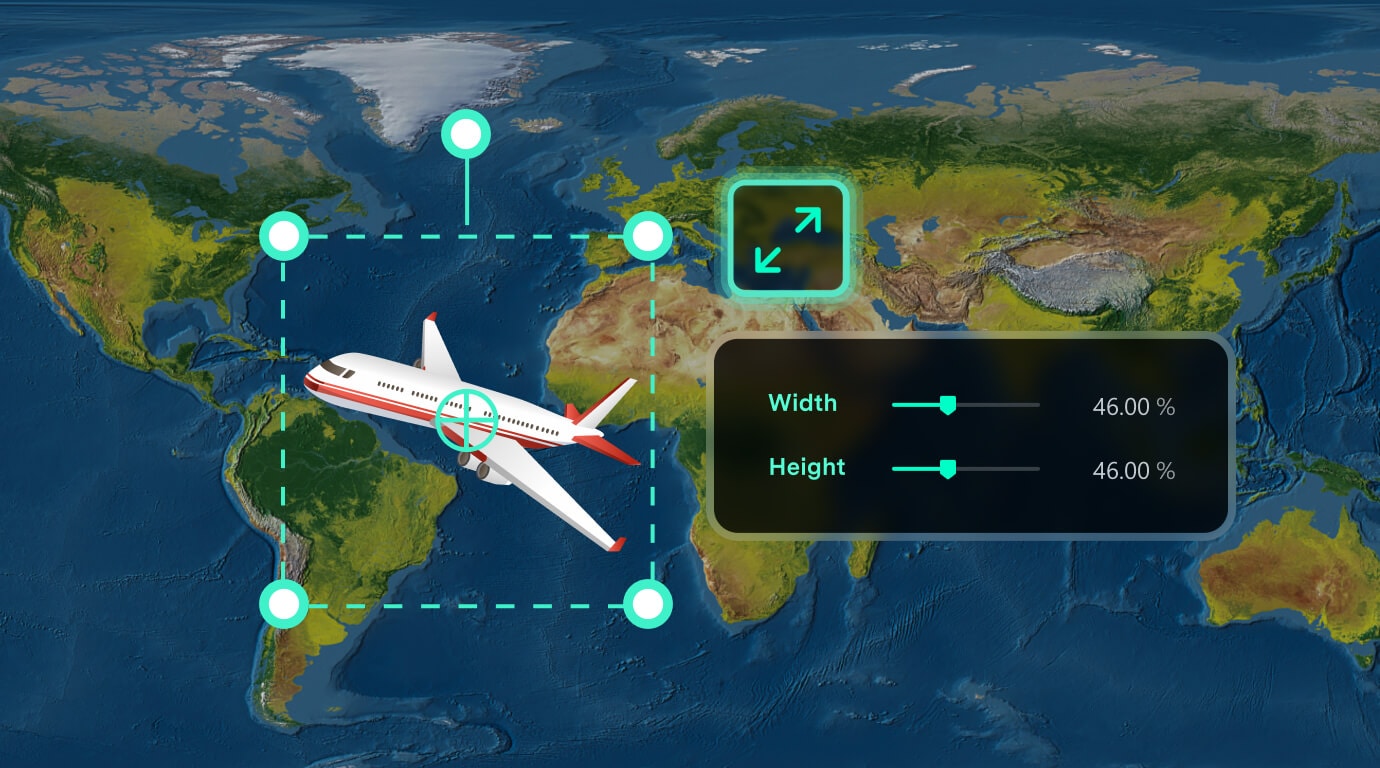
Scale animation
Scale animation lets you gradually enlarge or shrink media by setting different scale values at
different points in time. By adjusting the scale between keyframes, you can easily create zoom-in
and zoom-out effects, making it ideal for highlighting subjects, showcasing product details, or
adding dynamic movement to images.
Common effects: Zoom in, zoom out, push in, pull out
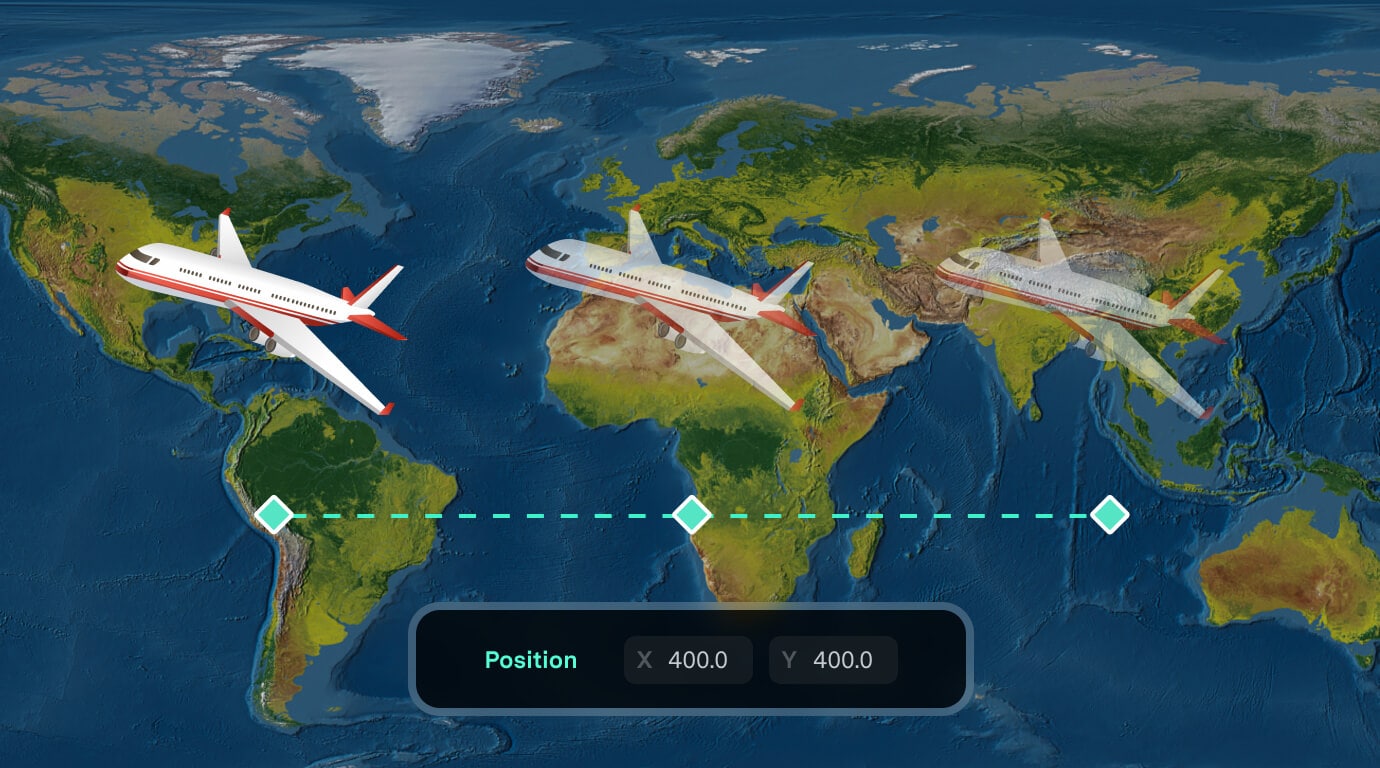
Position animation
Position animation creates movement by changing an element's X and Y coordinates at different points
in time. For example, you can make text slide in from outside the frame or move an image or video
subject from left to right. With multiple keyframes, you can create more dynamic motion paths.
Common effects: Fly in, slide out, horizontal movement, vertical
movement
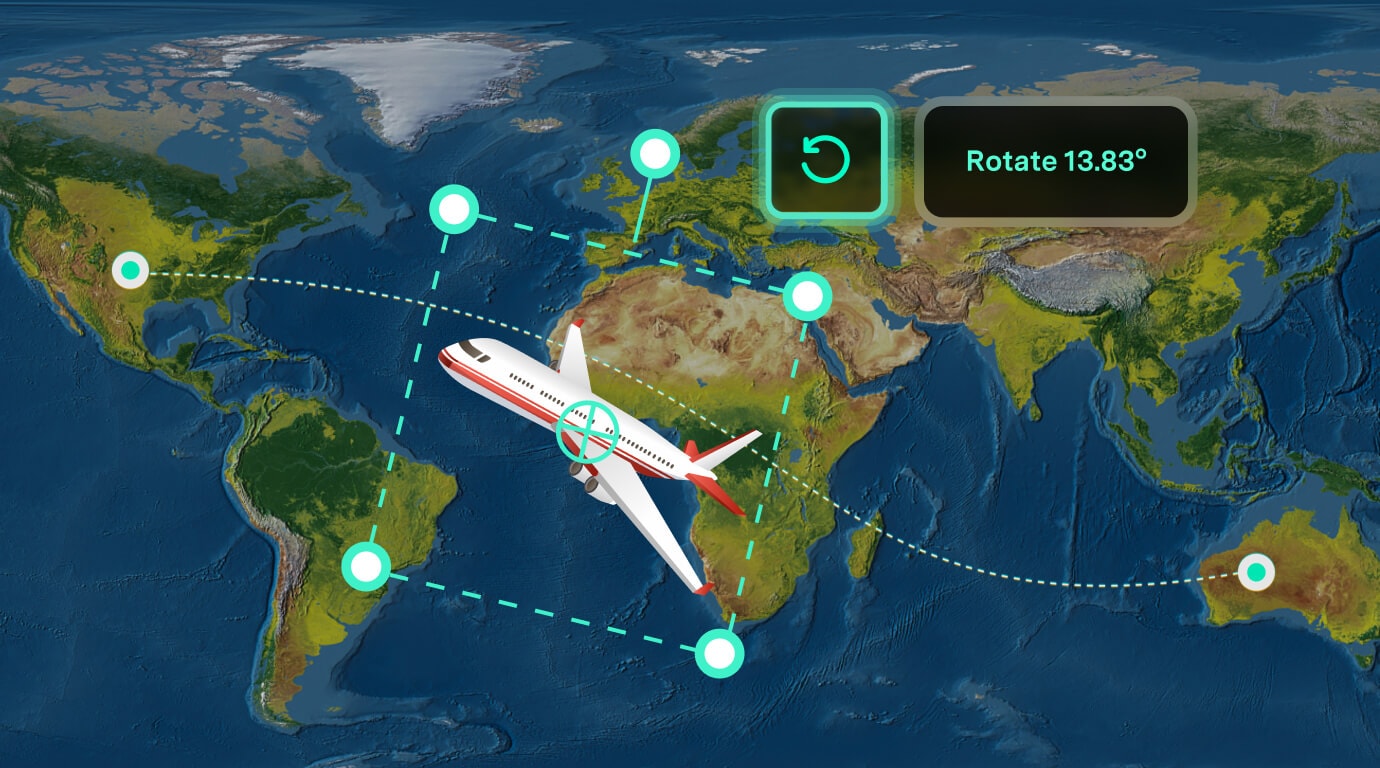
Rotation animation
Rotation animation lets you change an element's rotation angle over time, creating continuous motion
for images, text, logos, and other elements. By adjusting the rotation between keyframes, you can
create subtle swings, full rotations, or quick flips for more dynamic visuals.
Common effects: Logo rotation, text rotation, element flips
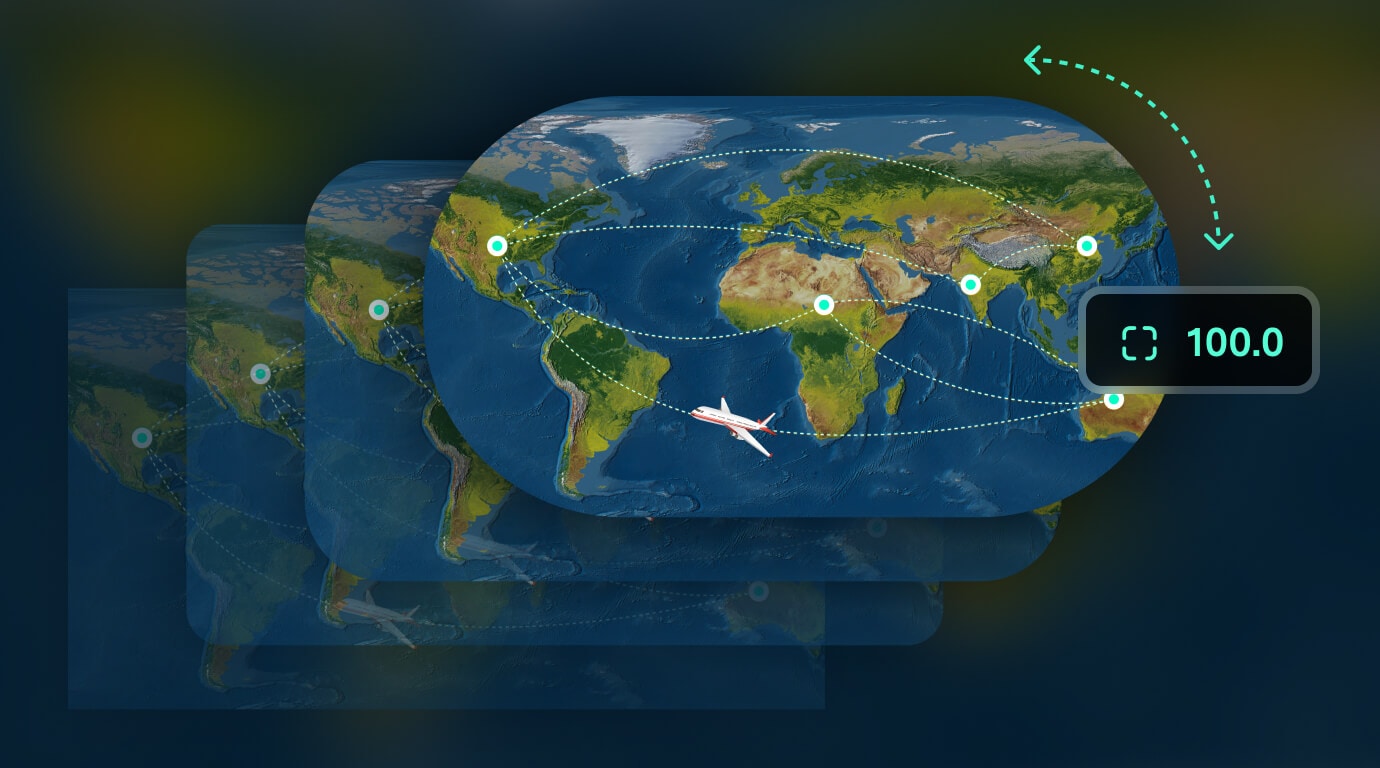
Corner radius animation
Corner radius animation lets you animate an element's corner radius over time, creating a smooth
transition between sharp and rounded corners. It works well for images, video cards, and other
visual elements, allowing you to transform a rectangle into a rounded card or create smooth shape
transitions.
Common effects: Sharp-to-rounded corners, card transformations,
shape transitions
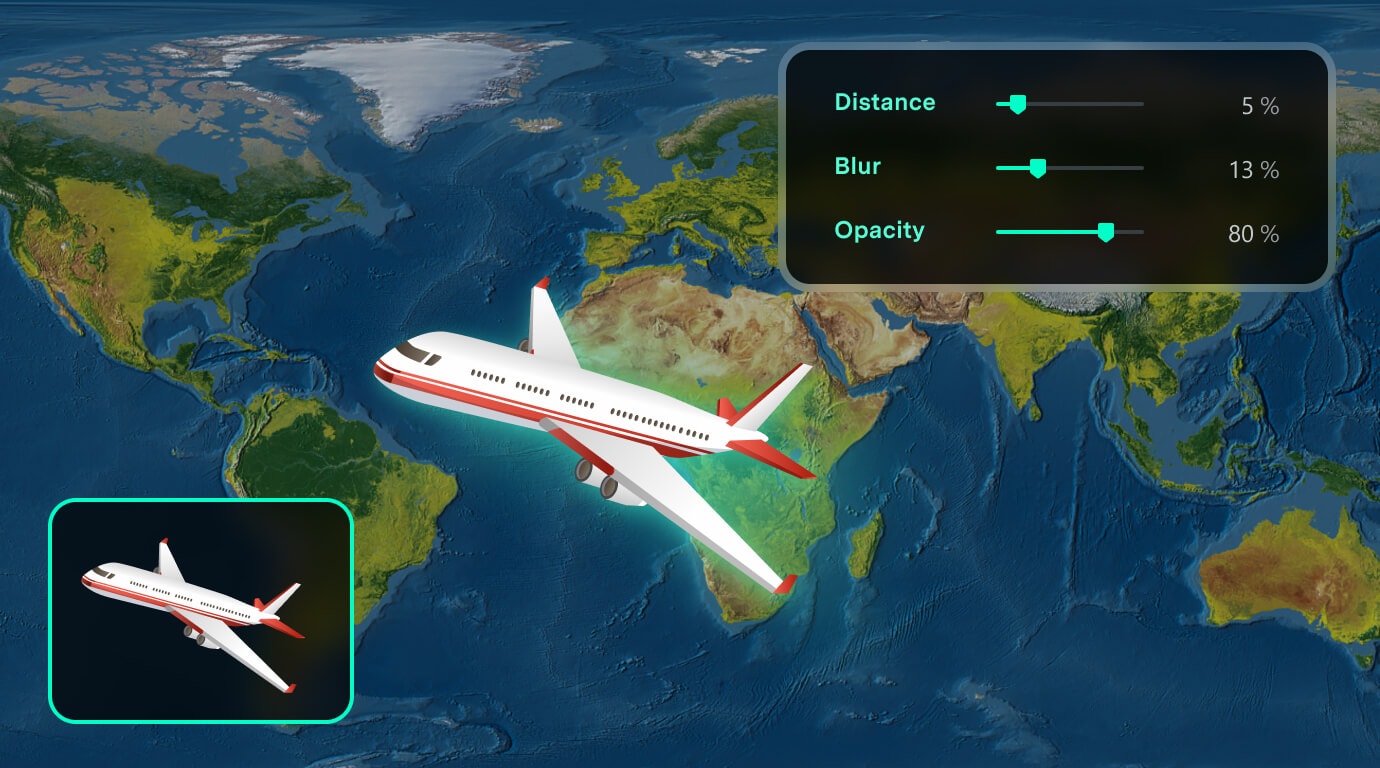
Shadow animation
Shadow animation lets you keyframe shadow properties such as angle, distance, blur, and opacity,
making shadows change dynamically over time. For example, you can make the shadow behind text or
images gradually deepen, shift position, or become softer, adding depth and motion to your
visuals.
Common effects: Moving shadows, intensity changes, blur changes,
dynamic drop shadows
Make Keyframe Animations Feel More Physically
Natural
Fine-tune motion blur angle, position, and samples to create more natural motion trails during
fast movement.
Note: Motion Blur works with basic transform keyframes to enhance motion in your animations and takes effect when position, scale, or rotation changes.
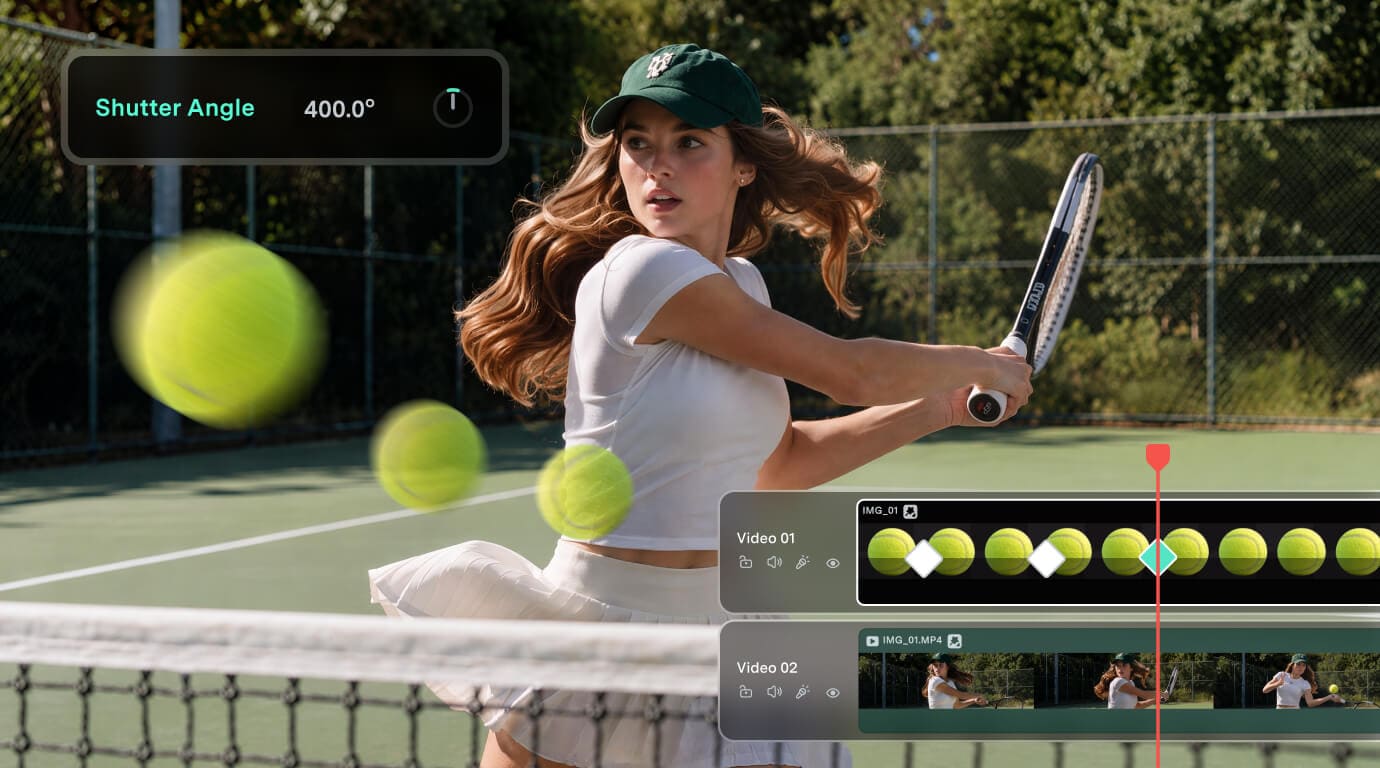
Motion Blur Angle
Motion Blur Angle controls the range and intensity of motion trails and can be dynamically adjusted
with keyframes. Higher values create more pronounced blur during movement. By changing the angle at
different points in time, you can make the motion blur adapt to the pace and rhythm of the
animation.
Common effects: Stronger motion trails, gradual blur changes,
enhanced sense of speed
Motion Blur Position
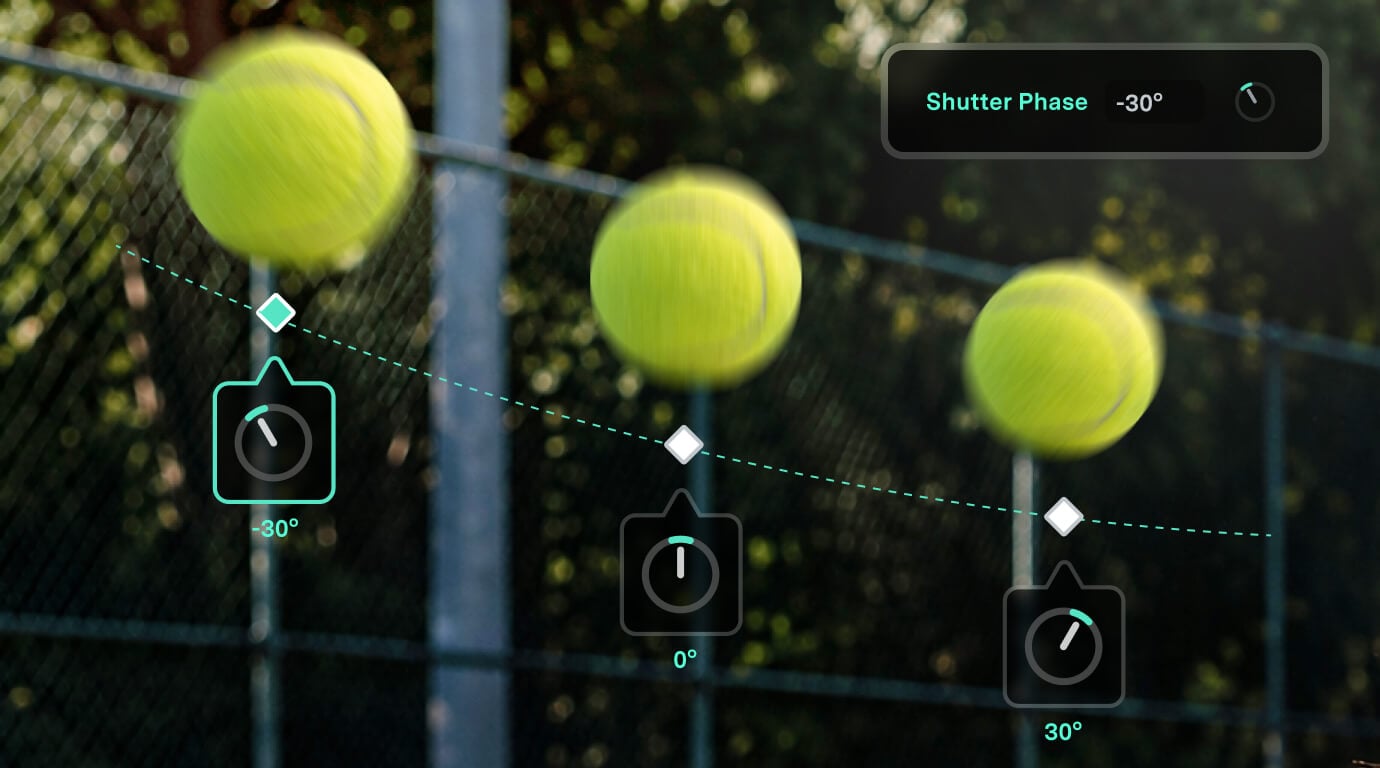
Motion Blur Position controls the temporal offset of motion blur relative to the current frame,
allowing the motion trail to appear more toward the front or back of the movement. By keyframing
this parameter, you can dynamically control where the motion trail appears throughout the
animation.
Common effects: Forward trails, backward trails, shifting trail
positions
Motion Blur Samples
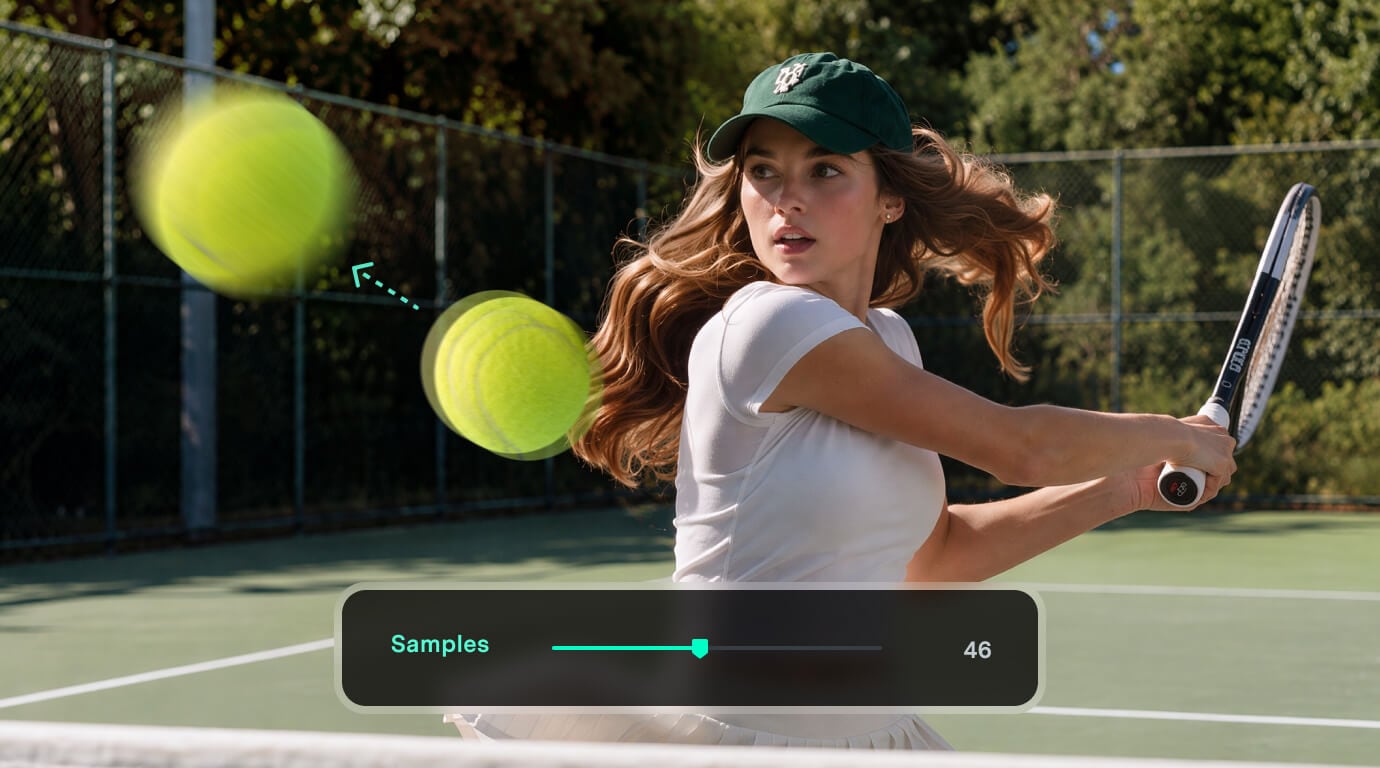
Motion Blur Samples controls the number of samples used to generate motion blur,
determining how smooth the motion trail appears. Higher sample values create smoother,
more natural trails during fast movement, scaling, or rotation,
but they also significantly increase processing demands.
The higher the value, the more CPU/GPU performance is required,
which may increase preview and rendering times.
Common effects: Smoother motion trails, more natural movement,
reduced ghosting and visual gaps
How To Use Keyframes in Filmora
Creating Keyframe Animation in Filmora is seamless, thanks to the video editing app's remarkable ease of use. You can follow the steps below to try spatial interpolation in Filmora or find detailed instructions by checking the full Keyframing in Filmora guide.
Step 1. Import the Media
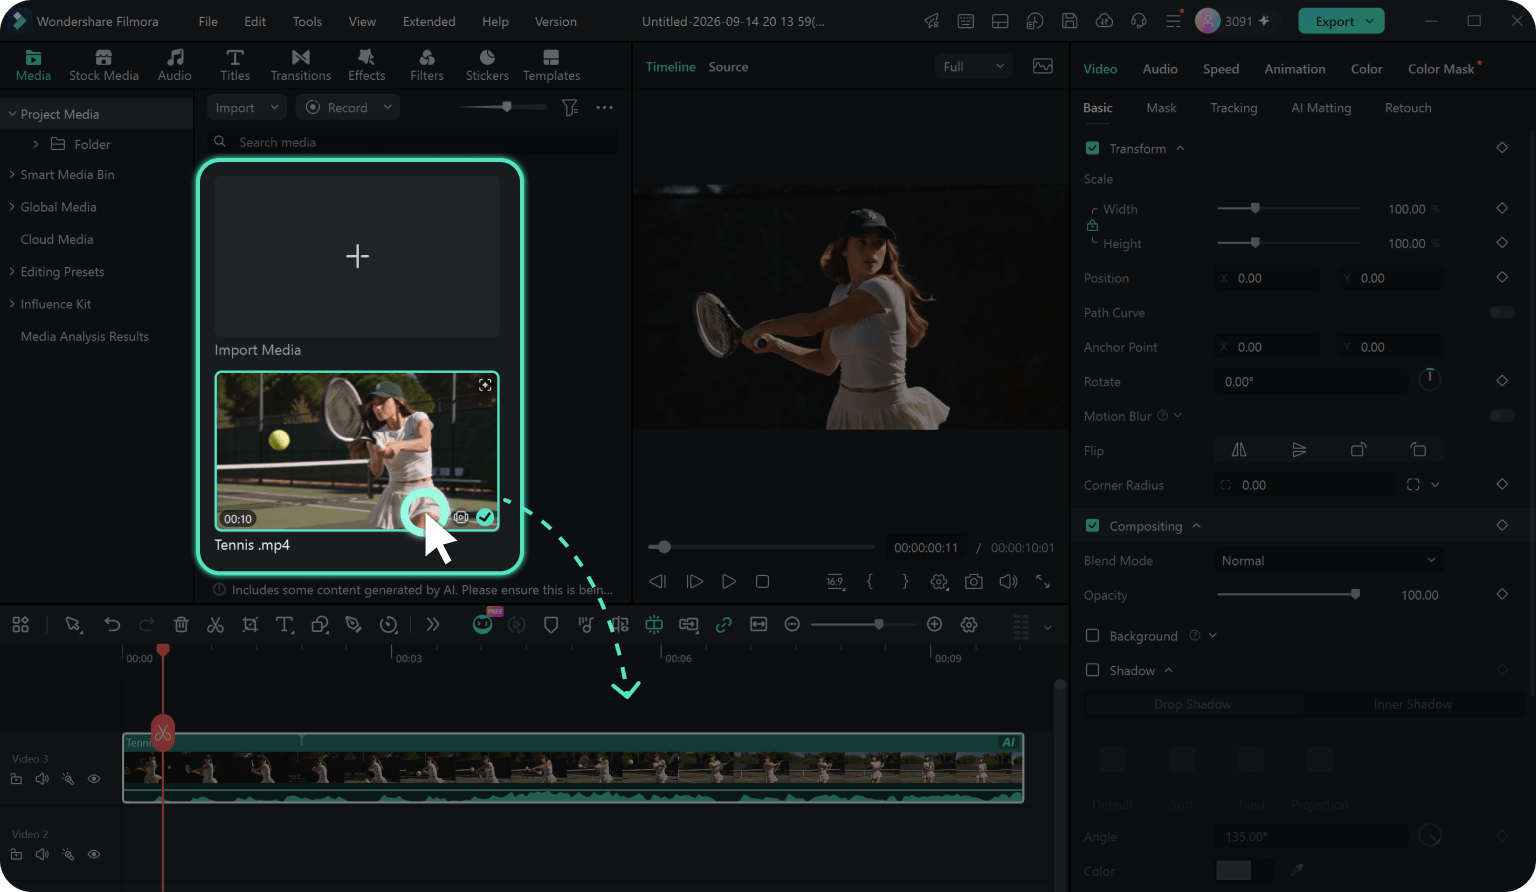
Import a video clip into Filmora and dragging it onto the Timeline.
Step 2. Add the Position Keyframe
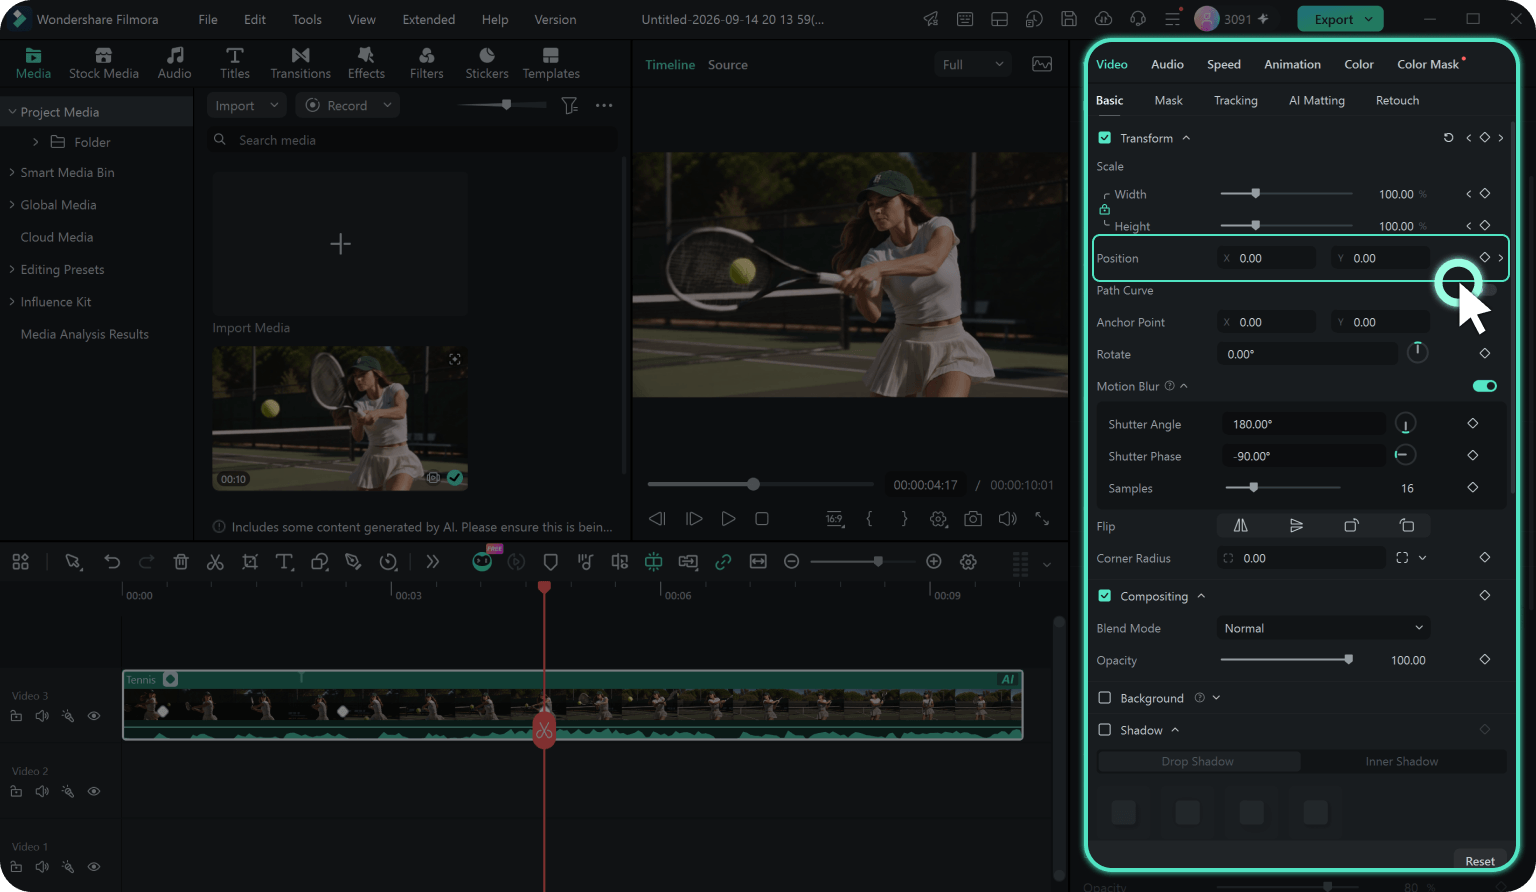
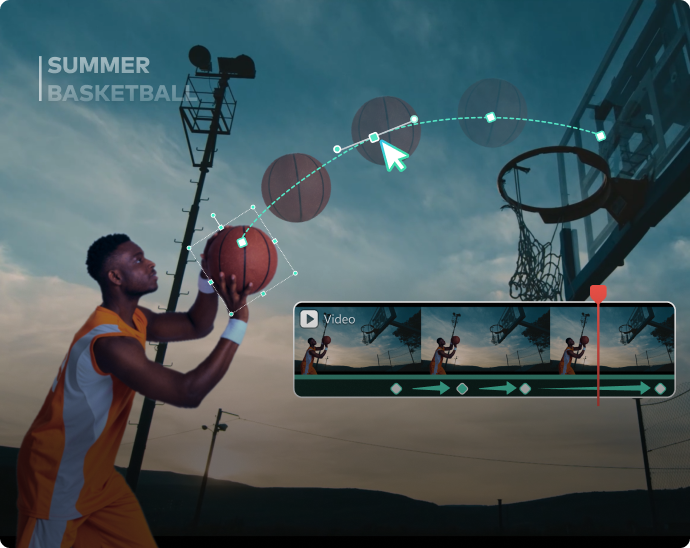
Scroll through the media file in the Timeline to locate the ideal starting point for your keyframe transition. Next, go to Video > Basic tab to add a position keyframe. After that, enable the Path Curve, move the playhead to the next frame on the timeline, and reposition the object in the Player to add another position keyframe. Repeat the steps until all keyframes have been added.
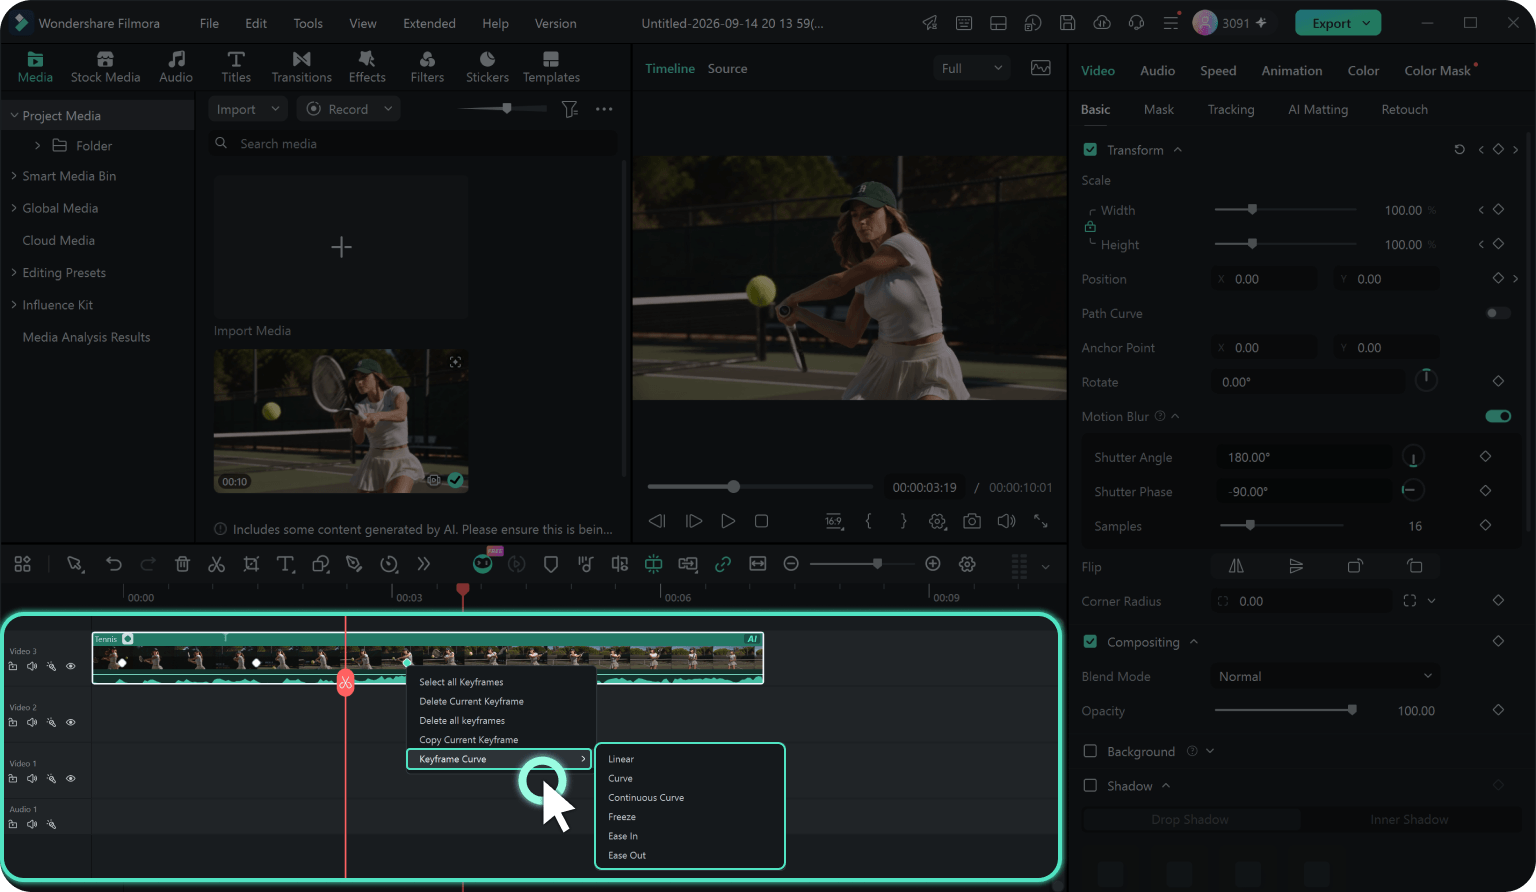
Step 3. Select a Keyframe Type
Choose the keyframe type that fits the motion you want. After setting the keyframes, enable Motion Blur from Video > Basic > Motion Blur when you need smoother movement.
Step 4. Preview and Save
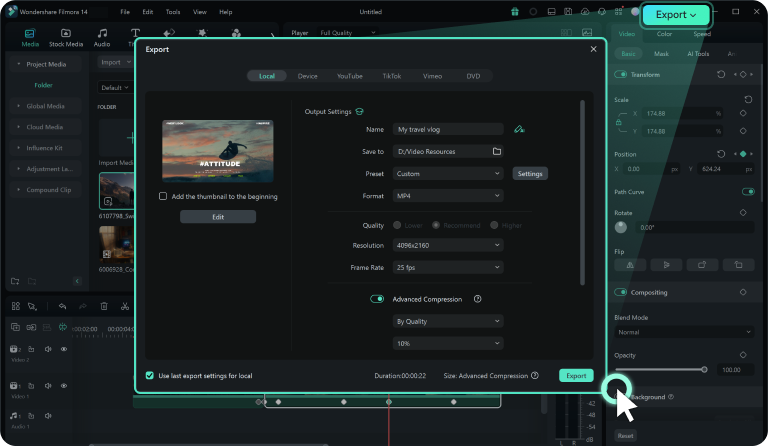
Finally, play the video in the Player to check if you're satisfied. If you are, hit the Export button and save the video to your device.
-
Step 1: Import the Media
Import a video clip into Filmora and dragging it onto the Timeline.
-
Step 2: Add the Position Keyframe
Scroll through the media file in the Timeline to locate the ideal starting point for your keyframe transition. Next, go to Video > Basic tab to add a position keyframe. After that, enable the Path Curve, move the playhead to the next frame on the timeline, and reposition the object in the Player to add another position keyframe. Repeat the steps until all keyframes have been added.
-
Step 3: Select a Keyframe Type
Choose the keyframe type that fits the motion you want. After setting the keyframes, enable Motion Blur from Video > Basic > Motion Blur when you need smoother movement.
-
Step 4: Preview and Save
Finally, play the video in the Player to check if you're satisfied. If you are, hit the Export button and save the video to your device.
Why Choose Filmora for Keyframing
Visual Keyframe Editing
Visual Keyframe Editing
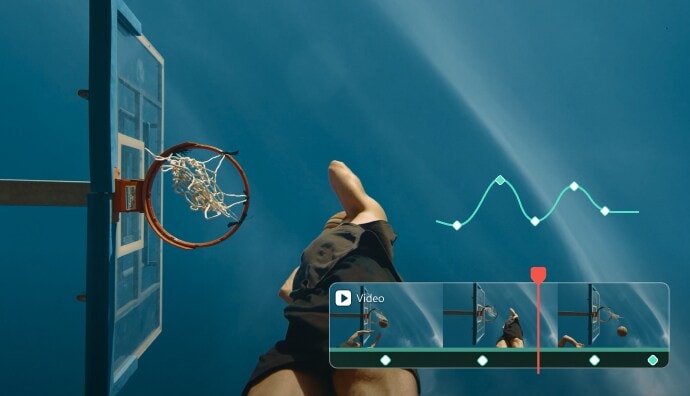
Adjusting keyframe animations can often feel challenging when you're doing it with pixels, percentages, and degrees. Yet, Filmora isn't limited to these adjustments. The video editing software also includes a Value Graph Editor and a Path Curve, allowing you to visually and intuitively adjust your keyframe parameters.
Multiple Parameter Adjustments
Multiple Parameter Adjustments
Different animations require different adjustments, and Filmora is perfect at this as it supports multiple parameter adjustments, including size, position, rotation, opacity, and other video or audio effects.
Preset Animation Effects
Preset Animation Effects
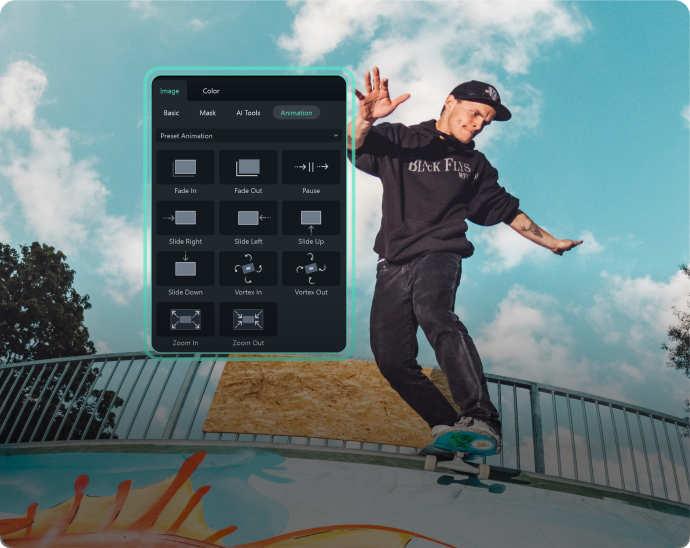
One of the primary advantages of Filmora is the massive library of effects, transitions, and filters. This library also includes preset animation effects for keyframing, allowing you to quickly add standard animations like Fade-in, Fade-out, Slide up or down, Zoom-in, Zoom-out, and other widely used ones.
Tap Into the Massive Potential of Keyframe Effects
Not only are keyframes a fundamental aspect of the video editing experience, but they're also exceptionally robust and have a vast potential for creating unique and exciting audio and video effects. Here are a few video tutorials that can serve as inspiration for your next editing project.
Master 3 Amazing Keyframing Tips
From mastering the iconic Dolly zoom effect to maintaining complete focus on your face regardless of movement to making photos come to life, these three great keyframing techniques are perfect for beginners and experienced video editors.
Create Transitions With Keyframes
Add VFX Effects with Keyframes
Using the Keyframe Panel in Filmora
Learn More Tips & Tricks About Keyframing
Frequently Asked Questions
Yes, Filmora users can utilize keyframes for free, with new users getting three days of using keyframes without a watermark, after which there'll be one when exporting keyframe footage. You can subscribe to a paid plan at any point to remove the watermark.
Adding keyframes in Filmora is seamless and looks like this:
1. Launch Filmora and import
media files.
2. Add the clip to the Timeline and find a spot to add a keyframe.
3. Place the play
head at the spot. Then, tap the Keyframe button or hit ALT + Left Click.
Deleting keyframes is even easier than adding them:
1. Locate the keyframe you want to
remove.
2. Once you see the blue Diamond button, click on it to delete a keyframe.
3. You can also
choose the Delete Keyframe option by right-clicking on a keyframe in the Timeline.
Yes, you can, and here's how:
1. Right-click on the keyframe in the Timeline that you
want to copy.
2. Select the Copy Keyframe option.
3. Move the Playhead, right-click the Timeline
> Key Frame > Paste Keyframe.
4. You can paste the keyframe as many times as you like.
Of course! Keyframing isn't restricted to video and audio tracks only. You can also apply it to other elements, including texts and titles, effects, stickers, split screens, and more.
Using the Curves (actually something called value graph curves) in the Filmora keyframe panel, you can make precise adjustments to the temporal property keyframes you've created for your animation. The value graph curve visualizes the changes in certain values over time. For example, when the value graph curve is set to be linear, the object will move at a constant speed. When the value graph is set to be easy ease, the object will move at a variable speed. The steeper the curve, the faster the speed.
Keyframes have been available since Filmora X, with Filmora 13 being the first version to receive temporal interpolation keyframes. Similarly, spatial interpolation keyframes are available with Filmora 15 and newer versions.
A video frame is a single still image from a sequence of many. At the same time, a keyframe marks the first and last video frames during which a particular object property change will be present, such as its position, scale, or other animation effect.
Keyframing plays a pivotal role in video editing. It lets users create dynamic and natural-looking transitions and animations while giving them precise control over an object's movement and timing.
As a motion graphics artist or an editor, you'll likely need full access to keyframes and their different types, which you can find in Wondershare Filmora, Adobe Premiere Pro, DaVinci Resolve, CapCut, and various other editors. However, not all keyframe types are available in all video editing programs, with most software solutions focusing only on linear, freeze, and curve keyframes.
Yes. After adding keyframes, go to Video > Basic > Motion Blur and enable the feature. This adds natural motion blur to your keyframe animations, making movement smoother and more dynamic.
Video motion blur is mainly used for fast motion already captured in the original footage, adding blur to make the movement look more natural. Keyframe motion blur, on the other hand, applies to animations created with keyframed properties such as position, scale, or rotation, automatically adding blur to the movement between keyframes. You can turn motion blur on or off at any time and adjust parameters such as shutter angle, phase, and samples.
Motion blur works best with keyframe animations that involve noticeable movement in position, scale, or rotation, such as text fly-ins, image push-ins and zooms, logo rotations, object swings, and fast transitions. This feature is available on desktop only (Windows and Mac).
What Our Customers Say

Tom
I needed a tool to create a cool-looking zoom-in effect for a product I was making an ad for. Filmora’s keyframing presets were great and the easiest way to make this video ad exactly how I wanted.

Kevin
So, I was making a Star Wars-themed intro for a video, and I wanted to add some cool new effects to my text. One Google search later, I found a Filmora keyframe guide, and I haven’t gone back to any other video editor since! My videos are getting so many views these days. I love it!

Lily
I've always struggled with transitions for my TikTok content. However, that hasn’t been the case since I started using Filmora. My transitions look so good right now, and I love how quickly I can create them.

Anya
I animate cartoon characters for a living, which always took up so much of my time. That is until I found Filmora, which was so intuitive to use. I really appreciate how much faster my animations are with keyframe editing! 10/10
Discover More Powerful Video Editing Features

A video editor for all creators.