Whether you need to create a family video montage or run a YouTube channel, mastering video editing can be highly valuable. Yet, as rewarding as editing a video is, the nuances of this profession can also feel overwhelming, especially with all the video editing concepts you’ll need to overcome.
This guide aims to demystify at least one of these video editing concepts: keyframing.
So, stay around. We’ll teach you what keyframing is, discuss its use, and explore its benefits. Then, we’ll provide valuable tips and show you beginner-friendly yet powerful video editing software to help you get started and learn what a keyframe is in animation.
In this article
What Is a Keyframe?
“What is keyframing?” is one of the most common questions video editing beginners ask. While understanding this video editing concept can be easy, especially if you watch a keyframing tutorial, mastering keyframes can be incredibly challenging.
So, what is a keyframe exactly?
The term keyframe has roots in traditional animation, where animators would get a shot to animate and sit down to plan things out. Before drawing anything, they’d figure out the most critical moments in that shot and then try to represent them with a single drawing or a keyframe, hence the name.
Today, that concept is different. When computer-generated animation came along, the term keyframing changed its meaning and now represents a specific value of a particular object at one point. As such, a keyframe marks the start or end of one change within a clip, like an object’s position or opacity.
What is Keyframe Interpolation?
Keyframe interpolation defines how changes between two keyframes occur, determining the transition in an animation’s properties—such as position, opacity, or scale. It ensures a smooth transition between the set values of each keyframe by calculating the intermediate values automatically. This process allows animators and editors to control not only where an object moves (spatial interpolation) but also how fast it moves (temporal interpolation).
There are two primary types of interpolation:
- Spatial Interpolation: This focuses on the path an object follows between keyframes, allowing you to control the object’s movement in space, whether it's along a straight line, a curve, or a custom trajectory.
- Temporal Interpolation: This deals with the timing or speed of changes between keyframes, adjusting how fast or slow a property changes over time, such as using linear motion for consistent speed or easing for gradual transitions.
Understanding keyframe interpolation helps you fine-tune animations, giving you control over both motion paths and the pacing of your animations for smoother, more natural results.
What Are the Basic Keyframe Types?
Now that we've covered keyframe interpolation, let's look at the five basic keyframe types and how each helps control animation and effects.
- Linear keyframes – Often considered the most basic type, linear keyframes use a uniform rate of change, seeming mechanical and abrupt. While they’re excellent for learning about and practicing keyframing, most editors prefer other types.
- Hold keyframes – This type of keyframe does what its name implies. It holds the layer on a specific keyframe, making it ideal for freeze-frame effects and footage.
- Bezier keyframes – These keyframing elements allow complete manual control, allowing video editors to adjust their element’s motion path or the value graph to precisely what they need.
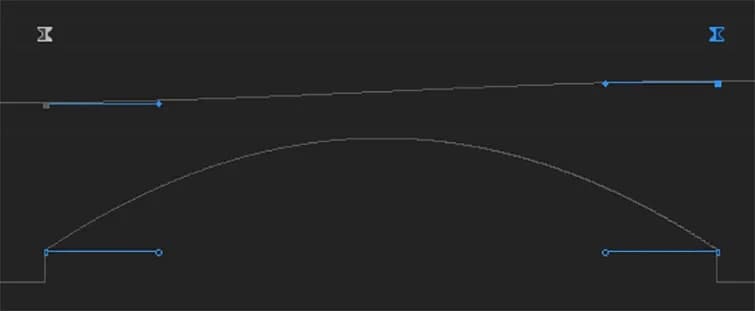
- Auto Bezier – Unlike the regular Bezier keyframe, it automatically generates curves for the keyframes, as its name suggests. It creates fluid motions and smoothes out the rate of change, making a much more professional-looking transition.

- Continuous Bezier – Finally, this keyframe type lets users manually smooth out the rate of change between keyframes. It provides much more manual control over a particular change in the clip.
Not all of these keyframe types will be available in a video editing program, with many software solutions focusing only on linear, hold, and Bezier keyframes. Furthermore, while professionals primarily use them for motion graphics, you’ll likely use all these keyframe types as a video editor.
Video Tutorial - Mastering Keyframe Curves: Understanding Position Keyframes
How Keyframes Boost Efficiency and Creativity in Video Editing
Keyframes are essential tools in digital animation and video editing, enabling precise adjustments to an object's properties over time. Their versatility and benefits make editing tasks smoother and more efficient:
- Faster animation processes: Keyframes simplify complex animations, ensuring consistency and reducing the need for frame-by-frame adjustments. This boosts efficiency, allowing editors to create animations more quickly.
- Increased creative flexibility: Keyframes offer flexibility for applying effects, transitions, animations, and audio adjustments. This enables editors to experiment with different styles and unleash their creativity.
- Precise control: Whether adjusting an object’s position, opacity, or scaling, keyframes allow for exact modifications, fine-tuning almost every aspect of a video.
- Dynamic video effects: Keyframes animate effects over time, eliminating the need to constantly adjust them for each scene, adding visual appeal and consistency.
- Smoother transitions: Keyframes help ensure smooth scene transitions, even when the scenes differ in location or lighting, enhancing the professional quality of the video.
Additionally, customized keyframes can be saved for use across multiple projects, helping to maintain consistency and build a distinctive brand image.
A Beginner-Friendly Keyframing Tool You Should Try
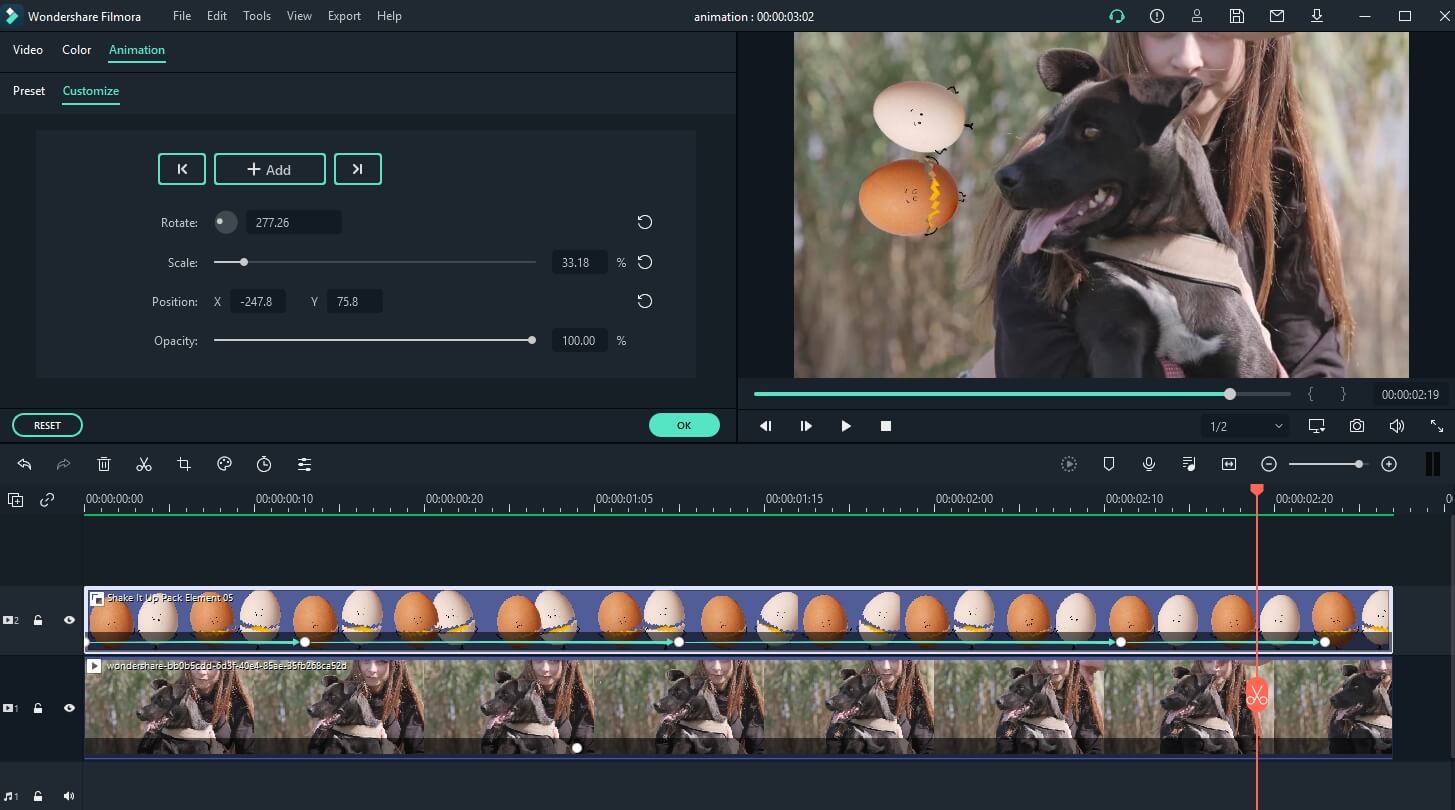
While dozens of video editing tools are available online and offline, none are as beginner-friendly and easy to master as Wondershare Filmora Keyframing. Yet, despite having an incredibly intuitive user interface that anyone can effortlessly navigate, Filmora packs a heavy punch regarding the number of video editing tools and features, making it the perfect option to learn what keyframing is and how to use it.
Its rich library of video effects, transitions, animations, and templates will allow you to test the endless possibilities of keyframing. At the same time, Filmora’s AI-powered features, like AI Copilot, will make your video editing tasks a breeze and drastically reduce the time you need to apply and adjust keyframing techniques.
How to Use Wondershare Filmora to Add Keyframes
An easy-to-learn user interface in Filmora makes any video editing task a piece of cake. That’s why adding keyframes is also seamless, and the process for it looks something like this:
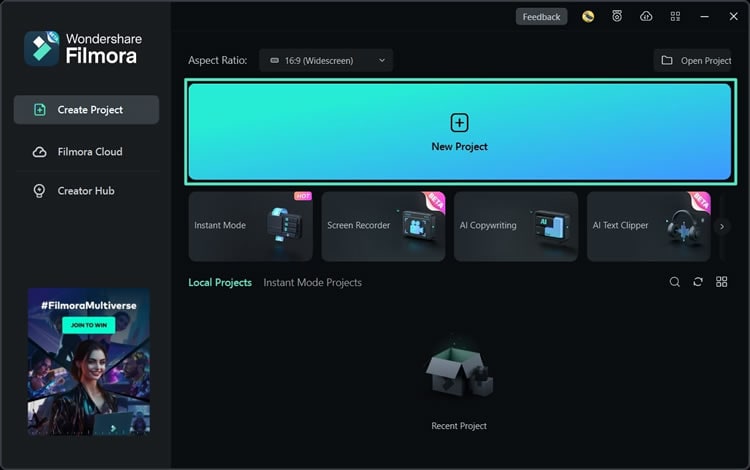
Step 1: Launch Wondershare Filmora and hit the New Project button.
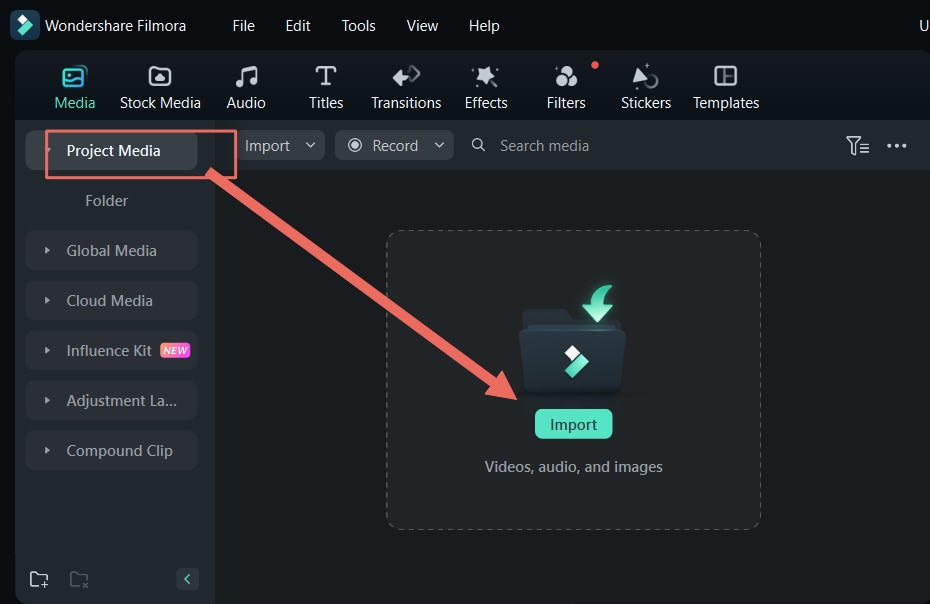
Step 2: Head to Media > Project Media and click Import to add your clips, or select Global Media and use Filmora’s ready-to-use videos.
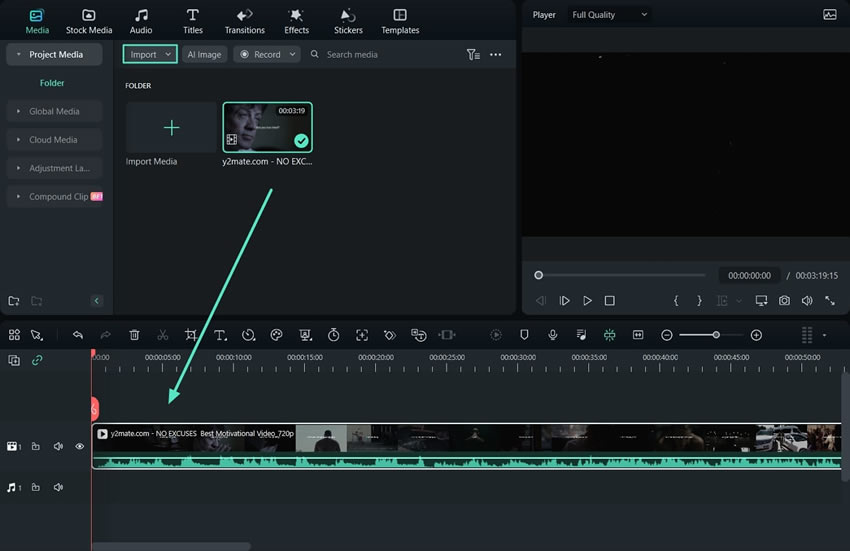
Step 3: Drag and drop the imported video onto the timeline and select it by clicking it.
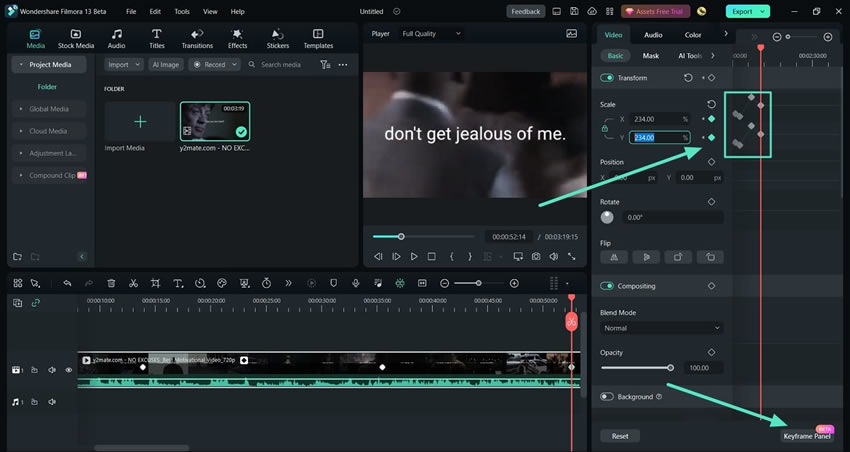
Step 4: Once you select the video on the timeline, the right sidebar will change, and you’ll see the Video tab. Click the Keyframe Panel button in the bottom right corner of this sidebar.
Step 5: Add keyframes for scale, position, rotation, compositing, opacity, and other aspects and adjust them in the Keyframe Panel.
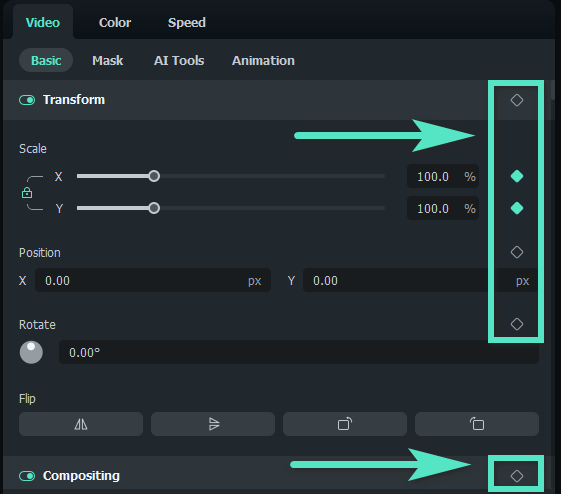
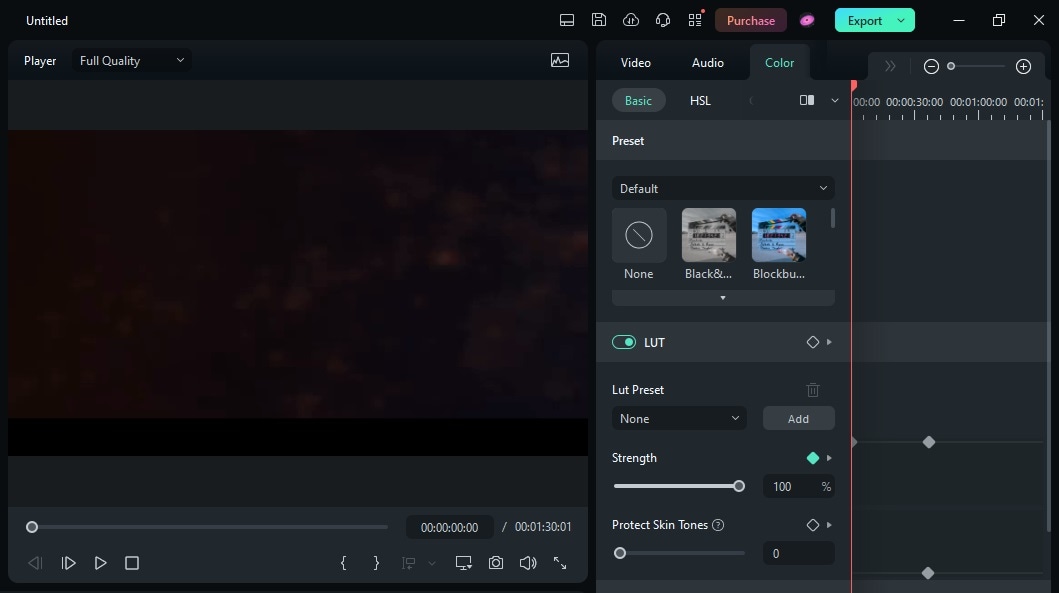
Step 6: Keyframes are also available for colors and audio, so click their respective tabs in the right-hand sidebar to add such keyframes.
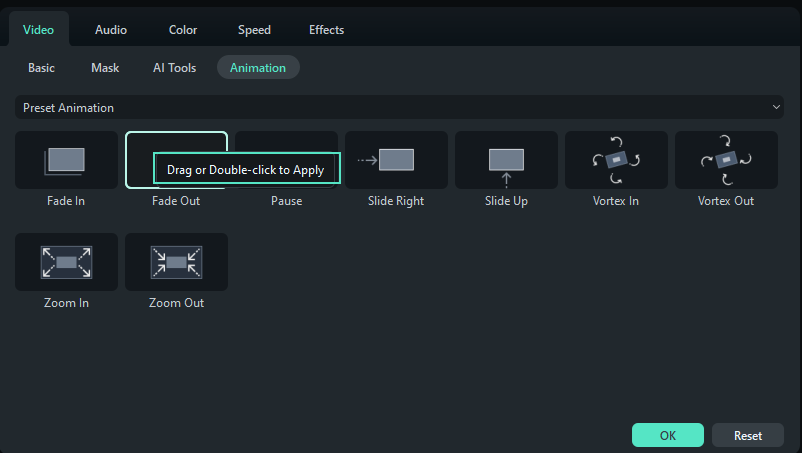
Step 7: Optionally, go to Video > Animation to access Filmora’s preset keyframes, which you can drag and drop onto the timeline.
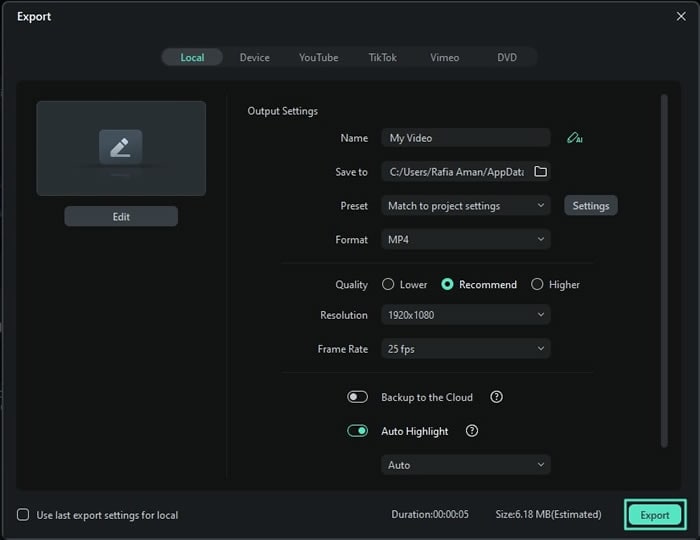
Step 8: Once you fine-tune everything, hit Export in the top right corner. Then, adjust the output settings and click Export again to save the video.
You May Also Like
What is B-roll Footage? A Complete Guide for Video Creators
What Is Cross-Cutting and Parallel Editing? Everything You Need to Know
J Cut vs L Cut: Definition, Key Differences & Pro Editing Examples
What Is a Vignette in Photography and Video Editing?
Conclusion
While challenging, becoming proficient in video editing is not impossible. Mastering keyframes can help you get there much quicker. After all, these powerful editing tools are crucial in creating quick animations and dynamic video effects. They can help you meticulously control every aspect of your clips, adjust colors and audio levels throughout the video, and create smooth transitions between scenes.
Whether you’re a beginner or a veteran video editor, Wondershare Filmora is an excellent place to start using keyframes. It offers a beginner-friendly interface and many helpful editing features, including AI tools.
Moreover, combining this effortlessly usable video editing software with YouTube tutorials, online courses on keyframing, and constant practice and presets will help you master keyframing techniques quickly and significantly improve your video editing skills.


