

 TL;DR:
Recording audio on an iPhone requires selecting the appropriate built-in tool based on your source: use the Voice Memos app for direct voice capture, and the Screen Recording tool to capture internal system sounds from playing media.
● Capturing internal system audio via Screen Recording outputs a video file, meaning you must use an editing tool like Wondershare Filmora to detach the audio track and export it as an MP3 or AAC file.
● Apple's iOS privacy restrictions prevent direct internal audio recording of regular phone calls, FaceTime, and WhatsApp, requiring workarounds like recording externally or using the microphone to capture speakerphone audio.
● To maximize recording quality, enable Lossless Audio within the Voice Memos settings for uncompressed files, activate Voice Isolation from the Control Center to reduce background noise, and keep the iPhone's bottom microphone six inches from your mouth.
Ask AI for a summary
 ChatGPT
 Perplexity
 Gemini
 Claude
 Grok
Grok
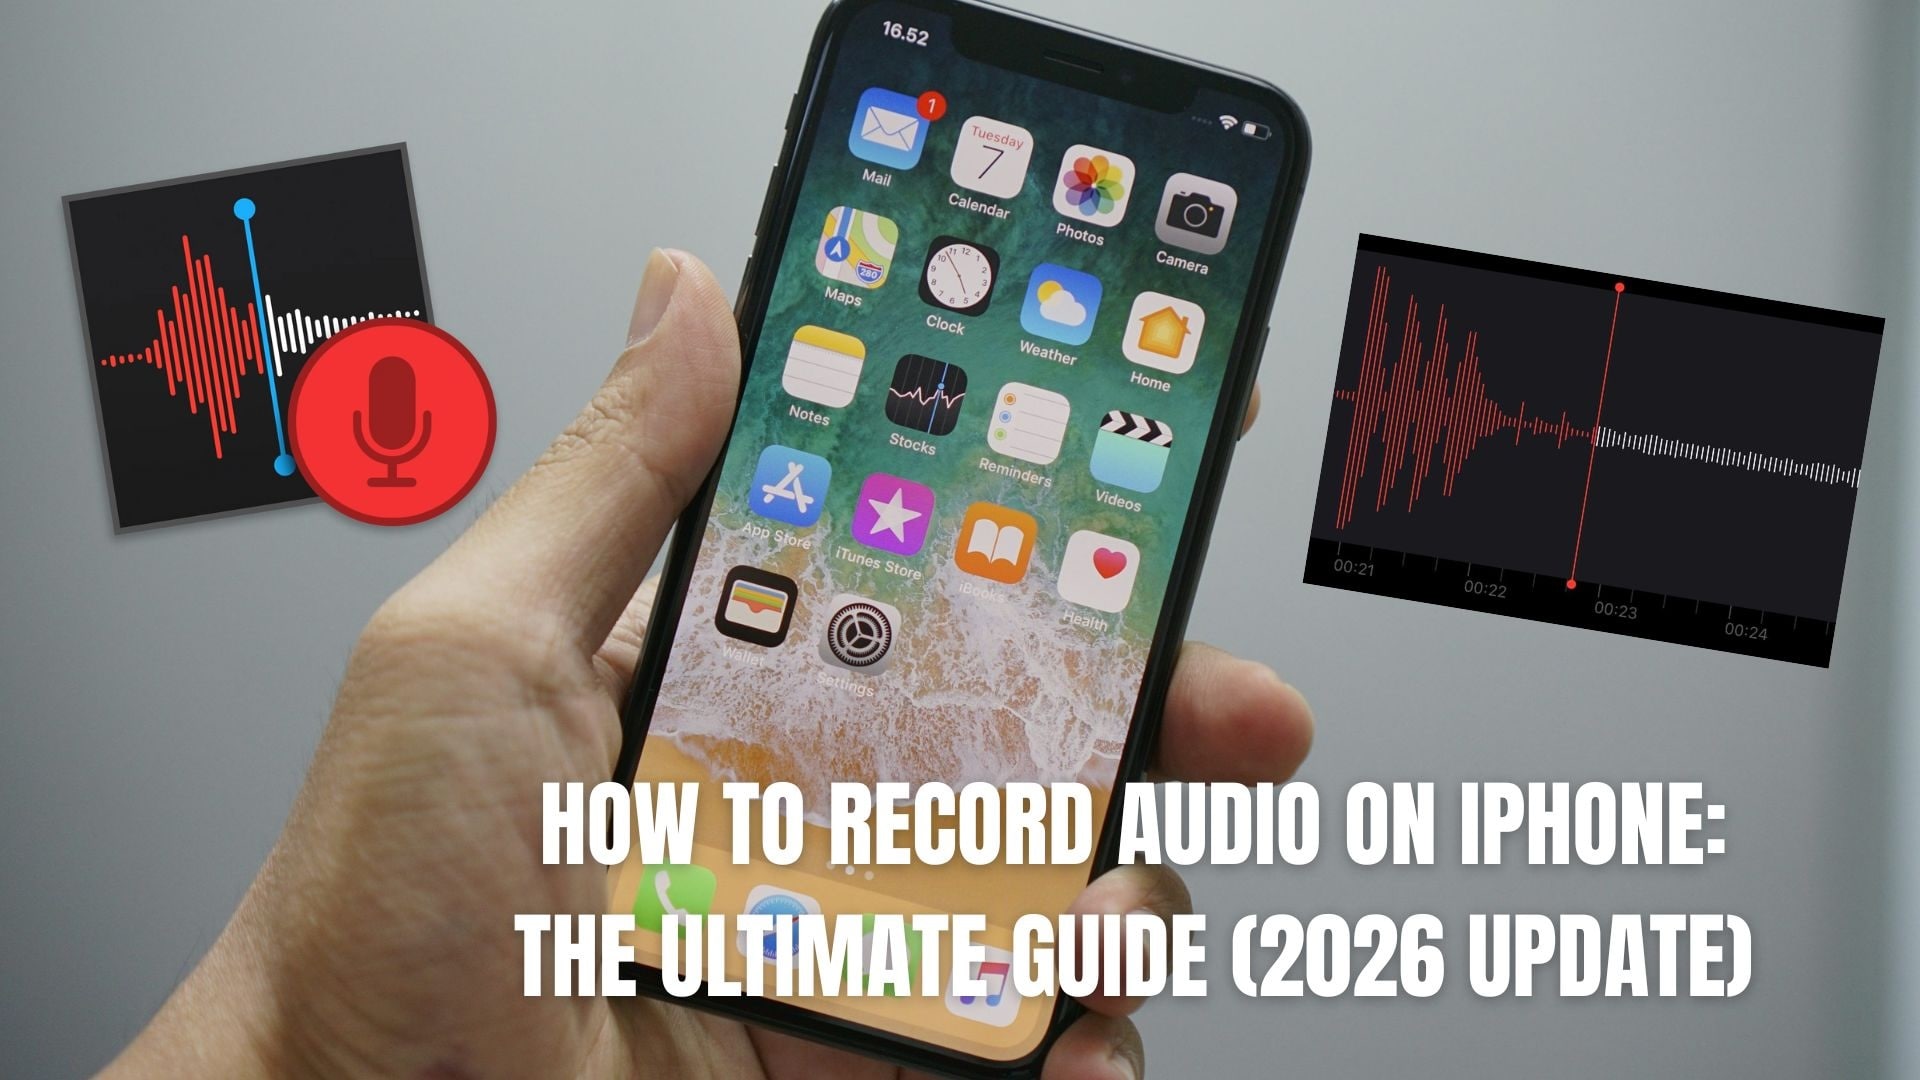
Whether you need to capture a quick thought, a lecture, or internal system audio, your iPhone is a powerful recording tool. In this updated 2026 guide, you'll discover how to record audio on iPhone using built-in tools and professional alternatives. We will also show you how to polish your recordings using Wondershare Filmora, the best video and audio editor for creators.
In this updated guide, you'll learn how to record audio on your iPhone using simple and practical methods. We'll start with Apple's built-in tools, move to smarter alternative solutions for system audio and calls, and wrap up with tips for enhancing sound quality and editing your recordings using Wondershare Filmora.
Method 1: The Quickest Way via Voice Memos (Official App)
If you want to record audio only on your iPhone, the fastest and most reliable option is Apple's built-in Voice Memos app. It's pre-installed, easy to use, and works perfectly for voice recordings, notes, interviews, or quick ideas without any additional setup.
How to Record Audio Only on iPhone Using Voice Memos
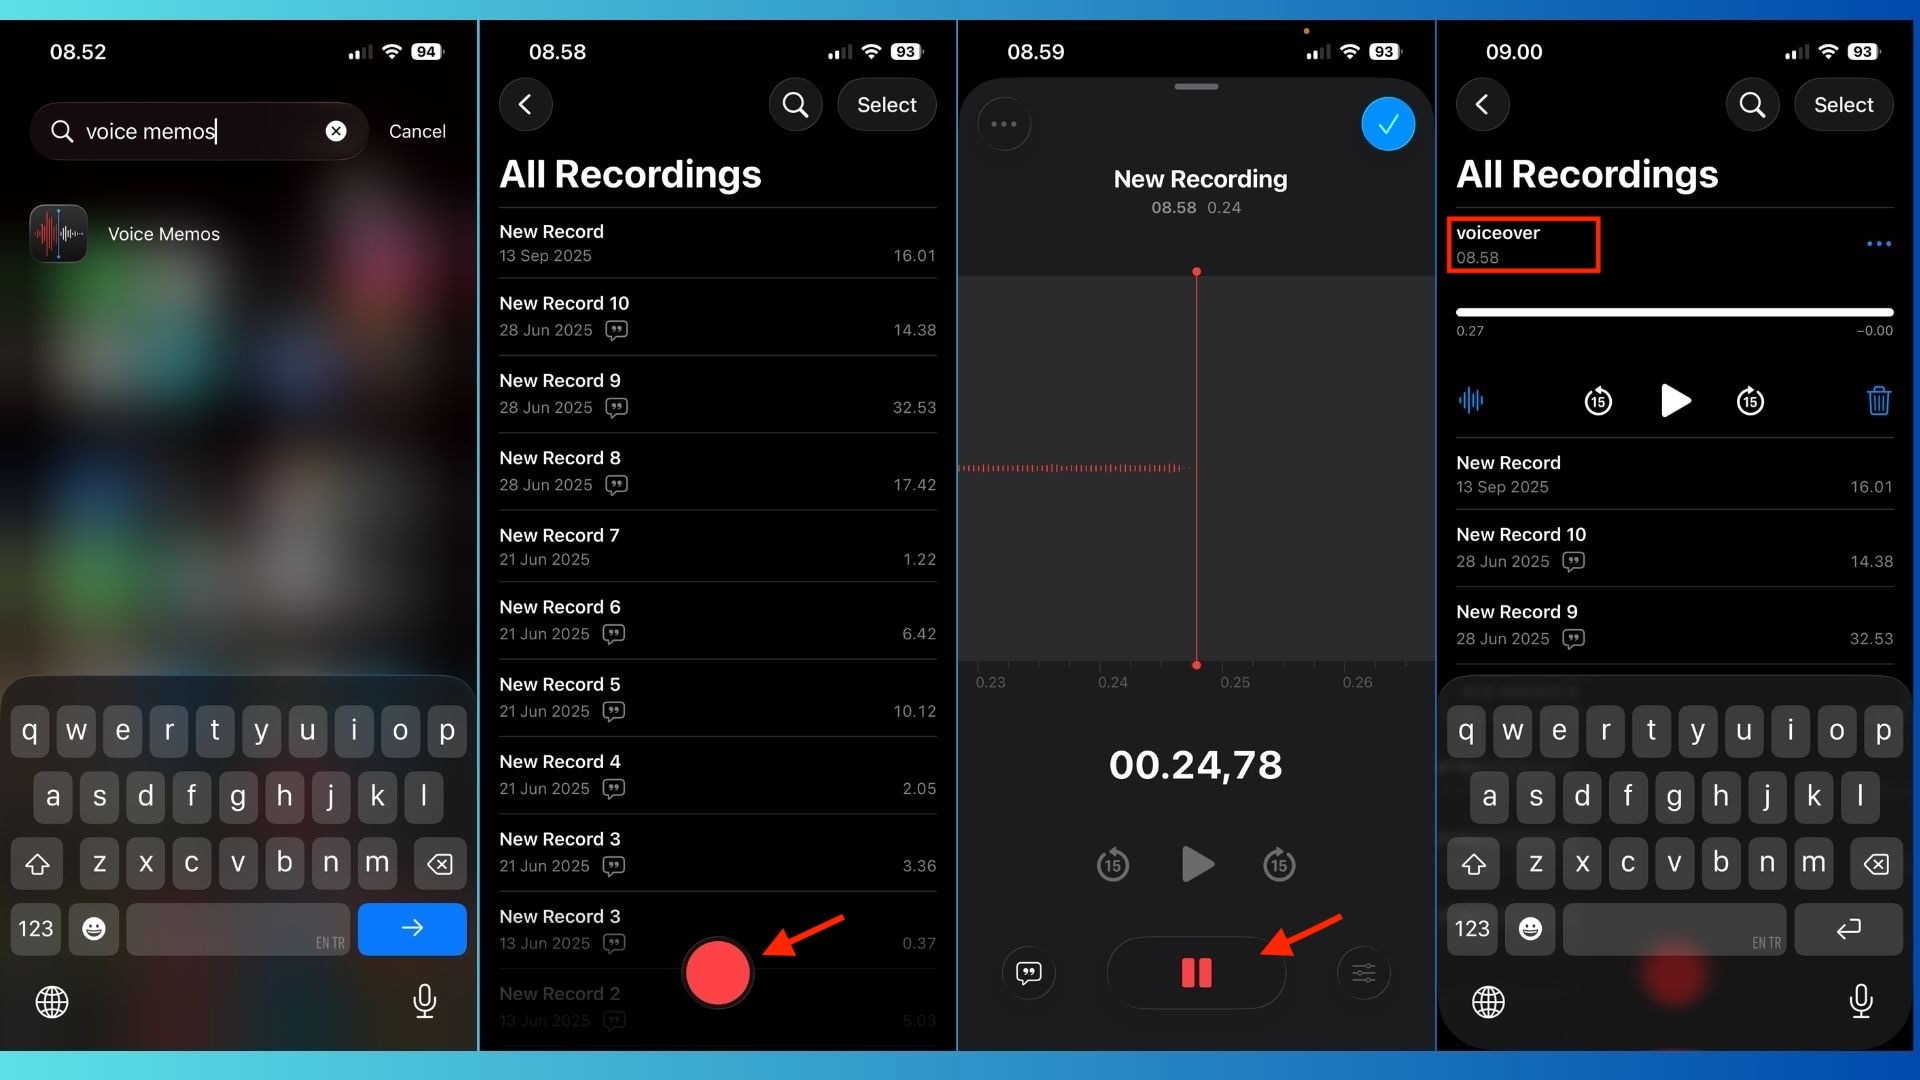
- Open the Voice Memos app. You'll find it preinstalled on every iPhone. No downloads required.
- Tap the red Record button. Once you tap it, the recording starts instantly. Speak clearly toward the bottom microphone for the best sound.
- Pause or stop the recording. Tap the red button again to stop. You can also pause mid-recording if needed.
- Rename your audio file. By default, Voice Memos names files based on location or date. Tap the recording name, then rename it, and give it a clear title so it's easy to find later.
Why Voice Memos Is Ideal for Quick Audio Recording
- Records audio only, no video distractions
- Works offline and saves files instantly
- Ideal for voiceovers, reminders, lectures, and content planning
Expert Tip: Enable Lossless Audio for Pro-Level Sound
If you want cleaner, more professional audio quality, you can upgrade Voice Memos to Lossless mode:
- Go to Settings and tap Voice Memos
- Select Audio Quality and choose Lossless
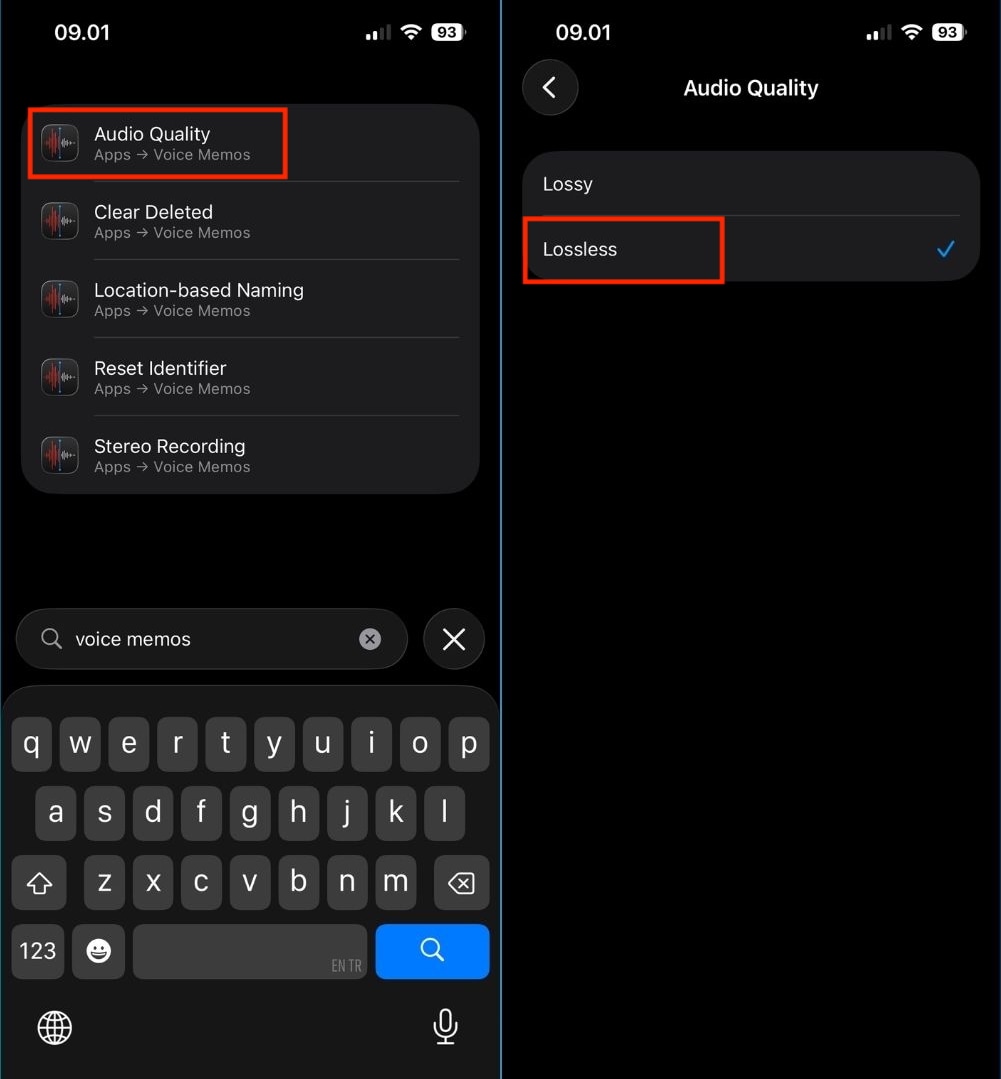
This setting captures richer details and clearer vocals, which makes it ideal for high-quality podcasts, narrations, or voiceovers. Keep in mind that Lossless files are larger, so make sure you have enough storage space.
Method 2: How to Record Internal Audio on iPhone (System Sound)
Once you're familiar with Voice Memos, the next question many users ask is how to record audio playing on an iPhone. This includes music, YouTube audio, online videos, or app sounds. While iOS doesn't offer a dedicated "system audio recorder," Apple's Screen Recording feature provides a smart workaround.
How to Record Audio Playing on iPhone Using Screen Recording
Screen Recording is integrated into iOS and can record both visuals and sound from apps.
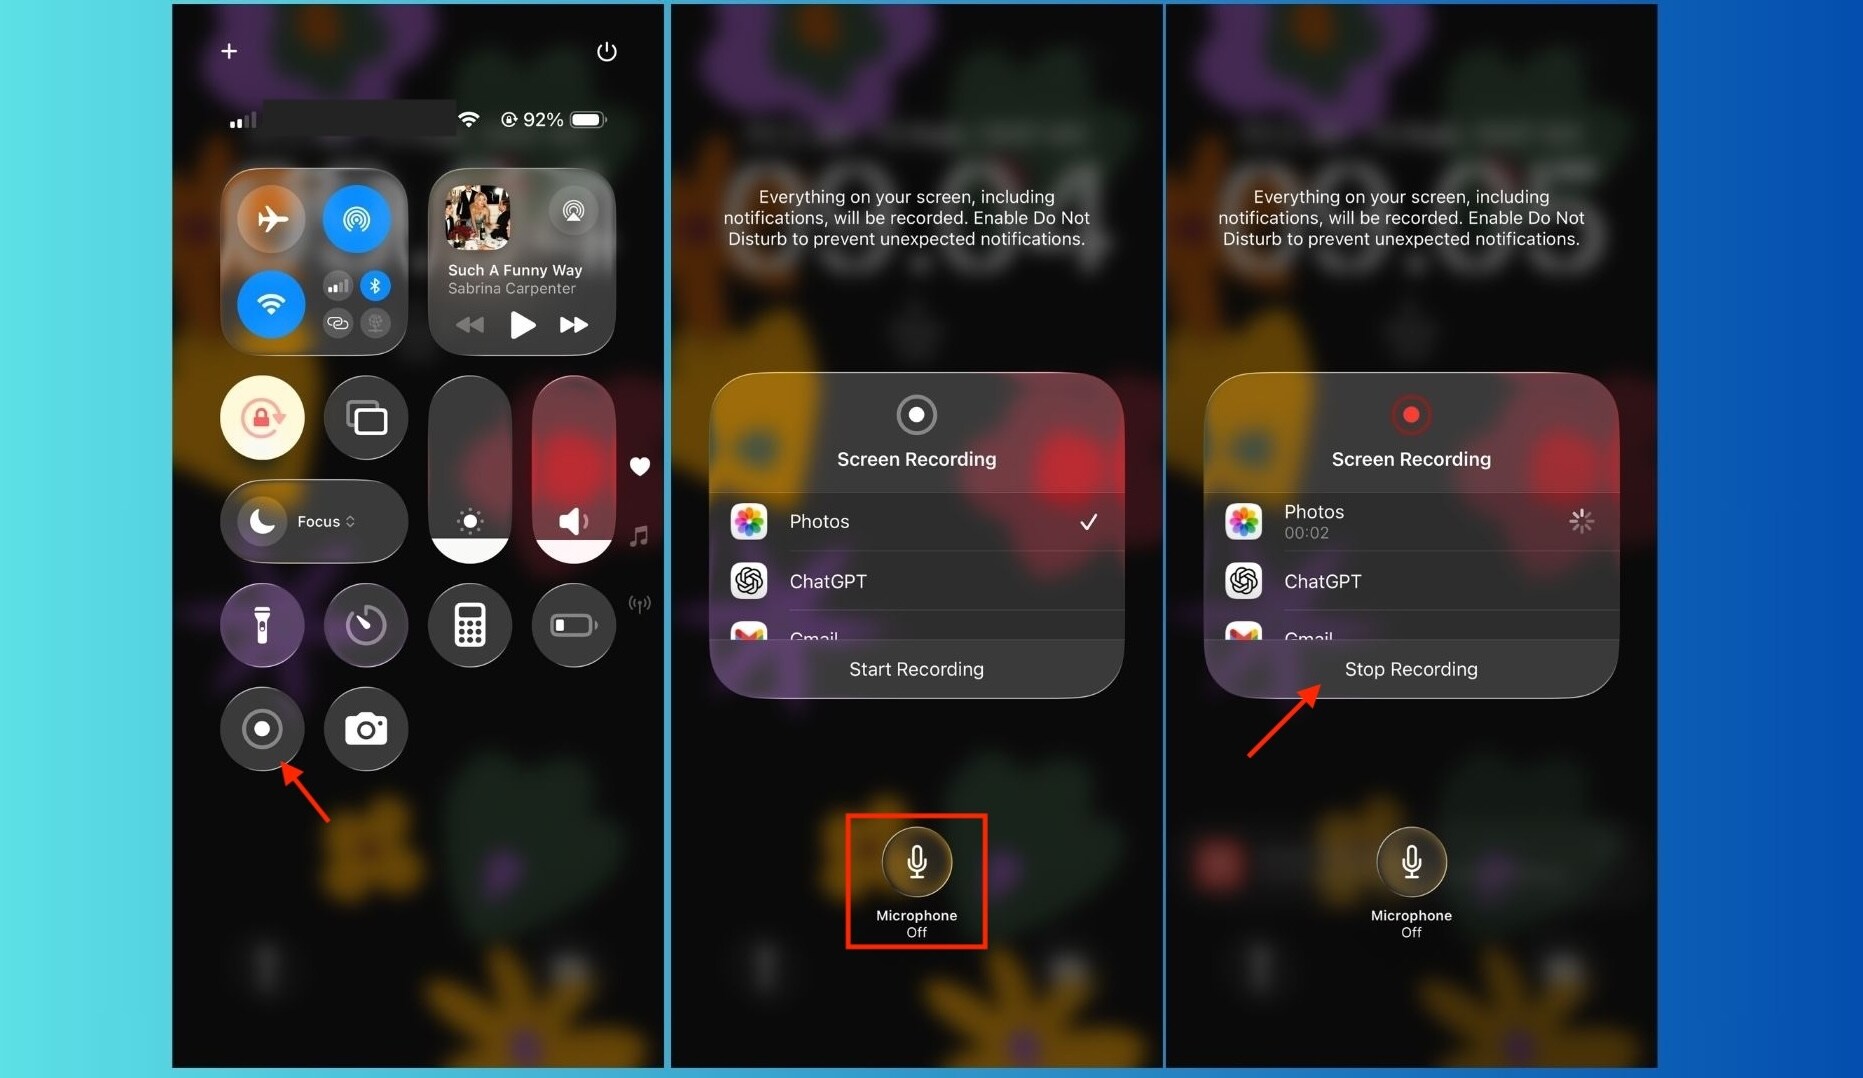
- Open Control Center. Swipe down from the top right corner of your screen.
- Press and hold the Screen Recording icon. This is a "hidden" step that many users often miss.
- Enable Microphone (optional). Tap the Microphone icon to enable it if you want to record your voice along with the system audio. Leave it off if you only want to record the app's audio.
- Tap Start Recording. Your iPhone will start recording after a short countdown.
- Play the audio you want to record. This can be music, a podcast, or a YouTube video.
- Stop recording. Tap the red status bar or return to Control Center and stop recording. The file will be automatically saved in the Photos app.
How to Record Audio From YouTube on iPhone
You can also use Screen Recording to record YouTube audio on iPhone, but keep these tips in mind:
- Use headphones to avoid feedback
- Set YouTube playback to the highest available quality
- Avoid notifications that may interrupt the recording
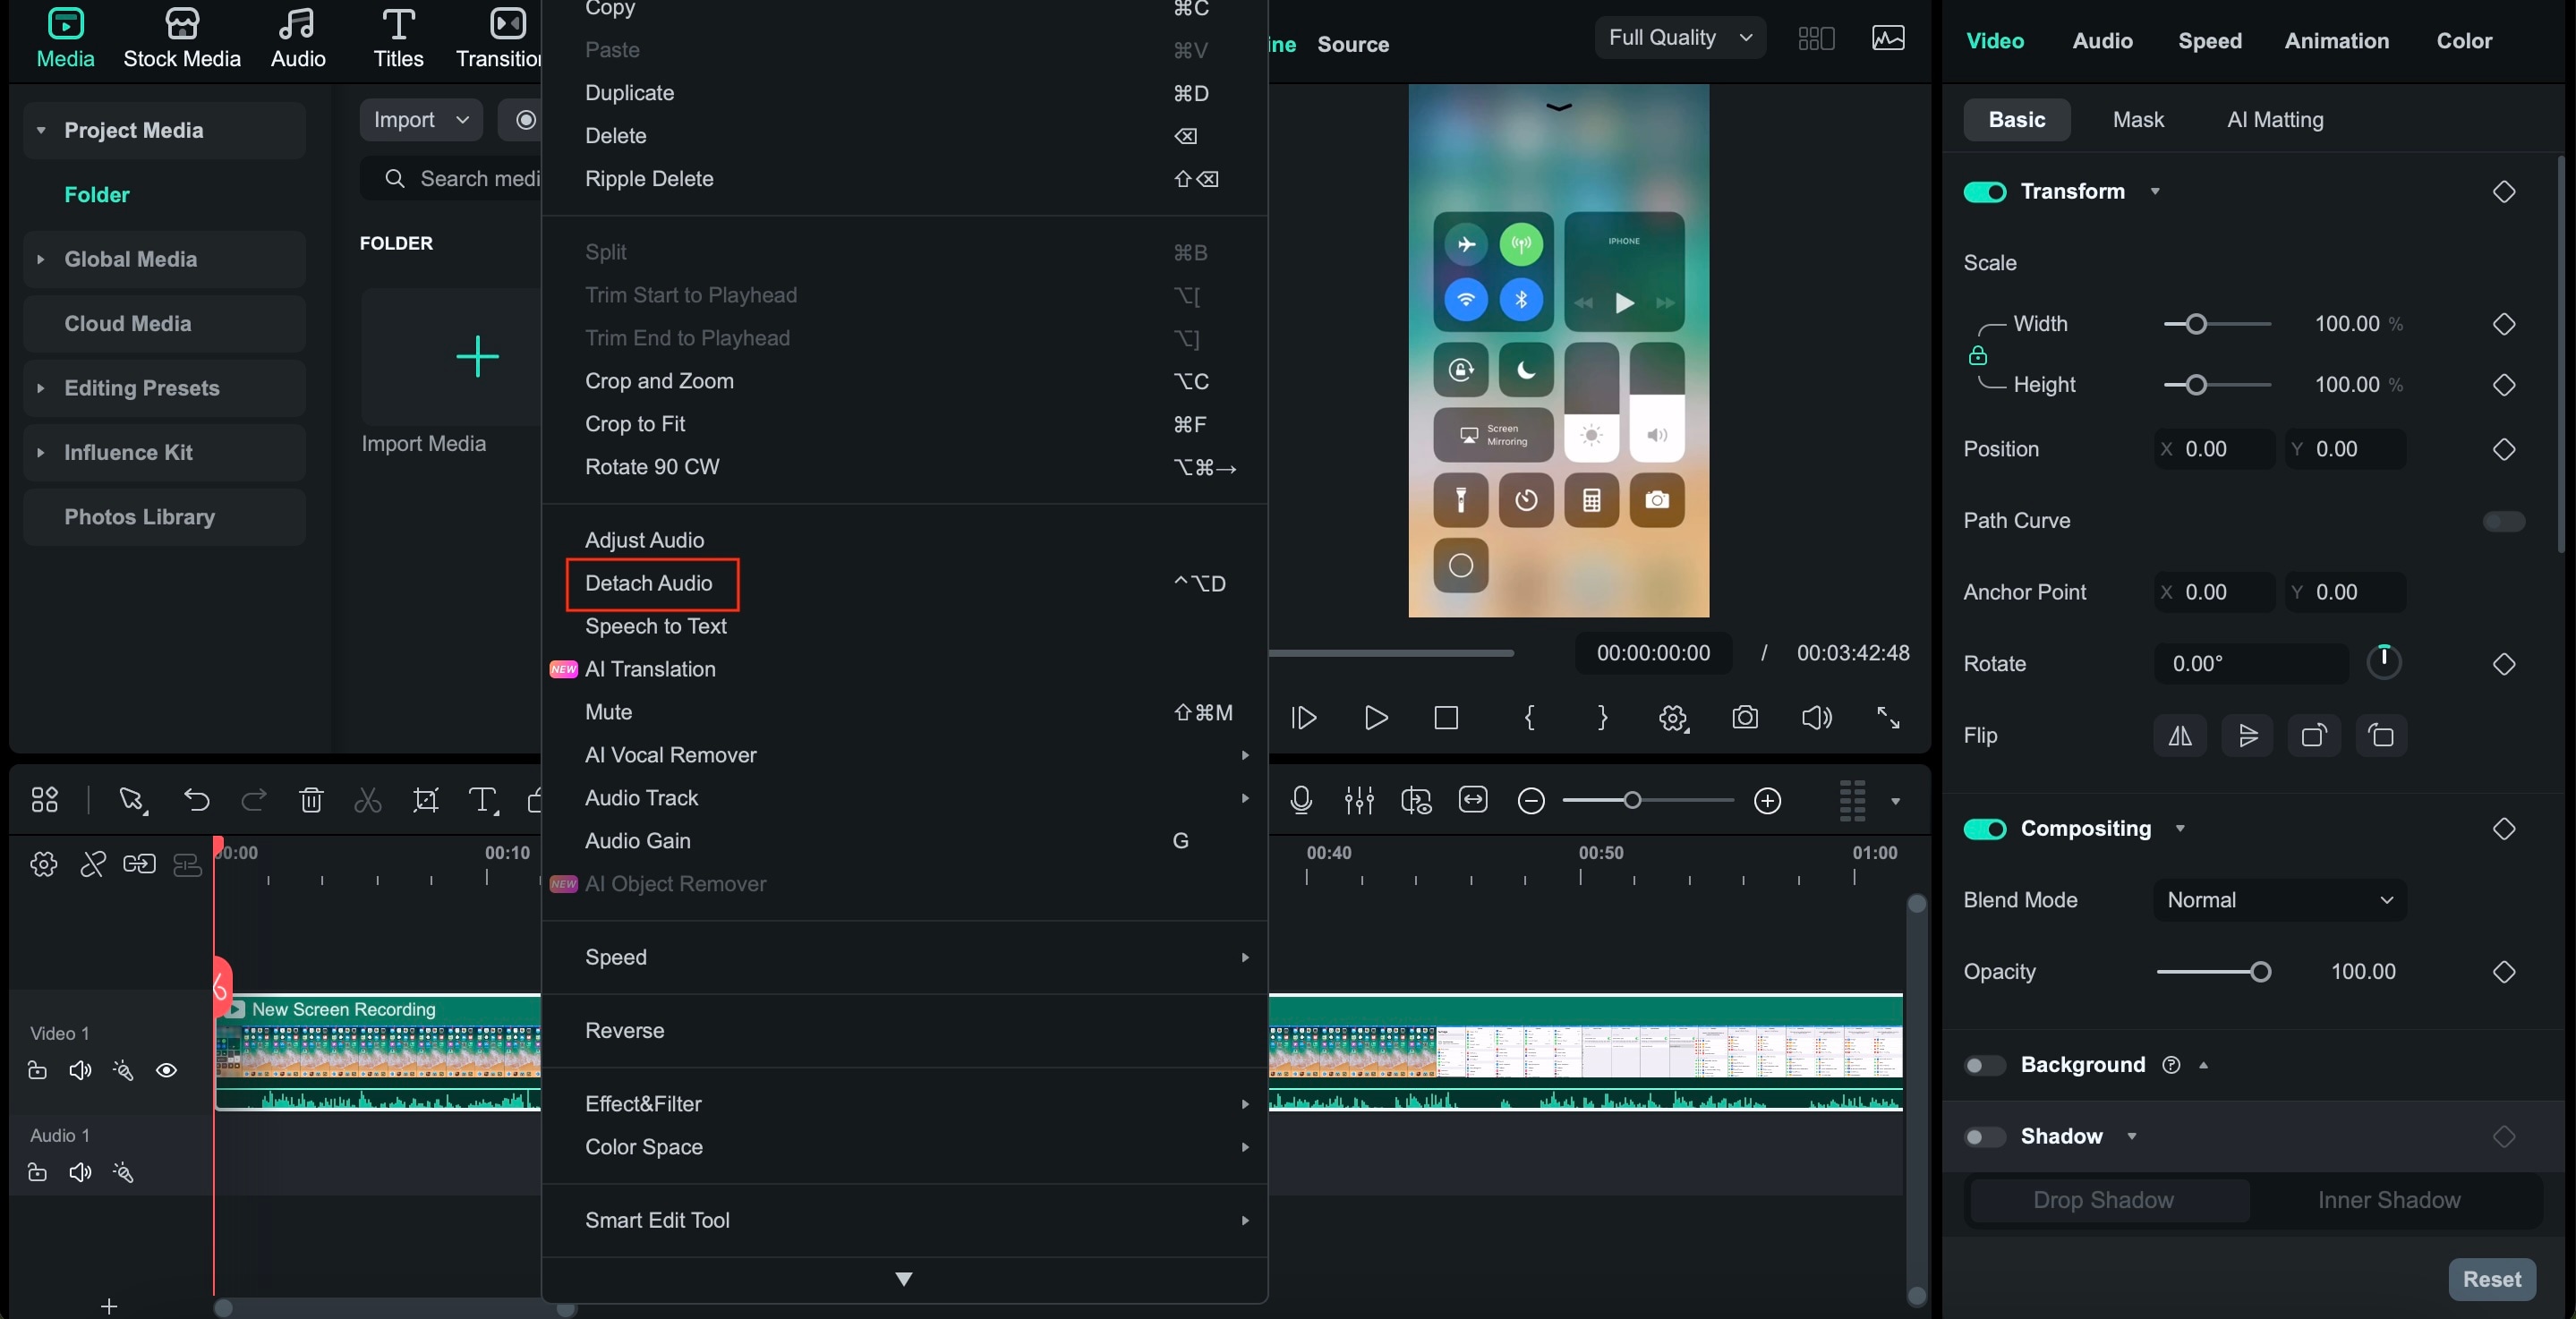
Once recorded, you'll have a video file containing the audio.
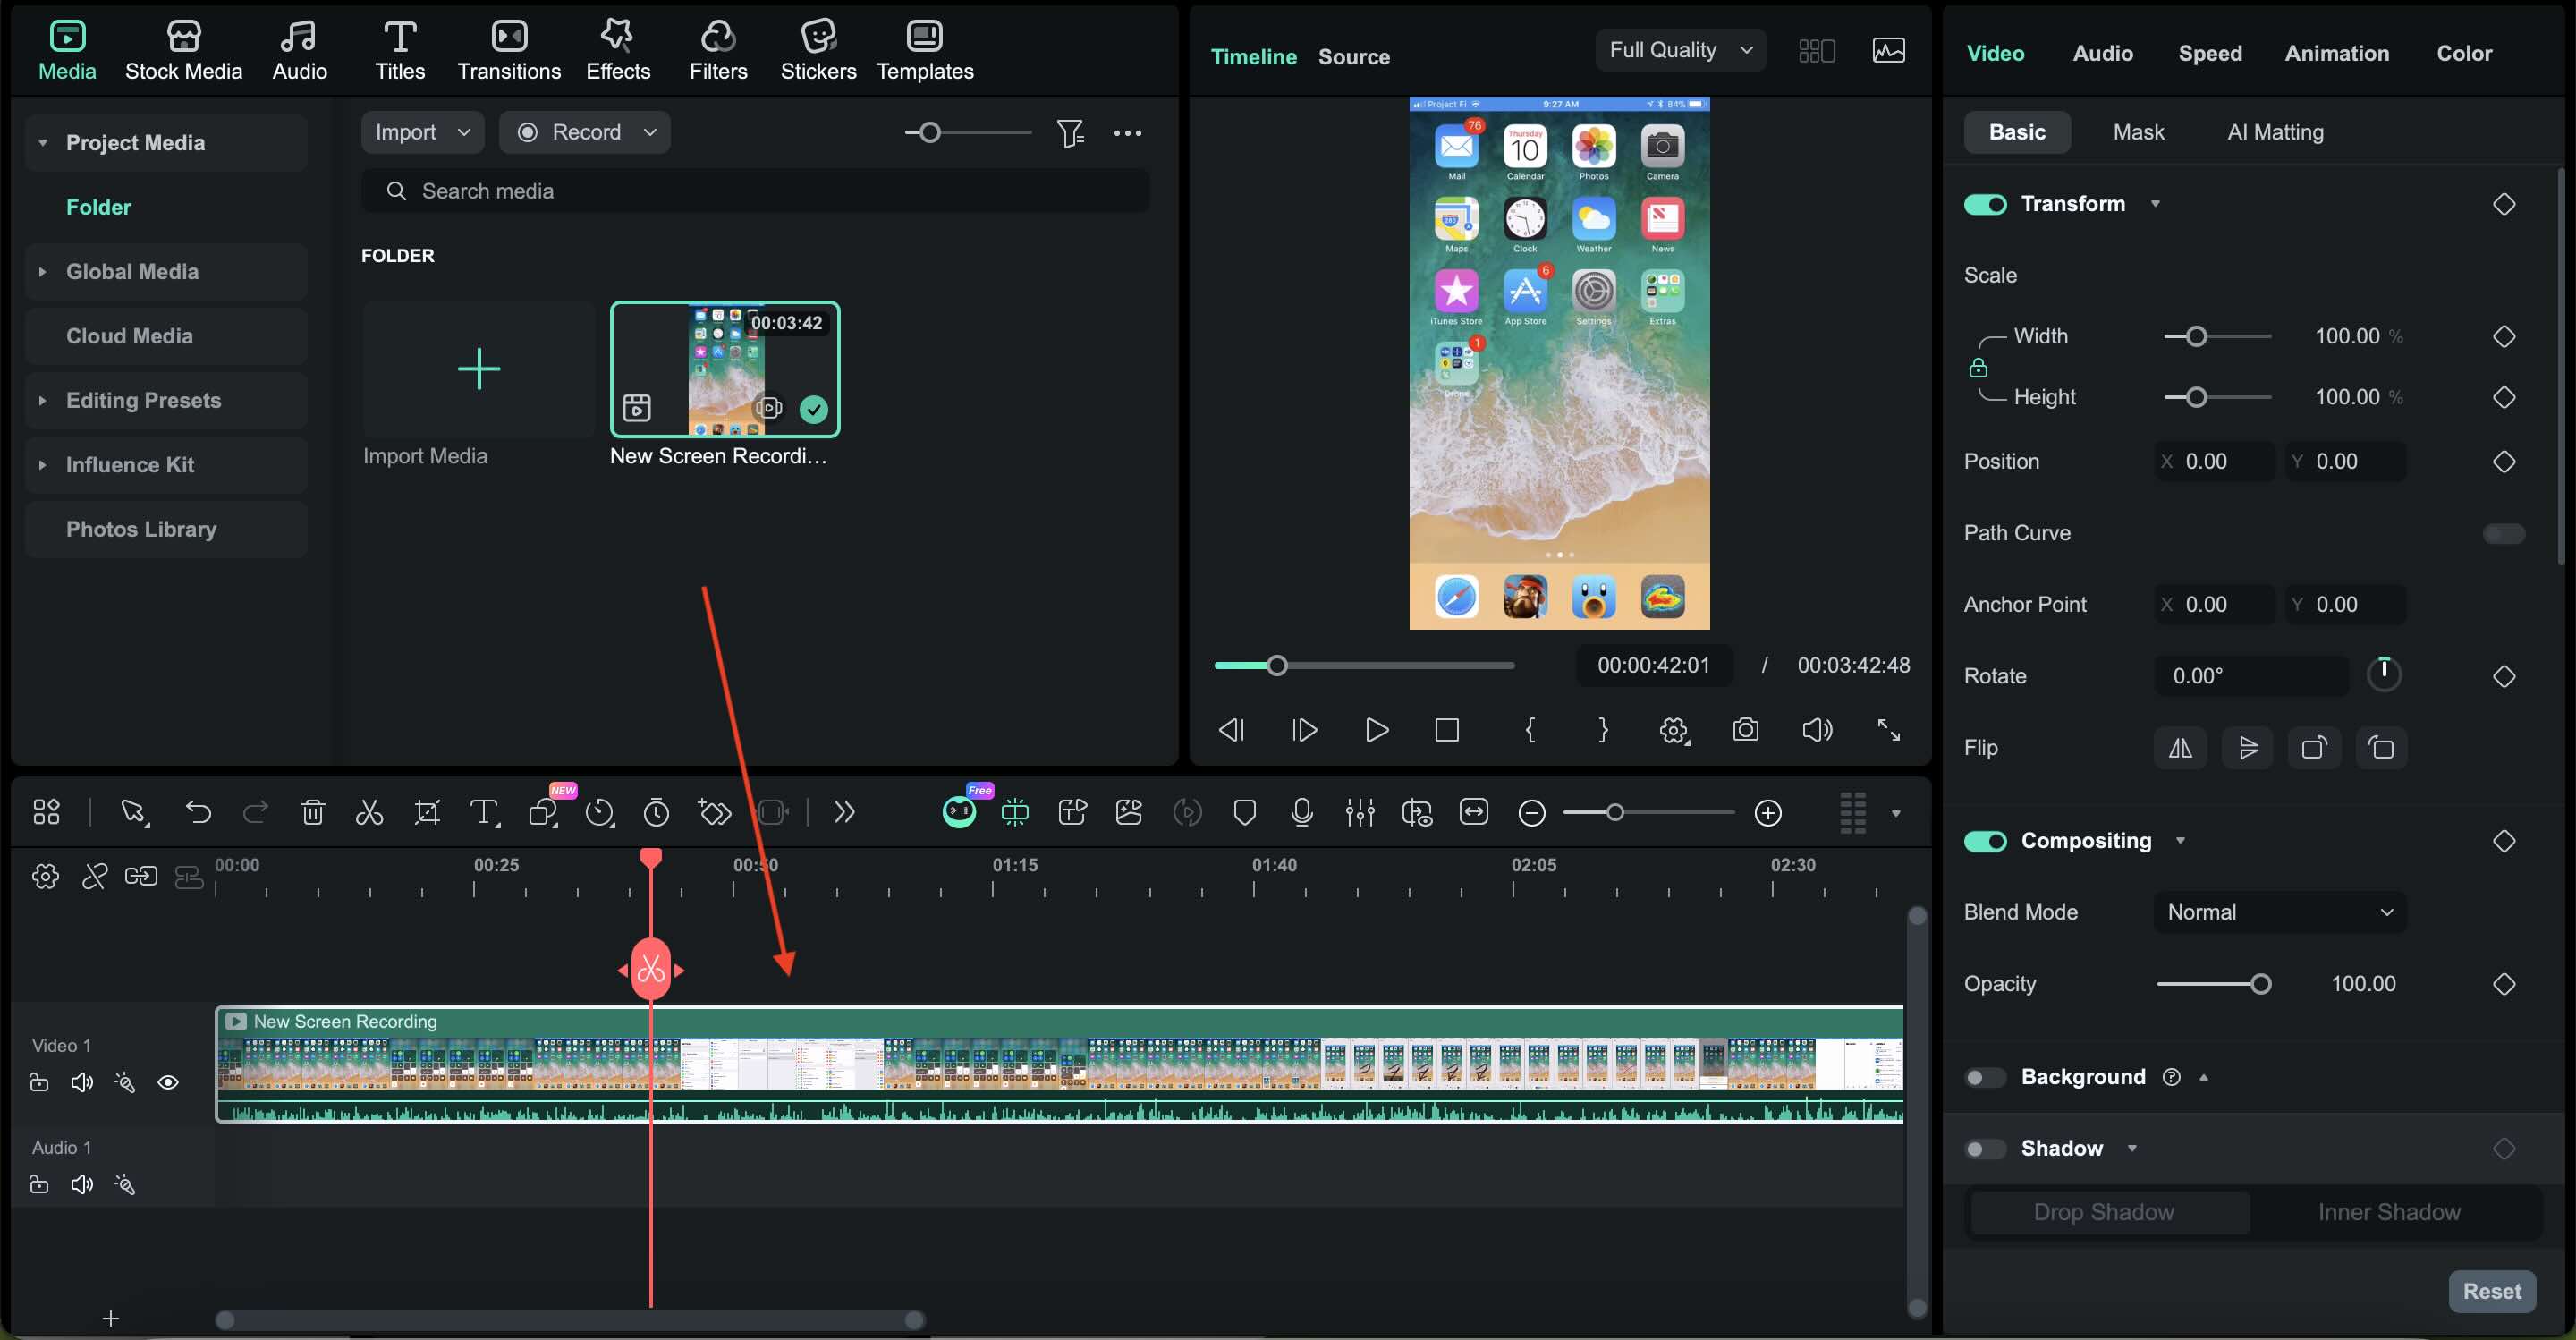
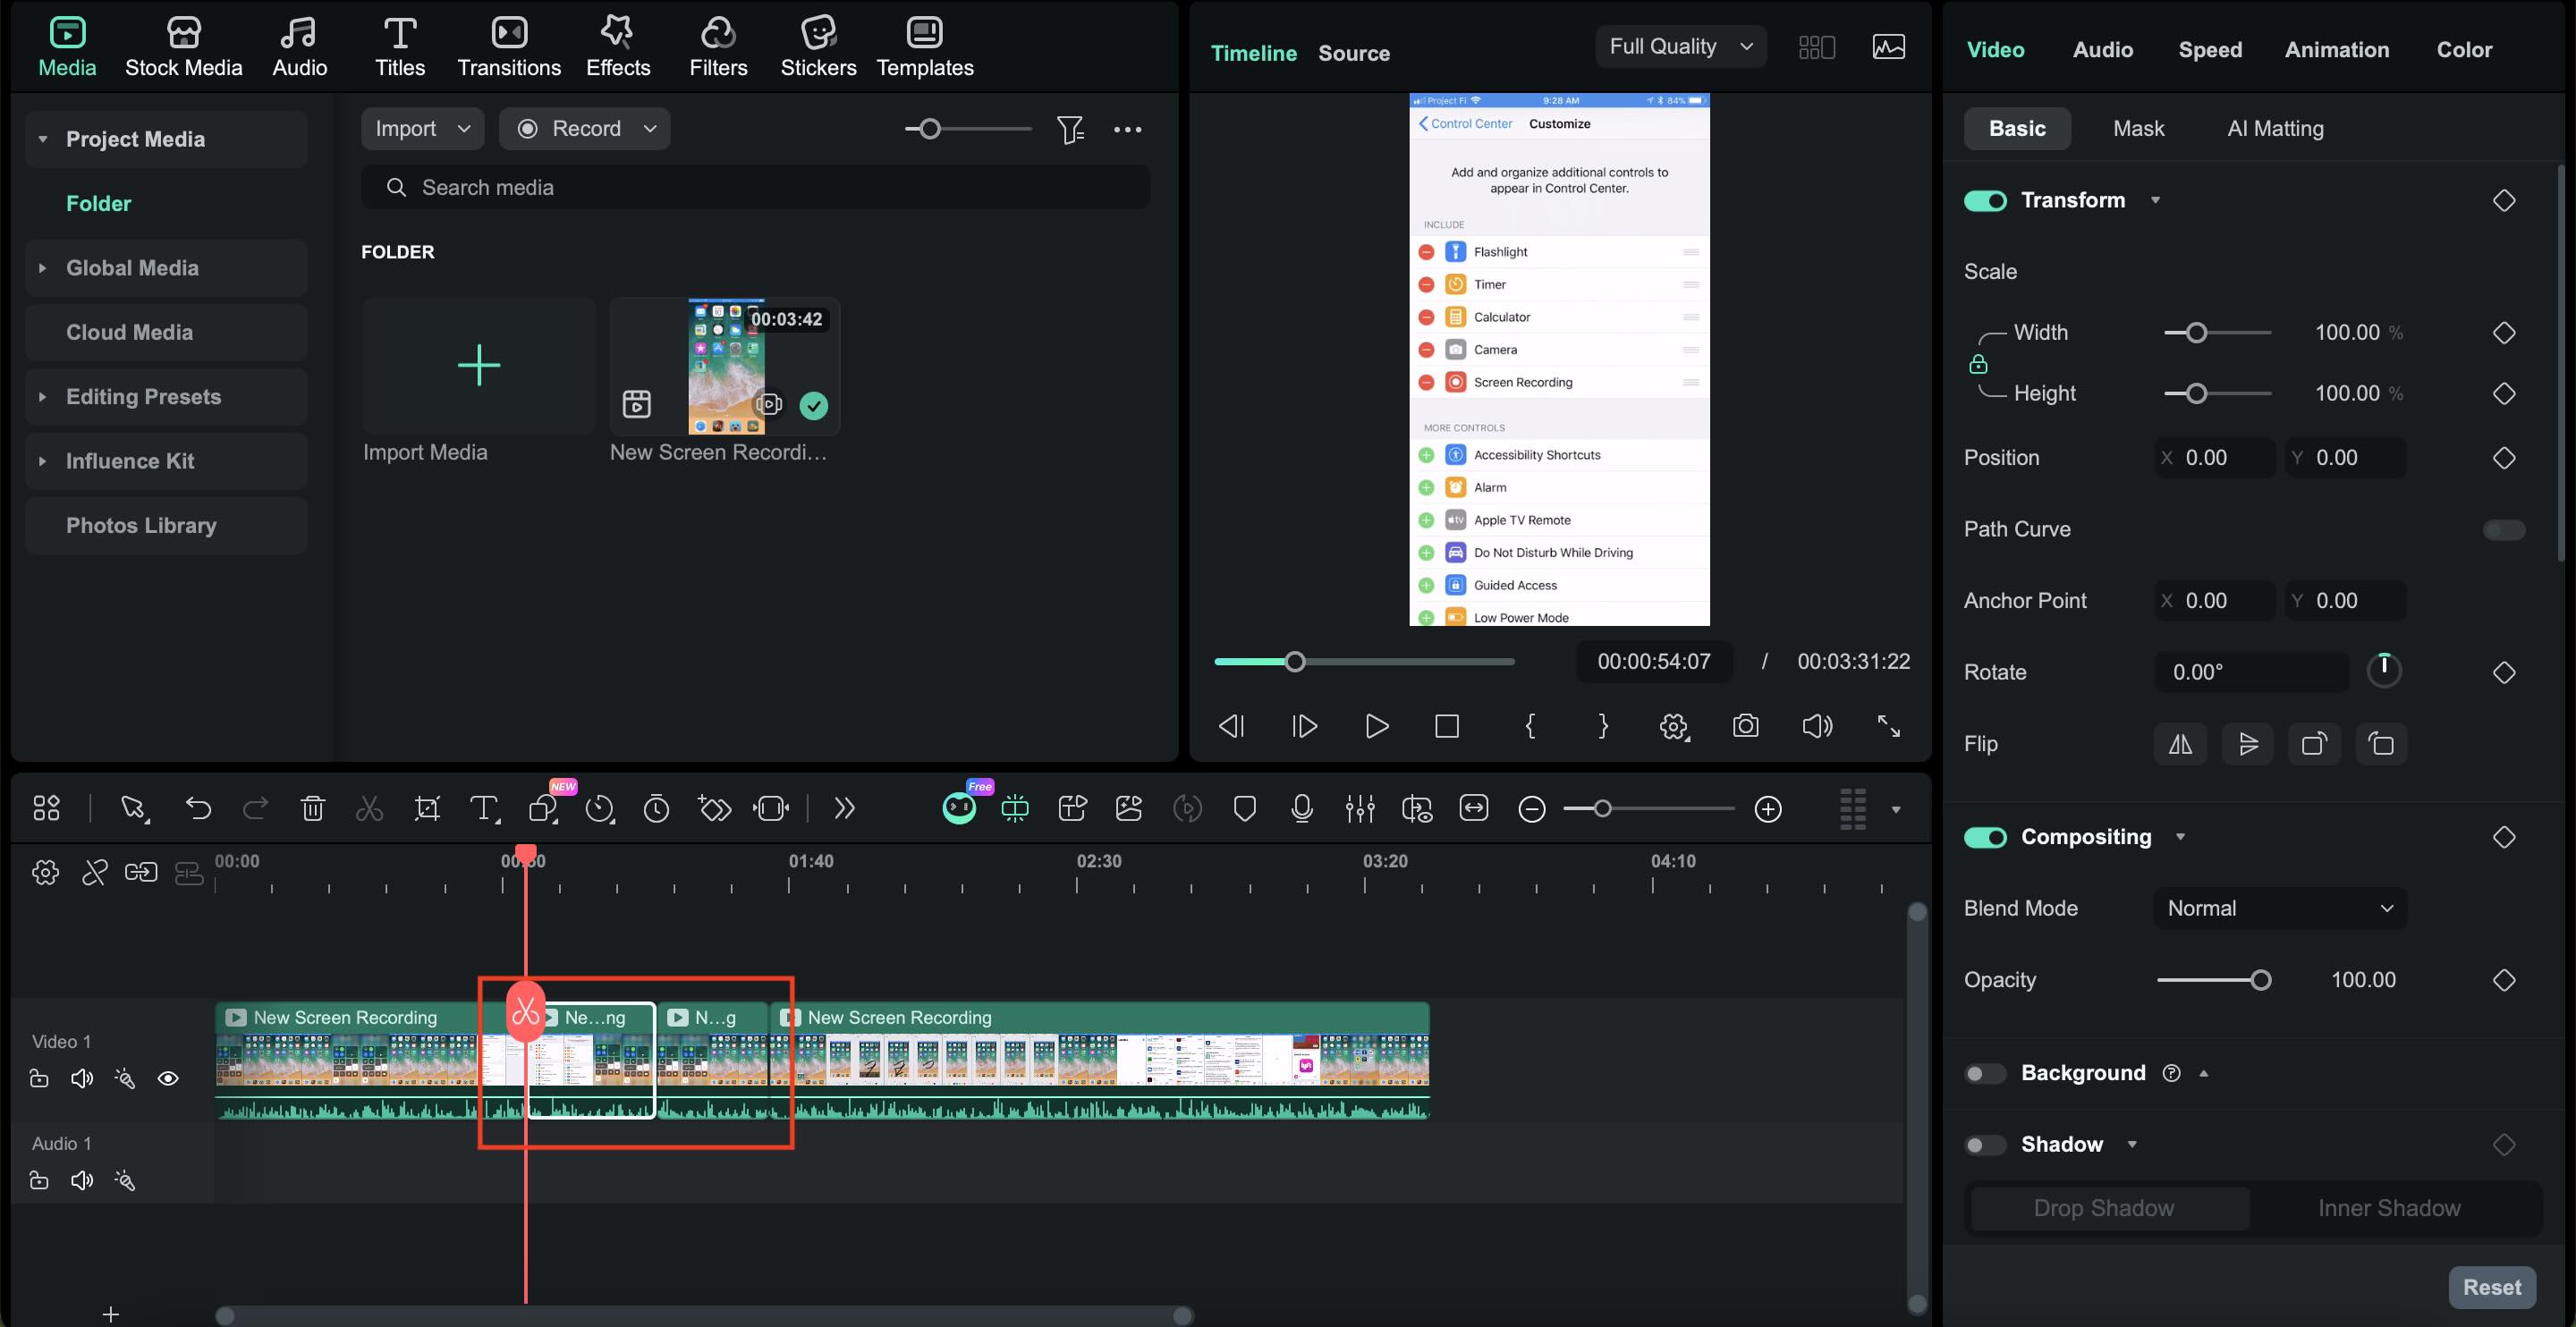
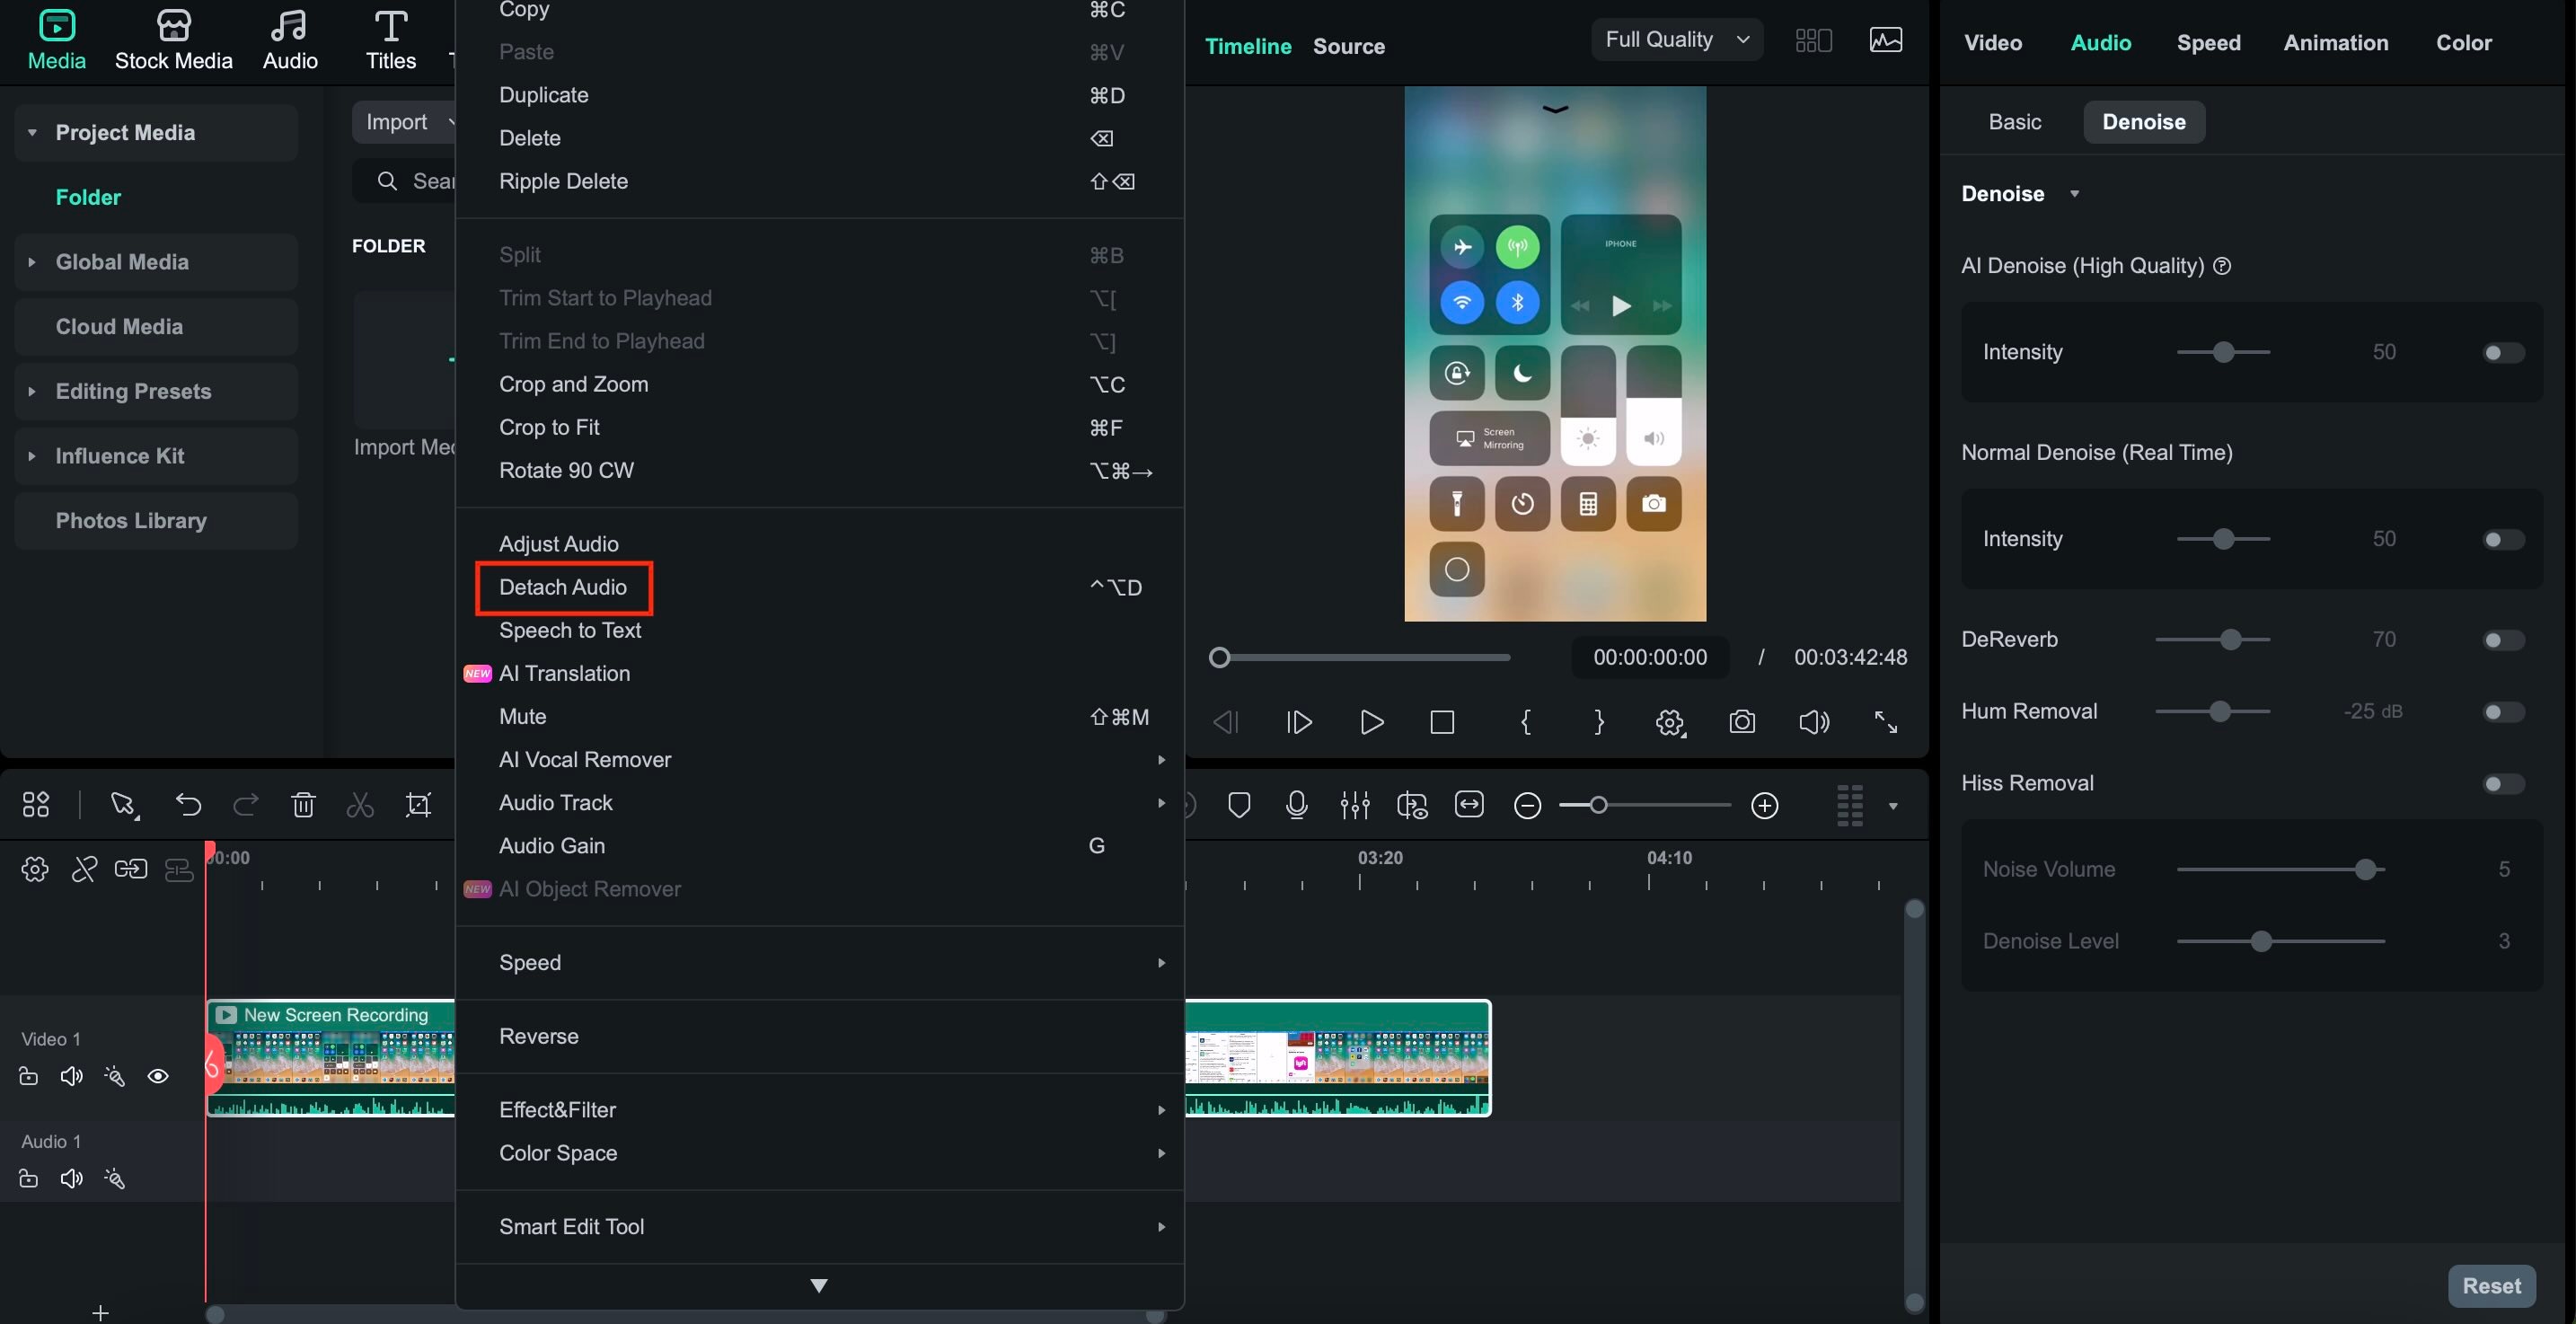
Convert Screen Recordings to MP3 or AAC with Wondershare Filmora
If you only need the sound, converting the screen recording into an audio file is the final step.
With Filmora, you can:

Method 3: Recording Calls and Social Media (The Tough Stuff)
Recording calls on iPhone is where things get tricky. Apple applies strict privacy protections to calls and social media apps, which means there's no one-tap solution like Voice Memos or Screen Recording. Still, depending on the app and situation, there are practical solutions that can be used.
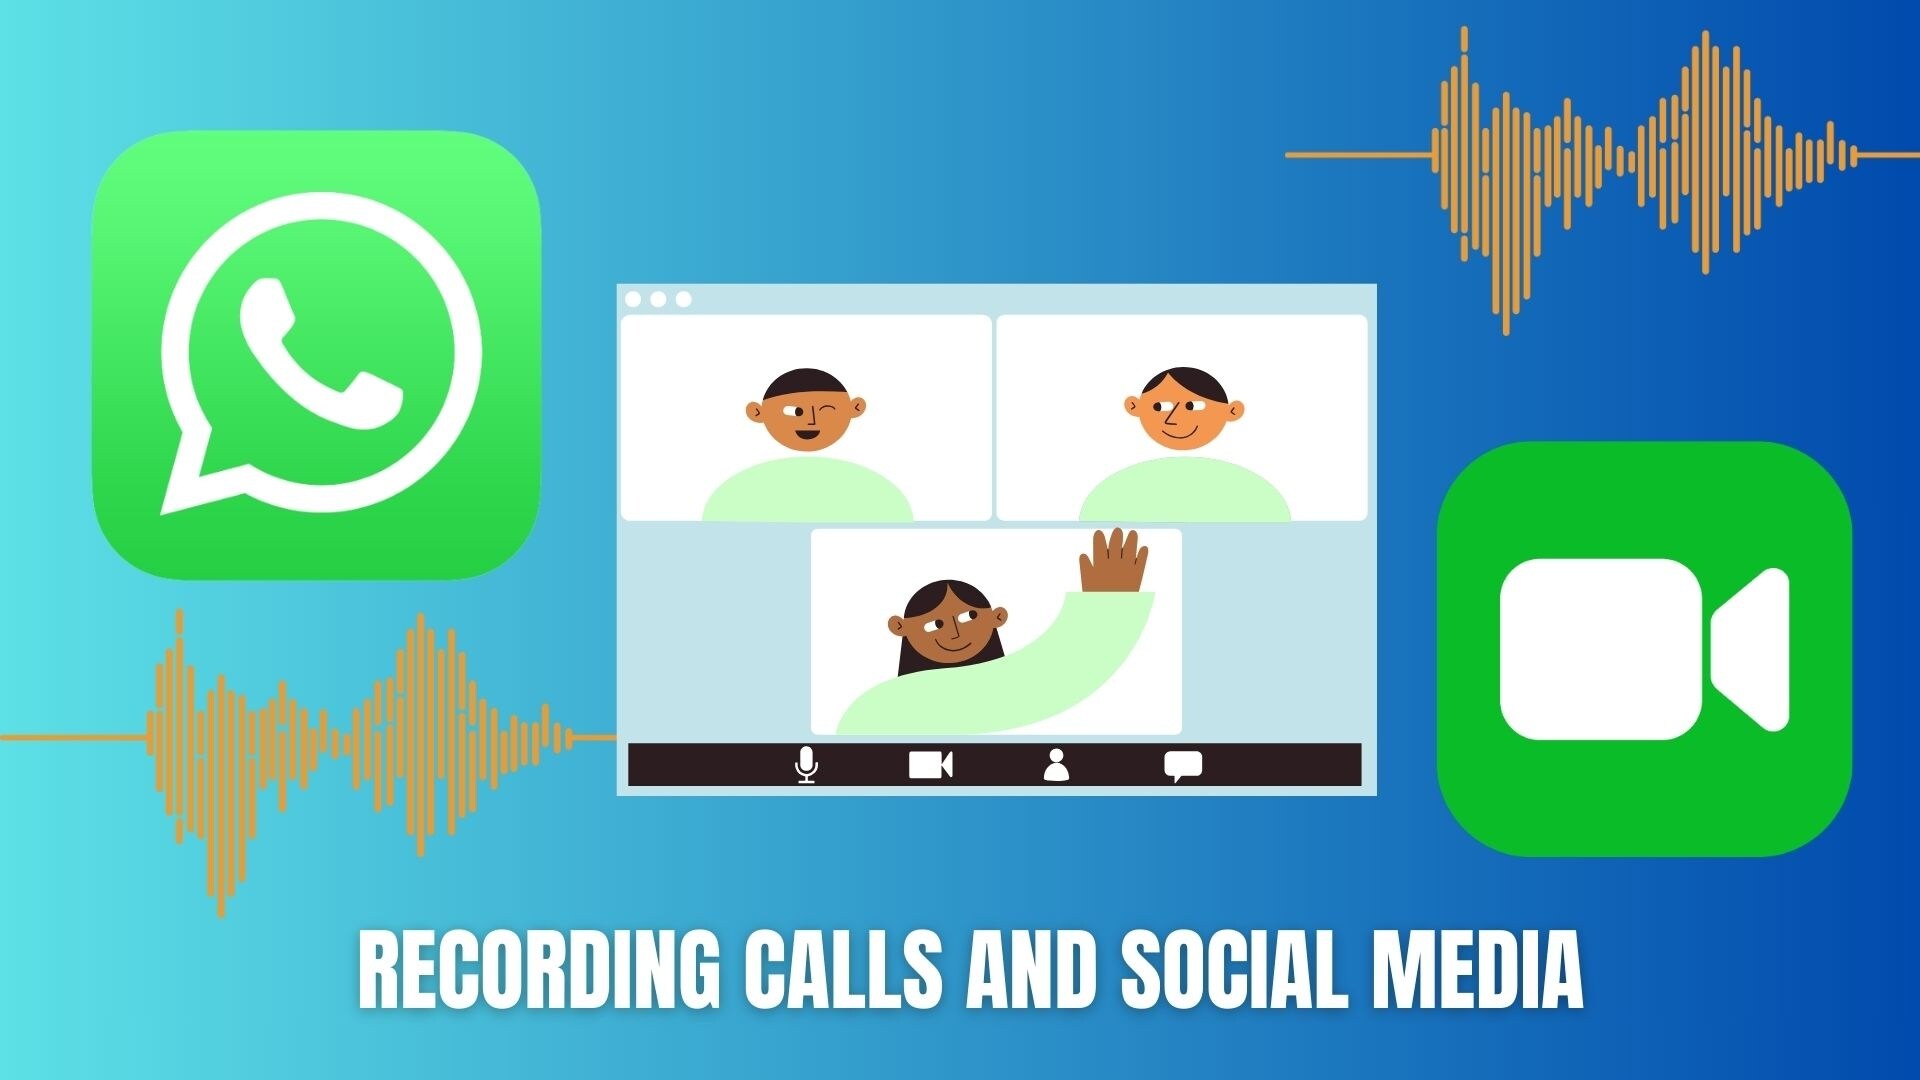
How to Record a FaceTime Call With Audio on iPhone
Apple intentionally restricts FaceTime call recording to protect user privacy. While Screen Recording can capture the video, the audio often becomes muted or inconsistent.
What you can do:
- Use Screen Recording for the video portion
- Enable the Microphone before starting the recording
- Place the call on speaker so your mic can capture both sides
This method indirectly records FaceTime audio through the microphone rather than recording the system call audio. Always notify others before recording, as consent is required in many regions. If you are recording audio for a podcast or YouTube video, you might also want to check our guide on [how to edit podcasts in Filmora].
How to Record a WhatsApp Video Call With Audio on iPhone
WhatsApp adds another layer of restrictions. Even if screen recording is enabled, call audio may not be recorded properly. Your realistic options are:
- Using an external device: Use another phone or recorder placed near the speaker for reliable audio.
- Third-party apps: Some apps claim to record WhatsApp calls, but results are inconsistent and often limited by iOS system permissions.
Due to Apple's system-level rules, there is currently no built-in way to fully record WhatsApp call audio internally on iPhone.
How to Record Video Calls With Audio on iPhone (Zoom & Google Meet)
For apps like Zoom and Google Meet, iOS offers more flexibility. Here are tips for better results:
- Use Screen Recording to capture the session
- Turn on Voice Isolation from Control Center during the call
- This reduces background noise and makes voices clearer
- Wear headphones to minimize echo and feedback
Zoom also provides built-in recording options for meetings, which may be a better choice if you need higher-quality audio and cloud backups.
Things to Remember About Call Recording on iPhone
- iOS prioritizes user privacy over recording convenience
- Call audio is often captured through the microphone, not internally
- Always get consent before recording calls
Method 4: Messaging and Social Audio
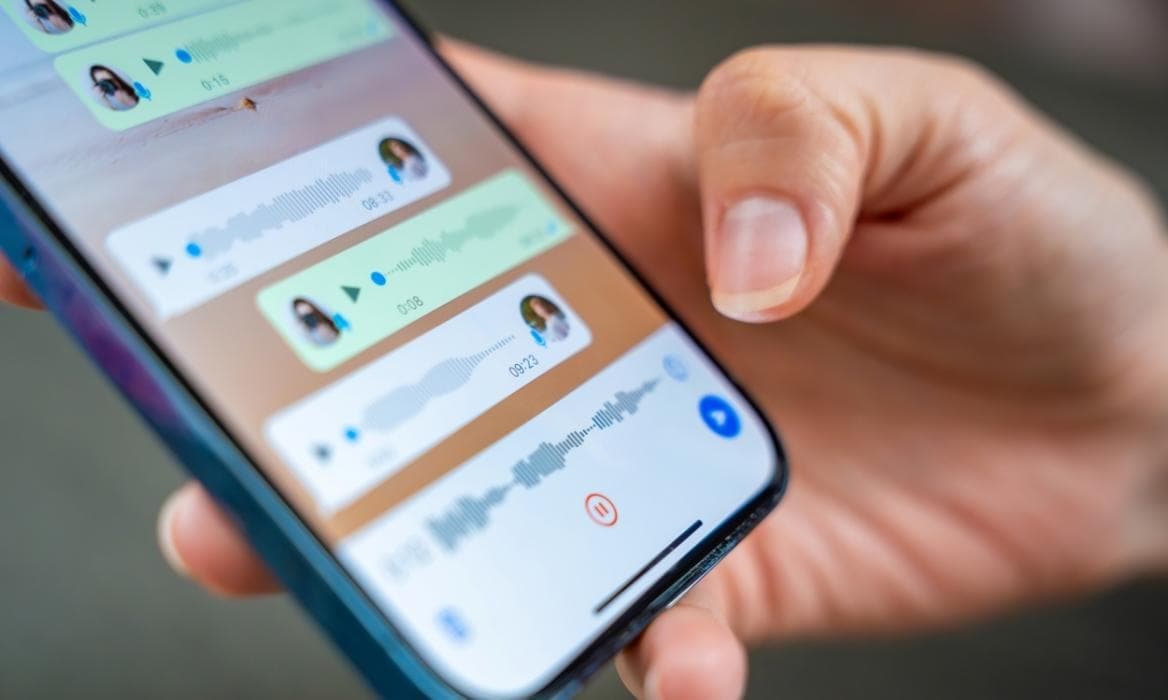
Not all audio recordings are designed to be saved as files. Sometimes, you just want to send a quick voice note. iOS makes this easy with built-in audio messaging features that work seamlessly across iMessage and many third-party apps.

How to Record an Audio Message on iPhone (iMessage & Apps)
For iMessage:
- Open a conversation in the Messages app
- Tap and hold the Audio icon next to the text field
- Speak your message
- Release to send, or swipe up to lock the recording for longer messages
Your audio message will be sent instantly and will play directly in the chat.

For third-party apps like WhatsApp, Instagram, or Telegram, the process is similar:
- Press and hold the microphone icon
- Speak clearly
- Release to send, or lock the recording if the app supports it
Understanding "Raise to Listen & Record" on iPhone
iOS includes a lesser-known feature called Raise to Listen & Record, designed for more natural voice messaging. Here's how it works:
- Lift your iPhone to your ear during an iMessage conversation
- The phone automatically switches to audio mode
- Speak, then lower the phone to send the message
To make sure it's enabled:
- Go to Settings
- Tap Messages
- Turn on Raise to Listen
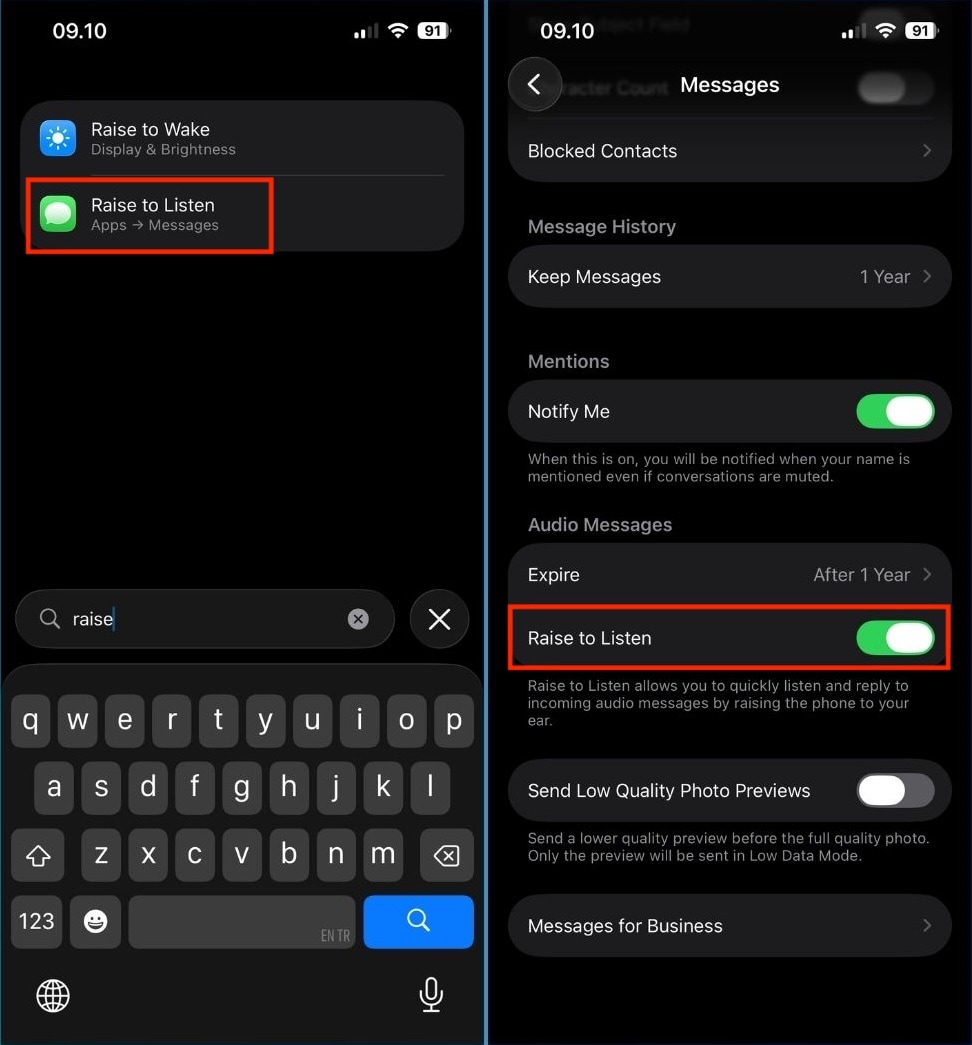
This feature is ideal for hands-free voice replies and feels almost like making a phone call, but with the convenience of voice messages.
When to Use Messaging Audio vs. Audio Recording
- Use audio messages for quick replies and casual communication
- Use Voice Memos or Screen Recording when you need saved, editable audio
Advanced Tips for Crystal Clear Audio Quality
Regardless of the method you use for recording audio on an iPhone, audio quality can make or break the final result. With a few simple adjustments, your iPhone can deliver clean, professional-sounding audio.
Use Voice Isolation to Reduce Background Noise
Voice Isolation is one of the most effective iOS features for improving vocal clarity in real time. It focuses on your voice while minimizing ambient noise.
How to enable it:
- Start a call or recording-supported app
- Open Control Center
- Tap Audio & Visual
- Select Voice Isolation
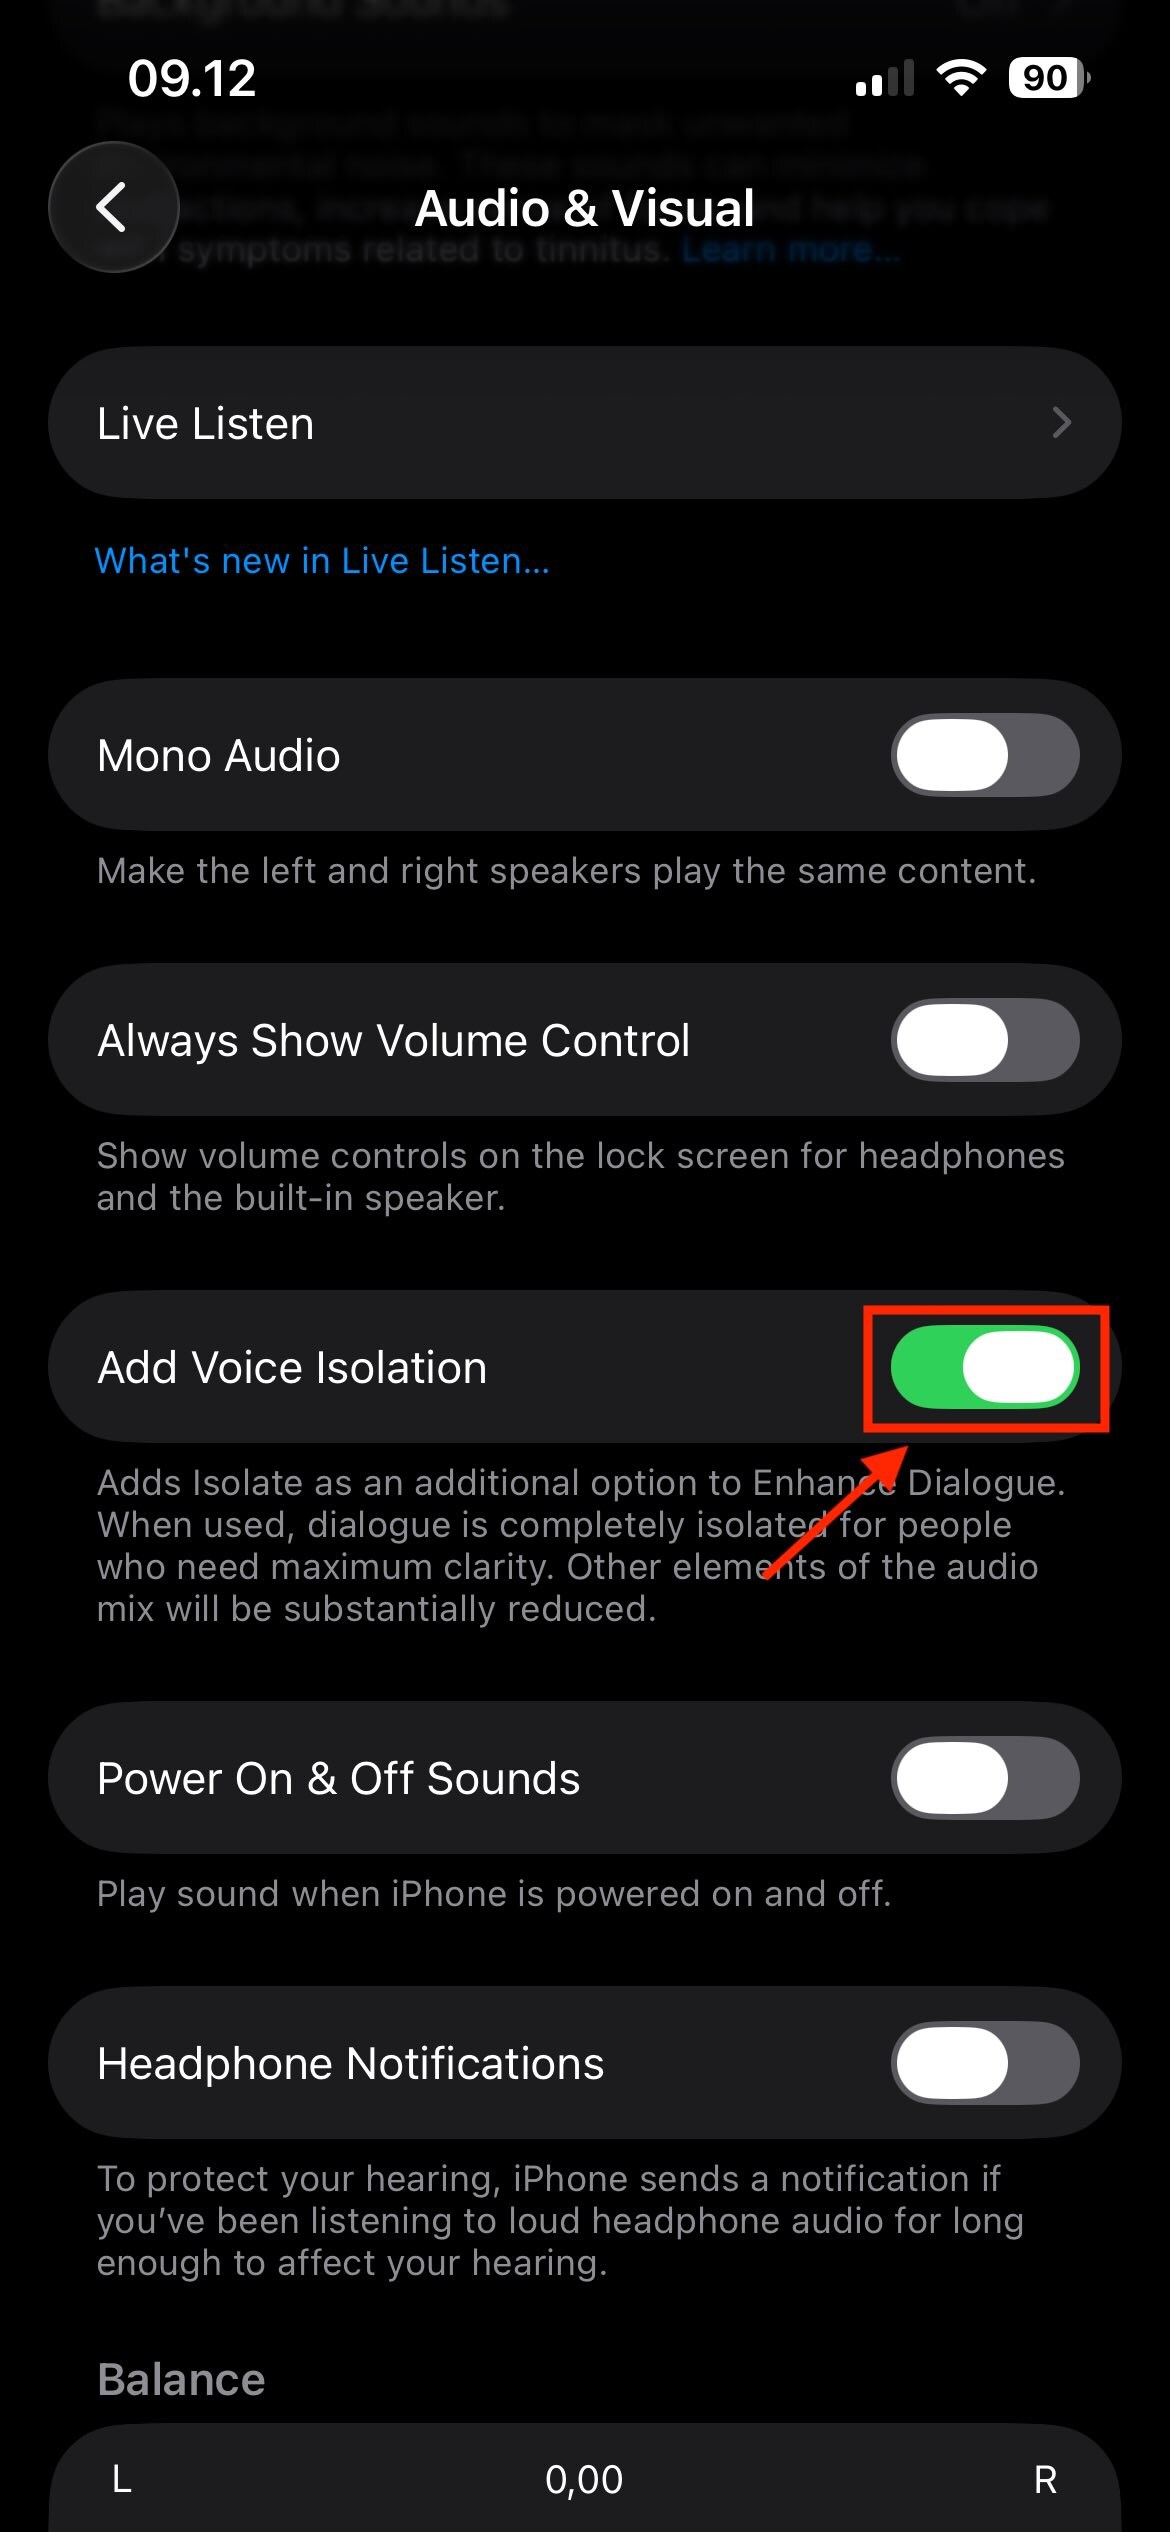
This feature works very well for video calls, screen recordings with narration, and noisy environments such as cafes or open areas.
Follow the 6-Inch Rule for Better Sound
iPhones use a bottom-facing microphone, and positioning matters more than most people realize. For best results:
- Keep the microphone about 6 inches (15 cm) from your mouth
- Avoid covering the mic with your hand
- Speak slightly in front of the mic, not directly into it, to reduce popping sounds
These simple rules instantly improve clarity and reduce distortion.
Use an External Microphone for Pro Results
If you record frequently, an external mic is the easiest upgrade you can make.
Recommended options:
- Lavalier (clip-on) microphones for voiceovers and interviews
- Shotgun microphones for directional recording
- USB-C or Lightning microphones designed specifically for iPhone compatibility
External mics provide cleaner audio, better noise handling, and more consistent volume than the built-in microphone.
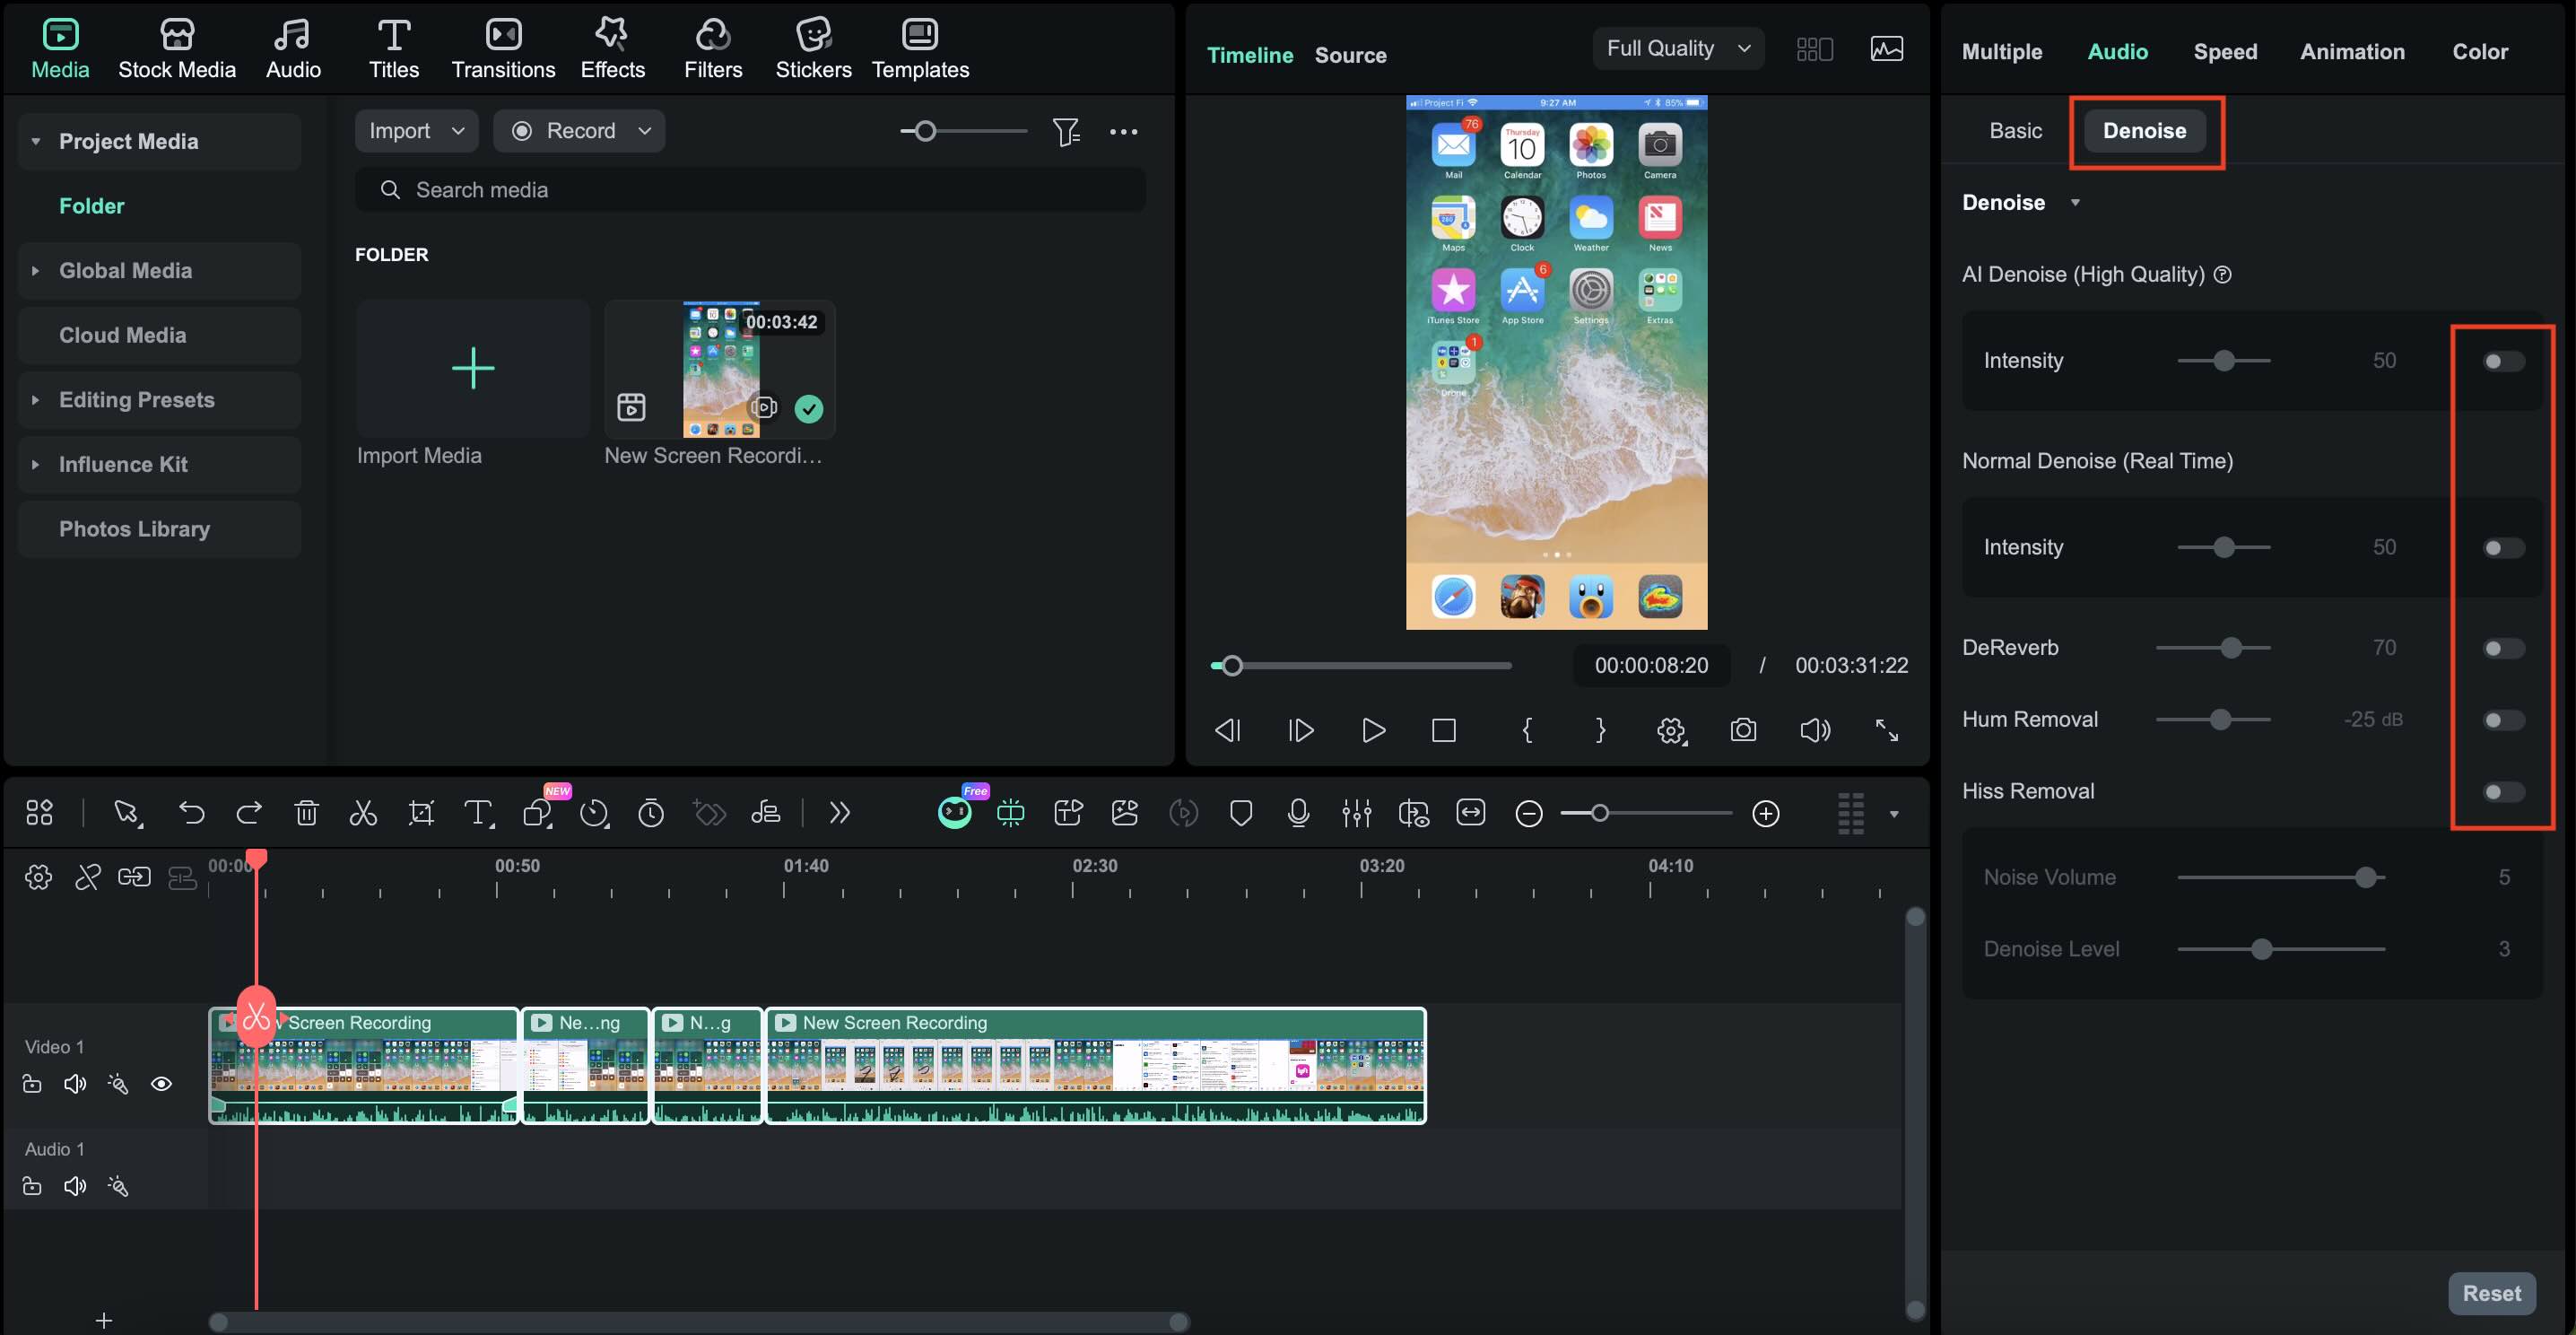
How to Trim and Edit My Recordings with Filmora
After your audio is recorded, the next step is polishing it. Cutting out mistakes, adjusting volume, and cleaning up noise can turn a raw recording into something that sounds polished and professional. This is helpful after you record audio on your iPhone, capture audio playing on iPhone apps, or save sound from video calls.
In this regard, Wondershare Filmora makes the process simple, even if you're not an audio expert.
Conclusion
Mastering Audio Recording on iPhone Recording high-quality audio on your iPhone is easier than ever with the right techniques. Whether you are using the Voice Memos app for quick notes, Screen Recording for internal system sound, or capturing important calls, your iPhone is a versatile studio in your pocket.
However, the recording is just the first step. To truly stand out, professional editing is essential. Wondershare Filmora offers the perfect set of tools to trim, denoise, and enhance your iPhone recordings, turning raw files into polished content for podcasts, social media, or personal projects. Ready to take your audio to the next level? Start editing with Filmora today and hear the difference!
FAQs
-
Why is there no sound when I record my screen?
This usually happens due to iOS privacy restrictions or microphone settings. When using Screen Recording, press and hold the Screen Recording icon, then make sure the microphone is active. Some apps, especially streaming or calling apps, block audio recording completely, so the screen is recorded but the sound is muted. -
Can I record a phone call without an app?
No. iOS doesn't allow phone call recording without a third-party app or external device. This restriction is due to privacy and legal reasons. Always get permission before recording a call.
