
 100% Security Verified | No Subscription Required | No Malware

Thanks to the streaming capabilities in Discord, the platform has been widely used to broadcast live gameplay, host virtual meetups, or share events as they happen. But if you're looking to record a Discord stream, you might feel a bit bummed to know that Discord doesn't come with a built-in recording function for the stream.
To address this challenge, you'll need to turn to a third-party tool to capture your streams. This guide will introduce you to the best third-party tool, so you don't miss out on saving those moments for later!
In this article
Part 1. Preparations for Recording a Discord Stream
Before we get into the process of how to record Discord streams, there are a few things you need to know first:
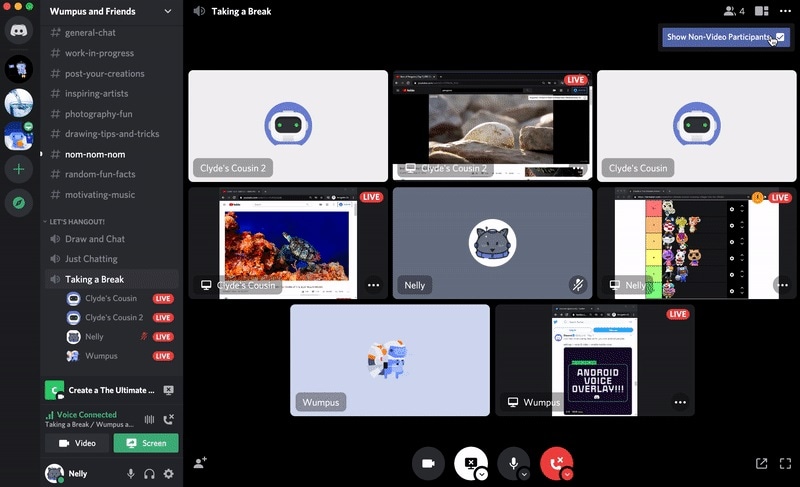
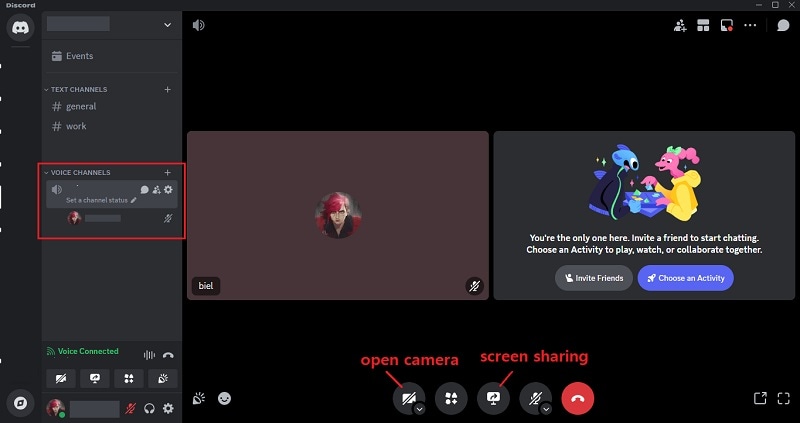
1. How to Join or Start Streaming on Discord
To start streaming or join a stream, click Voice Channel on the Discord server. Then click the 'Video' icon to share your webcam, or 'Screen' to share your desktop or a specific app.
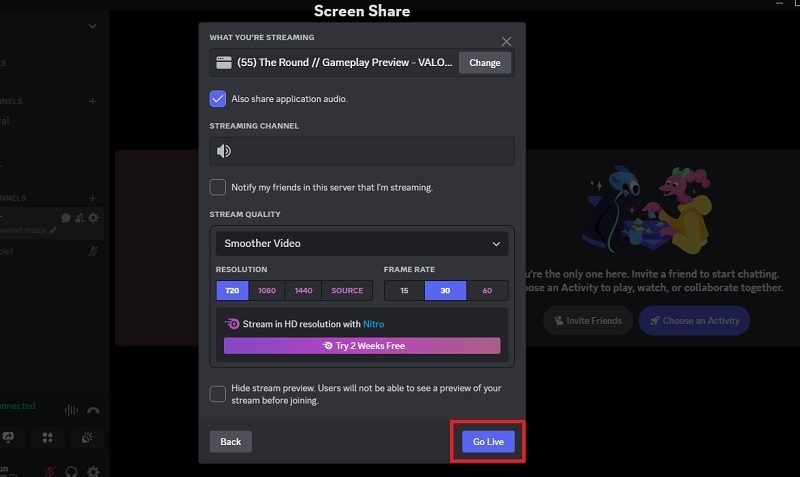
If you are screen sharing, you'll get to set the streaming settings. Click Go Live once ready.
2. Select the Right Audio Source
If recording gameplay, enable system audio. For podcasts or discussions, include both microphone and system audio. Check audio levels so game and voice don’t overpower each other, or adjust them after recording.
3. Choose the Right Recording Software
You may want to record Discord streams, so choosing recording software with video editing features is helpful. It lets you trim, add overlays, text, or transitions. One such tool is Wondershare Filmora, known for strong recording and editing functions.
Part 2. How to Record Discord Streams with Audio (Windows & Mac)
For this tutorial, we will be using Filmora Screen Recorder to show you how to record a Discord livestream. After the recording ends, you'll be directed to Filmora's editing interface where you can refine and enhance the video recording.
To get started, make sure you have installed Filmora first on your computer. Filmora is compatible with Windows and Mac, so you can follow these steps on either platform.
How to record stream on Discord
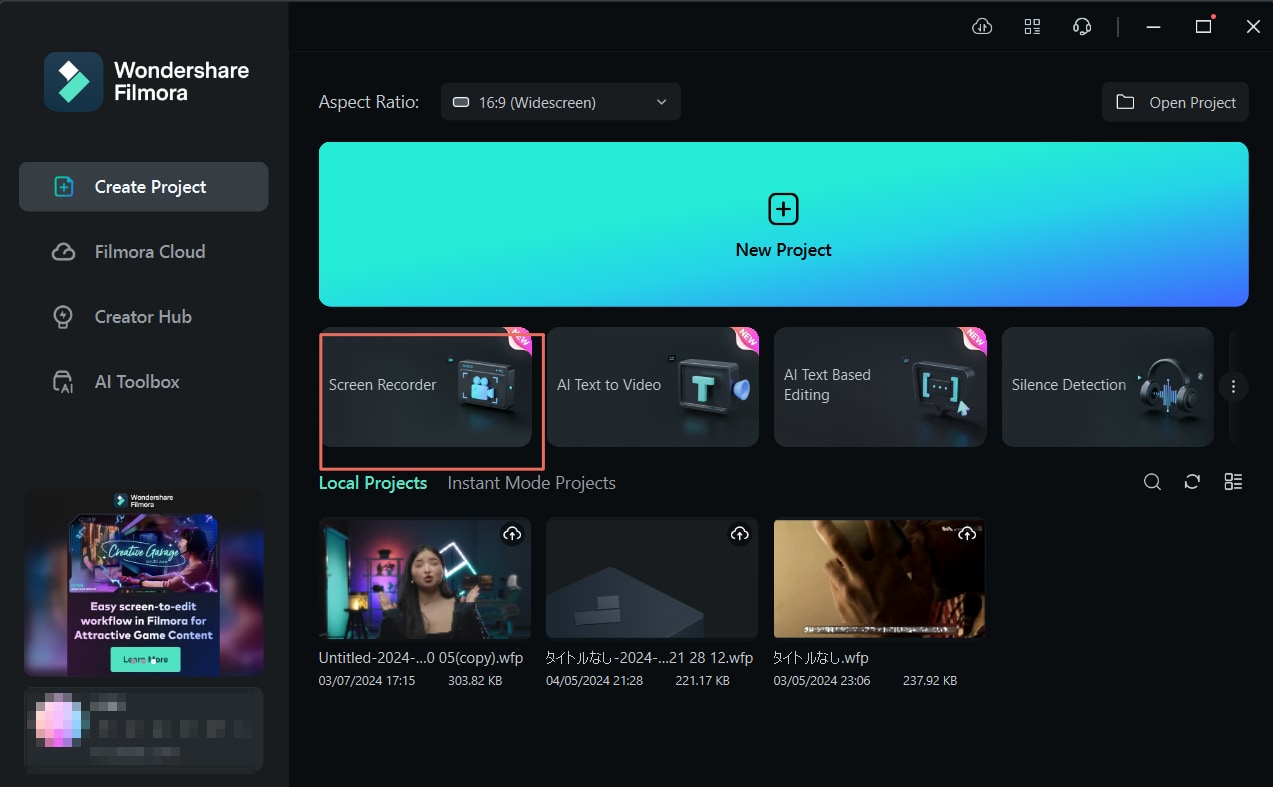
Step 1Open Filmora and Access the Screen Recording Feature
Launch Filmora and navigate to the "Screen Recorder" option on the Startup Window.
 secure download

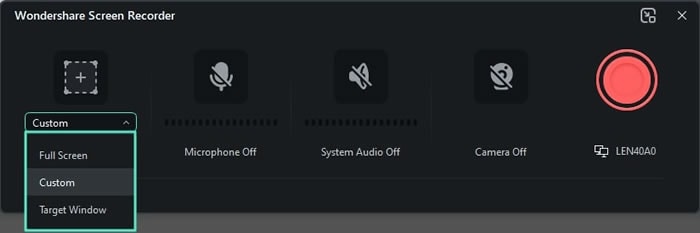
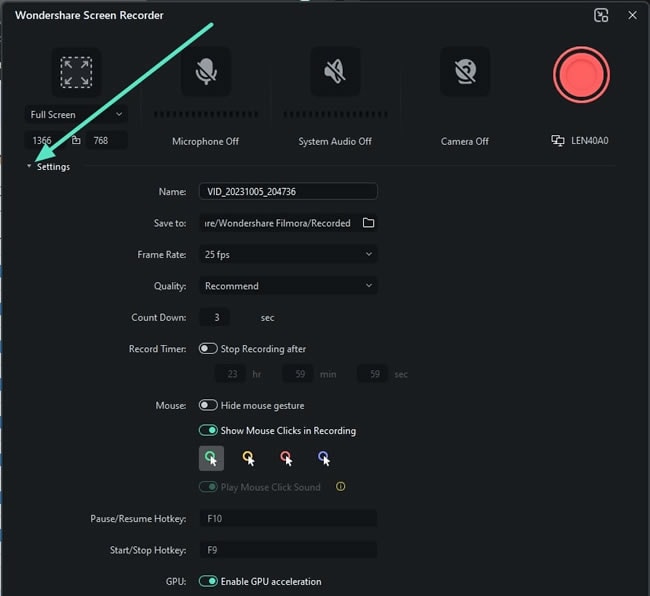
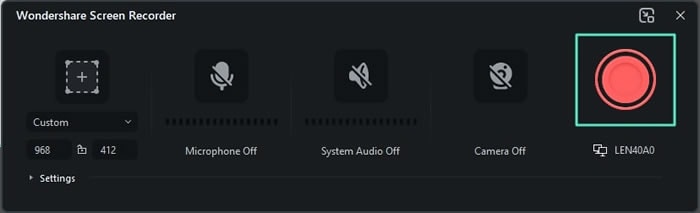
Step 2Set the Screen Resolution for Recording
Next, choose the recording area on your screen. Click the Square icon to pick from three resolution options: Full Screen, Custom, and Target Window. You can also manually adjust the size or ratio.
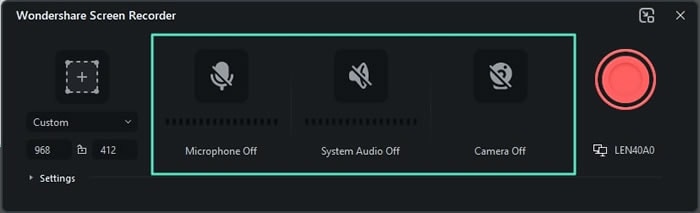
Step 3Select Your Recording Preferences
Within the screen recorder settings in Filmora, there are three options. To record your voice during the Discord stream, enable "Microphone." Then, toggle "System Audio" and "Camera" on or off as needed.
Step 4Customize Additional Settings
Click on "Settings" to adjust preferences like frame rate, quality, and countdown timer. For high-quality recording, set the frame rate to 30 FPS or higher and choose the best quality option.
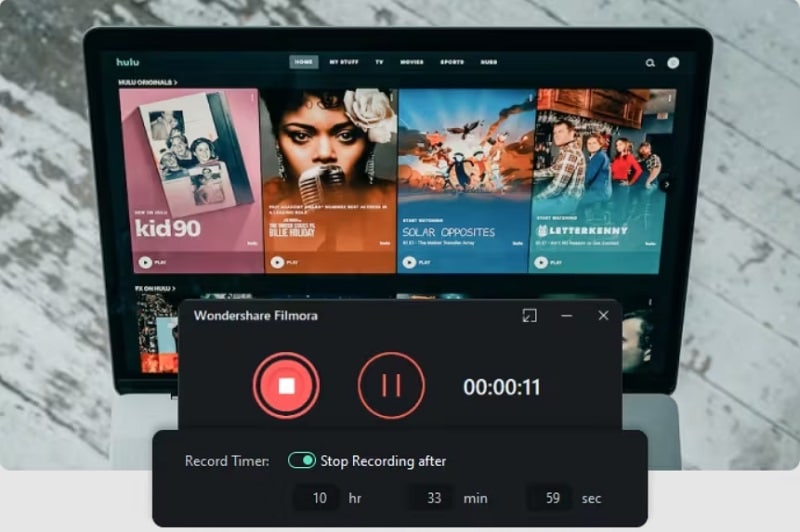
Step 5Start the Recording Process
Hit the red recording button to start. A countdown will play, which you can skip by clicking "Start Directly" below. During recording, you can "Pause", "Stop", or "Re-record" using the controls below the window.
Part 3. Improve the Recording Quality in Post-Production
Once you've recorded your Discord stream using Filmora, check the recording in the preview window. If the quality of the recording needs improvement, you can enhance it further during the post-production process.
secure download 1. Trim and cut unnecessary part
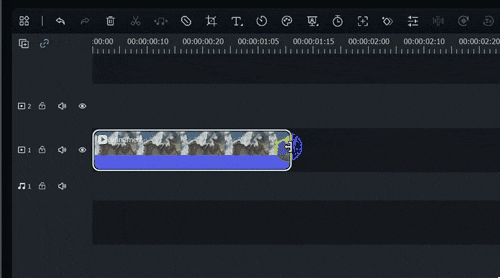
Trim any parts that don’t add value, like long pauses or off-topic talk. To split the clip, move the playhead and click the Split (scissor) icon.
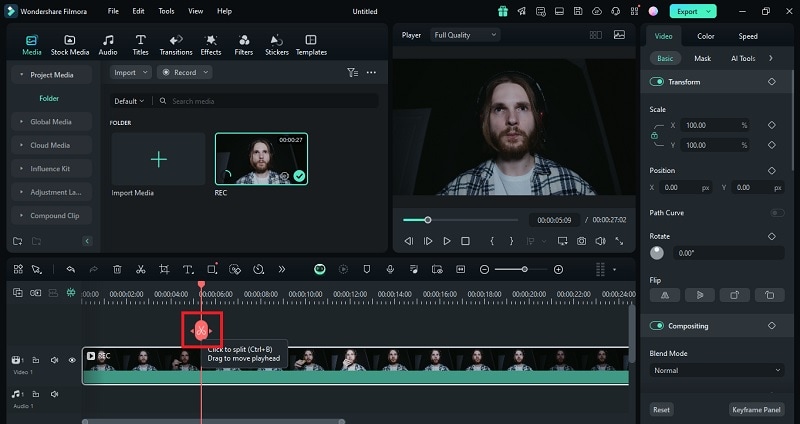
But if you want to trim the video recording, you can use the handlebars at the edges of the clip in the timeline. Drag these bars inward from either end to cut out the beginning or end of the video.
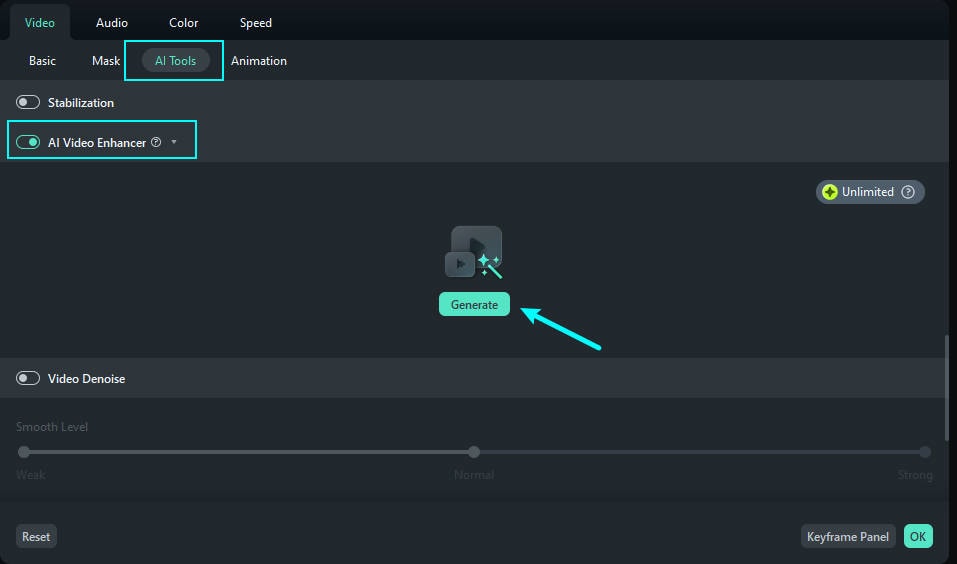
2. Increase the video clarity with AI Video Enhancer
Select the clip on the timeline to open the editing panel. Then go to Video, AI Tools, and click the button next to AI Video Enhancer to activate it. Finally, click Generate to start processing.
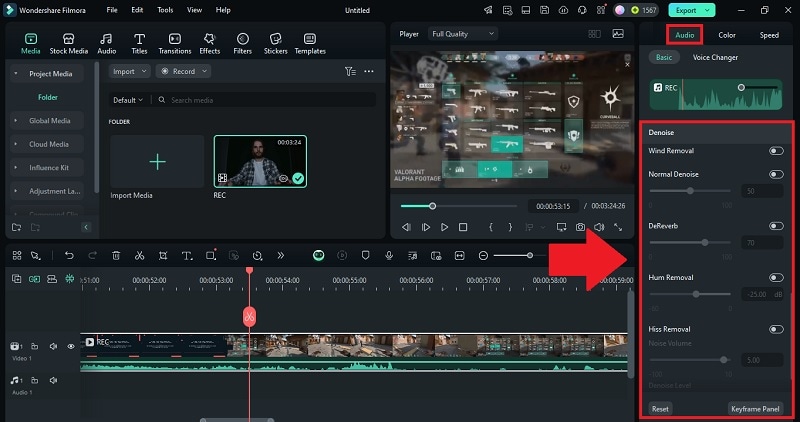
3. Use AI Denoise to minimize unwanted background noise.
Select the clip you want to remove background noise from. This opens the Audio panel on the right. Find Denoise and toggle the buttons next to each tool to adjust the settings.
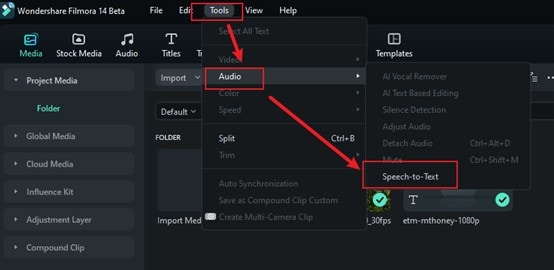
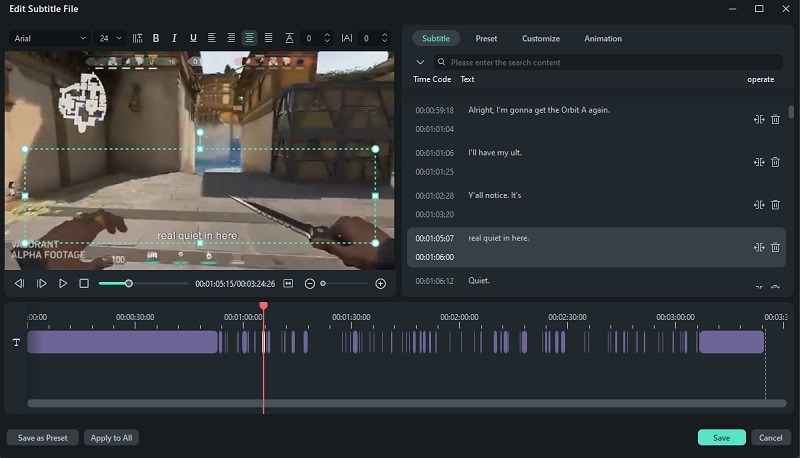
4. Add subtitle to the Discord stream recording with Speech-to-Text
To make your video more accessible, use Filmora's Speech-to-Text to auto-transcribe your audio. Select the video track, then go to Tools, Video, Speech to Text.
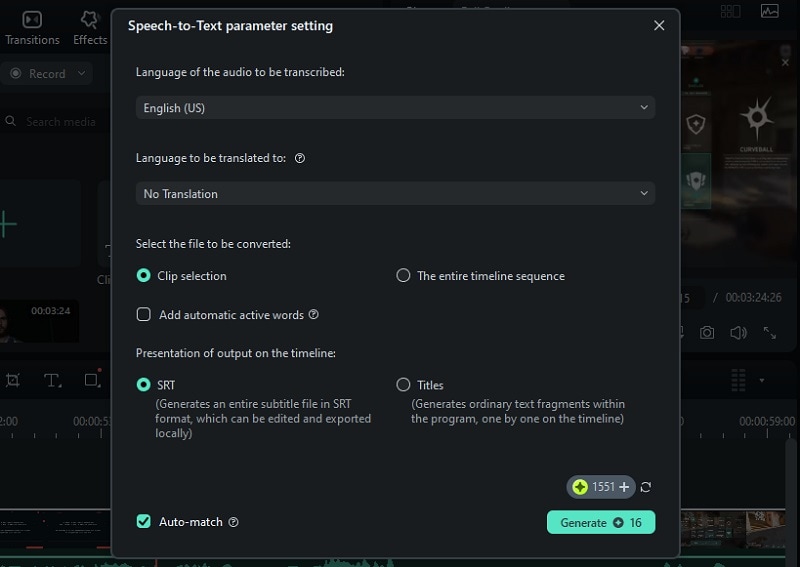
In the Speech-to-Text settings bar, select the language of the audio you want to transcribe and the files to convert. To translate the video too, choose the "Target Translation Language" option to change the video's language.
Once it finishes generating subtitles, the subtitle track will be added. Then, you can finetune them further by double-clicking the track on the timeline.
Bonus: Creating Highlights for Your Discord Stream Recording
Now that you've learned how to record a Discord stream, you can also leverage your recordings to create highlights. Since Discord streams usually take a long time, these highlights are perfect for sharing key moments from your stream with a broader audience, especially if they missed the live event or if you want to make short-form content out of it.
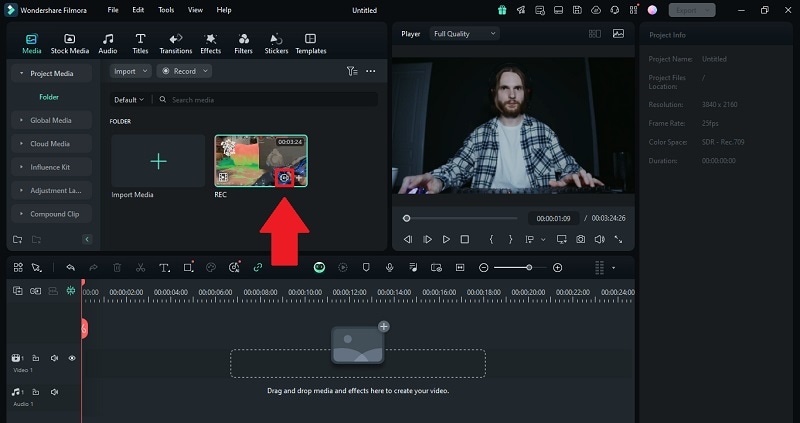
Still using the same video editing software, you can create a Discord stream highlight easily using the Filmora Smart Scene Cut feature. This tool employs advanced algorithms to scrutinize your video content. It identifies crucial components such as faces, objects, and variations in motion, lighting, and sound that usually signify scene transitions.
How to create highlights from a Discord stream recording:
Step 1: Click the "Smart Scene Cut" icon on the video thumbnail.
 secure download
 Step 2: In the Smart Scene Cut window, press "Start" and wait for the upload to finish.
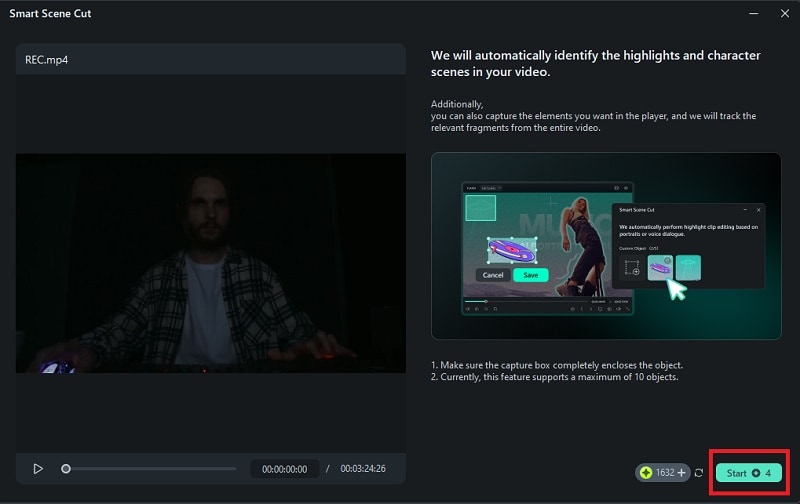
Step 3: On the results page for Smart Scene Cut, you'll find three categories for selection: "Highlight Scene," "Character Scene," and "Custom Object."
- Highlight Scene: This feature automatically pinpoints the standout scenes. Choose the segments that catch your eye and move them to the timeline for more detailed editing.
- Character Scene: This feature focuses on scenes involving characters. You can pinpoint and extract significant moments based on character interaction.
- Custom Object: Select and track specific elements within your video that you wish to highlight. Filmora will isolate these parts throughout the video.
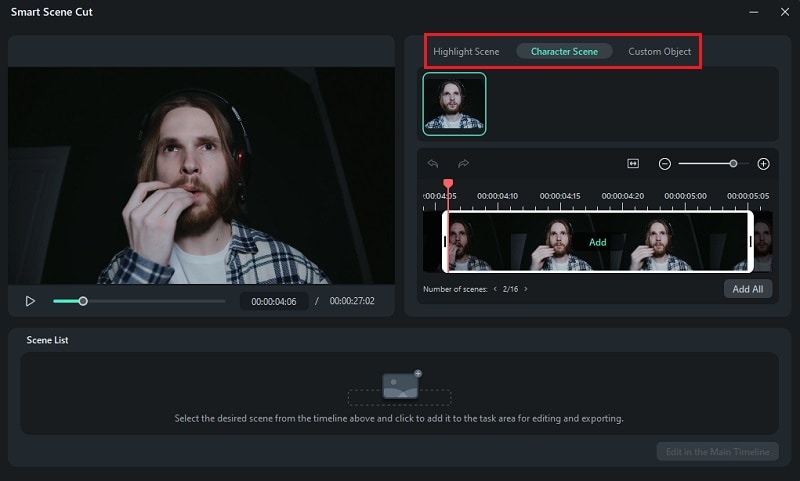
Choose the scenes by clicking "Add." Then, click "Edit in the Main Timeline." You'll be directed back to the editing interface.

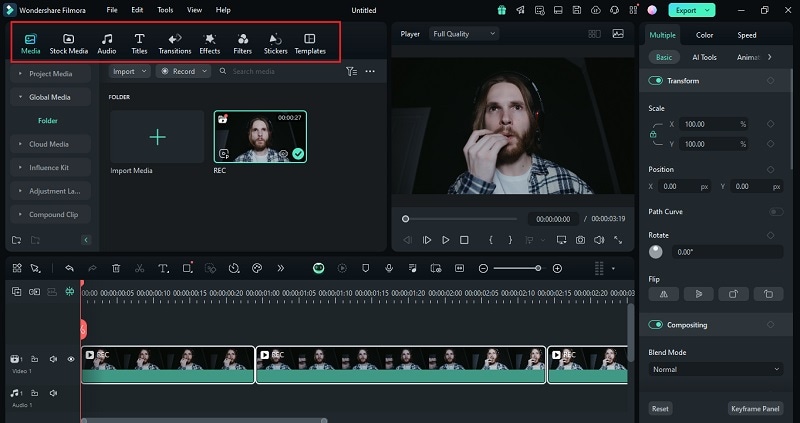
Step 4: With your selected clips now in the main timeline, begin editing them to fit your vision. Add text overlays, sound effects, and transitions to enhance the final product.
Step 5: Finally, select your preferred output destination and format. Adjust other export settings as required, and then click "Export" to complete the process.
You can check this video for more information:
Conclusion
Now you know how to record a Discord stream with only the best recorder in the market. With Filmora Screen Recorder, you're ready to snag every epic moment and keep those fun memories on replay! Not only that, you can edit your videos further by trimming unwanted parts, adding subtitle, minimizing background noise, and more.
Even if you want to create a highlight from your Discord stream recording, you can use Filmora Smart Scene Cut feature to automatically identify and extract the most exciting or important scenes.
secure download 