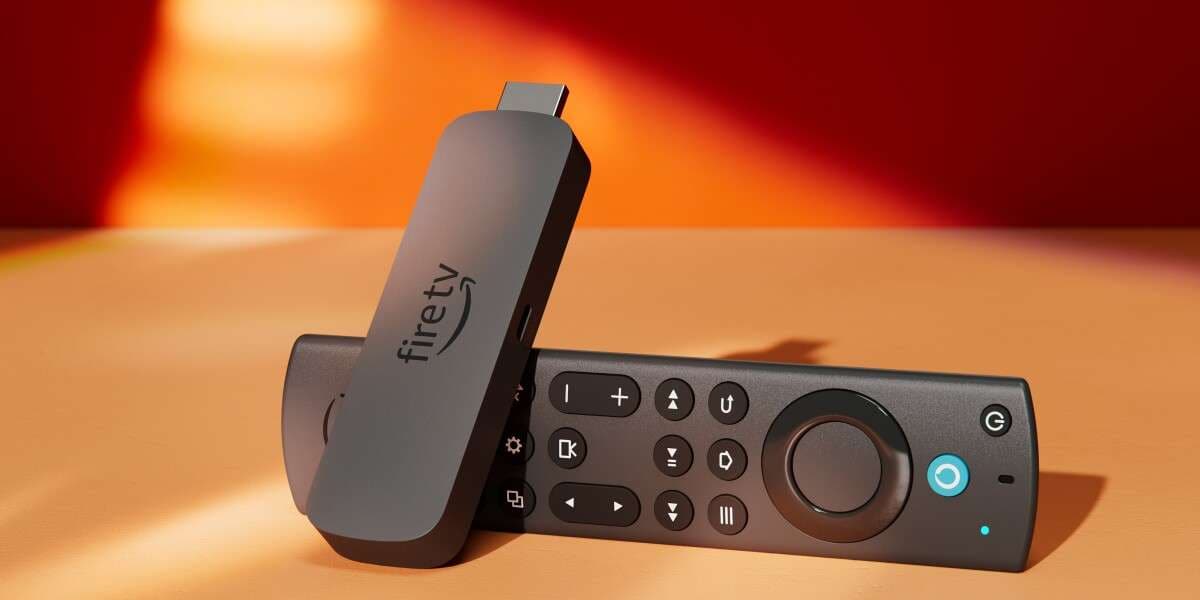
When it comes to affordability and ease of use, Amazon’s Fire TV Stick is one of the best devices on the market. It can transform any TV with an HDMI port into a smart entertainment hub. Plugging this compact device into your TV lets you easily access popular streaming services like Netflix, Prime Video, Hulu, YouTube, and more.
One standout feature of the Fire TV Stick is its ability to stream live content from platforms like Twitch. Whether you love gaming streams, music concerts, creative showcases, or even cooking tutorials, the Fire TV Stick allows you to enjoy all your favorite Twitch clips and live broadcasts on the big screen, making it a fantastic tool for both viewers and creators.
In this article
How to Watch Twitch Clips on the Fire TV Stick
Twitch clips can be a lot of fun, but first, we have to know how to access and watch them on the Fire TV Stick. It’s super easy, so you should have no problems following the steps we provided below!
- Install the Twitch App on Your Fire TV Stick
The first step is installing the Twitch app on your Fire TV Stick. From the Fire TV home screen, go to the Apps section and use the search bar to find Twitch. Then, simply click Install and download the app.
- Sign Into Your Twitch Account
After you install the app, open Twitch on your Fire TV Stick. Sign in to your account, and if you don’t have one, you can go ahead and sign up directly.
- Navigate The Clips
Once you’re set and logged in, navigate to the Videos section and click the Clips. You can see all the clips you’ve saved on your account.
- Select and Play Clips
Now, you can browse the clips and select what you like. The Fire TV Stick offers a cinematic HD experience, allowing you to enjoy high-quality clips, but the original video quality must also be high. A lot of times, the clips need polishing, so let’s see how to do that!
How to Watch Twitch Clips on the Fire TV Stick with Filmora

If you’ve ever wanted to make your Twitch clips stand out or improve the quality of your highlights before sharing them, then video editing can help you immensely. Many editing tools on the market are simply too complex or time-consuming, so you must choose carefully.
Filmora is one of the best solutions because its user-friendly editing software simplifies the process and offers features like trimming, cutting, adding transitions, and visual effects. It’s carefully designed for editors of all skill levels, and you don’t need to be a professional editor to make your clips look polished and crisp.
With its wide pallet of templates, transitions, and professional audio effects, you can easily enhance your clips and share them with your audience or fans with a few clicks. If you’re rewatching your own gaming highlights or checking out clips from other creators, editing tools like Filmora will make your videos look professional and sharp when streamed on devices like the Fire TV Stick.
To watch Twitch clips on your Fire TV Stick with Filmora, you can use the Twitch app or a browser. To edit clips with Filmora, download the clip to your PC, import it into Filmora, and edit it to your liking.
After editing, export the video, then transfer it to your Fire TV Stick via USB or cloud storage. You can use apps like VLC or Plex to watch your edited videos on Fire TV.
How to Cut And Trim Videos To Highlight Important Moments with Filmora
So, now that you know the basics of watching Twitch clips on your Fire TV Stick, let’s explore how you can enhance their quality using the best video editing software, Filmora.
You’ll be able to remove all the parts you don’t like, add modern AI effects, and produce a polished final product that looks great on any screen and that makes your audience hooked.
Filmora is at the top of the list for the best video editing software because it’s robust and equipped with stellar features and a super easy-to-use interface.
Making your clips stand out from the crowd has never been easier with powerful software, so let’s see how to trim and cut our videos to make them pop!
Step 1: Split the video on the Timeline.
Click your video in the timeline, drag the cursor to the point where you want to split the clip, and simply click the split button for separation.

Step 2: Use the Split Icon to separate the video into parts.
Click your video in the timeline again, and move the red playhead to the part where you want to split. Then, click the scissors icon above the timeline to separate it into two clips.
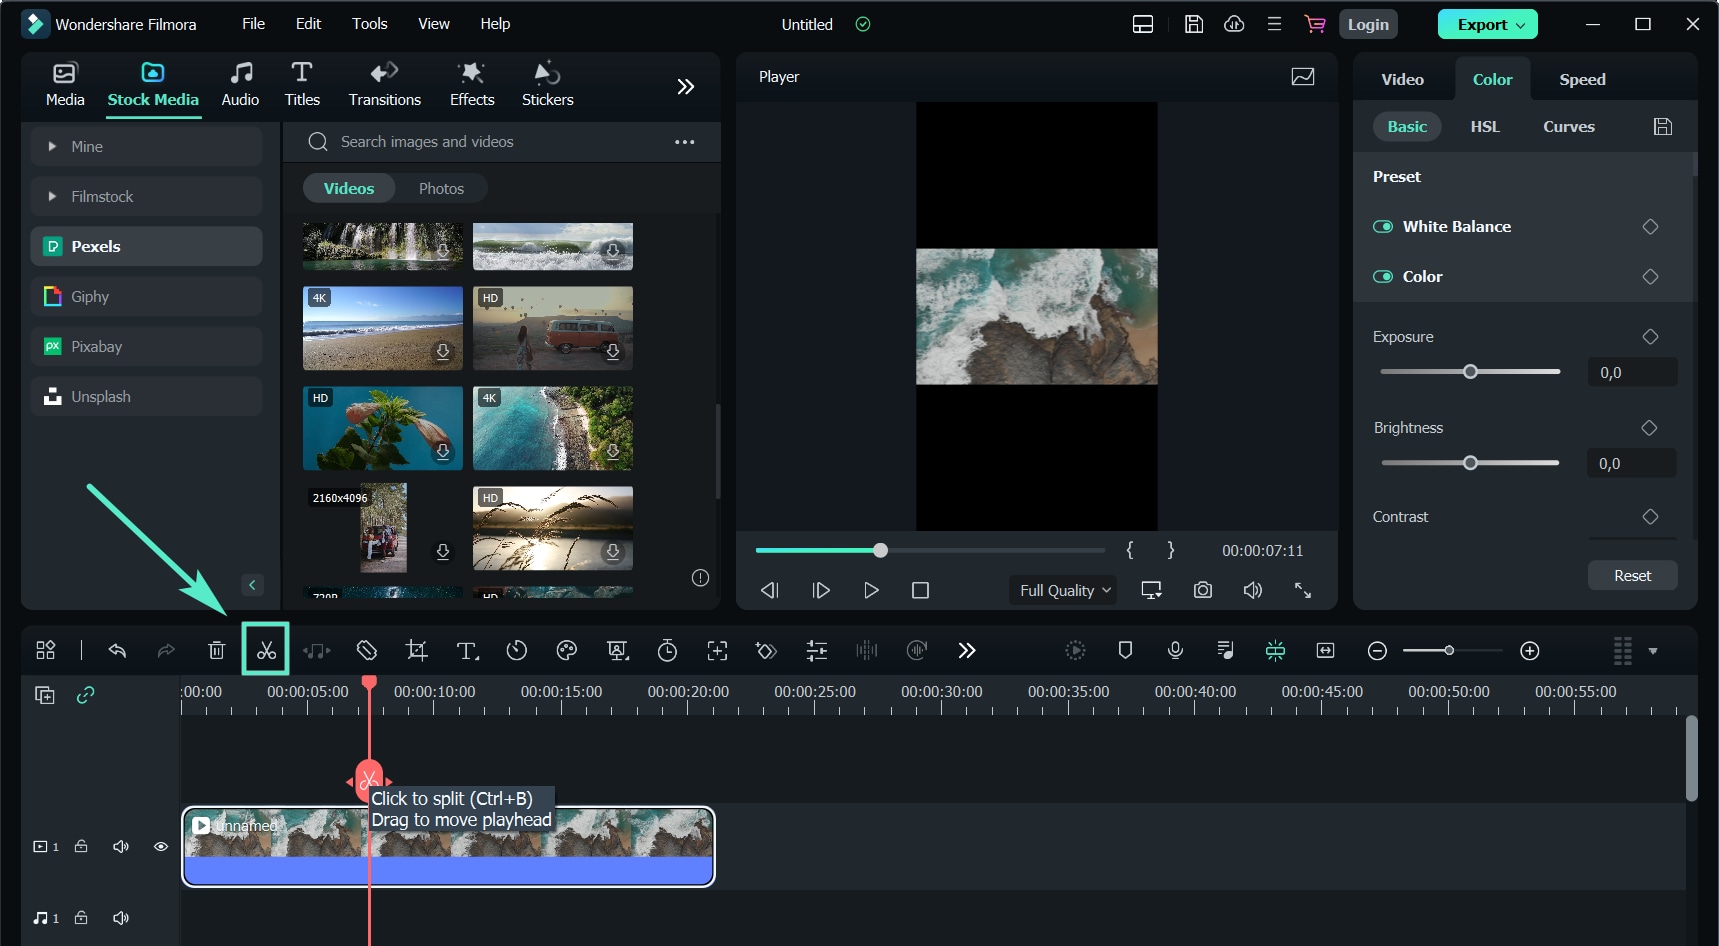
Step 3: Use the Split Option for separation.
Select the video again, place the playhead at the part where you want to split, and then right-click and choose Split from the context menu, as shown in the picture.

Step 4: Use the Quick Split Mode.
To do everything even faster, just Import your video to the timeline, select the Quick Split Mode icon, and then click on the timeline spot to split the clip.

Trimming The Video
It’s superbly easy to split your videos using premium software, but let’s quickly see how we can trim the videos and remove the undesired segments from them in no time!
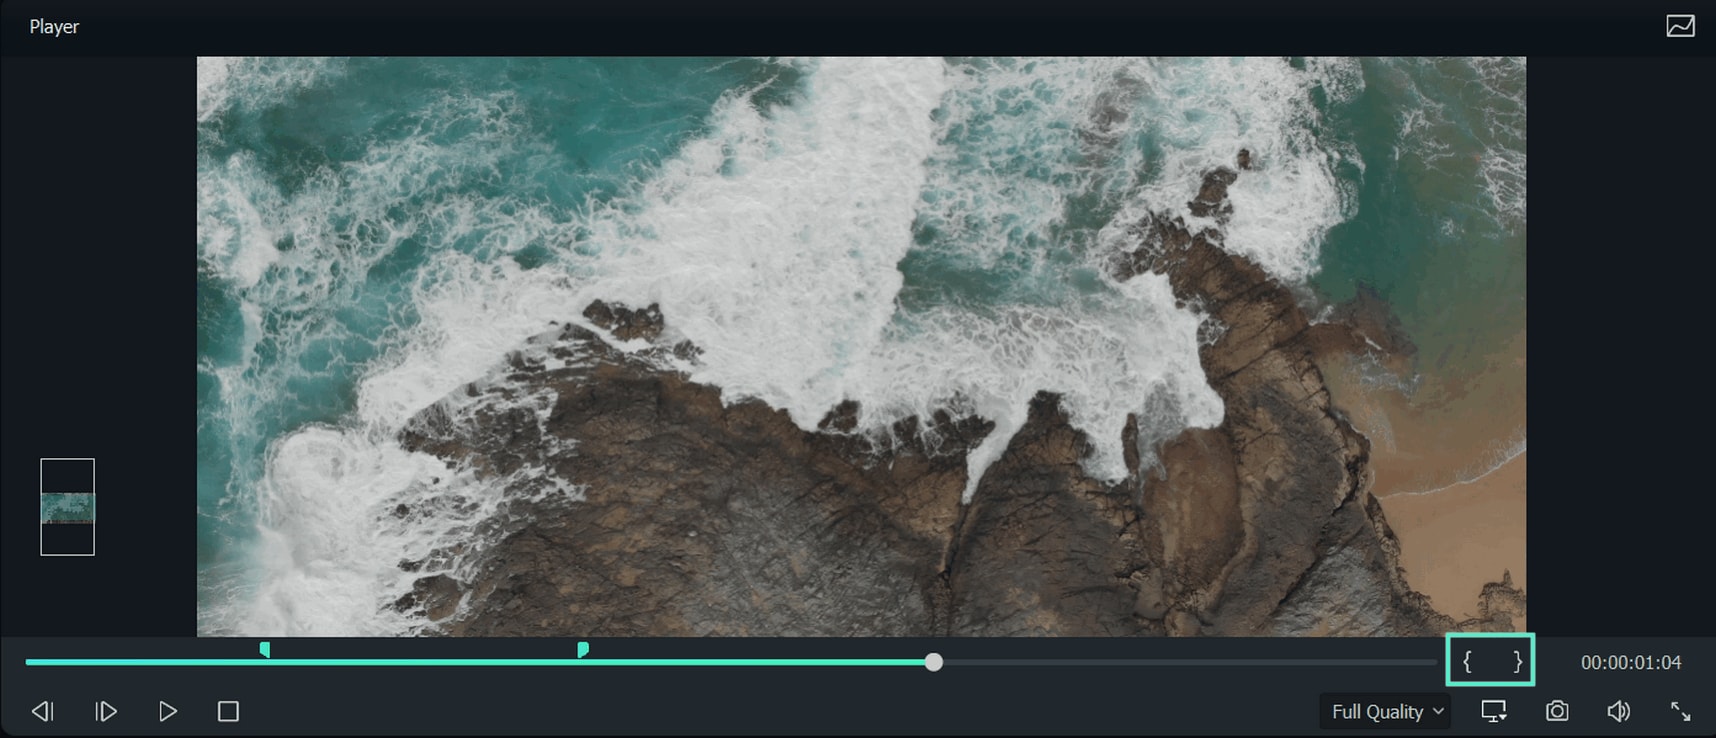
Step 1: Use the Mark In and Mark Out feature.
While using the Preview window, you can utilize the Mark In and Mark Out option to cut the video into several parts without importing it to the timeline.
Simply double-click the video to view it in the preview window, and then use the player controls to select where you wish the trimmed clip to start. Then click Mark In once you’ve picked the frame you want as the beginning point.
Step 2: Click Mark Out to set the ending frame.
Then, just drag the video from the preview window to the timeline, and the parts you want to keep will be loaded in the timeline.
Step 3: Trim the video directly from the Timeline.
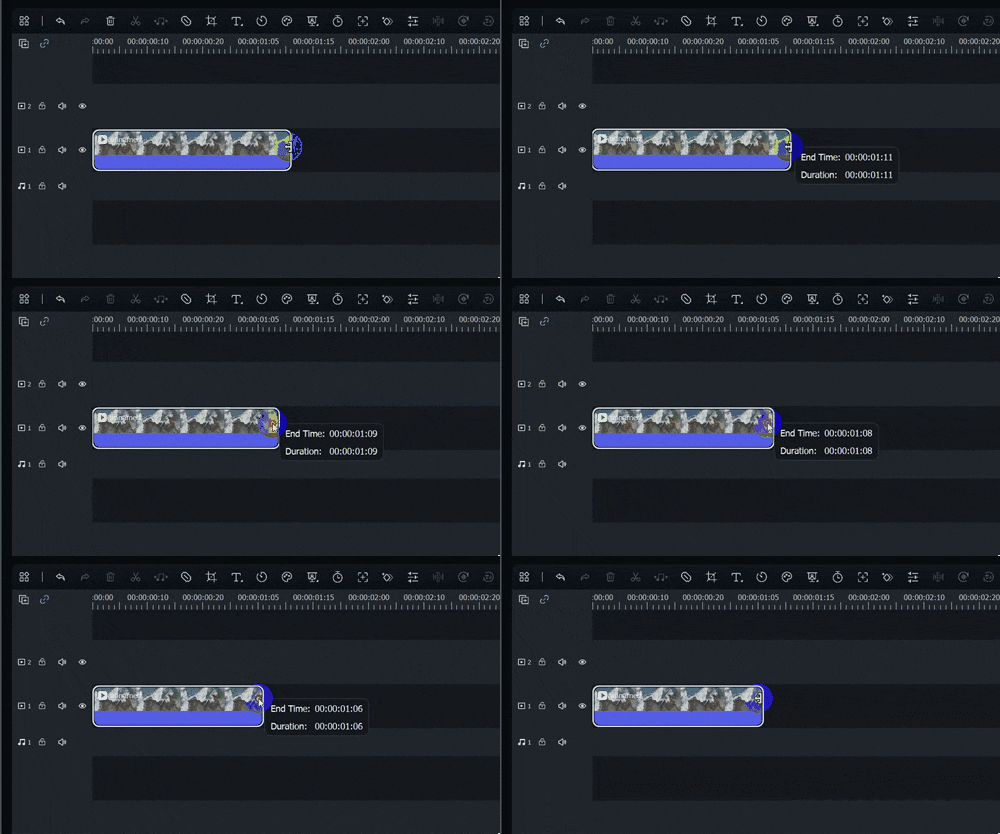
Simply place the clip on the timeline, click the part you want to trim, and navigate your arrow to the left or right edge until the trim tool shows.
Then, drag the edges of the video to trim off the undesired parts.
Filmora’s New Smart Short Clips Feature
It can be very difficult to transform longer videos into engaging shorts, but with the right and equipped software, it becomes a simple task. Filmora’s Smart Short Clips feature is a new, powerful tool that streamlines the editing process and automatically identifies crucial parts of your footage, allowing you to produce engaging shorts in a couple of minutes.
You can access this feature from multiple locations, including New Project, Filmora Cloud, and Toolbox. Just choose a video, upload it directly from your device, YouTube, or Filmora Cloud, manually select the language of the video, and then select the duration and themes you desire.
All the advanced options are available here, such as adjusting the aspect ratio, adding automatic background music, and inputting keywords to help the AI generate relevant animations. There are also endless templates for different situations and emotions, which you can choose from.
Once you upload your video and adjust the settings, Filmora generates different video options based on the user’s preferences.
You can further edit the clip, including modifying captions, adding text or effects and adjusting audio with features like AI Speech Enhancement. This amazing and modern software also allows you to apply custom fonts, change stickers, and utilize AI to intelligently place characters in the video.
When you’re finished editing, export your video to platforms such as YouTube, Vimeo, or TikTok.
Export the File in any Fire TV Compatible Format
And now that your clip is all set and ready, the following step is exporting it in a format compatible with your Fire TV Stick. That’s where Filmora makes your job easy again, so let’s see how the process goes!
Step 1: Enable Exporting Options
After editing your clip, go to the top right corner of Filmora’s editing window and click Export. You will see your video in the specified position.
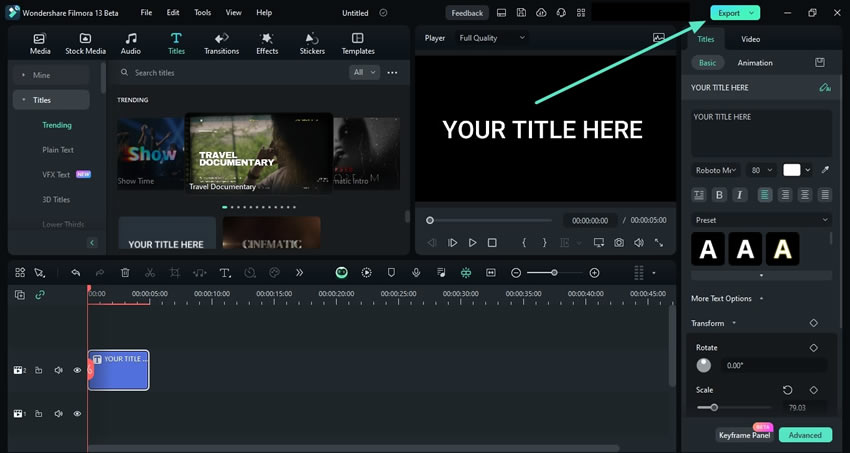
Step 2: Adjust the Settings
Clicking Export will lead you to a window to customize the settings and choose how you want to export your file. You can type a name and file location, choose a format, and pick your desired resolution in this window. Once you feel nothing more to do, click Export again to save the file.
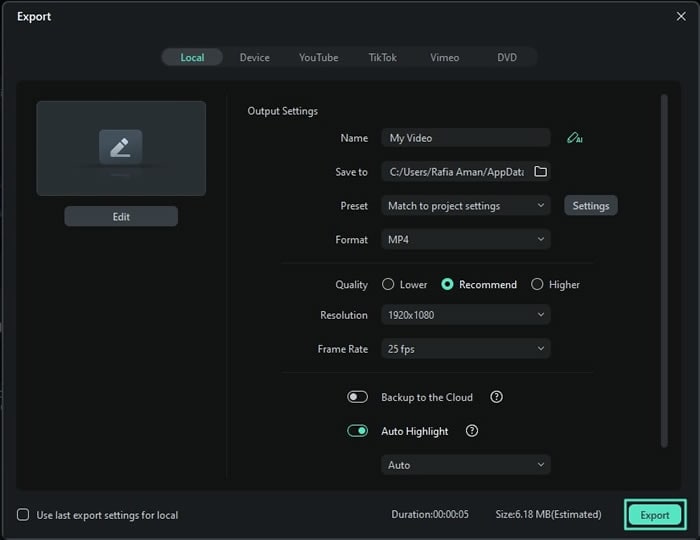
Exporting is incredibly easy in Filmora since it’s done in just a few clicks, and even novice editors can feel like pros while navigating this robust yet very easy-to-use software.
Conclusion
Improving the quality of your Twitch clips so you can have a fantastic viewing experience on the Fire TV Stick can be a breeze or a headache, depending on the tools you’re using. When you combine the power of modern and equipped software like Filmora with the accessibility of Fire TV, it’s a win-win.
Whether trimming your clips, adding transitions and effects, or creating social media shorts, Filmora will provide you with all the tools you need to make your videos better than your competition. So do your research, see all the options and choose the software to reduce stress and not waste your hours on endless editing.
Editing should be fun, so keep it that way while enjoying the best Twitch videos on the big screen!


 100% Security Verified | No Subscription Required | No Malware

