As a streamer, your content has the power to entertain live audiences while also reaching new viewers beyond your stream. One of the best ways to expand your reach is by sharing highlight clips from your broadcasts, and Streamlabs Cross Clips can make this process faster and easier.
For those who are curious about Streamlabs Cross Clips, our guide below will give you all the information you need to know about this tool. From understanding its features to creating and sharing your first clip, let’s make use of Stremlabs clips!
In this article
Part 1. Get to Know Streamlabs Clips
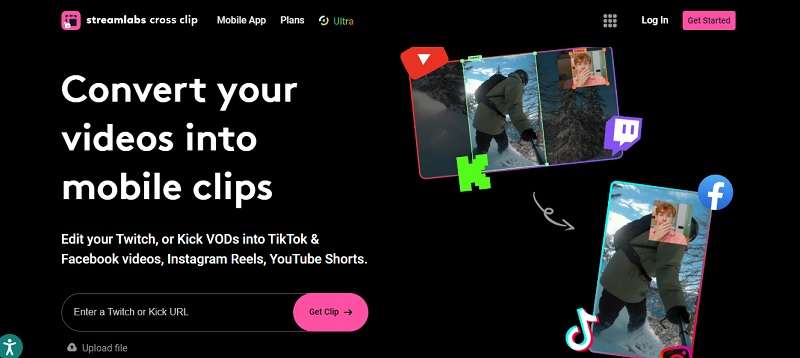
If you just come across Streamlabs Clips, this tool is designed to make it easy for Twitch (and Kick) users like you to transform the best moments from any live stream into shareable clips. You can then upload these clips to YouTube Shorts, Instagram Reels, or TikTok to draw more viewers.
It works similarly to Twitch Clips, but with a few more customization options to suit your preferences better. Some of Streamlabs Cross Clips features are:
- A variety of layouts to choose from
- The ability to combine up to three clips into a montage
- Options to integrate and upload directly to TikTok
- Easy sharing of clips to Facebook, Twitter, and Reddit
Streamlabs Cross Clip Pricing
Creating clips with Streamlabs is free, but it comes with some limitations. If you need more features, you can upgrade to the Pro version. Here's how they compare.
| Cross Clip Free | Cross Clip Pro | |
| Pricing | $0 | $4.99/month |
| Watermark | Yes | No |
| Upload Size | Up to 100MB | Up to 1GB |
| Export Quality | 720.30 FPS | 1080.60 FPS |
| Layers | No | Additional layers |
| Outro Video | Yes | No |
Part 2. How to Convert Twitch Clips Using Streamlabs Clips
To make Twitch clips using Streamlabs Cross Clips, you need to sign in or make an account first on its website. Once done, follow the steps below.
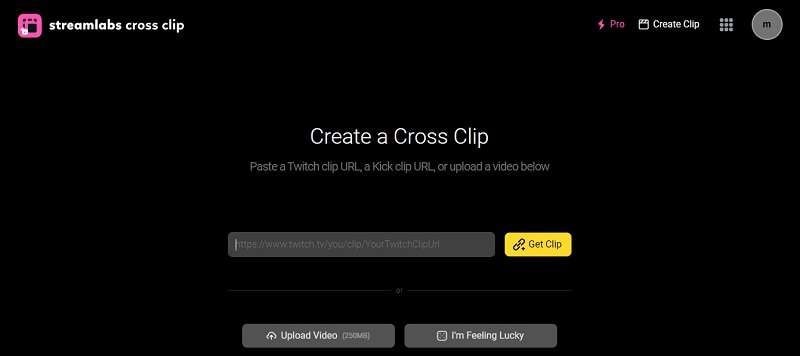
Step 1: Upload or Paste the Twitch Video Link
First, add your video by uploading it from your local folder or paste the URL video link.
Step 2: Choose Your Clip
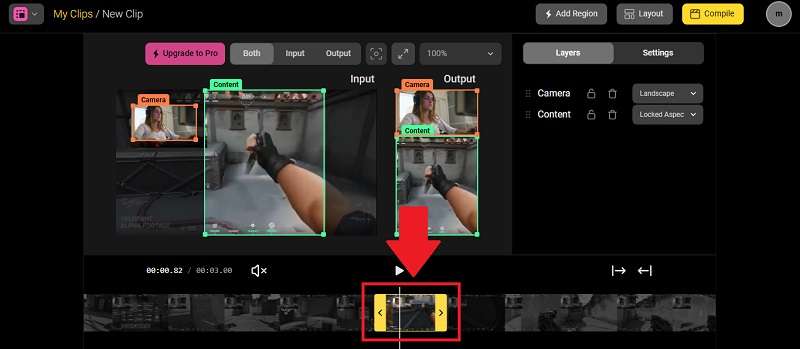
Once your video is uploaded, skim through it to find the perfect moment you want to turn into a clip. Select the start and end points of your clip using the trimming tool.
Step 3: Adjust the Settings
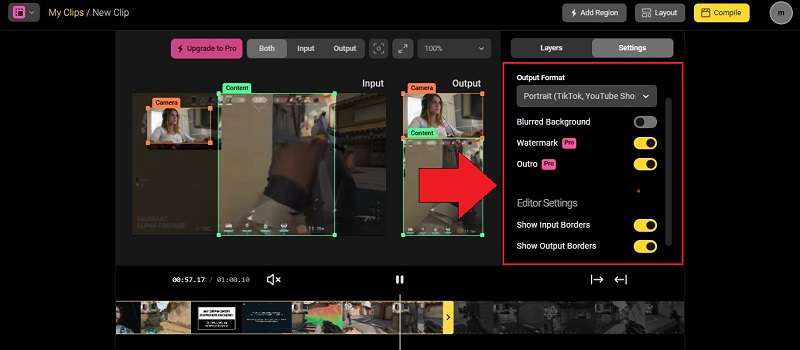
Open the Settings tab to set parameters like video format, enable blurred background, or remove the watermark (Pro users only).
Step 4: Customize Your Clip
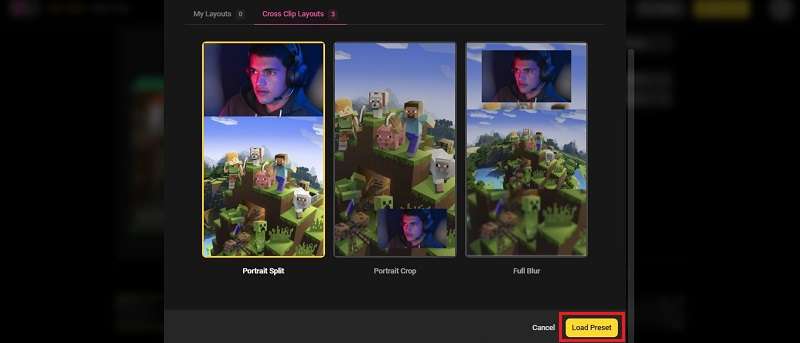
If you want to change the layout, you can select Layout to explore more options. Choose one that fits your style and click Load Preset.
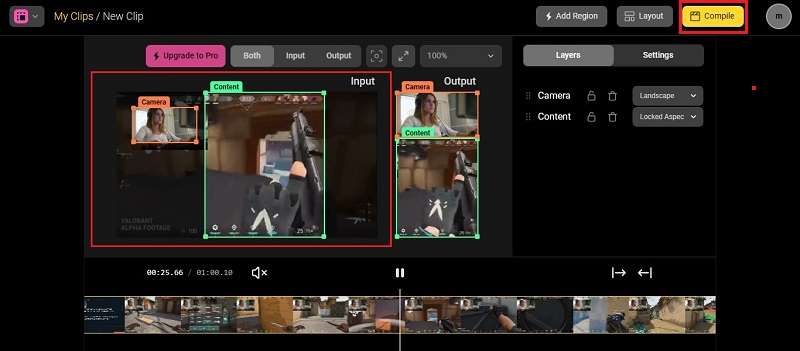
In the “Input” window, adjust the areas for both the content and the camera view by dragging the corners of the rectangle to resize as needed. Check the “Output” window to see how it will look.
Once everything is set, click Compile and wait for a few moments until the clip is ready for download.
Step 5: Download or Share the Clip
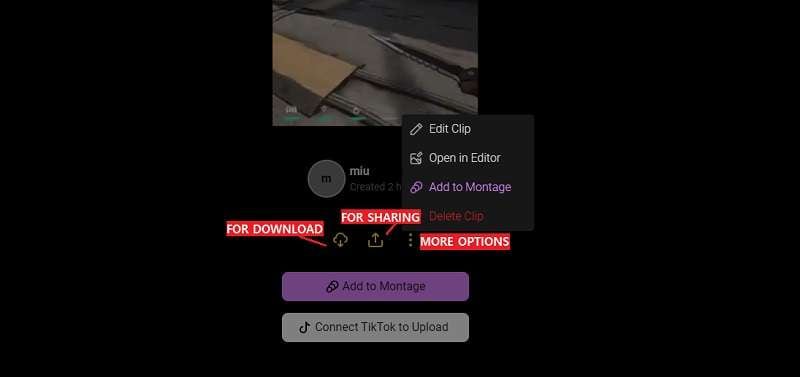
Finally, you can opt to download the clip to your device or upload it directly to TikTok. Or, you can also select the share button to share it on platforms like Facebook, Reddit, or Twitter.
Part 3. AI-Powered Tools that Make Converting Twitch Clips Even Easier
After using Streamlabs Cross Clips to make Twitch clips, do you feel like you need more features? We have another solution for you. If you're looking for a tool that provides more customization options for converting Twitch clips into content for other social media platforms, Wondershare Filmora might be just what you need.
Why Choose Filmora for Creating Video Highlights?
Just like Streamlabs clips, Filmora is also easy to use thanks to its AI-powered tools. However, Filmora offers even more customization options, which is perfect if you need greater flexibility. It includes features like:
- Auto dynamic captions with various templates
- A variety of transitions
- Various video effects
- Auto-reframe for different aspect ratios without cropping yourself
- Smart BGM Generation to automatically add music
Moreover, Filmora also features Smart Short Clips and Smart Scene Cut, which can automate the process of converting your Twitch live stream into shareable video content. These features can analyze your video and automatically select the most engaging segments to create clips for social media.
How to Use Smart Short Clips
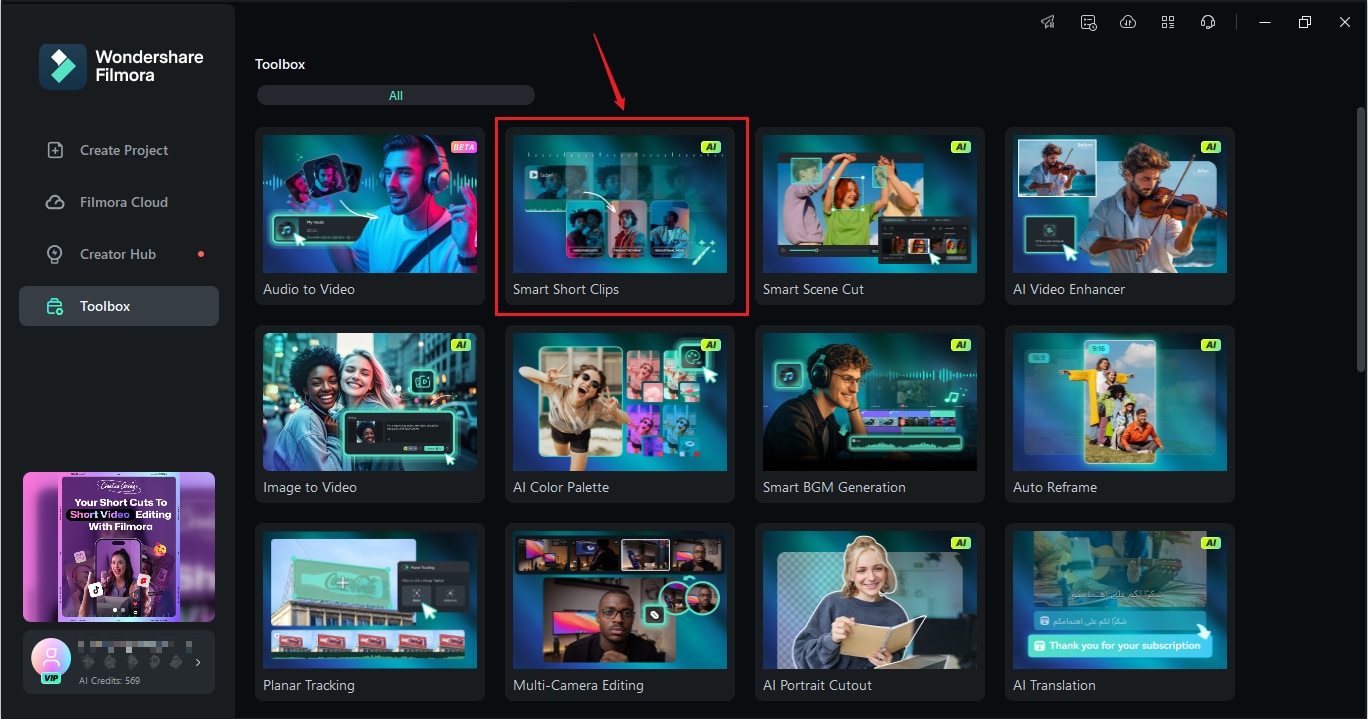
Step 1: Access Smart Short Clips Feature
Start by launching Filmora and go to the "Toolbox" section. Here, you'll find the Smart Short Clips option.
Step 2: Upload Your Video
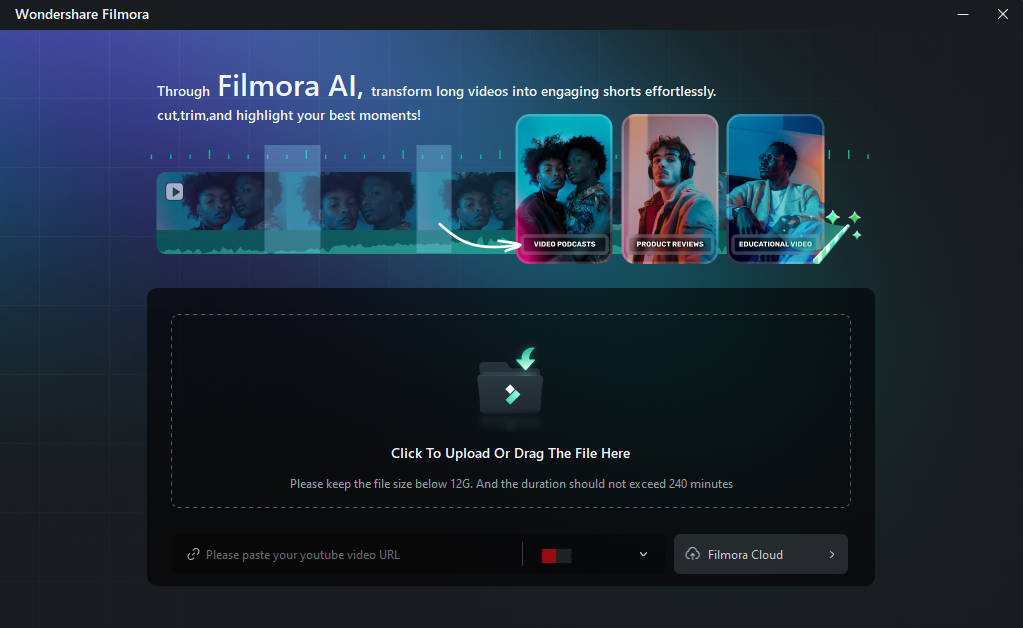
Click the box to upload the video you want to work with or you can drag and drop it to the interface.
Step 3: Customize Your Settings
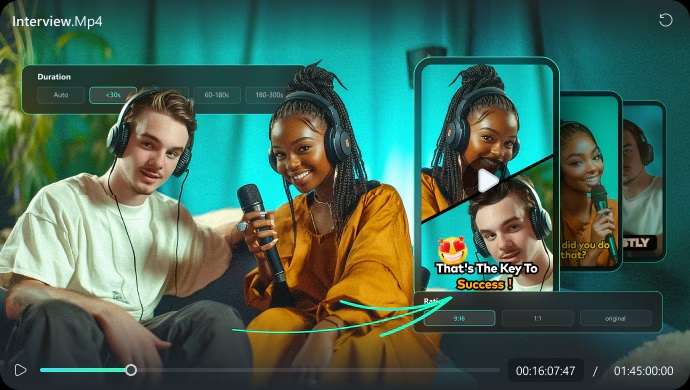
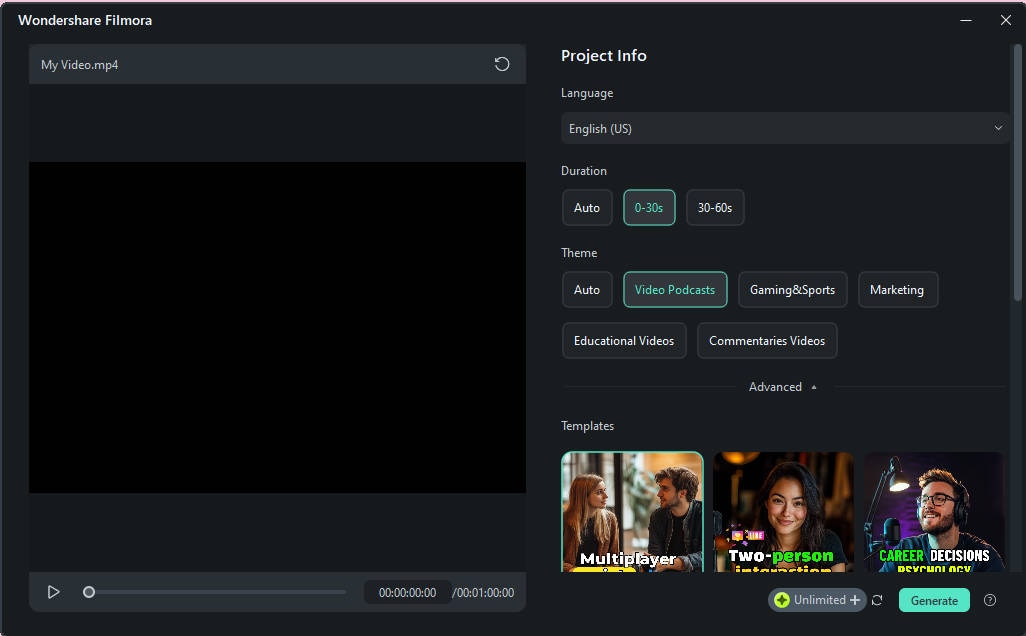
Once uploaded, select the language of the video. You can tweak the duration and themes to suit your needs or stick with the default options.
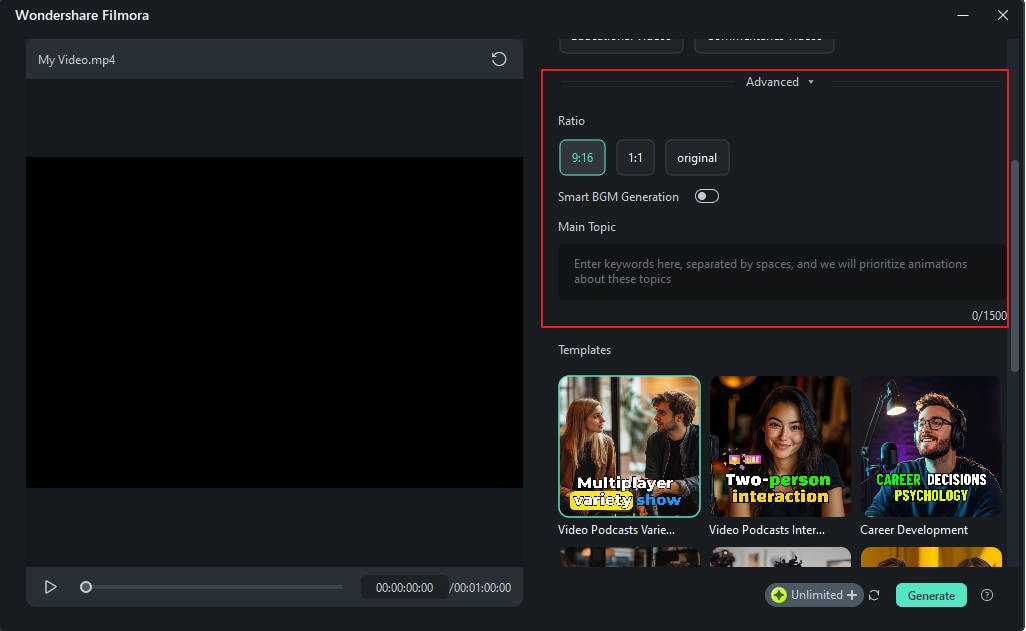
Open the Advanced settings to pick an aspect ratio and turn on Smart BGM Generation, which automatically creates music that complements your video.
Tip: Input some keywords related to your video in the Main Topic box to assist the AI in generating appropriate animations.
Browse through the templates under different themes. Scroll until you find one that grabs your attention, then hit Generate to proceed.
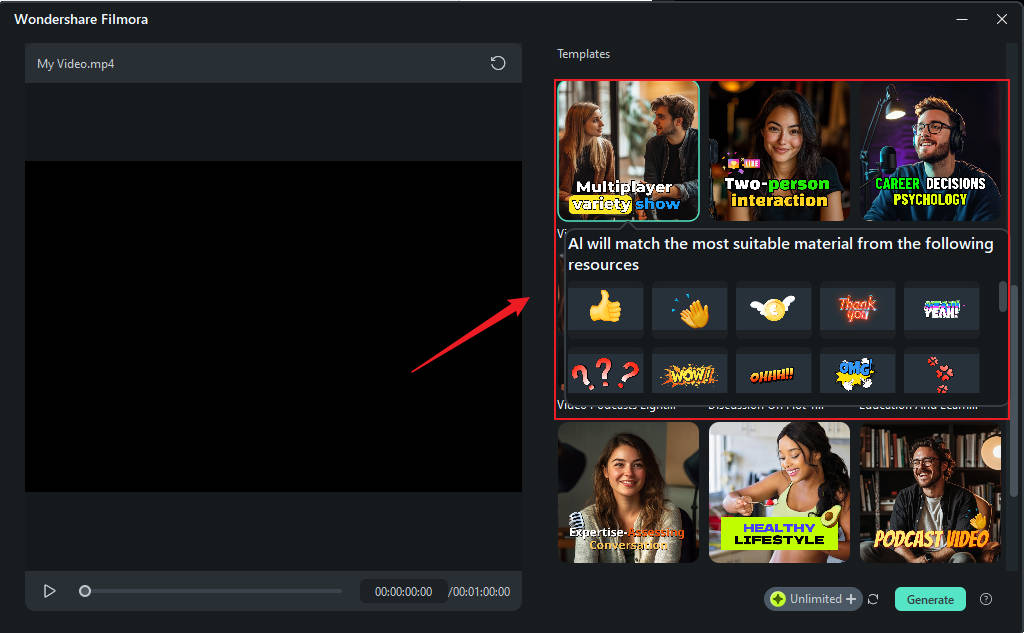
Step 4: Select Your Video
The system will create several video versions for you to pick from. Choose one, apply AI Speech Enhancement to reduce noise and improve sound, then click Edit to adjust more.
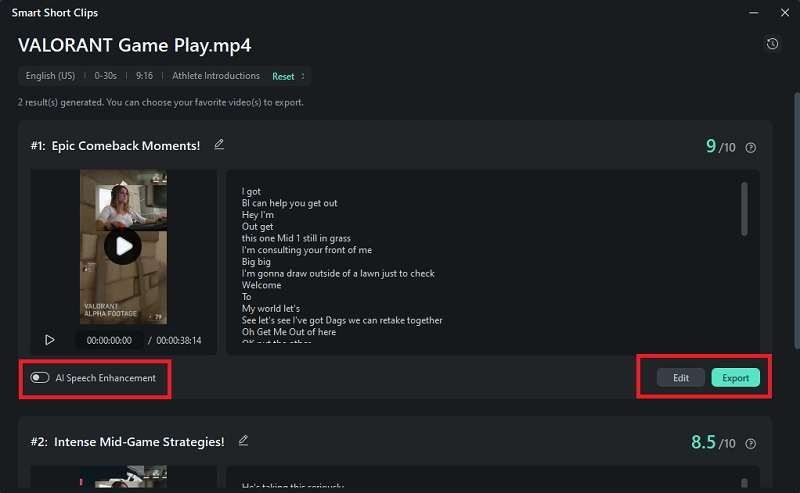
Step 5: Finalize Your Video
In the Smart Short Clips editing panel, you can modify captions, change the background music, create new voiceovers, generate thumbnails, and more.
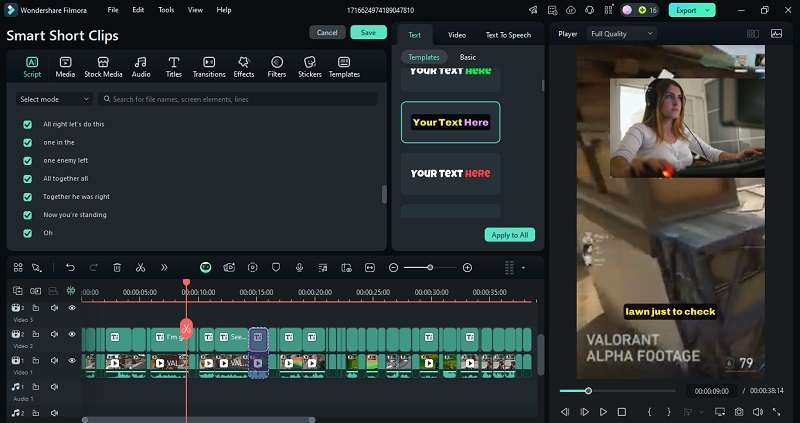
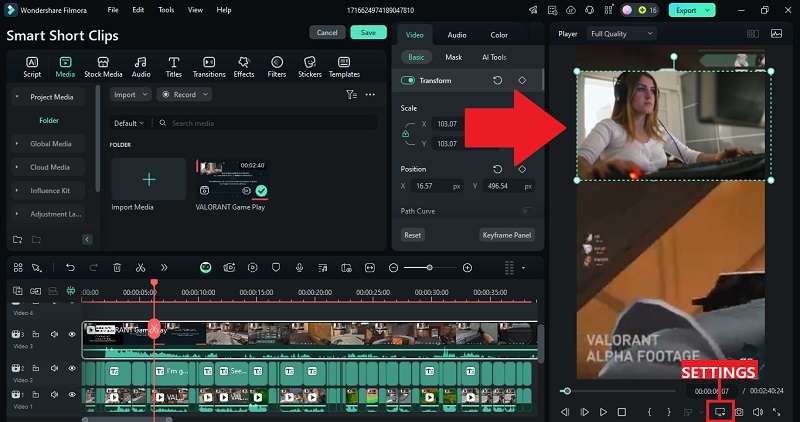
Smart Short Clips repurpose videos and may cut off the camera. To resize it, re-add the video, trim, then crop to focus on the camera.
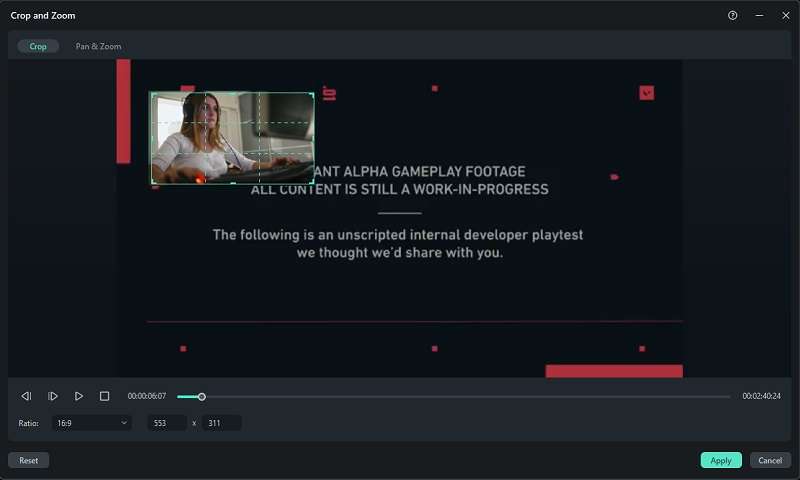
Adjust the clip size on the preview window. Don’t forget to keep the project aspect ratio to 9:12. If it changes, you can adjust it on the settings.
Step 6: Export and Share
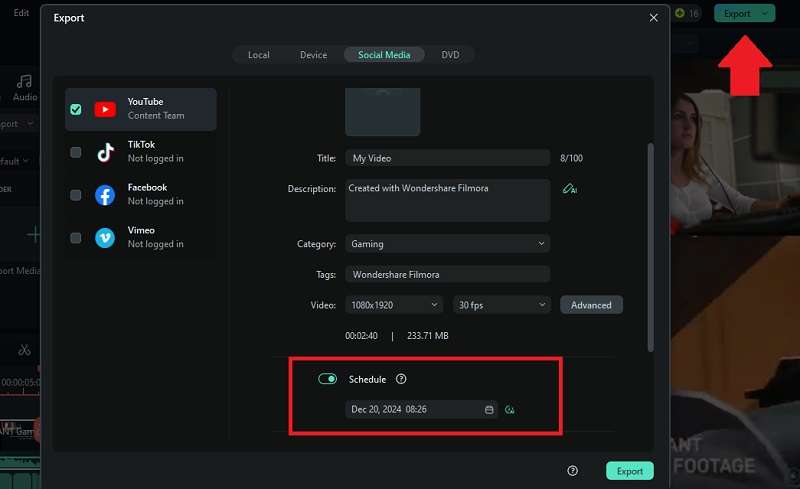
Once you're satisfied with your video, export it to save or directly upload it to platforms like YouTube or TikTok. You can also schedule your posting by enabling the Schedule option.
How to Use Smart Scene Cut
The Smart Scene Cut feature in Filmora differs slightly from Smart Short Clips. While Smart Short Clips automatically adds dynamic captions, stickers, and transitions to your videos, Smart Scene Cut focuses on extracting highlights and specific scenes or characters to enhance editing efficiency.
Watch the video tutorial here or follow the guide to create Twitch video highlights using Smart Scene Cut.
Part 4. Streamlabs Cross Clips vs. Filmora: Which Is Better for Converting Twitch Clips?
We’ve covered everything you need to know about Streamlabs Cross Clips, including how to use it to convert Twitch videos into more shareable content. But there’s another solution to consider: Filmora. With its advanced customization options and intuitive editing tools, Filmora provides greater control over your content.
To help you decide which tool is better for your needs, let’s compare Streamlabs Cross Clips and Filmora in these key areas:
| Streamlabs Cross Clips | Filmora | |
| Platform Integration | Direct upload to TikTok and sharable links to Facebook, X (Twitter), and Reddit | Direct upload to YouTube, Vimeo, and TikTok |
| Customization Options | Limited | Extensive (advanced video effects, dynamic captions, transitions, text overlays, and more) |
| Audio Features | No | Advanced (audio ducking, keyframing, noise reduction, and more) |
| Export Quality | 720p (Free) and 1080p (Pro) | Up to 4K |
| Best for | Beginners and streamers who need quick conversions | Creators who want professional-looking videos with more creative control and customization. |
| Limitation | Limited editing features and customization options | Requires more time for detailed editing |
If you need a quick, simple solution for converting Twitch clips into social media-ready videos, Streamlabs Cross Clips is a solid choice. However, for those who want to elevate their content with advanced customization, high-quality effects, and professional tools, Filmora is the better option.
Conclusion
Streamlabs Cross Clips is a solution for streamers who want to share their best moments far and wide. With just a few clicks, you can turn exciting parts of any live streams on Twitch or Kick into clips that you can post on platforms like TikTok, Instagram, and YouTube.
If you need more customization, there are also video editing tools like Filmora that offer advanced features and greater control over your content. Filmora allows for intricate editing, dynamic captions, and automatic background music adjustments–something that Streamlabs may lack.


 100% Security Verified | No Subscription Required | No Malware


