Remember those supernatural or fictional effects we used to adore in our childhood? It was all about using the right software and executing the perfect editing strategy. With the knowledge of these strategies, having your hands on competent editing software is valuable. When you’re introducing yourself to the world of video editing, certain concepts can make you clueless.
You must have heard about the concept of "FPS," which refers to frames per second. From this concept, a frame is the smallest unit of second helping in professional video editing. As you manage every frame, this concept connects with keyframing. Here, you can explore what keyframing is and how it is the key to creating animations, transitions, and much more.
In this article
The best editor helps you keyframing in video editing to create animations, transitions, and more.

Part 1: What is Keyframing in Video Editing?
Video editing or animation cannot carry on without keyframes as they're the critical units of successful editing. Keyframing video is defined as the starting and ending point of a video animation or motion. Users can add motions or create transitions at desired points in a video with the help of keyframes.
How Keyframing Works in Video Editing?
Keyframes enable an editor to change the scale, position, and other aspects at certain points. The technique may puzzle you at first, so here is a brief guide to how it works:
- Setting Keyframes: The first step is the position of these keyframes, which vary according to your video requirements. They are placed on the points in the timeline panel where you want to add an effect or transition.
- Adjusting Parameters: Every video has to specify demands depending on the transition or animation you're creating. Hence, adjusting the properties refers to changing an object's visual aspects, such as its color, position, and more.
- Animating Changes: As an editor, you are not bound to add single keyframes at starting or ending points. However, they can add multiple keyframes to ensure a smooth transition between these points.
- Interpolation: When you add a new effect or transition in a video, you define keyframes' beginning and ending points. Interpolation refers to filling the points in between them. The editing software will auto-analyze and adjust other keyframes for a smooth transition.
Applications of Keyframing in Video Editing
Now that you've known how keyframing works, let's look at what it can assist. It is keyframing that has enabled us to achieve professionalism in video editing. We are highlighting some of these applications for you here:
- Motion Effects: Editors can add all kinds of moving objects or stickers with the help of keyframing. You can even bring a still object into motion by changing its scale and position.
- Transitions: With the help of multiple keyframing, you can make seamless and magical transitions. You can take into account the minor editing details through it.
- Text Animation: Why add boring and still texts in your videos when you can add movements? Keyframing can help you make text animations in more than one way.
- Visual Effects: Users can add complex effects like changing eye color in a video and more through it. It can also help you achieve different types of camera movements and animations.
Part 2. What Are The Benefits of Keyframing While Editing Videos?
Keyframes were introduced in the 1920s; since then, they've been a never-ending aid to video editing. Along with accelerating the process, they help keep track of changes you make. Adding or removing a certain effect or object from the timeline makes it more accessible. If you want to know more about keyframes and their benefits, here is your guide:
1. Creating Animations
Animations refer to a series of images aligned to create a motion effect. When it comes to creating animations, keyframing video is the building block of it. If you want to add a starry animation to your video, first, you need to define the starting and ending points for the stars. Afterward, to create animations for stars, play with their scale and position keyframes.
2. Adjusting Properties
The process of creating animation or transitions is not bound to location parameters, but you can edit other factors as well. For example, to create a fading effect, you can experiment with the value of opacity at different keyframes. Furthermore, you can add a transition at the accurate time duration with the help of keyframes. You can also adjust a keyframe's color, lighting, or other properties with its help.
3. Bezier Curves
You have read about interpolation and how it maintains the gaps between keyframes. These interpolations are of different types, of which Linear and Bezier are the most popular. The Bezier interpolation is essential in maintaining non-linear curves with manual directions. For example, Bezier interpolation is suitable while editing a music video as it can vary according to high and low curves.
4. Fine Tuning Animations
Fine-tuning animations refers to additional editing in the previous animation to make it more precise. It is a process that requires keyframes to add further animations. This process is usually used professionally while editing animated and sci-fi movies. It is done to make the movements of characters more believable and less robotic.
5. Ease In and Ease Out
Have you ever watched a slow video at the start, fast in the middle, and slow again? Those are called ease-in and ease-out animations, in which the video is accelerating and going in slow motion. Such videos can only be created through keyframing. First, the speed of a video is decreased at the starting keyframe; it is changed to its original or increased speed in the middle and slow at the final point again.
Part 3: Wondershare Filmora: Knowing The Details of Keyframing
Getting familiar with video editing means stepping foot into the multiverse of software and tools. The options are diverse, but so is their user interface; you need a certain skill level to use it. This is where Wondershare Filmora steps in and liberates you from this difficulty. It is a versatile editing platform that covers video as well as audio editing.
Not long ago, Filmora introduced AI-driven tools, which have increased productivity. This integration helps in multi-tasking and auto-completion of tasks. Whether you want to improve the poor lighting of your video or remove audio flaws, it can assist in both. Here's a step-by-step guide to understanding the functioning of Filmora keyframing:
Steps to Performing Finest Filmora’s Keyframing
Step 1Launch Filmora and Create a Project
To experience the latest updates and seamless editing, make sure you have the latest version of Filmora. After downloading and installing Filmora on your device, launch the software. Once you launch it, you'll be taken to the main menu and select the "New Project" button.

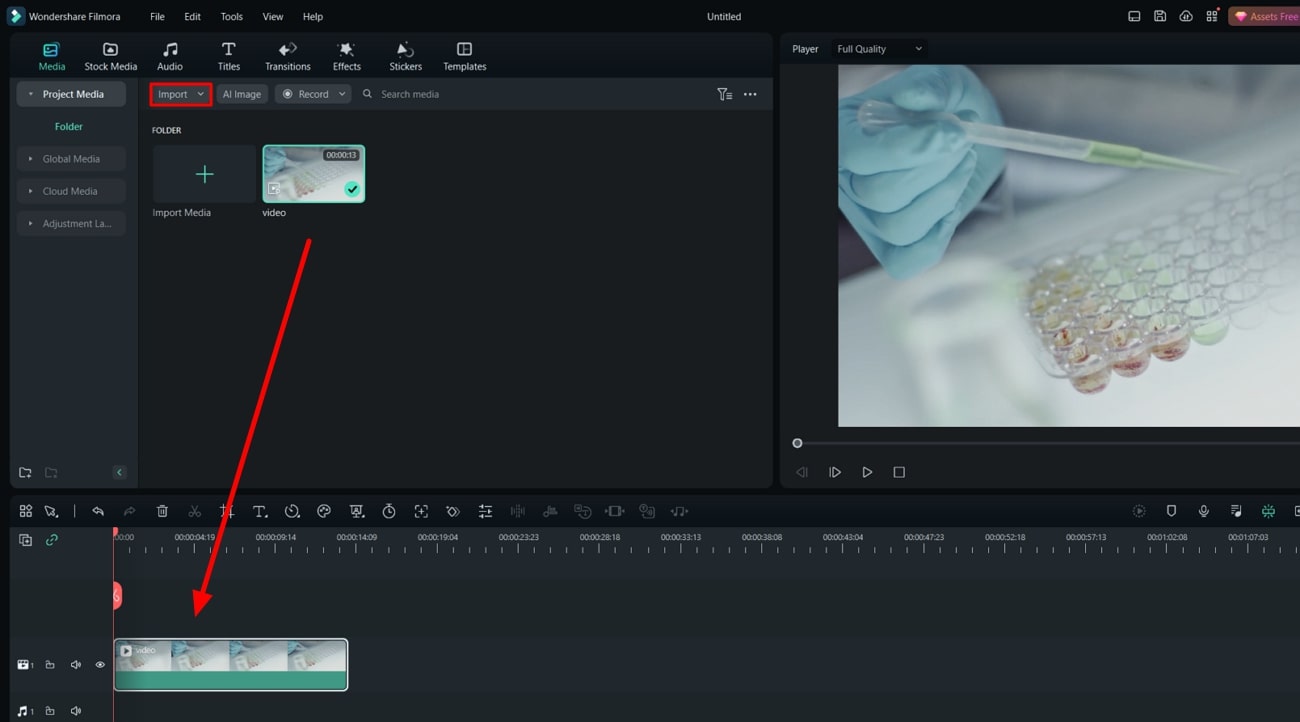
Step 2Import and Bring Media to the Timeline
By creating a "New Project," you'll be able to reach the main editing window. Under the "Project Media" category, import your files. Click on your imported file and drag it toward the timeline panel. After that, drop the file on the first track of the timeline.
Step 3Locate Keyframes
Left-click on the clip in the track, and an editing panel will appear on your top. You can add keyframes for all main tabs: "Video," "Audio," "Color," and "Speed." Go to the "Video" tab in case you're editing a video clip; in case of an image, you'll find the "Image" tab instead.
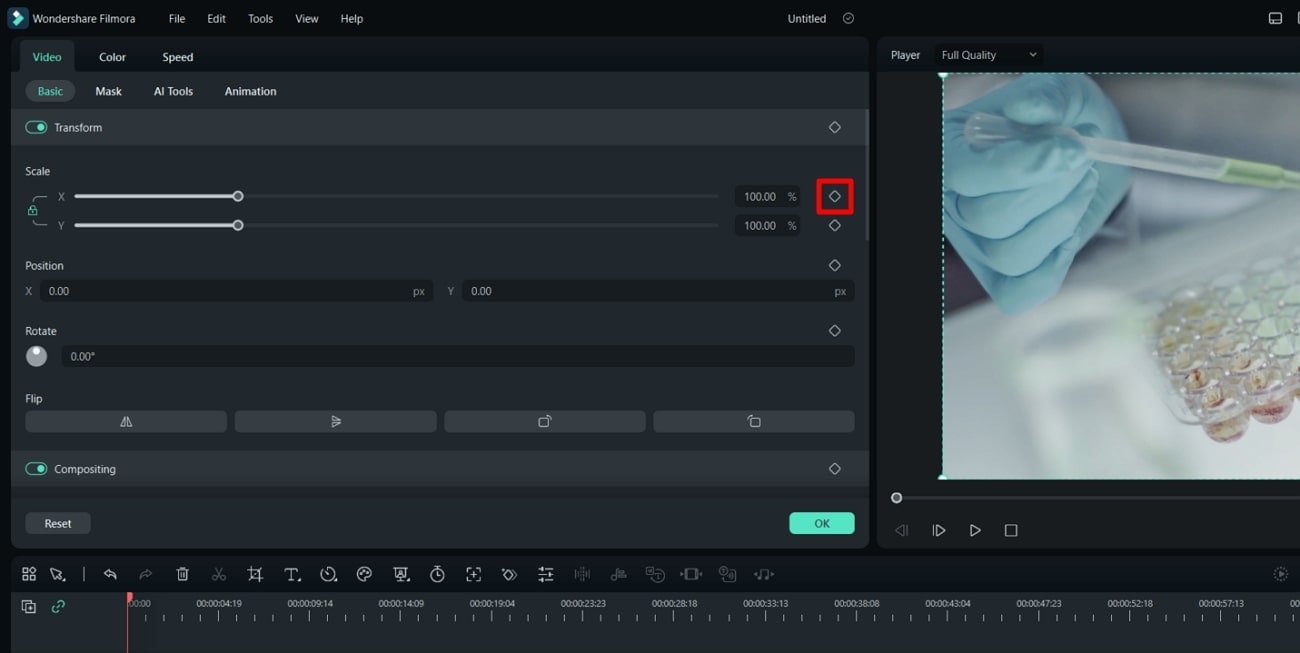
Step 4Add Keyframes
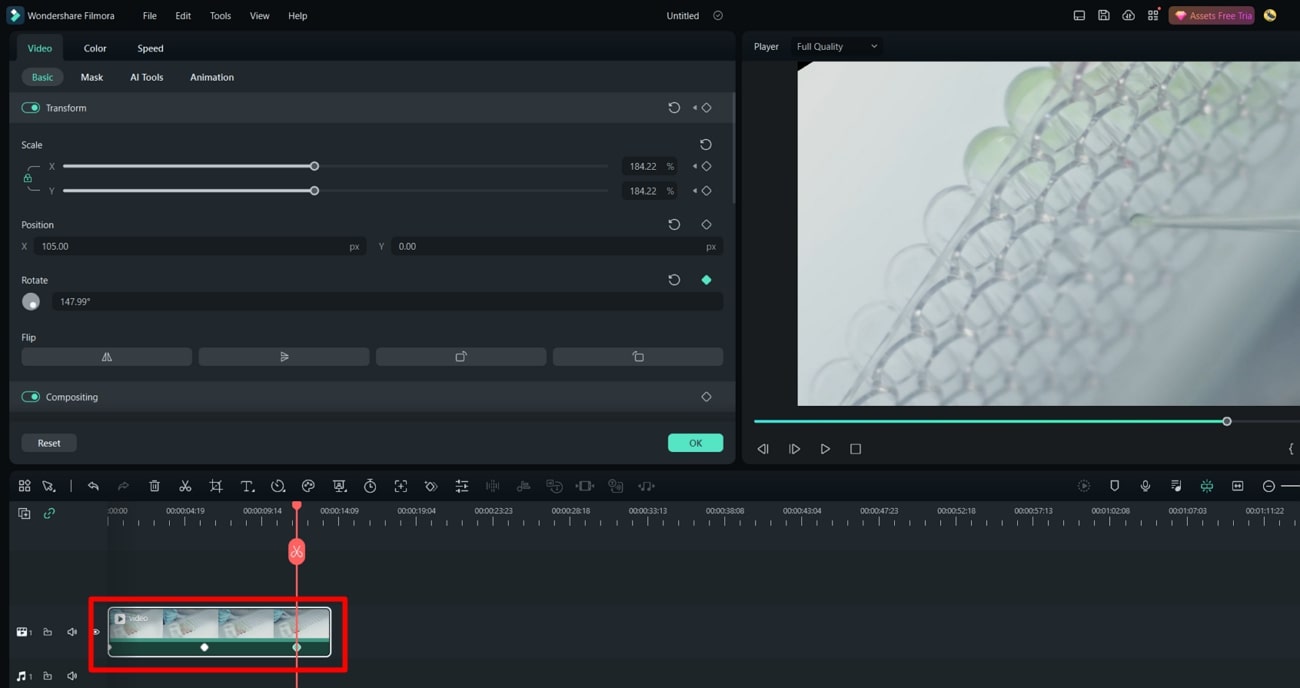
To add keyframes, first, you need to move toward the timeline panel. Then, place the playhead where you want to add the keyframe. For example, you want to change the position of an object in your clip. Go to the "Video" tab, and under the "Position" section, click on the diamond icon. This icon represents keyframes. Then, change the X and Y values for the position keyframe.
Now, if you want to change the position of the same object some seconds forward, place the playhead a few frames forward in the timeline. Repeat the keyframe settings and perform this for other audio or visual elements.
Conclusion
After reading this article, you are familiar with what keyframing is and how it has changed the editing process. Be it visual or audio editing, you require keyframing for adding animations and effects. However, the concept may be hard to understand at the start. To understand keyframing briefly yet in simple words, we recommend you use Wondershare Filmora.