Everyone is fascinated by a video portraying creativity and effort in each frame. Your films can easily have this captivity through the keyframe feature. It provides you the accessibility to make even a simple, plain shot pace up, slow down, or pan across the screen.
Wondershare Filmora offers you a simple yet great experience of Keyframing. It has been the editors' favorite feature for years. Under its Grow and Win Program, Filmora presents the Keyframe creativity contest. It is the ultimate solution for bringing captivity and precision to your shots.
In this article
Part 1. What is the Keyframe Feature?
A keyframe, also spelled "key frame," defines any smooth transition's beginning and conclusion. In the case of animation or film, or video, that something may be a drawing or a specific frame of a shot.
The keyframe feature creates room for boundless creativity. The Keyframe feature could imitate any illusive or fascinating impact, from object enlargement to magical power effects. A key frame is a frame that serves as a marker for the start or stop of a parameter change.
You could use a keyframe to mark the spot where the audio will have faded up or down to a specific volume.
Part 2. Where to Use The Keyframe Feature?
Editors and creators use keyframing for all kinds of stuff. These uses include:
Animated Logo Intros
You can use the keyframe feature to create indigenous intros with animated logos. It helps the editors go for vlogging or tutorial videos.

Special Transparency Effects
Keyframing is famous for creating blended visuals through experimentation with the transparency of the clip.

Custom Picture-in-Picture Paths
We use the picture-in-picture effect in many editing formats, from tutorial videos to gaming streams and vlogs. Keyframing allows editors to execute the movement of the PIP as they wish. For instance, this video call was shot from a video.
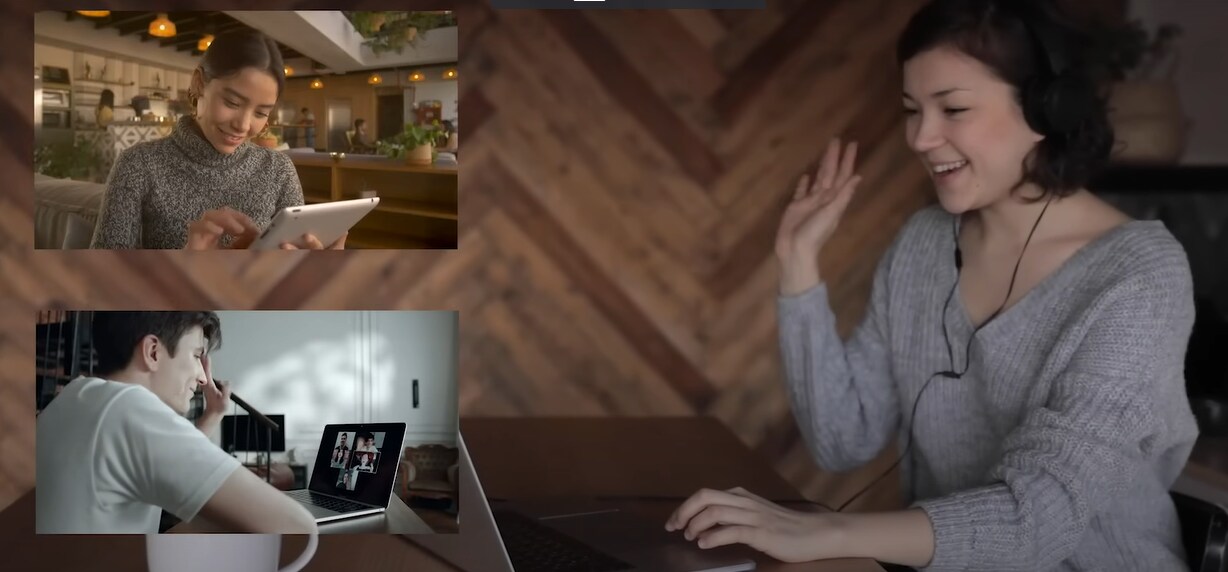
The picture will move across the screen between the 30-second and 1-minute marks if you indicate that it will be in the upper left corner of the screen at the 30-second timestamp of your video and the bottom right corner at the 1-minute timestamp.
Part 3. What Would You Need to Make a Keyframe Video
Let us share the procedure for making a video using the keyframe feature.
1. A Video Clip or Photos
For experimenting and creating with the keyframe feature, first, you would need high-quality video clips or images.
The high-resolution requirement is a prerequisite for the complete experience of all parameters of the keyframe feature. For example, the zooming and varying opacity effects you add might look bland and dull if the clip or image appears pixelated upon zooming and scaling.
2. Motion Elements
Keyframing allows for a vast area of creativity with motion elements that you can download online. The keyframe feature adds charm to these elements by playing with their orientation and scale.
3. An Advanced Editing Software
To utilize the keyframe feature, you need high-end video and animation editing software with an interactive and easy-to-use user interface and good accessibility options. So, what better choice than Filmora to use for this feature? To do the editing process on Filmora, follow the steps below and enjoy!
Part 4. How to Make a Keyframe Video With Filmora
Filmora can be one of the best video editors to achieve the effect. It can personalize anything in detail. There is plenty of footage from its built-in stock media with unlimited resources. By using this platform for editing, your editing time hugely can be greatly reduced.
- The keyframe tool is efficient for adding beautiful animations to podcast videos.
- More than 2,000 audio resources, including music, audio effects, and more.
- Multiple clips can be edited more quickly with the shortcut key.
- Choose from over 1,000 video effects, including transitions, filters, titles, and many others, to spice up your keyframe videos.
There are many different ways you can use keyframes on Filmora. To learn the complete step-by-step instructions, continue reading. Here we explain three examples of how to use keyframing and how to use the tool in Filmora.
Step1 Install the Wondershare Filmora
Launch the most recent version of the software on your computer to produce an outstanding film. To do this, take the following actions.
- You must first download and open Wondershare Filmora on your PC or Mac.
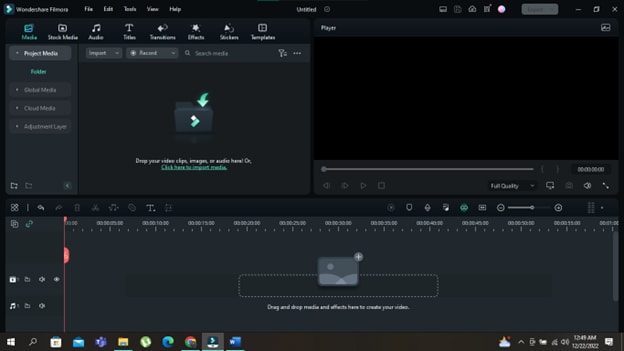
Step2 Import your Photos and Videos
- When you open Wondershare Filmora, you will notice the main import window in the top left corner.
- Click in the center of the import window upon the import icon.
- After clicking, Wondershare Filmora will automatically direct you to your PC library.
- Browse to where your target Clips or Images are stored.
- Select all the objects you want to import.
- Click on Open, and you will have imported files.
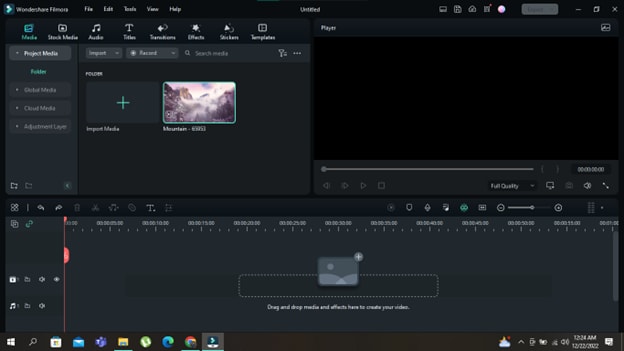
Step3 Add your Photos and Videos to the Timeline
Your next step will be to add the imported videos and images to the timeline. When you have many videos and photos imported into the timeline, you can add them simultaneously.
Or you can also add them one by one wherever you need. To add an item to your timeline, follow the steps mentioned.
- Right-click on the photo or video you want to add to the timeline.
- Keep holding the right-click and drag it down to the timeline.
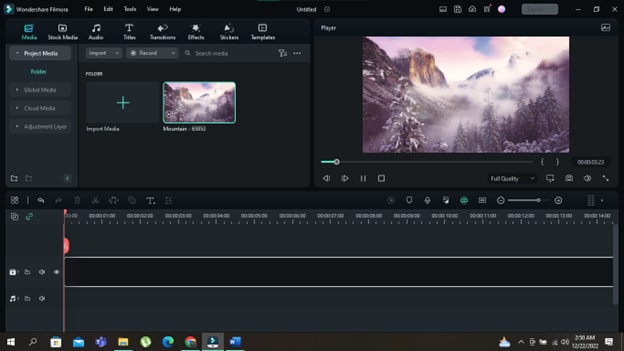
Step4 Adding Movement to your Shots
The next step would be to use the movement option in Keyframing, where you can pan and zoom a shot over a specified time. To do this, follow the bullet points below.
- After importing your clips to the timeline, double-click the clip to open the Editing Menu.
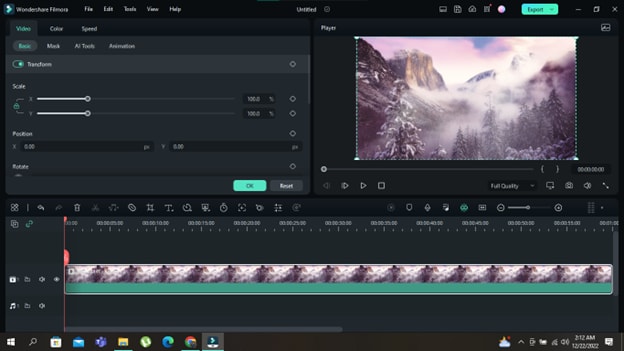
- Once opened, the editing menu will have a Basic tab; click it.
- Check the key-shaped button in front of the Transform button. It will create a Keyframe in the default form of your clip.
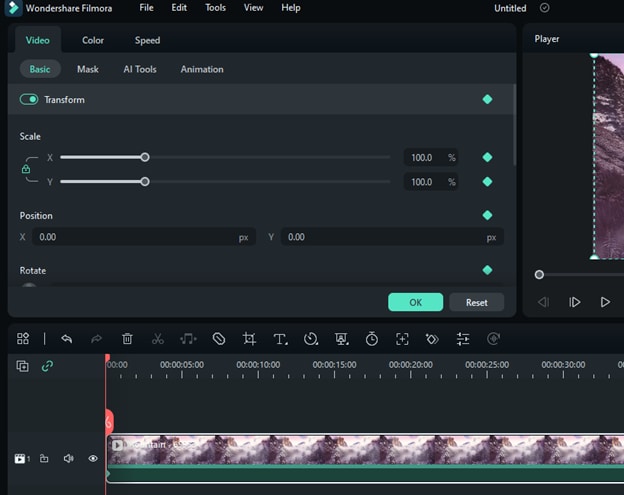
- You need to add a second keyframe at the end of the clip to create movement. First, move the timeline cursor to the end of the clip. Then, check the key-shaped button in front of the Transform button again for a second Keyframe.
- Now change the scale of the clip from the slider options in the Custom Animation
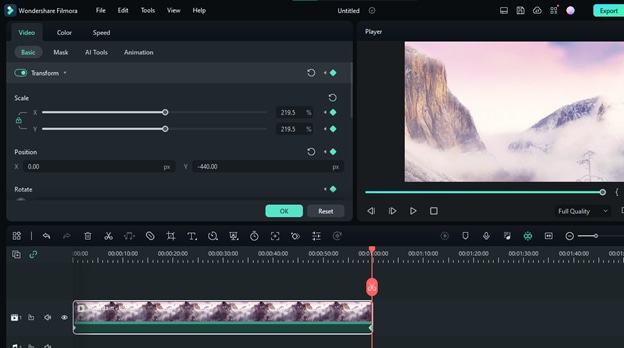
- Now play your clip, and you'll see it zooms in and pans automatically to the state of the second keyframe over that timeline.

Step5 Adding Motion to your Shots
Keyframing can add motion to your project's objects, clips, or images. To perform this in Filmora, follow these instructions:
- Go to the Stock Media tab on the top left ribbon in Filmora and download some motion elements (videos/GIFs) from accessible outlets like the Flora GIF used here.
- After importing elements to the timeline, double-click the element to open the Editing Menu.
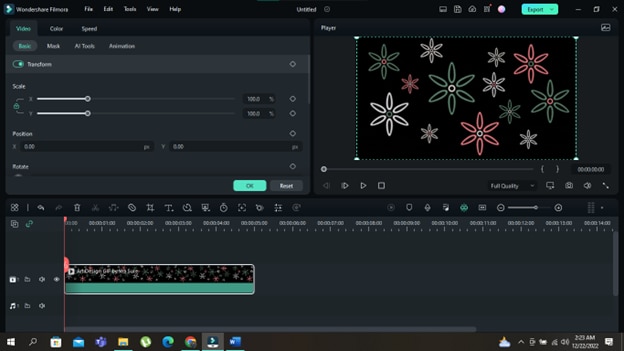
- Once opened, the editing menu will have a Basic tab; click
- Check the key-shaped button in the Basic Tab. It will create a Keyframe in the default form of your motion element.
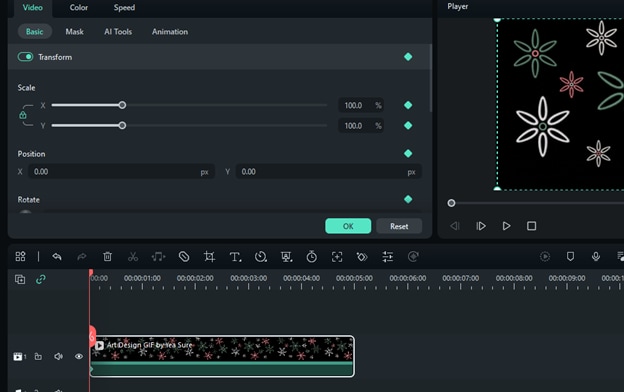
- Next, move it to the end of the clip, check the key-shaped button in front of the Transform button, and add another keyframe there, but this time, change its scale and rotation attributes as you like.
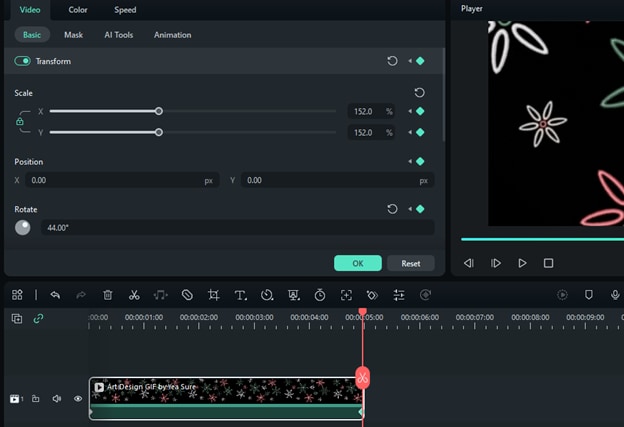
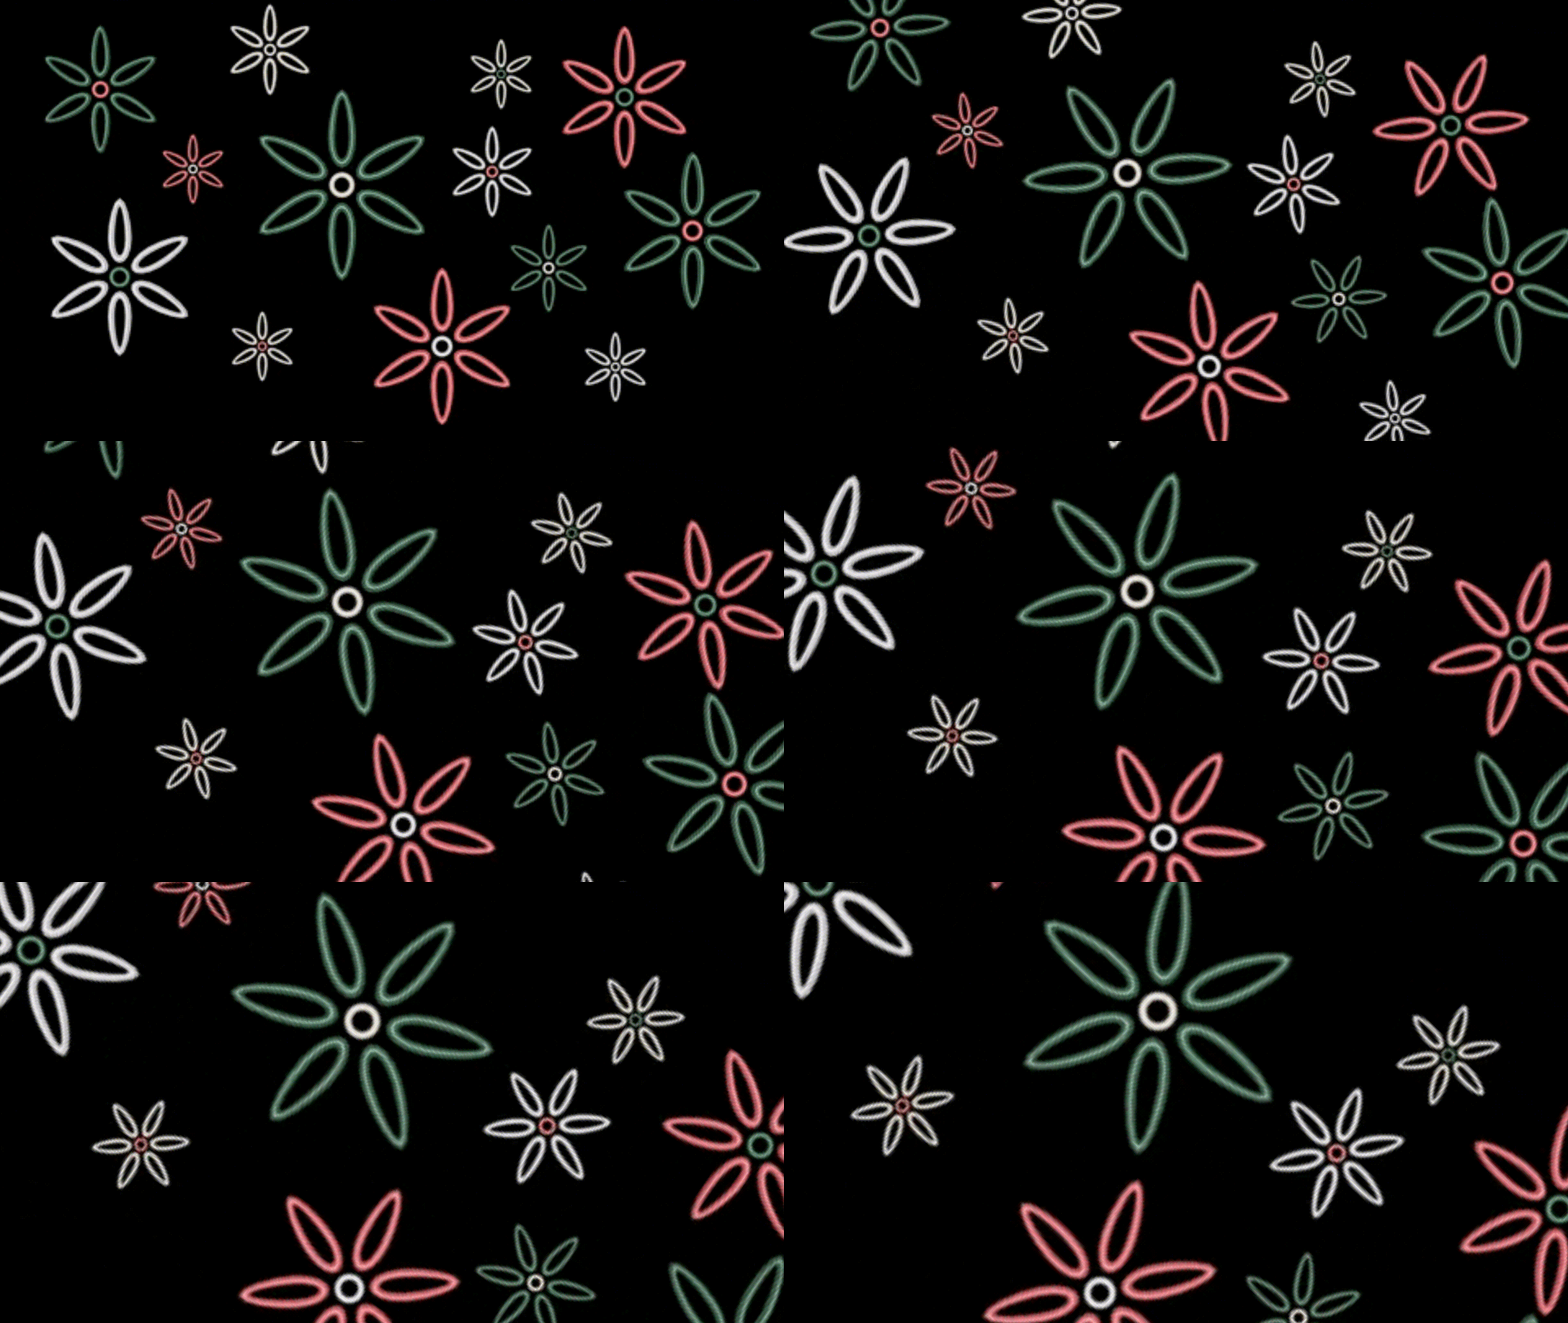
- Enter OK and play your clip to see the fantastic effect.
Step6 Keyframing Opacity
Keyframing allows creators to integrate variable opacity in their shots to instill a dramatic feel. This technique also helps create perfect fade-in and fade-out shots for your videos. Additionally, it is for theatrically dissolving shots too.
For an illustrated guide to keyframing opacity, keep on reading the following instructions:
- Add a Keyframe to a clip on your timeline. For it, double-click the clip to open the Editing Menu, Then go to Basic Tab.
- Check the key-shaped button in front of the Transform button. It will create a Keyframe in the default form of your motion element.
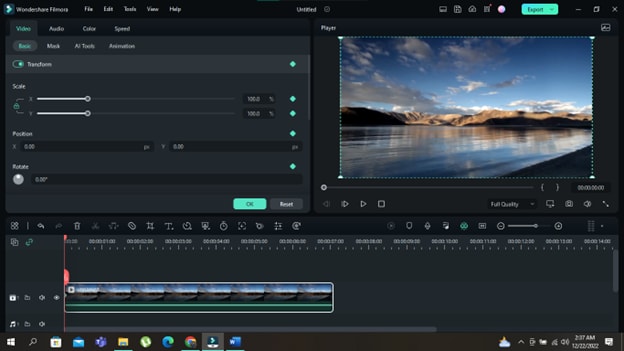
- Move the red cursor to the end of the clip.
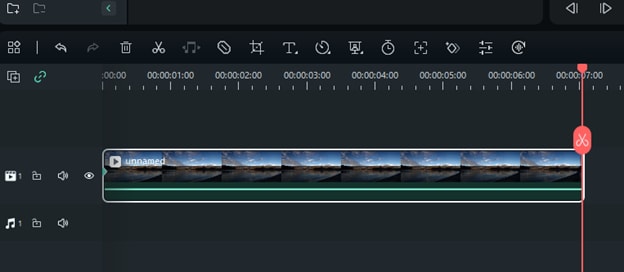
- Next, add another keyframe, scroll down in the editing menu, and remove the opacity from the slider below the Bend Mode option.
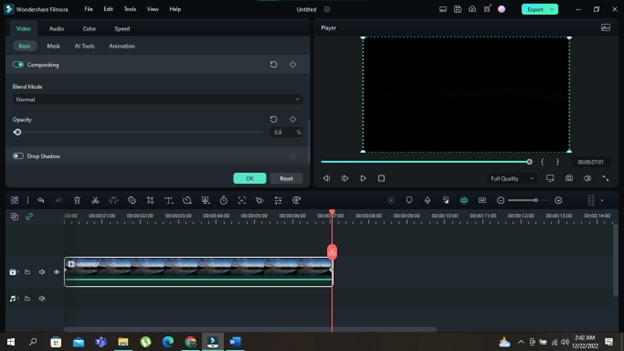
- That's it; you have a theatrical variation of the clip's visible opacity throughout the timeline.

Conclusion
On the whole, keyframing is all about creativity at your fingertips. When detailed effort becomes necessary, the keyframe feature is always there to save the day. This tool is a delight, from adding movement and motion to your playful and immersive shots to crafting a cinematic scene out of your films. This contest is your chance to show us how creative you can get with this beautiful feature. Good luck creating!


 100% Security Verified | No Subscription Required | No Malware

