
 100% Security Verified | No Subscription Required | No Malware


 ChatGPT
 Perplexity
 Gemini
 Claude
 Grok
Grok
In this article
Imagine you're editing footage from a beautiful outdoor shoot, but the video looks dull and hazy, lacking the crispness that would truly bring the scene to life. This common problem can frustrate even experienced editors. However, there are specific tools like Premiere Pro that let users remove visual flaws from their videos.
If you are new to video editing, read this article to learn how to dehaze videos in Premiere Pro and Premiere Elements effortlessly. By the end of this article, you will learn different methods to remove the haze from your video effortlessly.

Part 1. How to Remove Haze and Make a Sharp Video in Premiere Elements
Premiere Elements is Adobe's user-friendly video editing software designed for enthusiasts and beginners aiming for professional results without complexity. It offers a powerful feature that enhances video clarity with a one-click auto-haze remover. When dealing with hazy footage, Premiere Elements offers several adjustment tools to apply the Haze Remover effect to your preferences. Read the steps mentioned below to dehaze video with the dedicated feature of Premiere Elements:
Step 1. After you have imported your video to the tool's interface, head to the "Effects" option on the right. Under the "Video" section, locate the "Haze Remover" feature and click on it to enable it.

Step 2. Adjust the effects' attributes by dragging the sliders to your preferences. You can also select a specific area and draw on it to apply the effect. Once the haze is removed, head to the top-right corner and press the "Export & Share" option to save the results to your device.

Part 2. How to Dehaze Video in Premiere Pro
Premiere Pro is another Adobe tool that allows you to edit videos by offering professional-grade features. This video editor provides a manual way to remove haze and noise from your videos by adjusting different visual elements. If you want complete control over the elements' adjustment, you can use this manual method of removing haze. Follow the steps provided below to learn how to use this tool to remove haze from videos:
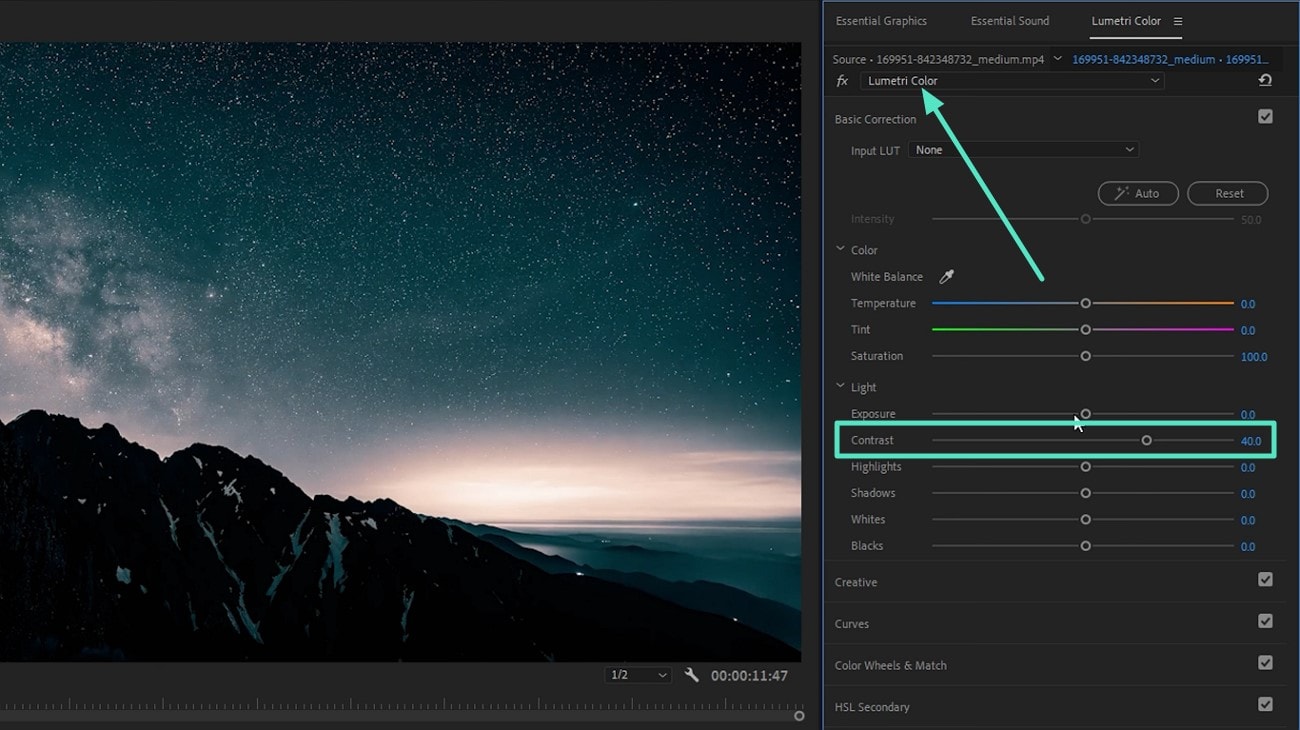
Step 1. After adding your hazy video, head to the right side of the interface and access the "Lumetri Color" section. Increase the "Contrast" by dragging its slider to the right. Now make further enhancements by dragging other attributes' sliders according to your preferences.
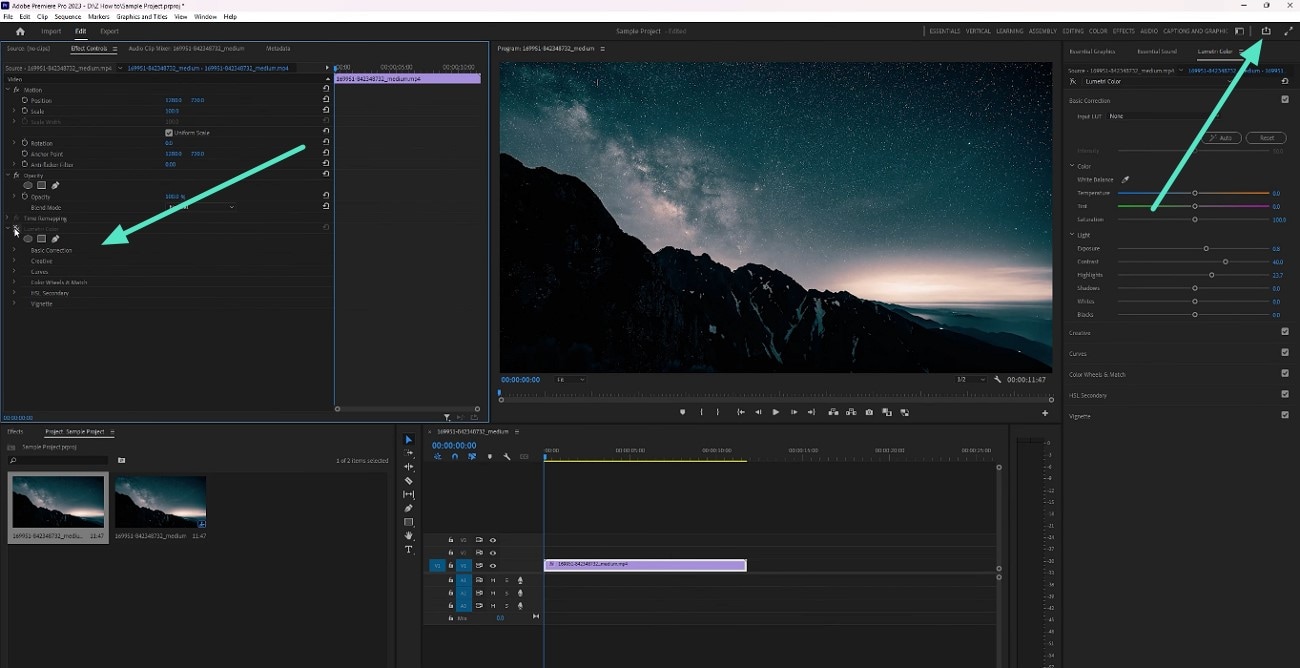
Step 2. Now, head to the section on the left and adjust opacity and blend mode as per the requirements. Once done, press the "Export" icon in the top-right corner to save the results to your device.
Part 3. How To Dehaze Videos Using an Online Tool
If you do not want to download any software, you can also go for online options to dehaze videos. One such tool is Fotor, which lets you remove grain and haze from videos using advanced technology. Its Denoise Video feature effortlessly removes unwanted flaws and artifacts from the video, leaving the content clear and crisp. To learn how to dehaze video online using this tool, read the steps mentioned next:
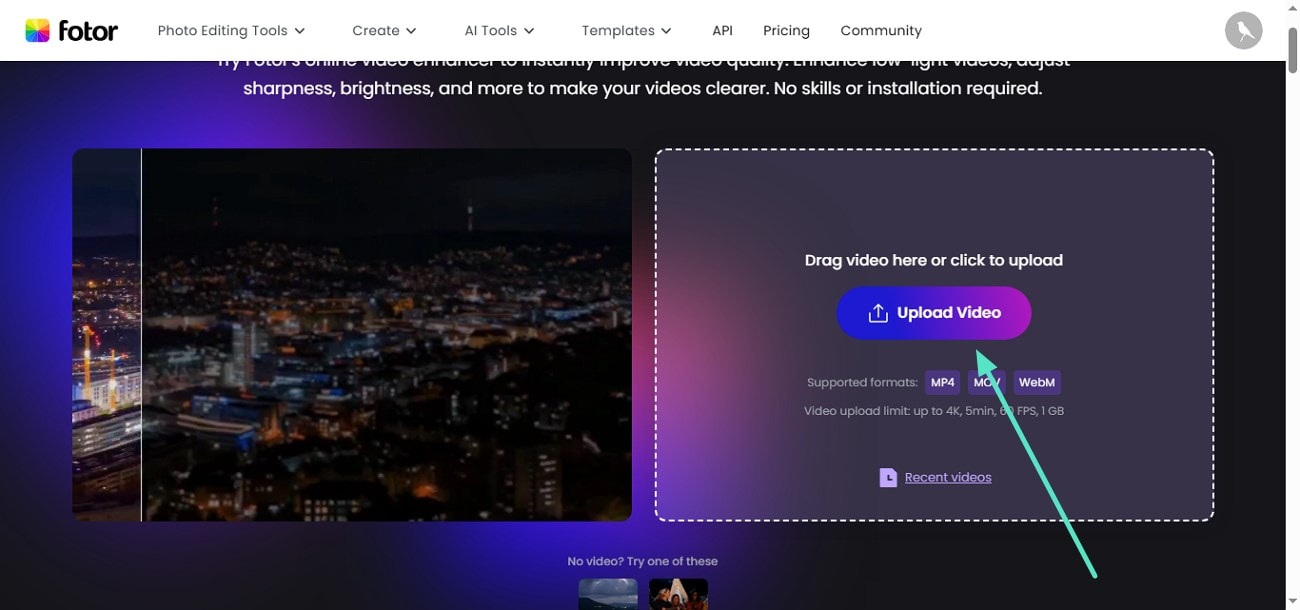
Step 1. After accessing the video denoising feature of Fotor, click the "Upload Video" button to add the video that has haze.
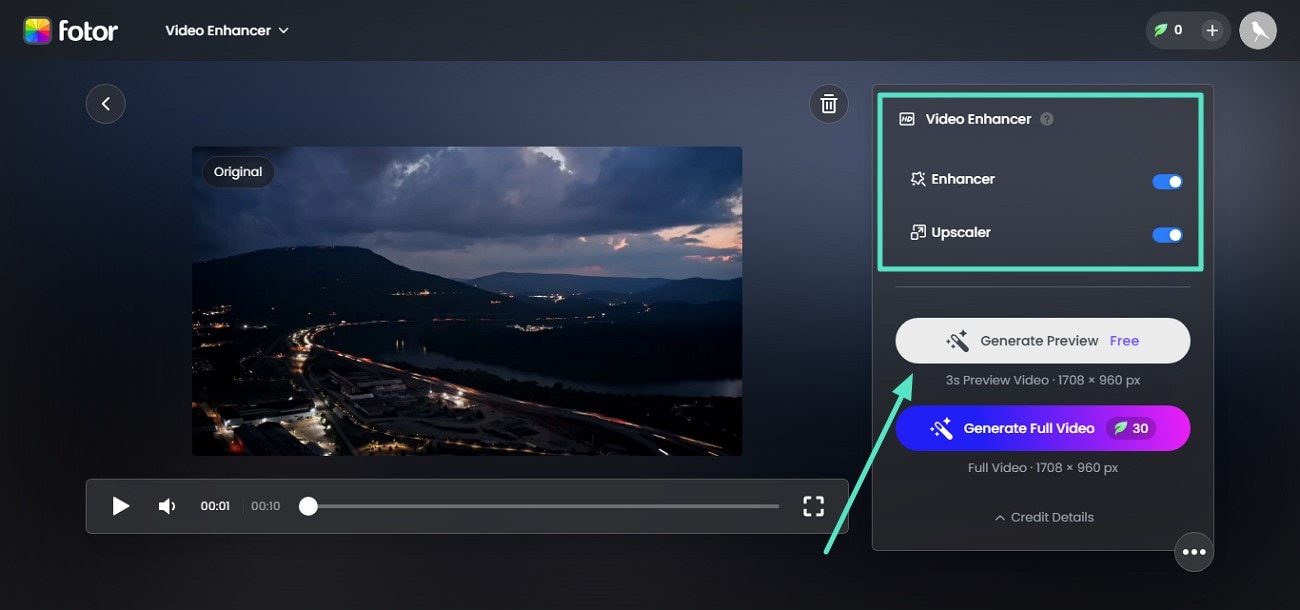
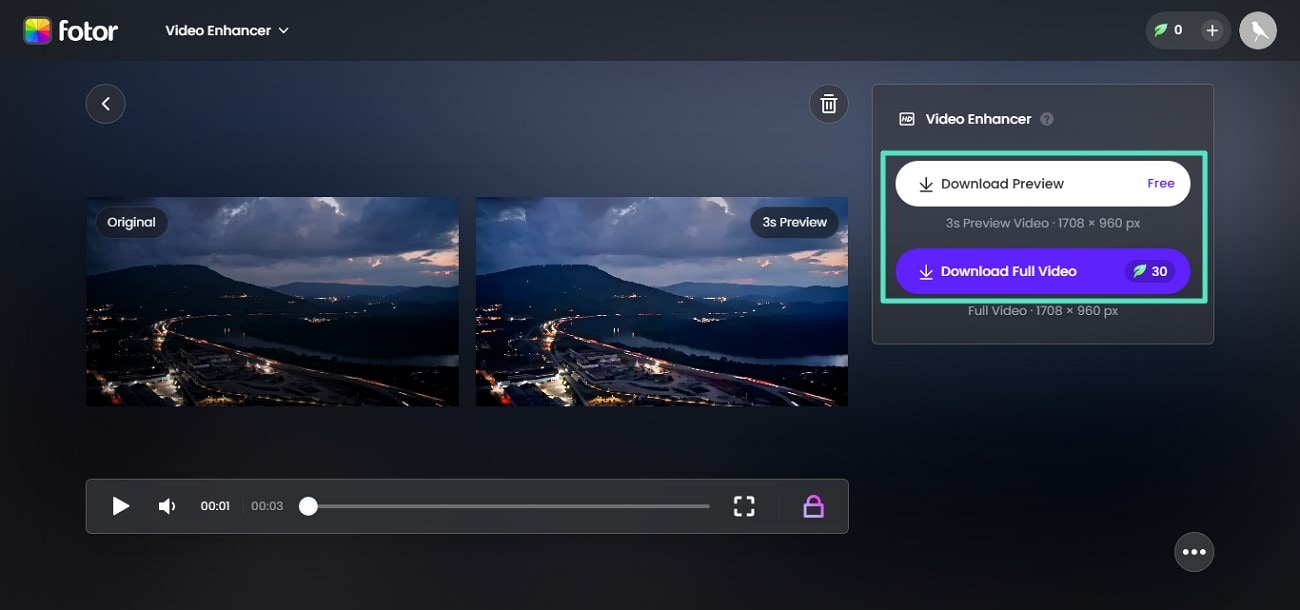
Step 2. Once the video is added, turn the toggles on for "Enhancer" and "Upscaler" located on the right. Now, press the "Generate Preview" button to begin the dehazing process.
Step 3. When the process is completed, compare the results within the preview window. Press the "Download Video" button to save the dehazed video successfully to your device.
Part 4. Most Effective Solution for Dehazing and Enhancing Videos
Although Premiere Pro and Premiere Elements provide the utility of removing haze from your videos, the complicated interface and complex functionality make users look for other options. As far as the online options are concerned, they are quick but do not provide the quality that is required. However, one of the tools that provides quality and speed, along with easy adaptability, is Wondershare Filmora.
This AI-powered multimedia editor allows users to enhance the overall quality of their video by offering various automatic enhancement options. It provides a dedicated Auto Enhancer that automatically removes flaws and artifacts from your video. Moreover, you get other functionalities such as Video Denoise and Lens Correction to effortlessly remove unwanted haze.
Comprehensive Steps for Dehazing Videos With Filmora
As discussed, Filmora offers a comprehensive solution to remove unwanted haze. Read the steps provided next to learn how to dehaze a video with Filmora:
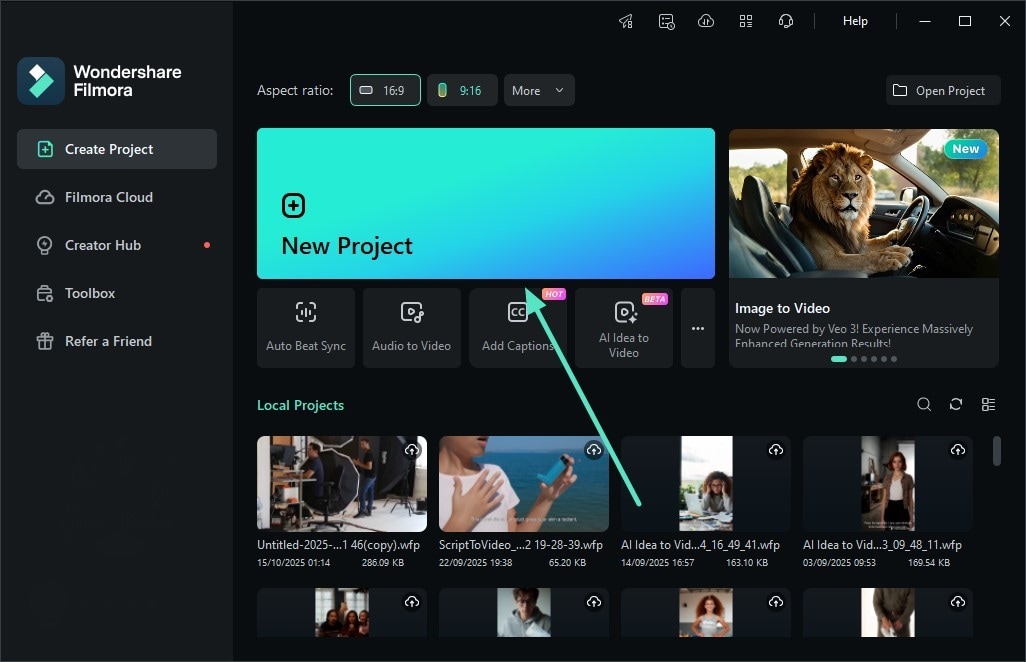
Step 1. Begin by Creating a Project. Start the process by clicking on the "New Project" tab located on the tool's homepage. Next, import the hazy video and drag it to the editing timeline.
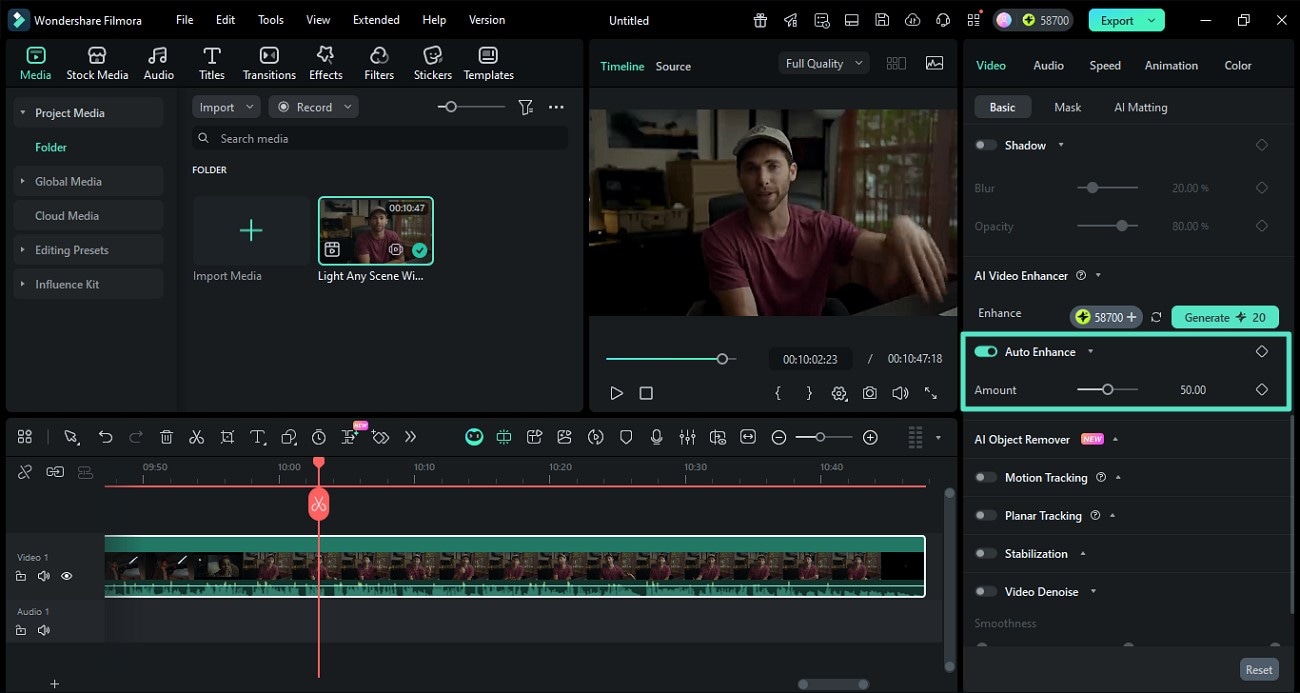
Step 2. Apply Auto Enhance. Once the video is successfully added, head to the "Video" panel on the right and enable the "Auto Enhance" feature. Now drag the "Amount" slider according to your preferences.
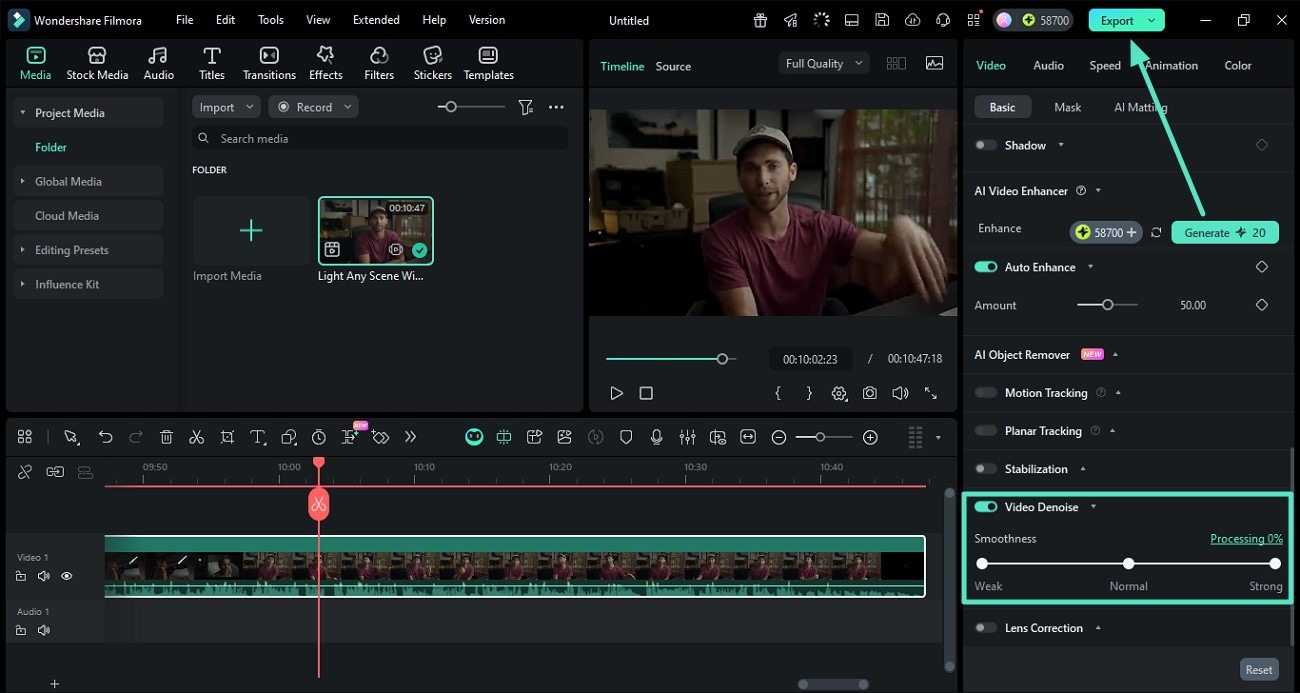
Step 3. Incorporate Video Denoise. Moving forward, turn the toggle on for the "Video Denoise" option and adjust the Smoothness from weak to strong. Once the haze is successfully removed, head to the top-right corner of the interface and press "Export" to save results.
 secure download

Conclusion
To wrap it up, this article discussed a complete guide on how to dehaze video in Premiere Pro and Premiere Elements. The article also suggested an online method to get the task done. However, one of the most efficient methods to remove haze and enhance clarity is to use Wondershare Filmora. This AI-powered multimedia tool automatically detects flaws in your videos and generates crisp and clear results.
