- •How to edit audio
- 1.Basic video editing tips
- See more
- 2.How to adjust volume
- See more
- 3.How to dit audio in video
- 3.1 How to Merge Video and Audio
- 3.2 How to Extract Audio from Video
- 3.3 How to Separate Audio from Video
- 3.4 How to Add Sound Effects to Video
- 3.5 How to Add Background Music to Video
- 3.6 Top 20 Best Music Source for Videos
- Remove background noise with Audio Denoise function.
- Edit audio separately by detaching it from video.
- Over 50 audio effects and royalty free music.

 100% Security Verified | No Subscription Required | No Malware
Updated | How to Extract Audio from Videos (PC/Mobile)

Jun 09, 2026• Proven solutions
We often end up with videos that have meaningful audio accompanied by unnecessary visuals. When that audio needs to be shared, we consider removing the video for a better impact on the listeners. Thanks to technology and extraction tools, lossless audio ripping is now a breeze. To help you learn how to separate audio from video, this article focuses on the top audio extraction facilities.
- Part 1: Exploring a Reliable Tool for Audio Extraction: Wondershare Filmora
- Part 2: Separating Audio from Video Using an Online Facility
Part 1: Exploring a Reliable Tool for Audio Extraction: Wondershare Filmora
Speaking of a reliable audio-ripping platform, Wondershare Filmora is the first name that crosses one's mind. With its functionality across mobile and desktop devices, it serves as a versatile platform. The following section is a walkthrough guide to using both these versions for effective audio extraction from videos:
Looking into the Desktop Version of Filmora to Rip Audio
Users looking for extensive audio editing can look into the desktop version of Wondershare Filmora. It offers various modes of separating music from video while polishing it to perfection. You can enhance the speech in your audio using the one-click speech enhancement feature. If your audio has a mix of speech and background music, use the Audio Ducking utility to create a balance and make the speech audible.
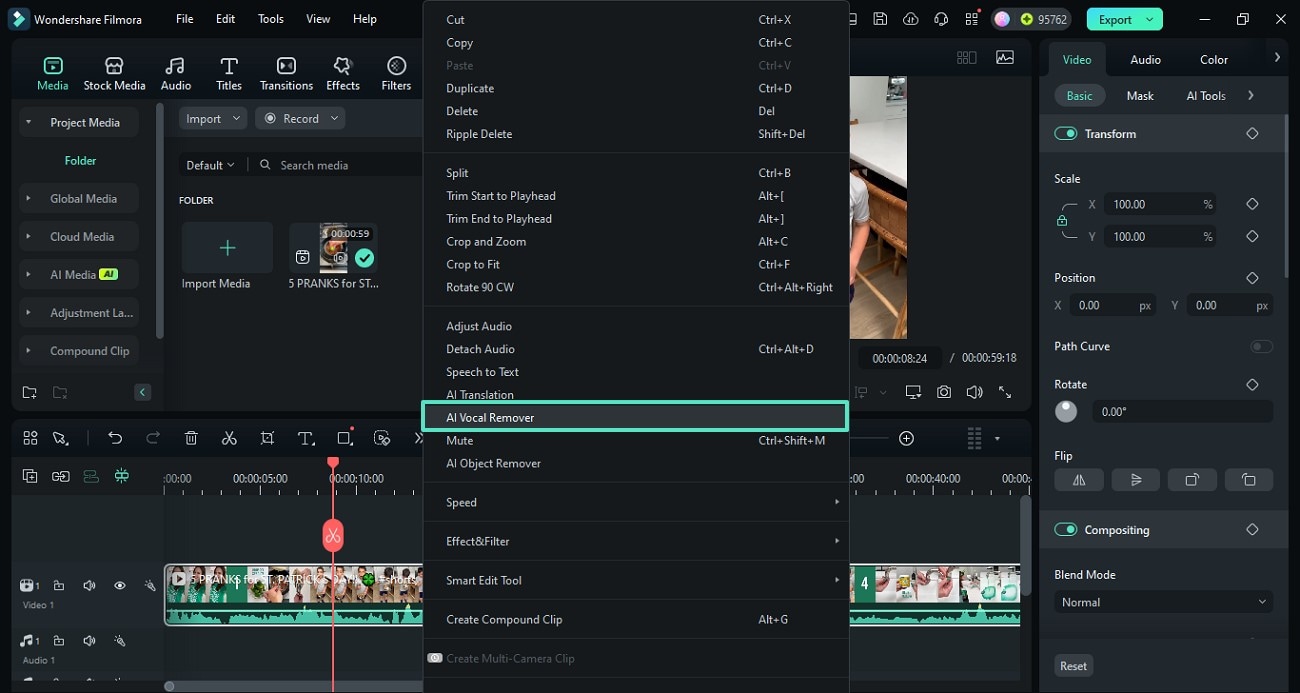
Method 1. AI Vocal Remover
When looking for AI-integrated audio ripping, this method turns out to be the most effective. Besides isolating vocals from background music, it also extracts the audio from the imported video. Once the audio track has been separated, you can apply various audio enhancements to it. Follow the guide below to learn how Filmora separates audio from video:
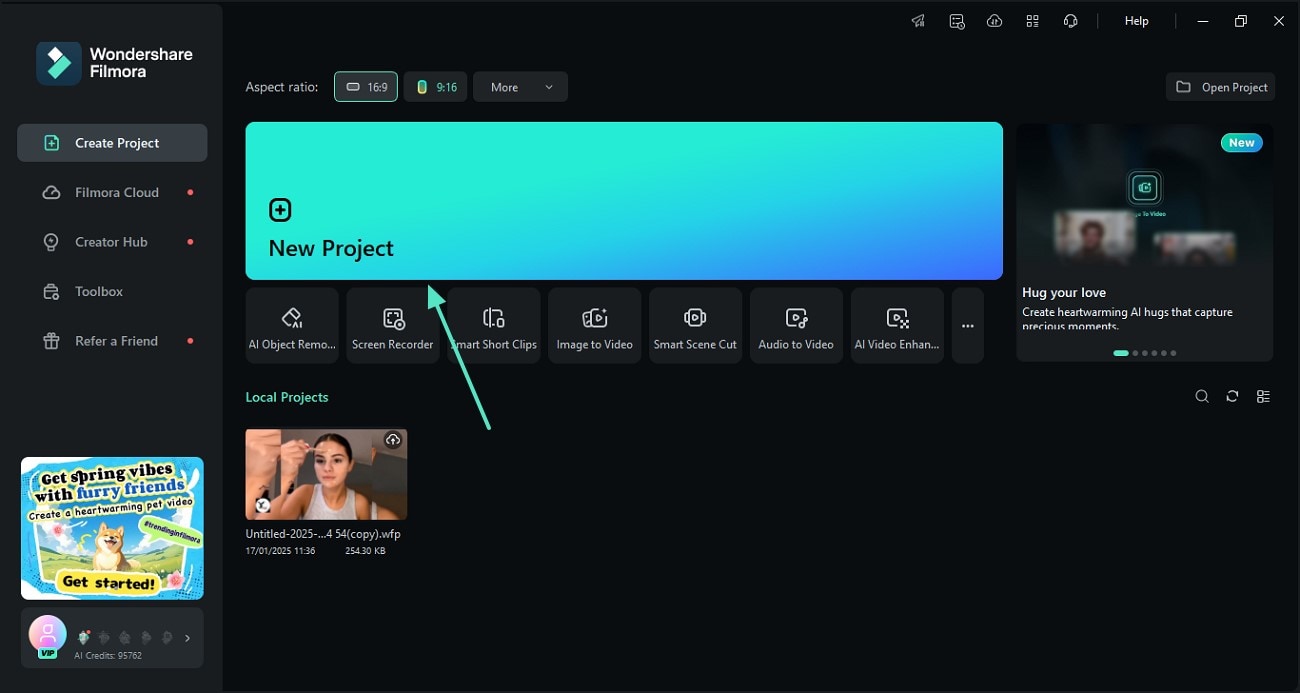
- Step 1. Import a Video to Start a New Project. To begin with, open Filmora on the desktop, explore the main interface, and click the "New Project" button. When directed to the next screen, "Import" the video from which you need to extract audio.
- Step 2. Apply the AI Vocal Remover to Extract Audio. After dropping the video onto the timeline, right click on the video track and click the "AI Vocal Remover" option from the pop-up menu.
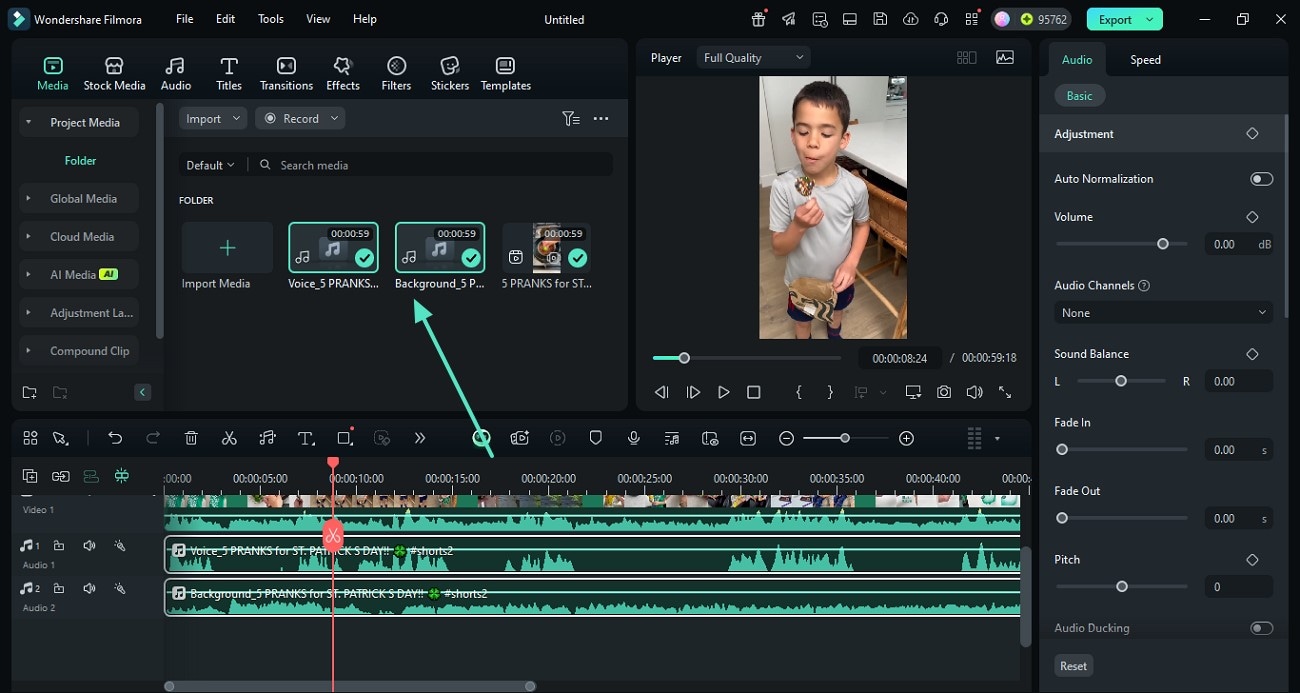
- Step 3. Enhance the Audio After Extraction. Once the audio tracks are created on the timeline, access the right panel to enhance their quality.
 secure download

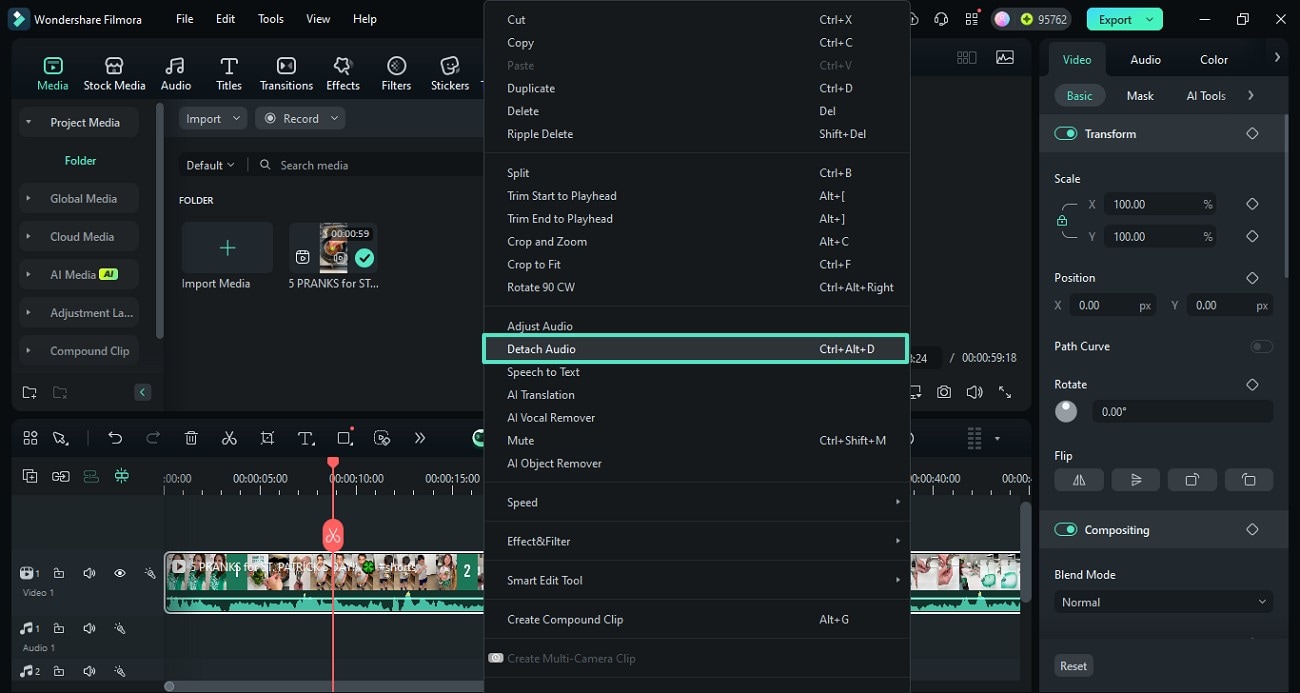
Method 2. Detach Audio Manually
If you need to edit the audio by bringing it to a separate timeline track, this method will be a good choice. The Detach Audio method also comes in handy when you need to edit the video precisely without affecting the audio. The following steps feature a complete guide on using this method for Filmora split audio from video:
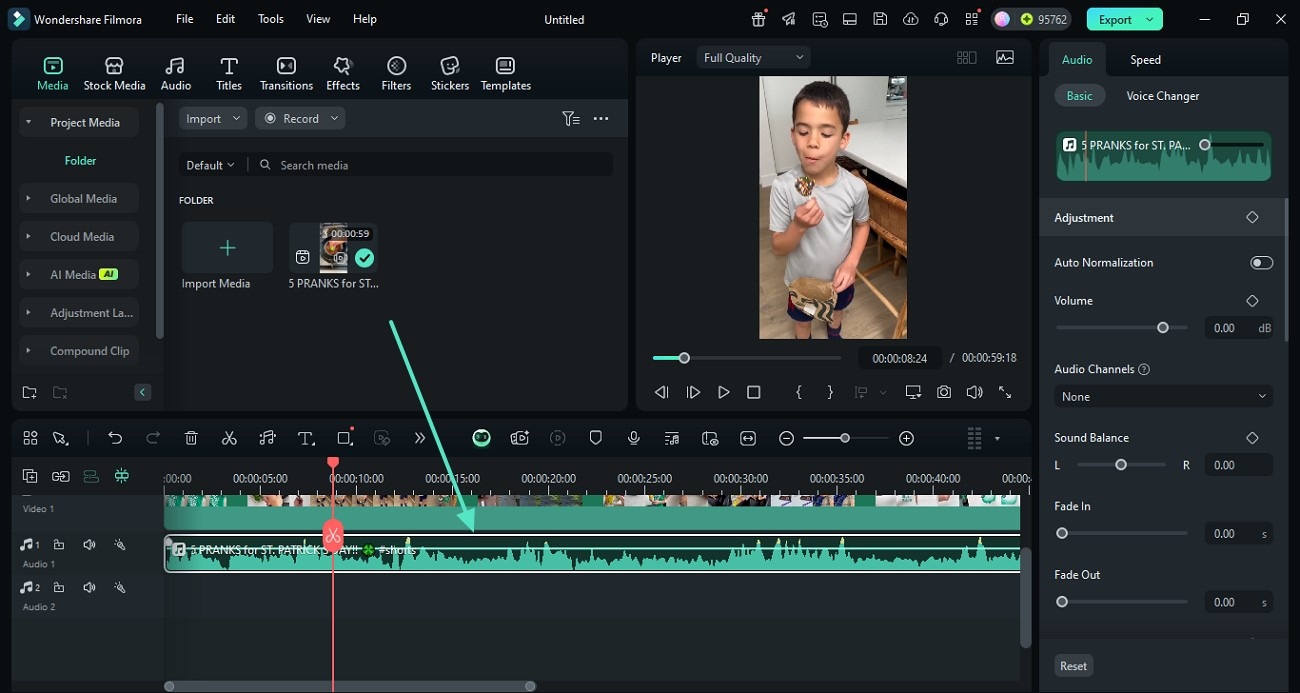
- Step 1. Use the Detach Audio Feature to Create an Audio Track. After importing the video, right-click on the video track and refer to the pop-up menu to select the "Detach Audio" option.
- Step 2. Edit the Audio After Isolating the Track. When the separate audio track appears on the timeline, access the right side panel to edit the audio as needed.
secure download
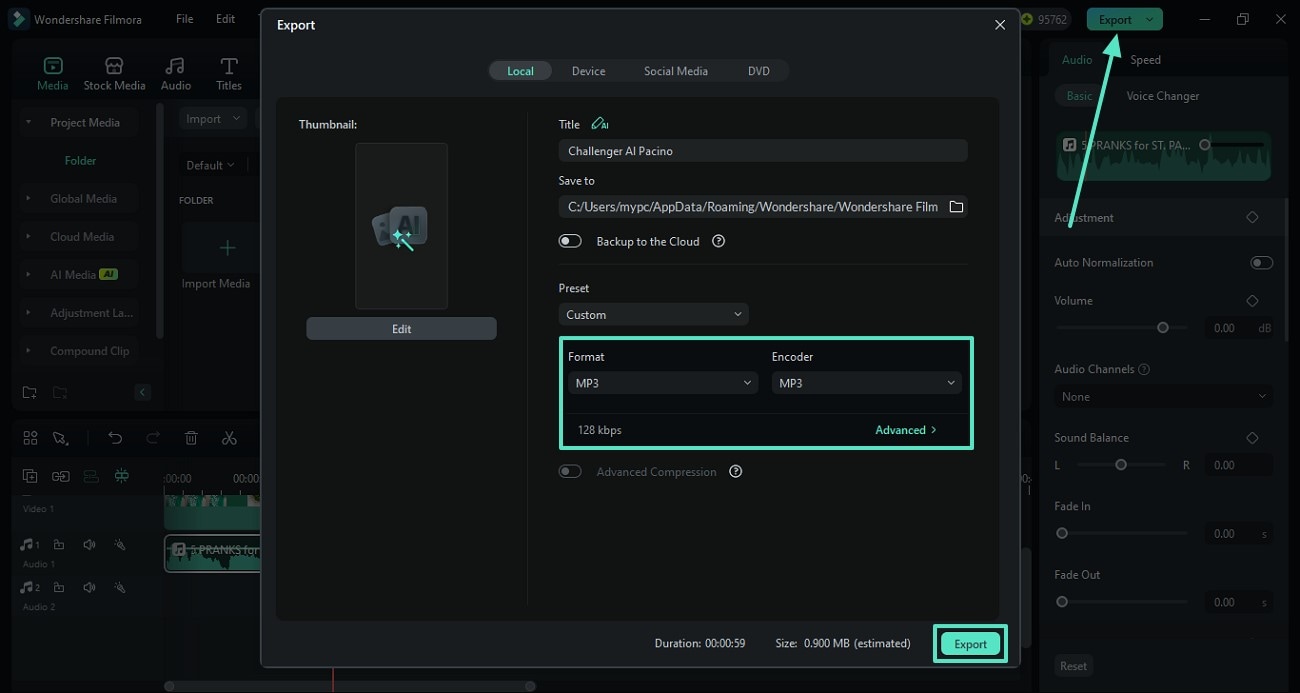
Method 3. Export the File as an Audio
One of the most convenient ways of extracting audio from a video is by exporting it as audio. While downloading the audio, you can select the sample rate and bitrate of your choice. Follow the instructions below on how to separate audio from video in Filmora.
- Navigate to the Export Section. Once you have edited the audio, access the "Export" button from the top right to enter a new window. Here, select the audio "Format" of your choice and click "Export" to save the audio file to your device.Part 2: Separating Audio from Video Using an Online Facility
Using the Filmora App for Effective Audio Extraction from a Video
If you want to make small changes to your videos while simply ripping audio, the Filmora App [iOS/Android] is a decent choice. It offers two methods for audio extraction for user convenience. After you have extracted the audio, you can adjust its volume to control audibility with ease. This tool also allows you to set the fade-in and fade-out options to create a balance throughout the playback.
Method 1. Direct Audio Extraction
The first method is the direct isolation of audio for better control over the editing. Besides extracting the original audio of the imported video, this technique also allows you to integrate local audio into your video. Once extracted, you can apply the voice changer to the audio for a unique attraction. Explore the following guide and learn how to Filmora separate audio from video:
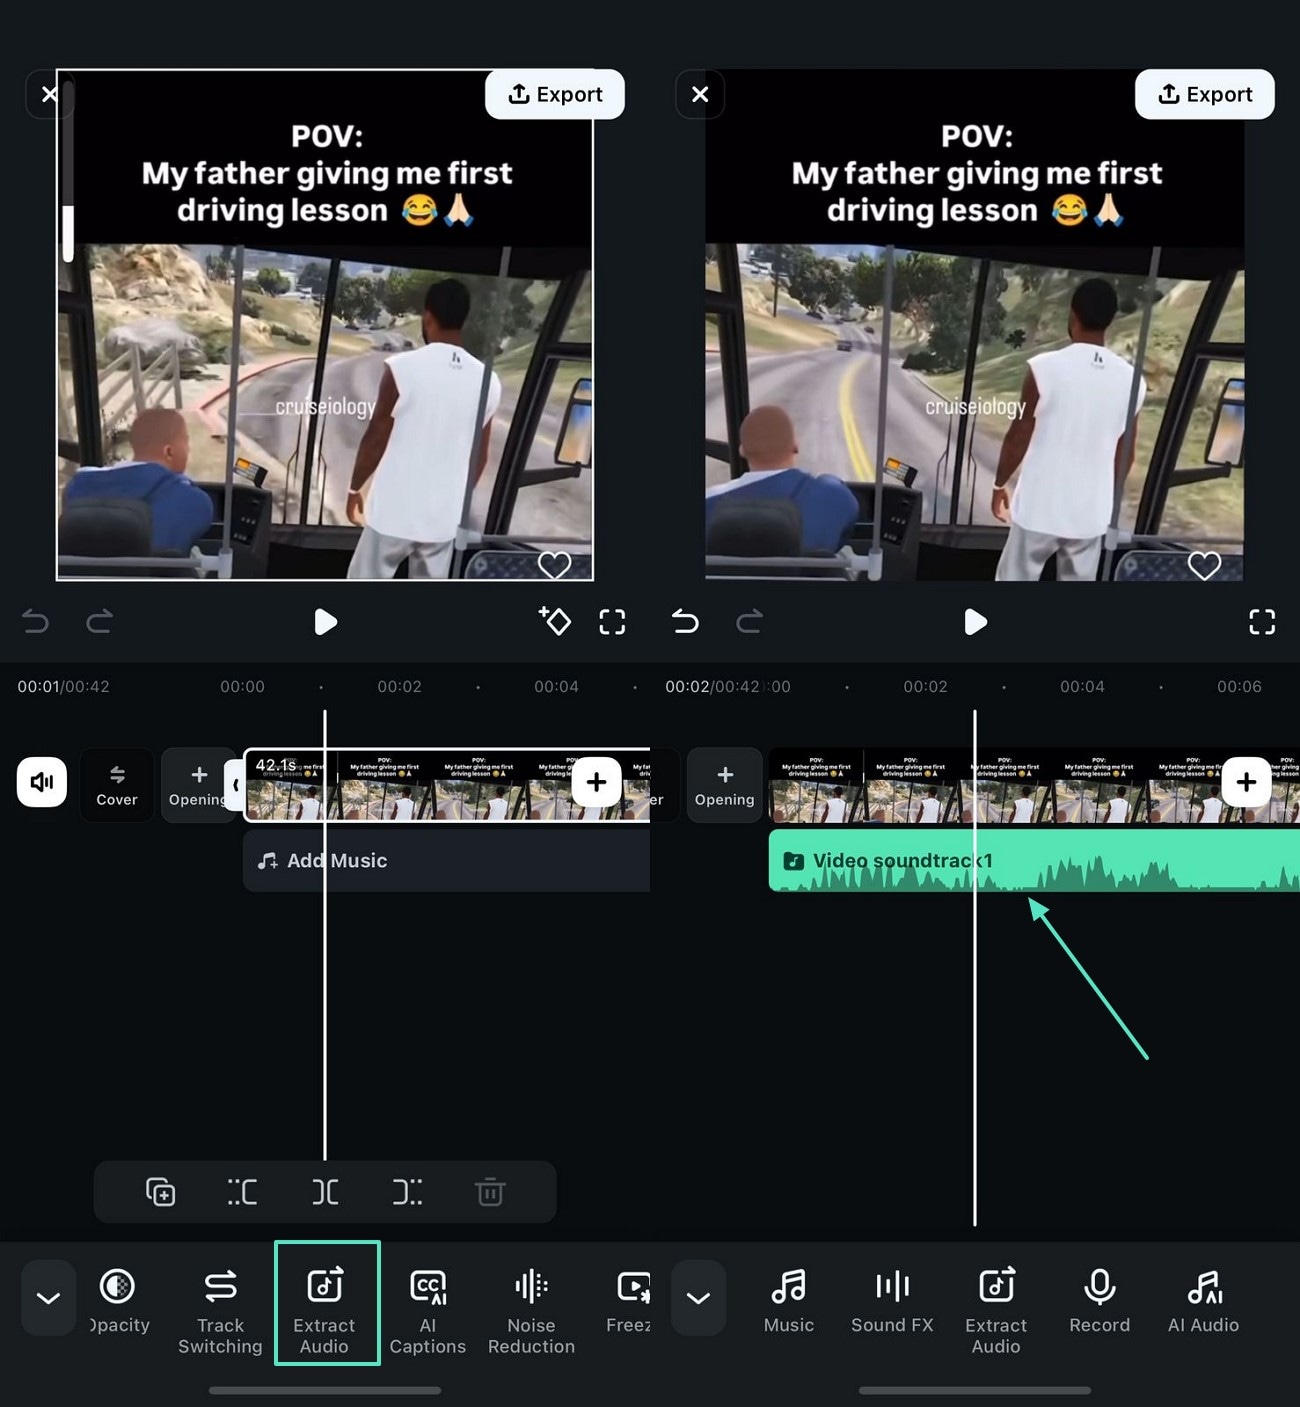
- Step 1. Start a New Project and Import Raw Video. To start, open the Filmora App and tap the "New Project" button from the main interface to "Import" a video.
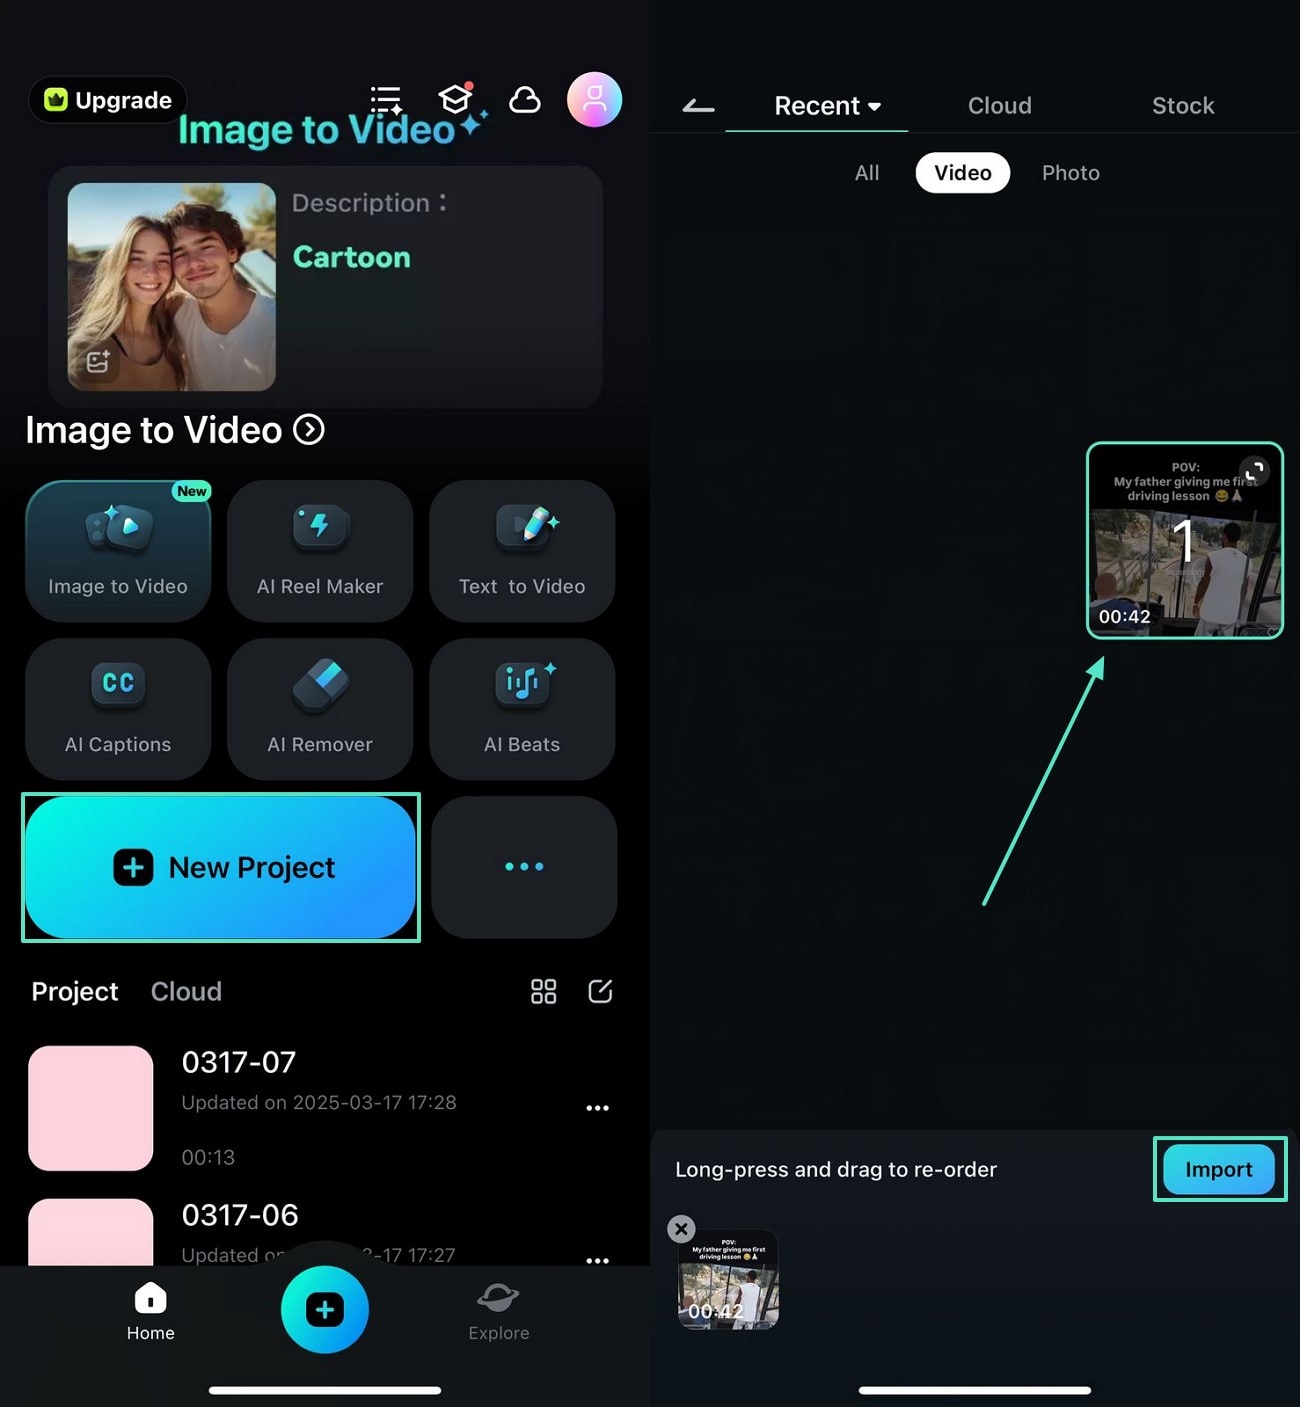
- Step 2. Extract Audio from the Video to Proceed. Now, tap the video track and select the "Extract Audio" tab to create a separate audio track on the timeline.
Method 2. Record a Separate Audio
If your video does not have audio, you can record an instant speech and automatically create a separate track. Once the separate track is created, users can apply the one-click audio denoiser to cancel the background noise from the recording. Follow the instructions below and learn how you can extract audio using this tool:
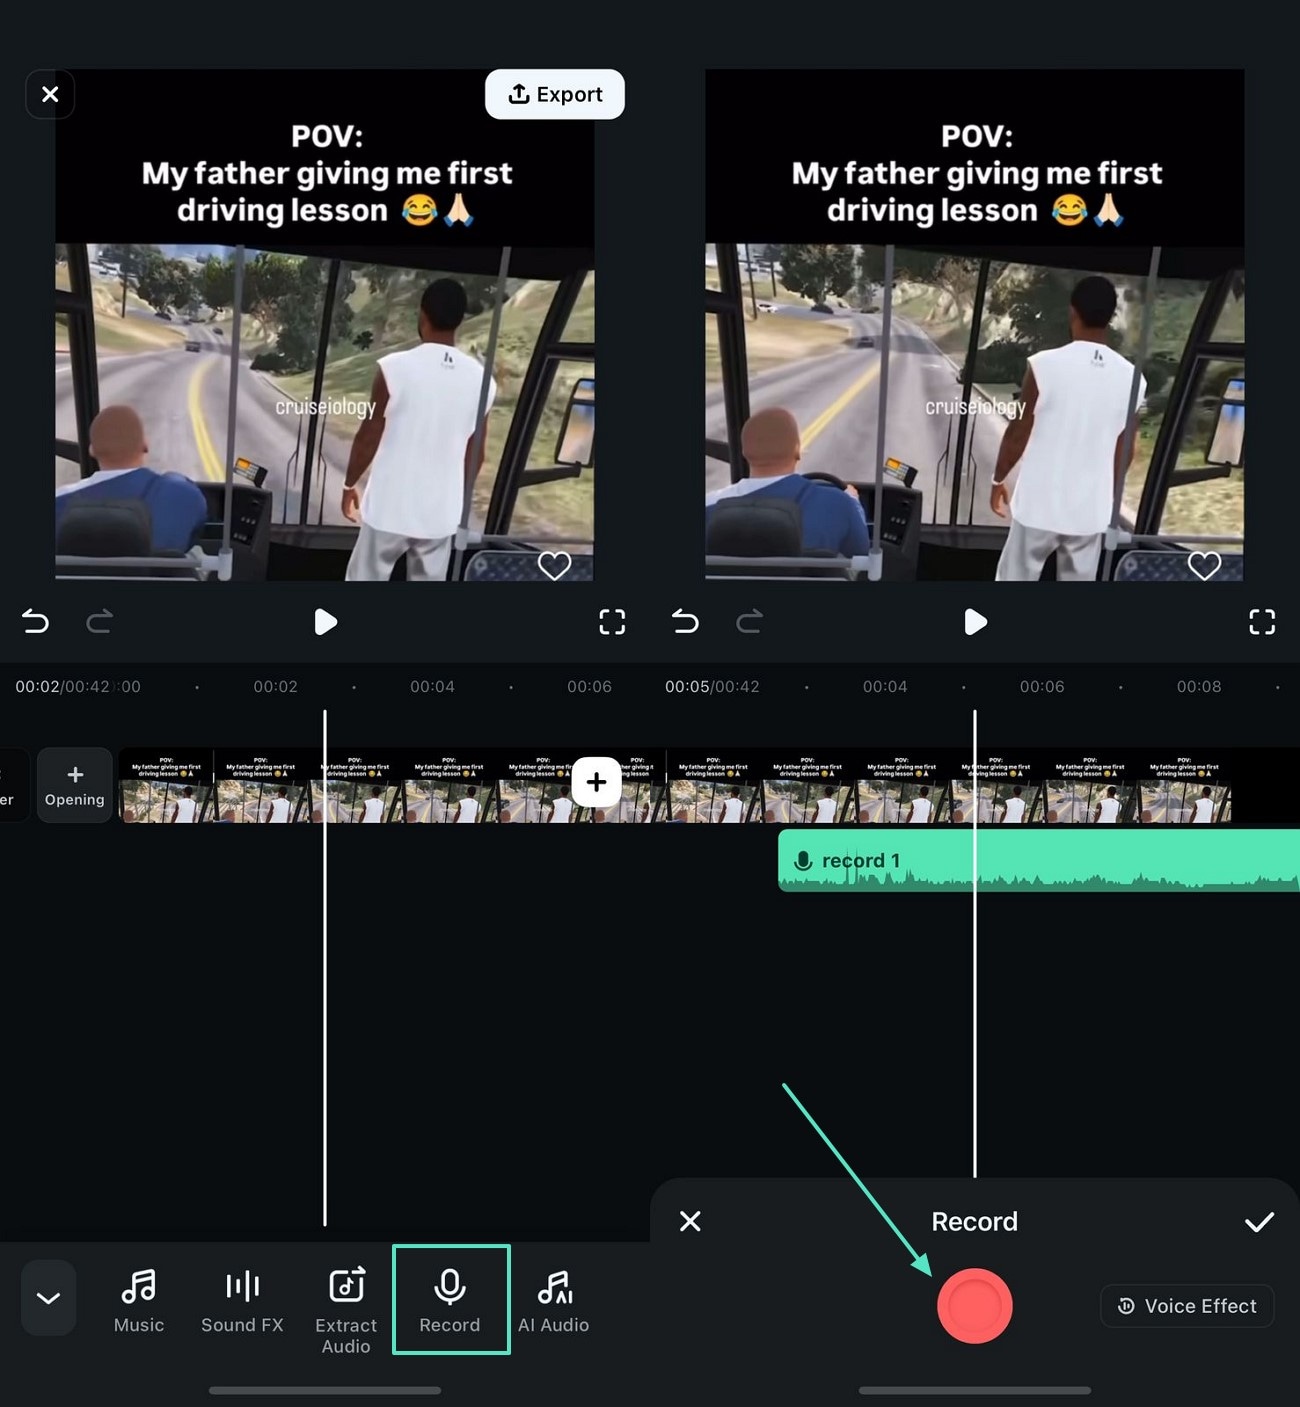
- Record Using Appropriate Settings. To start, import the video and tap the video timeline to select the "Record" option to instantly record the audio. After a separate audio track is created, you can enhance it using the audio refining features.
secure download
Part 2: Separating Audio from Video Using an Online Facility
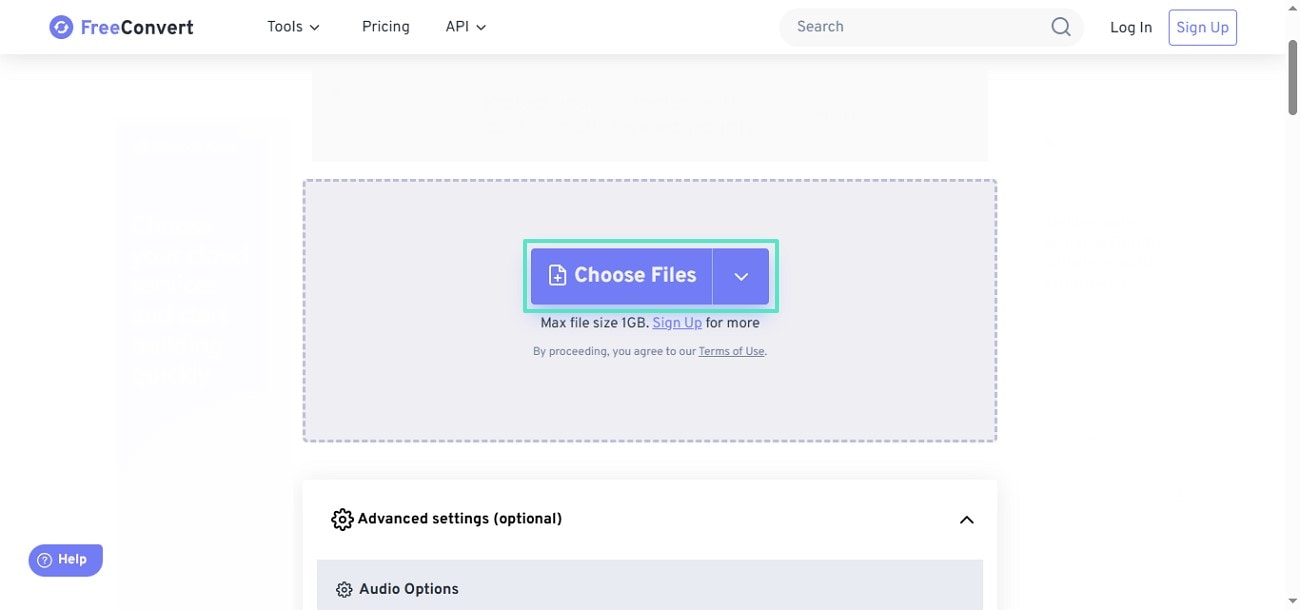
Although Wondershare Filmora offers a comprehensive audio extraction facility, it is okay to look into other facilities. FreeConvert is an easy-to-use converter that has the ability to convert batch files over 1GB in size. Follow the guide below and learn how to separate audio from video using this website:
Step 1. First, open FreeConvert on a web browser and click the "Add Files" button to upload a video from your device.
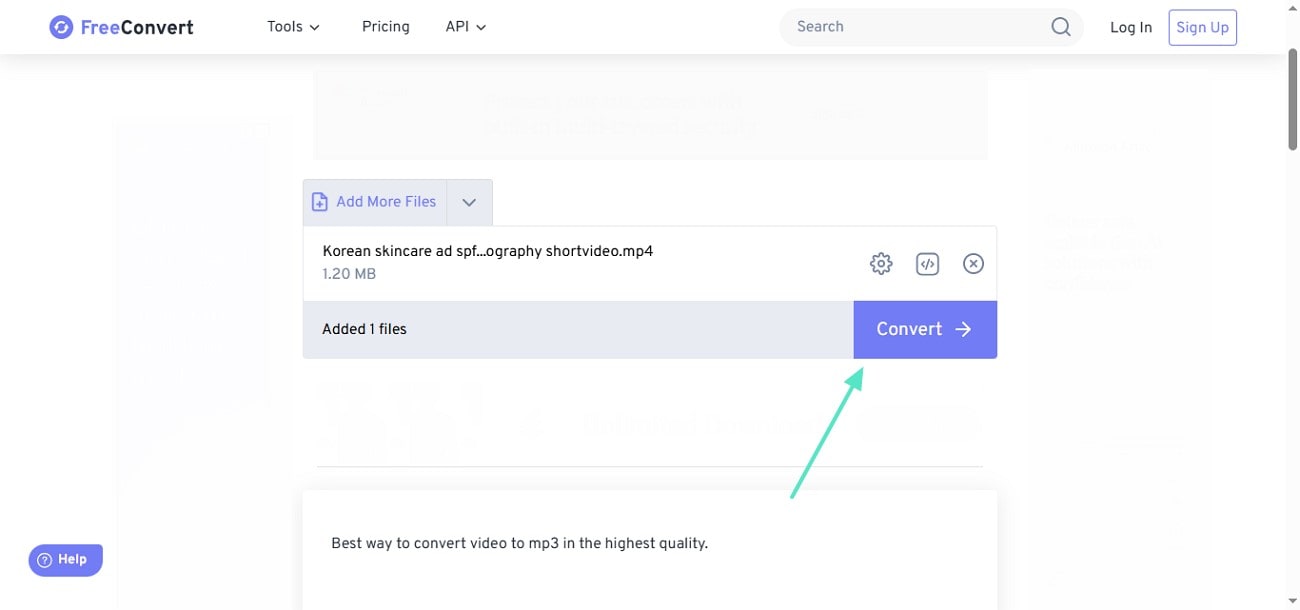
Step 2. Once the file has been uploaded, click "Convert" to download the audio file using the next page.
FAQs on How to Separate Audio from Video
1. Why would someone extract audio from a video file?
People might want to extract audio from their videos to use it as video background music. This process also helps when you need to reduce the file size by removing the visuals from a video.
2. Is it possible to rip audio from a video using my phone?
With the Filmora App on your phone, you can effectively separate audio from your video files. This platform offers two simple methods of extracting audio from your videos.
3. Will extracting audio reduce its quality?
Although audio extraction may deteriorate its quality, using Wondershare Filmora might help you with that. While converting your videos into audio, this platform preserves the original quality.
Conclusion
You can choose the two options mentioned above. We admit that online solution is more convenient to use. However, if the video size is more than 500 Mb and you want to have more editing features, like adding new audio or editing audio with effects, we would like to highly recommend Filmora. Check this video to learn more!
secure download
Shanoon Cox
staff Editor
