

 TL;DR:
To create an audio visualizer in Premiere Pro, you must route your timeline audio through a linked After Effects composition, install a reactive plugin, or import pre-animated templates.
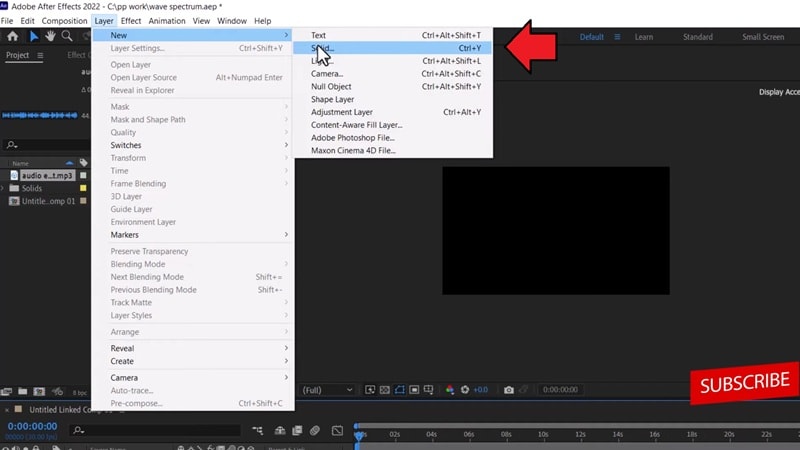
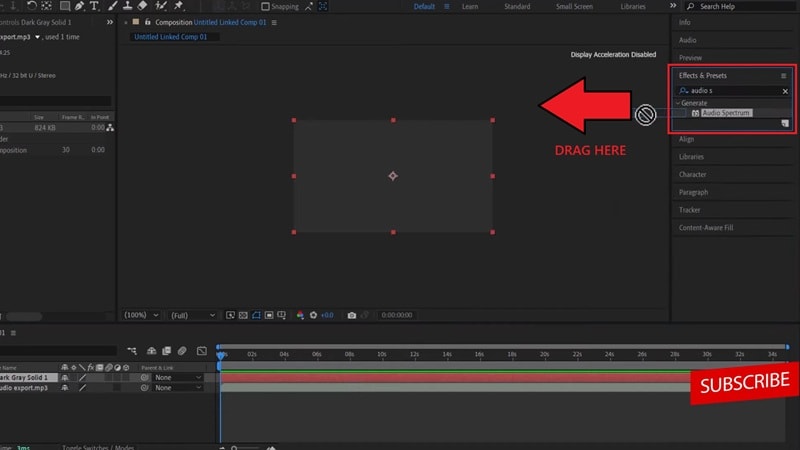
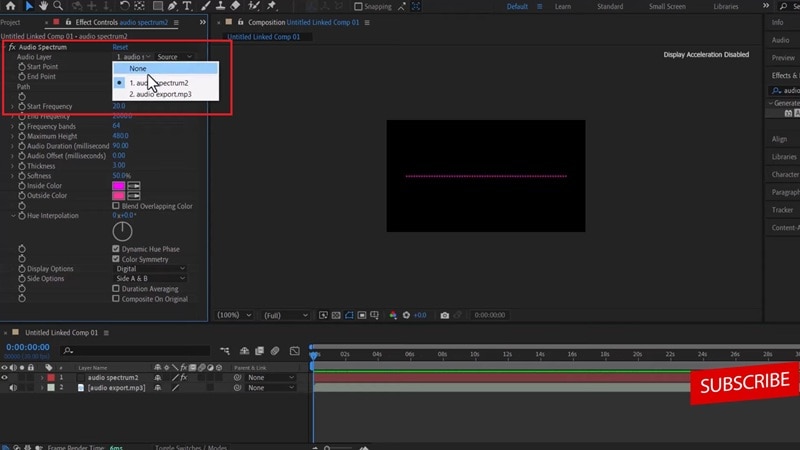
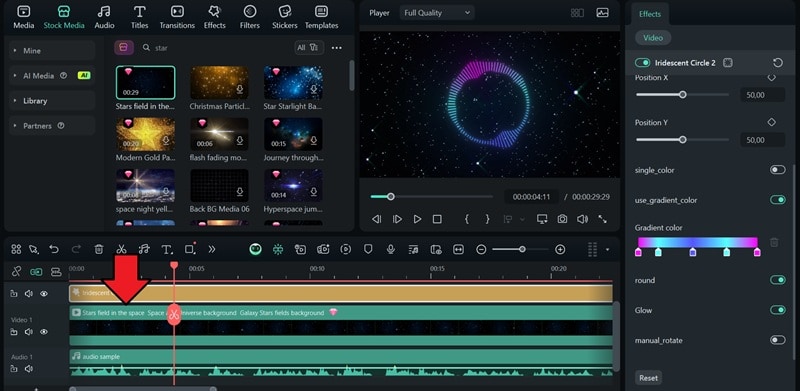
● Because Premiere Pro lacks native waveform generators, the default method requires using the Replace With After Effects Composition command to apply the Audio Spectrum effect onto a solid layer and linking your audio file to drive the animation.
● To build visualizers directly inside Premiere Pro without switching software, you can use the BCC+ Audio Visualizer plugin, which costs $27.08/month and includes integrated Mocha Planar Tracking for attaching graphics to moving subjects.
● As an alternative, Wondershare Filmora provides native drag-and-drop visualizer templates in its Effects library and features an AI Audio-to-Video Generator that performs best exclusively with story-based or historical audio tracks.
Ask AI for a summary
 ChatGPT
 Perplexity
 Gemini
 Claude
 Grok
Grok
Nobody wants their audio to just sit there with a static, boring background. An audio visualizer can be a solution when you need something for your audience to look at while your track plays, but in a way that's still eye-catching and professional.
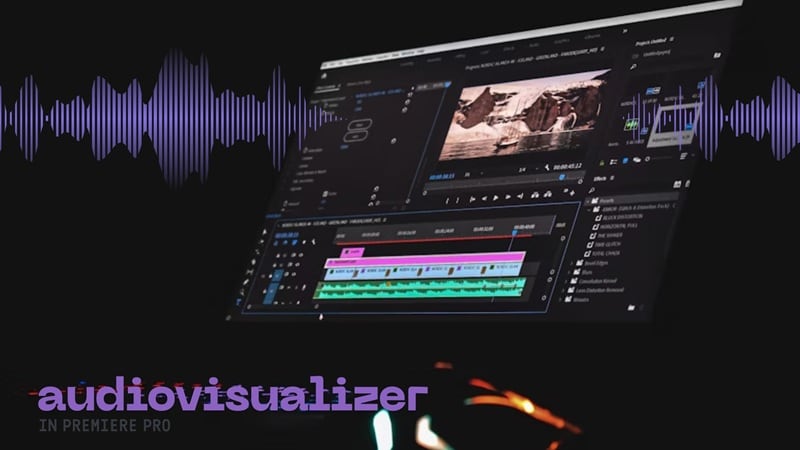
For Adobe users, many thought you could only do this with After Effects, since you need to work on a visual graphic for the visualizer. However, you can also do it entirely on Premiere Pro, too. We will cover all the methods available to create an audio visualizer in Premiere Pro easily.
Part 1. How to Make an Audio Visualizer in Premiere Pro
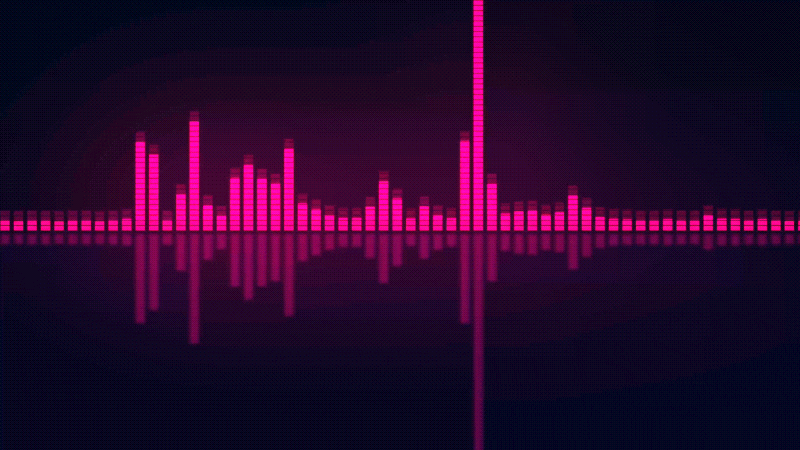
An audio visualizer (or music visualizer) is a type of motion graphic that moves in response to an audio track. It usually shows waveforms or shapes that react to the changes in frequency and volume of the sound.
To make a Premiere Pro audio visualizer, we'll first walk through the process of combining it with After Effects. But even without it, you can also learn how to build one directly inside Premiere Pro using an external plugin.
1. Make an Audio Visualizer With After Effects
If you have subscribed to Adobe Creative Cloud, you can use After Effects to create an audio visualizer that reacts to your music. Premiere Pro by itself doesn't include waveform or spectrum-style motion graphics, which is why it needs to be paired with After Effects.
By linking your clips between the two programs, you can build reactive waveforms or spectrum bars in After Effects and then bring them back into Premiere Pro to finish your edit.
How to Make an Audio Visualizer in Premiere Pro with AE

2. Make an Audio Visualizer Without After Effects
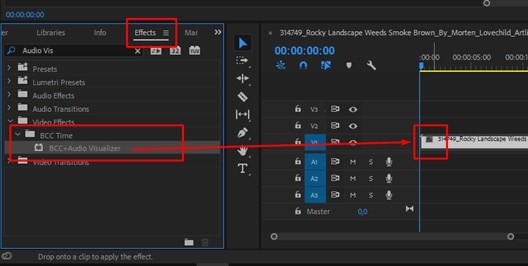
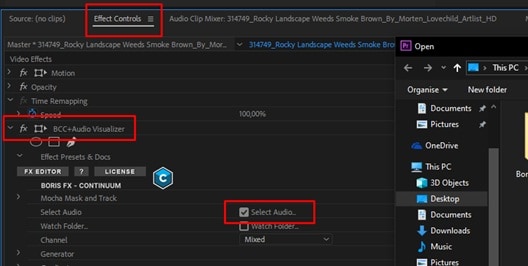
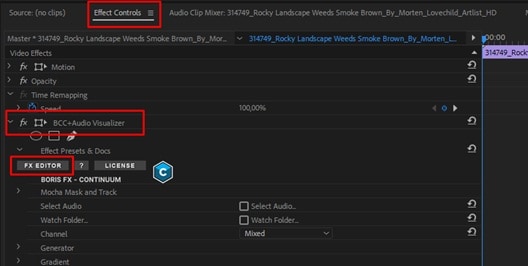
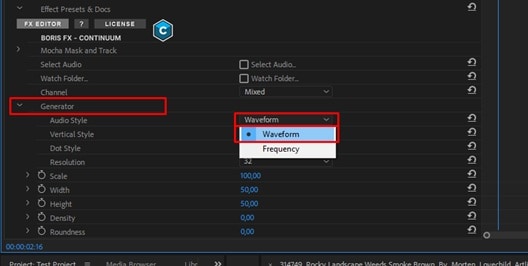
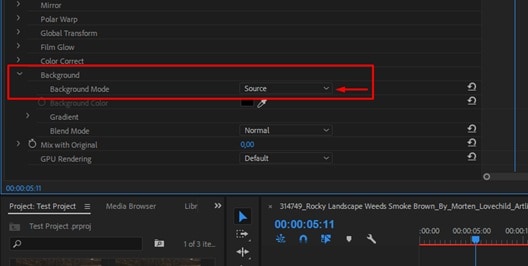
If you are not going to use After Effects, you can still create a Premiere Pro audio spectrum with the help of a plugin. One option is BCC+ Audio Visualizer, which is included in Boris FX's Continuum suite.
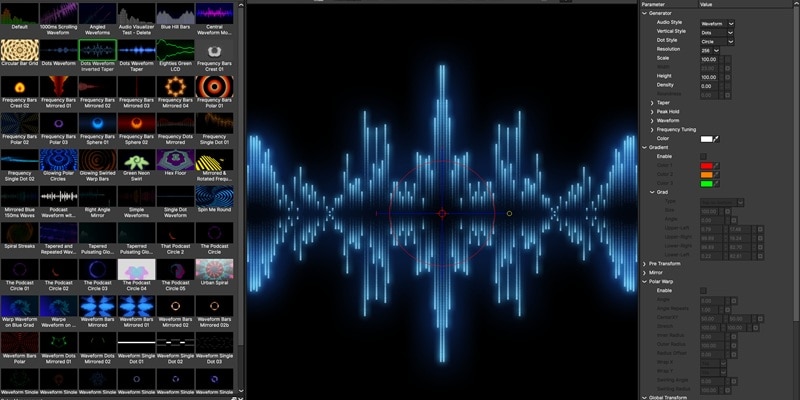
This tool acts as a generator that automatically produces animated graphics that react to the frequency and amplitude of your audio. While it offers a quicker method, the plugin is available through a subscription for $27.08/month.
How to Make an Audio Visualizer in Premiere Pro

Tip: Use Mocha for Masking and Tracking
Since BCC+ comes with integrated Mocha Planar Tracking, you can also attach the visualizer to a moving subject or hide parts behind objects.
Part 2. Download Audio Visualizer Templates for Premiere Pro
Other than relying on plugins, you can also download Premiere Pro audio spectrum templates online. These templates are pre-designed with animated elements that already react to music, so you only need to drop in your audio and customize the colors, text, or layout to match your video.
Some sources that provide free and premium audio visualizer Premiere Pro templates are:
| Mixkit | Content Creator Templates | Artlist | |
| Price | Free | $29/mo or $299/yr | From $9.99/mo |
| Style Variety | 2 design templates | 25 design templates | Extensive |
| Customizable | Limited | ✅ | ✅ |
| License | Commercial & Personal Use | Commercial & Personal Use | Commercial & Personal Use |
Part 3. Try Video Editor with Built-in Audio Visualizer Templates
Besides relying on Premiere Pro, what if we told you that there are video editors you can use that already come with audio-visualizer templates built in? Wondershare Filmora offers a more cost-effective and efficient way to create audio visualizers.
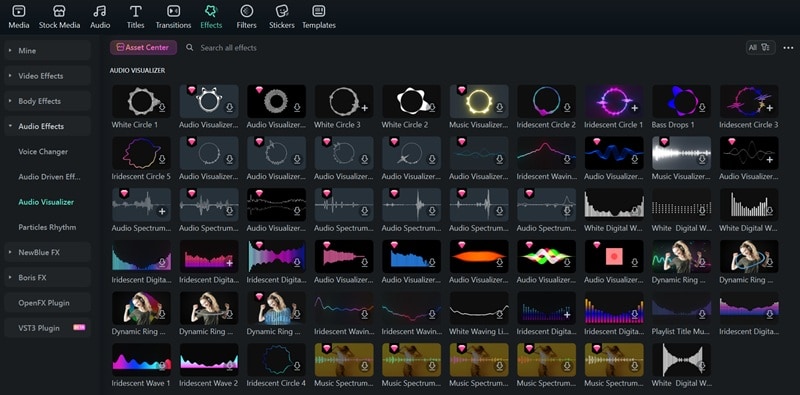
Unlike Adobe Premiere Pro's audio visualizer, where you might need extra plugins or templates, Filmora includes everything in one place. You can find Filmora's audio visualizers right inside its Effects library.
What you need to do is browse through the available styles, download the one you like, and apply it directly to your project. No complicated setups, no back-and-forth between multiple platforms. Just drop in your music, pick a style, and it's done.
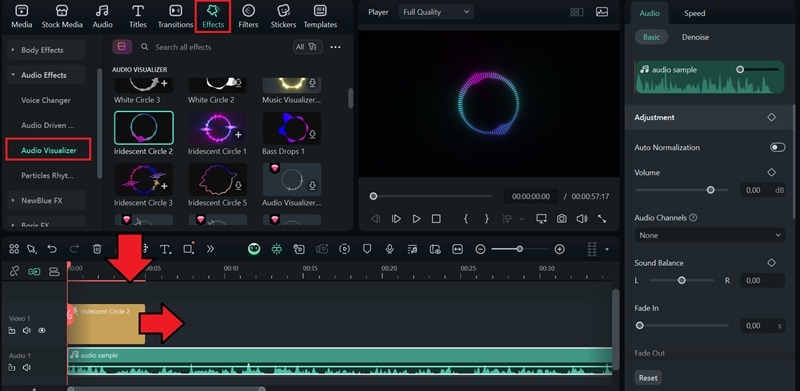
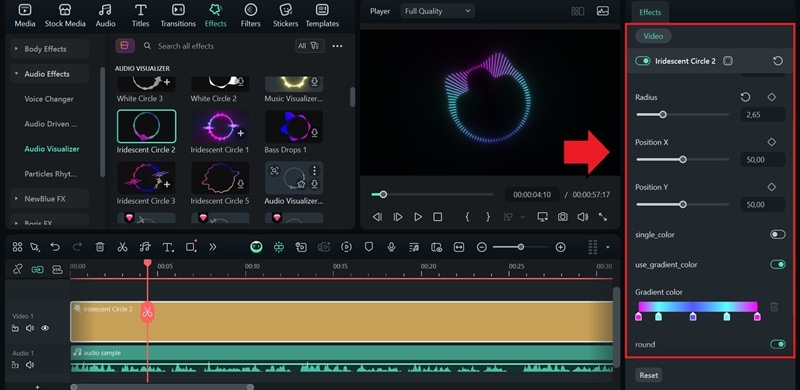
How to Create an Audio Visualizer in Filmora
Make sure Filmora is installed on your computer. Then, follow the steps below to create an audio visualizer in Filmora.
Visualizing your audio doesn't have to be limited to making an audio spectrum. You can go further and turn your sound into a complete video using Filmora's AI Audio-to-Video Generator.
NOTE: Filmora's AI Audio-to-Video Generator works best with story-based or historical audio.
This feature automatically visualizes and transforms your track into a full video with captions, visuals, and beat-synced animations, in just a few minutes. It's the fastest way to bring your audio to life and share it as a professional-looking video across different platforms.

Part 4. Where to Use Audio Visualizers in Your Content
Now that you know how to create music visualizers in Premiere Pro and Filmora, you can use them for different types of content:
1. Podcast
Although podcasts mostly focus on audio, when you put them on platforms that favor visual content like YouTube, you may need something that keeps the screen alive. In that case, an audio visualizer can create movement and rhythm that match your voice or background music.
The moving visuals add energy to the listening experience and give your listeners something to watch while they listen. Even without video footage, you can still hook your audience.

2. Music Video
For musicians or producers, audio visualizers are often used as quick music videos. They react to every beat, rhythm, and drop, making your track visually appealing even without a filmed performance. One popular example is the Arctic Monkeys' Do I Wanna Know? music video. Its simple Audio Waveform became instantly recognizable despite its minimal visuals.
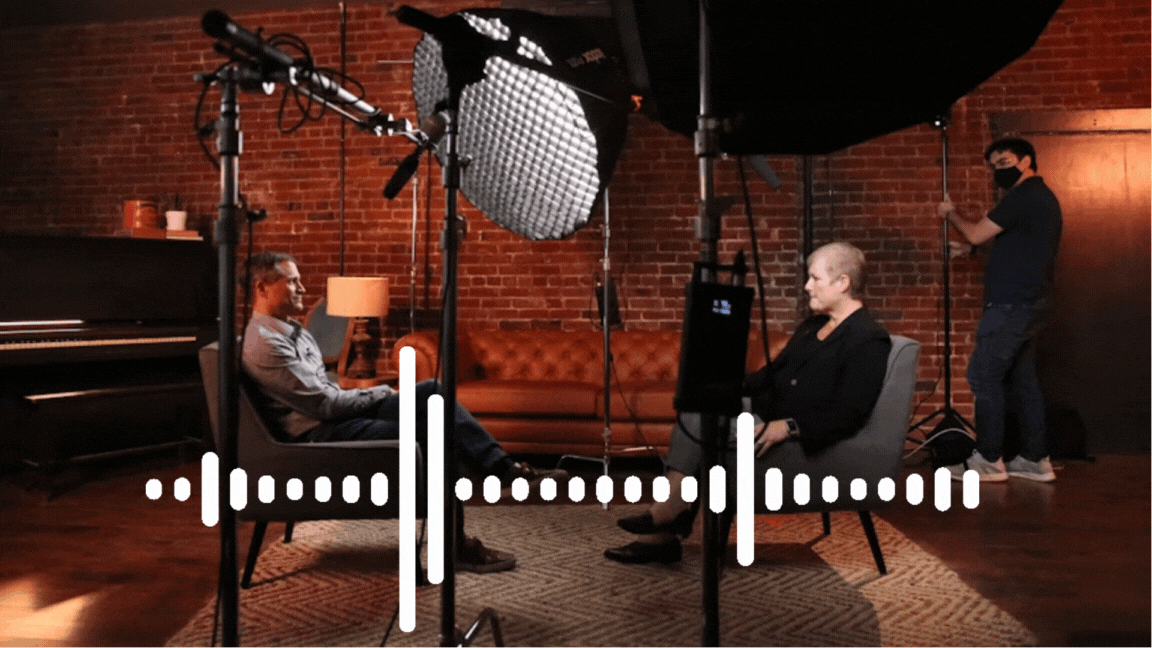
3. Interviews
There are times when recording video for interviews isn't possible or practical, such as during remote sessions or audio-only recordings. In those situations, an audio visualizer helps fill the empty screen by adding motion that follows the conversation.
You can let the audience know who's speaking by pairing the visualizer with name tags, profile pictures, or subtle waveform animations for each speaker.
Conclusion
Audio visualizers can give any audio content a visual identity, so it's not just sound. You can make one either by using Premiere Pro together with After Effects, creating it directly inside Premiere Pro using a plugin, or downloading a Premiere Pro audio visualizer template online.
Another option is to use a simpler editor like Filmora, which already includes built-in audio visualizer templates. You can apply them instantly without installing plugins or switching between software. Plus, Filmora's AI generators make it easy to visualize your audio and turn it into a complete video ready to share in just minutes.
