

 TL;DR:
ClipFinder is a web-based AI tool that automatically processes videos up to 10 hours long to generate short, captioned social media clips tailored for fast content repurposing.
● The platform operates on a pay-as-you-go model based solely on the uploaded video's duration, starting with a 1-hour free trial and scaling from $1 per hour for basic transcript scans to $6 per hour for advanced AI scene detection.
● Key limitations include fixed auto-reframing that cannot dynamically follow moving subjects, a maximum export resolution capped at 1080p, and manual editing tools restricted to basic text-prompt commands.
● ClipFinder is optimized for streamers and podcasters seeking immediate highlight extraction, while Wondershare Filmora serves as a necessary alternative for creators requiring 4K exports, dynamic subject tracking, AI translation for 23 languages, and full-timeline editing.
Ask AI for a summary
 ChatGPT
 Perplexity
 Gemini
 Claude
 Grok
Grok
Ampere Analysis reported that 63% of the global online population now watches short-form video content such as TikTok, Shorts, and Reels every day. That’s why many creators repurpose their long-form YouTube videos into short clips for social media.
The good news is you no longer need to spend hours searching for the best parts manually. AI tools can now handle that process. One popular tool is ClipFinder. It can analyze videos up to 10 hours long and automatically identify the most engaging highlights.
But how does it work? Check out ClipFinder's features, how to clip long videos, pricing, and its pros and cons in this article.

Part 1. What Is ClipFinder and What Can You Do With It?
ClipFinder is a platform designed to turn long videos into short, ready-to-share clips using AI. People love how easy it is to use. You can just upload your video or paste a supported link, and the platform will analyze the content to find the most engaging moments.
It is especially useful for creators who want to repurpose podcasts, interviews, live streams, or other long-form content. You can upload the generated clips to TikTok, YouTube Shorts, and Instagram Reels. These short clips can help attract viewers to watch the full version.
Let’s take a closer look at what ClipFinder can do.
ClipFinder Main Features
1. Detect Engaging Highlights and Keep the Subject in Frame
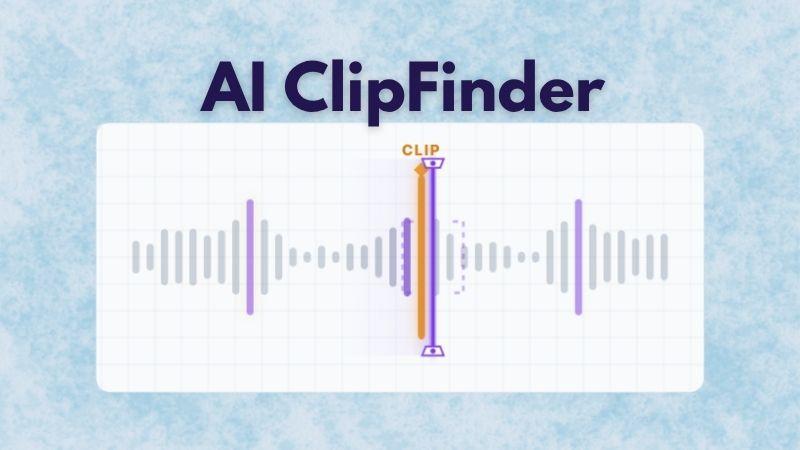
AI ClipFinder will automatically scan your video and identify the most interesting moments. This saves you from spending hours reviewing the footage one by one. It can also turn long videos into several short clips automatically.
The Auto Reframe feature adjusts the frame from a 16:9 format into a 9:16 output. It keeps faces, objects, or the main subject in focus and clearly visible.
2. Generate Captions Instantly for Your Clips
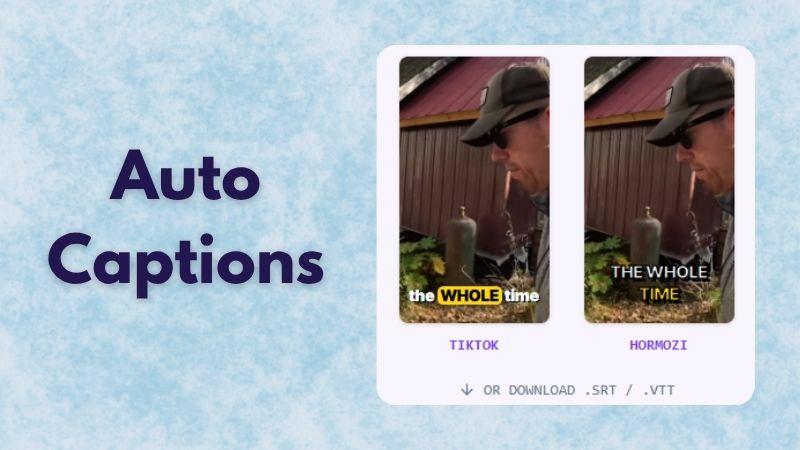
Captions can improve accessibility and help keep viewers engaged, and you don’t need to worry about typing captions manually. ClipFinder includes built-in captions, allowing the AI to generate captions automatically for selected clips. It offers styles similar to TikTok word-highlight captions or bold outline creator-style captions, making the text easier to read on screen.
3. Enhance Voice Quality and Remove Noise
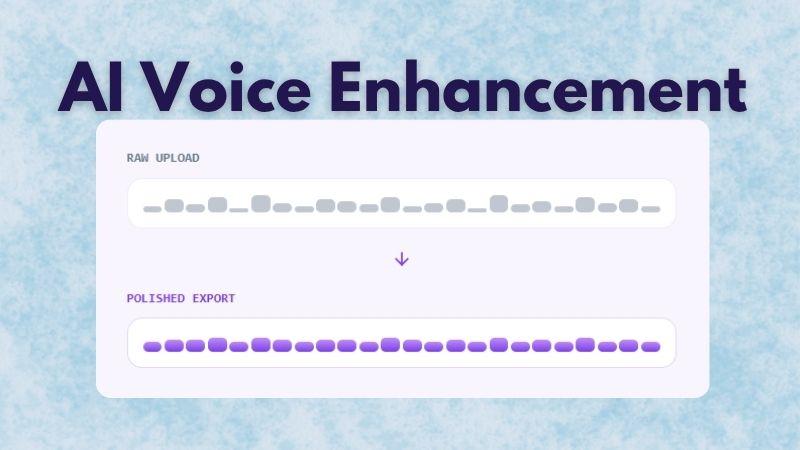
ClipFinder also comes with AI Voice Enhancement. This feature helps improve audio clarity and reduce unwanted distractions in your clips. When you export a clip, the tool automatically improves the audio by lowering noise, balancing sound levels, and making speech easier to hear. Even webcam or phone recordings sound much smoother.
4. Make Quick Edits Using Text Commands
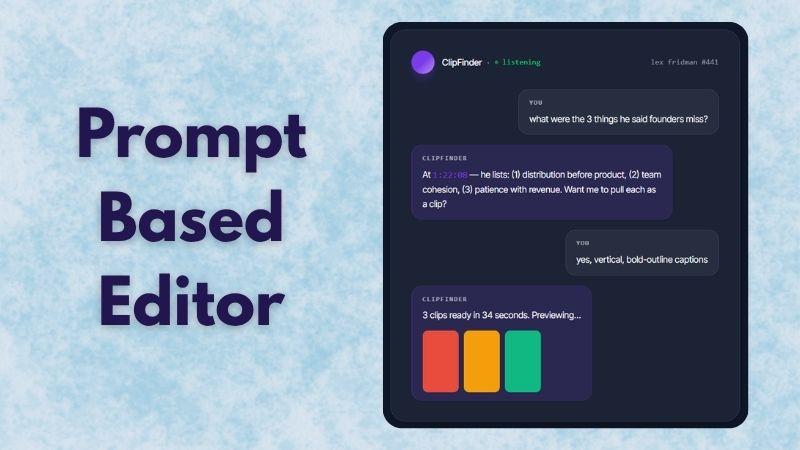
There is also a built-in editor inside ClipFinder, but it works a little differently from regular editors. You can edit specific parts of the highlighted videos using prompts. For example, you can type “the part where he explains pricing,” and ClipFinder will identify that scene and prepare it for editing. You can even ask questions about the video content and get answers directly.
5. Share Clips Directly to Social Platforms
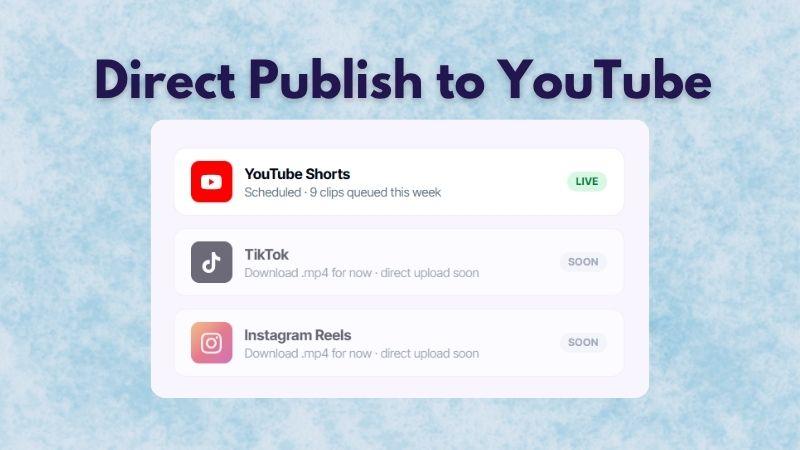
ClipFinder is now connected to YouTube. Once your clips are ready, you can upload them directly to YouTube Shorts without leaving the platform. Meanwhile, TikTok and Instagram Reels integrations are planned for future updates.
Where to Access ClipFinder?
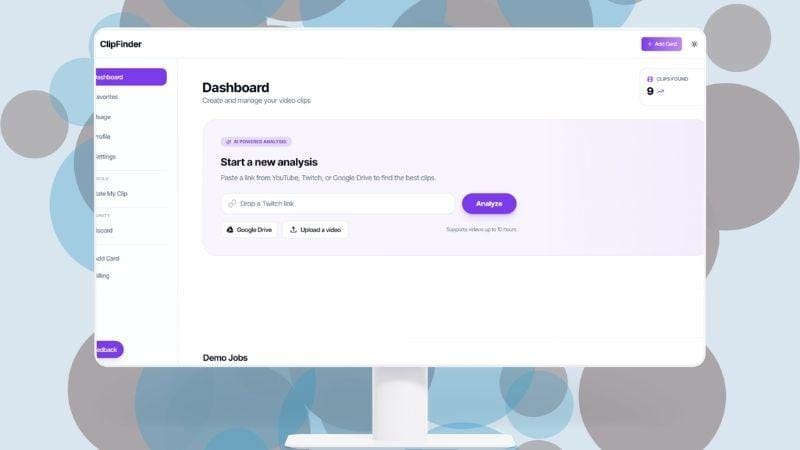
At this point, you may be wondering how to access ClipFinder. Well, the platform is available online, so you can use it directly from your browser without downloading any desktop software.
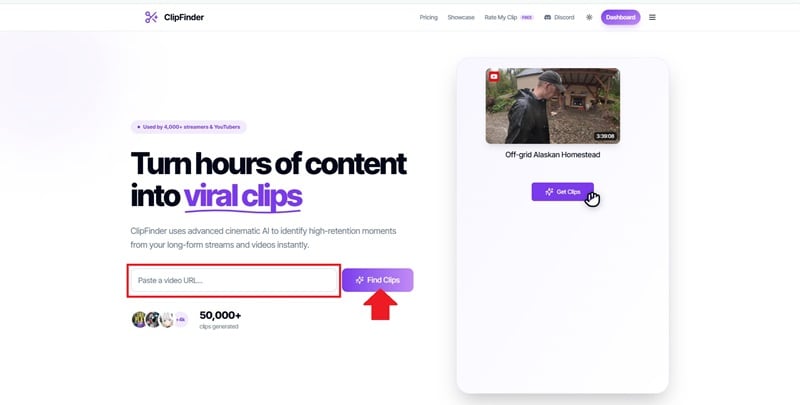
Step 1: Go to the ClipFinder Website
Visit https://clipfinder.org/. Paste your video link and click Find Clips.
Step 2: Sign Up or Log In
If you don’t have an account yet, you can register using Google or email. If you already have one, just log in.

Once you are in, you will be directed to the ClipFinder dashboard, where you can start exploring features and analyzing your video.
Part 2. How Much Does ClipFinder Cost?
We have explored ClipFinder features and what the platform can do. The next question is: Is ClipFinder free? Technically, no. However, new users can try the platform through a 1-hour free trial to see how it works.
After the free hour runs out, you need to pay to continue. ClipFinder uses a pay-as-you-go system, where pricing is based on the length of the video you upload.
Here is a breakdown of the ClipFinder pricing plans.
| Aspect | Lite | Standard | Pro |
| Price | $1 per hour | $2 per hour | $6 per hour |
| AI Analysis | Analyzes the transcript only | Watches and analyzes the full video | More advanced AI that detects subtle moments |
| Extracted Clips | Unlimited | Unlimited | Unlimited |
| Language Support | 20+ | 20+ | 20+ |
| Video Quality | 1080p | 1080p | 1080p |
|
Show More
Show Less
|
|||
As you can see, the biggest difference between plans is the depth of AI analysis. The more expensive the plan, the better the AI becomes at understanding content and identifying nuanced moments.
If you are still wondering what “per hour” means, it refers to your video duration. For example, if you pick the Standard plan at $2 per hour and upload a 3-hour video, the total cost will be $6, no matter how many short clips are created.
Part 3. How to Turn Long Videos into Shorts with ClipFinder
To continue our review, let’s see how ClipFinder performs. In this example, we’ll test both Lite and Standard analysis on the same video.
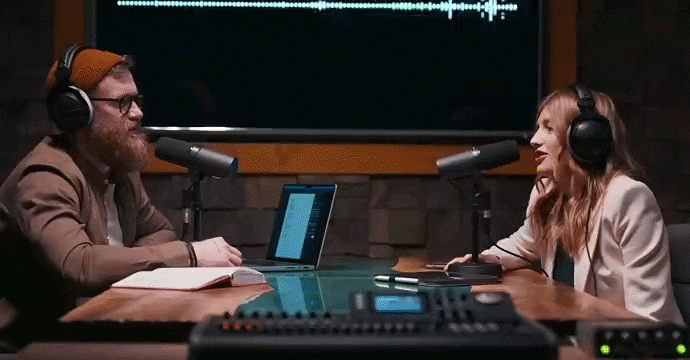
We’ll use a podcast episode from the Call Her Daddy YouTube channel, hosted by Alex Cooper, with Demi Lovato as the guest. The video is around 47 minutes long.
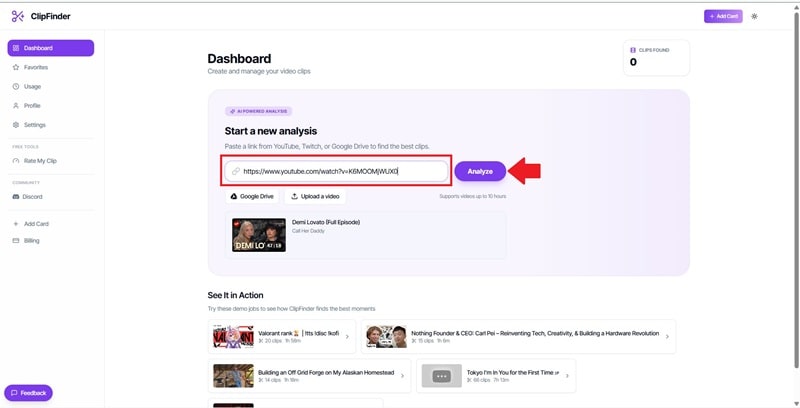
Step 1: Paste a Video Link or Upload a File
Log in to ClipFinder. From the main dashboard, paste your video link or upload a file. Then, click Analyze.
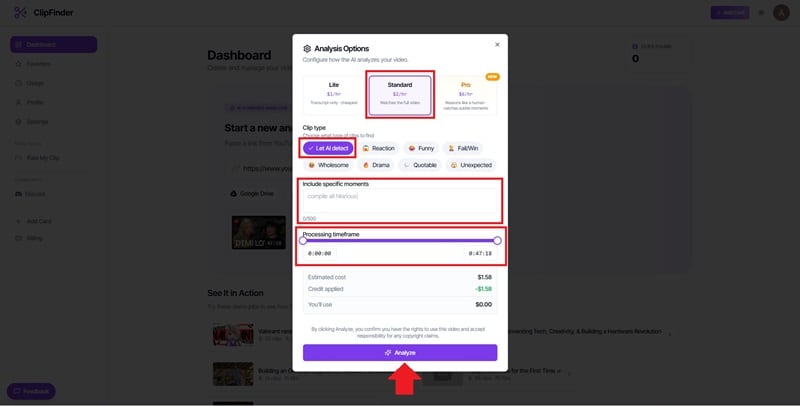
Step 2: Set Analysis Options
Select your analysis option. You can adjust several settings, such as the clip style, add prompts to highlight specific moments, and set the processing range for the video.
Next, click Analyze to start the clipping process.
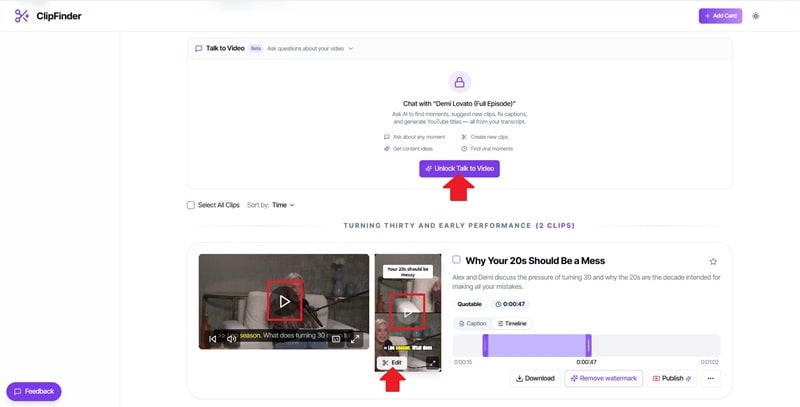
Step 3: Preview and Edit Clips
Review the generated clips and select one. To preview, click the play button on the video.
To edit, click Unlock Talk to Video if you want to edit using prompts, or select Edit on the portrait version. In this example, we’ll continue by editing the portrait clip.
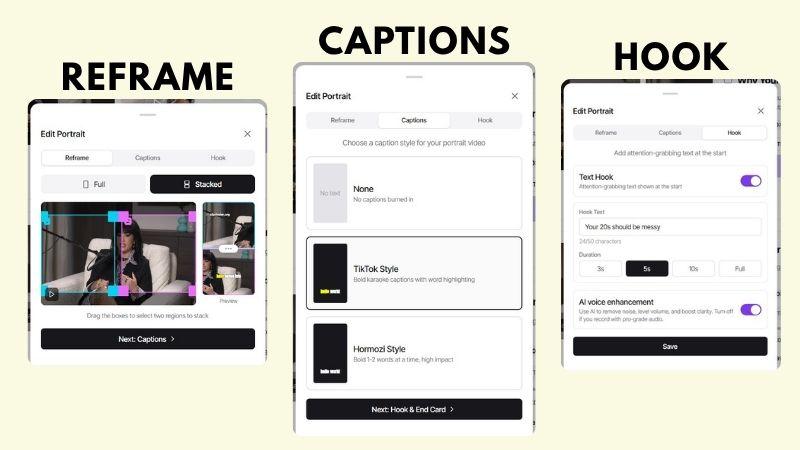
Step 4: Edit the Portrait Video
Choose the video layout, either full or stacked. Then, select a caption style.
You can also adjust the hook by editing the title and clip duration. Turn on AI Voice Enhancement to improve audio clarity.
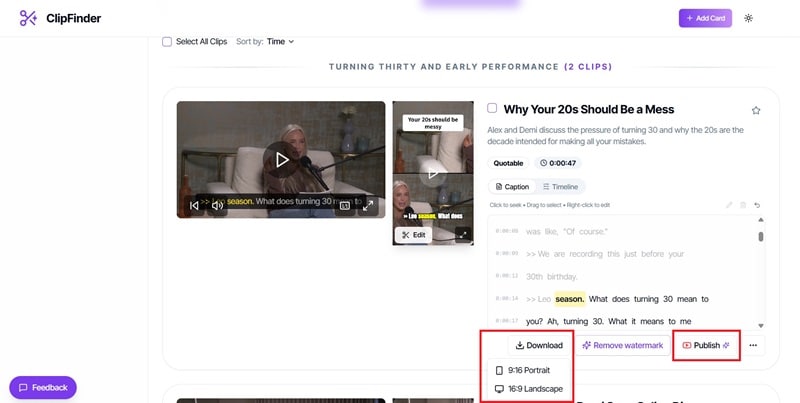
Step 5: Download or Publish Your Video
Once everything is ready, click Download to save the landscape or portrait version. Choose Publish to upload it directly to YouTube.
ClipFinder Lite vs Standard: What’s the Difference?
To see if there’s any real difference, we tested both Lite and Standard on the same video. Turns out, both generated 9 clips, but they differ in processing time and how much content is categorized.
| Category | Lite | Standard |
| Total Cost | $0.79 | $1.58 |
| Processing Time | 6 minutes 40 seconds | 9 minutes 8 seconds |
| Clip Categories | 5 categories | 6 categories |
| Total Extracted Clips | 9 | 9 |
|
Show More
Show Less
|
||
From the 47-minute podcast featuring Alex Cooper and Demi Lovato, both ClipFinder Lite and Standard break the video into several key topics, as shown below.
| Key Topic | Lite | Standard |
| Turning 30 and the pressure of growing up | - | 1 short clip |
| Demi Lovato’s past memories | 1 short clip | 1 short clip |
| Mental health struggles and recovery journey | 2 short clips | 1 long clip |
| Personal challenges and life experiences | 2 short clips | 3 long clips |
| Message for young women | 1 short clip | 1 short clip |
| Demi Lovato’s current life | 3 short clips | 2 short clips |
|
Show More
Show Less
|
||
While both options produce the same number of clips, ClipFinder Standard tends to group content more clearly and capture longer segments, resulting in clips that feel more complete and easier to follow.
Part 4. ClipFinder Review: Pros and Cons
After exploring ClipFinder’s features and testing it in a real workflow, it’s easier to see where it performs well and where it still needs improvement. Let’s find out.
- The platform is easy to understand and navigate. Everything feels straightforward, so you can start using it without a learning curve.
- Even on the ClipFinder Lite plan, the AI can still pick out important moments, which makes it surprisingly useful for a lower-tier option.
- The captions are generated automatically and are accurate enough for most use cases.
- The reframing is not always accurate. If the frame is placed on one side, it stays there from start to end instead of following the subject, which can make parts of the video look awkward or empty.
- Video export is limited to HD, with no option for higher resolutions like 2K or 4K.
- The ClipFinder editing features are minimal and not suitable for detailed or precise editing.
Part 5. A More Complete Alternative: Wondershare Filmora
ClipFinder works well for finding highlights and turning long videos into short clips quickly. However, it also comes with limitations such as 1080p export only, no translation tools, and no full video editor for deeper adjustments.
If you’re looking for a tool that can do more than auto-clipping, Wondershare Filmora is worth considering. It comes with a complete video editor and has a wide range of AI features to help you make a polished video. Let’s explore Filmora features.
Turn Long Videos into Short Clips Instantly
If you’re looking for a tool similar to ClipFinder, Filmora offers Smart Short Clips to automatically turn long videos into shorter content. It provides over 50 templates and layouts, from vertical videos for TikTok to split-screen and collage styles. You can easily adjust the colors, fonts, and layout to match your own style or brand.
Translate Your Videos for a Wider Audience
Filmora also includes an AI Translation tool that supports up to 23 languages with high accuracy. It comes with voice cloning and lip-sync features, so your translated videos still feel natural, as if the speaker is actually speaking that language.

AI Audio Tools to Improve Sound Quality
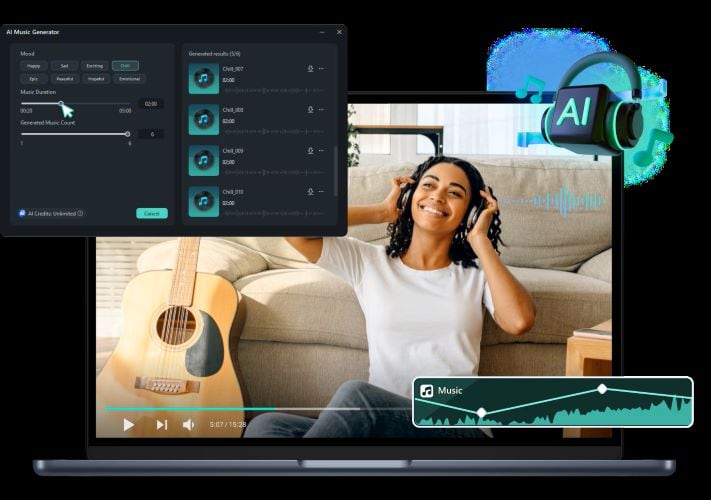
Filmora includes AI tools to clean up audio and improve voice clarity. With AI Voice Enhancer, you can reduce background noise and make your voice sound clearer. If you need extra audio, try the AI Music and Sound Effect Generator to create music or sound effects that fit your video.
Stock Media Library for Supporting Visuals
Filmora also gives you access to a stock media library filled with videos and images. You can use these as B-roll to support what’s being said in your clips, so the visuals don’t feel empty, and the message is easier to understand.

Export Videos in Higher Quality
Filmora gives you more flexibility when exporting videos. You can export in resolutions up to 4K, along with different formats and settings based on your needs.

ClipFinder vs Filmora: A Quick Comparison
Now that we’ve explored what ClipFinder and Filmora can do, it’s easier to compare them side-by-side. This way, you can clearly see the differences and decide which one fits your workflow better.
| Aspect | ClipFinder | Filmora |
| Pricing Model | Pay-as-you-go (per hour of video) | Subscription (monthly/yearly) |
| Main Function | Auto-clipping from long videos | Full video editor with AI tools, including the auto-clipping tool |
| Supported Formats | 16:9, 9:16 | 1:1, 9:16, 4:3, and more |
| Auto Captions | Yes | Yes |
| Caption Styles | 2 styles | 100+ styles |
| Auto Reframe | Fixed framing (single angle) | Dynamic, follows the subject |
| AI Translation | Not available | Supports up to 23 languages |
| Voice Enhancement | Yes | Yes |
| Export Quality | Up to 1080p | Up to 4K |
|
Show More
Show Less
|
||
In the end, whether ClipFinder or Filmora is worth it depends on your needs.
If your main goal is just to quickly cut long videos into short clips, ClipFinder already does the job well. But if you want more control, better quality, translation, or smarter framing, Filmora is the better choice.
Conclusion
It’s easy to see why many creators use ClipFinder. The tools make the clipping process faster by handling the work automatically. A single analysis can generate several short clips, complete with captions and cleaner audio. This allows creators to focus more on making content instead of spending too much time editing.
However, if you want a more advanced tool, Filmora is worth trying. It comes with Smart Short Clips to turn long videos into shorts automatically. Beyond that, Filmora also includes a full video editor to make precise edits. Plus, there are many tools to help create polished videos for social media.
FAQs
-
1. Can I upload videos instead of pasting a link to ClipFinder?
Yes. Once you are logged in, ClipFinder lets you paste links from YouTube, Twitch, or Google Drive. You can also upload a video directly from your device. -
2. How long does ClipFinder analyze my video?
ClipFinder usually needs about 10 to 15 minutes for a 1-hour video, and around 20 to 30 minutes for a 3-hour stream. Processing time can vary depending on the current queue. You will receive an email once it is finished. -
3. Can ClipFinder analyze videos with multiple speakers?
Yes. ClipFinder can analyze videos with multiple speakers, such as interviews, podcasts, panel discussions, webinars, or talk shows. -
4. Can I edit extracted clips inside ClipFinder?
Yes. You can edit the clips using ClipFinder’s built-in editor through text commands or prompts, although the editing tools are mainly for basic changes. -
5. Does ClipFinder add a watermark?
No. ClipFinder exports clips without adding any watermark. -
6. Who is ClipFinder best for?
ClipFinder works best for streamers, podcasters, YouTubers, and social media teams that produce long-form content and need a quicker way to find highlights and make short clips.
