Filmora
Filmora - AI Video Editor
Edit Faster, Smarter and Easier!
OPEN

How to Edit Audio in Final Cut Pro (FCPX): The Ultimate Beginner-to-Pro Guide

Effortlessly create video with AI

  • Various AI editing tools to increase your video creation efficiency.
  • Offer popular templates and royalty-free creative resources.
  • Cross-platform functionality for editing everywhere.
Try It Free Try It Free
qrcode-img
Scan to get the Filmora App
100% Security Verified | No Subscription Required | No Malware
robot TL;DR:

Final Cut Pro (FCPX) provides deep, professional audio control through manual timeline adjustments and the Audio Inspector, while Wondershare Filmora serves as a streamlined alternative for creators needing automated tools to bypass a steep learning curve.
    ● Basic FCPX audio balancing involves dragging horizontal timeline clip lines for volume and using clip handles for fades, while advanced editing requires expanding audio components to isolate channels and applying keyframes for dynamic volume changes.
    ● Managing complex FCPX timelines requires assigning specific roles like dialogue or music to visually separate audio lanes, alongside configuring the Audio Inspector for stereo, mono, or surround sound output based on the project requirements.
    ● Wondershare Filmora is best suited for beginners or creators requiring fast turnarounds, replacing manual FCPX audio processing with automated AI Audio Denoise, equalizer presets, and built-in AI generators for custom music and sound effects.


Ask AI for a summary

Mastering audio editing in Final Cut Pro is essential for professional video results. This guide will walk you through everything, from simple volume adjustments and fade transitions to using the powerful Audio Inspector for complex FCPX projects. Read on to learn all the essential steps for your Final Cut Pro audio workflow.

Final Cut Pro (or Final Cut Pro X) includes a complete set of audio tools for different needs. You can make quick changes like adjusting volume or add more advanced edits with effects and detailed controls. With these options, Final Cut Pro audio editing can take your projects to a higher level of quality.

For today's topic, you will learn how to handle basic clip-level edits and move into advanced features using the Audio Inspector. We will also recommend an easier option, which helps beginners or busy creators work faster on audio without losing quality.
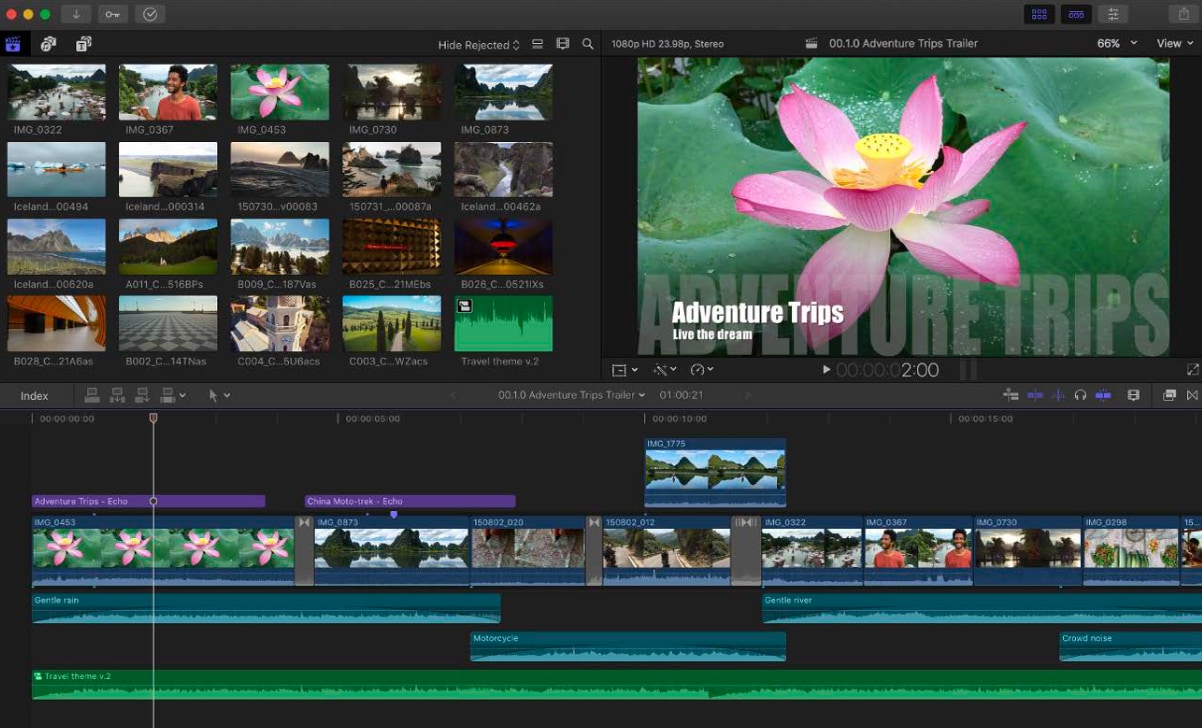
final cut pro audio editing

Method 1: Basic Clip-Level Audio Editing in Final Cut Pro

Basic edits are the foundation of Final Cut Pro audio editing. These tools are quick to apply and solve common issues like unbalanced levels, abrupt transitions, or distracting background sounds.

If you are starting with how to edit audio in Final Cut Pro, clip-level adjustments provide a strong base before moving into advanced features.
Step 1
Adjust Volume in the Timeline
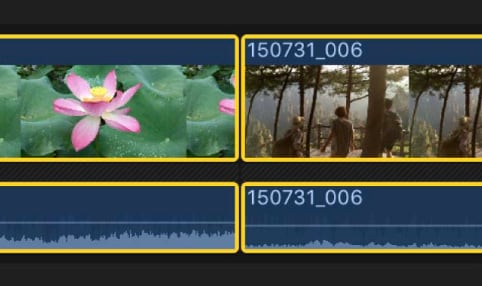
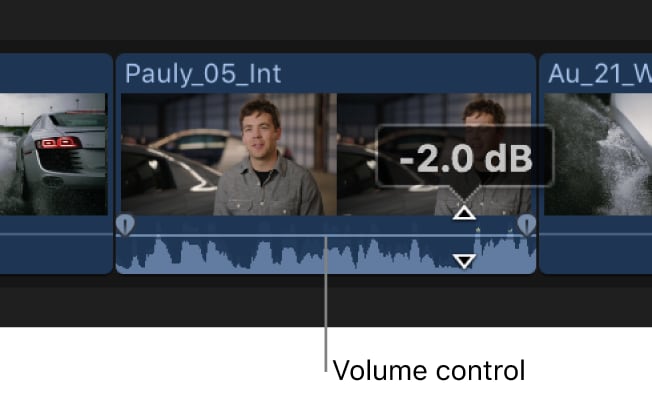
Each clip includes a horizontal line that represents audio levels. Drag it upward to increase volume or downward to reduce it. This helps balance dialogue, music, and effects for a clean Final Cut Pro mix.
final cut pro volume control
Step 2
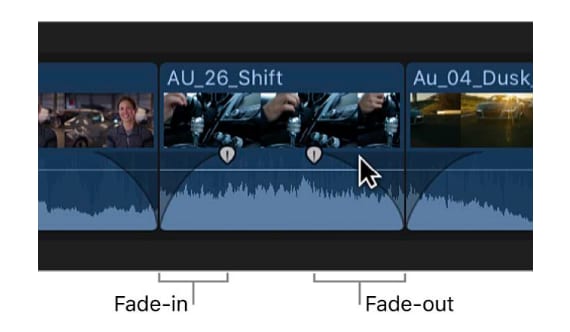
Add Fade-In and Fade-Out
Use the fade handles at the clip's start and end to create smooth transitions. Fade-ins help introduce background music, while fade-outs provide natural scene endings.
final cut pro fade in and fade out
Step 3
Use Crossfades Between Clips
Apply a crossfade when two clips overlap to merge their sounds seamlessly. This technique eliminates abrupt transitions and ensures smooth, professional-quality audio blending.
final cut pro crossfades
Step 4
Mute or Solo Tracks
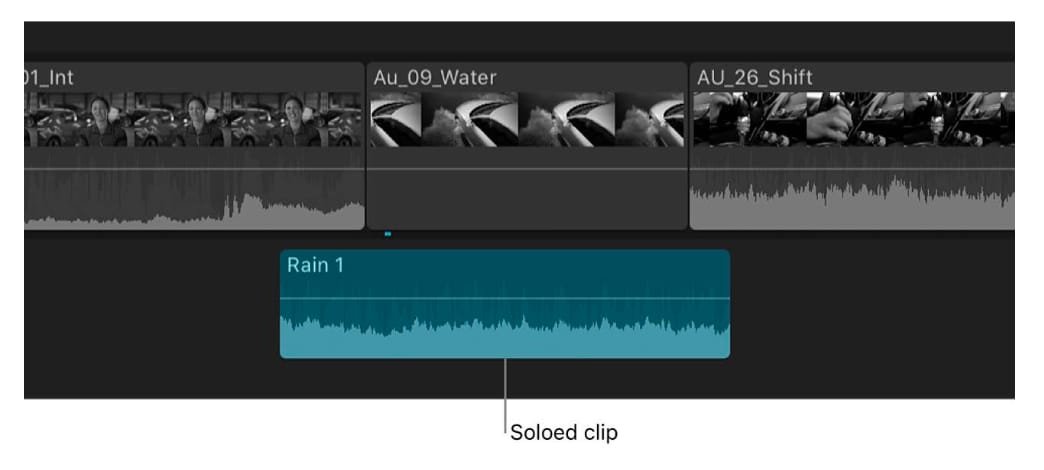
Mute temporarily silences a clip, while Solo isolates one track for focused listening. These tools are useful for diagnosing audio issues or fine-tuning individual elements in your mix.
final cut pro solo tracks
Step 5
Adjust Pan and Balance
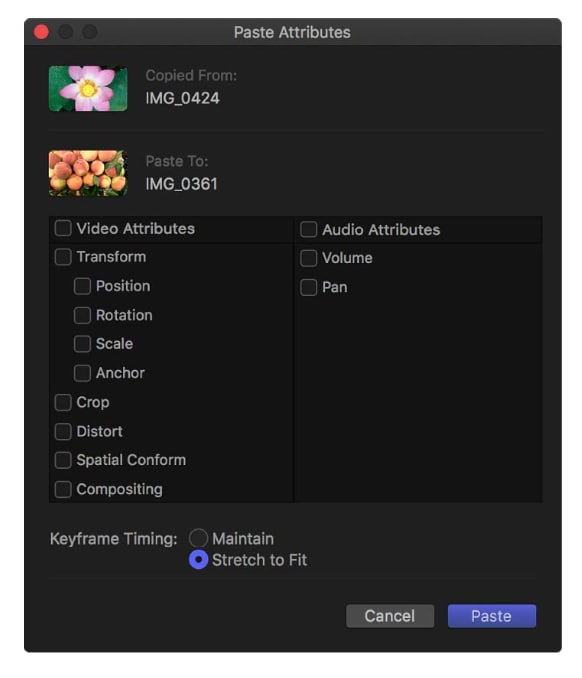
Use the pan control to move audio between left and right speakers, and adjust balance for even distribution. This adds space and clarity to your Final Cut Pro audio mix.
final cut pro panning

Method 2: Advanced Audio Editing with Final Cut Pro's Audio Inspector and Roles

After learning the basics, you can take Final Cut Pro audio editing further using the Audio Inspector and expanded audio components. These advanced tools provide detailed control over levels, effects, and output settings.

For more complex productions, Final Cut Pro X audio editing also ensures your mix is polished and professional.
Step 1
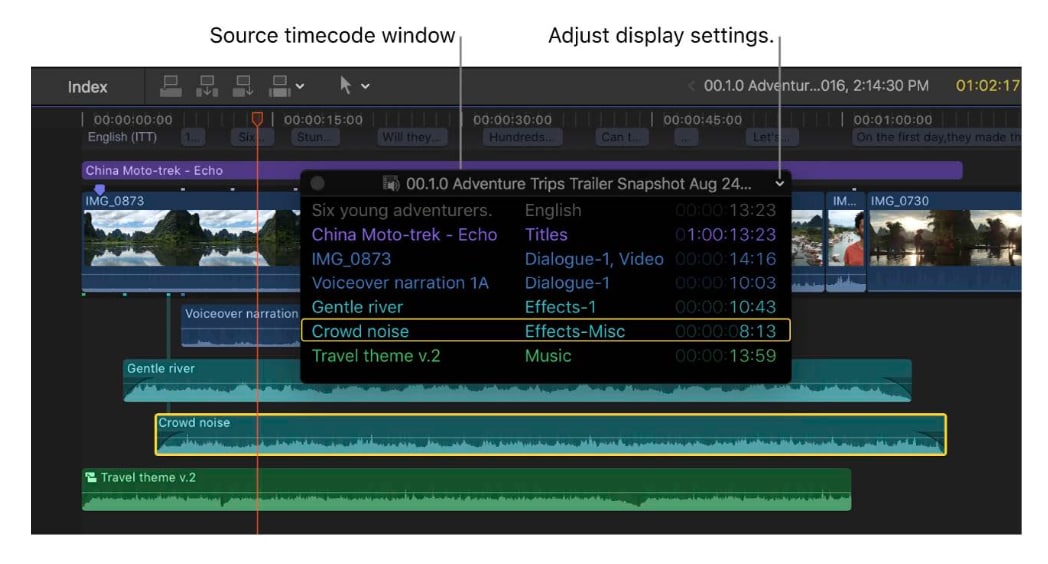
Expand Audio Components for Detailed Control
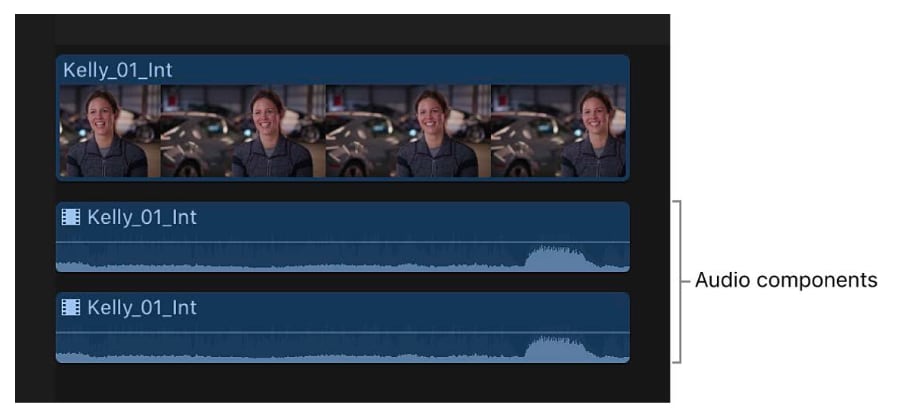
A clip may contain multiple channels, such as left and right dialogue, background noise, or music tracks. Expanding audio components allows you to edit each one independently—ideal for removing unwanted sounds or balancing layers in a complex mix.
final cut pro audio component
Step 2
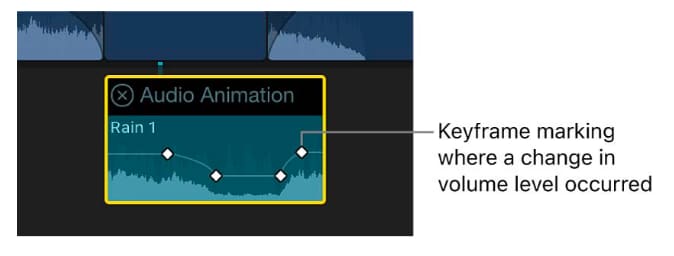
Use Keyframes for Dynamic Changes
Keyframes enable gradual changes in audio over time. For instance, lower background music volume during dialogue, then raise it afterward. This keeps voices clear while preserving the overall energy of your Final Cut Pro timeline.
final cut pro keyframes
Step 3
Apply Audio Effects
Final Cut Pro includes built-in effects like EQ, noise reduction, and reverb. EQ balances frequencies, noise reduction removes hums or static, and reverb adds space for a more natural sound—together enhancing your project's professional quality.
final cut pro audio effect
Step 4
Configure Stereo, Mono, or Surround Channels
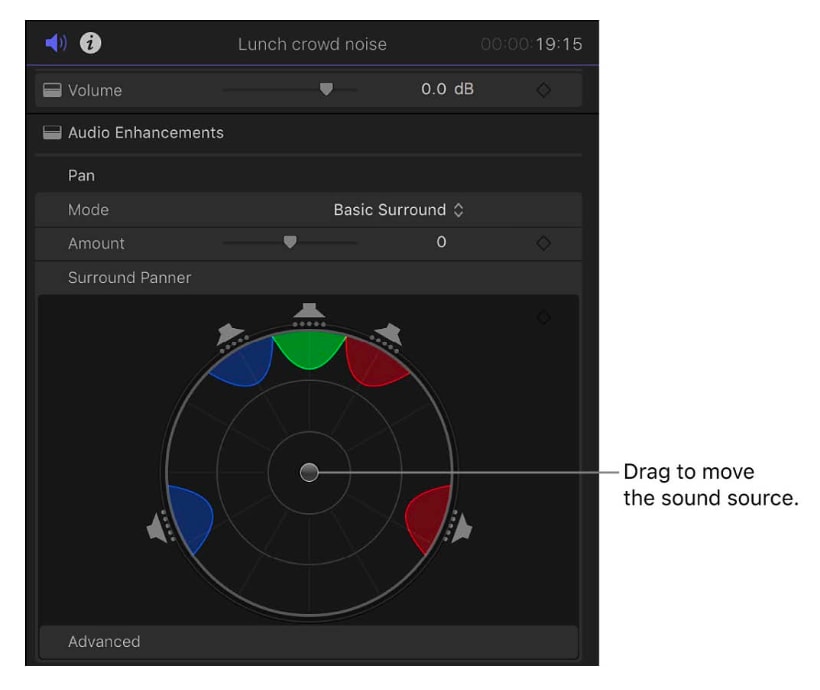
The Audio Inspector lets you switch between stereo, mono, or surround sound depending on your project. Choosing the right setup ensures consistent playback for online publishing, studio presentation, or immersive surround experiences.
final cut pro audio inspector
Step 5
Organize Audio with Roles and Lanes
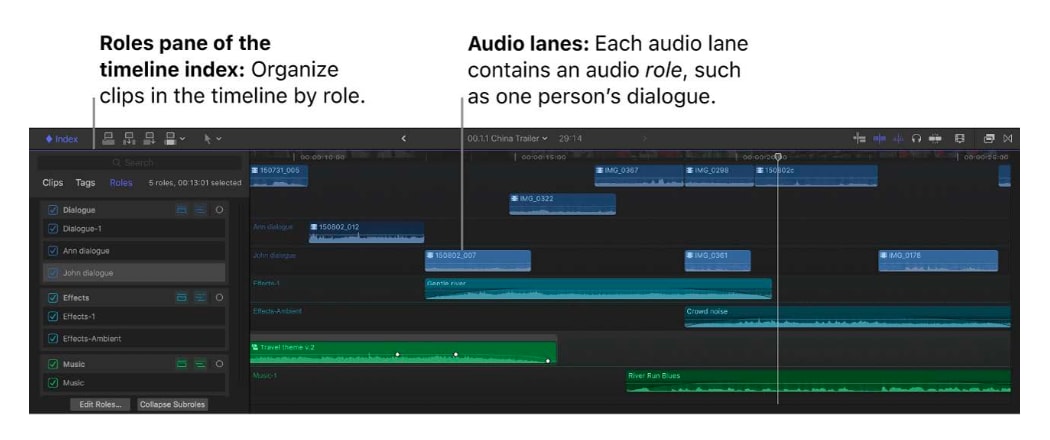
Assigning roles such as dialogue, music, or effects helps organize clips by type. Audio lanes visually separate these roles in the timeline, making large projects easier to manage and keeping your workflow efficient.
final cut pro organize audio

Best Alternative to Final Cut Pro for Simple Audio Editing

Try It Free Try It Free
qrcode-img
Scan to get the Filmora App
secure-icon Secure Download

While Final Cut Pro audio editing is exceptionally powerful, its advanced features often create a steep learning curve. For creators who need professional results without the complexity of FCPX, or want to clean background noise faster, Wondershare Filmora is a practical and intuitive alternative. It's designed to streamline the editing process without sacrificing quality, offering built-in audio tools that simplify common tasks.

1. AI Audio Denoise

AI Audio Denoise can automatically detect and remove unwanted background sounds such as fan noise, clicks, or static, improving clarity without manual adjustments.

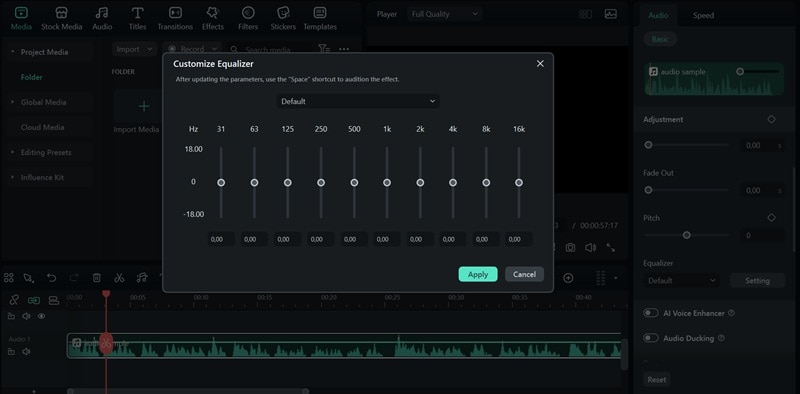
2. Audio Equalizer & Effects

Filmora offers presets and manual controls to balance bass, mid, and treble, along with creative effects that enhance or stylize your sound.
filmora audio equalizer

3. Royalty-Free Music & Sound Effects Library

You can find a wide selection of tracks and effects you can add directly, saving time that would otherwise be spent sourcing external audio. Didn't find the audio you need? Generate it easily depending on the mood and genre you are after with AI Music, or make custom sound effects from text with AI Sound Effect Generator.

These features cover the most common audio editing needs in a straightforward way. For creators who want results without the complexity of Final Cut Pro audio, Filmora delivers speed, simplicity, and professional-quality output.

Conclusion

Learning how to edit audio in Final Cut Pro gives you full control over sound, from quick clip-level adjustments to detailed work in the Audio Inspector. These tools make it possible to balance levels, clean recordings, and apply creative effects for professional results. However, not every project requires advanced editing.

When you need a faster and easier workflow, Filmora offers practical tools like AI Audio Denoise, an equalizer, and a built-in audio library. With both options available, you can choose between the depth of Final Cut Pro audio editing and the simplicity of Filmora.


Filmora
AI Video Editing App & Software
Try It Free Try It Free
qrcode-img
Scan to get the Filmora App
Best tool for making videos anywhere for all creators!
Simplify all your steps in video editing, from the pre-processing to finalizing, Filmora AI stays tuned.

You May Also Like

How to Animate a Stroke in After Effects (Step-by-Step Guide)

Want to animate a stroke in After Effects? This step-by-step guide explains the basics of stroke animation and introduces a simpler option for smooth line animations.

Posted byJames Hogan|2026-06-15 15:31:51
How to Add an Outline or Stroke to Text in Photoshop

You can outline text in Photoshop using Layer Styles or convert it into a vector for more scalable results. Follow simple steps in our article to make your text stand out.

Posted byJames Hogan|2026-06-15 15:31:46
How to Edit Audio in Premiere Pro: Techniques & Tools for Cleaner Sound

Edit audio in Premiere Pro with step-by-step guidance on trimming, volume, effects, noise reduction, mixing, and export for clear, professional sound that enhances every video project.

Posted byJames Hogan|2026-06-15 15:31:34
Complete Guide to Exporting from Adobe Premiere Pro

Exporting from Premiere Pro doesn't have to be confusing. This step-by-step guide breaks down all the key settings so that you can export your videos with perfect quality, quickly and easily.

Posted byJames Hogan|2026-07-17 15:30:48
Step-by-Step Guide on How To Resize Video in Davinci Resolve

Here are a number of tools used in the market to resize the videos. We are going to teach How to resize the video in Davinci Resolve and Fimora.

Posted byJames Hogan|2026-07-17 15:30:32
Best Free Slideshow After Effects Templates: Top 15 Picks

Looking for free After Effects slideshow templates to elevate your projects? Discover the top 15 picks and create stunning slideshows with ease.

Posted byJames Hogan|2026-03-26 17:38:08
Ultimate Tutorial: How To Add a Countdown Timer in OBS

Looking for a detailed guide on how to add a countdown timer in OBS? Read this article to understand OBS and figure out how to add an overlay timer to videos.

Posted byLiza Brown|2026-07-17 15:30:49