

 TL;DR:
Adobe Illustrator lacks a dedicated motion blur tool due to its vector nature, but you can simulate the effect by utilizing the Radial Blur filter for graphics or a manual Stretch method for isolated photos.
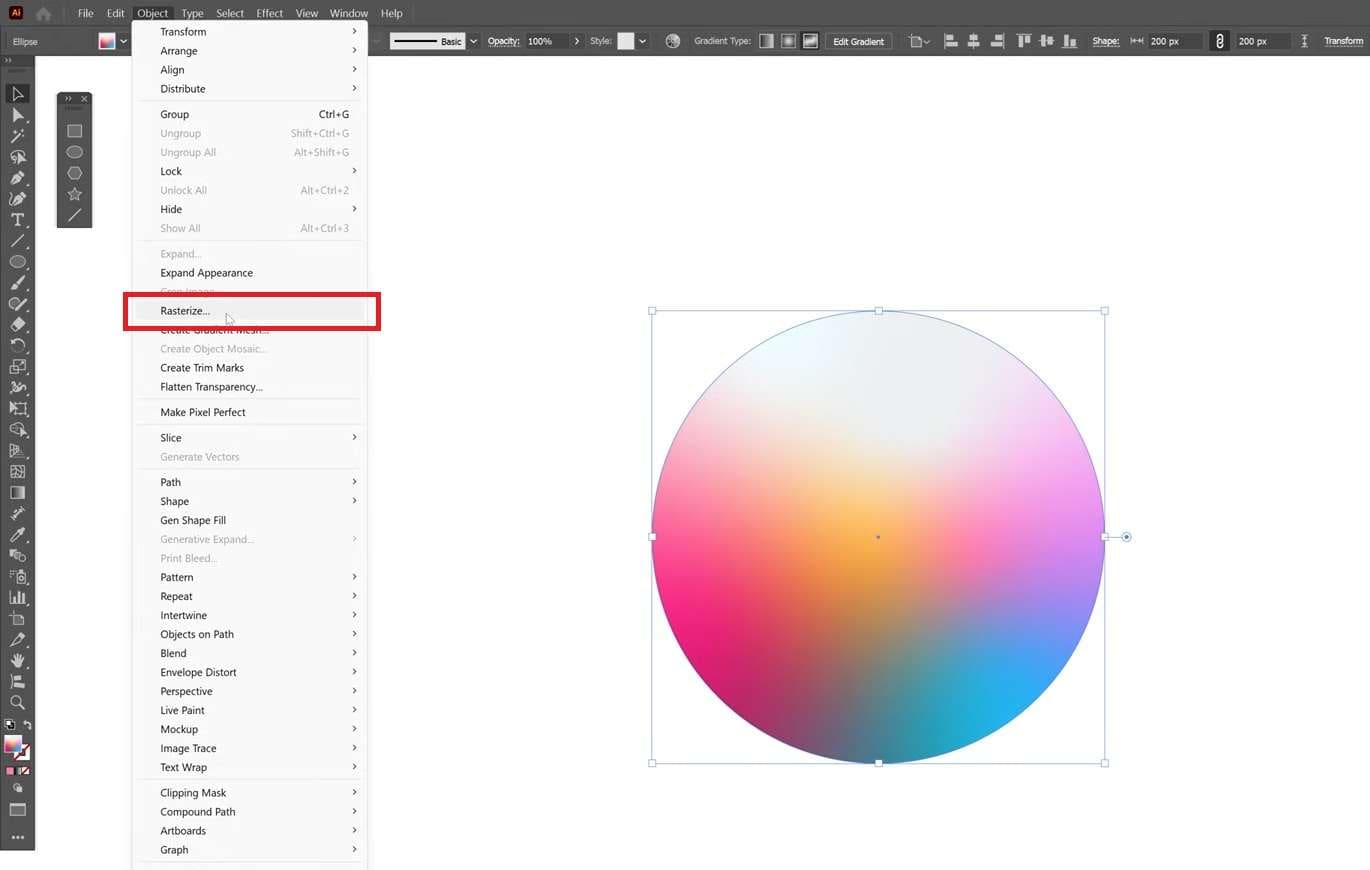
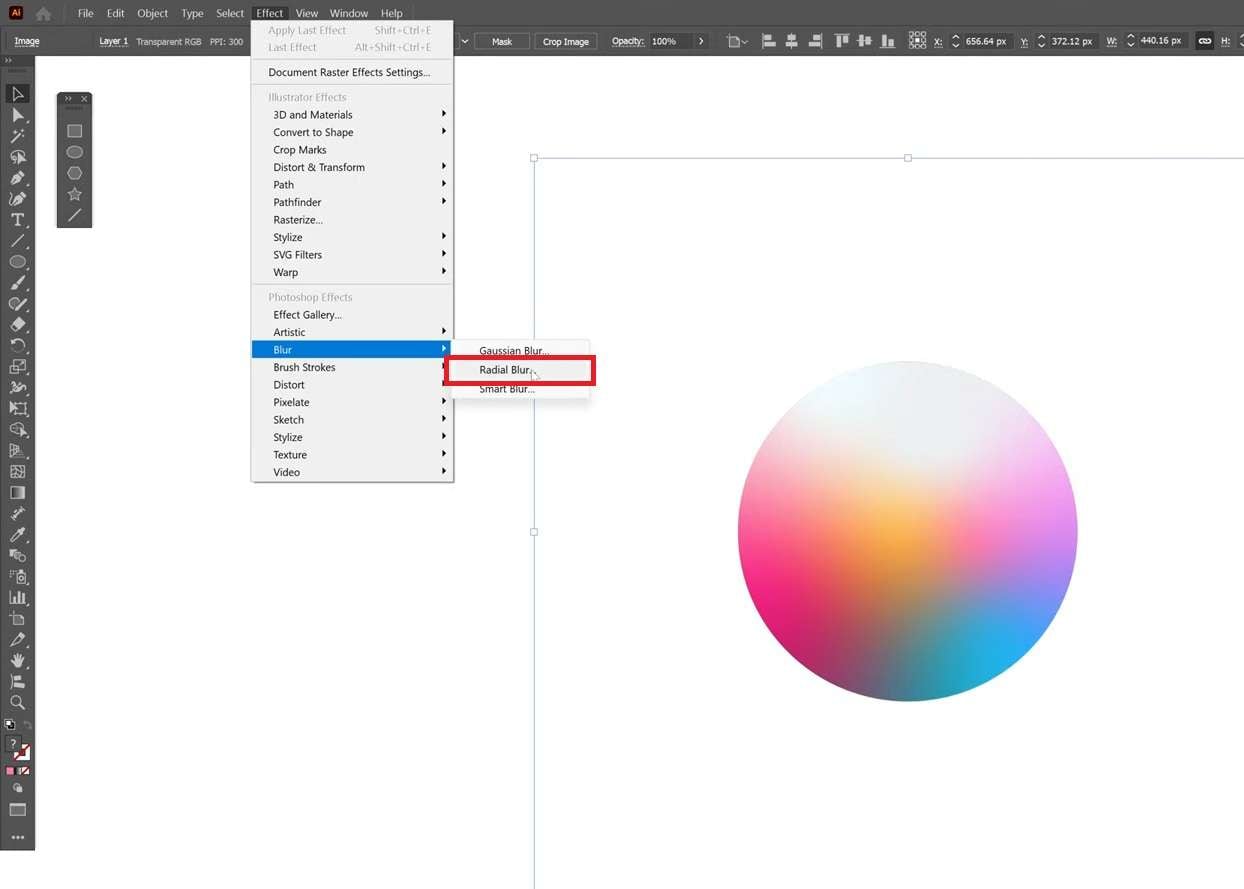
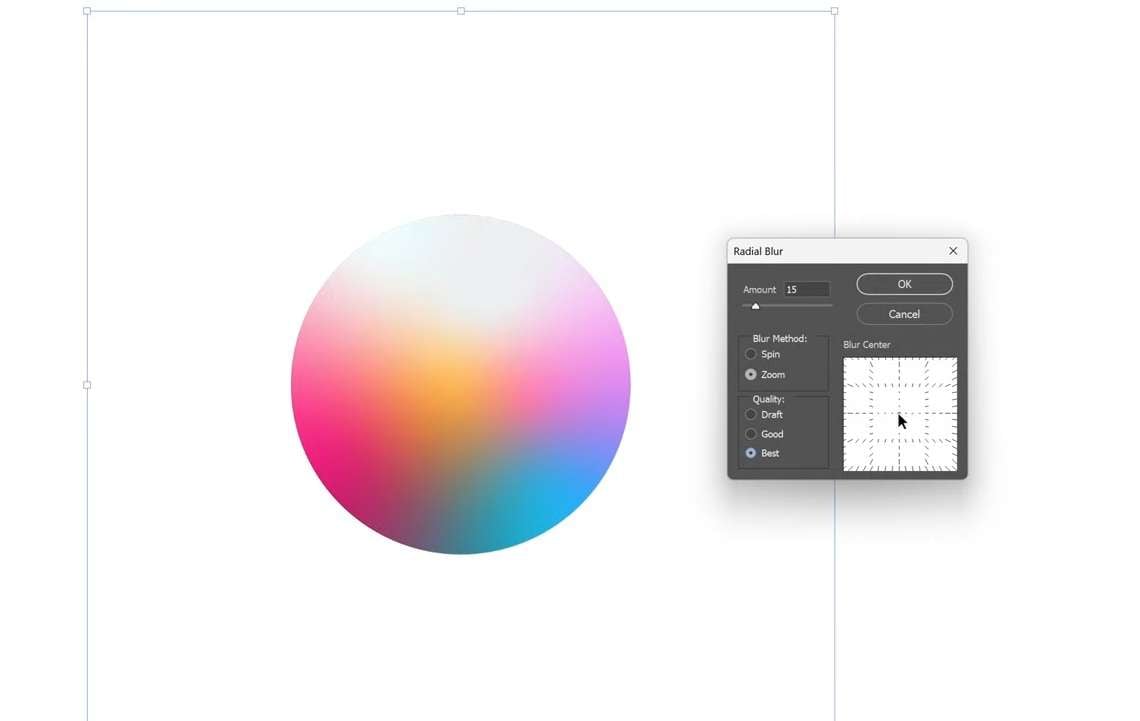
● For vector objects and text, you must first convert them using Object > Rasterize (set to 300ppi with a transparent background) before applying Effect > Blur > Radial Blur to simulate movement via Spin or Zoom methods.
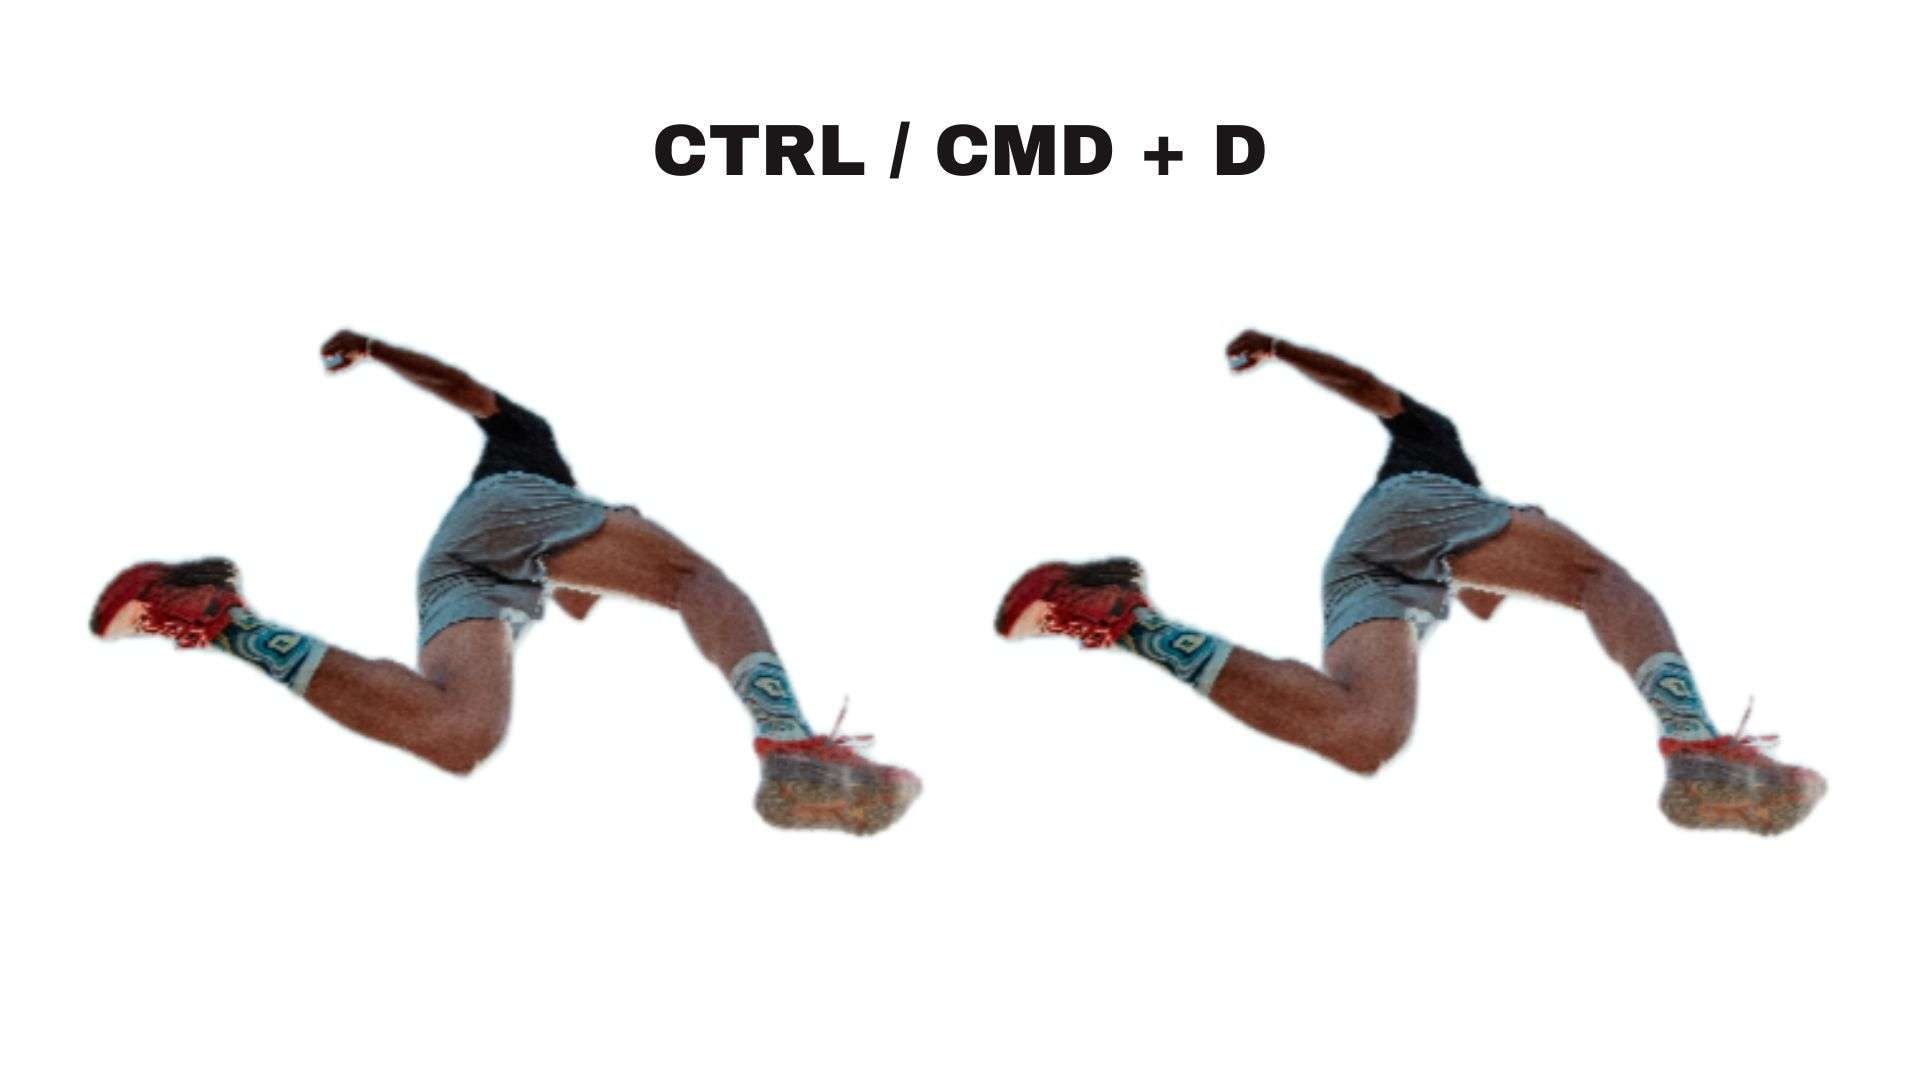
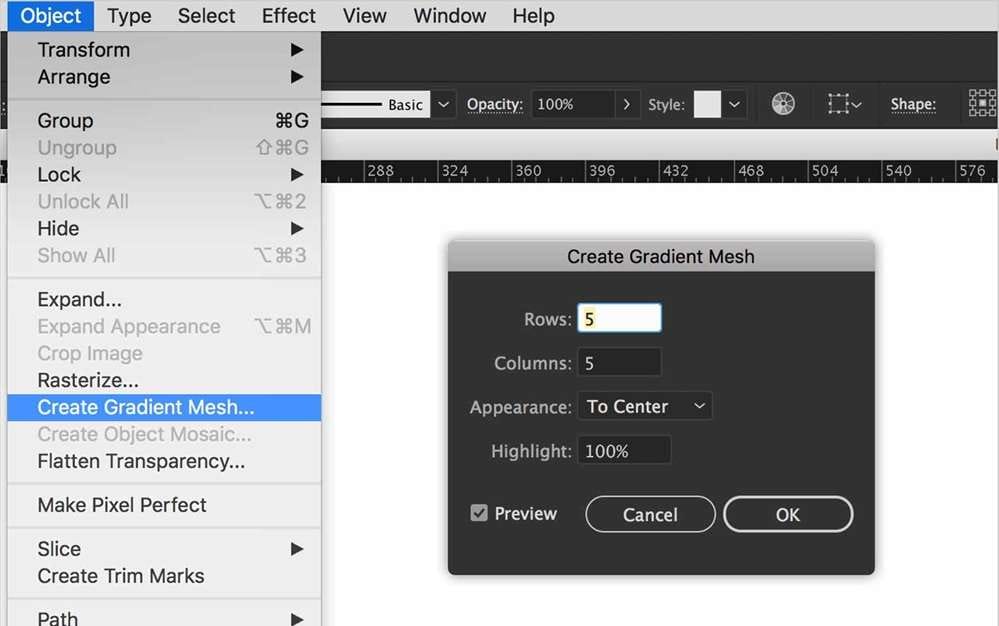
● For imported photos, you must remove the background beforehand, duplicate the transparent PNG, apply Object > Create Gradient Mesh, and stretch the duplicated layer behind the original at a reduced opacity.
● Because Illustrator blurs are resolution-dependent, you must set Document Raster Effects Settings to 300 PPI to prevent pixelated output; users working with video clips should use Wondershare Filmora for its dedicated motion tracking sliders.
Ask AI for a summary
 ChatGPT
 Perplexity
 Gemini
 Claude
 Grok
Grok
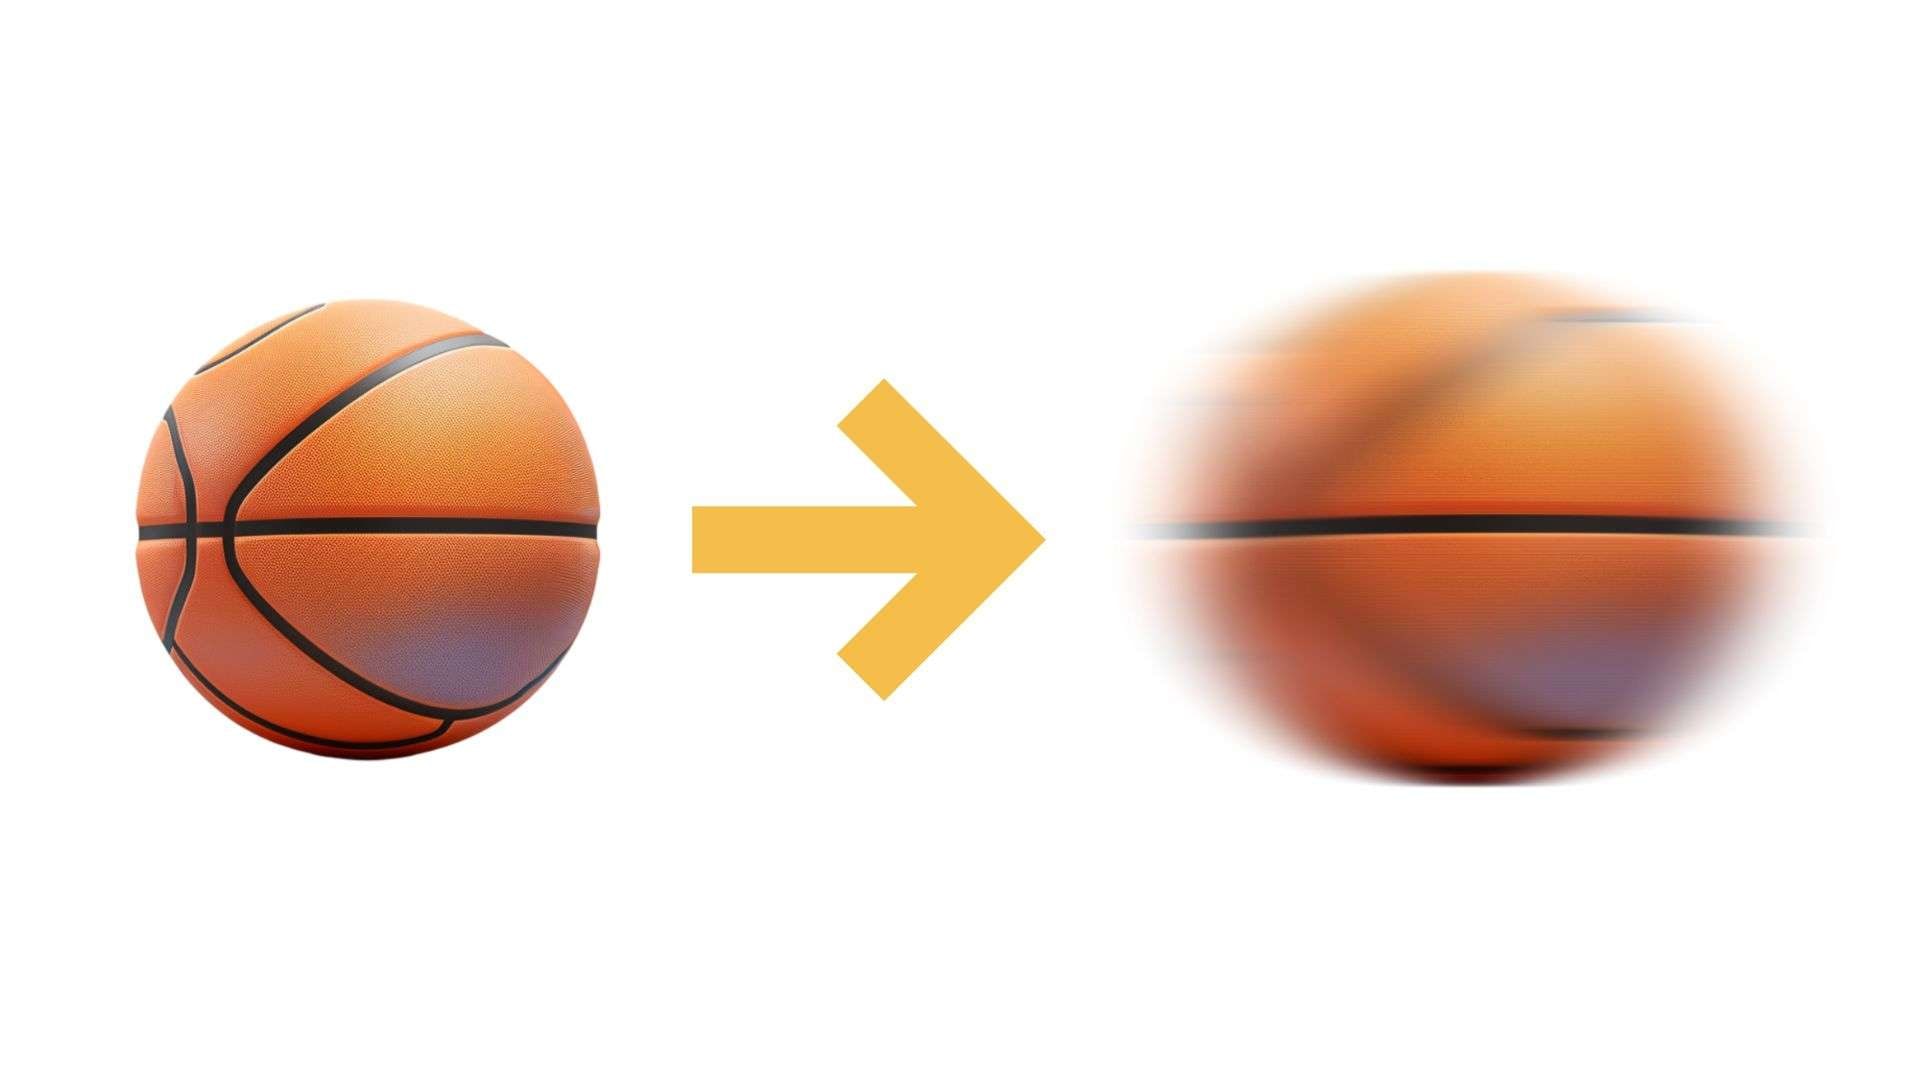
An effect like motion blur is usually native to a raster program like Photoshop, where there's a dedicated filter built specifically for it. But if you are already working in Illustrator, you can actually do it, too, with a little workaround and some settings you need to get right.
If you've been searching for a clean way to add motion blur in Illustrator, this guide walks you through what Illustrator can actually do, how to use it step by step, and what to watch out for along the way.
Part 1. Can Adobe Illustrator Create Motion Blur?
Adobe Illustrator can create a motion blur effect, but not with a dedicated "Motion Blur" tool. Motion blur works by manipulating pixels to produce that streaking effect, but in a vector program like Illustrator, everything is built from paths and anchor points, not pixels.
Illustrator has to work around its own vector nature to pull it off by rasterizing the object at the point of rendering. Even then, your blur options for vector artwork are currently limited to Radial Blur, Gaussian Blur, and Smart Blur.
Part 2. Features and Usability
Just like in any photo editing or graphic design tool, Adobe Illustrator motion blur is usually used for:
- Implying movement. Making a static object look like it's in motion by adding a directional blur trail.
- Creating a sense of speed. Common in automotive, sports, and action-related designs where energy and momentum matter.
- Adding visual interest. Using blur as a stylistic choice to break up a flat composition and draw the eye.
- Faking long-exposure photography. Reproducing the streaking effect you'd get from a slow shutter speed, without needing an actual camera.
To achieve the effect, motion blur in Adobe Illustrator is usually done using Radial Blur. It offers two methods: Spin and Zoom.
- Spin produces a rotational blur like a wheel in motion.
- Zoom creates an expanding blur from a center point, like a camera pushing forward.
If you are editing a placed photo inside Illustrator, you can also create a motion blur effect using the Stretch feature. The result is a smeared, elongated look that approximates a linear motion blur without using a blur filter at all.
Part 3. How to Add Motion Blur in Illustrator
As discussed, we will show you two ways to add motion blur in Adobe Illustrator: the Radial Blur filter, which works on vector objects, and the Stretch method, which works best on photos with the background already removed.
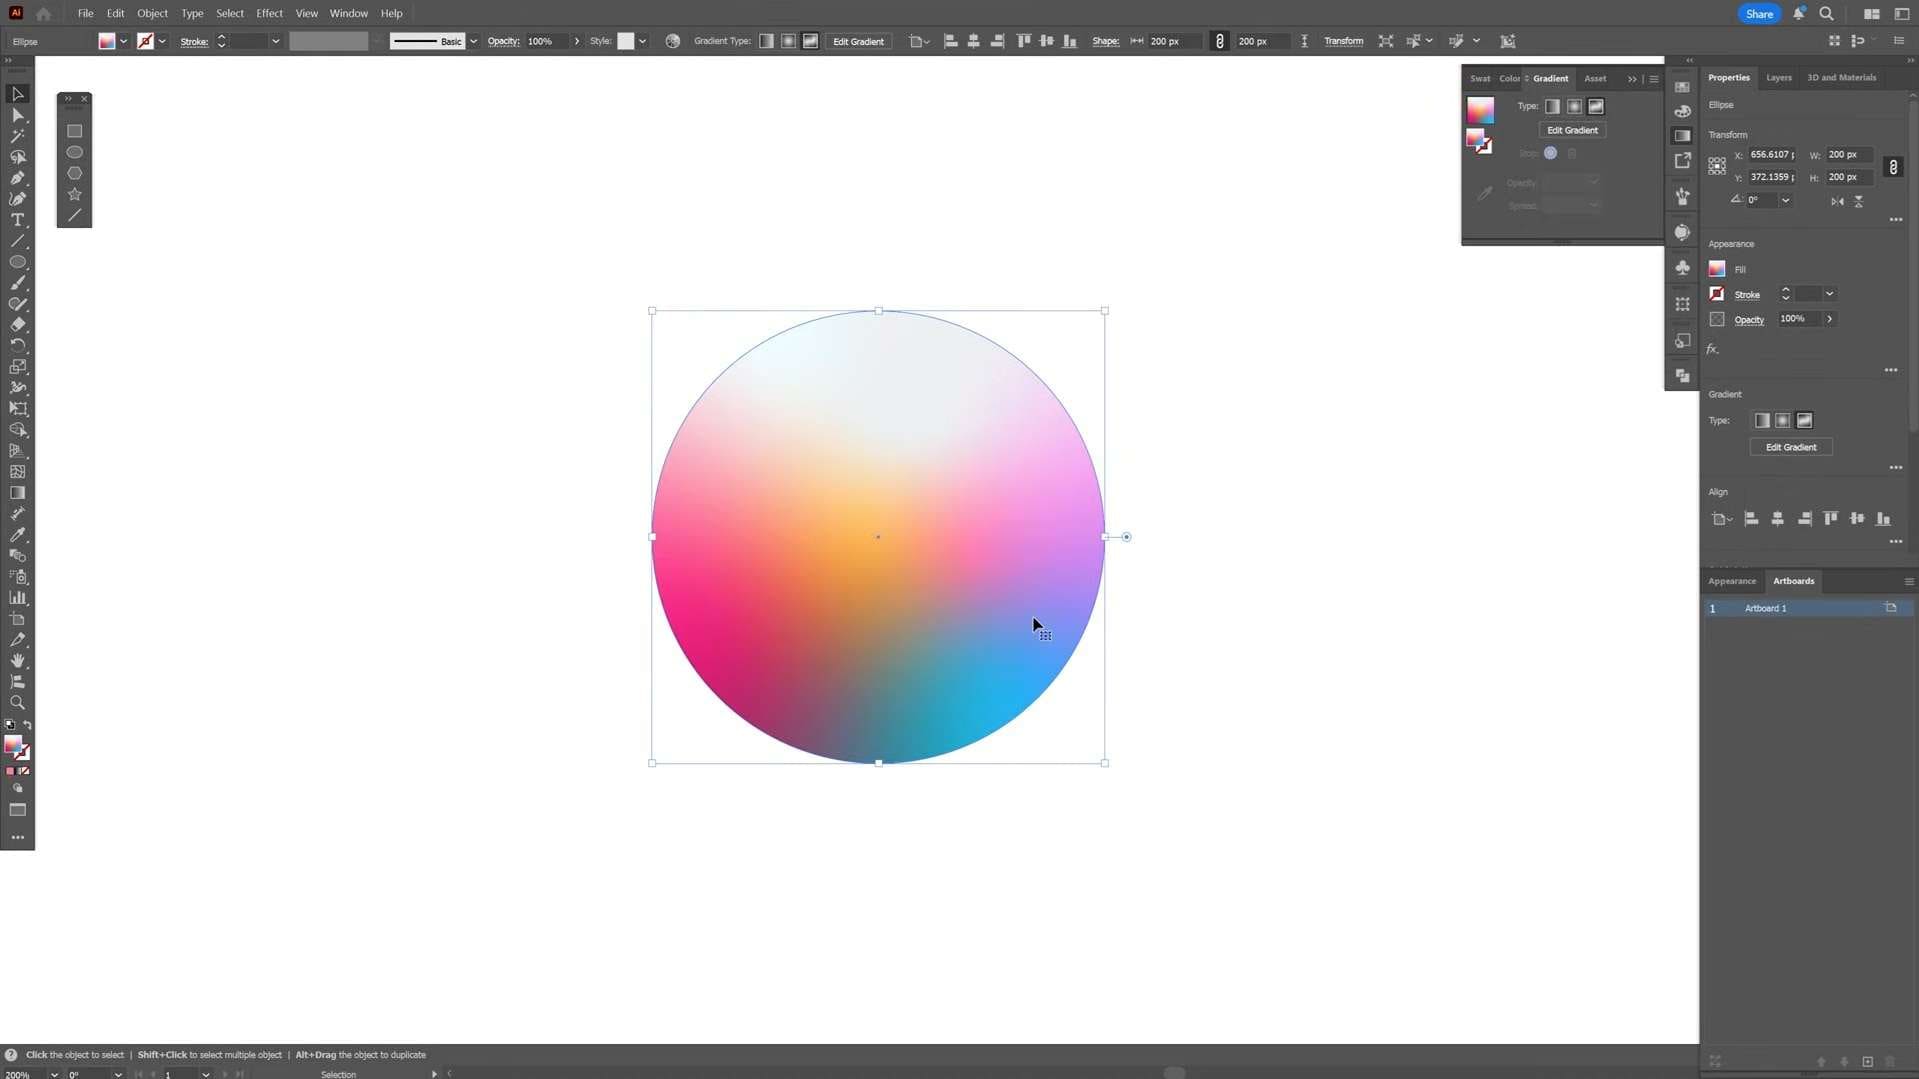
For Vector Object: Using the Radial Blur Effect
For this tutorial, we are going to break down the steps from the PANTER video on YouTube.
- Resolution: 300ppi
- Background: Transparent
- Add Pixel Around Object: Depends on the size of your vector object.
For Photo: Using the Stretch Effect
To use this method, it's best to prepare the photo without a background. If your photo has one, remove it with a background remover first. Then, save it as a PNG with a transparent background and follow the steps below.

Part 4. Pros and Cons
Now that you've got a better idea about how to achieve the motion blur effect in Illustrator, it's easier to weigh what it does well and where it falls short. Whether the trade-off is worth it depends on what you want.
- Works on groups and individual objects, giving you flexibility in how you apply it across a composition.
- No need to rasterize your vector artwork to apply the blur.
- Changes are still reversible.
- No dedicated motion blur tool for pure vectors.
- Limited blur types. Illustrator doesn't have Smart Blur, Lens Blur, or Path Blur like Photoshop does.
- Resolution-dependent output. If your document raster effects settings are set too low, the motion blur will look soft or low-quality when printed or exported at large sizes.
- Not ideal for complex motion effects.
Part 5. Better Alternative of Illustrator for Motion Blur
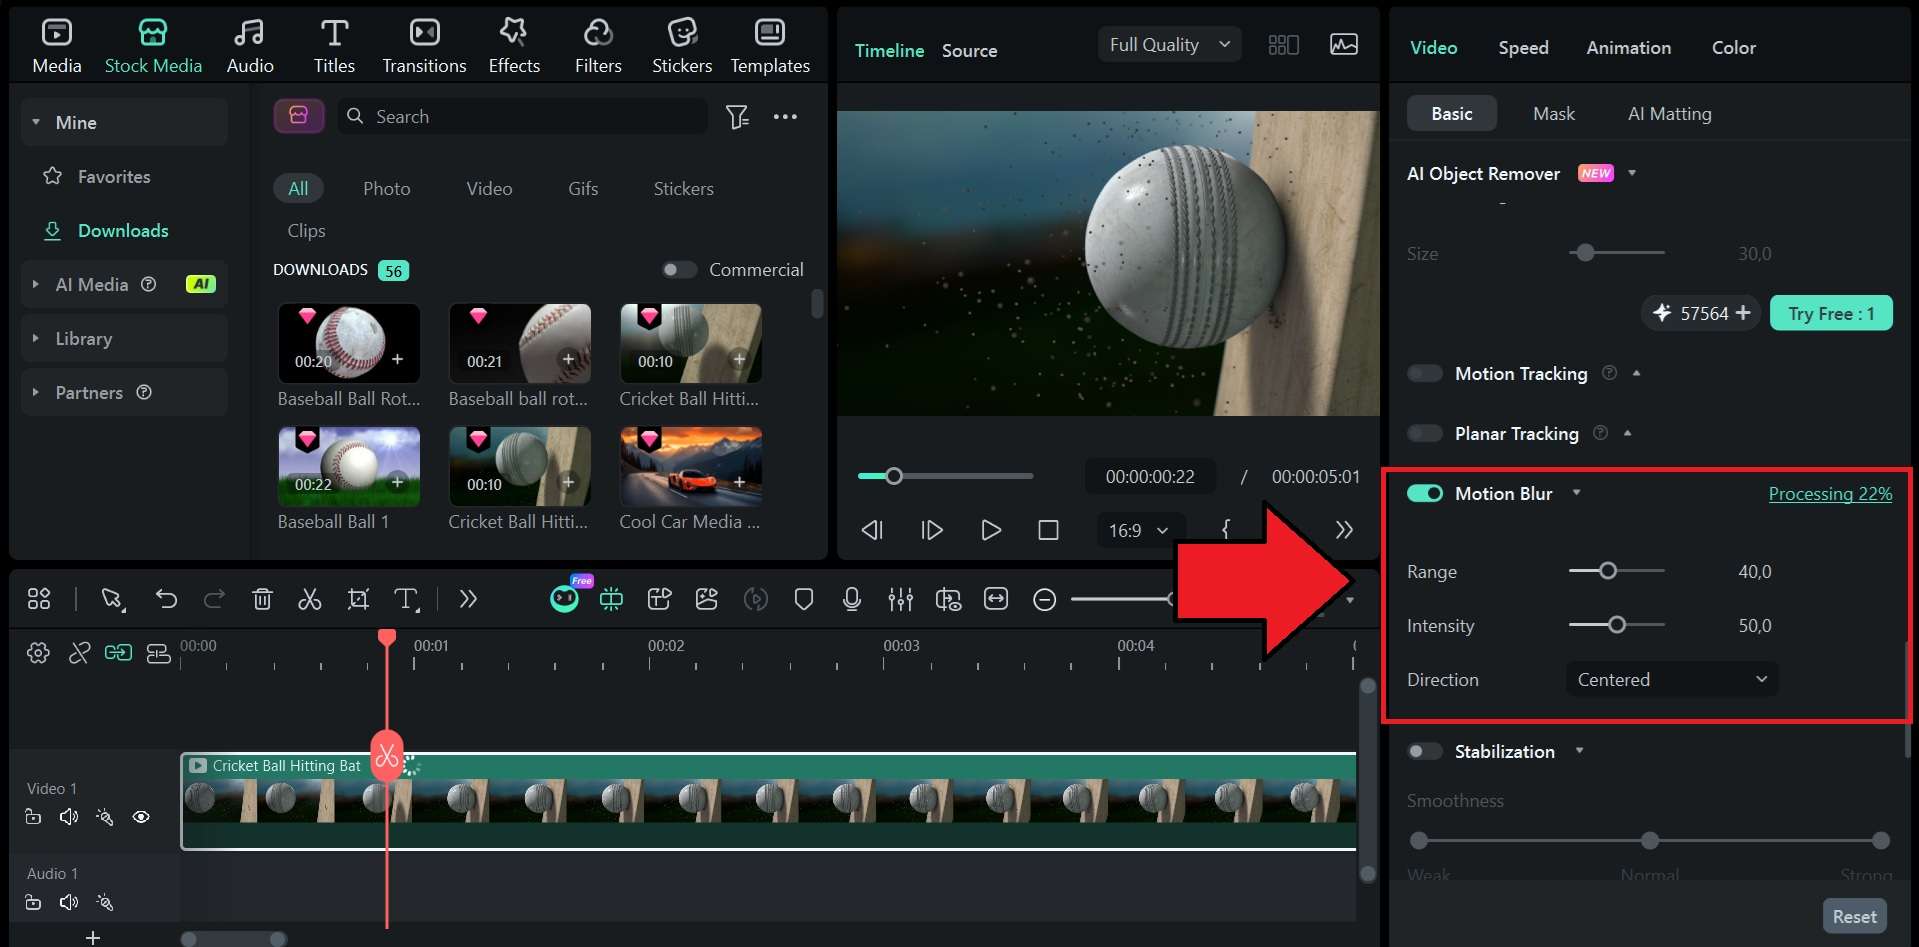
If you are not quite happy with how motion blur in Illustrator works, the next tool worth trying is Wondershare Filmora. Unlike Illustrator, Filmora motion blur feature is built specifically for the effect, particularly for motion clips and footage where the blur has to follow the action to feel convincing.
Applying it is just a click away, and you still have full control over the range, intensity, and direction through simple sliders and selections. Filmora's motion blur smartly detects what in the frame should carry the blur, so the result looks natural even without manual masking.
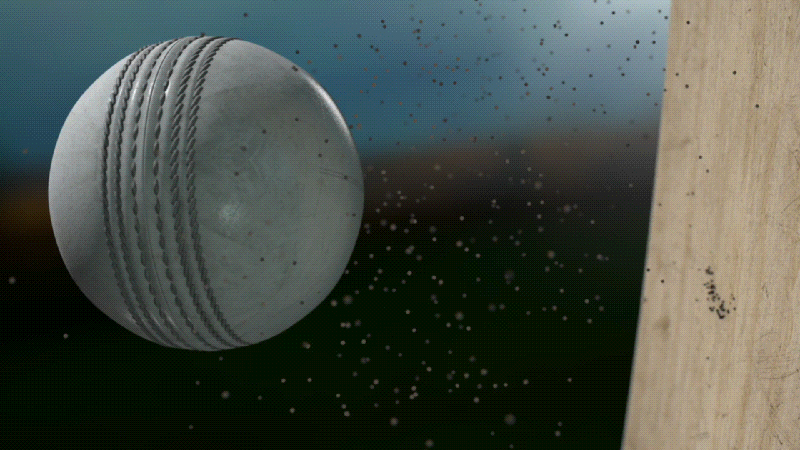
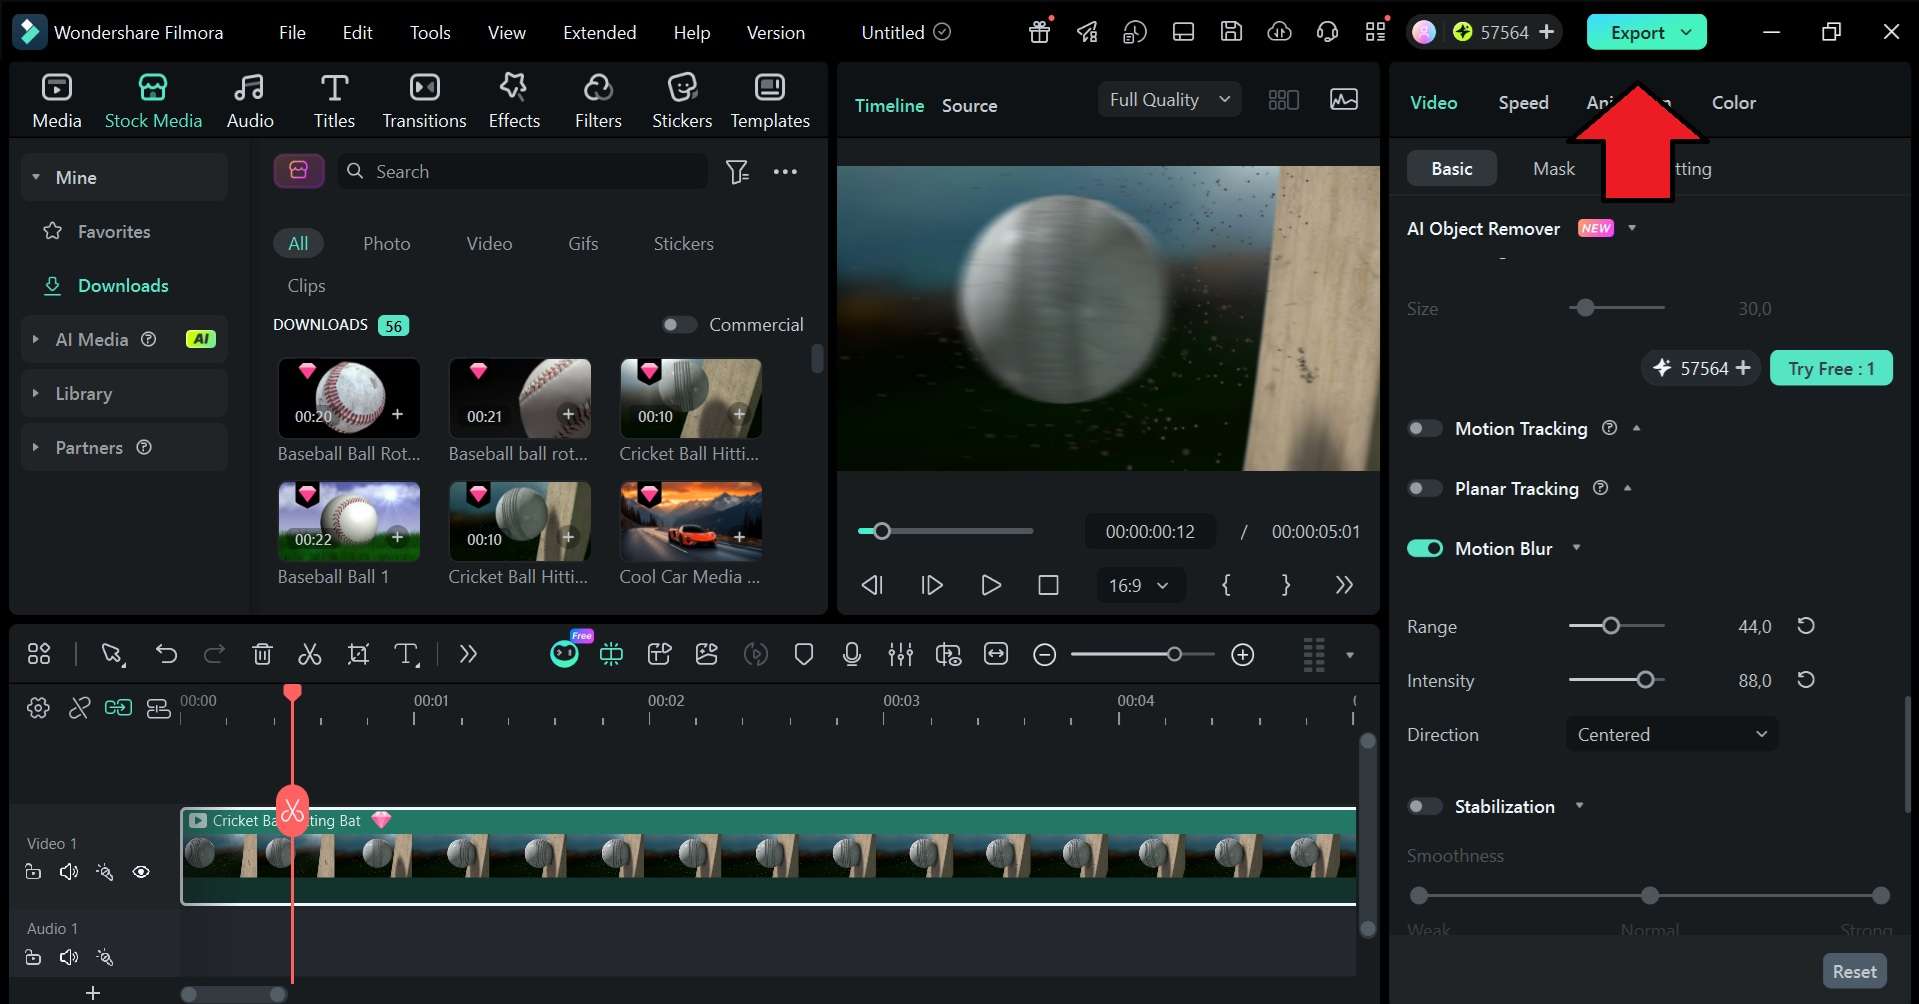
Before (original clip):

After applying motion blur:
How to Add Motion Blur in Filmora

We recommend using Filmora since it gives you more flexibility than Illustrator when it comes to motion blur. Other than the effect being easy to apply, you can still edit your project further by choosing from 100+ different types of effects beyond just motion blur.
Conclusion
Since Illustrator is a vector program, you need to rasterize your object first before applying any blur effect. The motion blur effect in Illustrator can be achieved by either using Radial Blur or the Stretch method, depending on what you're working with.
For something more straightforward, especially if you are working with a motion clip, you can try Filmora. The built-in Motion Blur feature is a one-toggle tool that you can fine-tune through simple sliders for range, intensity, and direction.
FAQs
-
Can you create motion blur in Illustrator using Gaussian Blur?
Gaussian Blur softens an object evenly in all directions, so it doesn't produce the directional streaking that motion blur is known for. For a motion-blur look in Illustrator, Radial Blur is the closest option, as it offers Spin and Zoom methods that simulate movement. -
Can you add motion blur to text in Illustrator?
Yes, but you also need to rasterize the text first. Go to Object > Rasterize, then apply the Radial Blur effect under Effect > Blur > Radial Blur. Keep in mind that once rasterized, the text is no longer editable as a vector. -
Why does my motion blur look pixelated or low quality in Illustrator?
If the blur turns out pixelated in Illustrator, the reason usually comes down to the raster effects settings. If the resolution is set too low, the blur will look soft or rough, especially at larger sizes. To fix it, go to Effect > Document Raster Effects Settings and set the resolution to 300 PPI before applying the blur. -
How to blend and blur in Illustrator?
To blend objects in Illustrator, select two or more objects, then go to Object > Blend > Make. To control how the blend behaves, go to Object > Blend > Blend Options and set the spacing and orientation. After that, you can apply the blur by going to Effect > Blur. The two are separate functions in Illustrator and are not combined into a single tool. -
How do I blur a part of an image in Illustrator?
Illustrator doesn't have a masking-based blur that targets a specific area. As a workaround, you can duplicate the image, apply the blur to the duplicate, and then use a clipping mask (Object > Clipping Mask > Make) to limit where the blur is visible.
