

 TL;DR:
Premiere Pro provides precise audio control through its Parametric EQ and Graphic Equalizer for detailed sound shaping, while Wondershare Filmora serves as a faster alternative with genre-based presets for creators needing instant audio cleanup.
● Premiere Pro requires a steeper learning curve and a US$22.99/mo subscription, making it best suited for audio engineers requiring fine frequency manipulation, whereas Filmora fits vloggers seeking quick adjustments without prior audio knowledge.
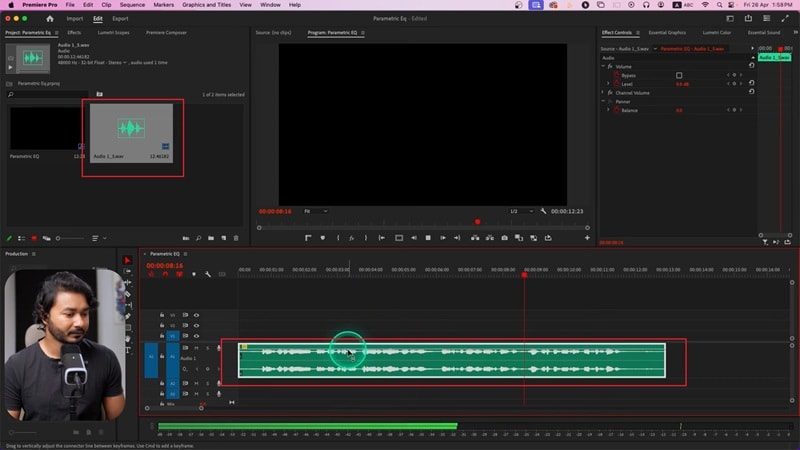
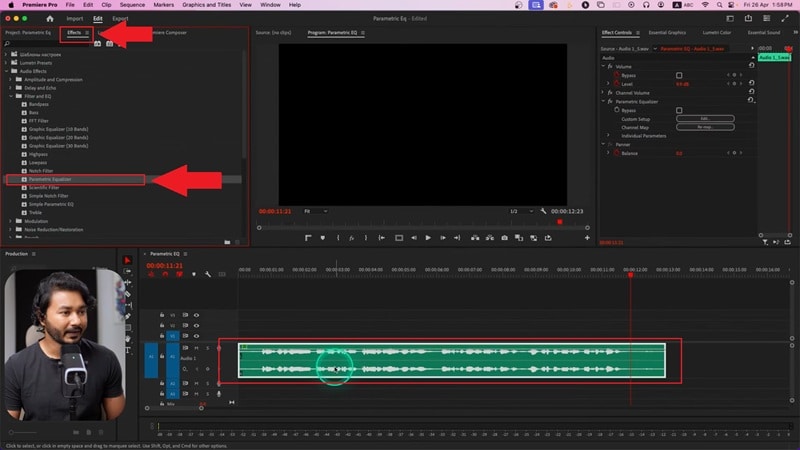
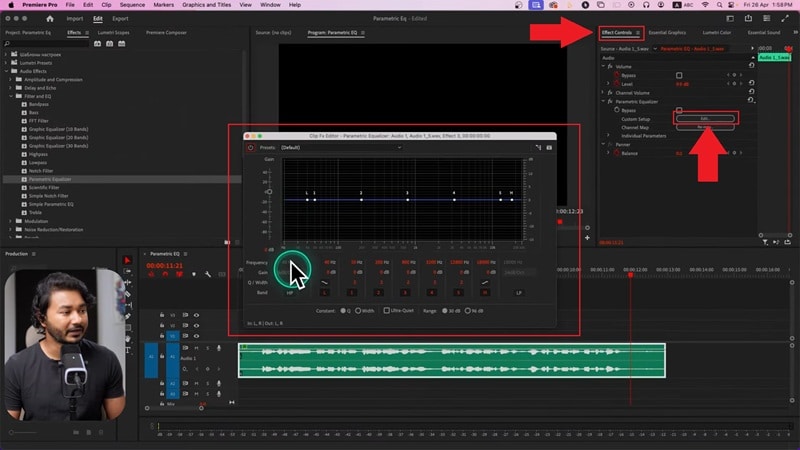
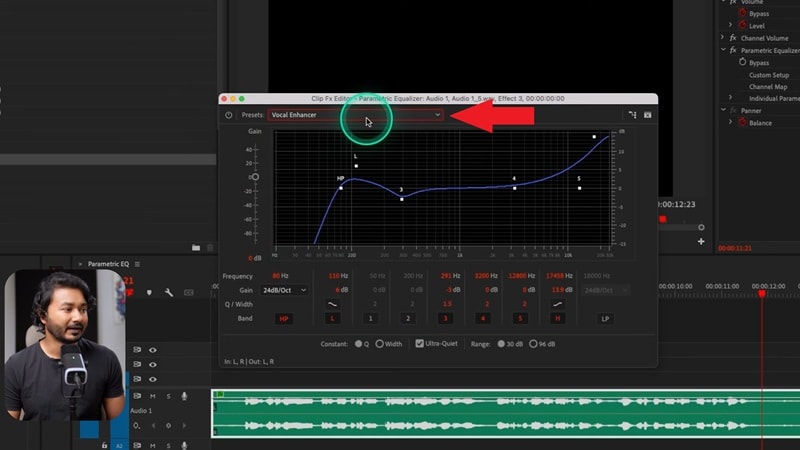
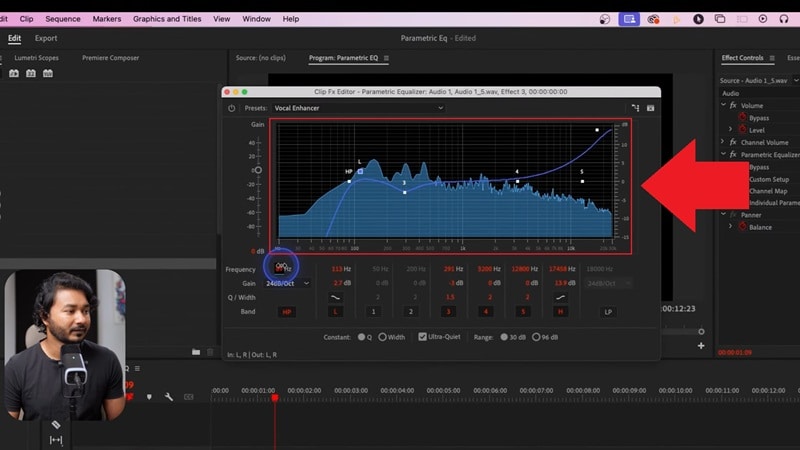
● The core Premiere Pro EQ workflow requires applying the Parametric Equalizer from the Effects panel onto a timeline clip, clicking Edit within the Effect Controls, and utilizing starting presets like "Vocal Enhancer" before manually shifting graph points.
● Specific equalization adjustments can resolve common issues by cutting lower frequencies to clarify muffled dialogue, reducing the 2 to 4 kHz range to soften harsh recordings, or utilizing a high-pass filter to eliminate low-end background rumble.
Ask AI for a summary
 ChatGPT
 Perplexity
 Gemini
 Claude
 Grok
Grok
Have you ever finished editing a video only to realize your audio sounds muffled or too sharp? The Premiere Pro audio equalizer is designed to fix exactly that. With the parametric EQ in Premiere Pro, you can brighten dialogue, smooth out background music, and give your project a polished sound.
That said, many creators see learning how to equalize audio in Premiere Pro as overwhelming, filled with knobs, graphs, and endless sliders. Well, this guide makes it simple, showing you clear steps to bring your audio to life without the stress.
Part 1. Understanding Equalizer in Premiere Pro
A scene can look stunning, but if the audio feels muddy or too sharp, the whole project loses its impact. But with the Premiere Pro equalizer, you get the chance to sculpt your sound so every word, beat, and note sits right where it should.
EQ in Premiere Pro lets you play with three main layers of sound. The low end adds weight and depth, the midrange carries the heart of voices and instruments, and the highs bring out crisp detail and sparkle. When you start adjusting these ranges, the difference is instant: voices become clearer, background noise fades away, and music blends seamlessly with dialogue.
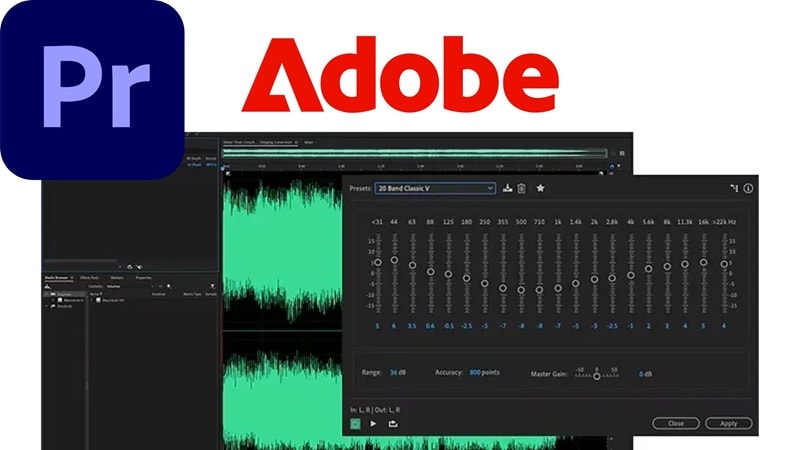
Equalizer Premiere Pro gives you two main ways to shape your sound, the Parametric EQ and the Graphic Equalizer. Each has its own strengths, and the table below makes it easier to see which one fits your editing style.
| Feature | Parametric EQ | Graphic Equalizer |
| Control | Highly flexible, precise control over any frequency | Limited to fixed frequency bands |
| Interface | Graph with adjustable points and curves | Sliders for set frequency ranges |
| Learning Curve | Steeper, requires more practice to master | Easier for beginners to start with |
| Use Cases | Dialogue cleanup, podcast editing, music mixing | General sound improvement, casual projects |
| Best For | Detailed audio shaping, voice clarity, removing specific noise | General sound improvement, casual projects |
Part 2. How to Equalize Audio in Premiere Pro: Step-by-Step Guide
Now that you have a better understanding of the audio equalizer in Premiere Pro, it is time to operate and apply it to your own project. But unlike what you think, learning how to equalize audio in Premiere Pro does not need to feel complicated, and once you see it in practice, the process becomes clear.
Using guides from James Prince on YouTube as a reference, here is a simple step-by-step guide that walks you through the process to start shaping your sound with confidence.
Part 3. One-Click EQ: Instantly Improve Your Audio
Alright, once you've tried learning how to equalize audio in Premiere, you've probably noticed something. While their equalizer is powerful, it can take time to get comfortable with all the knobs and curves. If you are after quicker results, there is an easier way.
Wondershare Filmora keeps things simple by making audio cleanup almost instant. While most people know it as a video editor, it also comes with audio tools that do a great job at boosting clarity, cutting noise, and balancing your mix with hardly any effort.
Here's why Filmora can be a smarter choice when you want fast, polished sound:
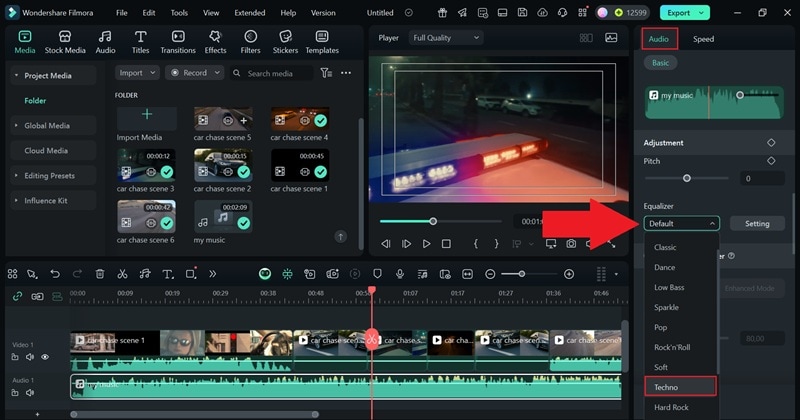
- Presets For Every Style: Filmora comes with EQ presets built for different genres like rock, country, techno, and more. This makes it easy to match your audio to the vibe of your video without starting from scratch.
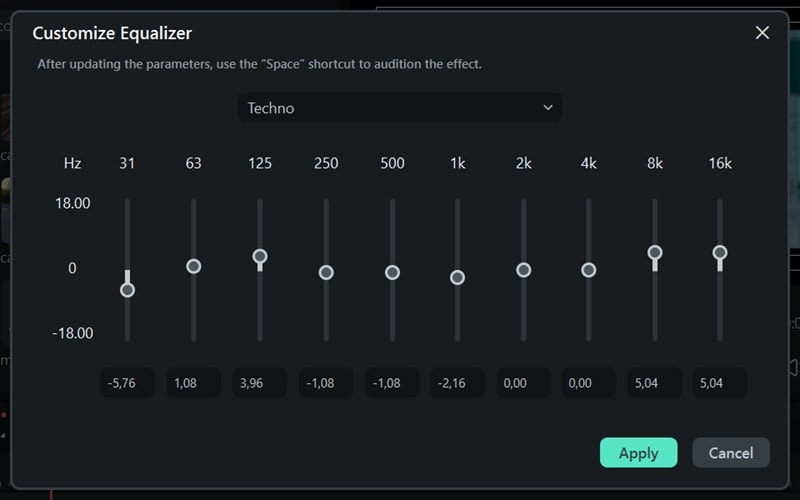
- Full Control When You Need It: Beyond presets, you can fine-tune everything yourself. Filmora's equalizer gives you the freedom to shape your sound exactly how you want it.
- Simple Sliders Anyone Can Use: The interface is straightforward with easy sliders, so even first-time editors can adjust EQ settings in seconds.
- Balanced Mix With A Click: The equalizer in Filmora helps balance music and voice tracks automatically, saving time and giving your project a polished finish.
- Instant Voice Clarity: Filmora's EQ tools are especially handy for dialogue, cutting out background noise and boosting vocal presence so voices come through sharp and clear.
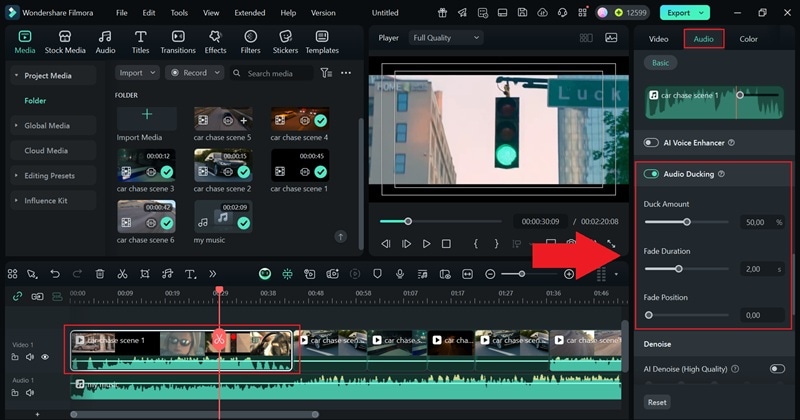
These capabilities make Filmora a great pick for beginners or anyone who just wants to get clean audio without spending hours on it. On top of that, it comes loaded with AI audio tools like denoise, ducking, stretch, silence detection, and even voice cloning to cover all your editing needs.
With all that ready to go, there's really no reason not to give it a try. So, let's dive in and follow the quick guide below to see how you can use Filmora's EQ to polish your sound.
Filmora vs Premiere Pro Audio Equalizer
As you can see, Filmora makes working with an audio equalizer feel simple and effective, which is why it stands out for creators who want clear sound without a steep learning curve. After spending time with both Filmora and Premiere Pro audio equalizer, it is clear they share some common ground but also handle audio in different ways that can shape how you edit.
To make it easier to see which one fits your style, take a look at the comparison table below.
| Feature | Filmora | Premiere Pro |
| EQ Adjustments | Presets by genre plus easy sliders for custom tweaks. | Parametric EQ and Graphic EQ with frequency control. |
| Learning Curve | Very easy to pick up, no prior knowledge needed. | Steeper, requires practice and audio know-how. |
| Voice Enhancement Tools | AI Vocal Remover, AI Voice Enhancer, AI Voice Cloning, AI Voice Changer. | AI-powered Enhance Speech. |
| Price / Subscription | One-time plan or lower subscription cost. | US$22.99/mo for the annual billed monthly plan. |
| Best Suited For | Musicians, vloggers, podcasters, creators needing fast polish. | Audio engineers, film editors, professionals needing fine control. |
Part 4. Common Audio Problems You Can Fix with EQ
After looking at how the Premiere Pro equalizer compares with Filmora, it is clear that both bring something valuable to the table. The one you choose depends on the kind of results you are aiming for.
Now that you know how to handle EQ, it is time to put it to work on real problems. Below are some examples of how you can start using it to tackle common audio issues and make your tracks sound cleaner and more balanced.
- Clear Up Muffled Voices: When voices sound like they are buried under a blanket, it usually means the low end is too heavy. To solve that, try cutting some of the lower frequencies in the equalizer to make dialogue sharper and easier to follow, like in a vlog recorded indoors with poor acoustics.
- Smooth Out Harsh Tones: Sometimes audio recorded with a phone or cheap mic can feel sharp and tiring to the ear. Reducing frequencies around 2 to 4 kHz helps soften those harsh tones so the sound is smoother and more pleasant.
- Add Spark To Flat Audio: If your music or dialogue feels dull, it might be missing the bright top end that gives sound its energy. Boosting the highs adds sparkle and detail, perfect for making podcast intros or YouTube tutorials sound more lively.
- Remove Background Rumble: Street noise, air conditioners, or mic handling can create low rumbles that distract from the main track. Using a high-pass filter cuts out those deep unwanted sounds, leaving your voice or music much cleaner.
- Balance Music and Dialogue: Background music often overpowers narration when both are placed in the same mix. Adjusting the midrange with EQ ensures the voice cuts through clearly, like in a travel vlog where you want the music to support the story without drowning it out.
Conclusion
Many people want to know how to equalize audio in Premiere Pro since it plays such an important role in the overall quality of a project. So, we went over what you need to know about the Premiere Pro audio equalizer, the two main ways to use it, and clear steps for getting the best results.
Overall, the audio equalizer in Premiere Pro works well, but it can feel limited at times, which is why it helps to look at other options like Filmora. This editor gives you EQ presets based on genre and lets you adjust them manually with simple sliders. On top of that, Filmora includes powerful AI audio tools and a huge media library that make editing both sound and visuals easier.
