
 100% Security Verified | No Subscription Required | No Malware
Cooking videos on YouTube have exploded in popularity, offering everything from quick recipes to gourmet dishes. Whether you're wondering how to make food videos or how to start a cooking channel on YouTube, this guide will help you create engaging content. Learn how to make a cooking video that combines delicious recipes, smart kitchen tips, and visual appeal to keep your viewers coming back for more. With the right techniques, your YouTube recipe video can inspire and educate your audience, while boosting your culinary confidence.
In this article
Part 1. Creating Your First Cooking Video on YouTube: Preparation Stage
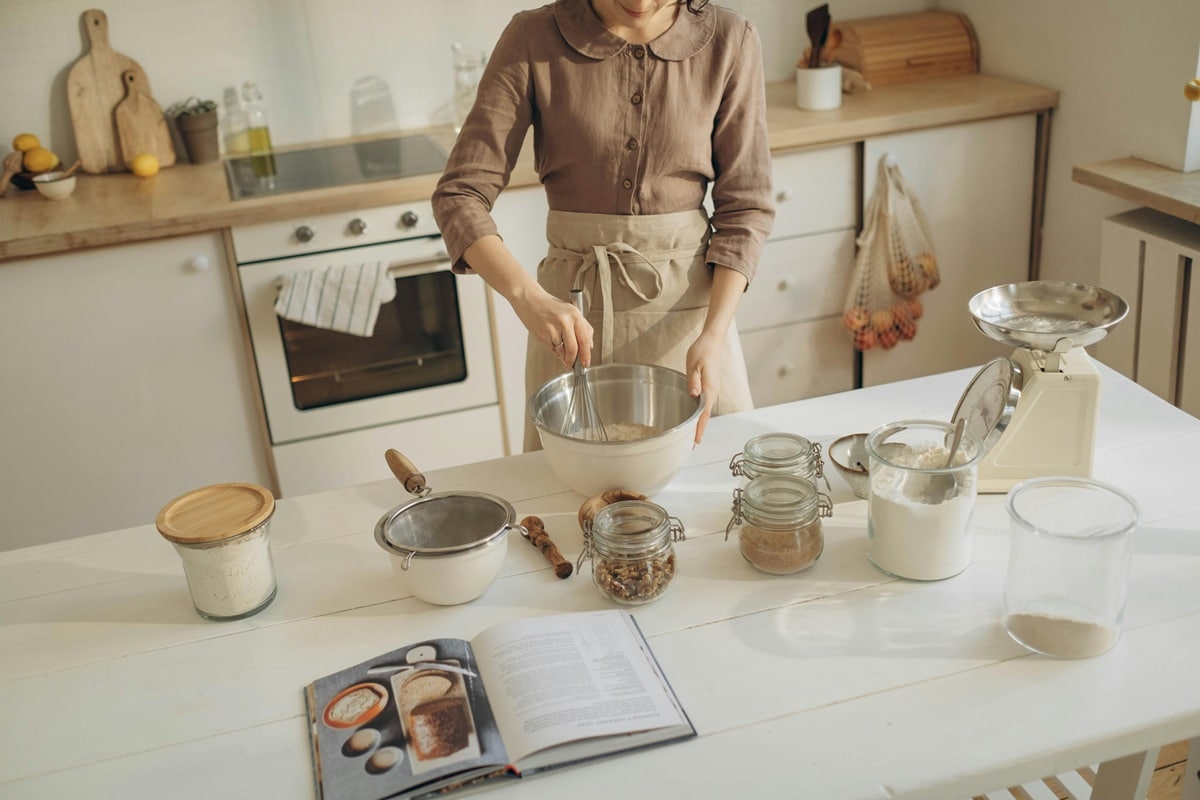
Before you start filming, it's essential to get everything ready. Planning makes your video look better and saves time. Making cooking videos on YouTube isn't just about showing recipes—it's about telling a story, keeping viewers engaged, and making your dish easy to follow.
To start, organize your ideas, prepare your tools, and ensure everything's set before you turn on the camera.
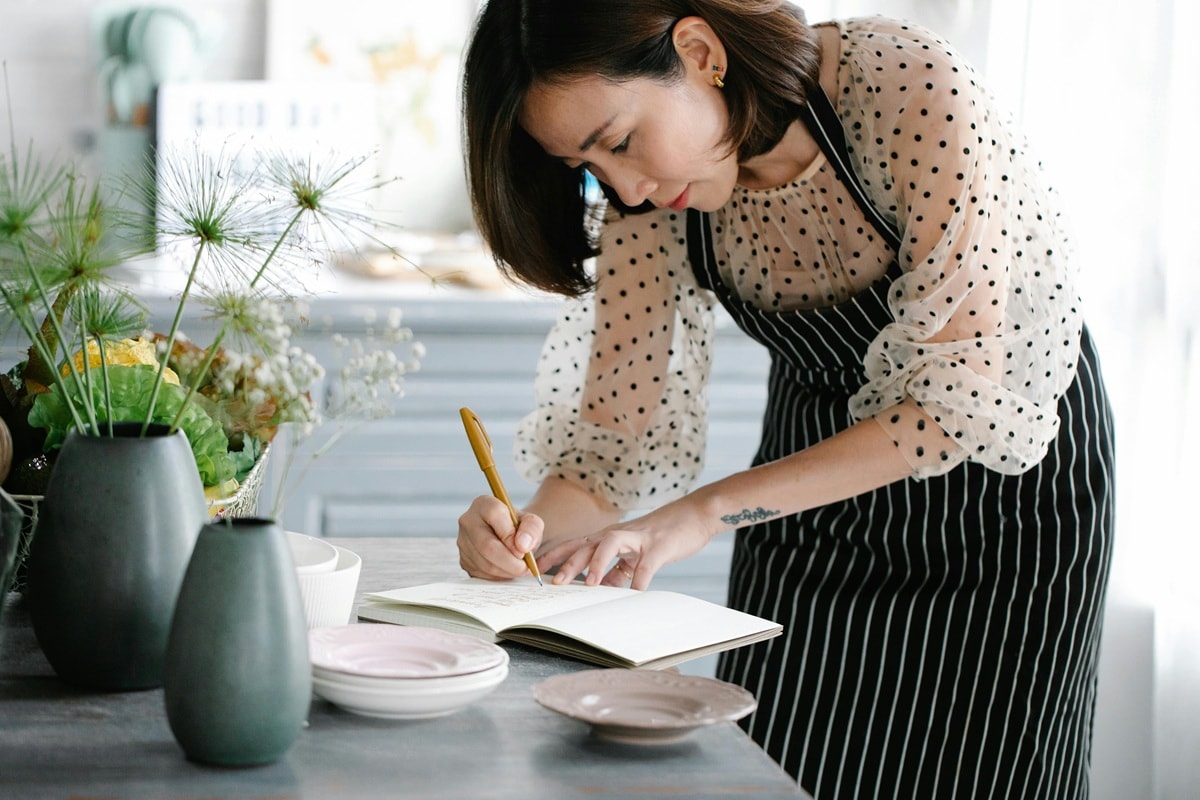
Scripting Your Video
Think about what you want to show and say in your video. Start by writing down the steps of your recipe, the ingredients, and any tips you want to share. You don't need a word-for-word script, but having an outline will keep you on track.
If you're unsure how to start, try using an AI copywriting tool. It can help you write a fun intro, organize your steps, or create a catchy video title.
Gathering Equipment
To make a good cooking video, you'll need a few essential tools:
- Cameras for Recording: A good smartphone camera can work just fine, but it's even better if you have access to a DSLR or mirrorless camera. Try using a tripod or something steady to keep the video from shaking.
- Kitchen Utensils: Get all your cooking tools and ingredients before recording. Neatly organized utensils, clean surfaces, and pre-measured ingredients help the process feel smooth and make your video look professional.
- Video Editor Software: After filming, you'll need to edit your footage. We recommend using Wondershare Filmora—a beginner-friendly yet powerful video editor. It lets you cut clips, add text, music, and even cool effects with just a few clicks.
 secure download

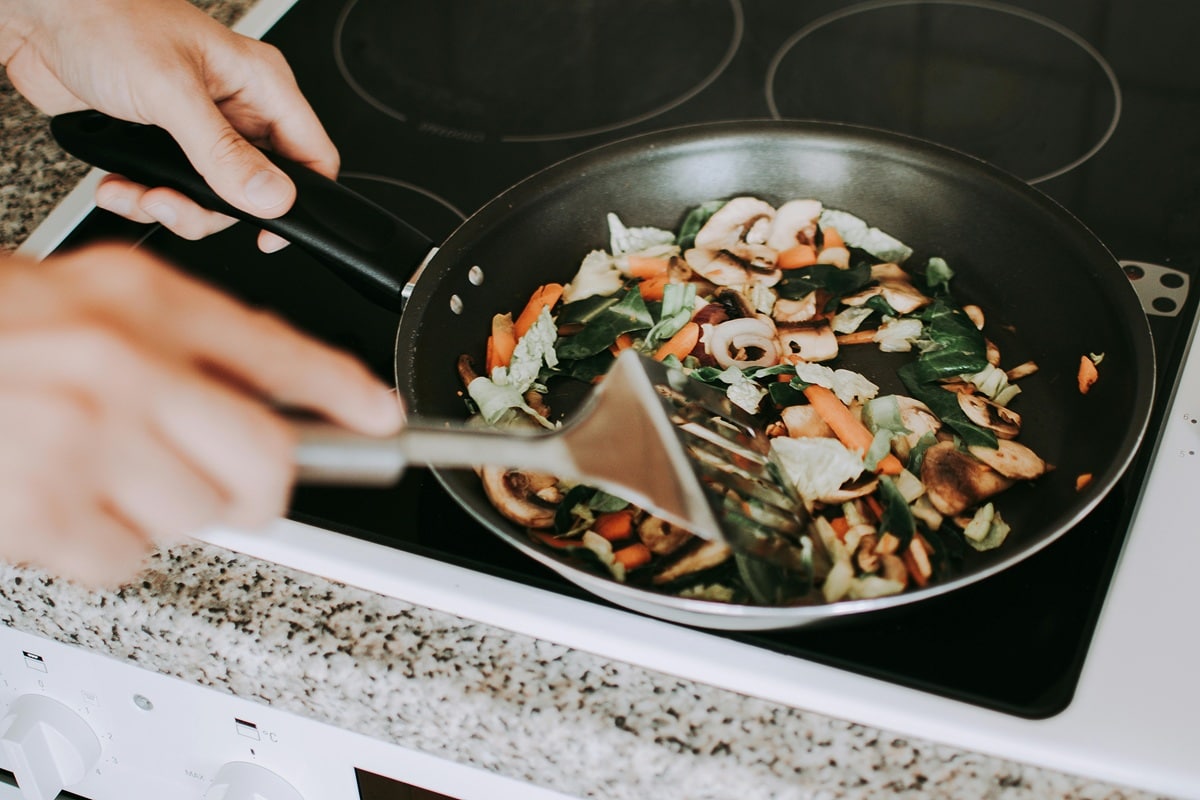
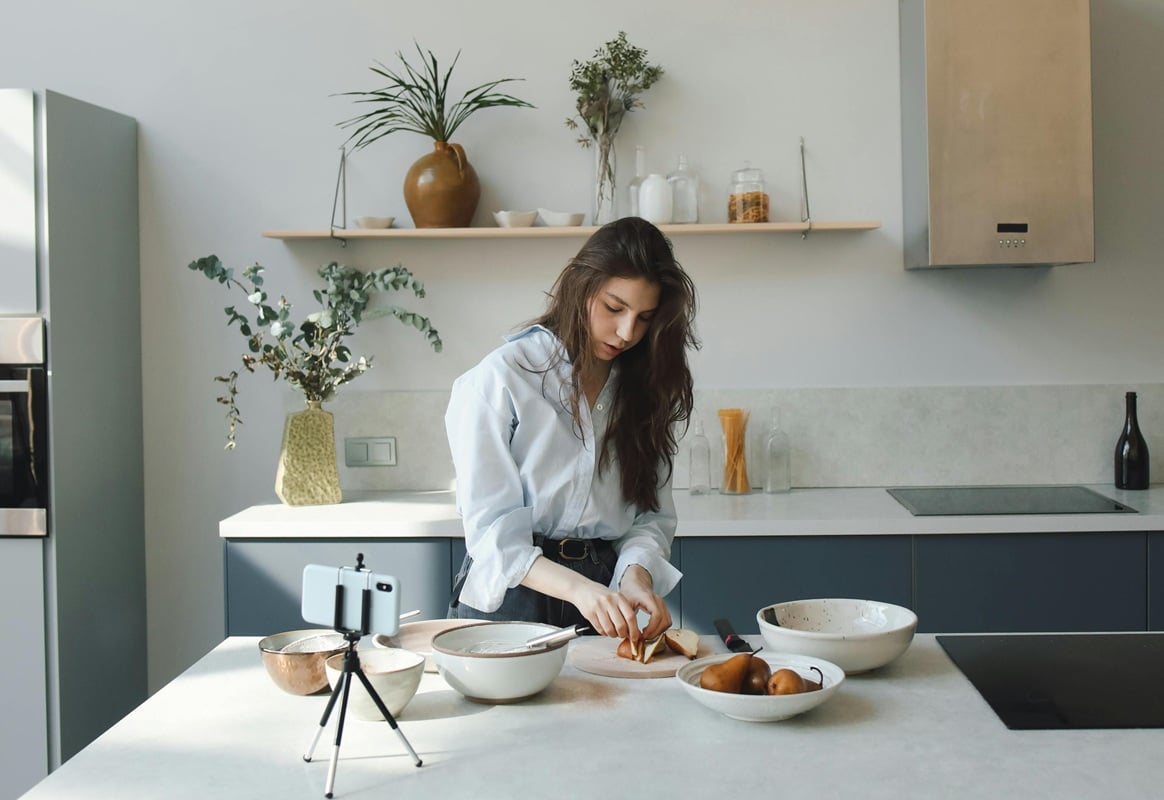
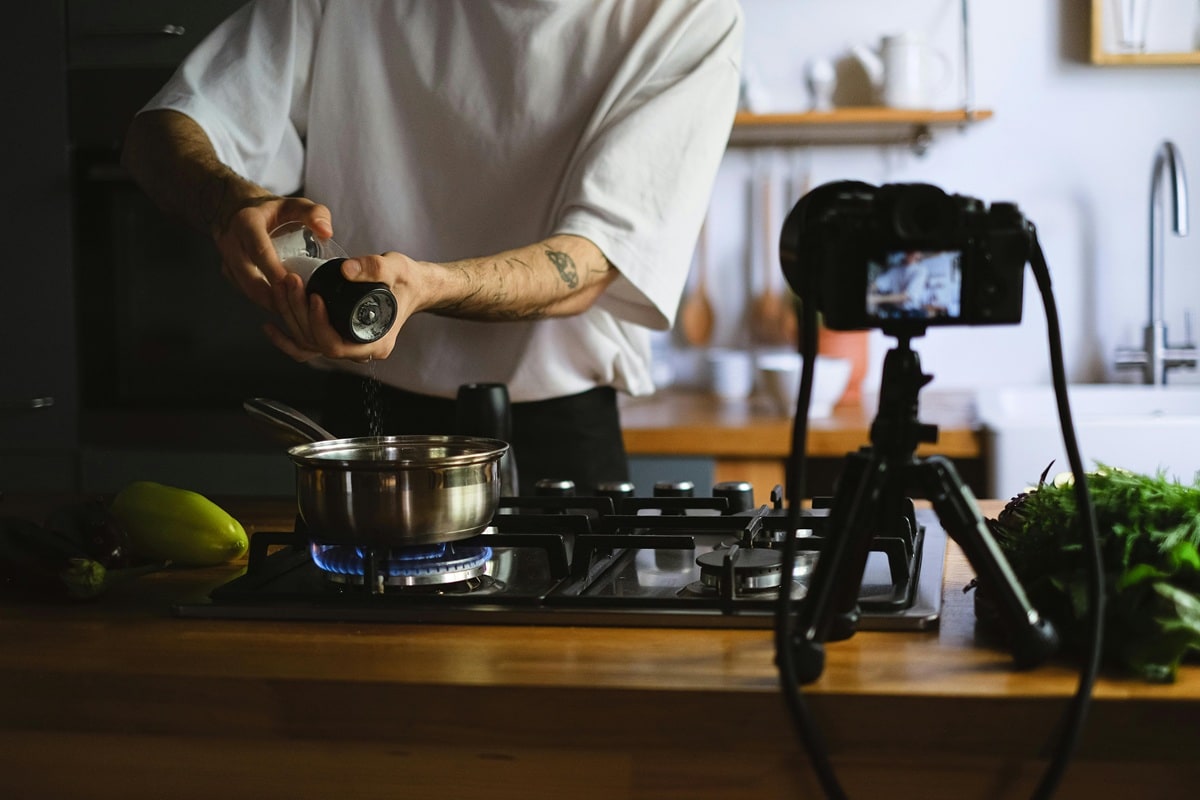
Part 2. Filming Techniques for Creating Cooking Videos
Once you've planned your content and gathered your tools, it's time to start filming! This part might feel a bit tricky at first, but with a few simple tips, you can make your YouTube recipe video look clean, bright, and easy to follow. Let's focus on three key things: camera angles, lighting, and audio.
Camera Angles
Good camera angles help your viewers see clearly what you're doing. Here are two angles you can try:
- Top-down (Overhead)– Great for showing what's happening in the bowl or pan. It's perfect for step-by-step cooking.
- Eye-level (Straight on)– Use this when talking to the camera or showing ingredients.
You can switch between these angles to make your video more interesting. If possible, use two cameras or film each step from different angles and edit them together later.
Lighting
Bright, natural light makes your food look fresh and appealing. If possible, film near a window during the day. If that's not enough, use a ring light or soft LED light to brighten your kitchen.
Tip: Avoid harsh shadows and yellow light from overhead bulbs. Soft, white lighting gives the best results.
Audio Quality
A clear sound helps viewers understand you better. Use these tips for better audio:
- Use an external microphone if possible; even a small clip-on mic can make a big difference.
- Record in a quiet place – Turn off noisy equipment and minimize background noise.
- Speak clearly and stay close to the mic when speaking.
You can also record a voiceover during editing if the kitchen is too noisy while cooking.
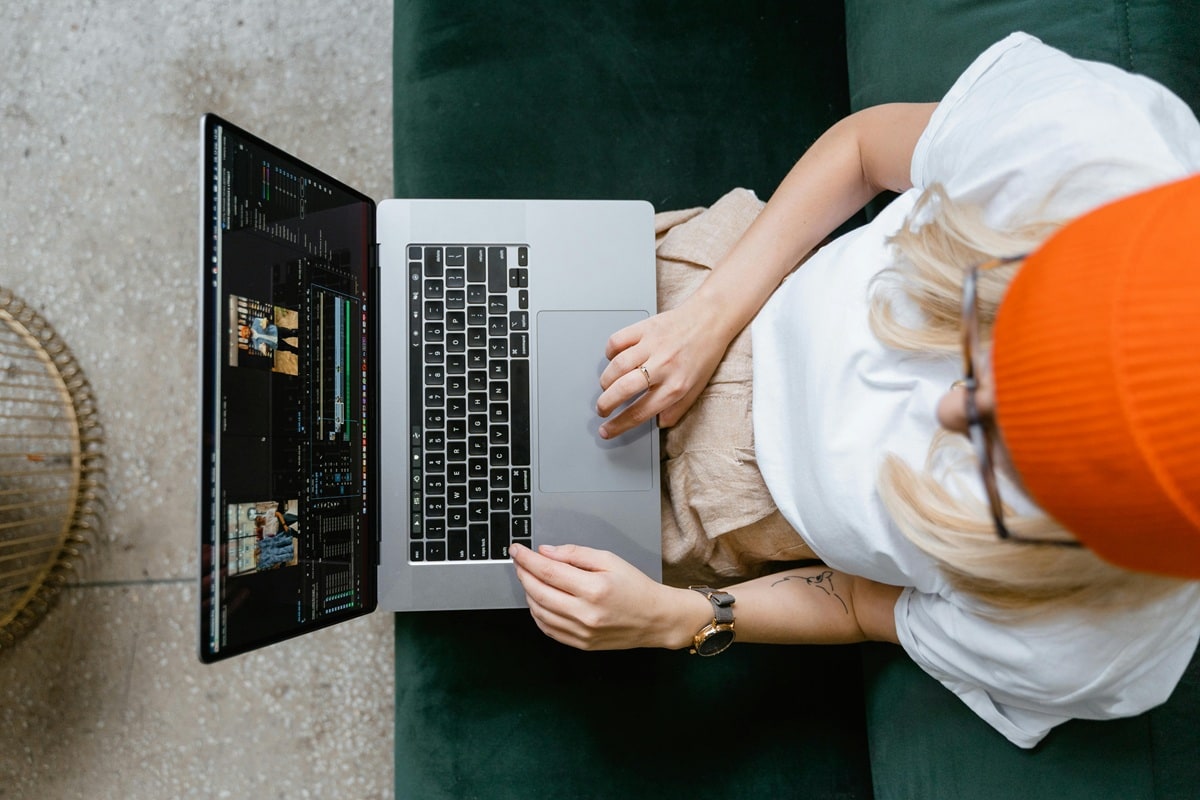
Part 3. How to Edit Your YouTube Cooking Videos
Editing is where the magic happens. This is the part where you turn your raw footage into a smooth, eye-catching, and fun-to-watch YouTube recipe video. With the right tools, editing doesn't have to be complicated, especially if you're using Filmora. It's packed with features that are perfect for beginner YouTubers and food content creators.
Here are some powerful (and super helpful) tools in Filmora that can take your video to the next level:
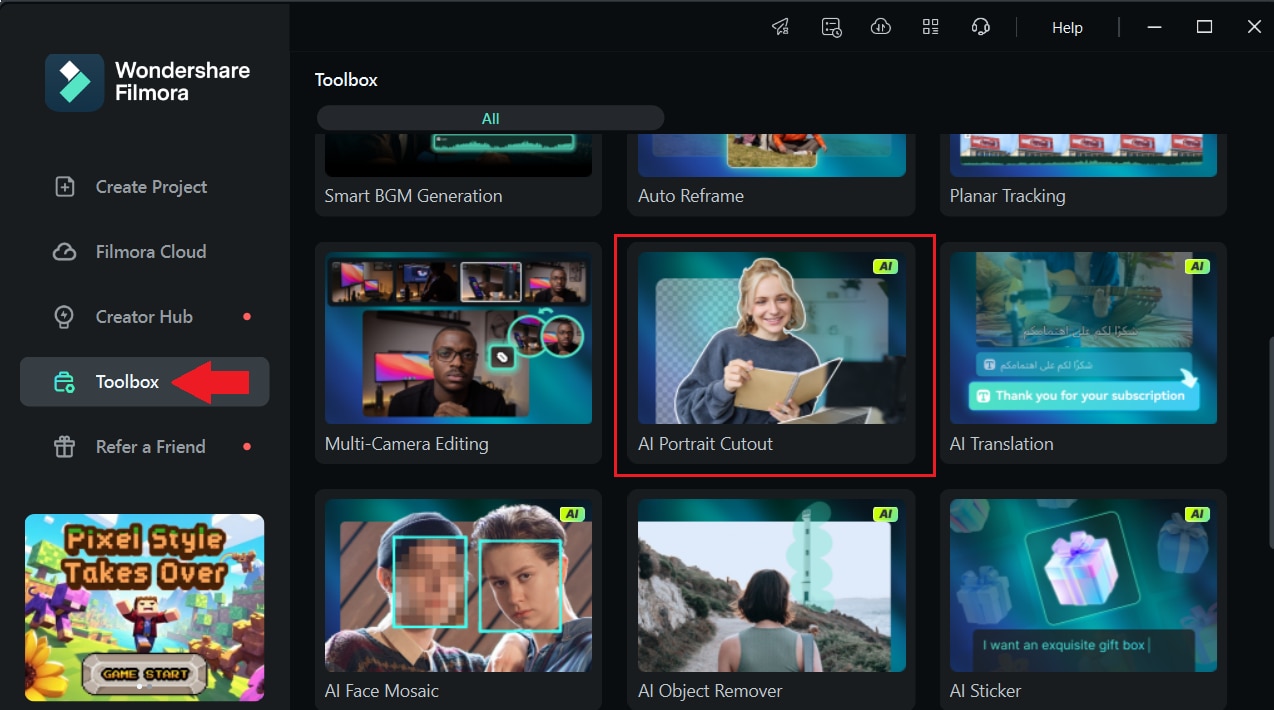
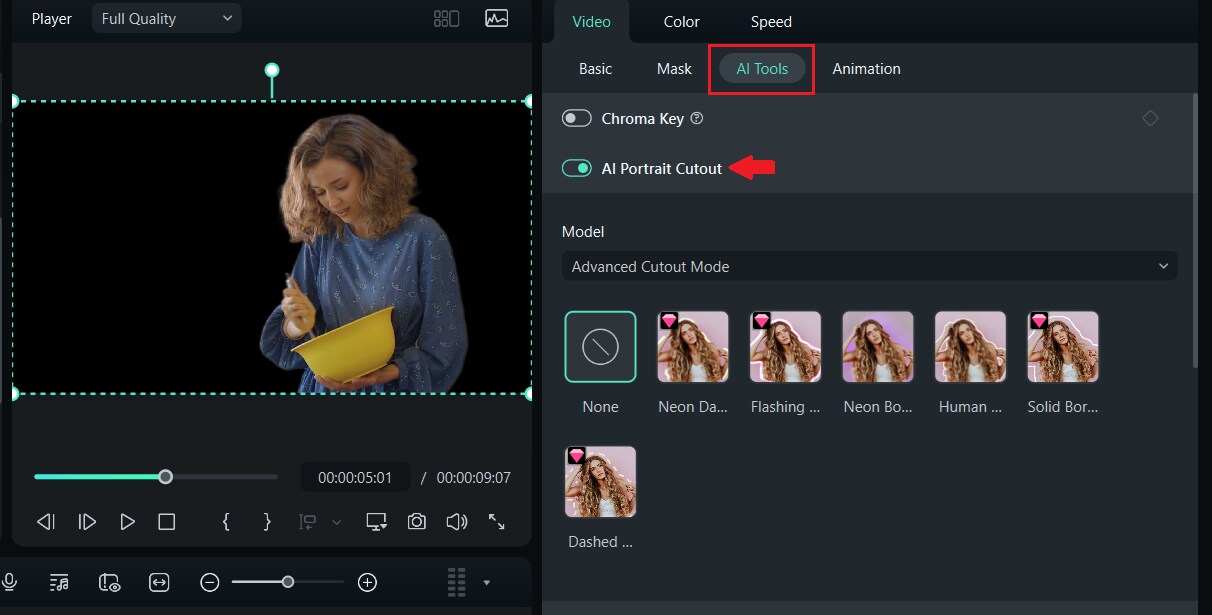
Make a Cleaner Look with AI Portrait Cutout
Want a cleaner look, or want to remove your background without using a green screen? Filmora's AI Portrait Cutout can do it for you in one click. It automatically cuts out the background, so you can place yourself in front of a solid color, stylish design, or your own logo.
🖼️How to Use AI Portrait Cutout in Filmora
Step1Open Filmora and Access AI Tools.
Launch Filmora and go to the Toolbox section to find the AI Portrait Cutout tool.
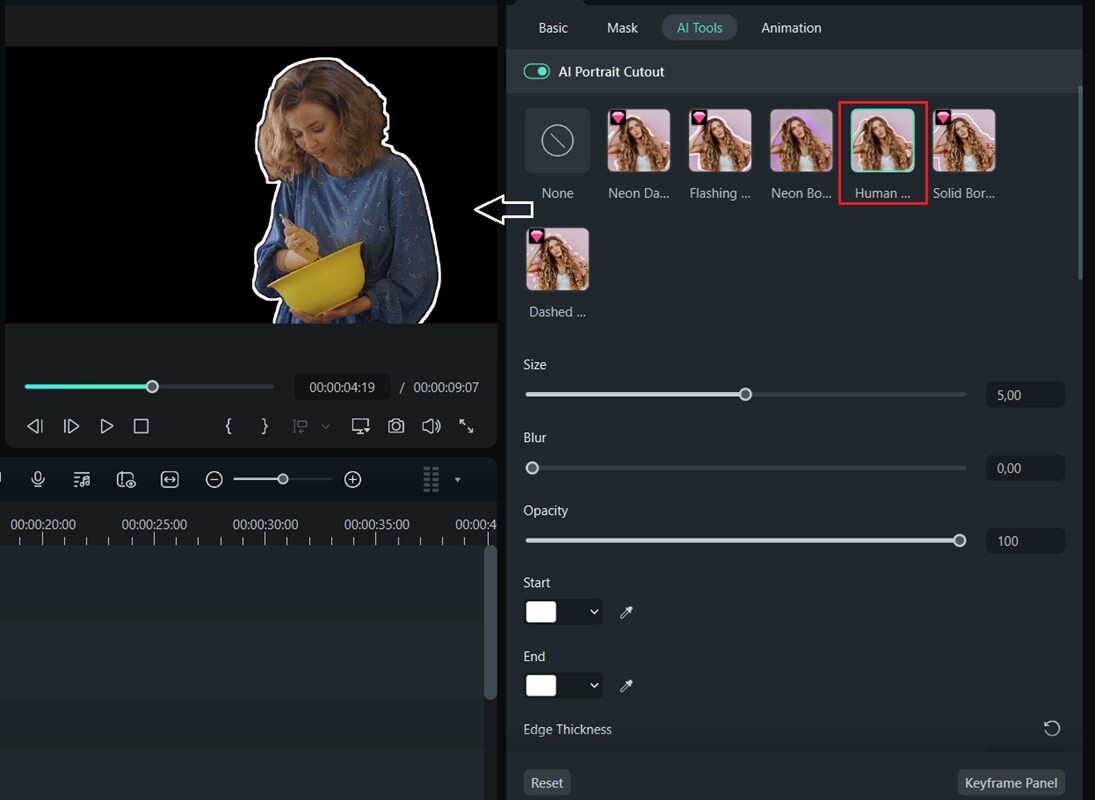
Step2Import Your Clips
Select the AI Portrait Cutout tool and import your clips into Filmora.
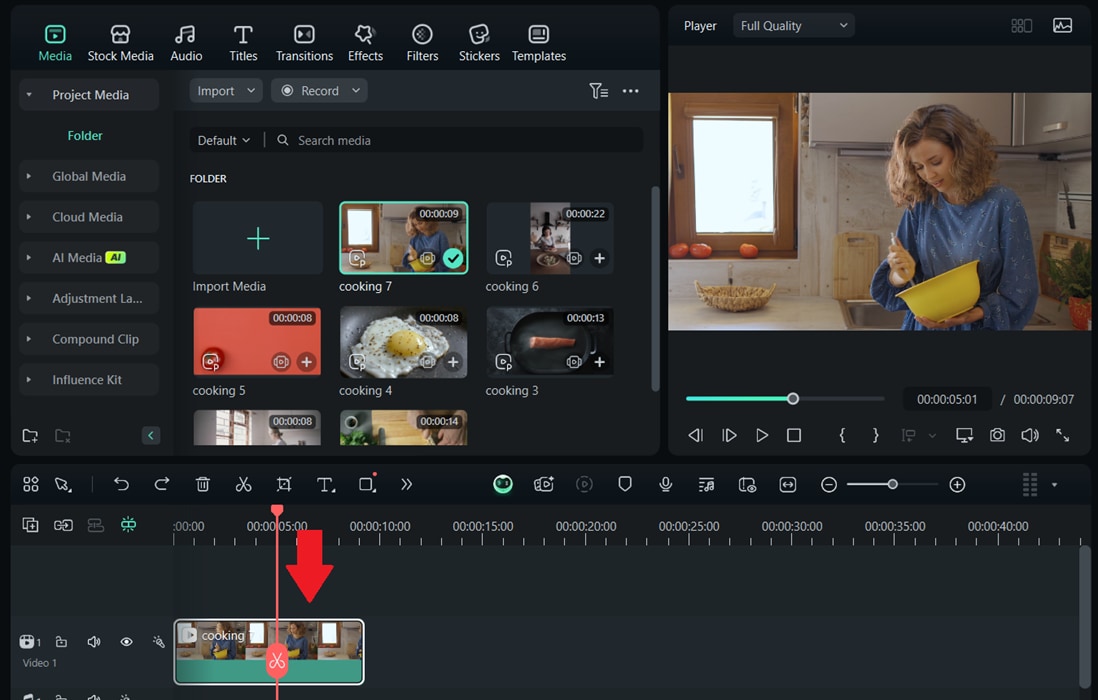
Step3Apply AI Portrait Cutout
Click the clip in your timeline, then check the AI Portrait Cutout box to begin the process.
Step4Choose and Customize Body Effects.
Pick from available body effects to enhance or modify the subject's appearance. Adjust the size, blur, opacity, edge thickness, and color settings as needed to perfect the look.
Make Custom Music with AI Music
Every good cooking video needs the right vibe. Filmora's AI Music Generator helps you find the perfect soundtrack that matches the mood of your video.
🎵 How to Generate AI Music in Filmora:
Step1Go to the main editing panel and click on the Audio section in the toolbar.
Select AI Music, then click Start to access a variety of moods and themes.

Step2Choose your preferences:
- Mood
- Theme
- Genre
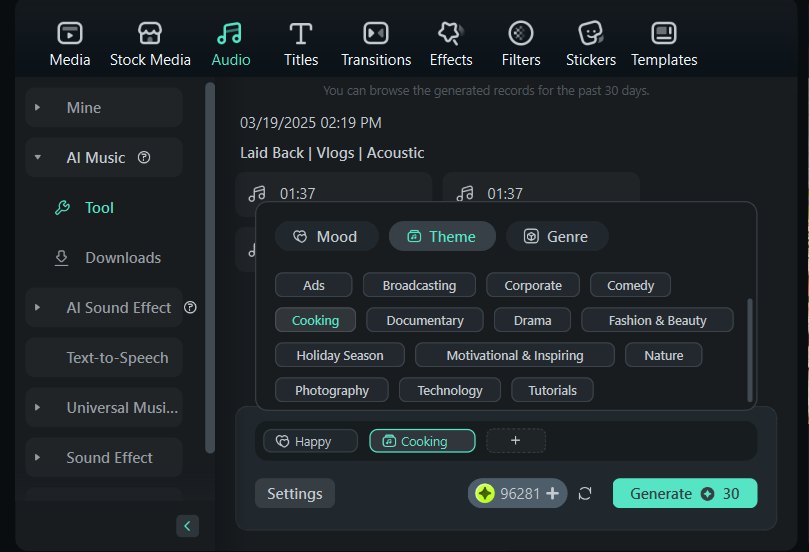
In Settings, set:
- Duration (20 seconds to 5 minutes)
- Number of tracks to generate (1 to 6)
Then click Start to generate music.

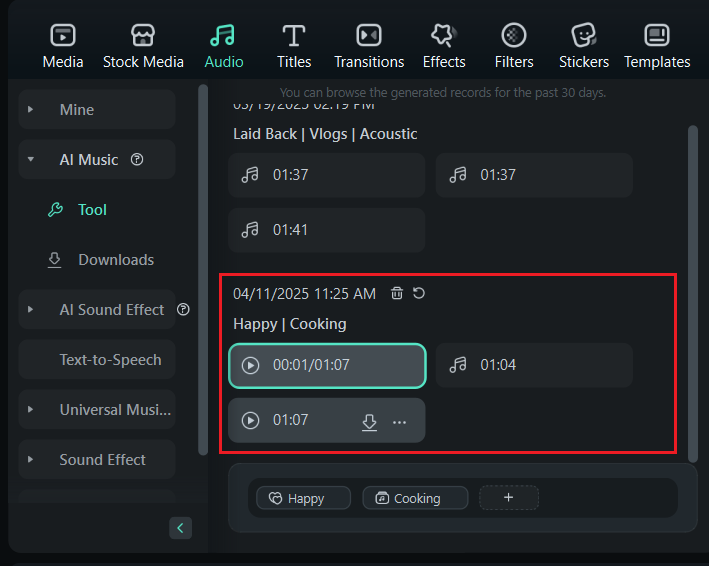
Step3Preview and download the music:
Once the music is generated, preview it on the right. Click Download to add it to your project, or find it later in the Generated folder.
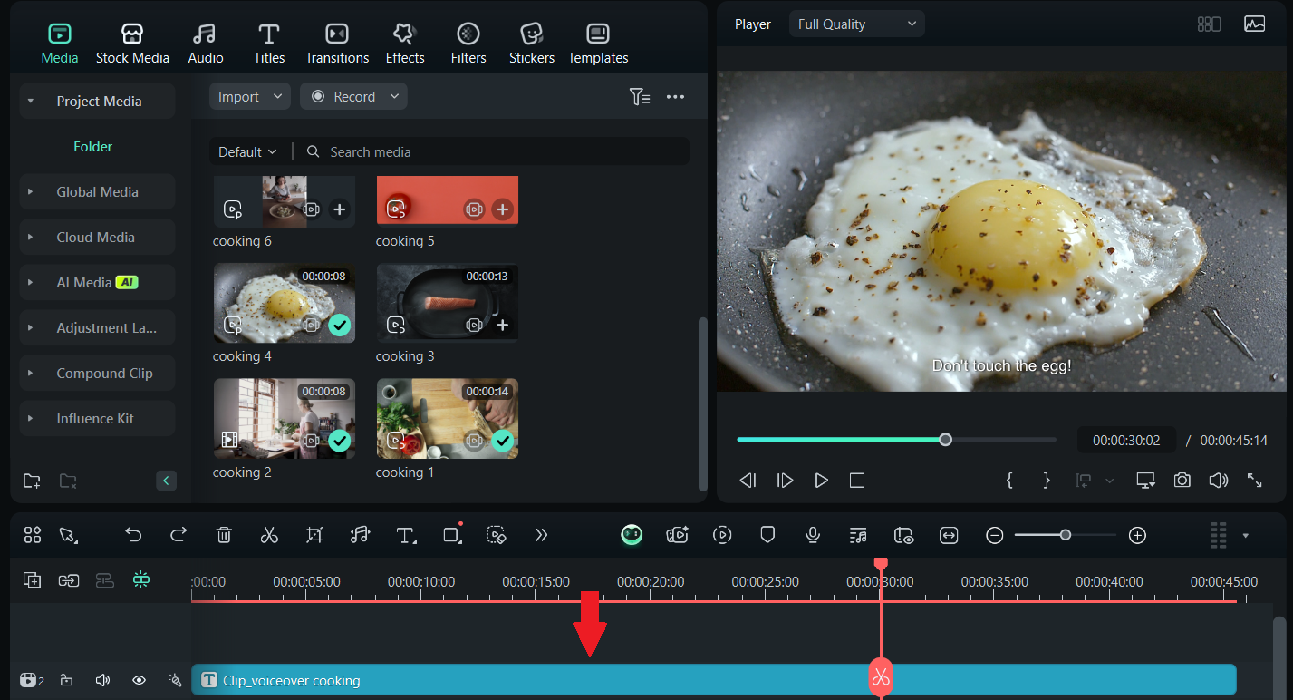
Generate Captions with Speech to Text (STT)
Want to add subtitles without typing everything out? Use Filmora's Speech-to-Text feature. It automatically converts your voice into text, saving you time and effort.
🎙️ How to Auto-Transcribe Audio into Subtitles with STT in Filmora
Step1🗣 Convert Audio to Text
Right-click the audio clip on the timeline and select Speech to Text.
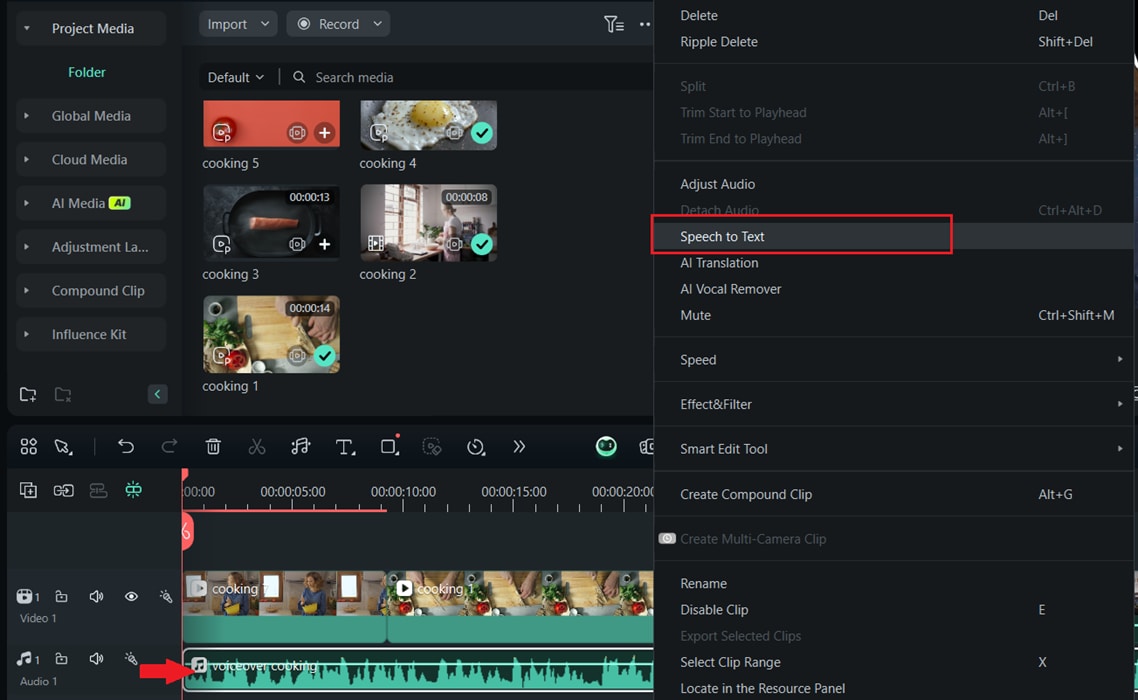
Step2🎛️Adjust STT Settings
In the STT settings window:
- Choose the audio language
- Select the desired audio files
- Check Auto match to the timeline
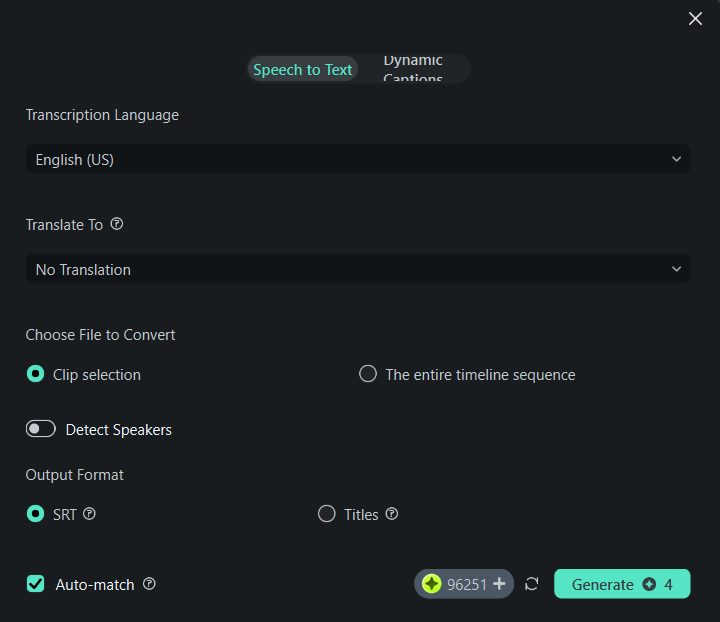
Step3🎬 Add STT to Timeline
The generated subtitles will automatically appear in the editing timeline, synced with your video.
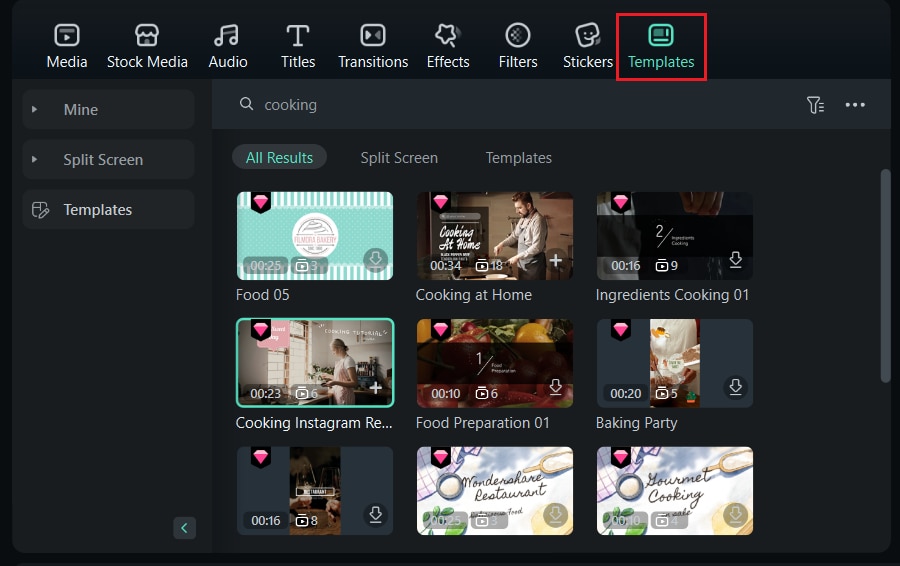
Video Templates
Don't know where to start? Try Filmora's video templates. These ready-made designs come with animations, titles, and effects built in—just add your clips and customize.
🎬 How to Create a Customized YouTube Video with Filmora Templates
Step1Select a YouTube Template
Go to Filmora's Template section and pick a YouTube-style template that fits your video style.
Step2Replace Sample Clips
Swap out the sample clips with your own footage to personalize the project.
Step3Customize Your Style
Adjust text, colors, and transitions to match your desired vibe or theme and make the video uniquely yours.
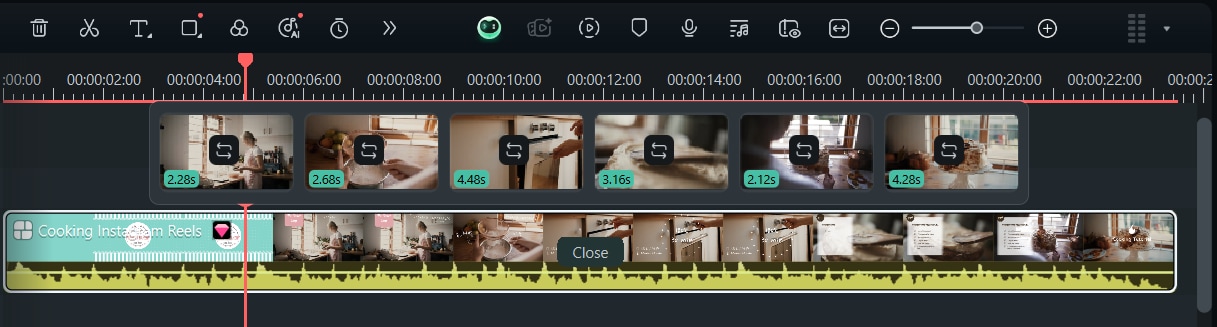
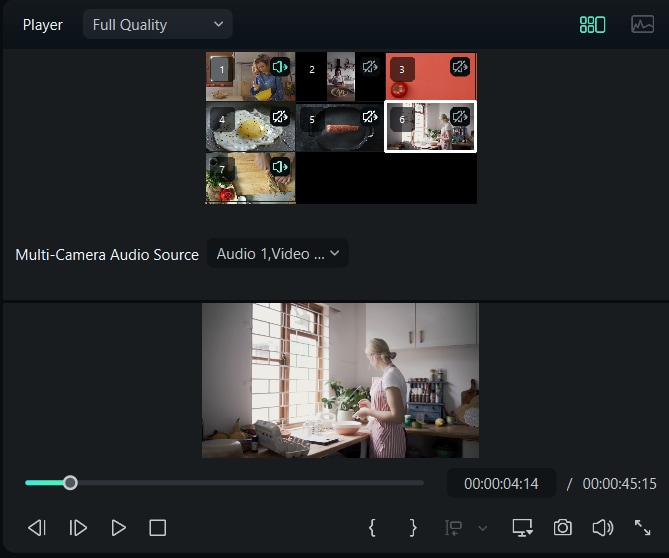
Edit Multiple Angles with Multicamera Editing
If you are recording your recipe from more than one angle (like overhead and from the front), Filmora's Multi-Camera Editing makes it easy for you to switch between the shots.
🎥 How to Edit with Multi-Camera Angles in Filmora
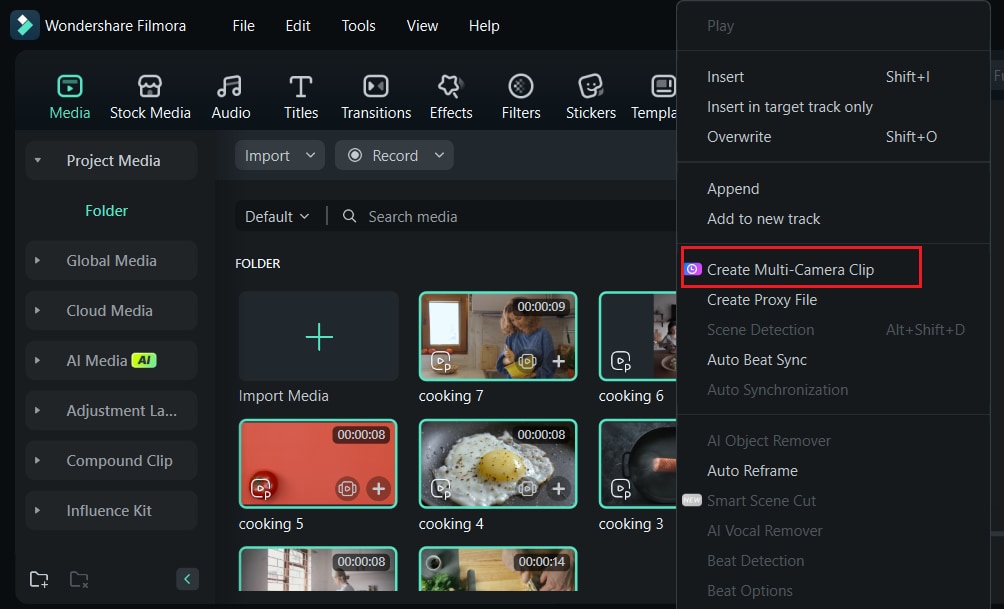
Step1🎬 Create a Multi-Camera Clip
Right-click your multi-camera video or audio clips in the project media section and select Create Multi-Camera Clip.
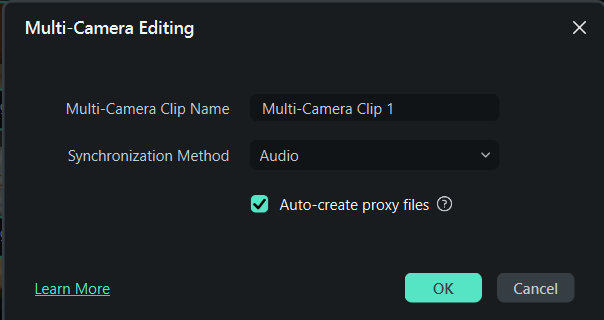
Step2📝 Name and Sync
Give your new compound clip a name and choose your preferred sync method (like timecode or audio).
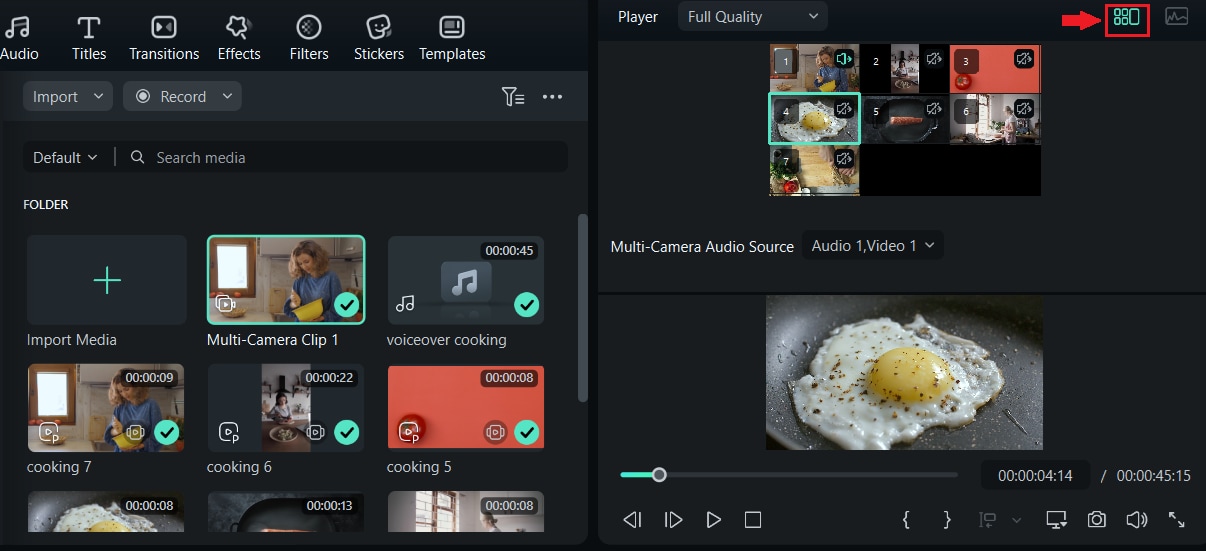
Step3👀 Enable Multi-Camera View
In the player window, click Switch Multi-Camera View to activate multi-camera mode. You'll now see all camera angles at once, making it easy to decide which one to use.
This lets you see all camera angles at once and easily switch between them for your final edit.
Step4✂️ Edit by Switching Angles
Press the spacebar or click Play, then click the camera view you want during playback to switch angles directly in the timeline.
These tools are like your secret ingredients in post-production. Filmora makes it simple to create YouTube cooking videos that look clean and engaging.
Part 4. Tips on Growing Your Cooking Channel on YouTube
After editing and uploading your cooking videos on YouTube, it's time to attract more viewers. Growing a YouTube channel takes time, but with the right strategy, you can build a loyal audience that keeps coming back for more tasty content.
- Stick to a Niche: Don't try to cook everything. Pick a theme—like vegan meals, budget recipes, desserts, or quick dinners. A clear niche makes your channel stand out and helps viewers know what to expect.
- Use Search-Friendly Titles and Tags: Think like a viewer. What would you type into the search bar? Use simple keywords like "easy pasta recipe" or "5-minute breakfast ideas" in your titles, descriptions, and tags. This helps YouTube show your videos to the right audience.
- Engage with Your Viewers: Reply to comments, ask questions in your videos, and remind viewers to like and subscribe. Building a community helps you connect with your audience and keeps them coming back.
- Post Consistently: You don't need to upload every day, but stick to a schedule, like once a week or every other Friday. This helps viewers know when to check back. Being consistent builds trust, and YouTube's algorithm loves it too!
Conclusion
Sharing your cooking videos on YouTube is more than just showing recipes. It's about telling a story, inspiring others, and building a community. From planning and filming to editing with tools like Filmora and sharing your content, every step will add to the growth of your channel. With creativity and consistency, even a simple dish can go viral.
Don't worry about being perfect—just start creating, keep learning, and enjoy the journey. Your next video could be the one that inspires someone to cook for the first time. So, are you ready to start? Your cooking journey begins now!
secure download
