
 100% Security Verified | No Subscription Required | No Malware


 ChatGPT
 Perplexity
 Gemini
 Claude
 Grok
Grok
In YouTube videos, audio plays a vital role—setting the tone, enhancing storytelling, and keeping viewers engaged. Many creators spend hours searching for music, unaware that YouTube Studio Audio Library offers a free download of high-quality, royalty-free music and sound effects. The YouTube Audio Library is a hidden gem inside YouTube Studio. It provides an extensive collection of tracks for creators to use without copyright concerns. Whether you're looking for background music, sound effects, or mood-setting tunes, the YouTube Sound Library has you covered.
In this guide, we’ll show you how to use the YouTube Audio Library, from browsing and previewing to downloading music for your YouTube videos. If you're a content creator searching for the perfect soundtrack, this built-in YouTube Music Library for creators is your go-to tool.
In this article
Part 1. How to Access YouTube's Audio Library
The YouTube Studio Audio Library has royalty-free music and sound effects to enhance videos. This library has options for different styles and moods, from background music for vlogs to dramatic impacts for short films. So, without further ado, let's immediately explore and use them.

Below is a step-by-step guide on how to use YouTube Audio Library effectively. This includes details on licensing types to help you use each track correctly without copyright issues. Follow these steps to get started:
01of 03Go to YouTube Studio
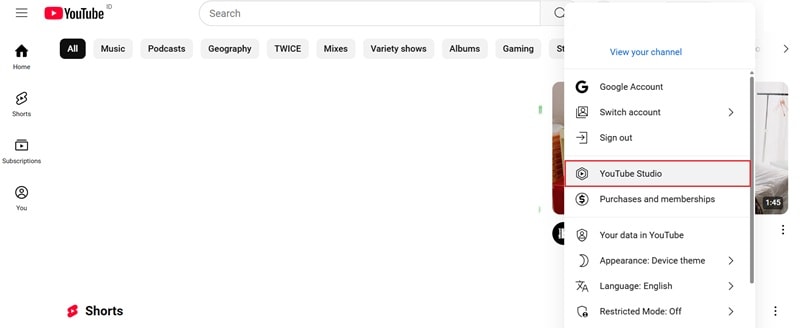
Sign in to your YouTube account, click on your profile icon, and select "YouTube Studio" from the drop-down menu. Alternatively, go directly to YouTube Studio by visiting studio.youtube.com.
02of 03Access YouTube Audio Library
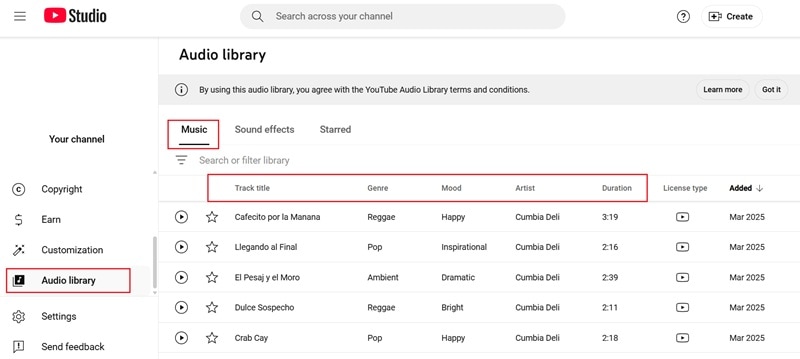
Now that you're inside YouTube Studio, navigate to the left menu and select "Audio Library". You'll now see a wide selection of music that you can download, sorted by genre, mood, artist, and duration.
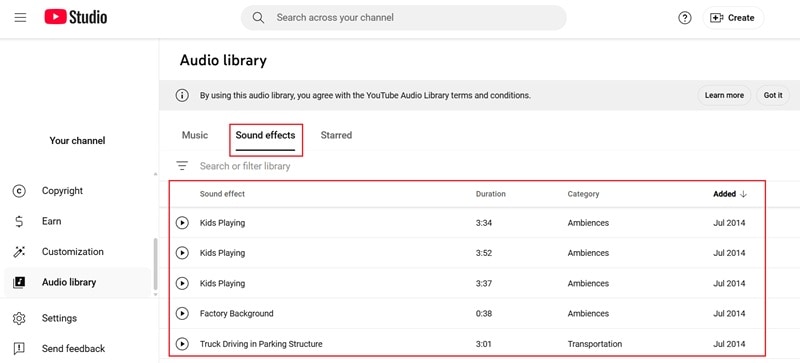
If you're looking for sound effects instead, go to the YouTube Sound Library by clicking the "Sound Effects" tab to explore various options.
03of 03Browse and download music
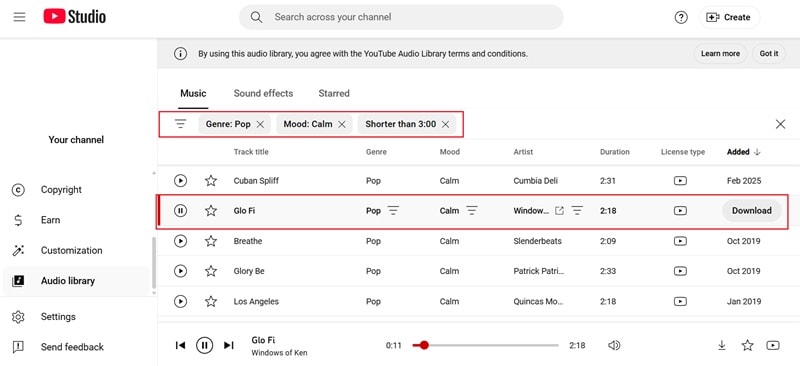
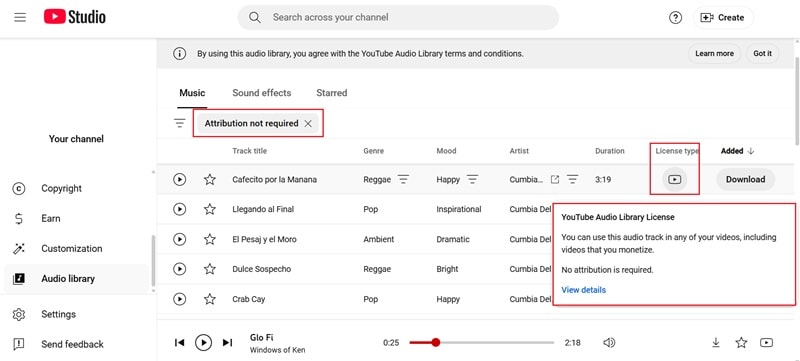
Use the filters icon and search bar in the Music tab to find tracks for your videos easily. Click the play button to preview a track before downloading. Once you find a track you like and want to download YouTube Audio Library music, click the "Download" button next to it. The track will be saved to your device, allowing you to seamlessly import it into any video editor and sync it with your footage.
Understand the Licensing Types
As you can see, it's easy to download music from YouTube's Audio Library. However, it's essential to understand that YouTube Audio Library offers two types of licenses for its free music:
Royalty-Free Music (No Attribution Required)
These tracks are available for free download from the YouTube Audio Library and can be used in any video without needing to credit the artist. Download the track and add it to your video right away.
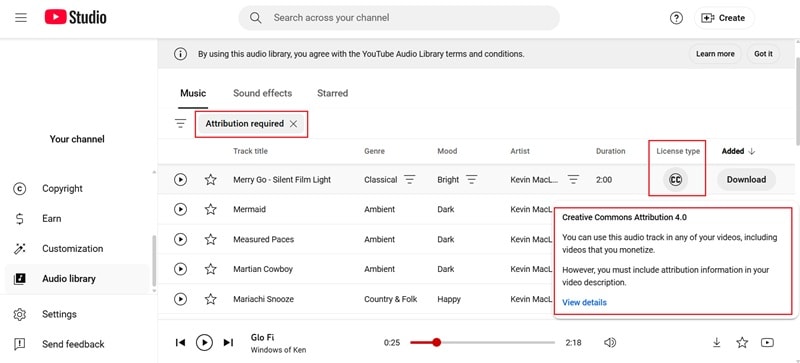
Attribution Required
These tracks require credit to the original creator in the video description. The details of properly attributing will be listed next to the track.
Part 2. Mistakes to Avoid When Using YouTube's Audio Library
Now that you know how to access and use YouTube's Audio Library, you can add some excellent background music and sound effects to your videos. But before you hit that download button, there are a few things to watch out for. To stay within YouTube's rules and make the most of the library, keep these key factors in mind:

- Ignoring Attribution Requirements: As previously mentioned, not all tracks on YouTube Audio Library are free to download. Always check the "Attribution" column before downloading a song to avoid copyright issues.
- Using Overplayed Music: Some tracks in the YouTube music library for creators are super popular, which means many creators use them. If you want your videos to stand out, try exploring new tracks instead of using the same ones everyone else does.
- Picking Music That Doesn't Fit Your Video: A slow, sad song in an exciting action video? Not a great match. So, make the music from the YouTube Audio Library match the tone and energy of your content.
- Making the Music Too Loud: Your background music should support your video, not take over. Constantly adjust the volume when using tracks from the YouTube Studio Audio Library so everything is clear.
- Ignoring New Music Updates: YouTube continually adds and removes tracks from the YouTube Sound Library. So, don't miss out on fresh, new sounds, and check back regularly to find the latest tracks available.
Part 3. Beyond YouTube's Audio Library: Create a Custom Track for Your YouTube Videos
You now know how to use the YouTube Audio Library to add free music and sound effects to your videos. It's a great resource, but sometimes, you need something that perfectly fits your video's vibe. Maybe you want to mix different moods, combine multiple genres, or create a unique sound that makes your content stand out.
That's where you'll need something more potent than YouTube's Audio Library. Free sites like Free Music Archive and Incompetech offer royalty-free music, while premium options like Epidemic Sound and Artlist provide high-quality tracks. But if you're looking for an all-in-one solution that lets you customize and create music inside your video editor, Wondershare Filmora is the way to go.
 secure download

Here's why Filmora is a more powerful alternative to the YouTube Audio Library for accessing free music:
- Huge Library of Royalty-Free Music: Filmora offers a wide range of royalty-free tracks across different categories. Whether you need upbeat background music, cinematic scores, or chill vibes, there's something for every video style.
- Smart BGM for Effortless Music Creation: Filmora's Smart BGM feature automatically generates background music that matches your video's mood and pacing. This makes it simple to find the right soundtrack without spending hours searching.
- AI Music Generator for Custom Tracks: Filmora's AI Music Generator creates custom tracks based on your input. By describing the mood or style you need, the AI generates unique music that perfectly fits your video.
- A Complete Editing Toolkit: Filmora offers more than music customization. With its built-in media library, advanced effects, and professional editing tools, you can enhance your video with smooth transitions, filters, and high-quality visuals in one place.
- Direct Upload to YouTube: Once your video is complete, upload it directly to YouTube from Filmora without needing extra steps. You can also schedule your upload to go live at the perfect time.
In addition to all these great features, Filmora is also budget-friendly, with flexible pricing options and even a free version to try out first. This makes it an excellent free alternative to the YouTube Audio Library for adding music to your videos.
Below, you'll find a step-by-step guide on accessing Filmora's Audio Library, using the Smart BGM feature, and creating custom tracks with the AI Music Generator.
- Superb video stabilization with low distortion.
- Vast video/audio effects and creative assets.
- Powerful AI for effortless content creation.
- Intuitive, professional yet beginner-friendly.
- Works on Mac, Windows, iOS, and Android.

How to Access Filmora's Audio Library
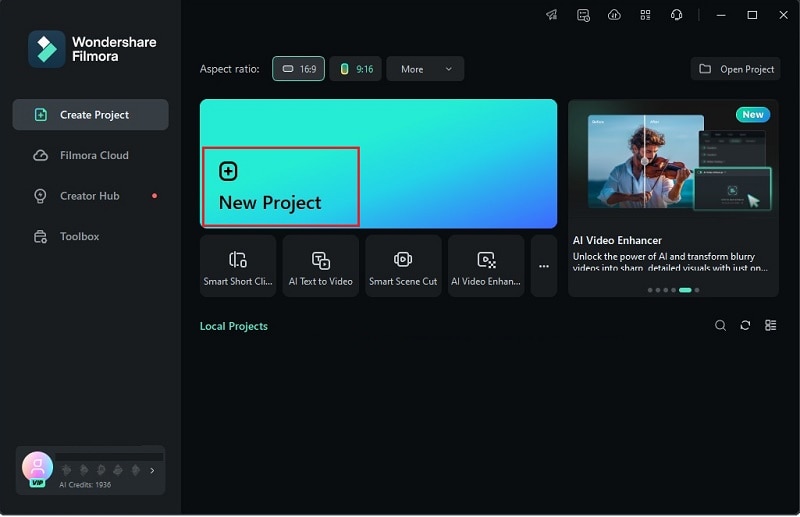
01of 05Open Filmora and upload your clips
Make sure you have the latest version of Filmora installed on your computer. Once everything is ready, open the program and select "New Project" to begin. This will bring you to the main editing timeline.
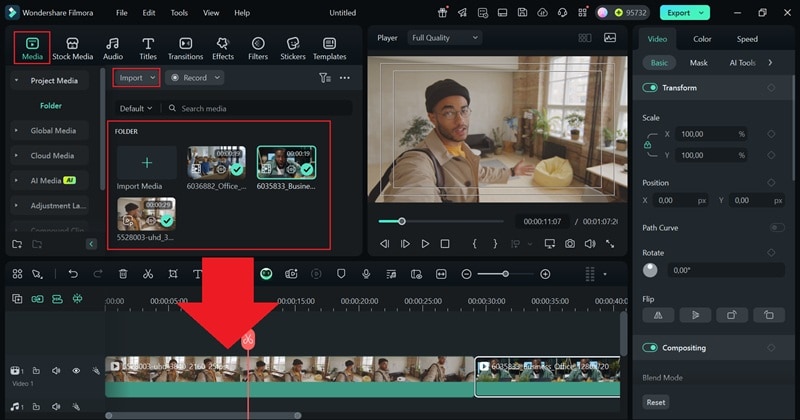
Next, navigate to the "Media" tab and click "Import" to add your footage. Drag the files to the timeline below and arrange them in the desired order.
secure download
02of 05Browse Filmora audio library and add the track to the timeline
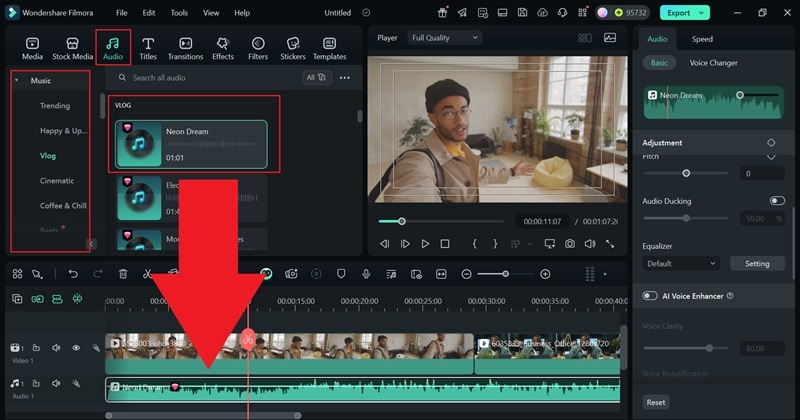
Click on the "Audio" tab at the top of the screen and select "Music" to open Filmora's built-in music library. Browse through different categories or use the search bar to find a specific track. Click the play button to preview a song, and when you find the right one, drag and drop it onto your timeline. Adjust its placement to sync perfectly with your video.
03of 05Adjust audio settings
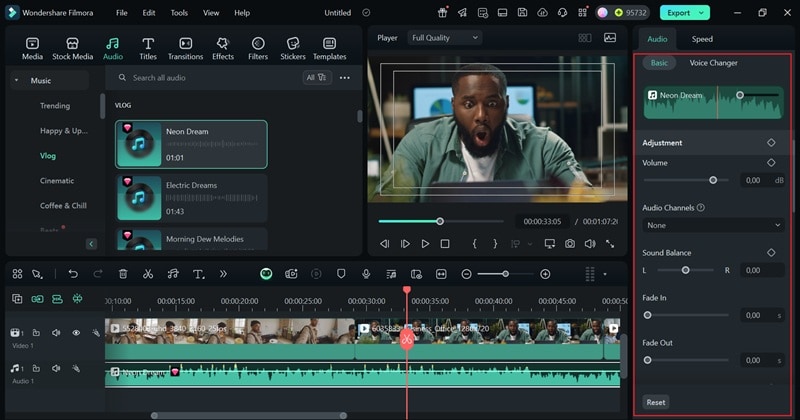
The property panel on the right allows you to tweak the music. You can adjust the volume, add a fade-in or fade-out, or even use the AI Voice Enhancer for better sound quality. Scroll down to explore all the available audio settings.
04of 05Enhance your video (if necessary)
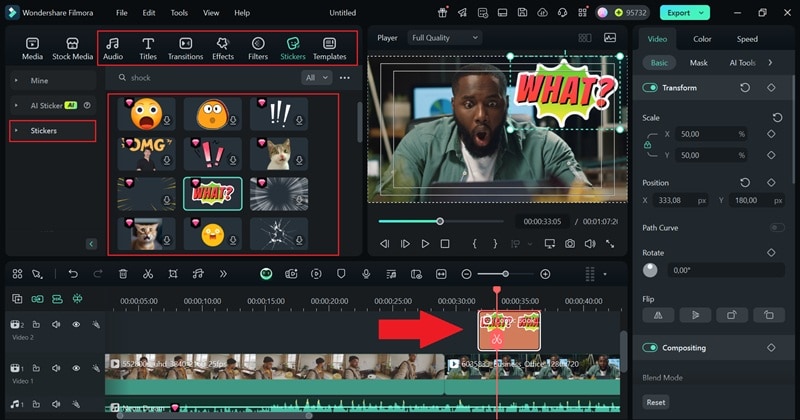
Take some time to explore Filmora's media library for filters, stickers, text styles, transitions, and more. Just drag and drop them onto the timeline where they fit best. These elements can help make your video more unique and visually engaging!
05of 05Export your video
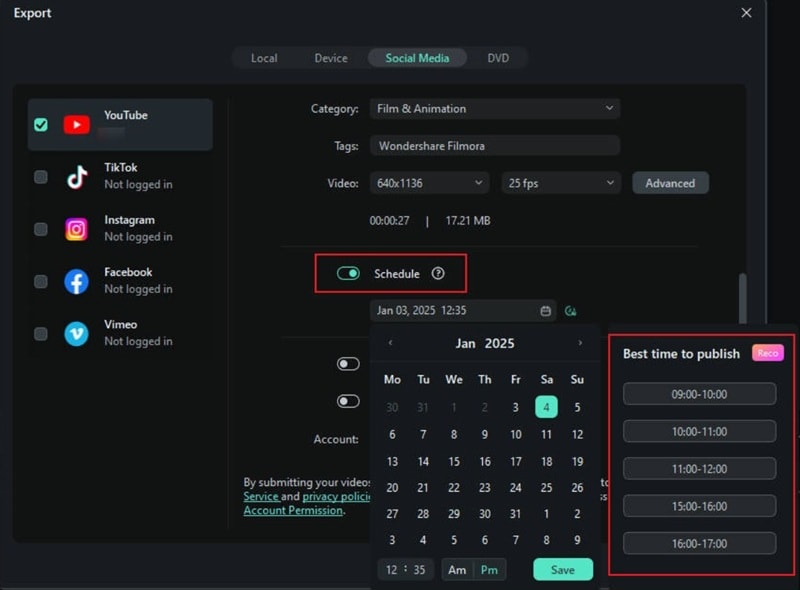
When your video is ready, click the "Export" button in the top right corner. In the export window, go to "Social Media" and select YouTube as your upload platform.
To schedule your post, select the Schedule option and set your preferred date and time. Before finalizing, customize the title, description, category, and video resolution to match your needs.
How to Create Background Music on Filmora
01of 02Upload your clips and find the Smart BGM feature
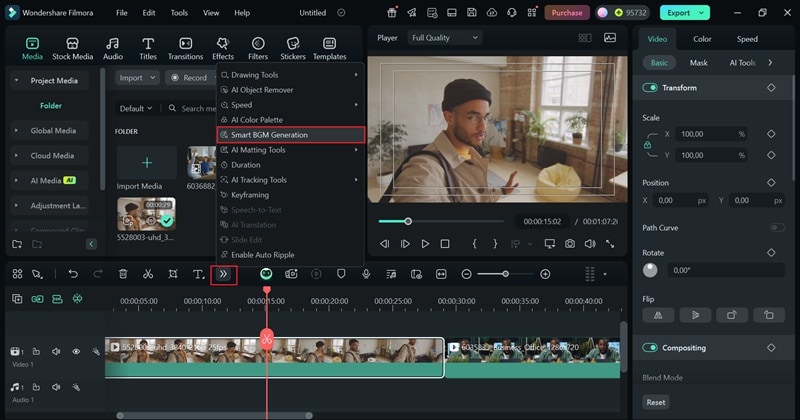
After opening Filmora and uploading your clips using the steps above, look for the Smart BGM Generation icon on the toolbar.
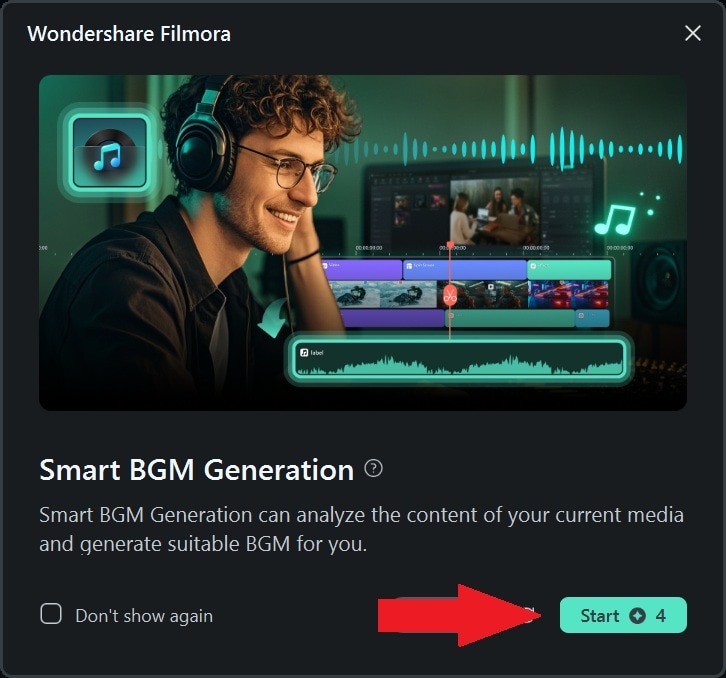
02of 02Start Generating BGM
Once you find it, click "Start" to begin. The program will analyze your video and automatically select a Smart BGM that matches its content.
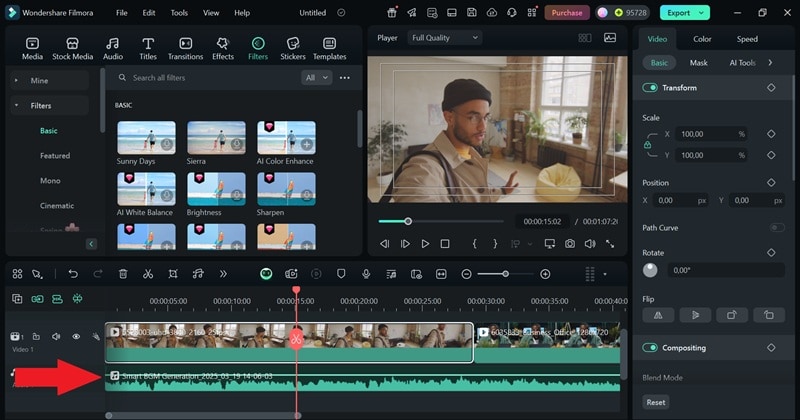
Once Smart BGM Generation is complete, the perfect background music will appear on the timeline. Just like that, it's ready to go! You can then take it further by adding stickers, filters, and effects to enhance your video before sharing it on YouTube.
How to Create Custom Audio Tracks on FIlmora
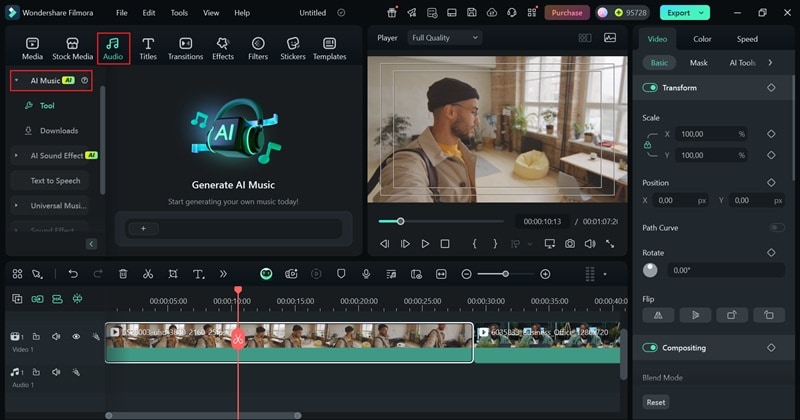
01of 03Open Filmora and access the AI Music Generator feature
Once again, open Filmora and add your video clips to the timeline. Then, navigate to the "Audio" tab and choose "AI Music" to begin.
02of 03Generate AI Music
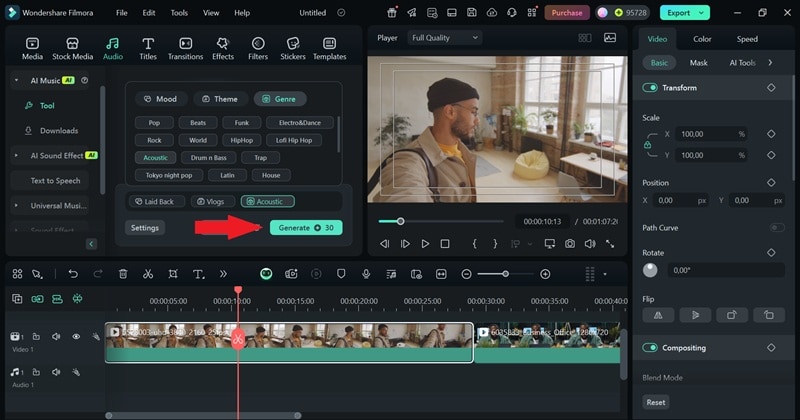
Click the plus icon on the prompt bar, then choose the Mood, Theme, and Genre for your custom track. If you go to Settings, you can adjust the Tempo and Music Duration. Once everything is set, click "Generate" and let the AI create your custom music.
03of 03Download and apply AI Music
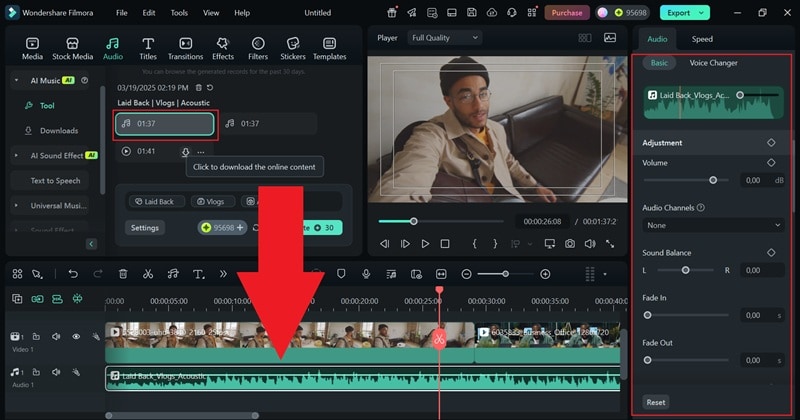
After the AI generates your music, click the download arrow to save it for commercial use. Drag the track onto the timeline and fine-tune the audio settings in the property panel. Now that your custom track is in place, you can enhance your video by adding stickers, filters, and effects before sharing it on YouTube.
Conclusion
The YouTube Audio Library is a free resource with royalty-free music for creators, but its limited track count and lack of customization may hold you back. For more variety, try Wondershare Filmora—it offers a vast music library, Smart BGM to auto-sync music to your video, and an AI Music Generator to create custom tracks. Go beyond the basic YouTube music library for creators and bring your content to life with Filmora.
secure download
