
 100% Security Verified | No Subscription Required | No Malware

YouTube thumbnailsare important for the success of your YouTube channel. They serve as the first impression viewers get of your content and can significantly impact your click-through rate. When a viewer is searching for a video, they need an eye-catching and relevant thumbnail that grabs their attention before deciding to watch it.
Given the importance of thumbnails, it's essential to pay attention to details such as size and format to make sure they look best. Fortunately, there are many YouTube thumbnail templates available today that simplify the design process.
To create a thumbnail that truly stands out and captures attention, check out this list of top templates and get some helpful customization tips.
In this article
Size Guidelines for Your YouTube Thumbnail Design
Creating a custom YouTube thumbnail is essential for attracting viewers, showcasing your YouTube branding, and boosting engagement. However, getting the size right is also crucial. A correctly sized YouTube thumbnail should appear clear and sharp on all devices. Thumbnails that are too large or too small can look blurry or distorted, which may drive potential viewers away.
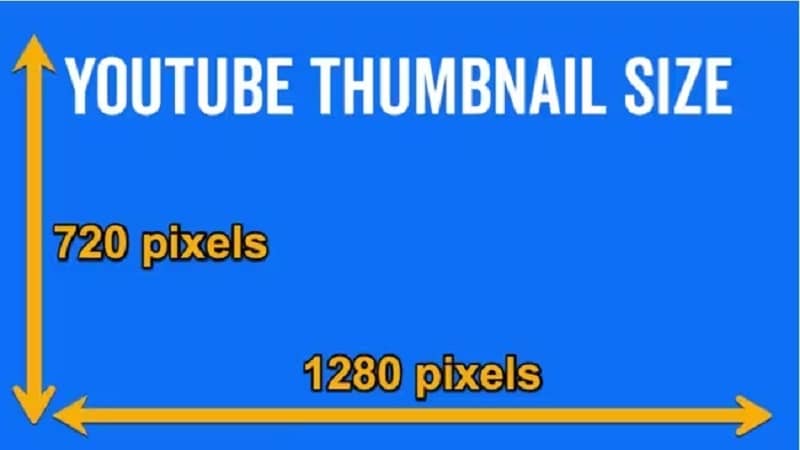
To help you get it right, here are the essential YouTube video thumbnail dimensions to follow:
- The ideal width and height for a YouTube thumbnailare 1280 x 720 pixels.
- Make sure the thumbnail file size is under 2MB.
- Save the thumbnail in JPEG, PNG, or GIF format, but the best format is JPG.
- The ideal thumbnail ratio for YouTubeis 16:9.
- The width of the thumbnail should be at least 640 pixels.
Finding the Best YouTube Thumbnail Templates
Next, finding great YouTube thumbnail templates is easy with so many options available online. Whether you need something basic or more creative, there are plenty of resources to choose from.
To help you get started, we've put together a list of our top picks for YouTube thumbnail templates that will make your videos look attractive to get more viewers:
1. Wondershare Filmora
Wondershare Filmora is a top choice when it comes to creating YouTube thumbnail templates. Thanks to its AI Thumbnail Creator feature, this video editing software not only helps you create and edit videos quickly and easily but also allows you to generate and customize thumbnails based on your video's content. This way, you can handle both video editing and thumbnail creation on the same platform. No need to switch tools for such tasks.
Filmora stands out with its user-friendly interface and extensive features. It offers a rich library of effects and transitions, along with useful tools like the AI Sticker Generator and a variety of video preset templates. This makes it a versatile tool for all your video editing needs.
Available on: Windows, Mac, Tablet, Android, and iOS.
Price: Free version available. Subscription plans start from $49.99/year.


2. Canva
One of the most popular options for YouTube thumbnail templates is Canva. It provides a wide variety of customizable templates and design tools, making it easy to create eye-catching thumbnails quickly. Additionally, Canva is highly accessible, allowing you to edit templates directly on their website.

Available on: Windows, Mac, Android, and iOS.
Price: Free version available. Subscription plans start from $12.99/month.
3. Kapwing
Another great option for YouTube thumbnail templates is Kapwing. This online video editor provides a free 1280 x 720px template tool for resizing photos or images to the perfect YouTube thumbnail size. Beyond resizing, Kapwing lets you add text, insert stickers, adjust colors, and create custom designs to ensure your thumbnails grab attention.

Available on: Kapwing works entirely online, so you can access and edit your content from any device or location.
Price: Free version available. Subscription plans start from $24/month.
4. PosterMyWall
PosterMyWall is another great choice for creating YouTube thumbnail templates. In addition to thumbnails, it offers hundreds of customizable templates and design tools for email campaigns and various publishing options. You can also upload your logo and brand fonts for consistent branding or create a new logo for your YouTube channel.

Available on: PosterMyWall works entirely online, so you can access and edit your content from any device or location.
Price: Free version available. Subscription plans start from $9.95/month.
5. Snappa
Lastly, we recommend Snappa for YouTube thumbnail templates. Since its founding in 2015, Snappa has become a top choice for editing images, with over 30 million images created using the platform. It provides a range of ready-made templates designed to make your videos stand out and attract more clicks. All templates are free, correctly sized, and easy to customize.

Available on: Snappa works entirely online, so you can access and edit your content from any device or location.
Price: Free version available. Subscription plans start from $15/month.
Author's Pick and How to Create YouTube Thumbnail
When it comes to choosing the best YouTube thumbnail templates, Wondershare Filmora stands out as the top choice. One of the main reasons is its AI Thumbnail Creator, which makes Filmora different than other video editors like CapCut and allows you to easily create eye-catching thumbnails based on your video's content with the help of AI.
Besides the AI Thumbnail Creator, Filmora has other advanced features to make, edit, and enhance your YouTube videos. You can use preset templates for intros and outros to create more polished content. These templates are user-friendly and make it simple to produce high-quality videos. Additionally, Filmora is more affordable than other video editing software with similar advanced tools.
Follow these step-by-step instructions to create YouTube videos then use the AI Thumbnail Creator feature to make the thumbnail:
Step1Use a preset template for intro
Before making the thumbnail to your YouTube video, you need to create to upload or create and edit your video first using Filmora's features. YouTube videos usually consist of intro, video content, and outro (end screen).
For intro, you can go to the "Templates" tab at the top and choose the "Templates" category. Look around the available templates, click on one to preview it, then drag it to the editing timeline. You can edit the template's materials and content by clicking the "Click to Replace Material" button.

Step2Upload your video place it on the editing timeline
The next step is adding your video content. If you want to add your own video or footage, you can navigate to Media > Project Media and click the "Import" button. Then position it after the opening intro on the editing timeline.
Alternatively, you can also find available footage by accessing Filmora's stock media from the "Stock Media" tab. Choose one and position it after the opening intro on the editing timeline.

Step3Use a preset template for outro
For your outro, use Filmora's template just as you did for your intro. Go to the "Templates" tab and select Library > Outro to find one. Or you can simply type in "YouTube outro" to make the process easier. Select your preferred template and place it on the editing timeline.

Step4Export your video and use AI Thumbnail Creator tools
Once you're done editing, click "Export" to activate the AI Thumbnail Creator. In the export window, click "Edit" under the thumbnail. Then, select the thumbnail option suggested by AI or you can manually select the frame you want to use for the thumbnail. Customize it further by clicking the "Edit" button.

Step5Pick a template
When editing the video thumbnail, select a suitable template from Filmora's pre-designed options for different themes such as food, vlogs, music, and more. Choose one that matches your needs, and Filmora will automatically add the template's content to your thumbnail.

Step6Edit your thumbnail
If you want to customize the thumbnail, double-click on it. Edit the text, adjust the position and size, change the color, and make any other modifications you like. Ensure it is engaging and clearly conveys the content of your video. When done, click the "Save" button.

Part 3. Creating Impactful YouTube Thumbnails: Pro Tips
While using AI Thumbnail Creator by Filmora can be incredibly helpful, you still need to consider other factors to make your YouTube thumbnail impactful. A compelling thumbnail can be the deciding factor between someone clicking on your video or scrolling past it.
Here are some professional tips to help you design eye-catching and effective YouTube thumbnails:
Follow YouTube Video Thumbnail Dimensions: Make sure your thumbnail follows YouTube's recommended thumbnail width and heightof 1280x720 pixels for the best display on all devices.
Use Engaging Text: Adding catchy titles to your thumbnails is a great way to attract viewers' attention. A well-crafted title gives viewers a quick glimpse of your video's content.
Incorporate Branding Elements: Include your logo or consistent colors to maintain brand recognition and make your videos easily identifiable.
Highlight Faces and Emotions: Featuring faces and expressive emotions can draw viewers in and make your thumbnail more relatable. For added creativity, you can use the AI Sticker Generator by Filmora. With this powerful feature, creating high-quality custom stickers is simple. Just describe your sticker in the text box under the "AI Sticker" tab, and the AI will generate various versions for you. You can also add elements such as text and animations, or resize the sticker to fit your needs.

Test Different Thumbnails: Experiment with various thumbnail designs to see which ones perform best, and adjust based on your findings to maximize viewer engagement.
How to Upload a Custom Thumbnail to a YouTube Video
After creating a customized thumbnail image, the next step is to upload it to your YouTube video. This process is straightforward and quick, involving just a few easy steps. Here's how you can do it:
- Step 1: Open your YouTube account and upload a new video by clicking the camera-plus icon.

Or if you want to add a thumbnail to an already uploaded video, go to the Studio dashboard and select the video you want to edit.
- Step 2: Click on the "Upload File" box under the "Thumbnail" option.

- Step 3: Select and upload your custom thumbnail image, then click the "Upload" button.
Conclusion
In conclusion, paying attention to YouTube thumbnail size is crucial for creating a visually appealing thumbnail and can greatly influence your click-through rate. Fortunately, with numerous templates available online, designing an eye-catching thumbnail has never been easier.
Our top pick for YouTube thumbnail templates is Wondershare Filmora, which stands out with its AI Thumbnail Creator. This feature makes it simple to create striking thumbnails with the help of AI, while other advanced tools and preset templates enhance your video content.
With Filmora's tools and the professional tips for creating impactful thumbnails provided in this article, you can make your YouTube channel truly stand out.
