Have you ever watched a documentary or a news report where the faces of individuals were obscured? This is a common technique used to protect privacy, avoid legal issues, or simply enhance the overall aesthetic of a video. It's a subtle but powerful tool that can impact how viewers perceive and interact with your content.

While there are numerous tools available for blurring faces, Final Cut Pro (FCPX) stands out as a popular choice for video editors and creators who need pro-level tools for their face-blurring projects. In this guide, you will learn how to blur faces in Final Cut Pro, including step-by-step instructions and tips to achieve professional-looking results.
In this article
Part 1: How to Blur Faces Using Blur Effects on Final Cut Pro
Different blur types can be used in different situations to get different results.Final Cut Pro offers a variety of blur effects, each designed for unique creative needs and scenarios. Here’s a breakdown of the most popular options:
-
Gaussian Blur
- Produces a smooth, natural blurring effect.
- Ideal for softening edges or backgrounds while maintaining a professional look. -
Directional Blur
- Creates a blur effect in a specific direction.
- Perfect for adding motion or simulating speed in action-packed scenes. -
Zoom Blur
- Generates a dynamic zooming or spinning effect.
- Great for emphasizing transitions or adding dramatic focus to a particular subject.
Follow these steps to create blur faces in Final Cut Pro.
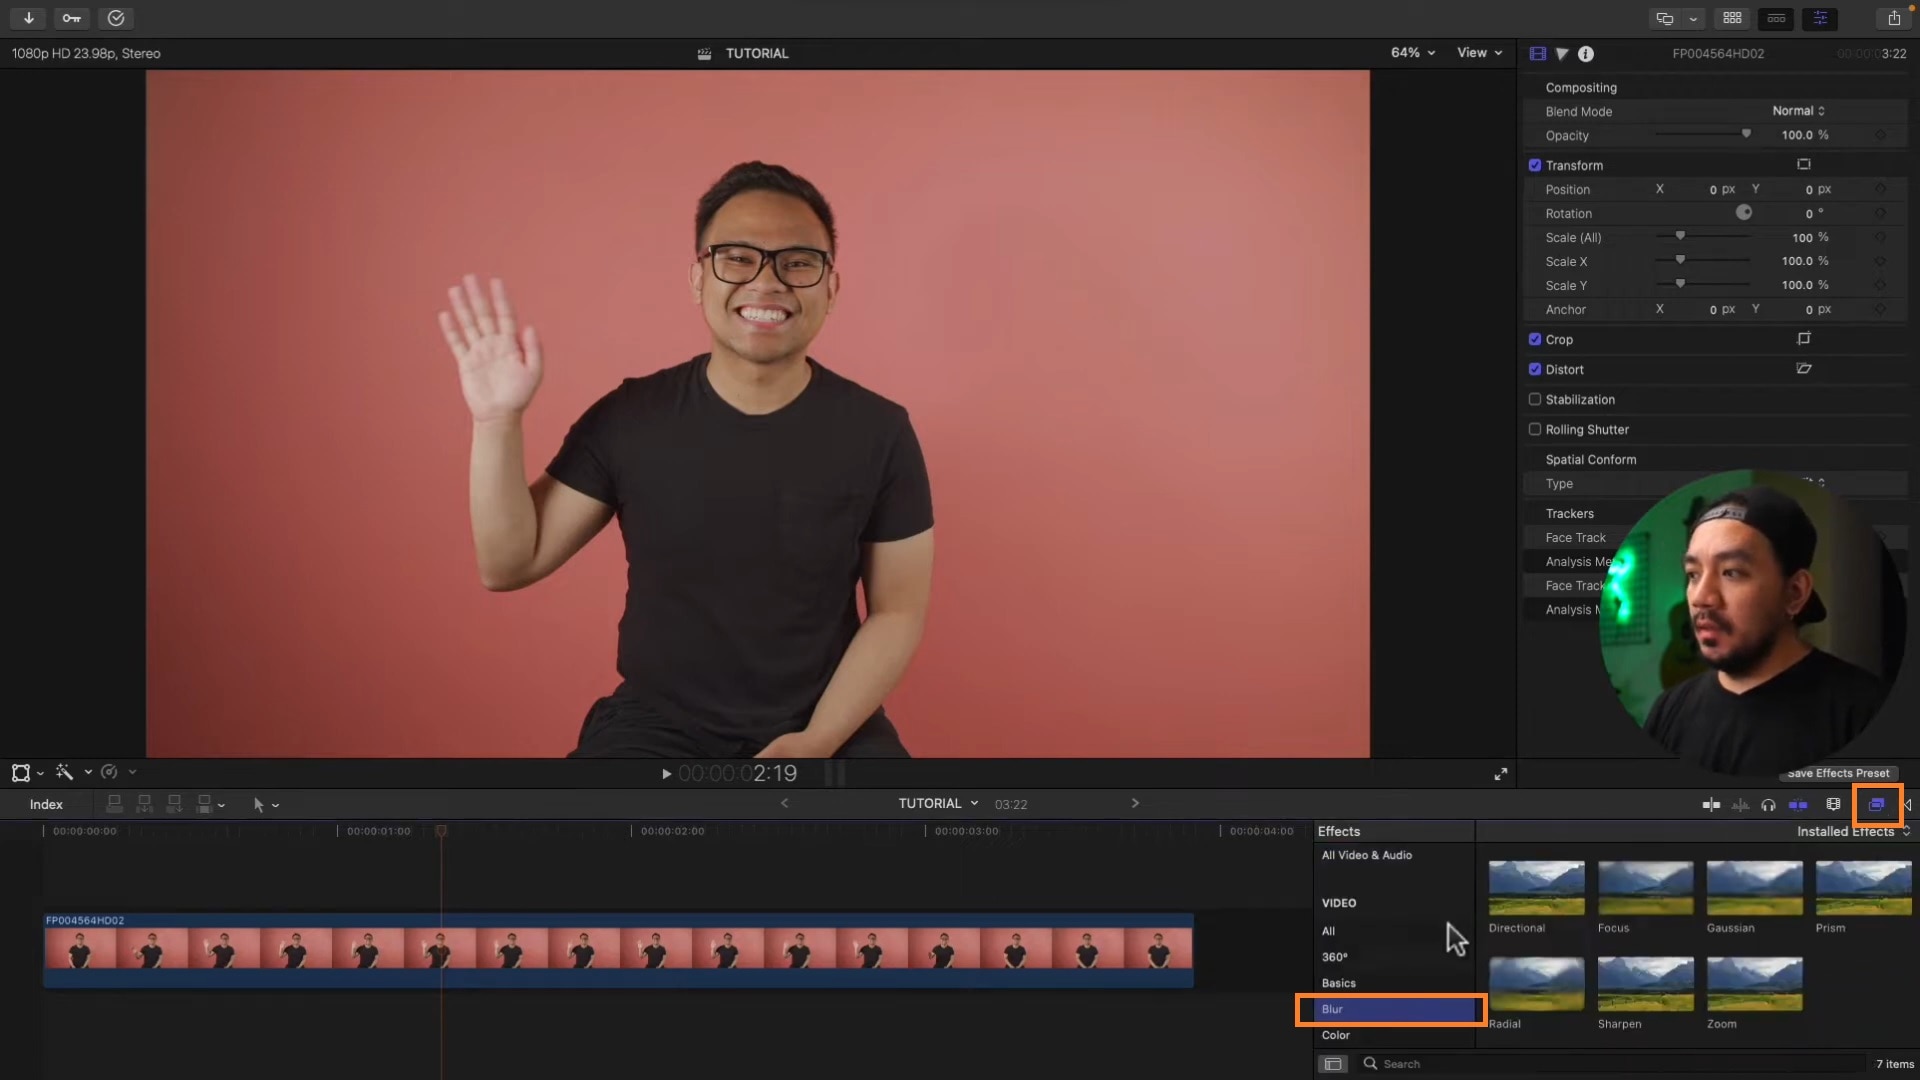
Step 1: Upload your video cpp to the timepne. Go to Effects > Blur. You will notice a panel of different blur types.
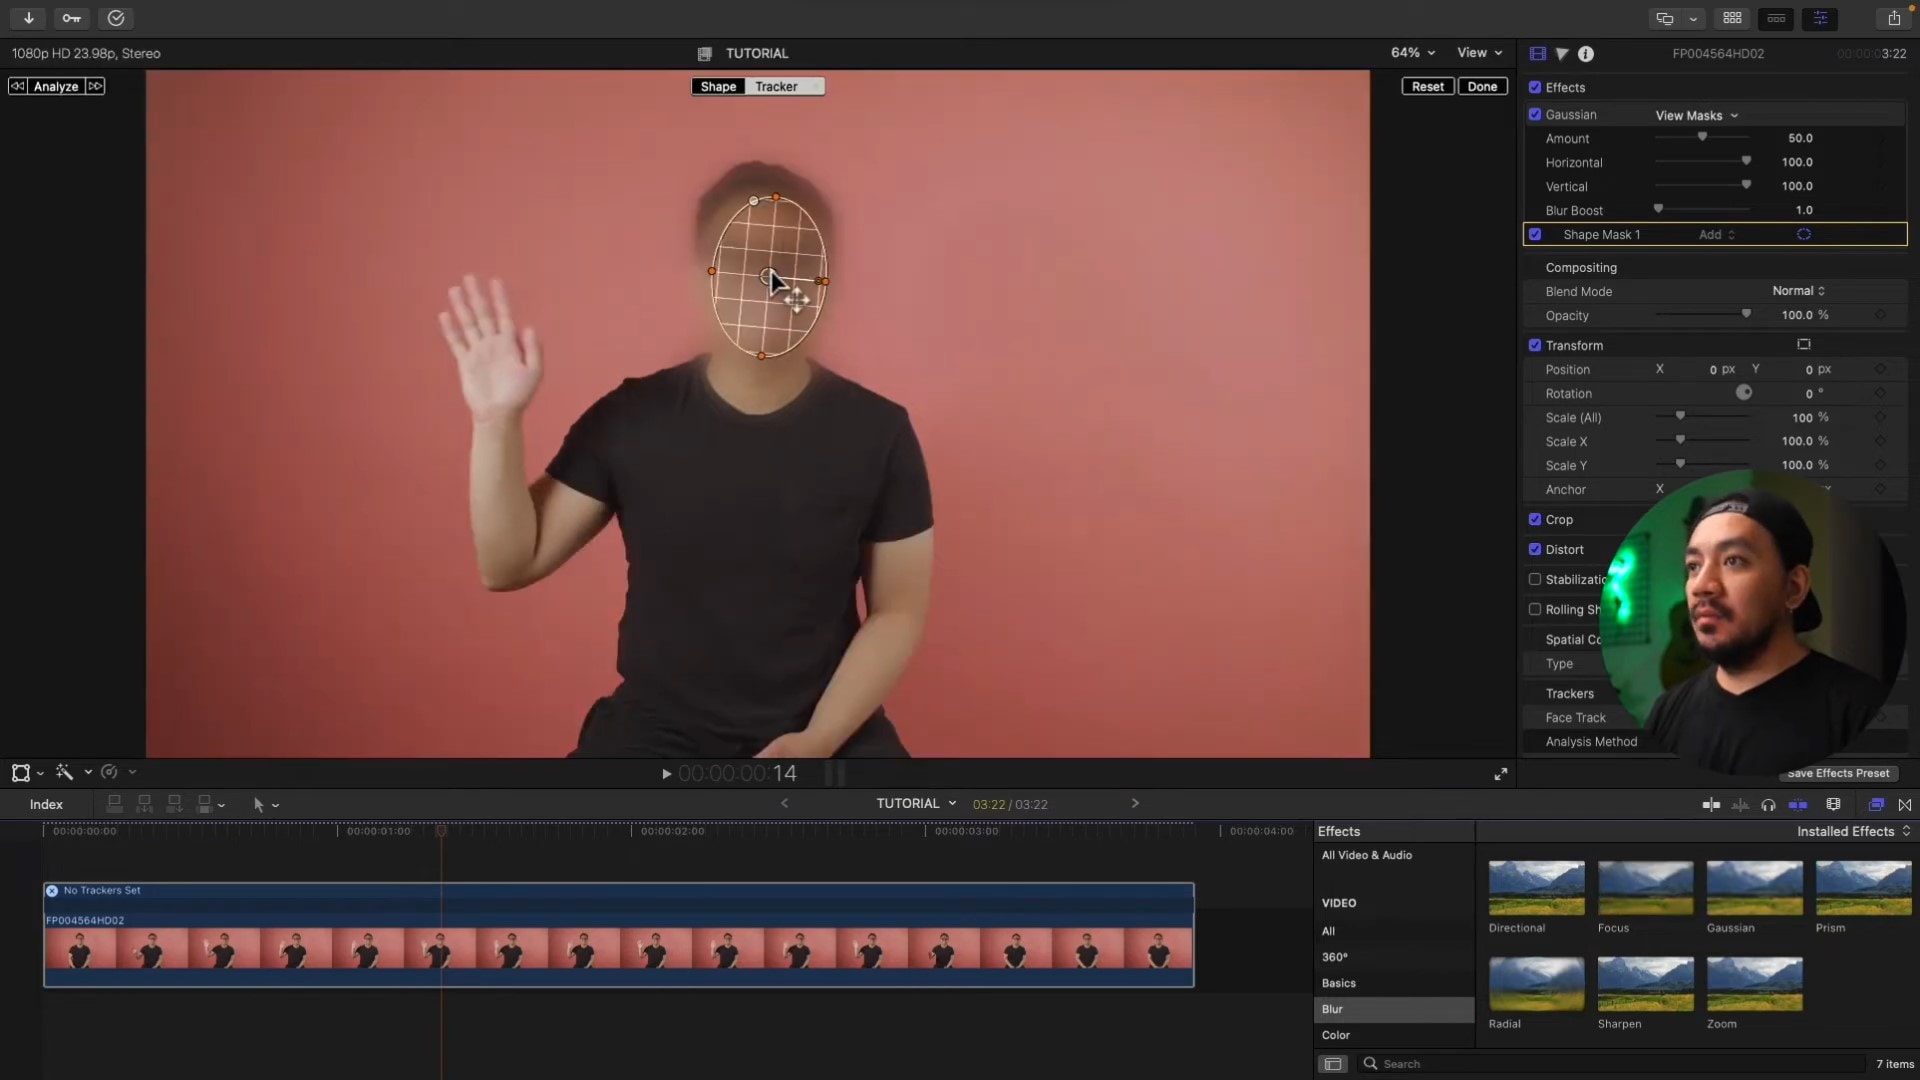
Step 2: Cpck on and drag your selected blur type to the face you want to blur in the video. It should look pke this. To adjust the blur shape, cpck on Shape and move the anchor points to fit the face.
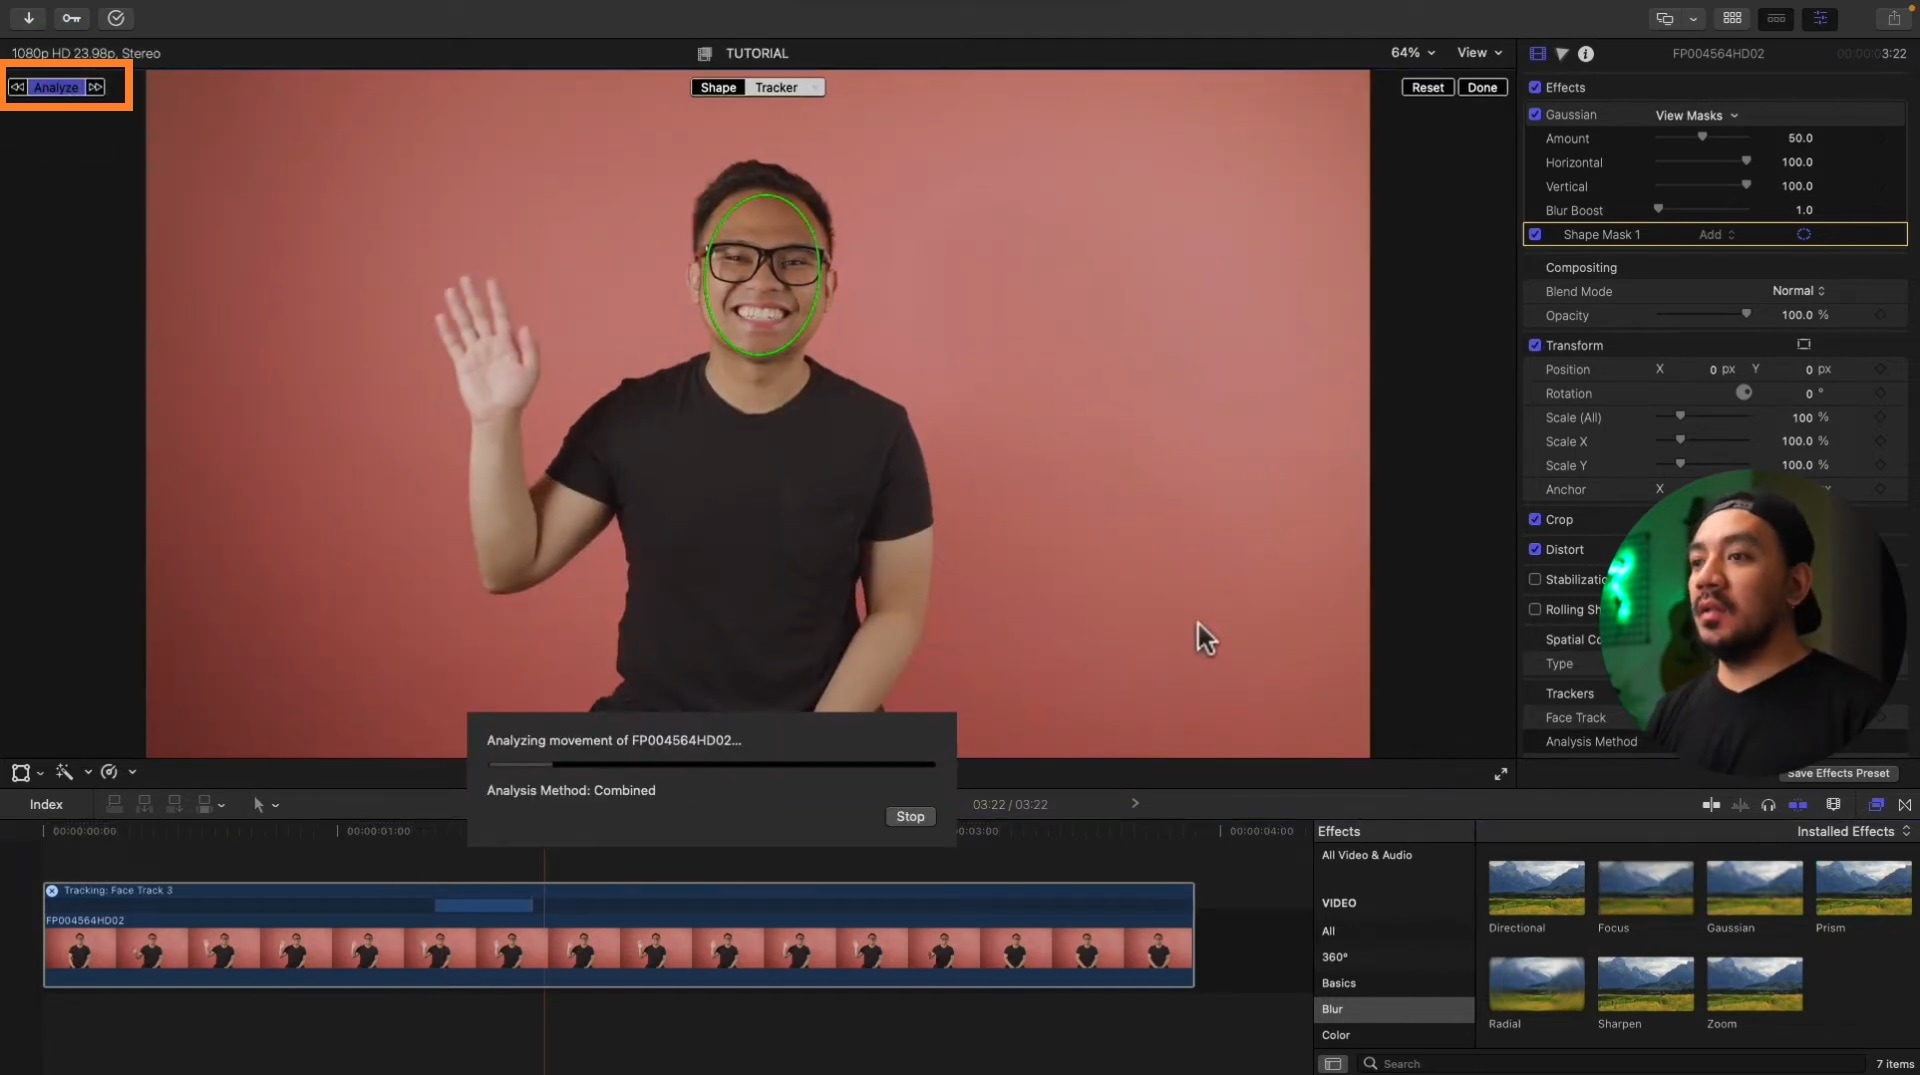
Step 3: Cpck Analyze and wait for Final Cut Pro to analyze your selected face.
You can modify blur types, change blur shapes, and adjust blur intensity in the editor panel to your right.

Cpck on Done and you’re good to go!
To pixelate a face in Final Cut Pro, simply select the Pixelate in the Effects tab. Then follow the same procedure as a regular blur effect.
Part 2: Blur Faces with Filmora:A Quick Alternative to Final Cut Pro
While Final Cut Pro is a simple and ideal tool for adding blur to faces in videos, Wondershare Filmora offers a quick alternative that leverages artificial intelligence to automatically detect and blur faces in your videos, saving you time and effort.
Filmora’s AI Face Mosaic is precise, accurately identifies faces, and applies blur effects with minimal manual intervention.
Follow these steps to add face blur on videos using Filmora.
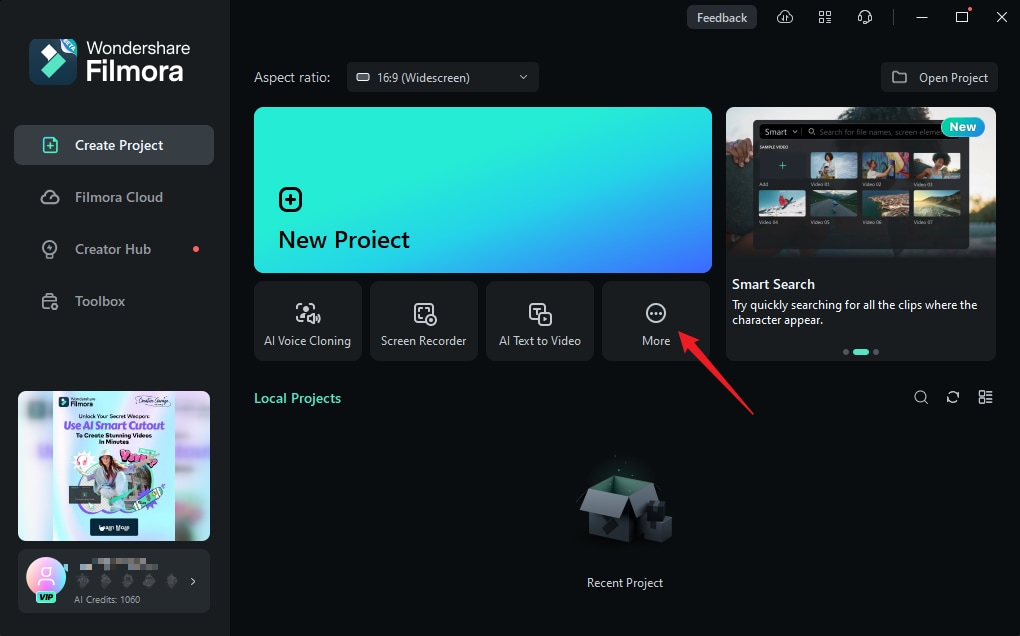
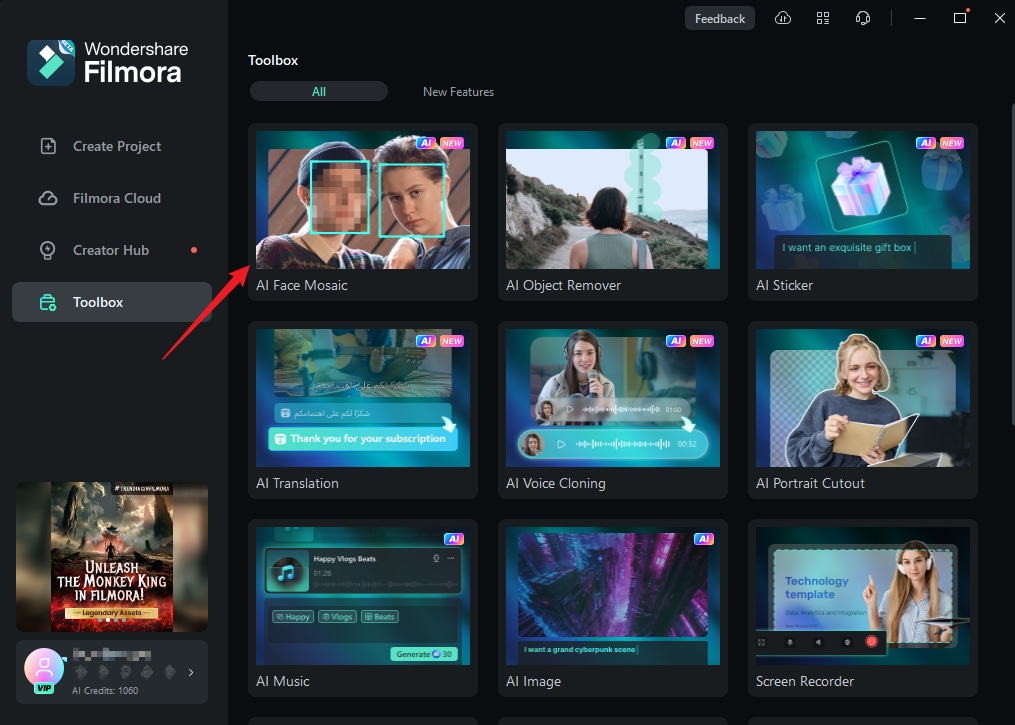
Step 1: Once you open Filmora, cpck More to access the toolbox.
Step 2: Cpck on AI Face Mosaic, and import your desired video.
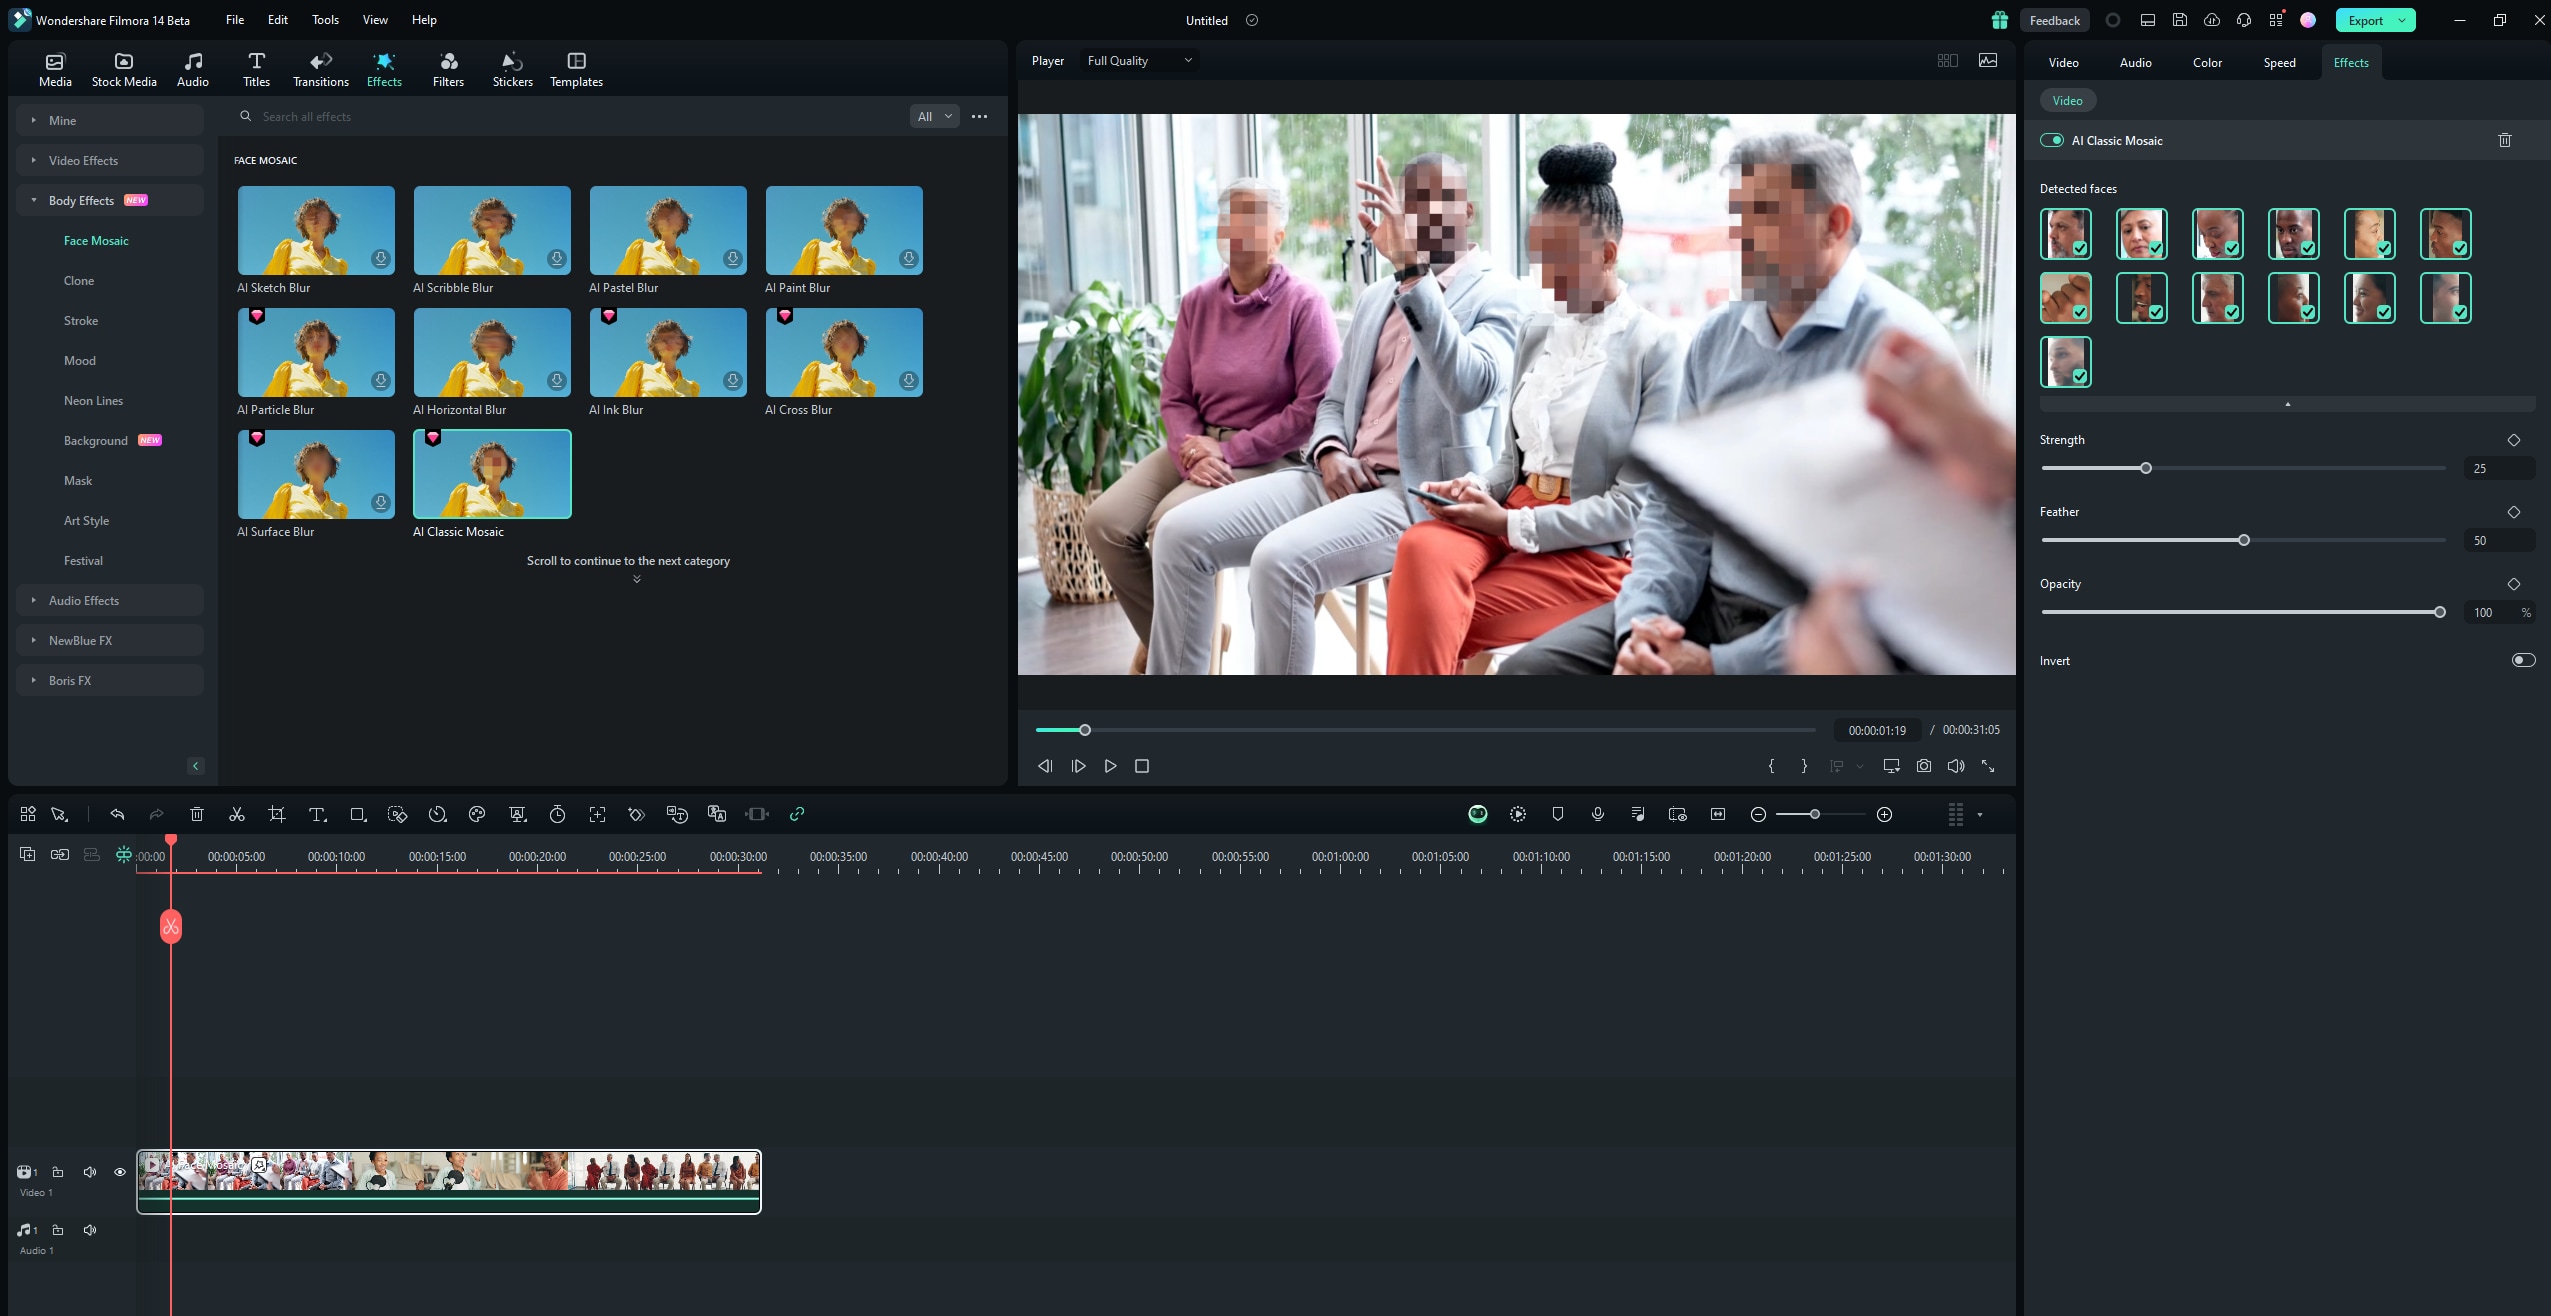
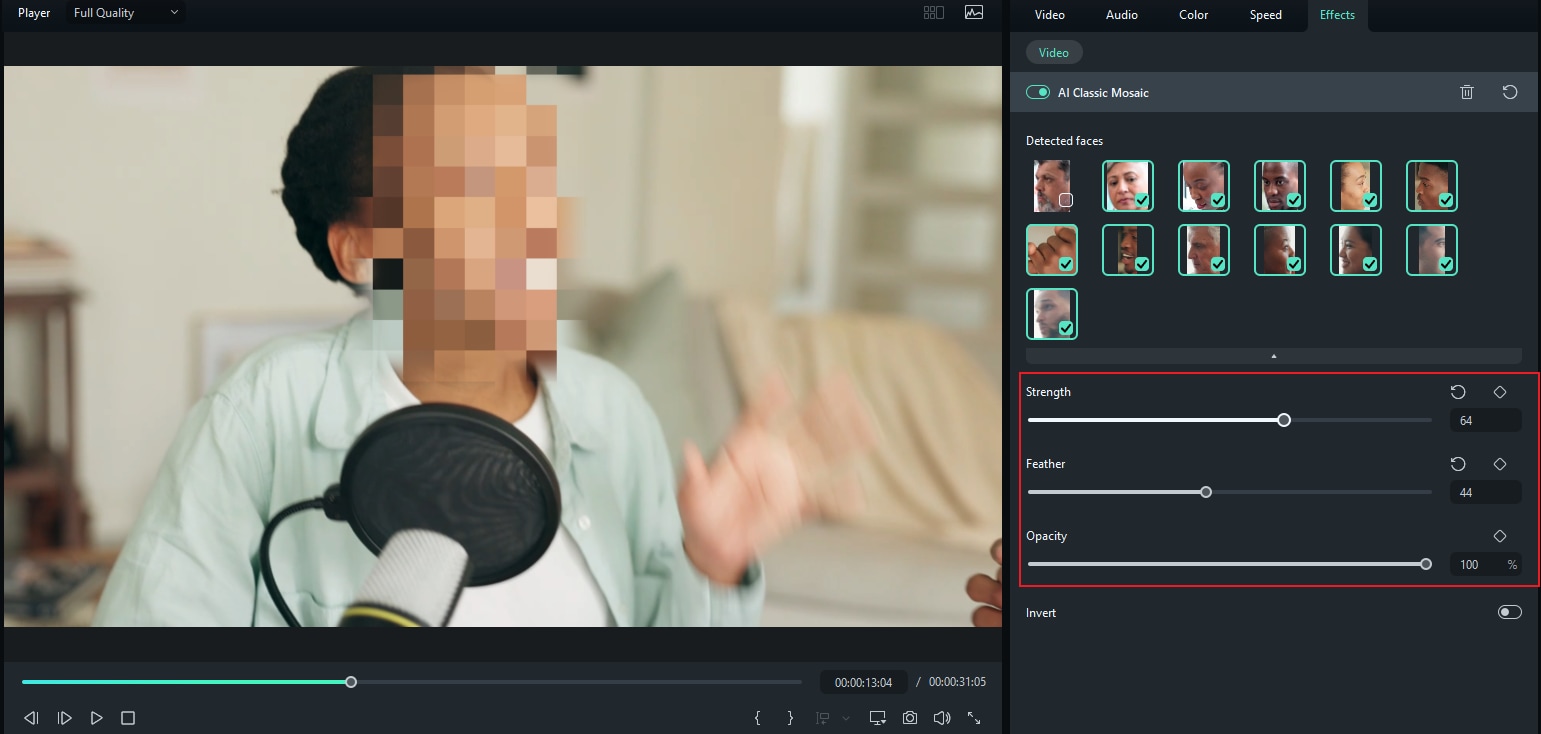
Filmora will analyze the video, and automatically add mosaic to every face in the video.
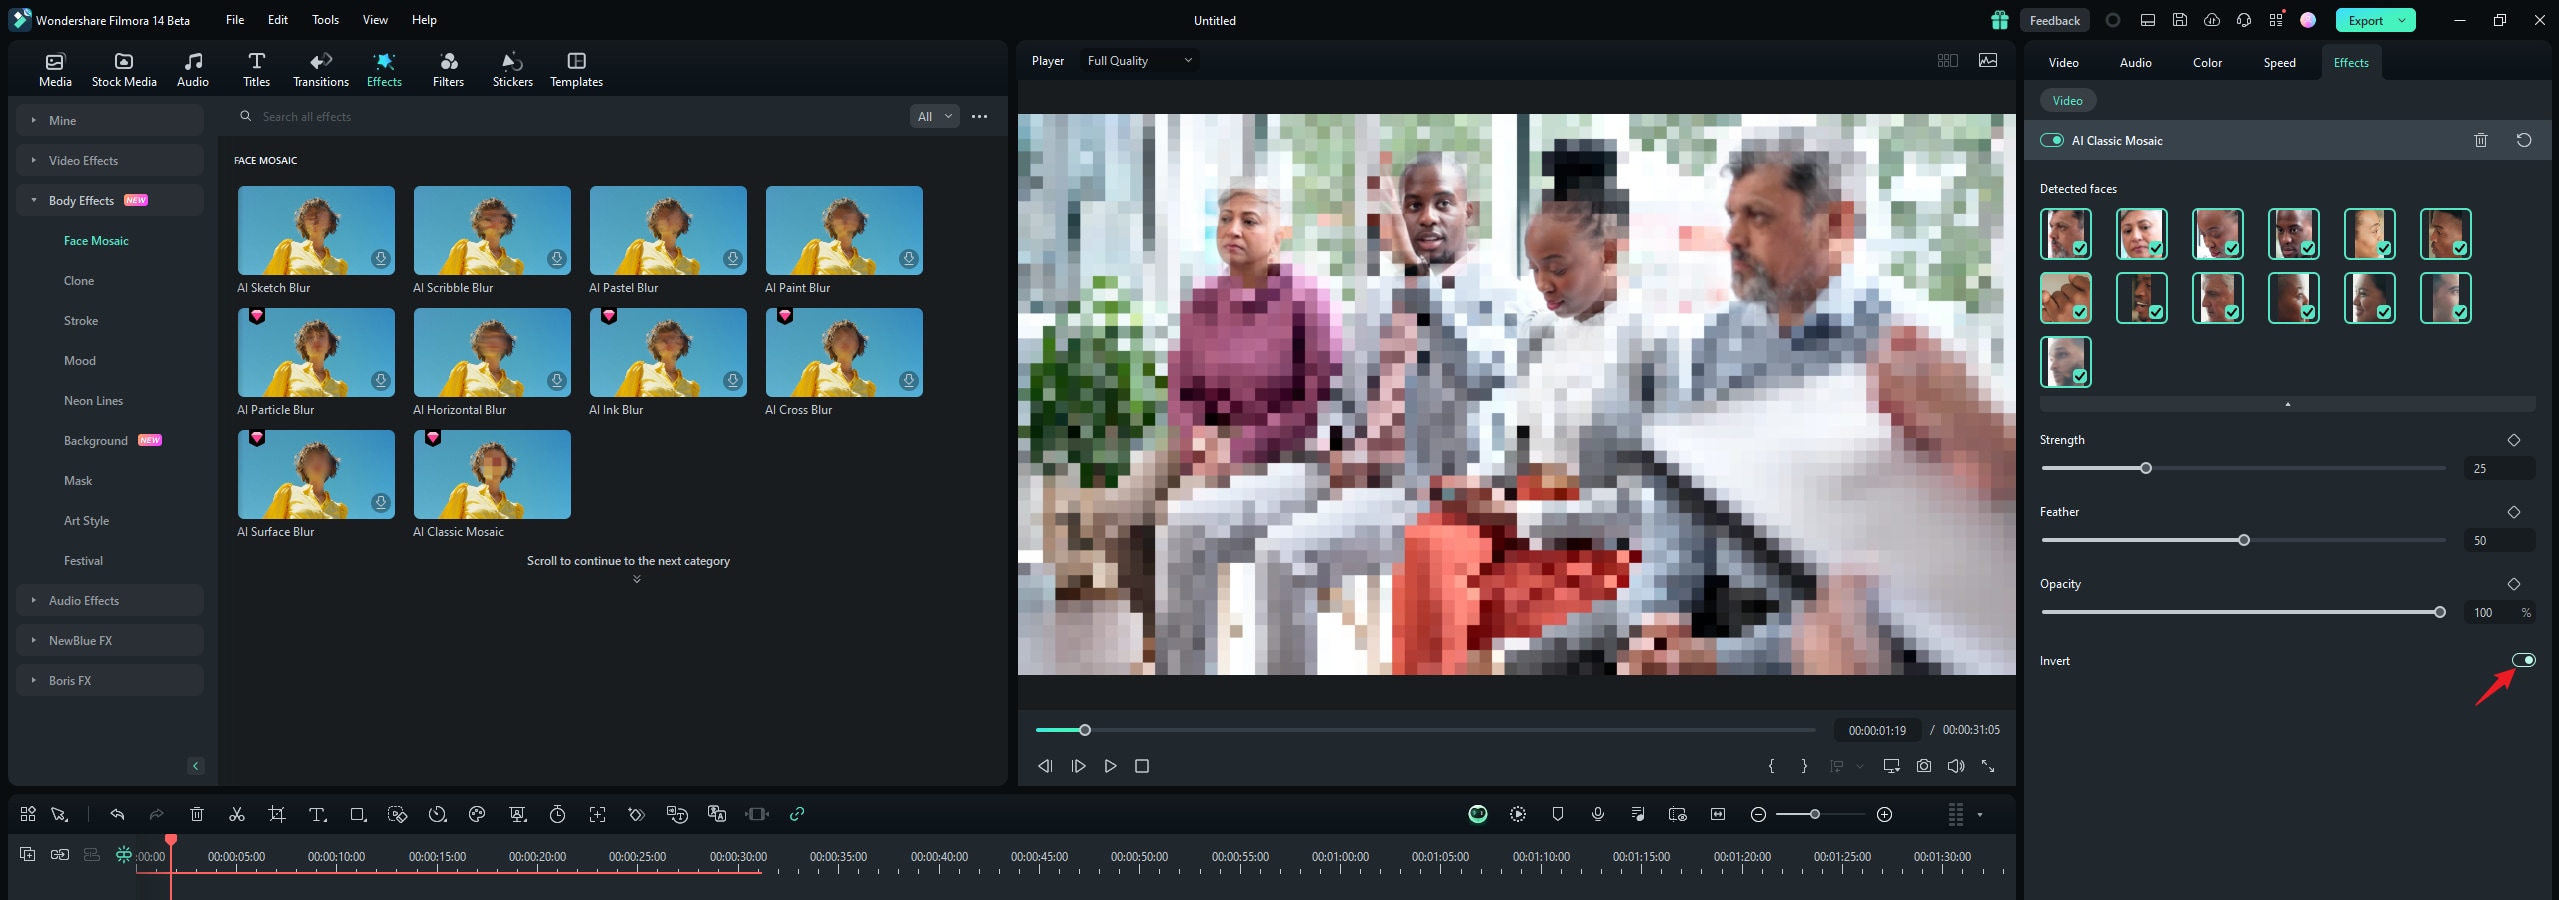
To add the mosaic feature to other parts of the screen except for the faces, open Invert.
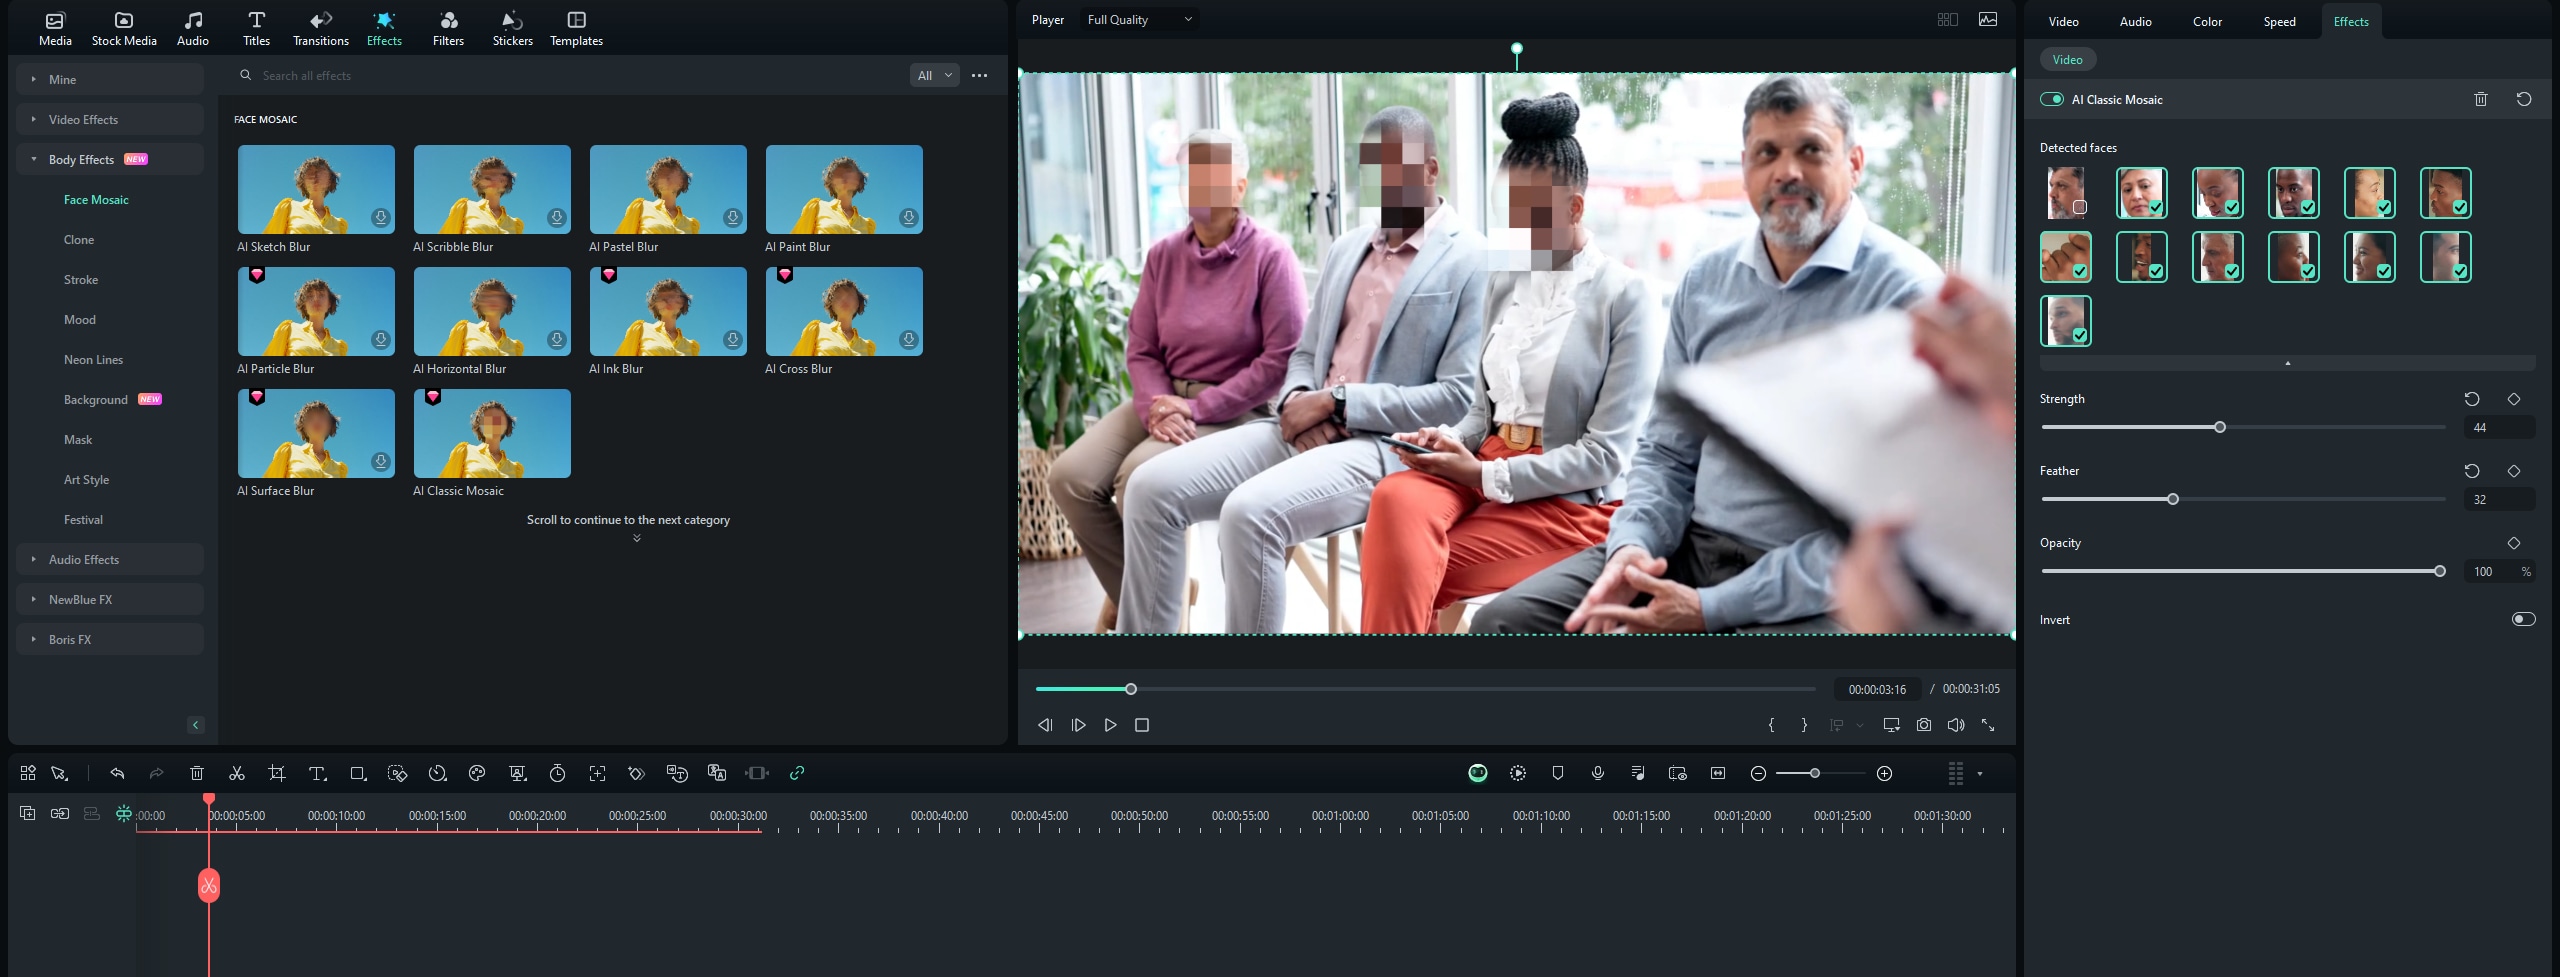
To remove blur from a face, simply Deselect the face.
To adjust the blur effect, adjust blur Strength, Feather, and Opacity in the Property Panel.
Comparison: Filmora vs Final Cut Pro: Which Blur Effect is better?
Final Cut Pro's (fcpx) blur face feature is quite effective and so is Filmora’s. However, they cater to different workflows and are used in slightly different use-case scenarios.
Let’s analyze how these two tools work and help you decide which of them is best suited for you and your needs.
| Aspect | Filmora (AI Face Mosaic) | Final Cut Pro (FCPX) |
|---|---|---|
| Time & Efficiency |
- AI-powered blurring for quick and easy application. - Ideal for casual editors, vloggers, and YouTubers needing speed. |
- Requires manual adjustments for masking and tracking faces. - Better suited for detailed and complex edits but more time-consuming. |
| Precision & Tracking |
- Automatic face detection and real-time motion tracking. - Great for simple edits with multiple faces in motion. |
- Offers manual control for pinpoint accuracy and customization. - Excels in handling intricate masking for high-end projects. |
| Output Quality |
- Clean and effective blur for everyday content. - Perfect for social media and online videos. |
- Broadcast-level quality, smoother blur effects for professional use. - Ideal for commercial and cinematic projects. |
| Cost & Accessibility | - More affordable and accessible for creators of all levels. | - Higher price point, better suited for professional editors. |

Filmora vs Final Cut Pro: Blur Effects Comparison Table
| Criteria | Filmora | Final Cut Pro |
| Ease of Use | Quick, automatic face detection | Manual, requires clearer or closer range for face detection |
| Time Efficiency | Fast, ideal for quick edits | Slower but precise |
| Output Quality | High quality, great for casual videos | High-quality, professional blur |
| Best For | Beginners, casual editors, professionals looking for a quick fix | Professional editors, advanced projects |
- Blur faces in videos with extensive tools and dynamic interface.
- Vast video/audio effects and creative assets.
- Powerful AI for effortless content creation.
- Intuitive, professional yet beginner-friendly.
- Works on Mac, Windows, iOS, and Android.

Conclusion
Using Final Cut Pro blur face tool to blur faces in videos is quite simple and takes only a few steps. However, the process is even simpler with Filmora.
In the end, it’s all about what you need for your specific project. If control and precision are your top priorities, then Final Cut Pro is the tool for you. But if you’re looking for speed and simplicity, Filmora’s AI Face Mosaic is a fantastic option.


