Creating a teaser video is important for capturing the attention of your audience. It compels them to learn more about your product, show, or service. At this age, when videos are popular on social media, you can stand out from the crowd with an original trailer.
If you are a videographer and want to know how to make your videos stand out, do not worry. Creating a video teaser that captivates can be hard but possible.
This article will examine tried-and-tested techniques for creating attention-grabbing teaser videos. We will focus on the Filmora teaser video maker tool, which makes the process much easier.
In this article
Part 1: What is a Teaser Video?
Teaser clips are short videos created to briefly introduce your video content, which can be social media content or an online commercial. Teaser videos that go viral often strike a balance between engaging the audience and creating anticipation.
The major goal of a teaser video is to hook viewers' attention within 30 minutes or less. The video should leave the audience wanting more.
A great teaser video catches the audience's attention and addresses unanswered questions. Learning to create a teaser video will make you connect faster with your audience.
Part 2: Why Should You Create a Teaser Video?
A 30-second teaser video can inform an audience about a topic faster than a 5-minute blog. Video marketing has been around for a while and it's the best approach a business can take to grab audiences' attention.
- Create Excitement: Video teaser-making generates excitement among your viewers. Like movie teasers, product teaser videos for businesses highlight the services or products that customers expect from you.
- Increases Brand Awareness: A short teaser video shows the audience what to anticipate. This is great for content creators who want to build brand awareness. Consistent visuals and sounds in your clips help develop a strong and noticeable brand.
- Receive Feedback From The Target Audience: Teaser videos create anticipation among your audiences and engage them. When you release new products for your business, the audience can share their views on your content, which is important for your brand.
- Repurposing Material: Webcam teasers are popular in social media thanks to the versatility of the content that makes them sharable on many social media platforms. Repurposing the video businesses can build hype around their new service or product and finally in their customers.
Part3: How to Create a Teaser Video Using Filmora
Creating a captivating teaser video is essential for grabbing attention, and Filmora makes it easier than ever. With its user-friendly interface and powerful editing tools, you can quickly craft a teaser video that stands out. Whether you're promoting a product, event, or project, Filmora provides all the features you need to make your teaser video look professional and engaging.
Features That Can Help Create Teaser Videos
1. Basic Function
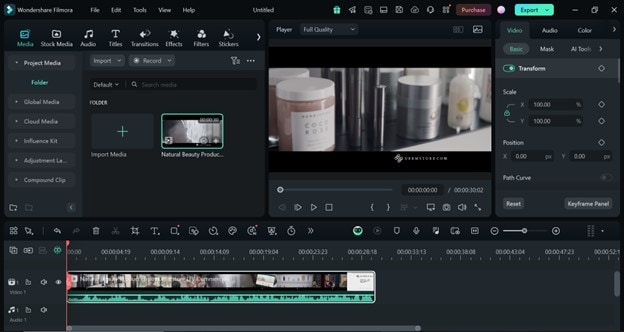
Preparation functions are necessary before basic video editing. You must check the system requirements, compatibility preferences, and performance settings for editing teaser videos.
- Project Creation: A beginner video editor should understand how to create projects, move, locate, and open them in Filmora.
- Importing Video Files: After creating projects, one needs to know how to import videos from different sources. This is from local drives, phones, cameras, or third-party drives.
- Basic Editing Steps: The editor needs to understand basic editing steps. The basic skills include trimming, cropping, rotating, and so on. Understanding basic columns like navigating keyframes, speed ramping, and video masks is key.
- Audio Editing: Familiarize yourself with audio fading and advanced audio mixer features. There are also advanced AI audio editing features that simplify the audio editing process. You can generate your background music, generate voice cloning, and also voice changer.
- Editing and Animating Text: Filmora offers you various options to add, edit, and animate texts. Video editors can also customize their videos by using features such as color editing, audio effects, filters, transitions, templates, stickers, and animations.
2. AI Tools You Should Try
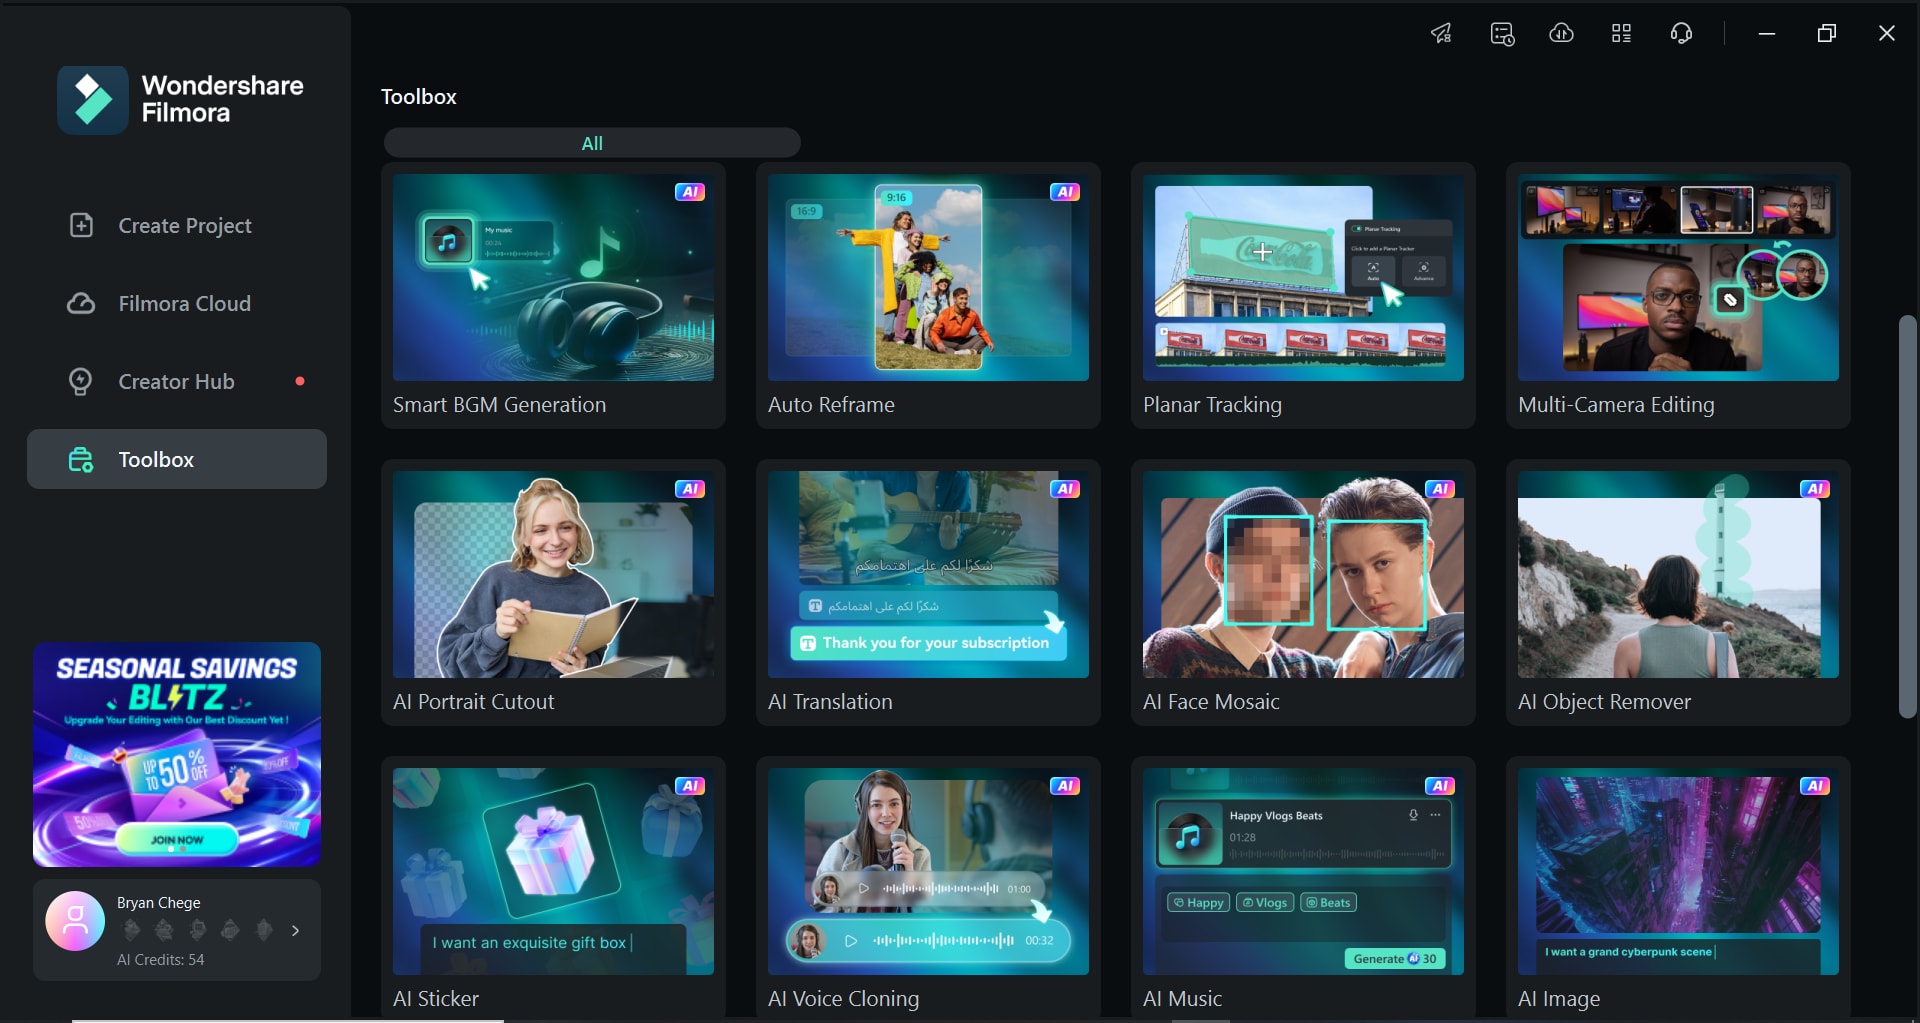
With the new Filmora version video editors can enjoy new AI features to improve their video production efficiency. Some of the AI features include:
- AI Translation Lip Sync: To reach a wider audience, you need to dub your video content in various languages. The AI Translation Lip Sync feature automatically syncs the translation with the mouth movements making the edit look natural.
- Smart Scene Cut: The Smart Scene Cut feature makes the rough cut process faster by automatically recognizing and extracting key instances from your clip. This feature helps you find key moments to make your rough cut.
- AI Face Mosaic: This new AI tool recognizes and automatically pixelates faces in videos. If the person you are interviewing wants to hide their identity, this AI feature can do it with a button click.
- AI sound effects: Editors can create custom sound effects via text prompts. This feature can automatically generate matching background sounds with the visual setting for a more captivating scene.
- Auto Reframe: The Auto Reframe feature automatically detects and crops your video's focal point and keeps it on the frame. The main focus points of your video are always on sight. You can also change the focal point of your video manually or select your preferred aspect ratio and motion speed.
- AI Portrait Cutout: This new AI feature can detect complex objects such as hair through advanced hair-level keying. It retains the props in an individual's hand and ensures the resultant image looks as natural as possible.
Step-by-Step Guide to Creating Teaser Videos for Your Product
Method 1: Use Smart Scene Cut to Edit Existing Marketing Videos
Smart Scene Cut is a video editing feature that captures the highlights of a video clip. To use it, follow the steps below:
Step1Upload your video file
Open Filmora and import the video file on the launch page to start a new project.
Step2Select Smart Scene Cut
- Entry 1: On the launch page there are two smart scene-cut windows. Selecting either of them takes you to the Smart Scene Cut interface.
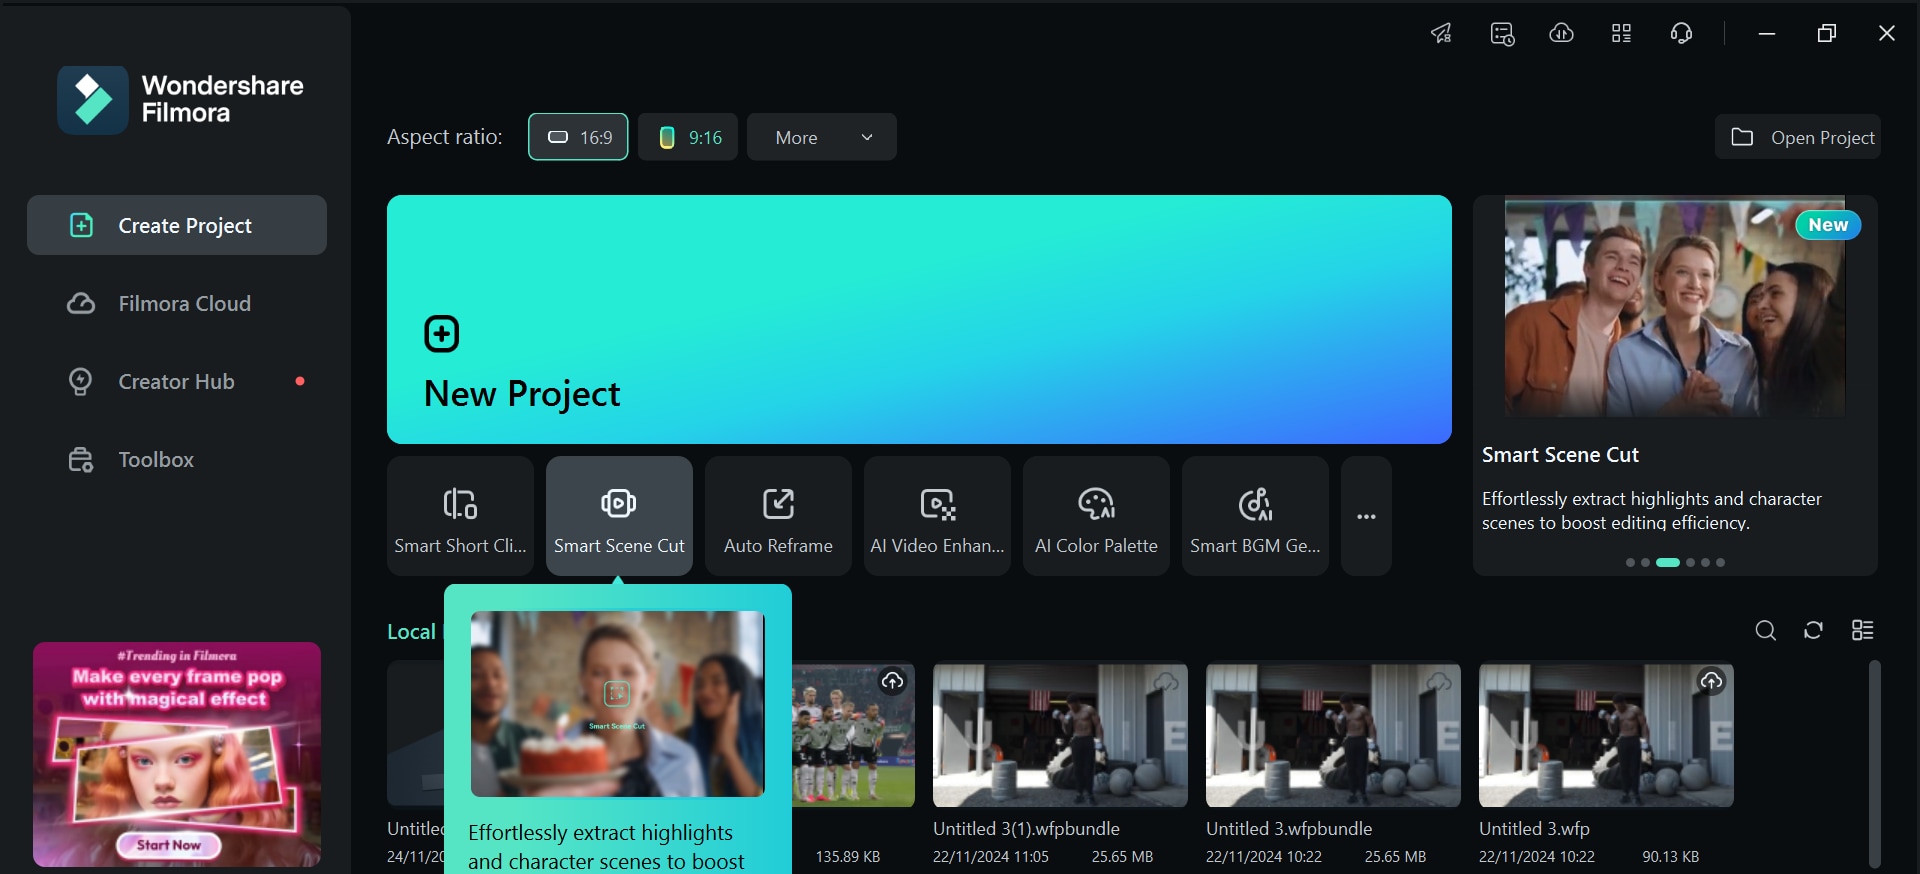
- Entry 2:Import your video file and click on the Smart Scene Cut icon on the interface on the thumbnail.
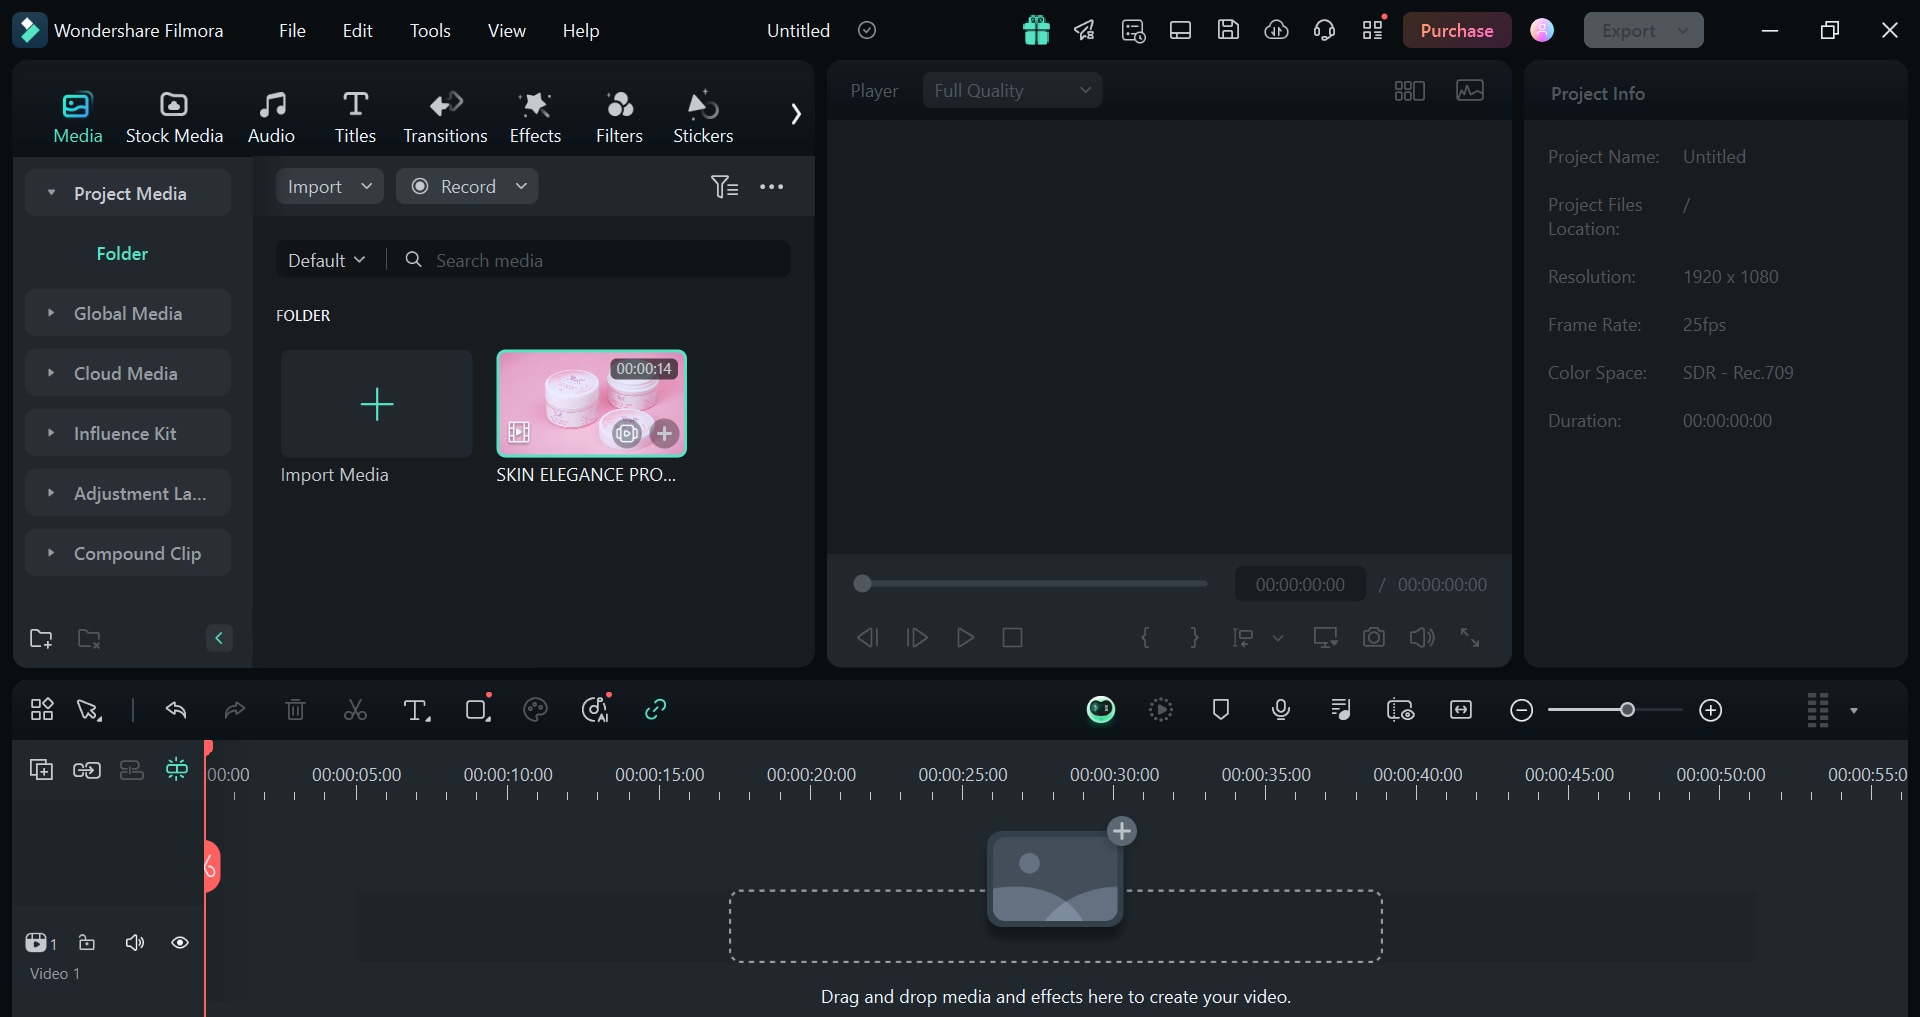
- Entry 3: You can right-click on an imported video file choose Smart Scene Cut and access its original editing interface.
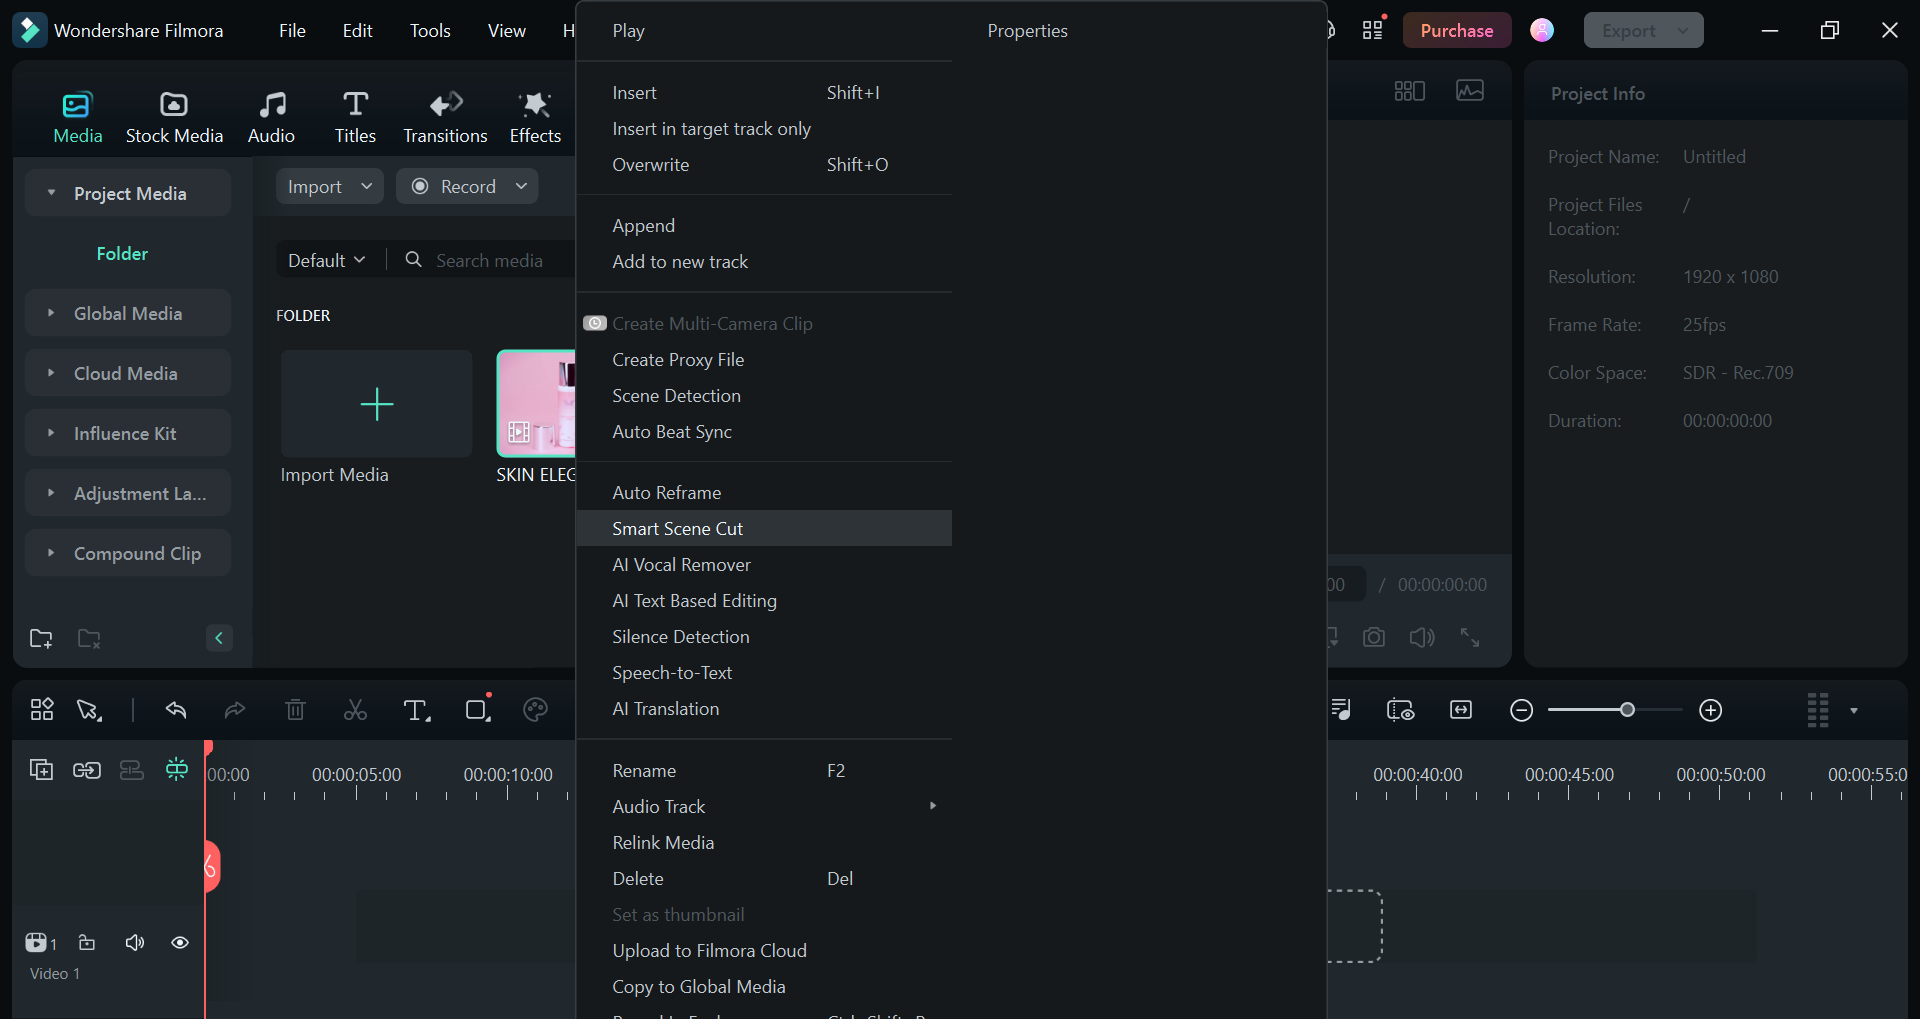
Step3Access the Smart Scene Cut editing page
Click on "Start" on the new page and wait for the video to upload.
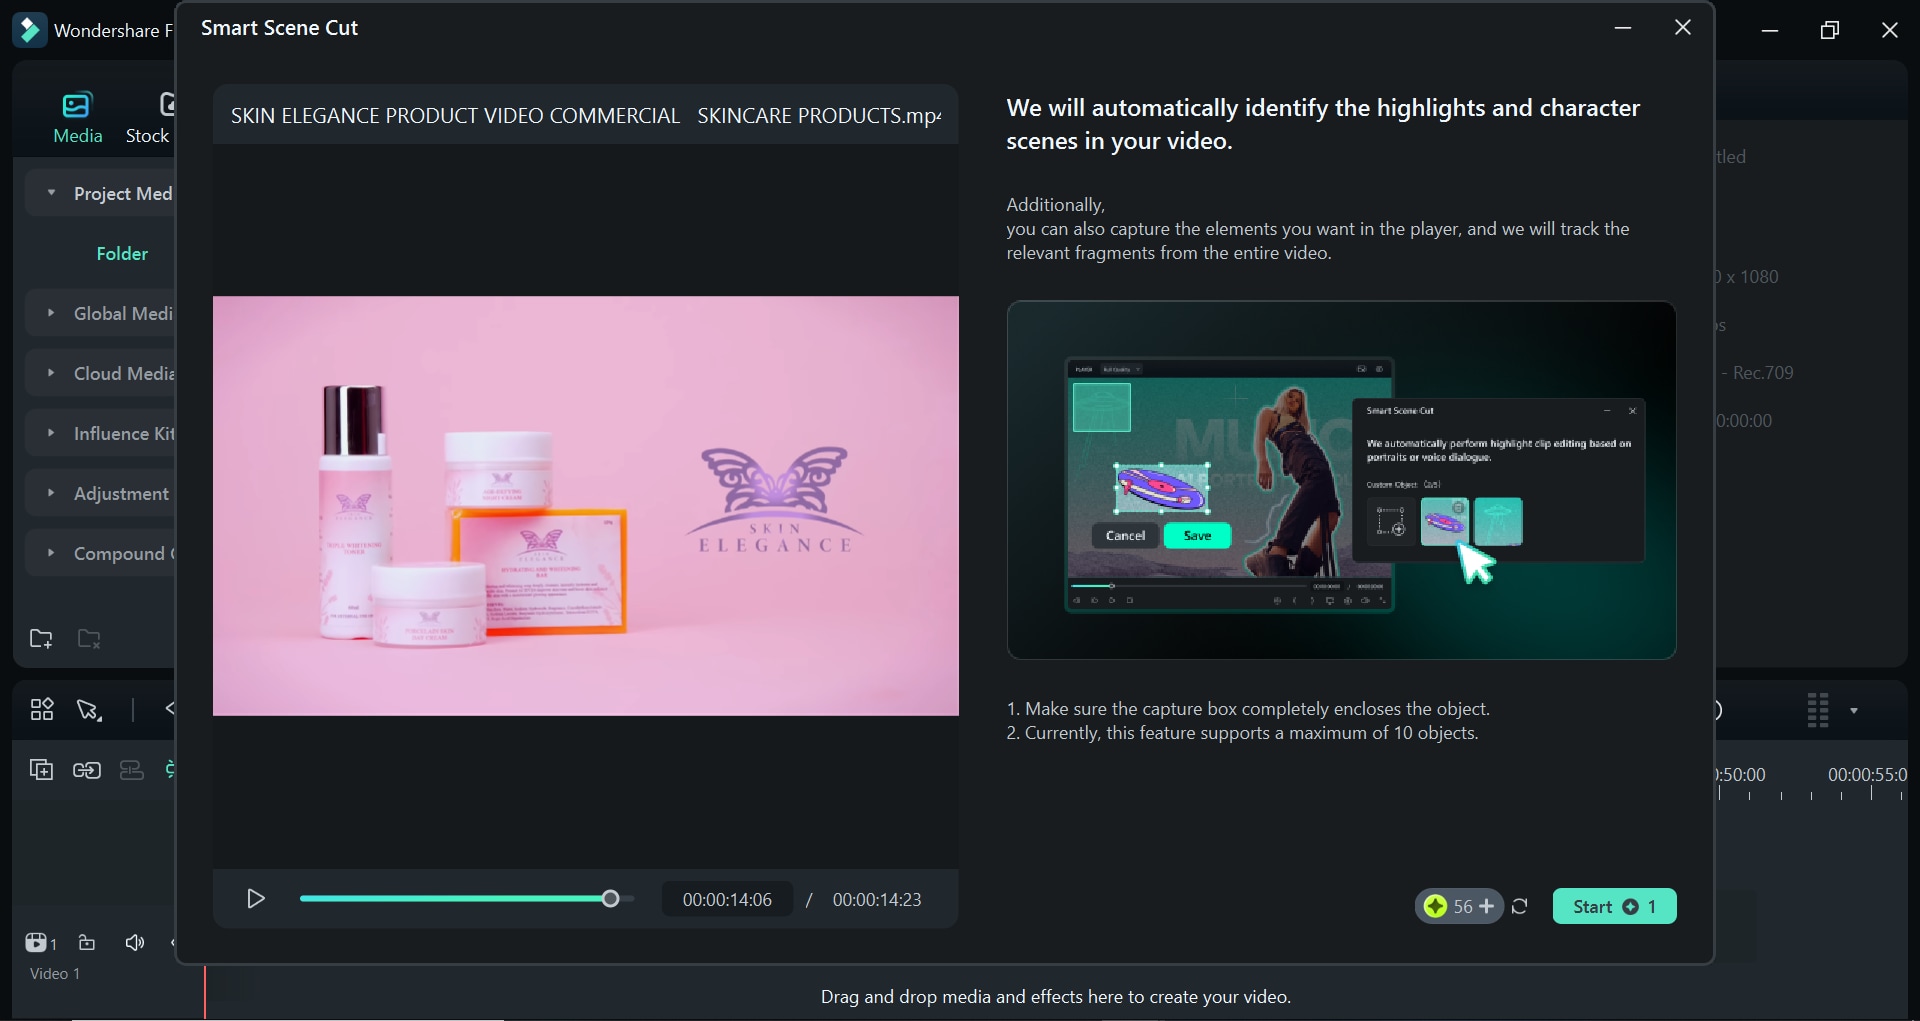
View the progress of the task and you can also select "Hide" to let the progress run in the background.
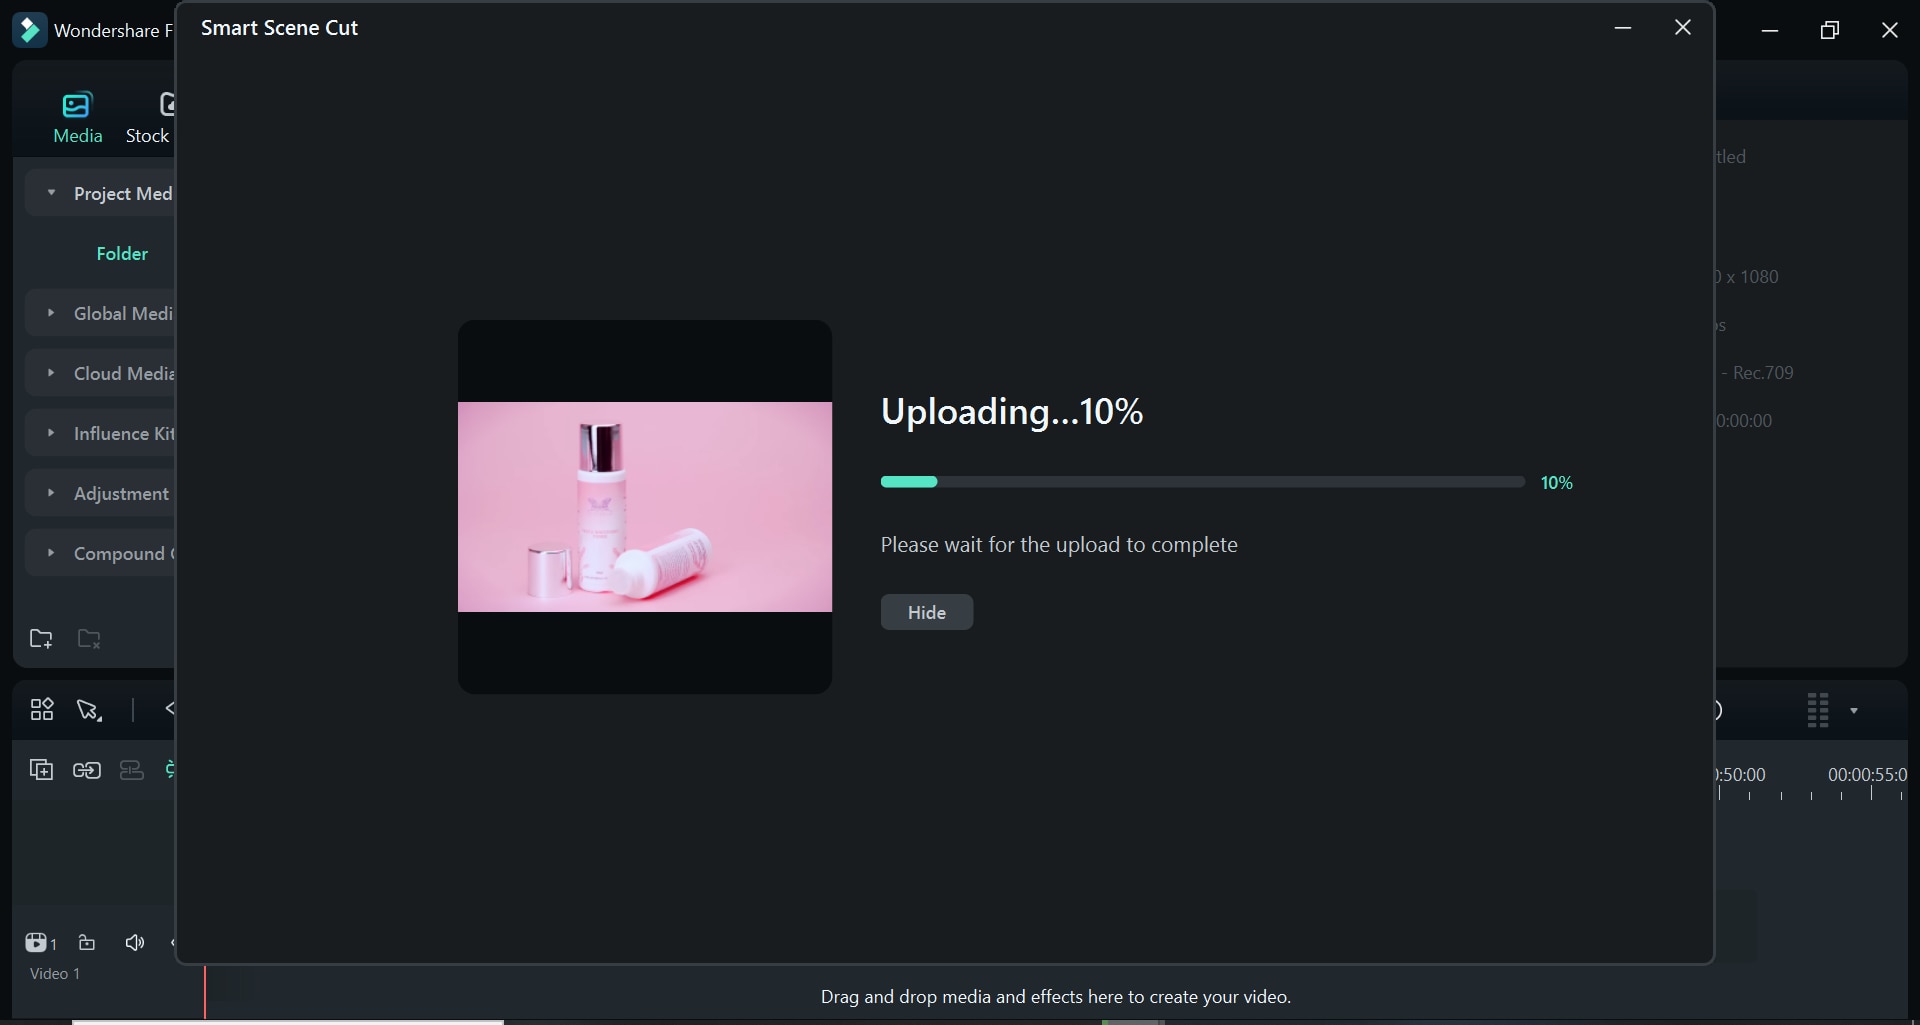
Click the uploaded video to enter the Smart Scene Cut editing interface.
Step4View the results
On the results page, you will be able to see the Highlight Scene, Character Scene, and Custom Object categories.
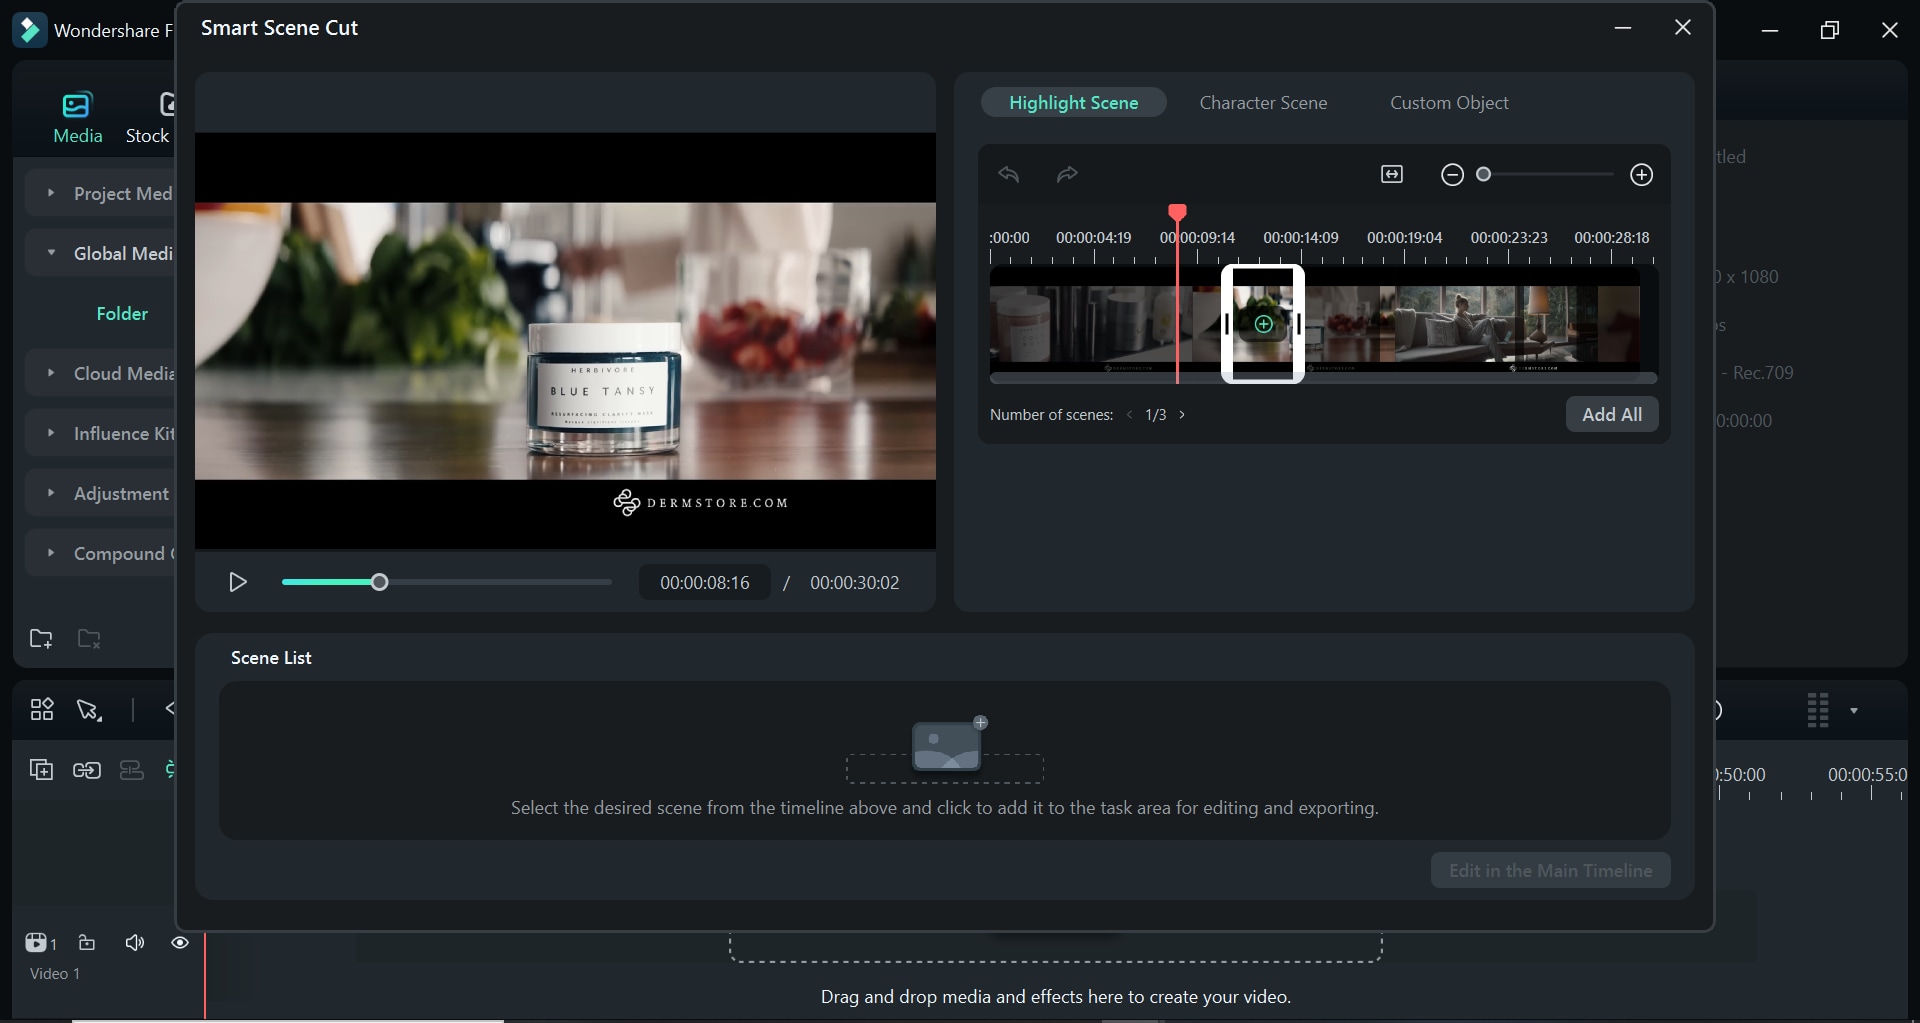
- Highlight Scene
This automatically selects highlight scenes. You can select the impressive segments and add them to the timeline to edit them even further on the main track.
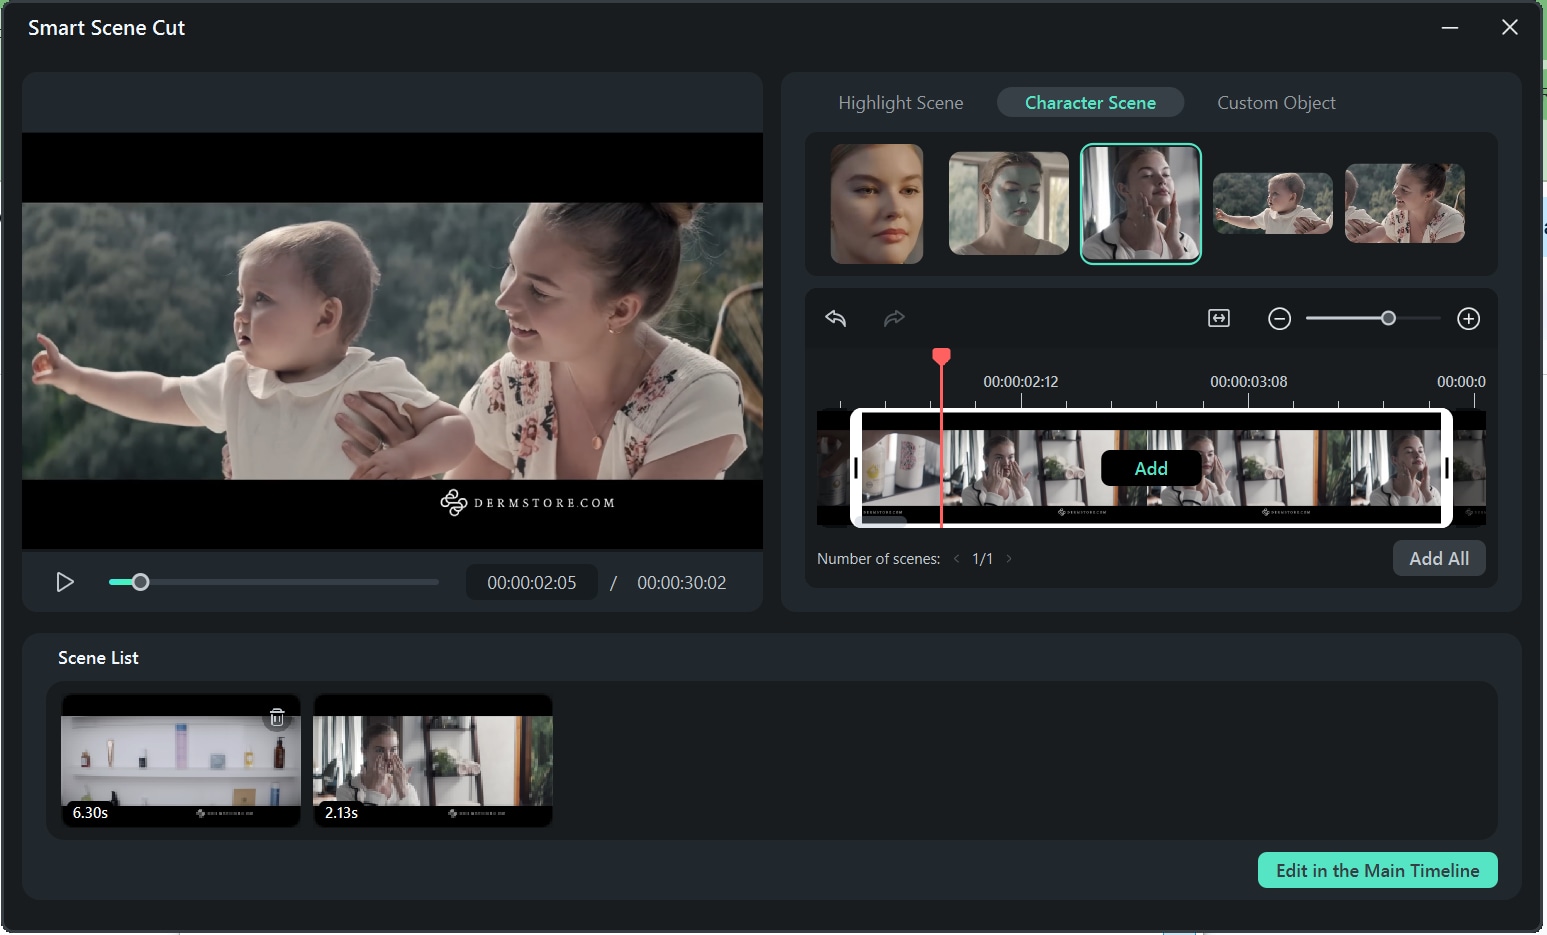
- Character Scene
This feature automatically extracts segments based on character scenes.
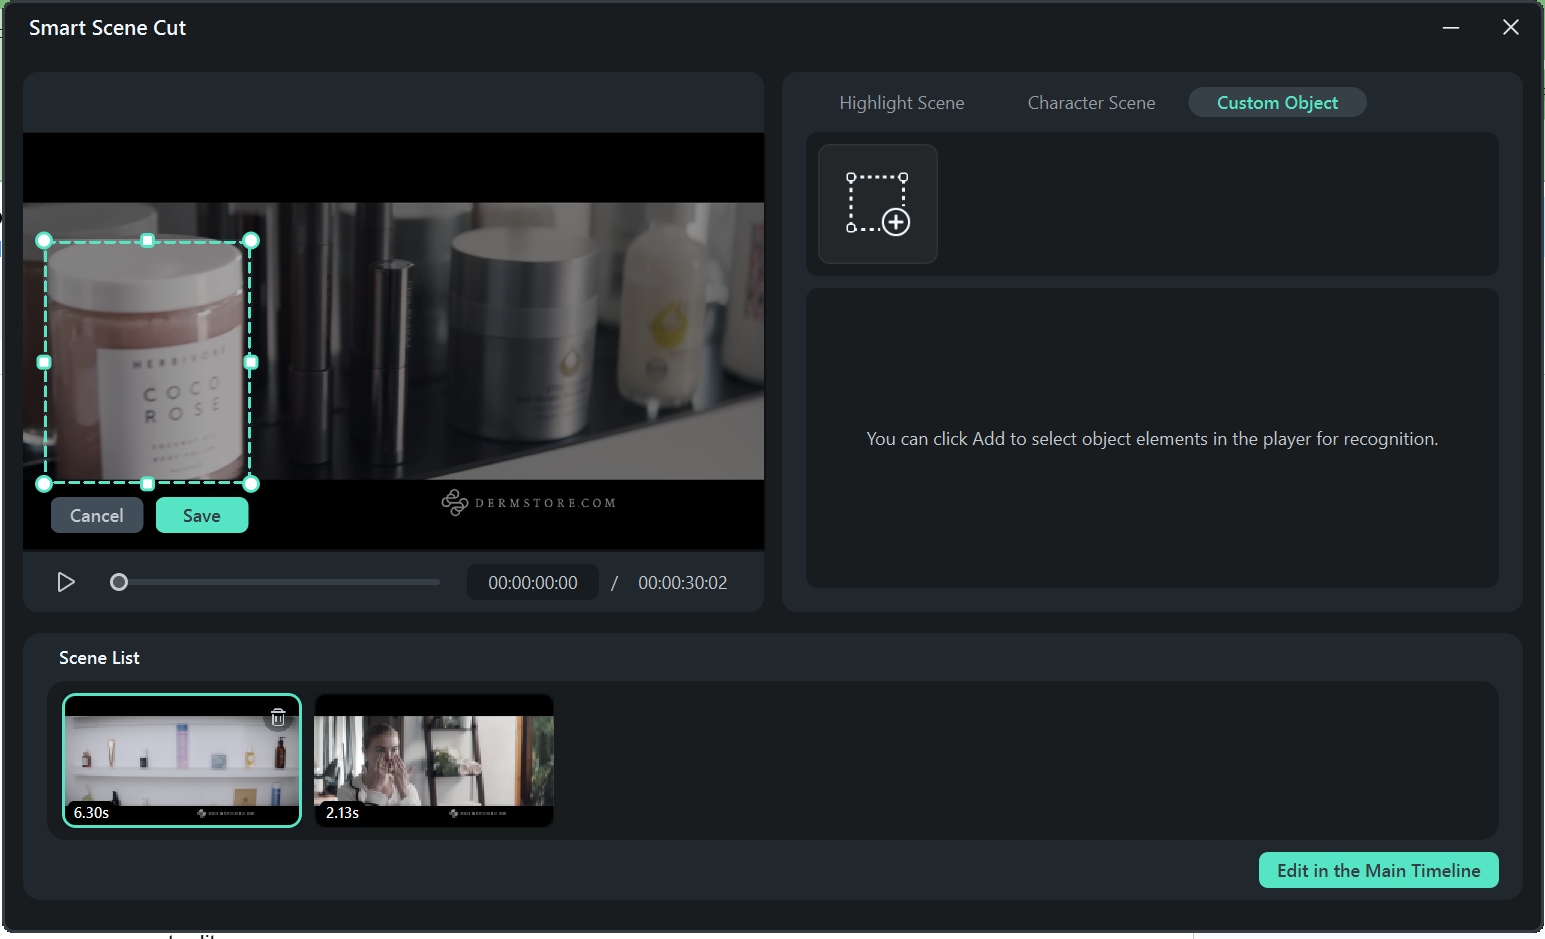
- Custom Object
This feature captures custom elements in the video. Filmora AI will capture the relevant sections of the whole video.
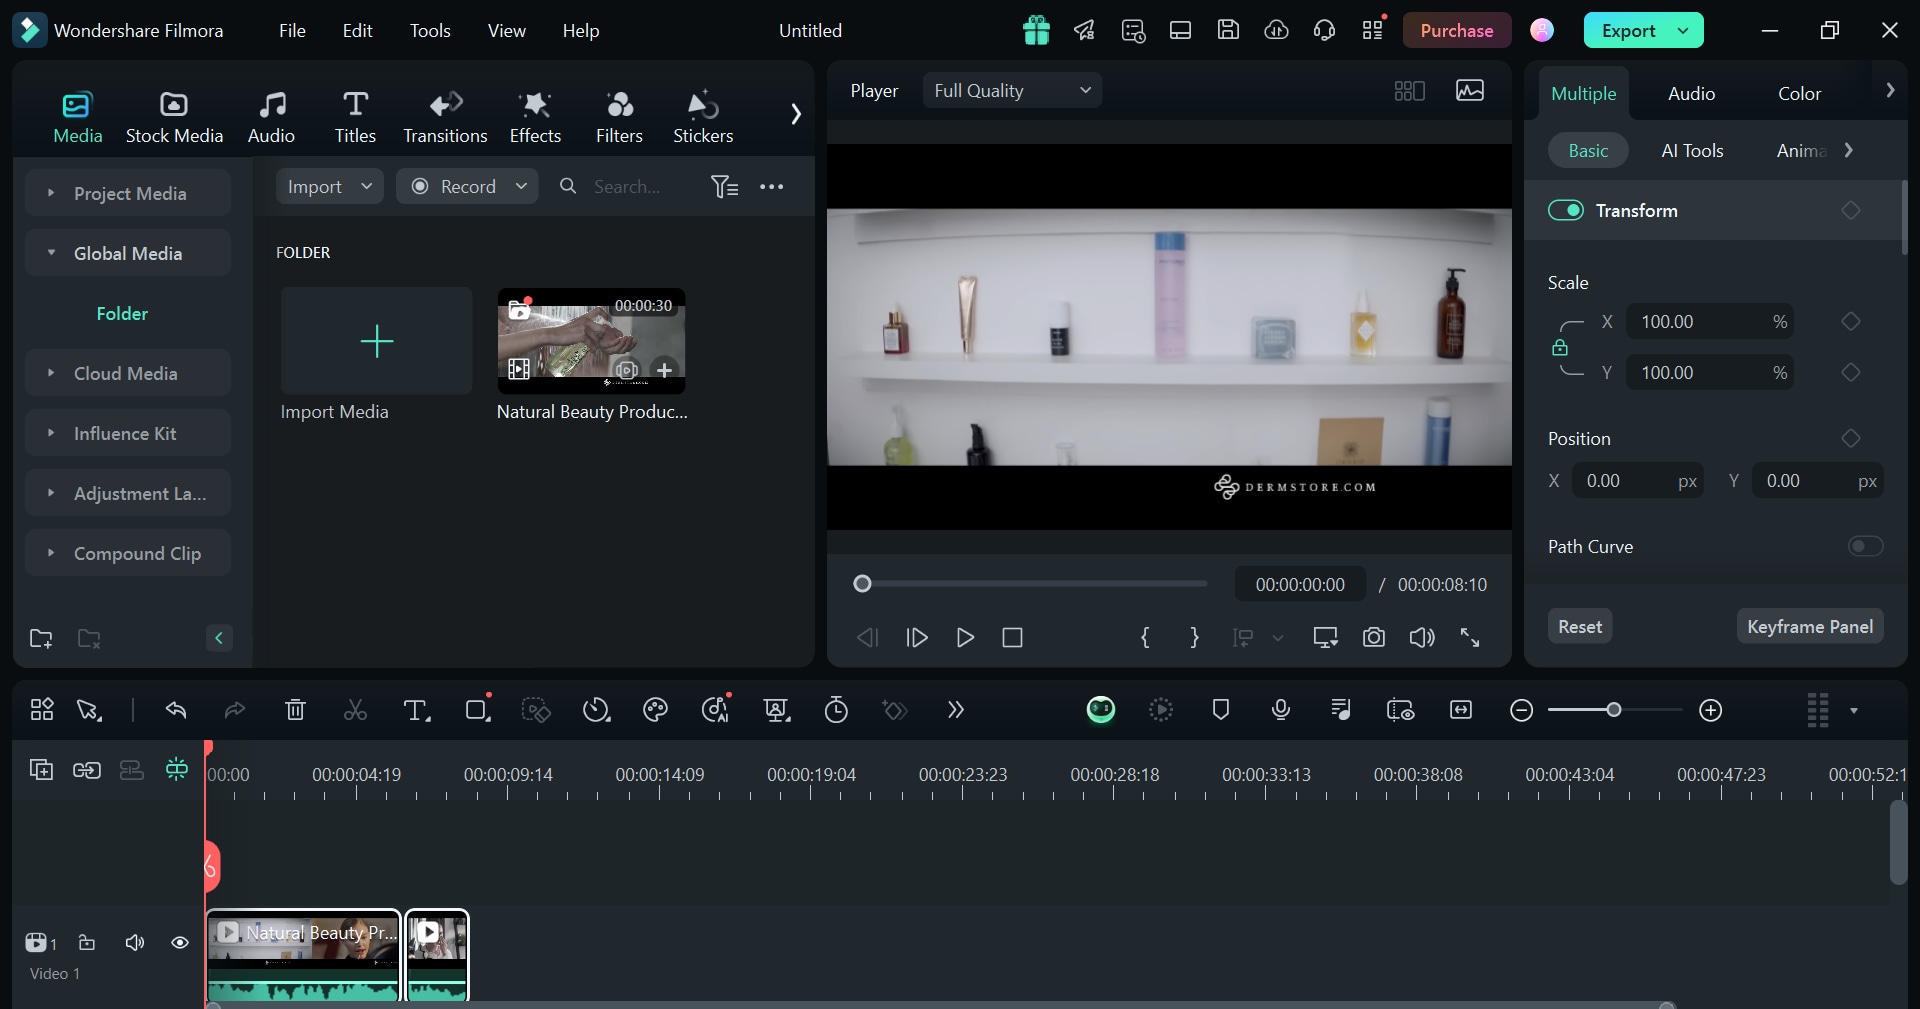
Step5Edit in the main timeline
You can edit your highlighted clips in the main timeline according to your preference. Add sound effects, transitions, and text.
Step6Export and Share
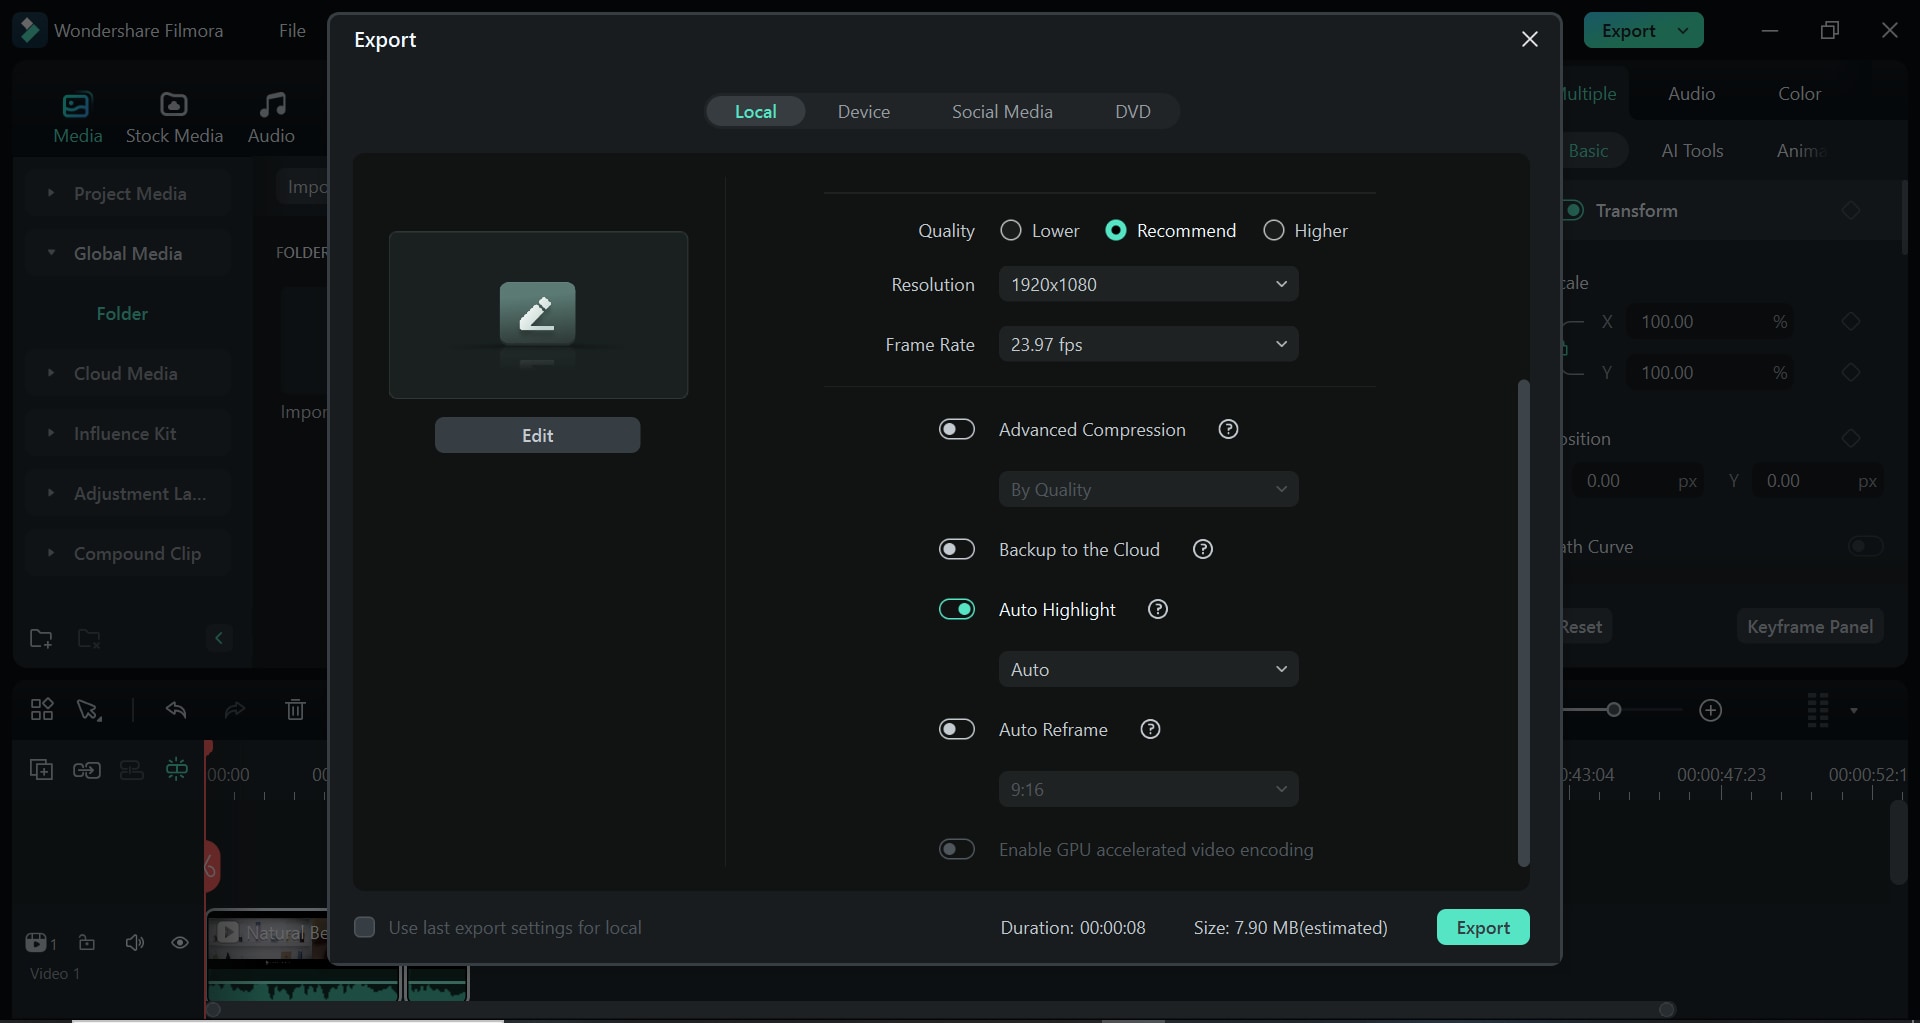
Select a destination file and choose the video format. Click on "Export" after making the required export edits.
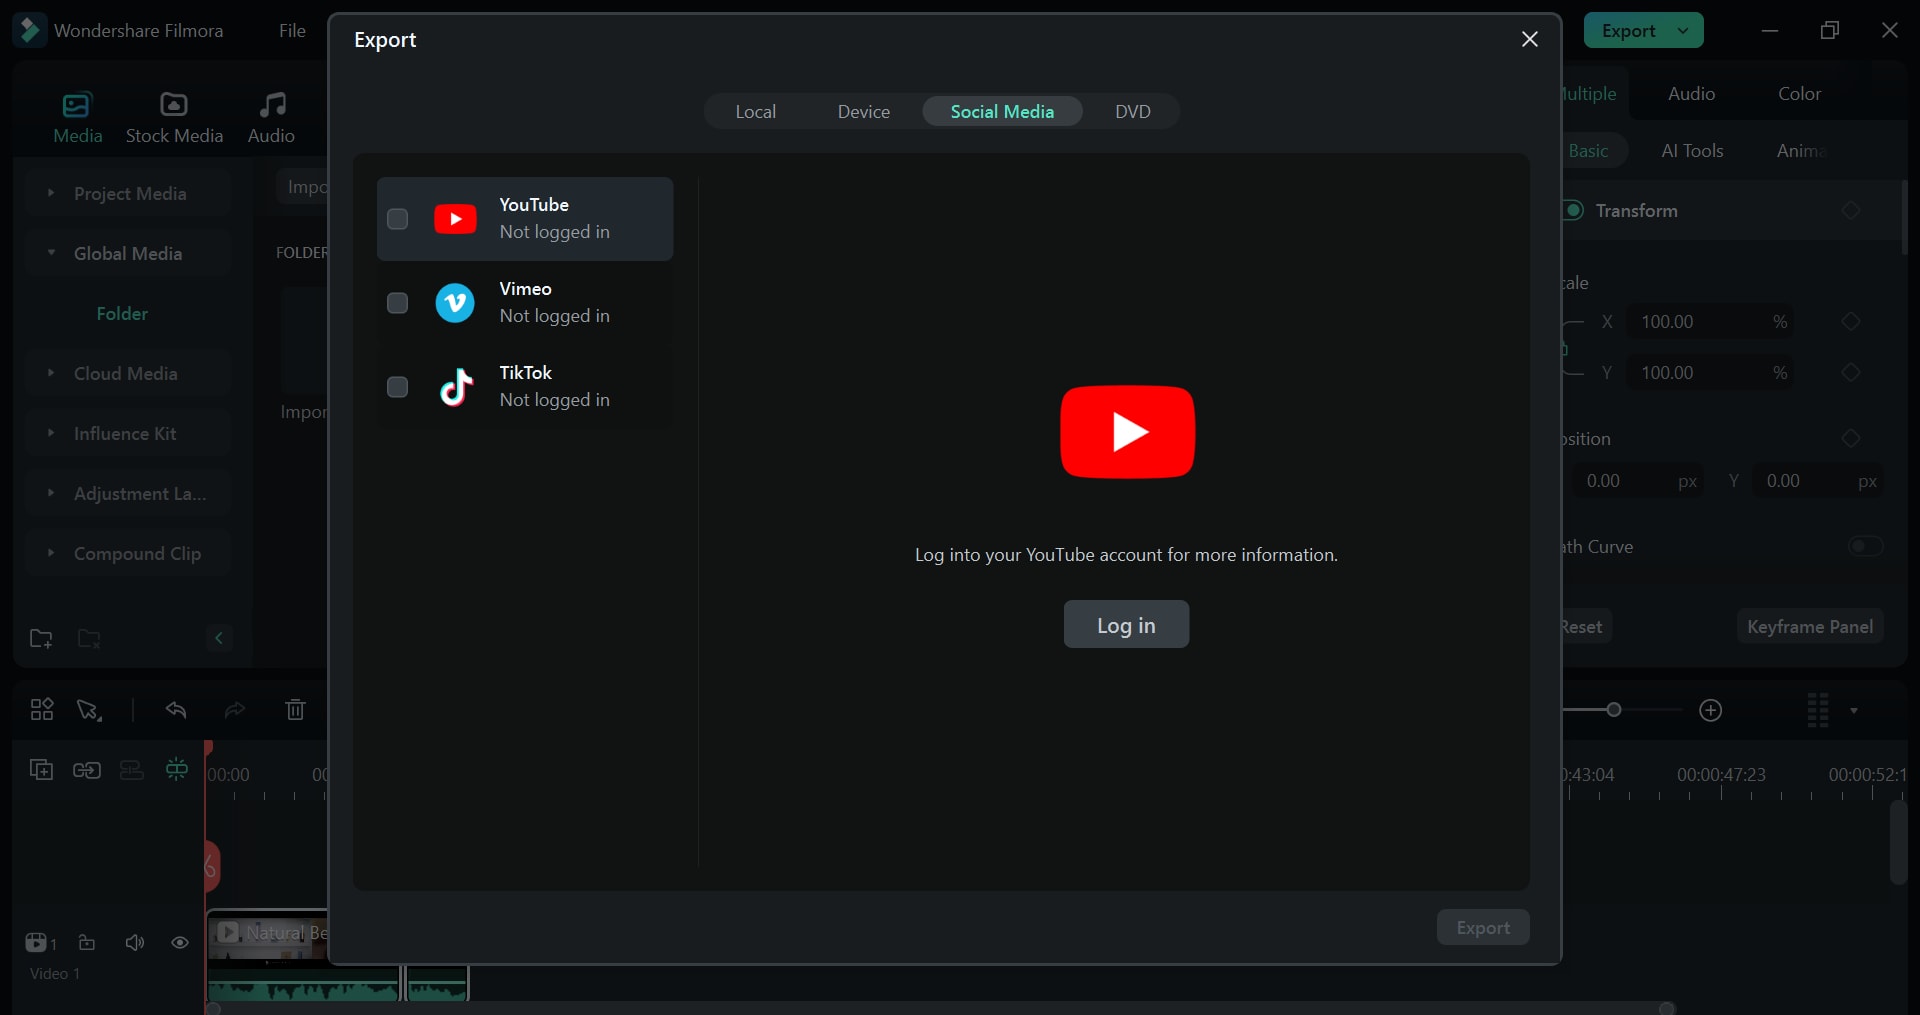
You can also export directly to various social media platforms and edit the thumbnail, description, title, etc.
Method 2: Use Filmora's Internal Resources to Create Promo Videos
If you are a video promoter considering making a teaser video you are in the right place. Creating a promotional video for your target audience can be quite hard but still manageable with Filmora.
Step1Plan your videos
- Set your goal: Determine what your video plan aims to achieve, such as promoting product videos.
- Write a script: Set up a script to ensure yor video comes out correctly.
- Collect media data: Choose top-notch video clips, music, and images for your promo videos.
Step2Import video file
Launch Filmora and create a new project. Click the "Import" button to choose your video file.
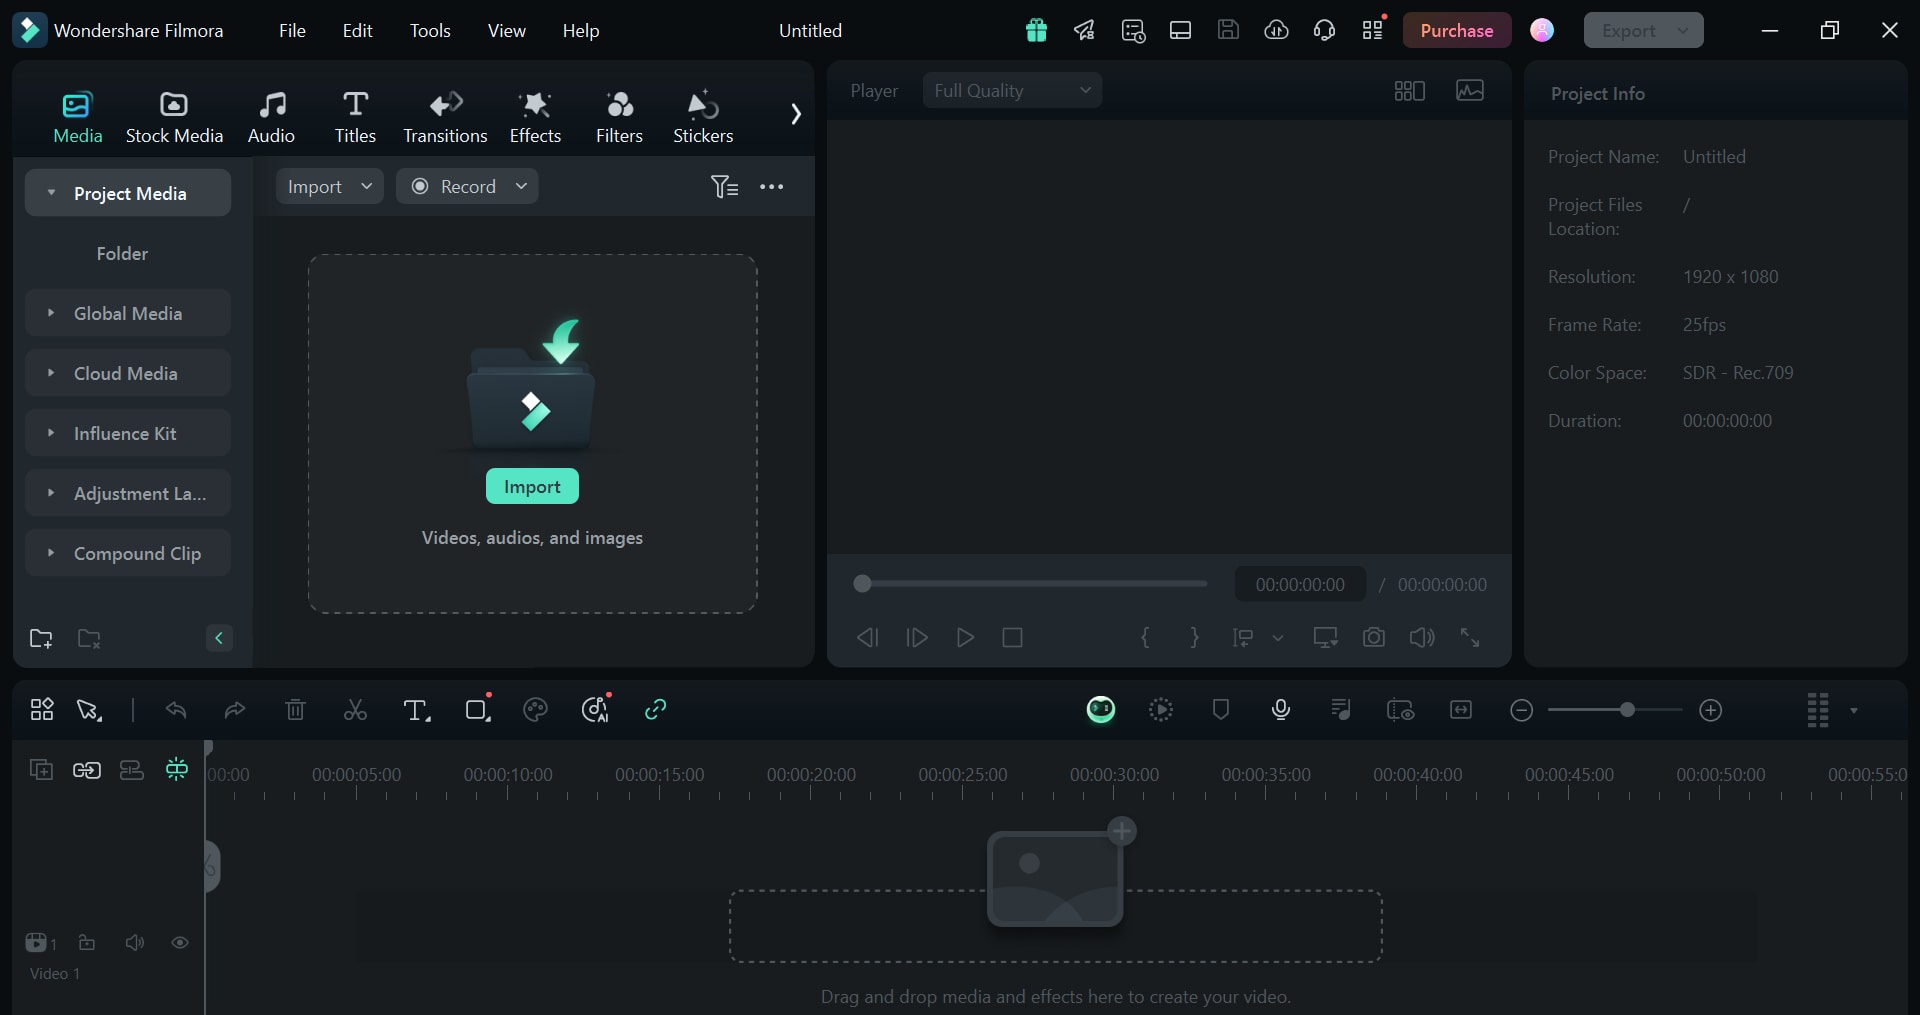
Organize your video files for easier access while editing.
Step3Make the timeline of the video
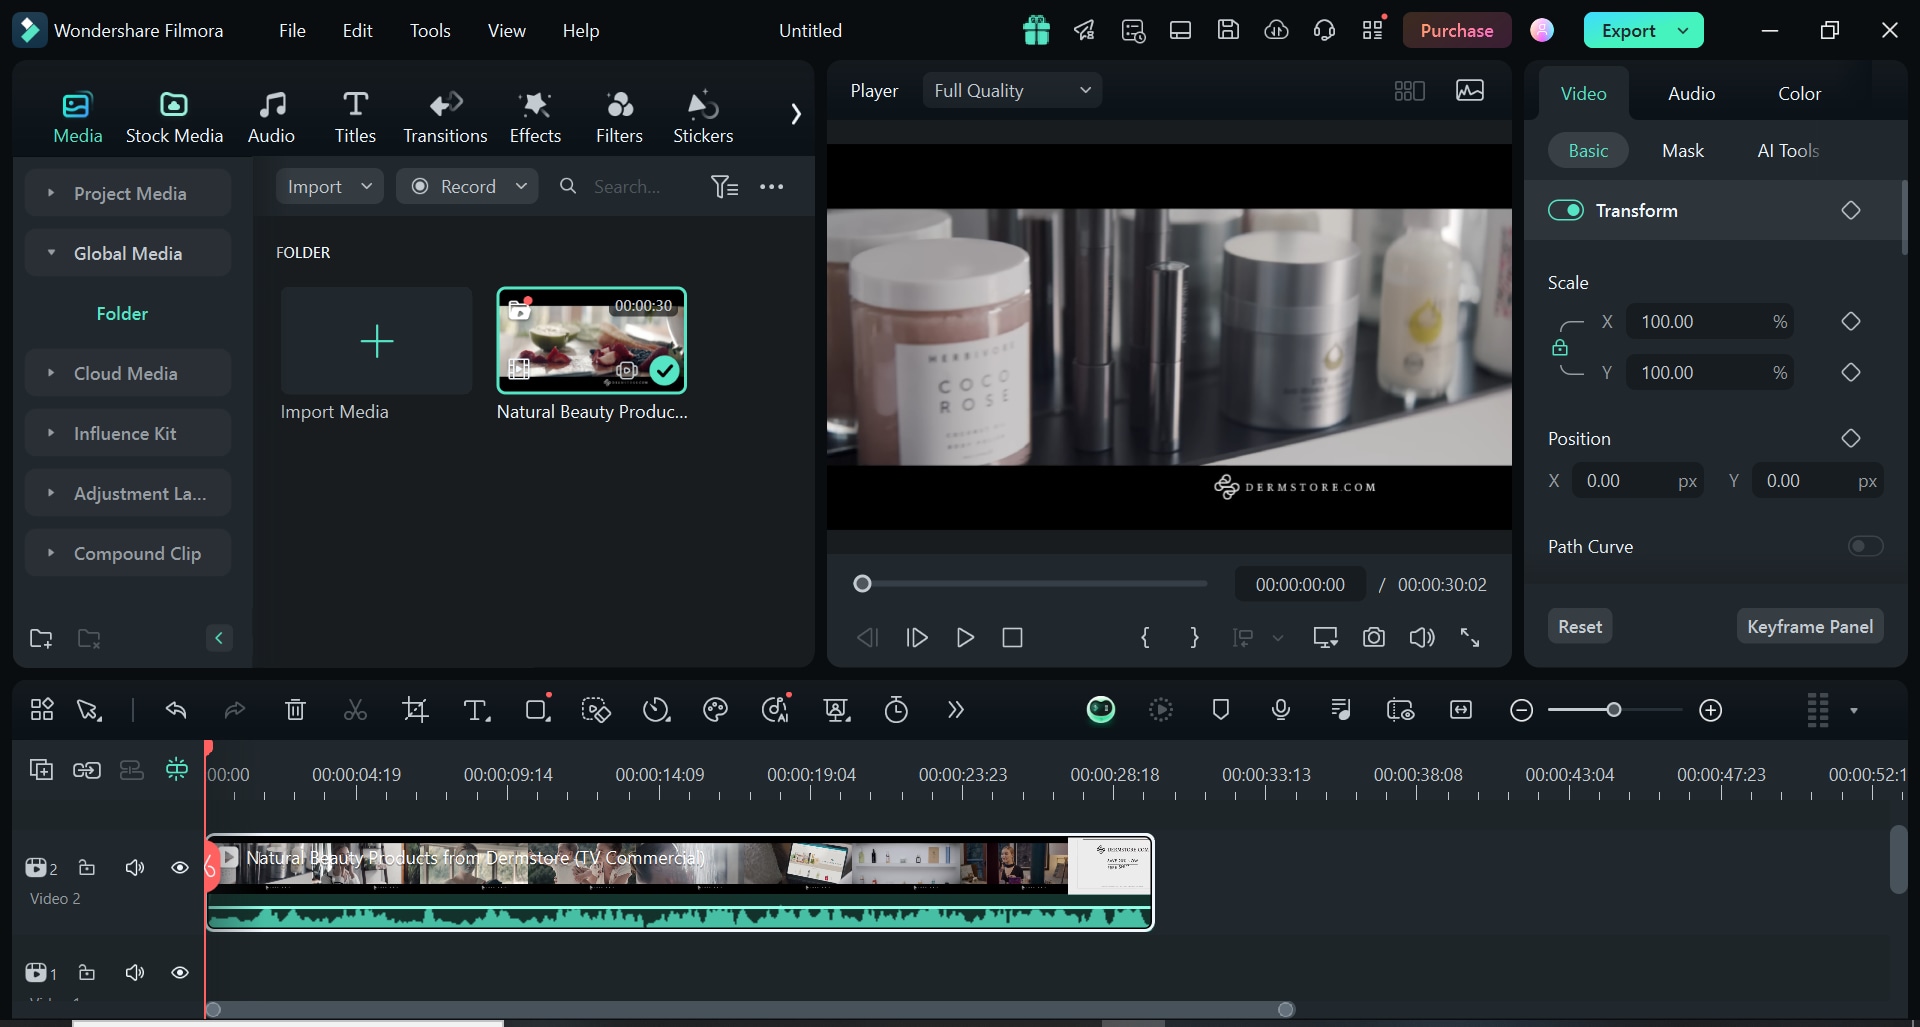
Drag and drop the video files into the timeline. Adjust the sequence to fit your script.
Step4Edit and trim videos
You can use the "Scissors Tool" to trim videos. Split clips to organize or delete specific portions.
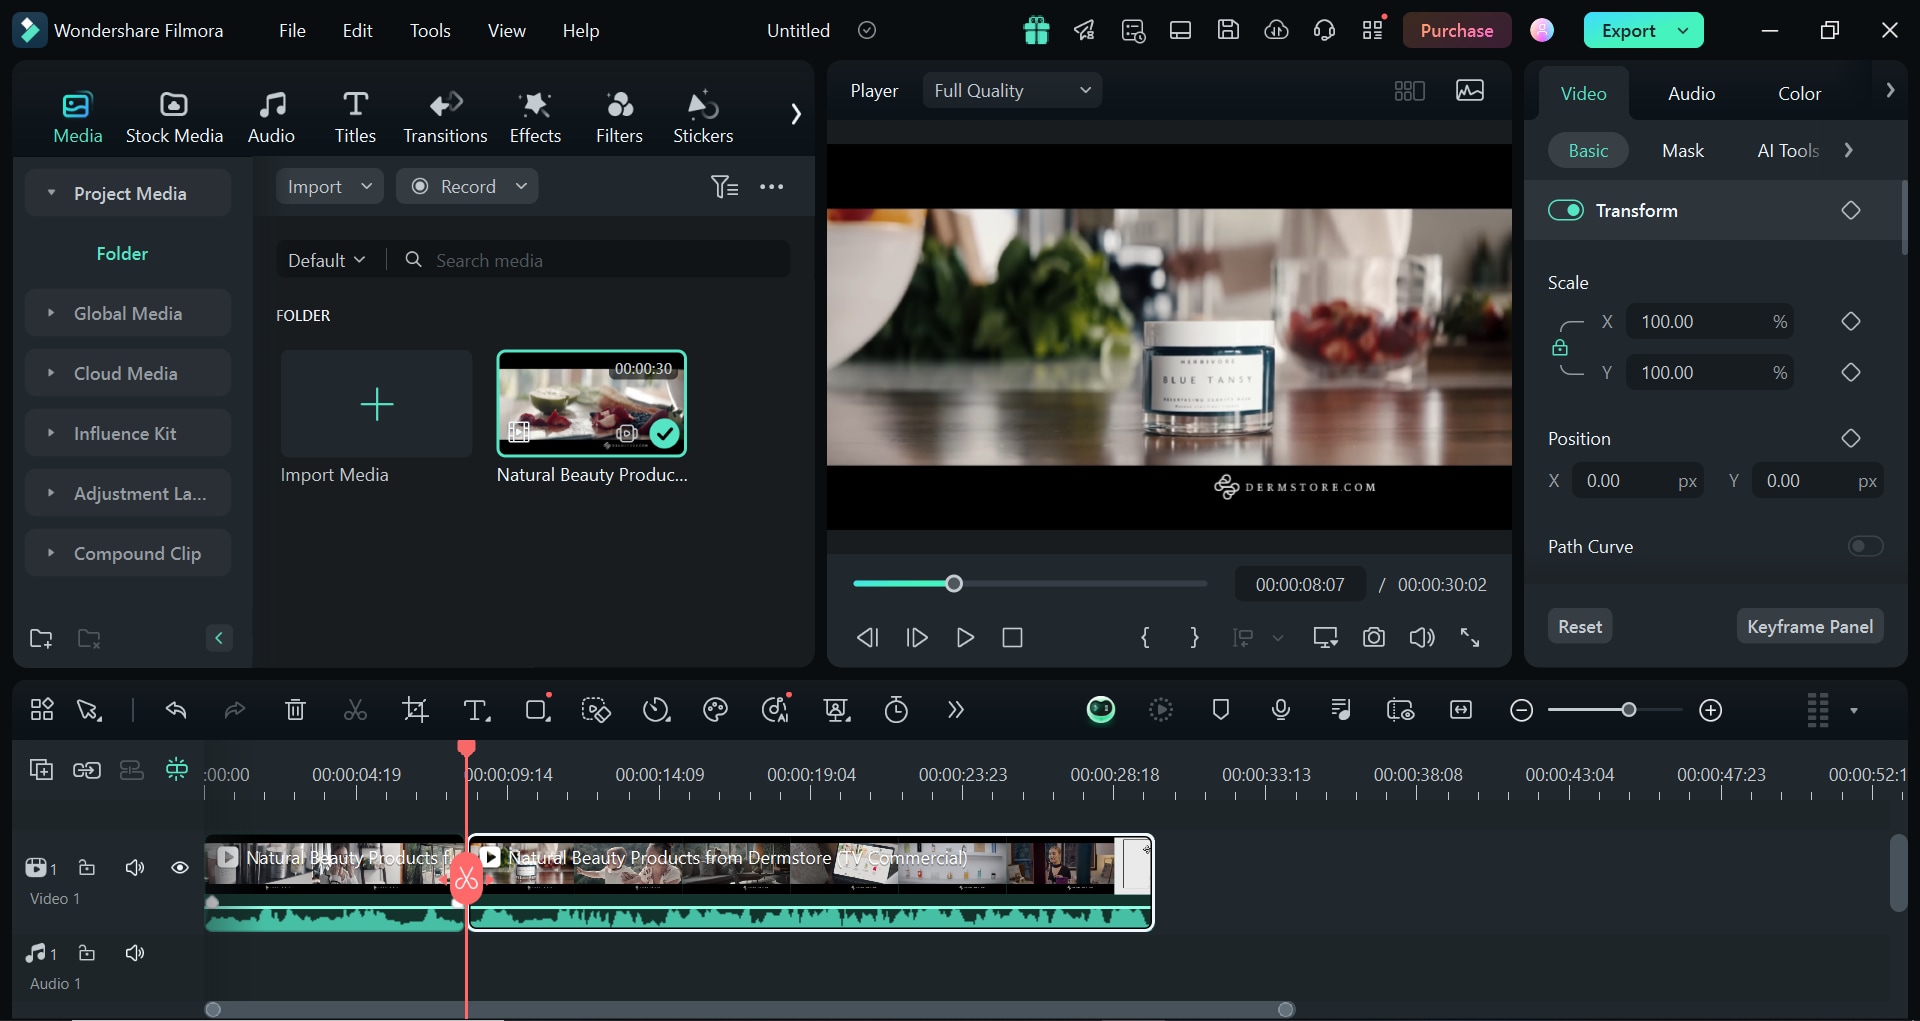
You can speed up or slow down clips for a more dynamic effect.
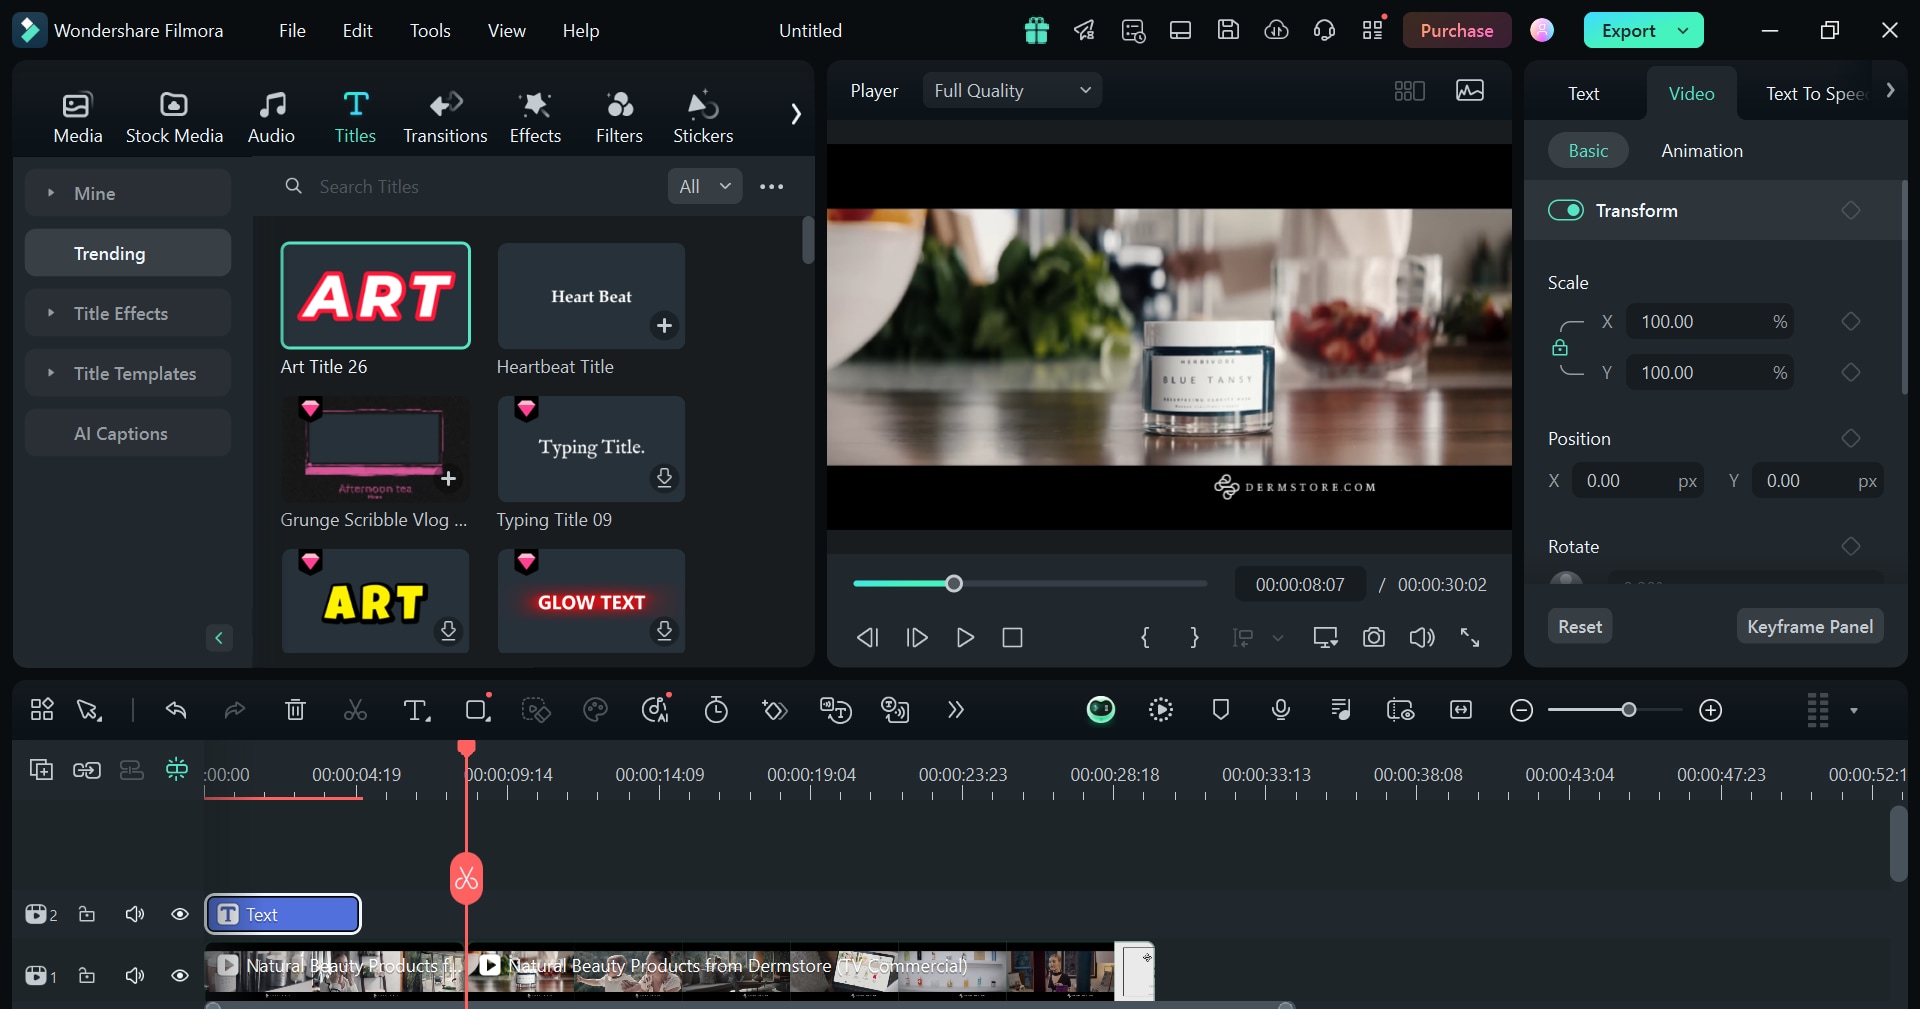
Step5Add titles and texts
In the "Title Tab", you can choose a suitable template for the promo video. Drag and drop a title template above your video clips on the timeline. You can make customized text fonts and animations that match your brand.
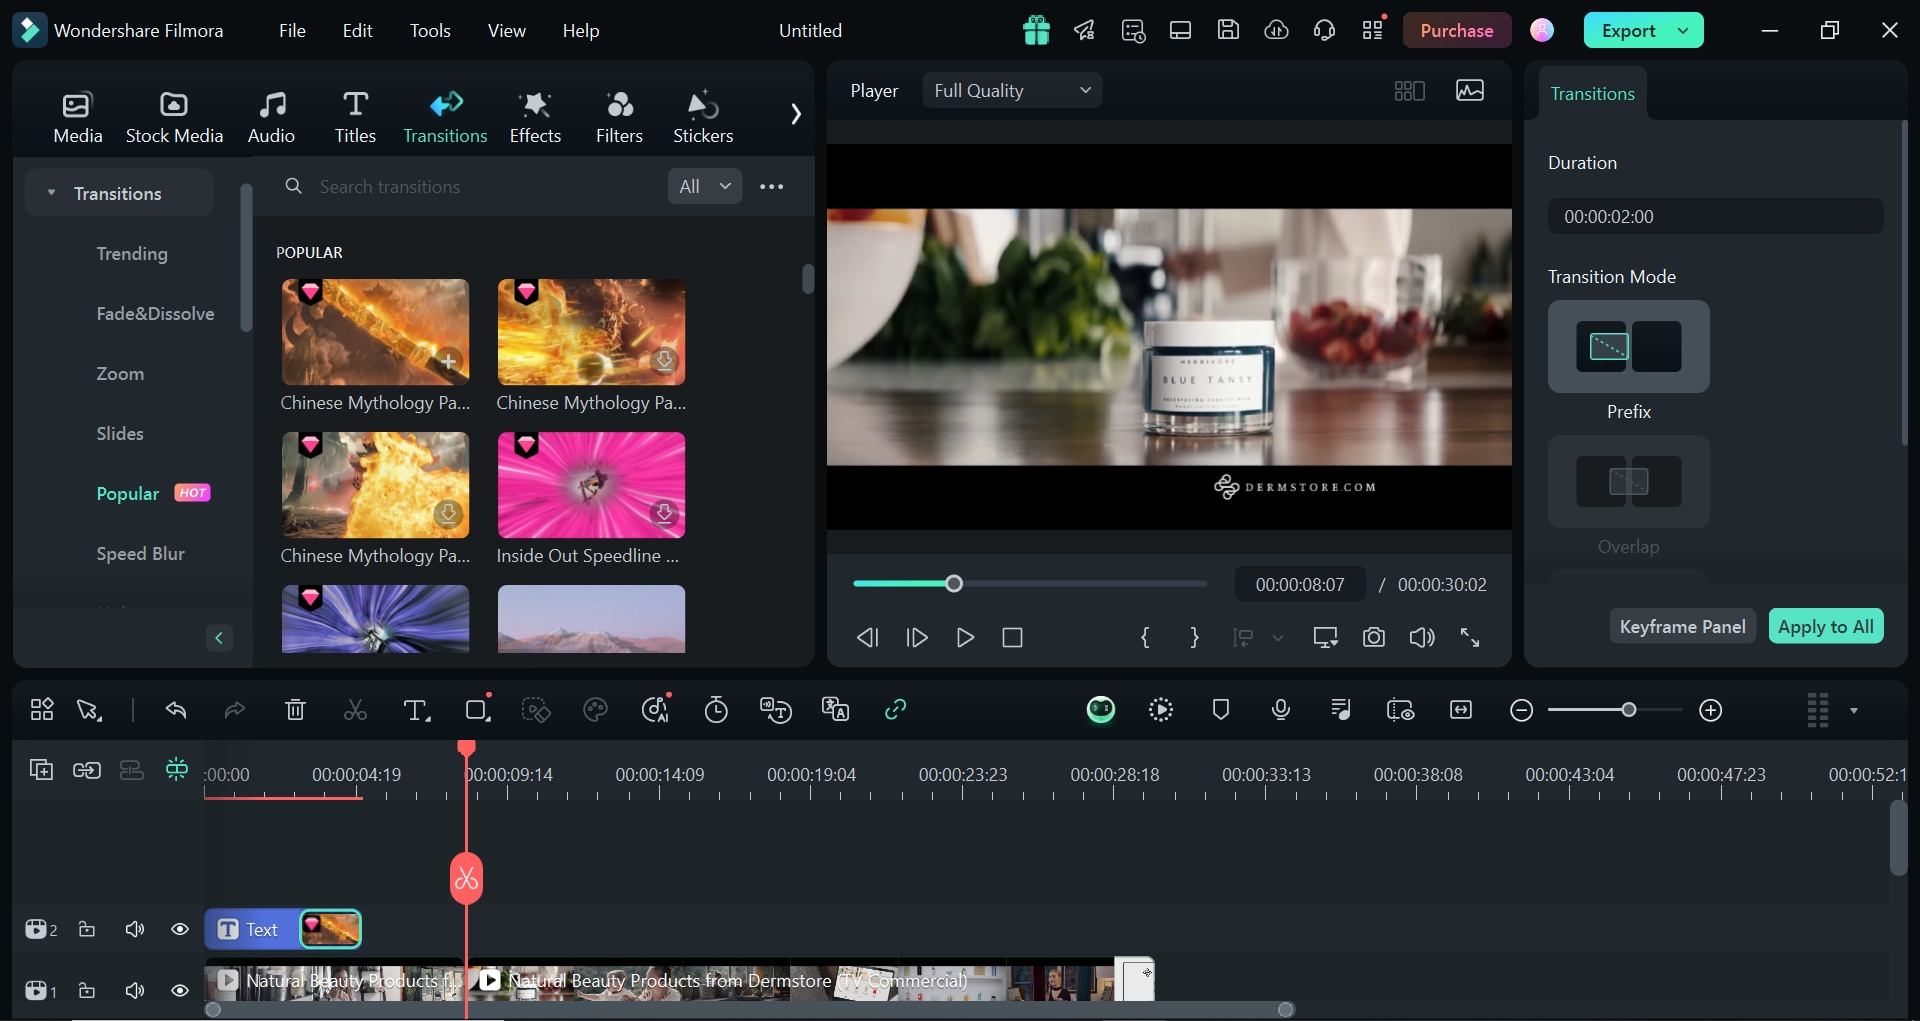
Step6Customize the video with transitions
Click the "Transitions Tab" and check out the variety of effects. You can drag and drop transitions between video clips for a natural flow.
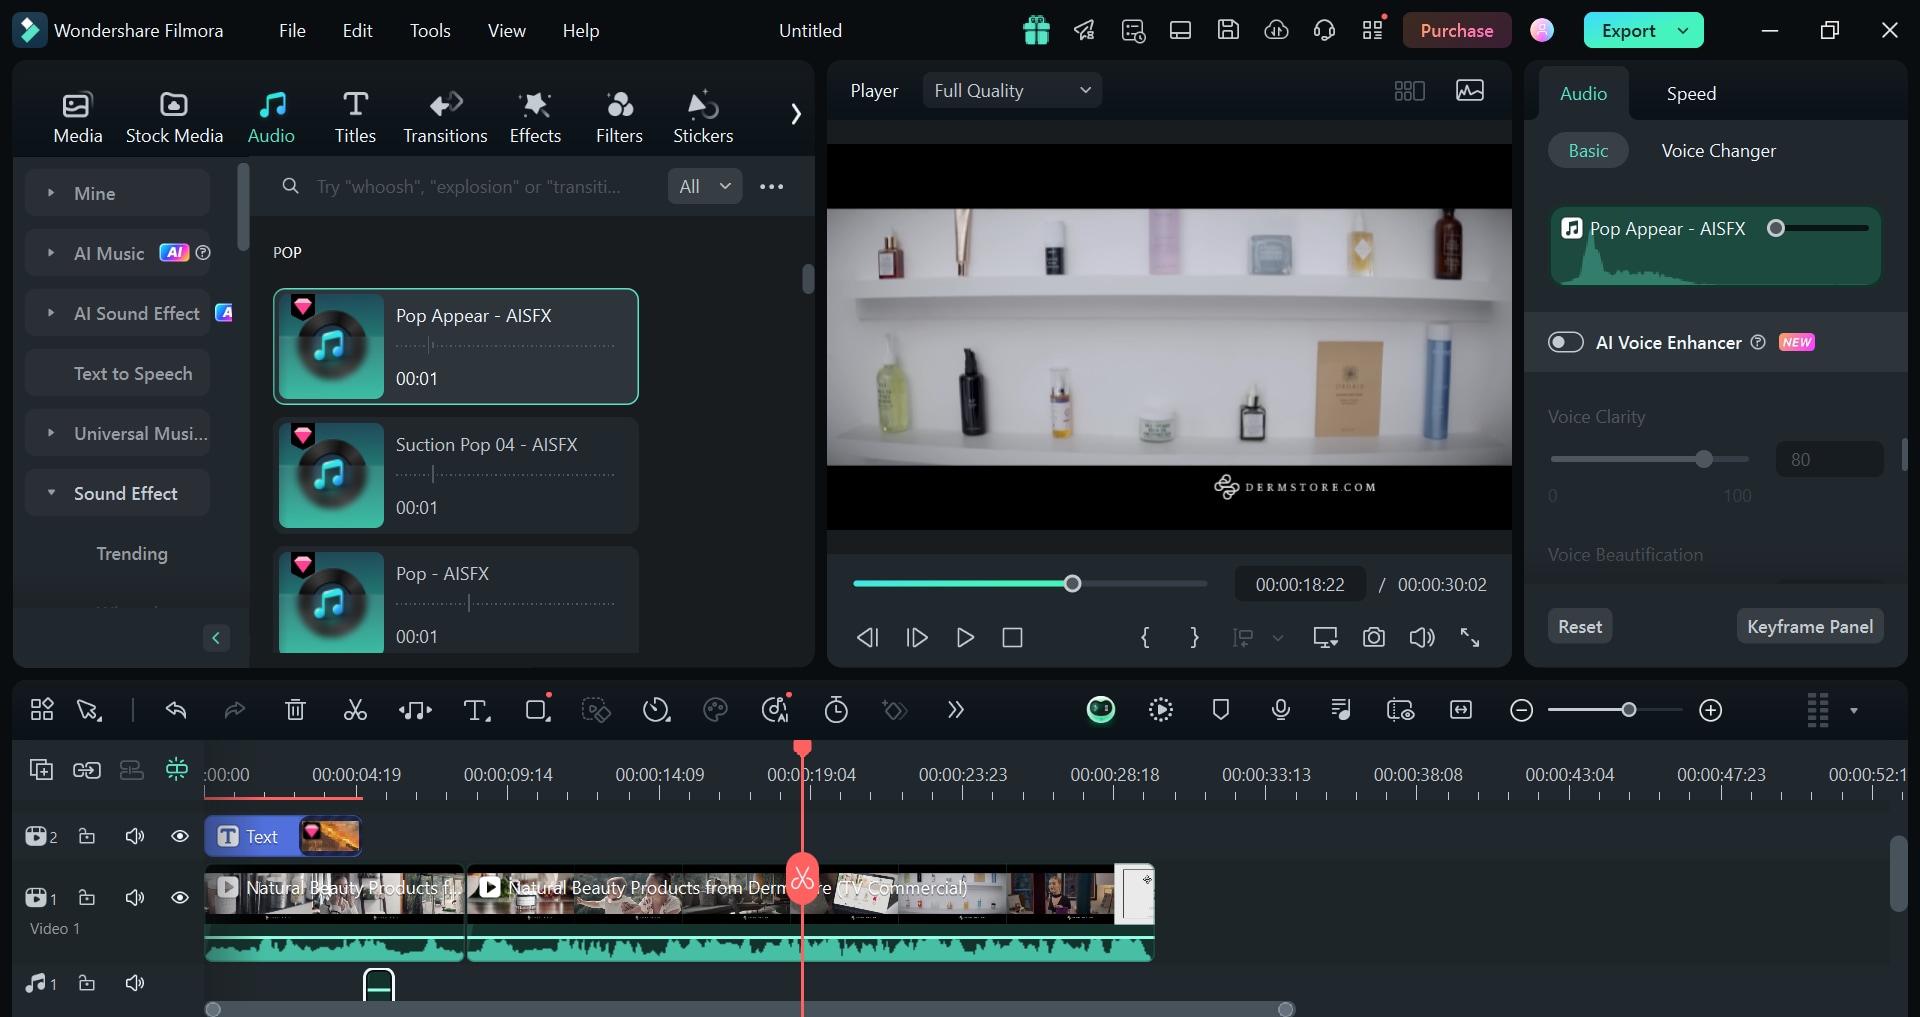
Step7Add music and sound effects
Click on the "Audio Tab" to choose free tracks or you can still import your sound effects. Drag and drop the audio file onto the timeline to sync it with your promo video. Change the volume levels for a natural audio.
Step8Preview your video
Click the Play Video button to preview and fine-tune your video. Make any adjustments to the timing, effects, or transitions as required.
Step9Export your video
Click the "Export" button. Choose your desired video format.
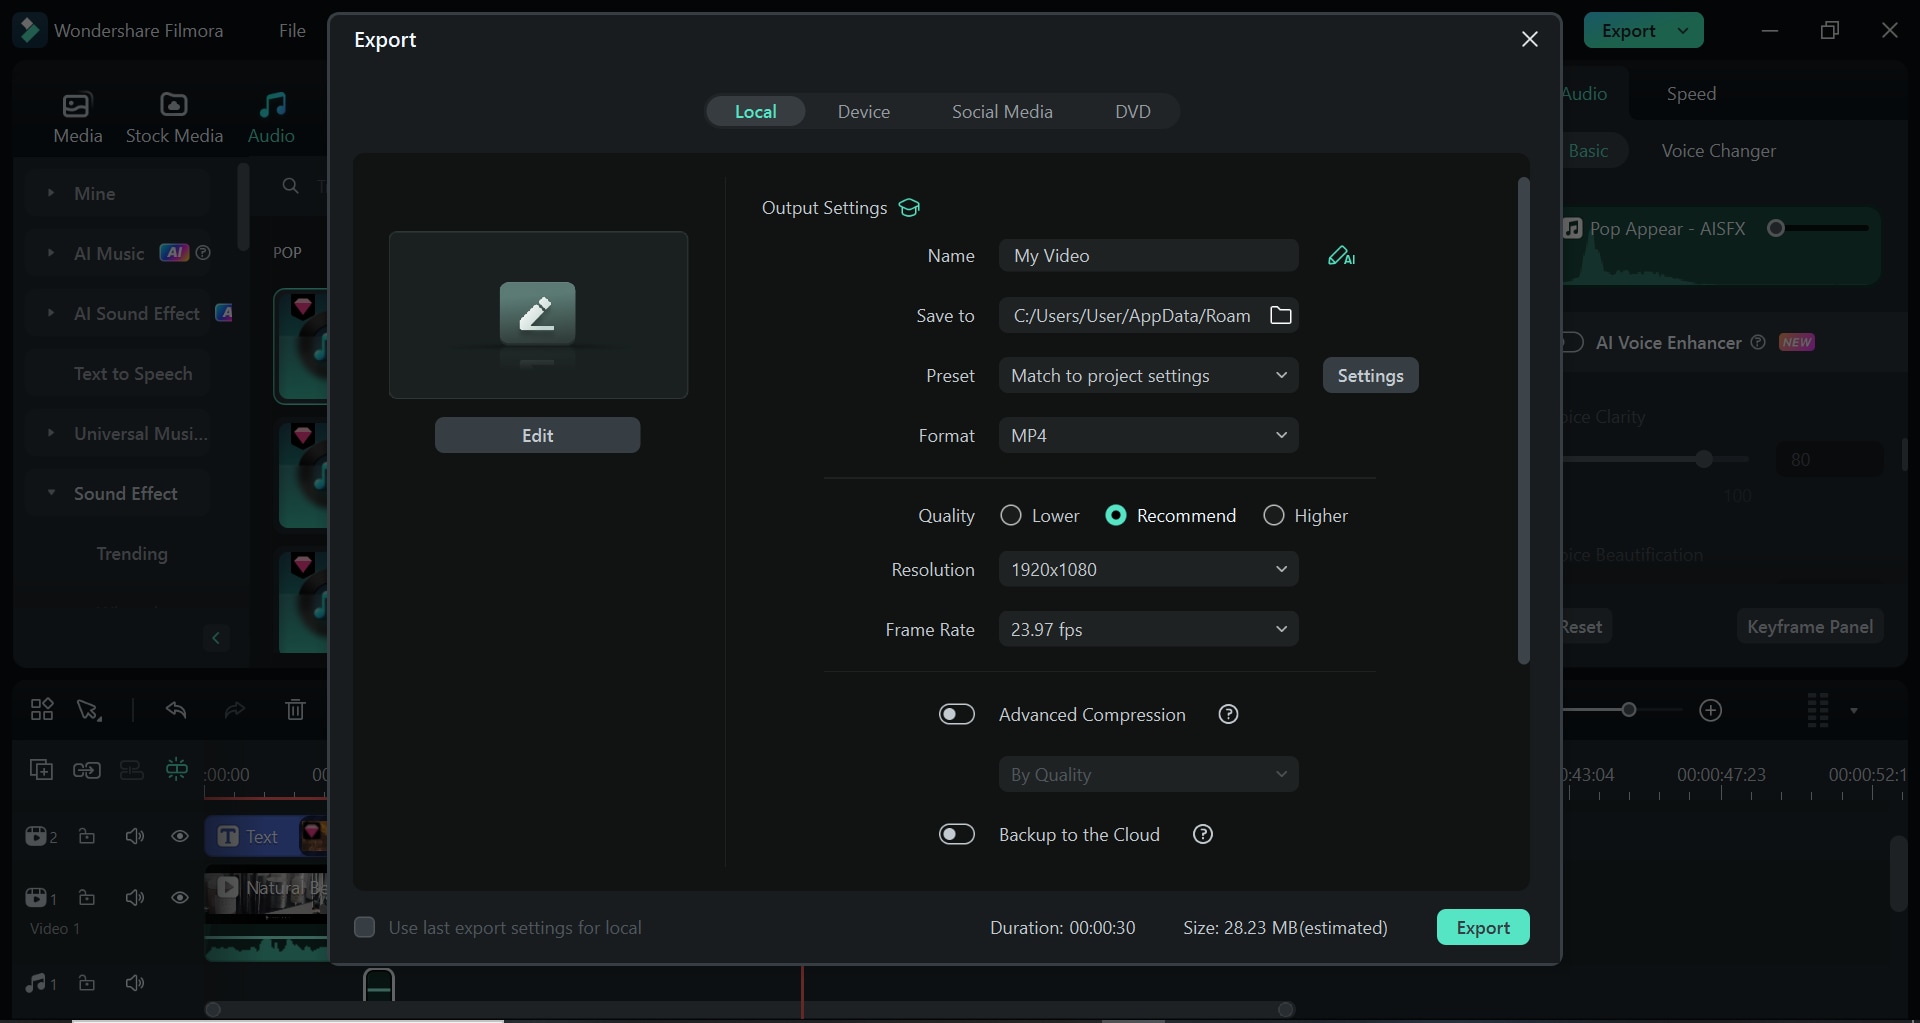
Name your file and choose your desired file location. You can also share it on social media platforms.
Part 4: Tips for Creating an Outstanding Teaser Video
- Add Music: Filmora has a big music library categorized into genres to find the song that perfectly fits your video. You can use Filmora Smart BGM Generation for intelligent music integration into your teaser clips. This feature automatically analyzes video content and adds the appropriate music simplifying the whole editing process.
- Add a Voice-over: You can complement your teaser video with a catch voice-over. Voiceovers complement your visuals with voice explanations to create a connection with your target audience.
- Create Brand Awareness: Incorporating your brand enables your audience to know who is communicating with them. You must use your business name to create brand awareness. You can incorporate other features to build your brand such as fonts, sounds, colors, logos and so much more. A video teaser gives you a few seconds to market your brand so ensure you are recognizable faster.
- Include a Call To Action: Video teasers should compel the target audience to take a certain action. The action could be subscribing and following your social media platforms, or signing up for your newsletter to constantly engage with your target audience.
- Use The Correct Hashtags: Hashtags are great for generating traffic to your webcam teasers. Since your videos will likely be posted on social media, you need a clever hashtag plan to create more engagement. You can start by checking your competitors' hashtags.
Conclusion
A teaser clip grabs your audience's attention and drives your point home. This article covers everything you need to know about creating a teaser video. You have seen the types of trailers and the various creation methods.
All the methods are great alternatives but the game changer is the Smart Scene Cut feature which uses AI. It does all the hassle for you by automatically selecting the important moments in your video clip and making all the edits. With the advanced features of Filmora, you can create video teasers without any stress.


