

 ChatGPT
 Perplexity
 Gemini
 Claude
 Grok
Grok
Have you ever tried using FFmpeg to make videos from images? Maybe you want to merge product images to create marketing videos or make learning more enjoyable for your students. While many video editing tools are available, FFmpeg is a flexible, powerful command-line tool that offers control over video and audio processing.
FFmpeg stands for Fast Forward Moving Picture Experts Group. It is an open-source tool; this means it is open and accessible to everyone and is constantly updated by a large community of developers contributing to it. FFmpeg might look intimidating at first glance, but rest assured that you can effortlessly convert your images to videos with some guidance. This tool supports every video and audio format.
So, whether you’re a complete novice or have previous experience using FFmpeg, this article will show you methods to change FFmpeg pictures to images and the basic commands for converting, optimizing, and customizing image-to-video conversion.
In this article
Part 1: How to Convert Images Using FFmpeg to Create a Video
Installing FFmpeg
Installing the tool is the first step in using FFmpeg for image to video conversion.
- Verify Existing Installation (All OS)
Enter this command prompt:
ffmpeg -versionIf version details appear: FFmpeg is installed
If error occurs: Proceed with OS-specific installation
- OS-Specific Installation
- Windows
Download FFmpeg from the official website . After downloading, extract the ZIP file contents to your preferred directory. The critical final step is to add the directory containing ffmpeg.exe to your system's PATH environment variable to enable command-line access.
- macOS (Using Homebrew)
Executing the command below in your terminal:
brew install ffmpeg- Post-Installation Check</li>
Re-run verification command after installation:
ffmpeg -version
Use FFmpeg to Convert Images to Videos

- Basic Command for Single Image Conversion
To create a static video with a single image, use this command.
ffmpeg -loop 1 -i input.jpg -c:v libx264 -t 10 output.mp4The -loop 1 keeps the image repeated on a loop while the - t 10 sets the video duration to 10. You can adjust the number depending on your desired video length.
- Command for Image Sequence Conversion
When using FFmeg for image sequence to video conversion, ensure the pictures are correctly named sequentially and numerically. You can make videos from an image sequence in three ways: by using format specifiers, the glob pattern, or the FFmpeg concat demuxer.
- Using Format Specifiers
If your image sequence is sequentially named, format specifiers indicate which images FFmpeg should use. To use format specifiers, copy and paste this command.
ffmpeg -framerate 1 -i image%d.jpg-c:v libx264 -r 30 output.mp4-framerate 1 defines how many pictures are read per second, in this case, 1 photo per second. Not inputting a frame rate will set the default framerate to 25, which is 25 pictures read per second.
-i image%d.jpg is the input image sequence, where %d represents the numerical sequence in the filenames. It searches for the images with the same name as the input image sequence, setting the image with the lowest digit as the starting image. Add -start_number n to the above command to specify the start image. If you use -start_number_8, the starting image will be image8.jpg.
-c:v libx264 is the codec used to encode the video. To increase the compatibility of your video for different players, add -pix_fmt yuv420p to the command prompt. It should look something like this.
ffmpeg -framerate 1 -i image%d.jpg-c:v libx264 -r 30 -pix_fmt yuv420p output.mp4-r 30 represents the output video’s framerate. If the framerate of the input images is not defined, it is set to a default of 25.

- Using Glob Pattern
The glob pattern allows you to specify your desired input images.
ffmpeg -framerate 1 -pattern_type glob -i '.jpg' -c:v libx264 -r 30 -pix_fmt yuv420p output.mp4The pattern .jpg selects all the.jpg files in the current directory. This pattern is useful if your images are named sequentially but not numerically.
- Using the concat demuxer
The concat demuxer links images together in a series. First, create a file input.txt and add the images you need for the video. Specify a duration for which each photo will be displayed, like this.
file 'image01.jpg'
duration 1
file 'image02.jpg'
duration 1
file 'image03.jpg'
duration 1
Use this command prompt to get a video slideshow output of these images.
ffmpeg -f concat -i input.txt -c:v libx264 -r 30 -pix_fmt yuv420p output.mp4
Naming Image Sequences
When naming the images:
| Command Specifier | Example Filenames | |
| img%d.jpg | img1.jpg | |
| img%02d.jpg | img01.jpg | |
| img%03d.jpg | img001.jpg |
Stick to the right naming format and ensure it matches the format specified in the command. If there are inconsistencies, you may get an error message.
Part 2. Issues You Might Encounter While Converting Images to Video Using FFmpeg
Here are common issues you may face when using FFmpeg for image to video conversion and how to address them.
FFmpeg’s Active Development
FFmpeg is constantly updated as an open-source tool. These frequent changes may occasionally introduce bugs affecting your workflow. Always use the latest FFmpeg version and consult the official documentation when encountering issues.
Incorrect File Naming
FFmpeg requires precise sequential naming for image sequences. Missing numbers or inconsistent naming will cause errors. Ensure all filenames follow a strict numerical order. For large image sets, use bulk renaming tools to maintain consistency.
Path and Command Errors
Typographical errors in commands frequently prevent successful conversion. Carefully verify your command syntax and file paths before execution. Double-check every parameter and consult documentation for unfamiliar options.
Pixel Format Compatibility
Default settings may produce videos incompatible with common media players. Always include the pixel format specification in your command to ensure broad compatibility. Use this format:
ffmpeg -framerate 1-i image%d.jpg-c:v libx264 -pix_fmt yuv420p output.mp4Part 3: How to Customize Converted Videos With FFmpeg
To Add an Audio Track to a Slideshow
Copy and paste this command.
ffmpeg -framerate 1 -pattern_type glob -i '.jpg' -i audio.mp3 \-shortest -c:v libx264 -r 30 -pix_fmt yuv420p output.mp4- i audio.mp3 adds a second input file, an audio file. -shortest sets the length of the output video to the shortest length of the two input files (image and audio). If the audio file is longer than the image sequence, this command will set the length of the output audio to the image sequence length.
To Add Text Overlays and Watermarks to FFmpeg Converted Videos
If you want to add a text or watermark to your video, save it as an image in JPG or PNG format. Then, use this command prompt.
Ffmpeg -i input.mp4 -i watermark.png-filter_complex "overlay=10:12" output.mp4-i input.mp4 is the input video file, while -i watermark.png is the input (watermark or text) image file. -filter_complex "overlay=10:12" overlays the input image on the video at specific coordinates (10,12), and output.mp4 is the final output video.
To adjust watermark transparency, use the blend filter using this command.
ffmpeg -i input.mp4 -i watermark.png-filter_complex"[0:v][1:v]overlay=10:12:format=auto,blend=all_mode='overlay':all_opacity=0.7" output.mp4all_opacity controls the watermark transparency. 0.7 means 70% opacity. You can adjust the figure to achieve your desired watermark opacity.
To Adjust Converted Video Speed to Create Time-Lapse or Slow Motion Effects on FFmpeg
| Action | Command Prompt |
| To speed up video by 2x | ffmpeg -i input.mp4 -filter:v "setpts=0.5PTS" -an output.mp4 |
| To speed up audio by 2x | ffmpeg -i input.mp3 -filter:a "atempo=2.0" output.mp3 |
| To speed up both video and audio | ffmpeg -i input.mp4 -vf "setpts=0.5PTS" -af "atempo=2.0" output.mp4 |
| To slow down video by 2x | ffmpeg -i input.mp4 -filter:v "setpts=2.0PTS" -an output.mp4 |
| To slow down audio by 2x | ffmpeg -i input.mp3 -filter:a "atempo=0.5" output.mp3 |
| To slow down both audio and video | ffmpeg -i input.mp4 -vf "setpts=2.0PTS" -af "atempo=0.5" output.mp4 |
-filter:v applies a video filter to the input video while setpts=0.5PTS makes the output video play 2x faster than the original and atempo=2.0 doubles the speed of the audio to match the speed of the output video. setpts=2.0PTS makes the output video play 2x slower than (half the speed of) the original video, and atempo=0.5 makes the audio twice as slow as the original audio . -vf applies a video filter while -af applies the audio filter.
To Change the Resolution of FFmpeg Videos Made from Images
To scale/resize/change video resolution, use this command prompt's scale filter.
ffmpeg -i input.mp4 -vf scale=$w:$h < encoding-parameters> output.mp4$w and $h are the intended video width and height. For example, the —vf scale=640:480 command changes your video resolution to 480p.
Bonus: A Non-Technical Alternative to FFmpeg
While FFmpeg is a powerful tool, its command-line editing interface can be overwhelming, especially for new users or people without technical knowledge. The various command prompts, syntax, and file directory organization can be stressful and time-consuming. In cases like this, users opt for an easier, more intuitive, and non-technical tool like Wondershare Filmora.
Filmora is video editing software that allows users to indulge their creativity without prior skill or expertise. It takes photo and video editing to a new level with easily accessible effects and a media library you can work with. Filmora combines photos seamlessly to create beautiful videos you can edit and customize further to your preference.
Here is how to convert your images to a video using Filmora.
Step 1: Install Filmora from the Google Play or Apple Store. Then, launch the application on your mobile device.

 secure download

Step 2: Open the Image to Video tool on the Filmora home screen.
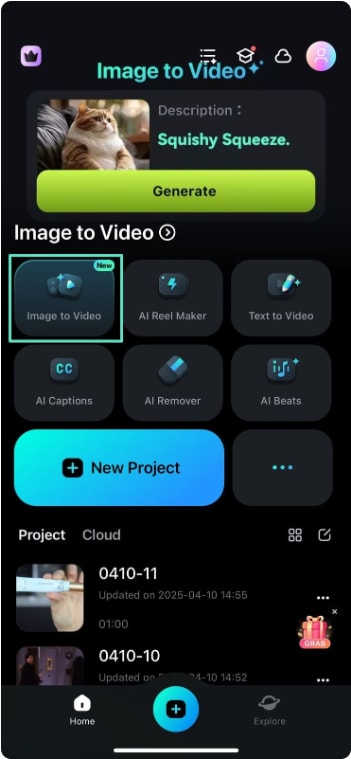
Step 3: Upload the image from which you want to generate a video. Describe the kind of video you want and hit Generate.
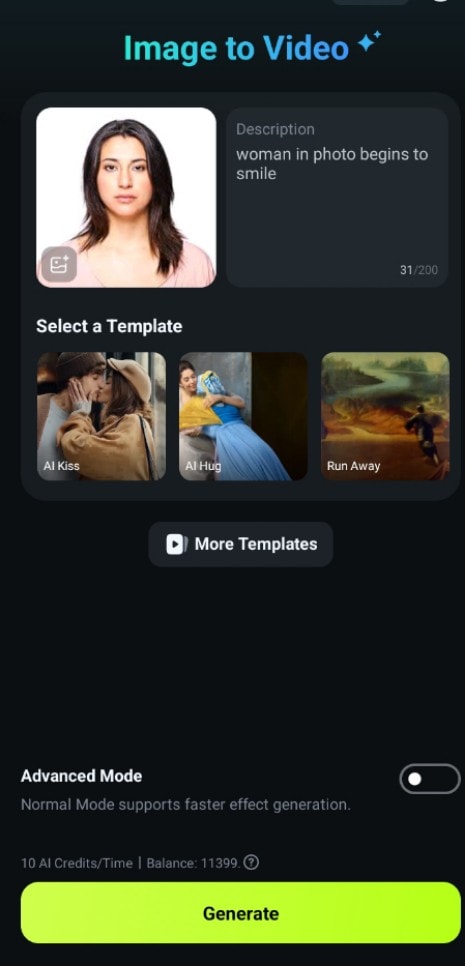
Save your video. If you want to explore more of Filmora’s features, click Edit.

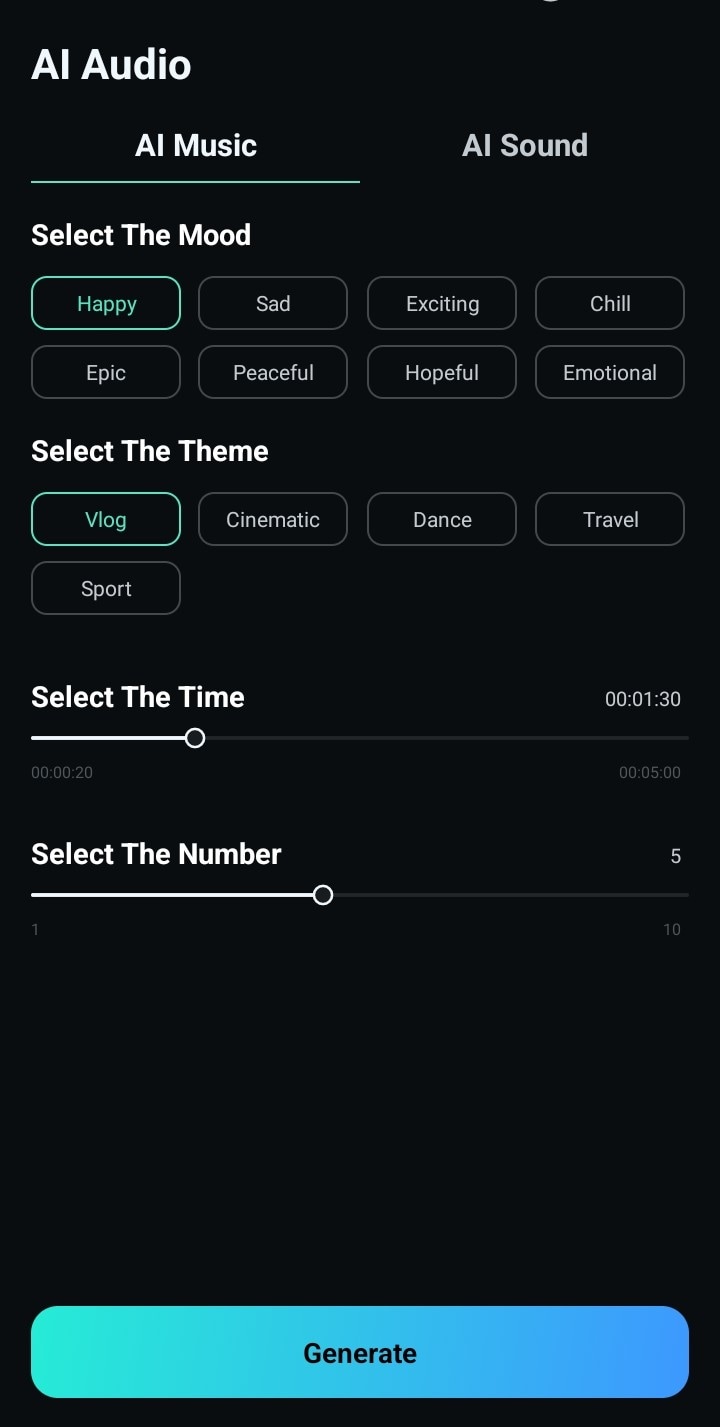
You can customize the video by clicking Audio on the toolbar to add sound effects and voiceovers or use Filmora’s AI Audio feature.You can also generate music with Filmora’s AI Audio by selecting your preferred tone, theme, and duration. Once you’re done, hit Generate. Then, export the finished video to your mobile device.
Conclusion
Whether you’re an experienced editor or not, converting images with photos is a breeze, especially if you have the right tools. FFmpeg is an excellent tool for achieving this, with command-line prompts for every action, including further edits like adding audio clips and overlays and resizing the video/changing its resolution.
However, Filmora is a great choice for users who find FFmpeg image-to-video conversion too technical or those who need more customization options with less processing time. You can explore Filmora’s array of tools by installing the app on your mobile phone. You can create videos from photos, add effects and background music, and export your edited video in your preferred resolution.
secure download 