


There are moments when you’re done shooting, only to realize your subject keeps drifting out of frame or isn’t centered the way you wanted. Luckily, you can fix that in post-production with camera tracking. If you've heard that term before, you might naturally confuse it with motion tracking or planar tracking.
You're not completely wrong, but they work differently. So, we’ll break down how each method works and show you which editor supports all three. That way, you can understand the three concepts better and apply them in your own project.
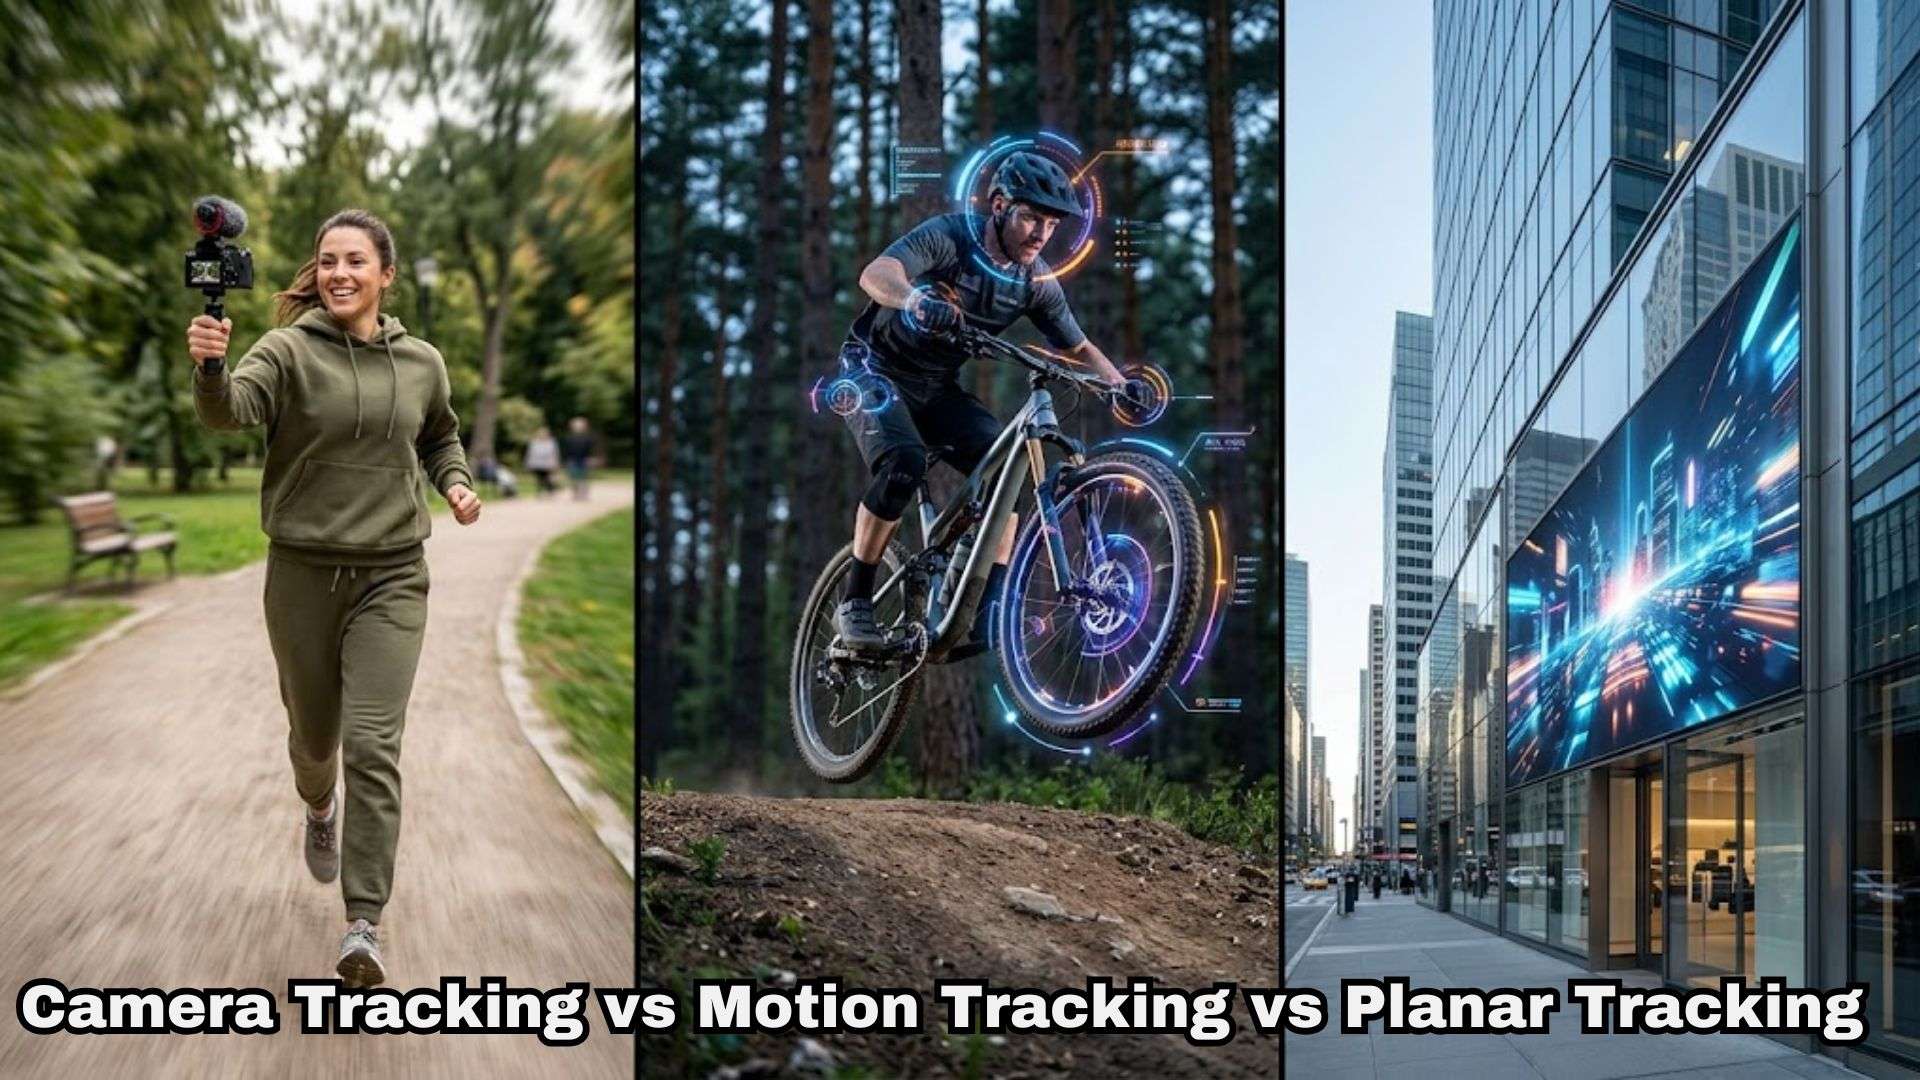
Part 1. The Core Mechanics of Video Tracking in Modern Editing
Tracking sounds complicated when you first encounter it, but the basic idea is pretty simple. They analyze pixel movements across your clips to automate position, scale, or frame adjustments without any tedious manual keyframing.
And in modern tracking tools, there are three types of tracking: motion tracking, planar tracking, and camera tracking.
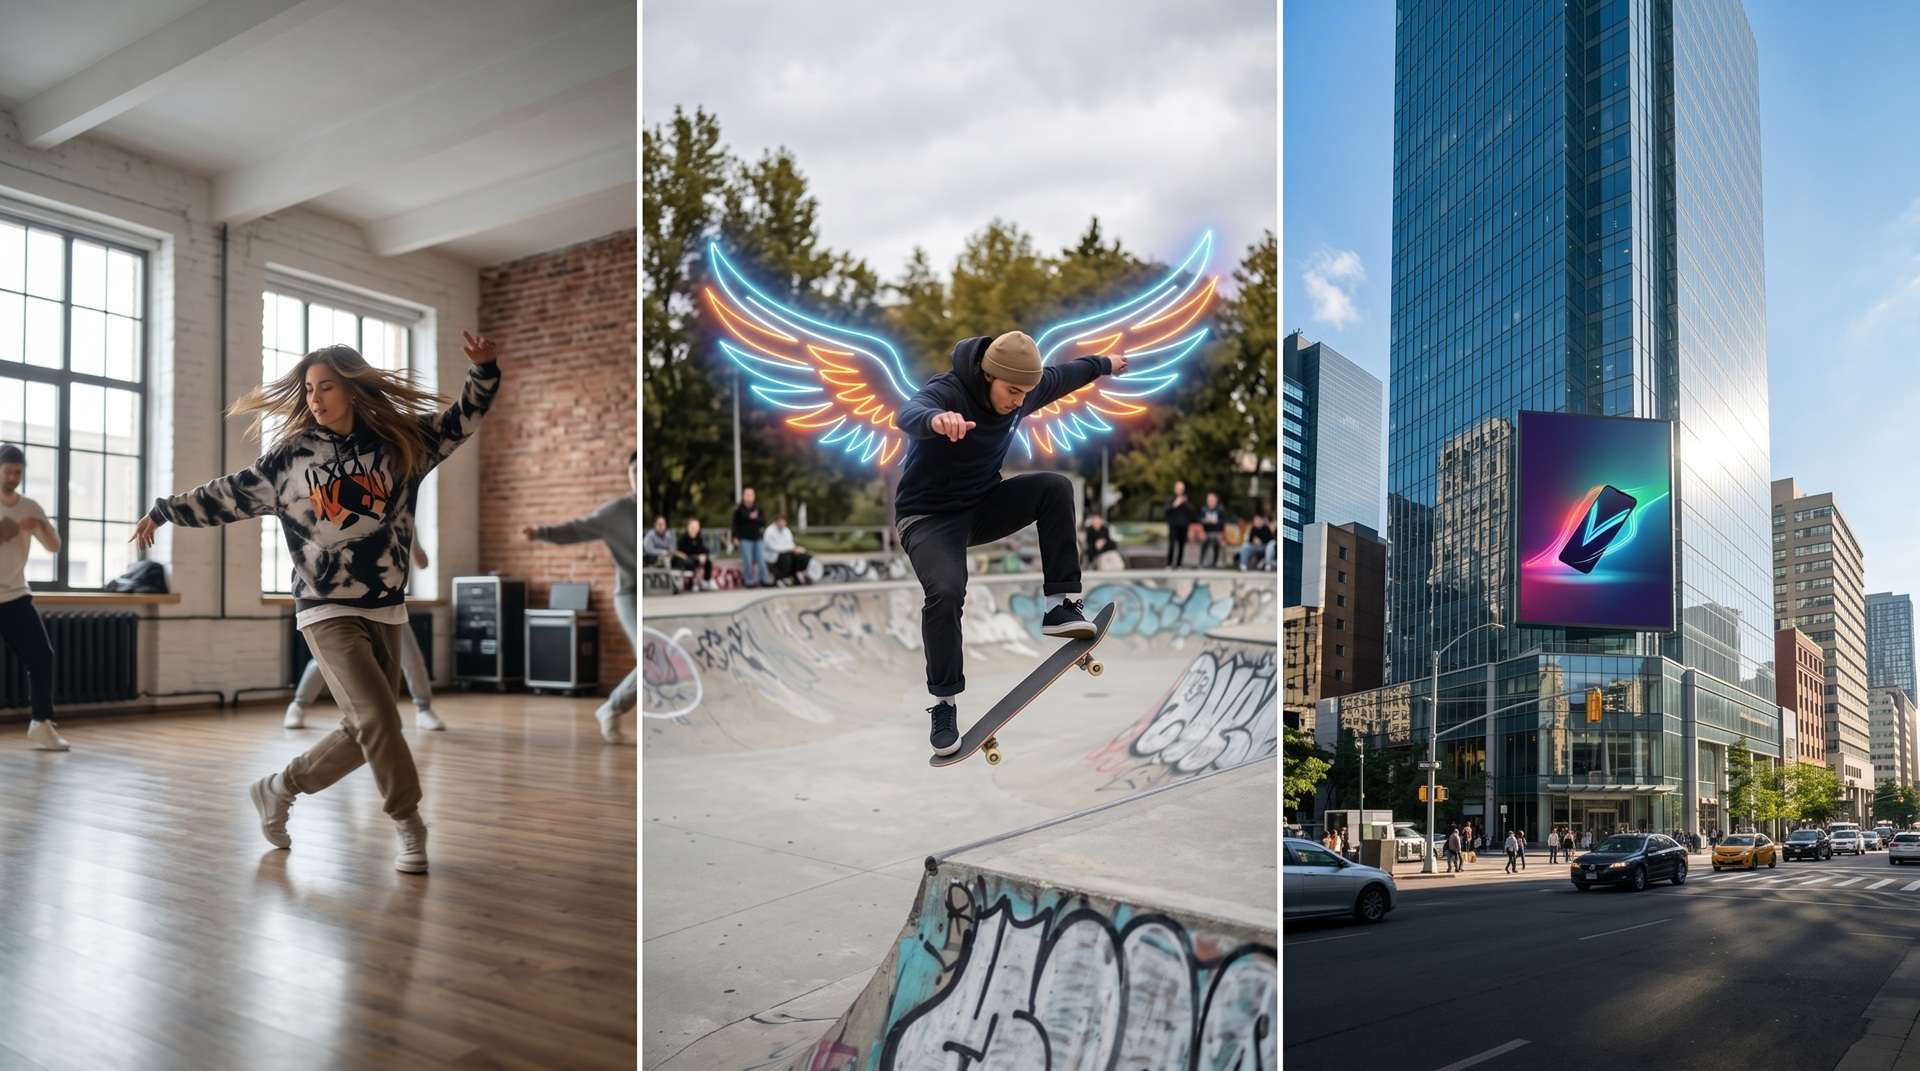
Camera Tracking vs Motion Tracking vs Planar Tracking at a Glance
All three methods analyze movement in a video, but they absolutely do not track the same thing or produce the same result. Here is the easiest way to look at them:
- Camera Tracking: Keeps a selected subject framed as it moves.
- Motion Tracking: Follows an object's movement so another element can follow it.
- Planar Tracking: Follows a flat surface as it moves, rotates, scales, or changes perspective.
In the next part, we’ll go deeper into the camera tracking vs motion tracking vs planar tracking discussion so you know which one to use.
Part 2. Camera Tracking vs Motion Tracking vs Planar Tracking: Key Differences
It’s easy to lump all three together because they involve tracking movement. But knowing the difference between camera tracking vs motion tracking vs planar tracking will save you a ton of headache when editing. Here is a quick breakdown to help you visualize it.
| Feature | Camera Tracking | Motion Tracking | Planar Tracking |
| Primary Purpose | Keep a subject properly framed | Attach an element to a moving target | Attach an element to a moving surface |
| Tracks | A chosen subject: Head, Body, or a custom area | One point or object moving through the frame | A flat surface using reference points |
| Main Result | The video framing follows the subject | Text, graphics, or effects follow the target | An element stays aligned with a surface |
| Common Uses | Auto-reframing, vertical crops, subject centering | Callouts, floating labels, face blurs, lower thirds | Screen replacements, poster swaps, wall or vehicle decals |
| Best For | Vlogs, dance, sports, product highlights, fast action | Tutorials, product labels, meme effects, privacy blurs | Phone/laptop screens, billboards, logos on flat surfaces |
|
Show More
Show Less
|
|||
The easiest way to understand the difference is to stop thinking about the word tracking and think about the job you want done. Let's go deeper into it:
Camera Tracking (Auto-Framing & Centering)
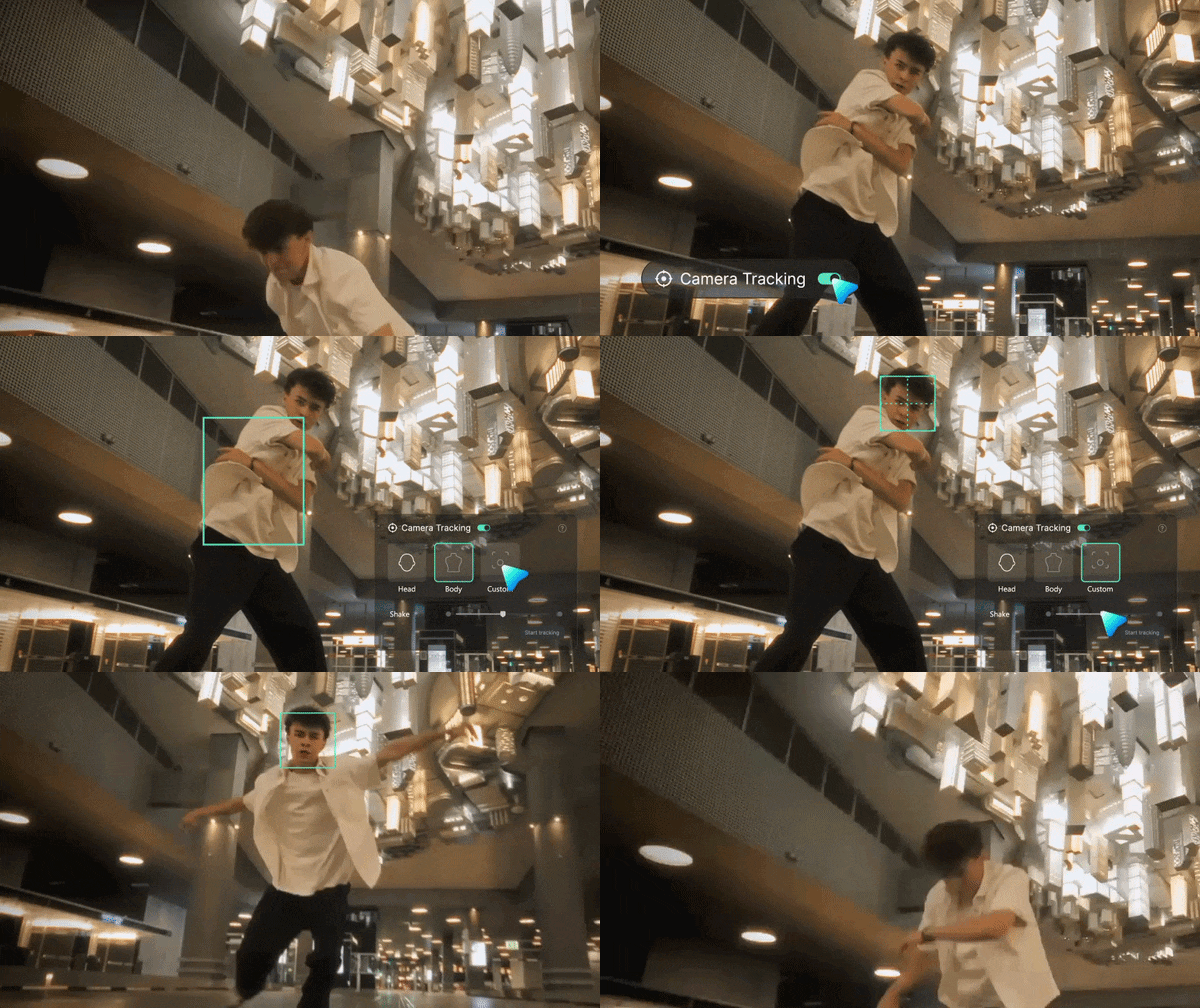
Camera tracking is about the shot itself. You choose the person, object, or area you want to follow, and the software adjusts the framing around that target. In Filmora, you can choose Head, Body, or Custom Target depending on what you're trying to keep in view.
Examples:
- A dancer spins and travels across a wide shot, and the frame glides along so they stay centered the whole time.
- A skateboarder rolls past while you filmed from a fixed spot, and tracking keeps them in frame instead of leaving them stranded at the edge.
- A product demo with the item wandering around a table stays neatly centered without any manual zooming.
Motion Tracking (Graphic & Text Attachments)
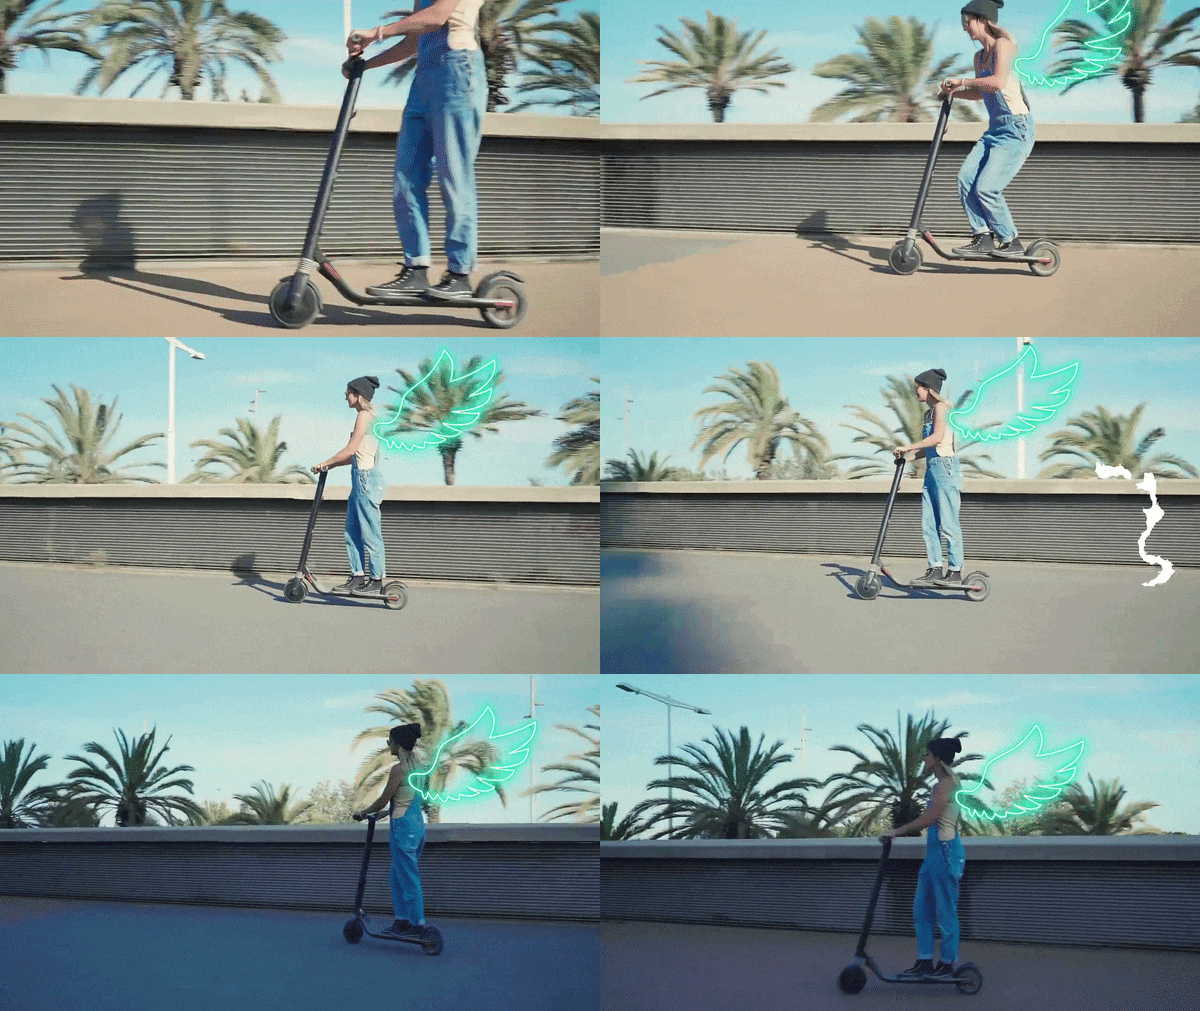
Meanwhile, motion tracking is more about attaching something to movement. With Filmora's motion tracking feature, you can attach text, images, mosaics, and other elements to moving objects.
Examples:
- A name tag that floats above a speaker's head and follows them as they walk.
- A blur that stays glued to a bystander's face so their identity stays private.
- An arrow in a tutorial that keeps pointing at a moving cursor or tool.
Planar Tracking (Surface & Perspective Tracking)
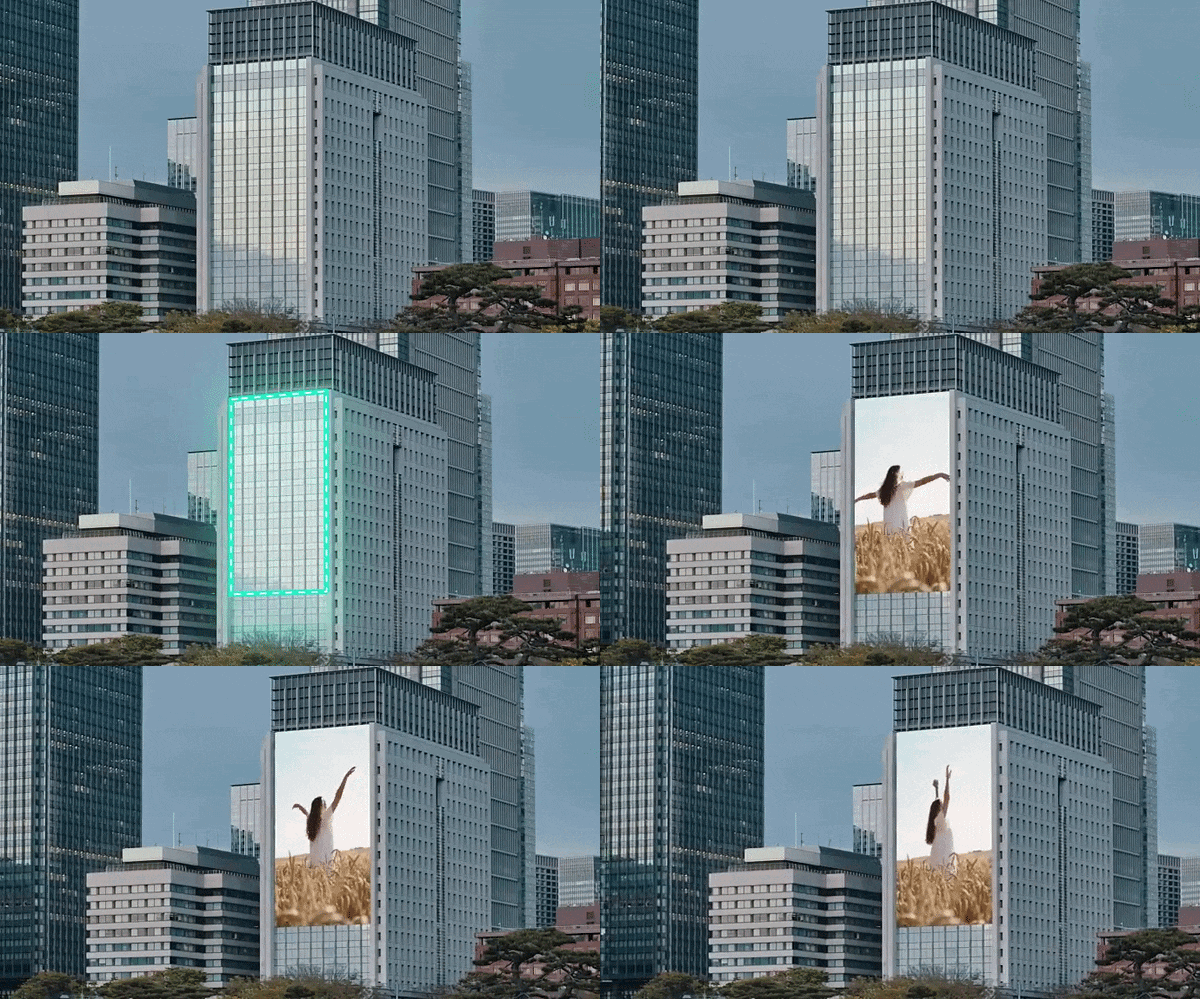
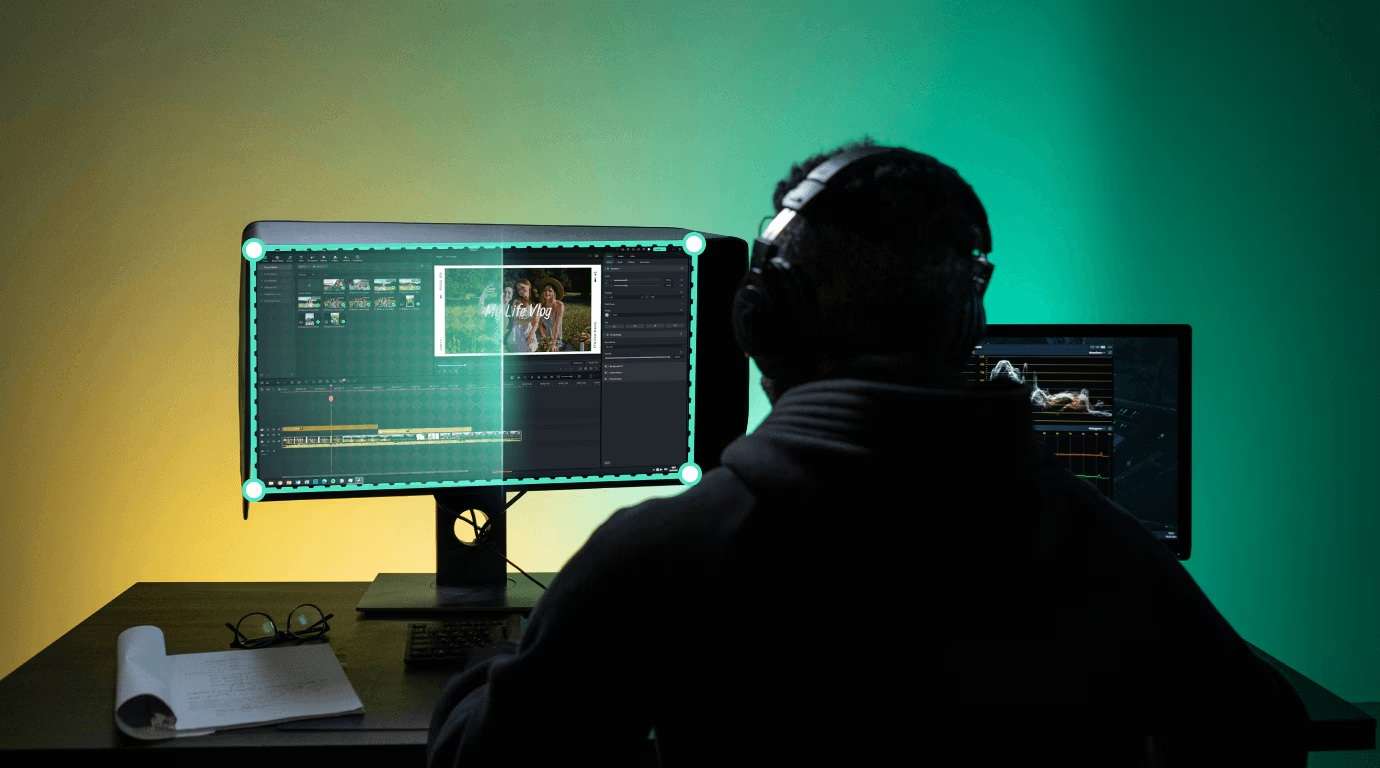
On the other hand, planar tracking becomes useful when a surface has a shape and movement that a simple point or object track can't describe well enough. In other words, if you want to replace what's on the screen (like a laptop), your replacement image needs to move with the screen's corners.
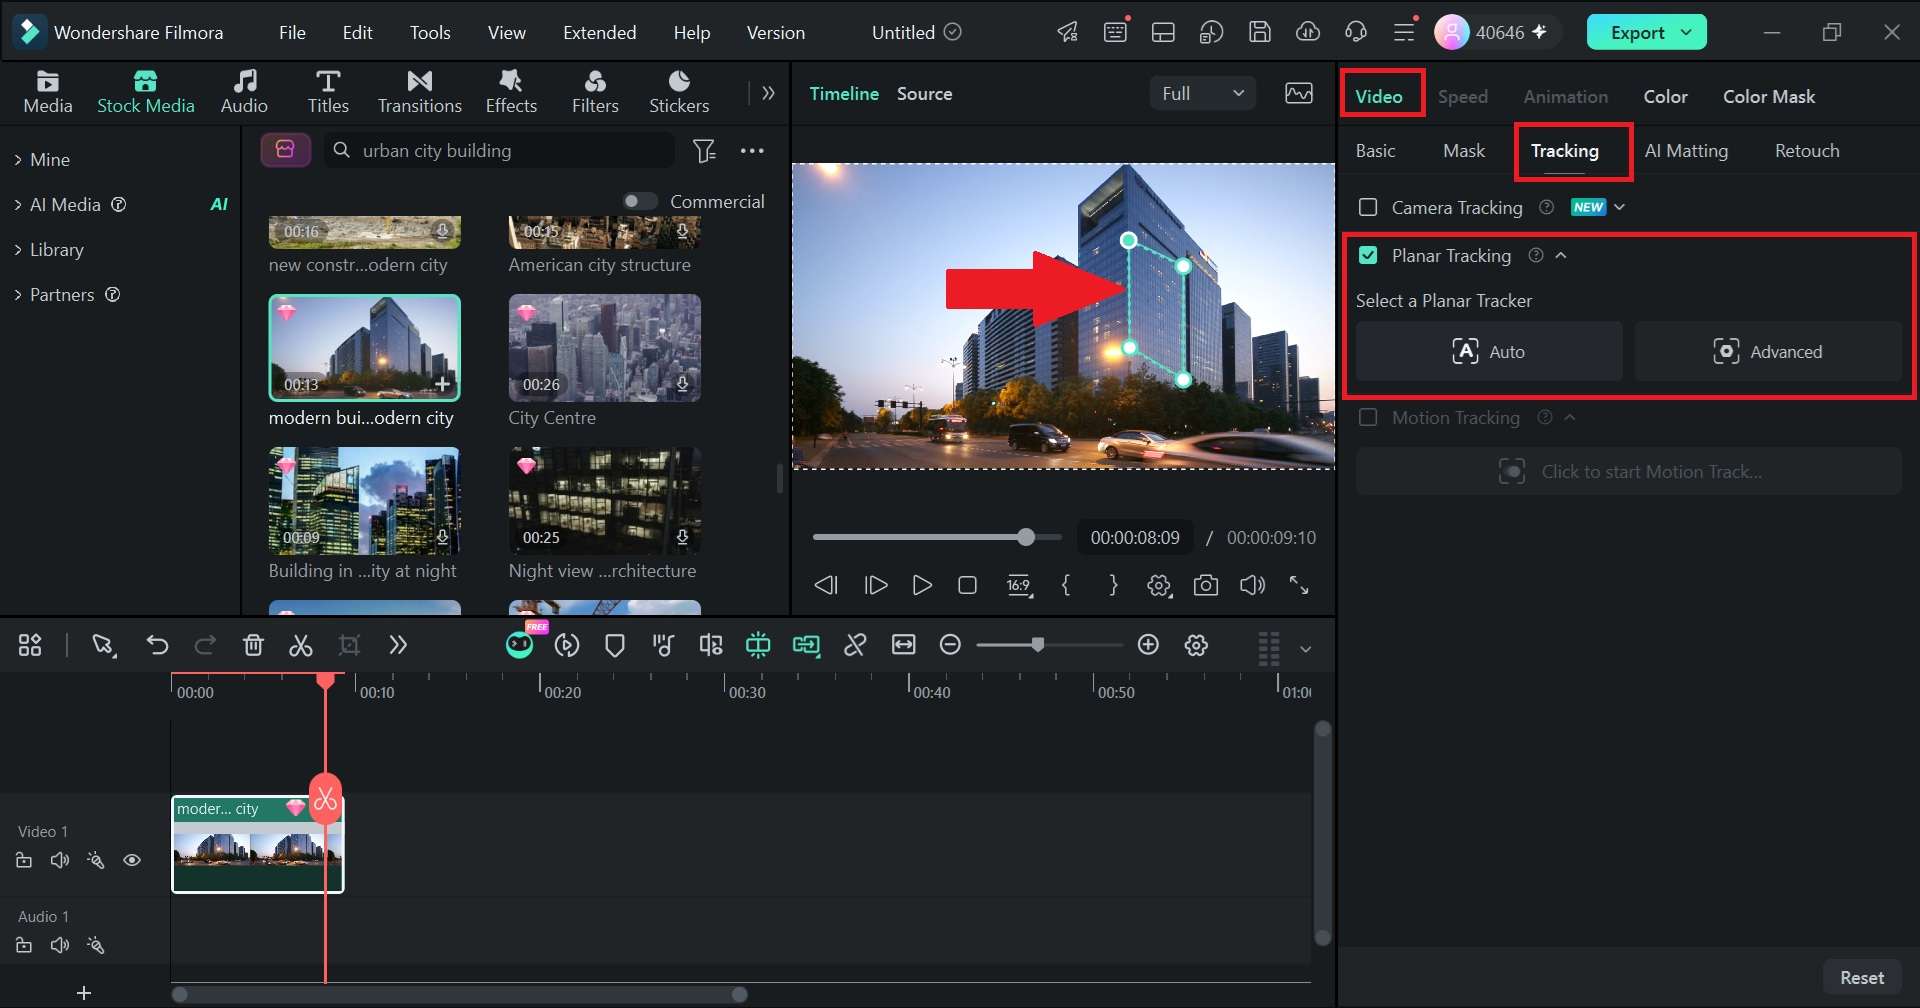
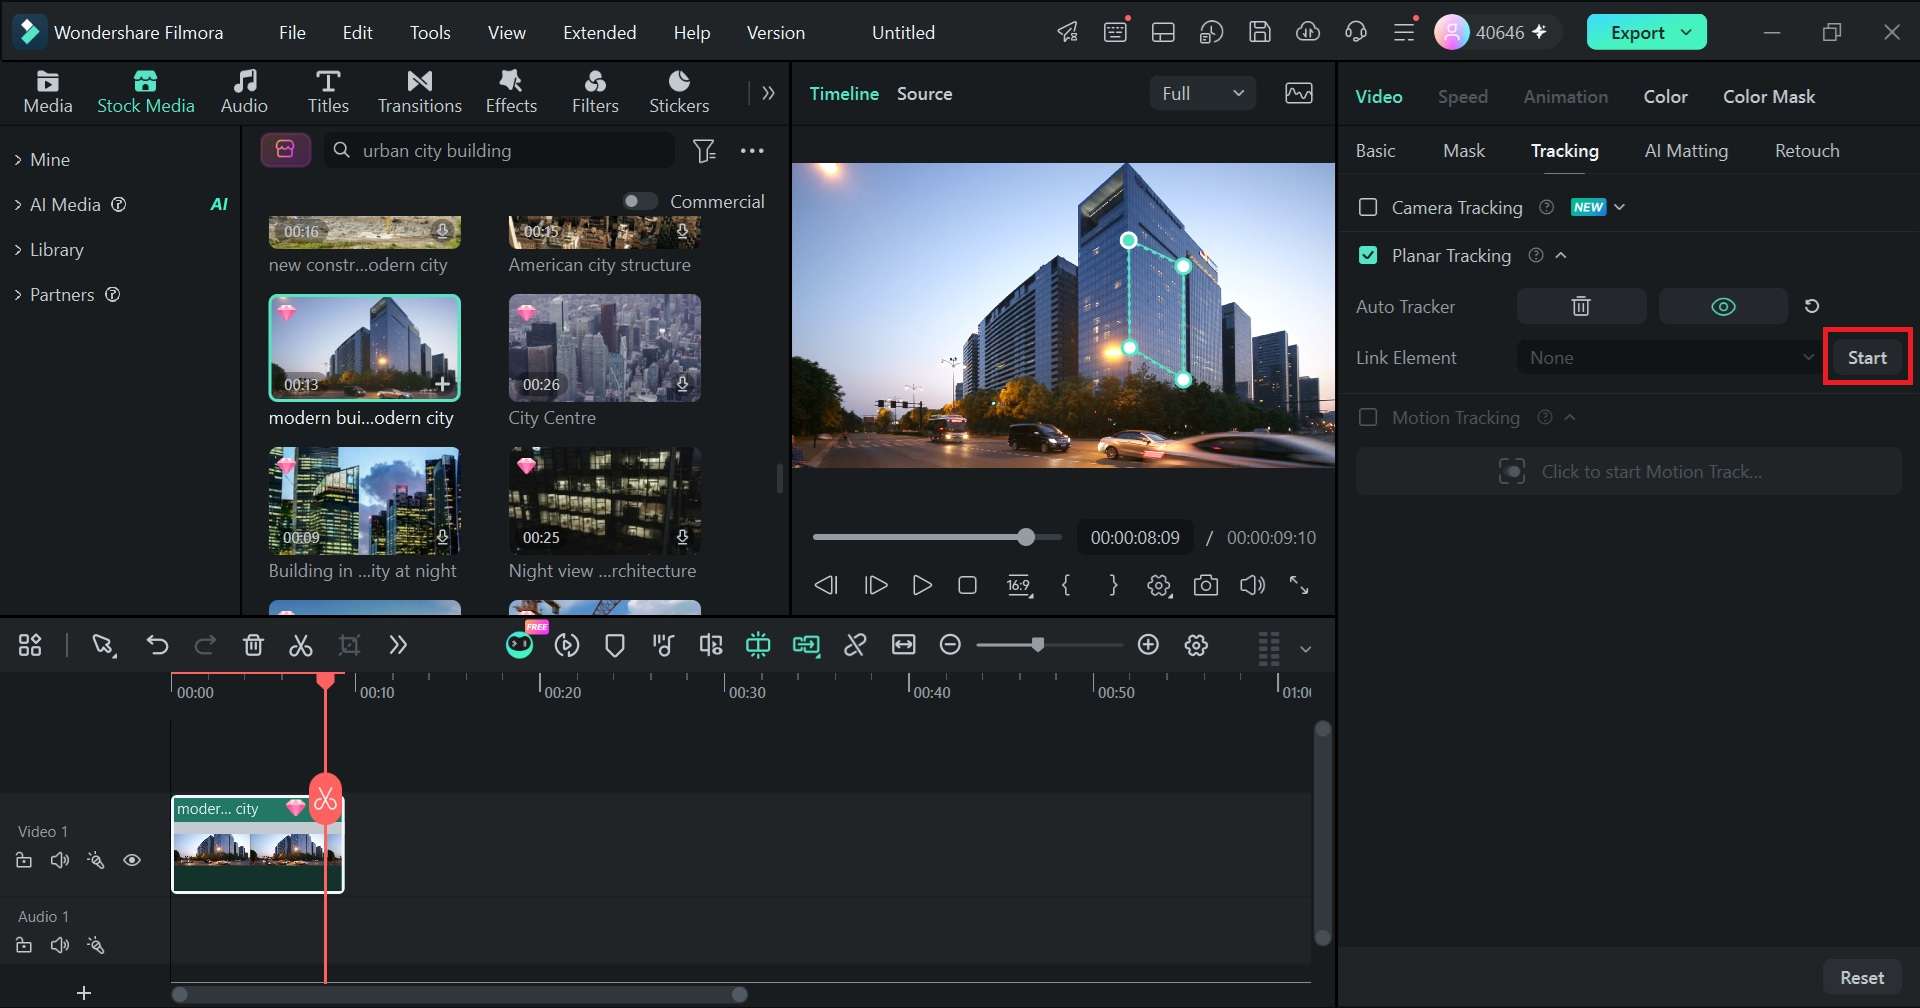
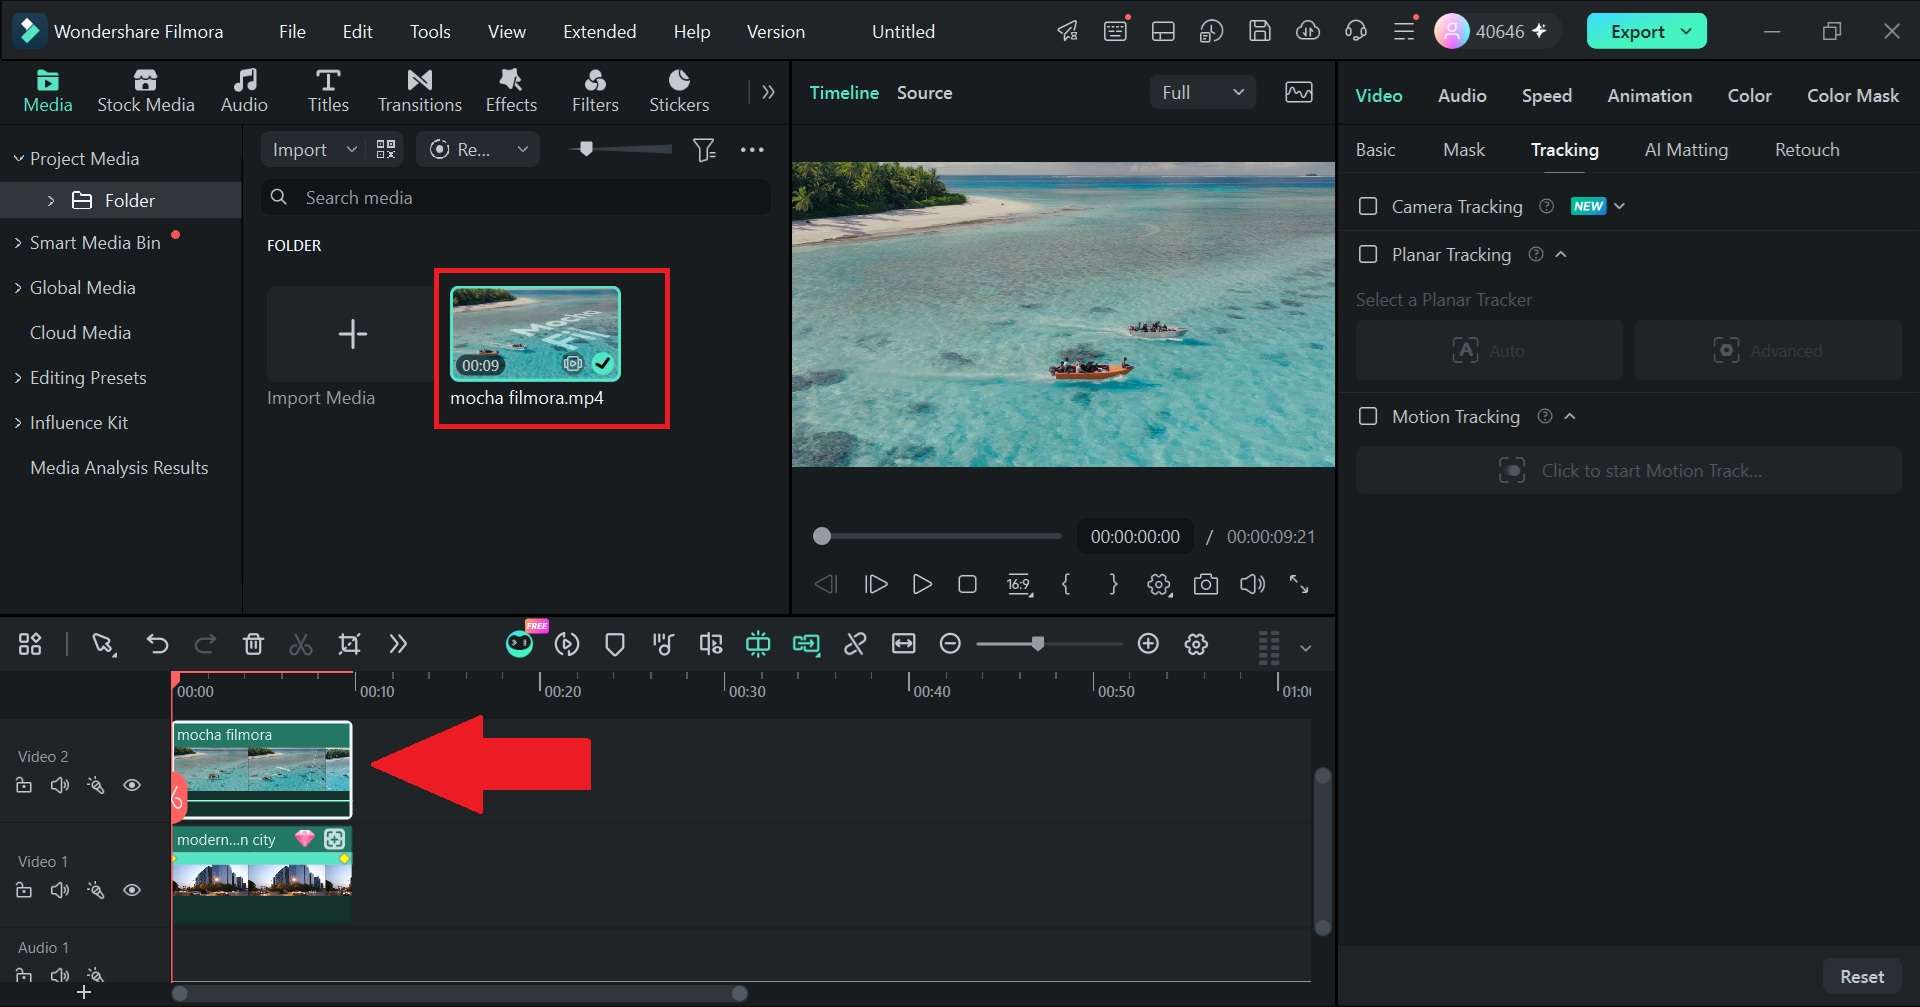
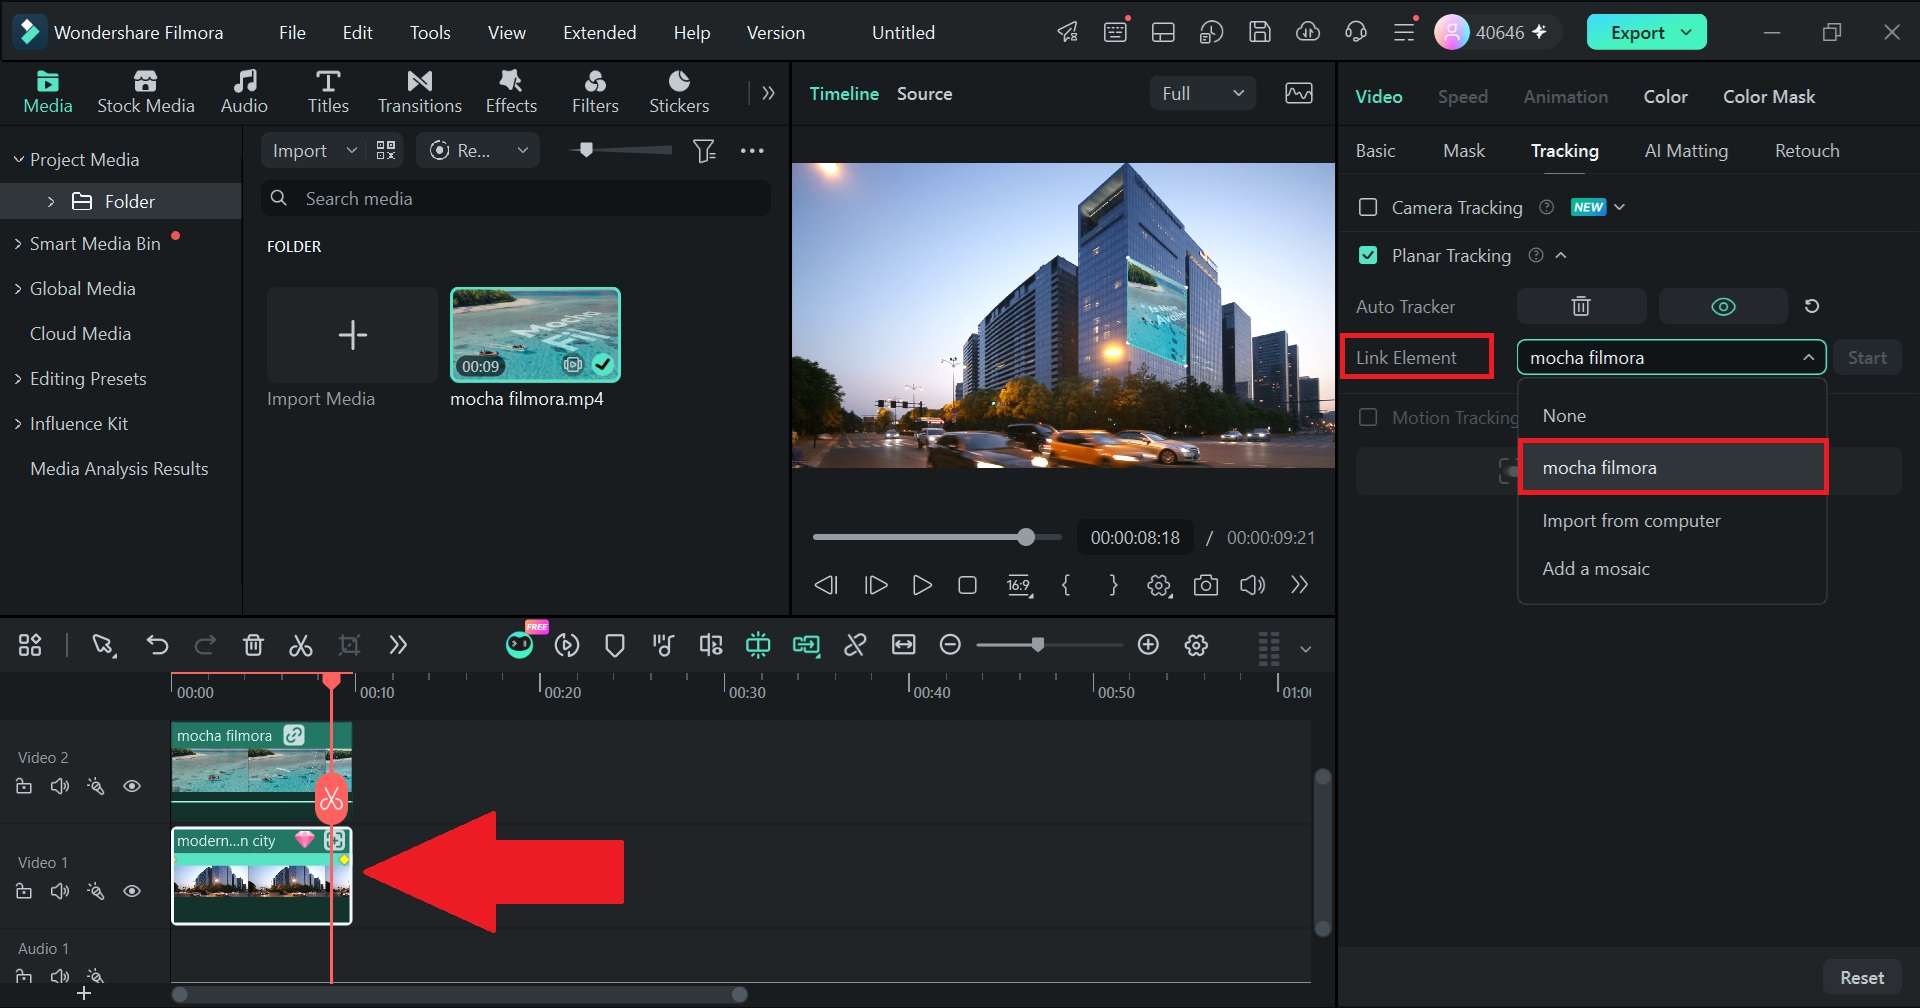
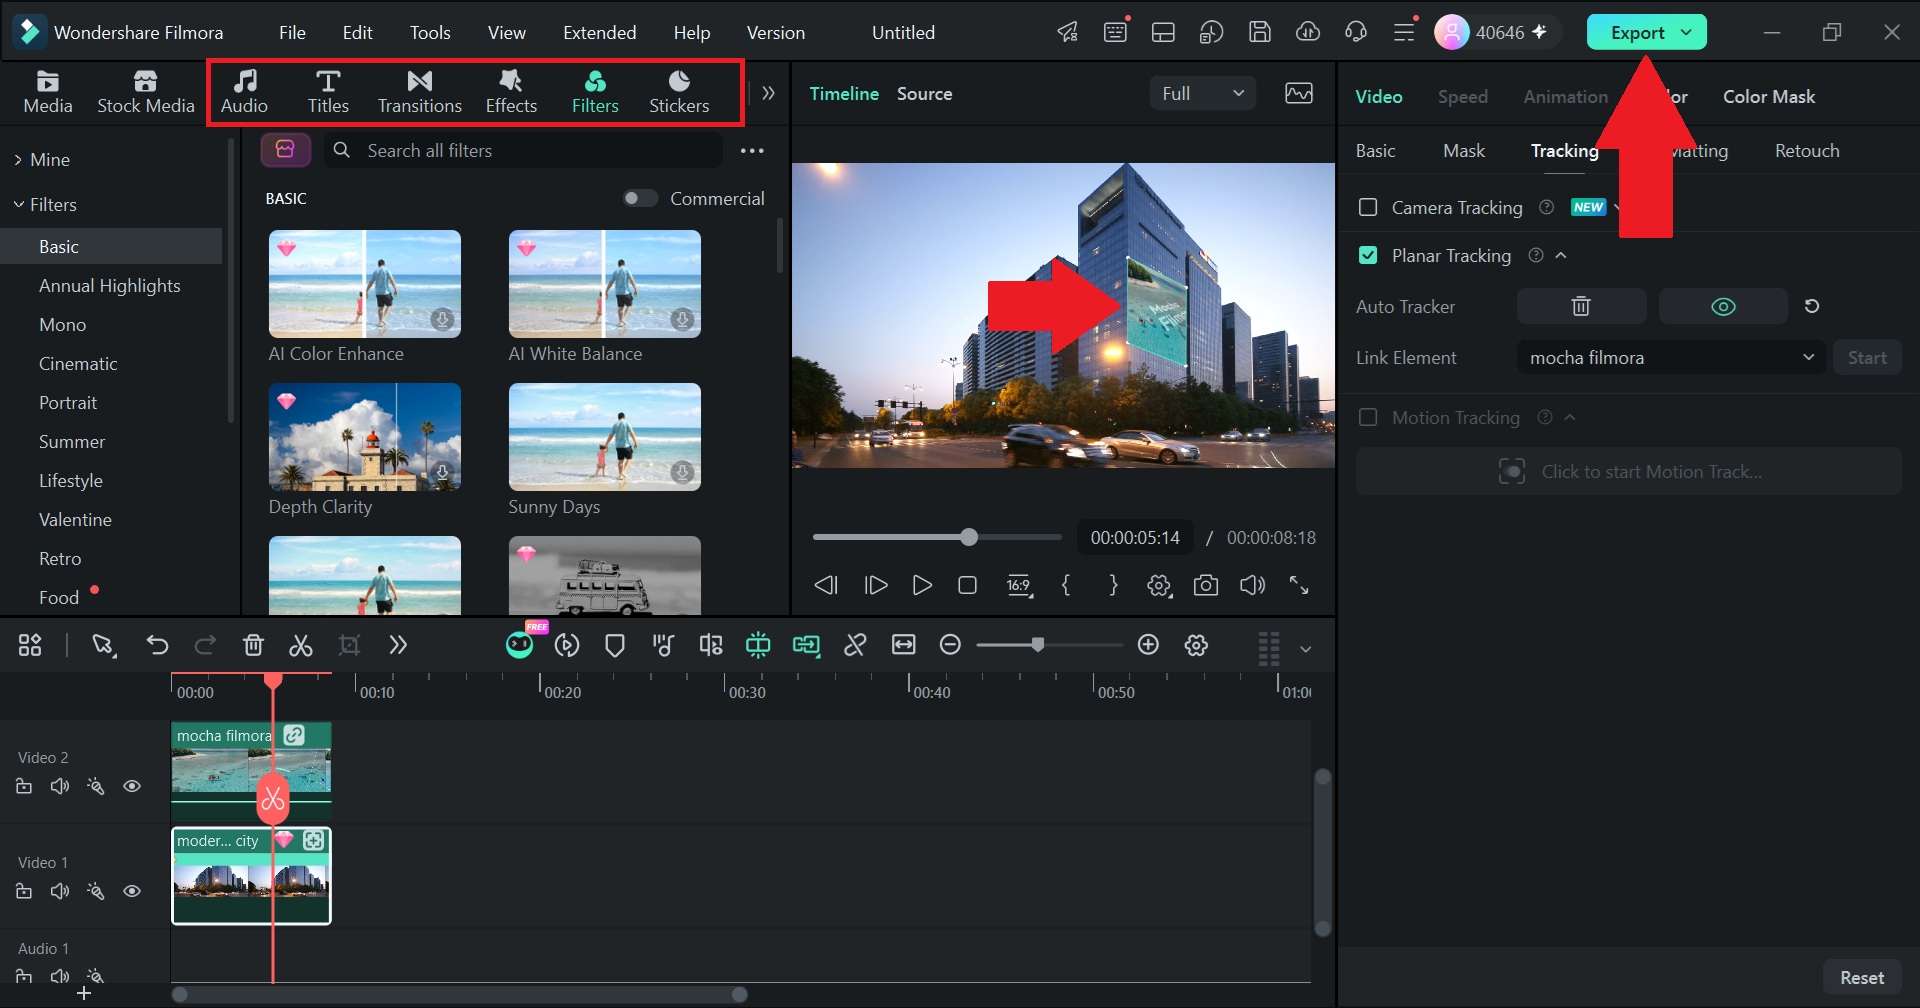
For this, Filmora's Planar Tracking feature uses four tracking points to collect position, scale, and rotation information from a surface. It can then attach video, images, text, mosaics, or other elements to that tracked area.
Examples:
- Someone walks while holding a phone, and you swap the blank screen for your app demo.
- A framed poster in the background gets replaced with your own artwork.
- A logo sticks to the side of a moving van and tilts with it as the van turns.
Part 3. Access Camera, Motion, and Planar Tracking in Filmora
After getting deeper into the camera tracking vs motion tracking vs planar tracking debate, you might assume you need separate software programs to handle these different tasks. Thankfully, that is not the case at all.
That's because Filmora brings Camera Tracking, Motion Tracking, and Planar Tracking right into its editing toolkit. So, you just need to choose the appropriate method based on what you are trying to track, all within the exact same workspace.
How to Access Camera Tracking in Filmora
Using this brand-new framing feature is incredibly straightforward. This is the one to reach for when your subject won't stay put in the frame. It only takes a few clicks to get it running.
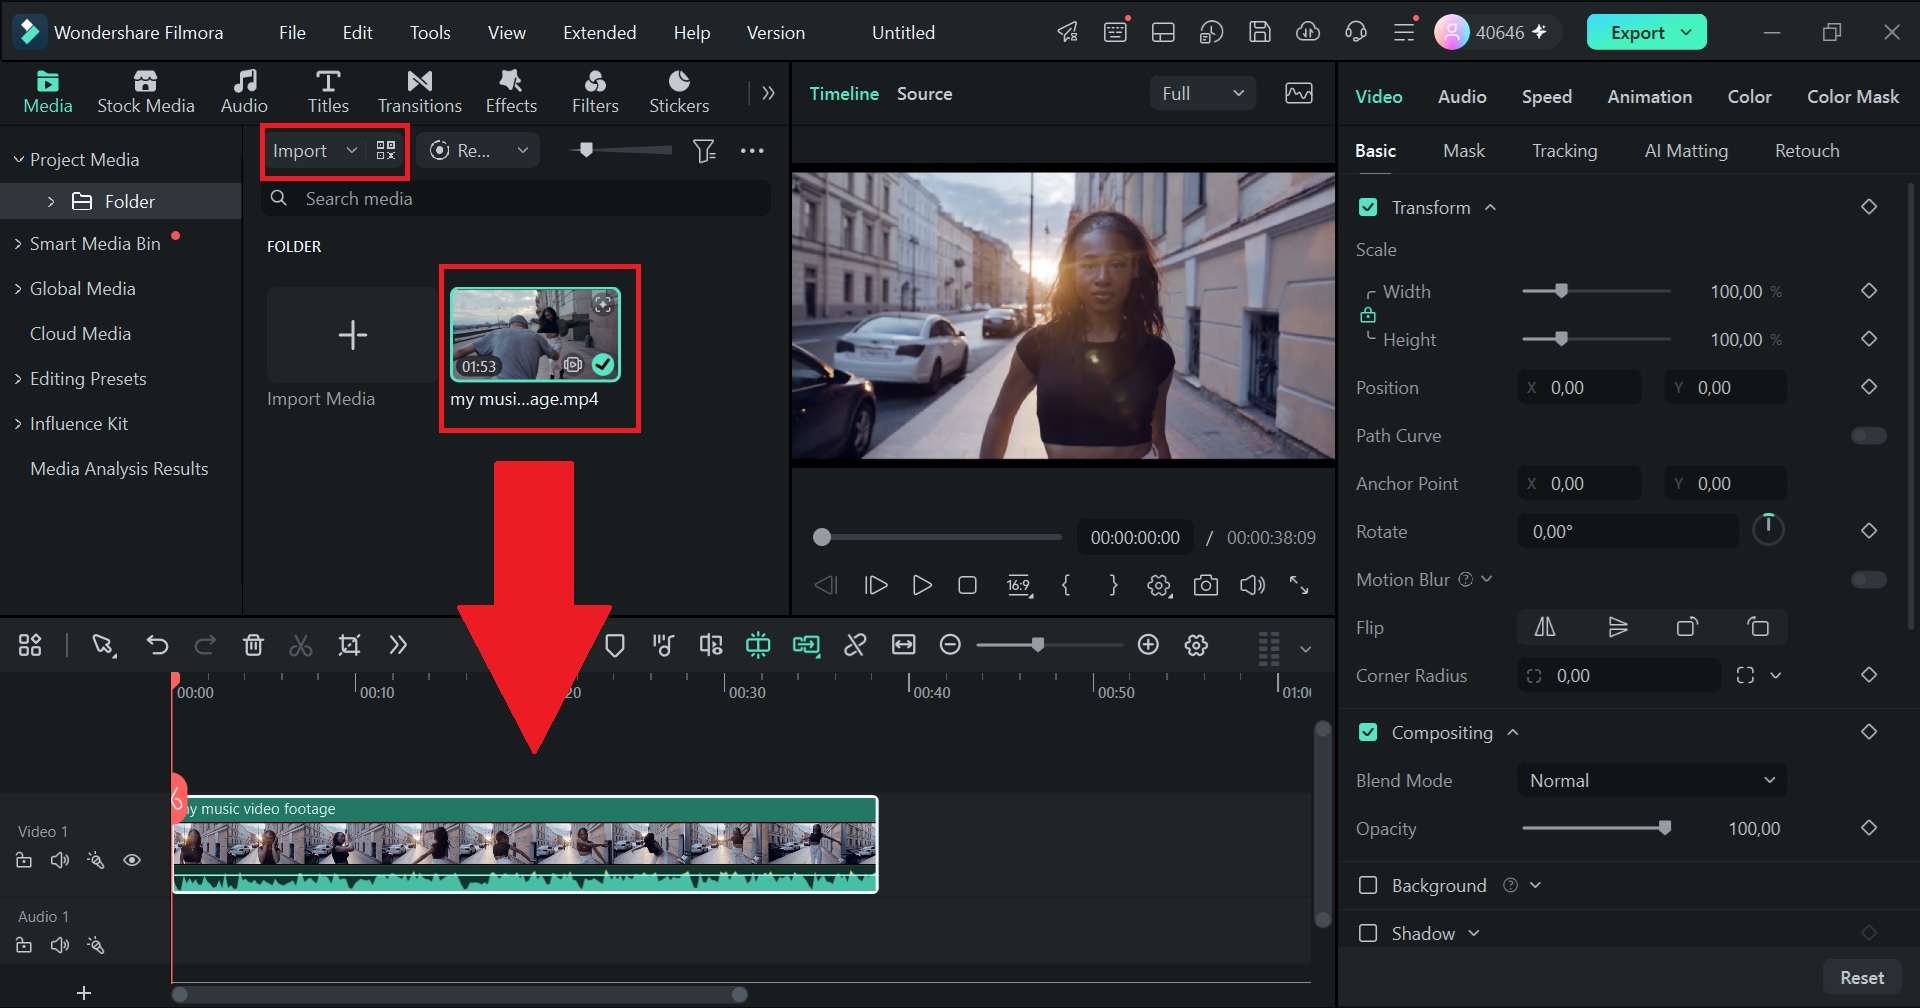
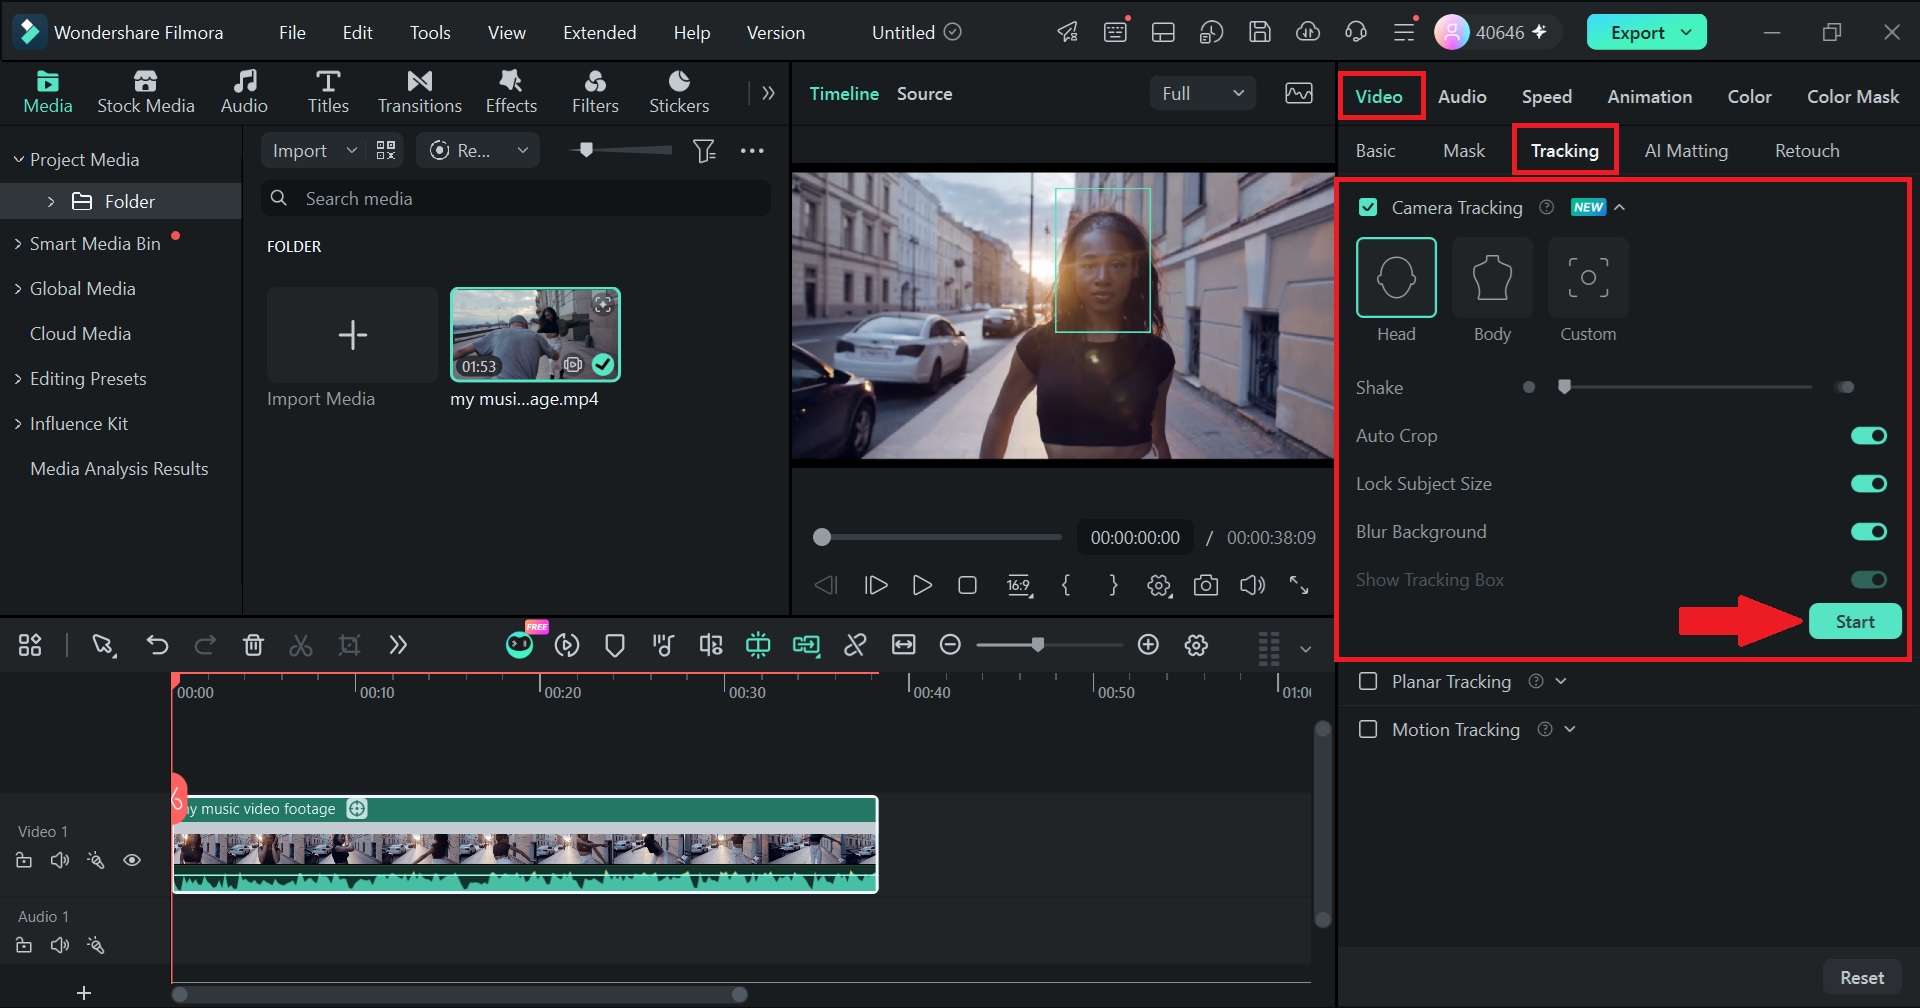
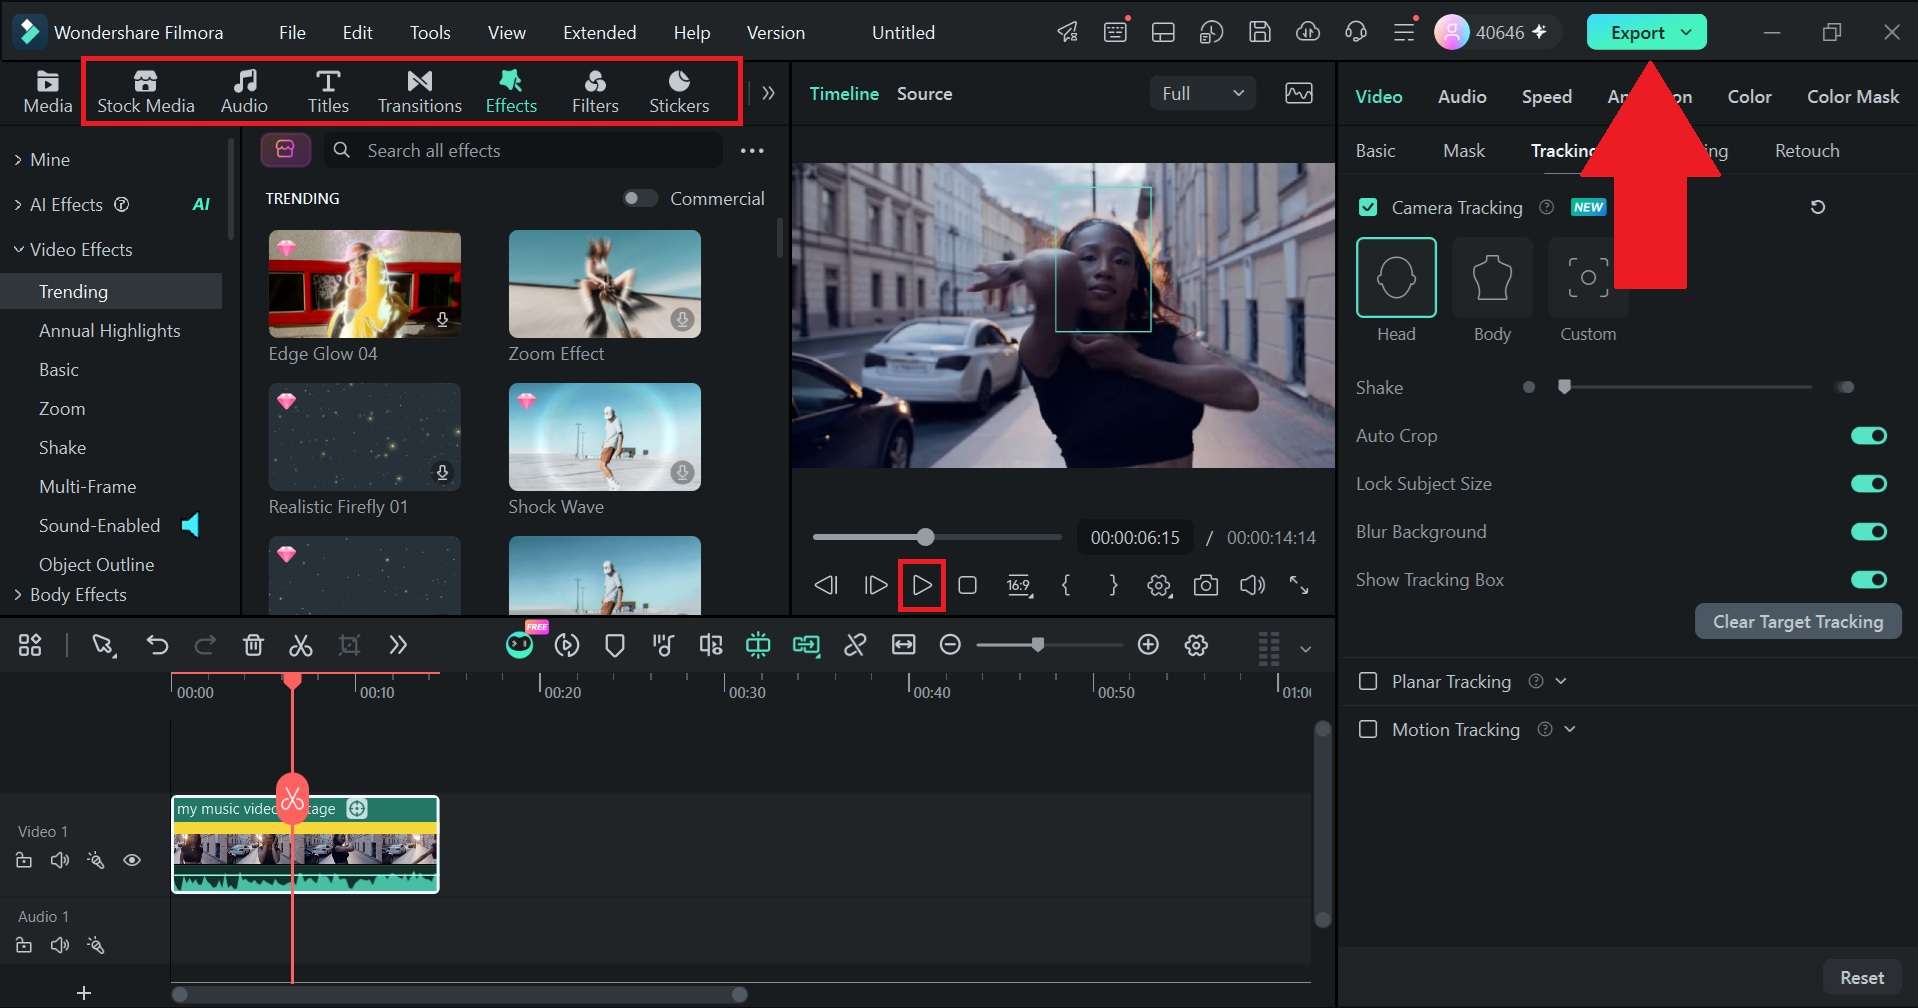
And that’s about it! As you can see, using camera tracking in Filmora is super simple and only takes a few clicks. And the result is pretty good, too! See how it turns out below:
 Secure Download
How to Access Motion Tracking in Filmora
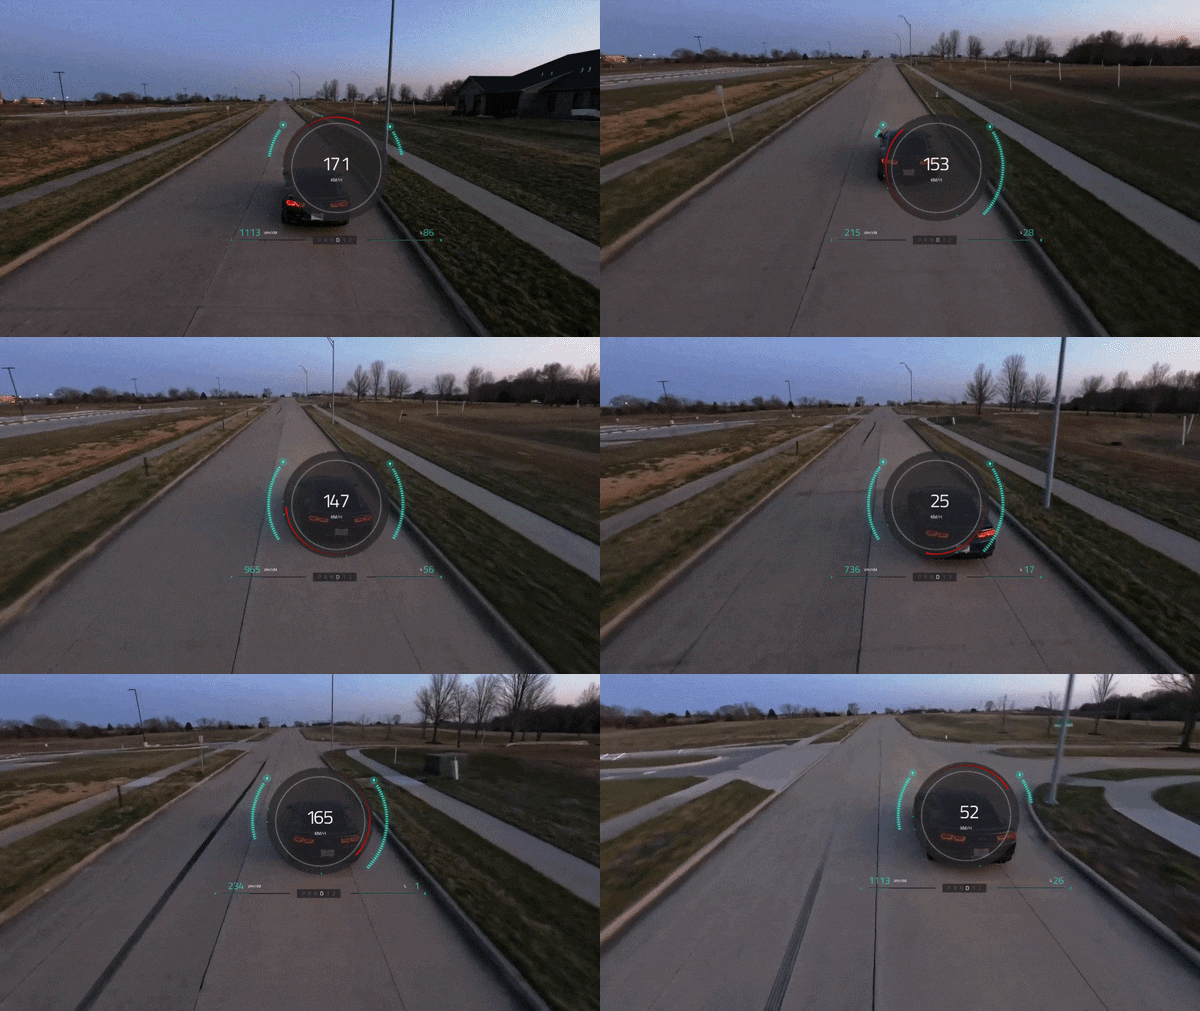
As we said previously, motion tracking is your go-to when you want text, an emoji, or a graphic to travel along with something in your shot. The steps are simple, and the one thing worth getting right is the tracking box.
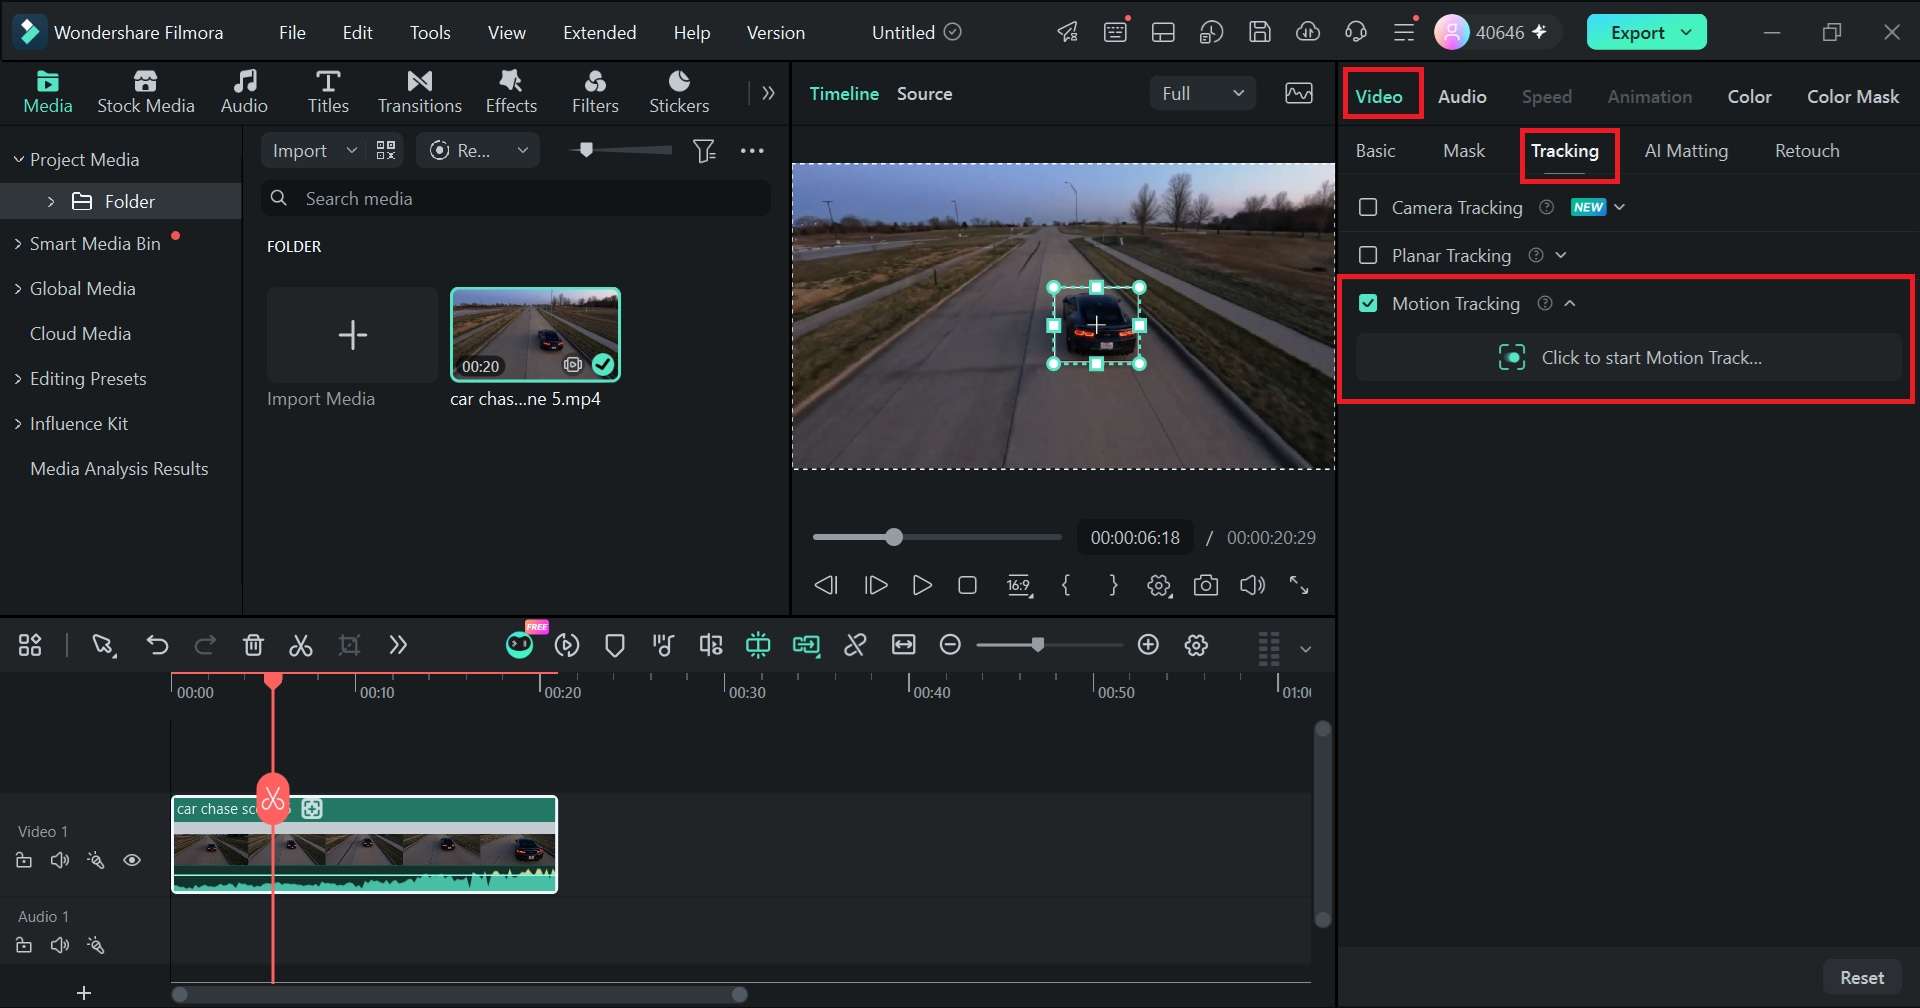
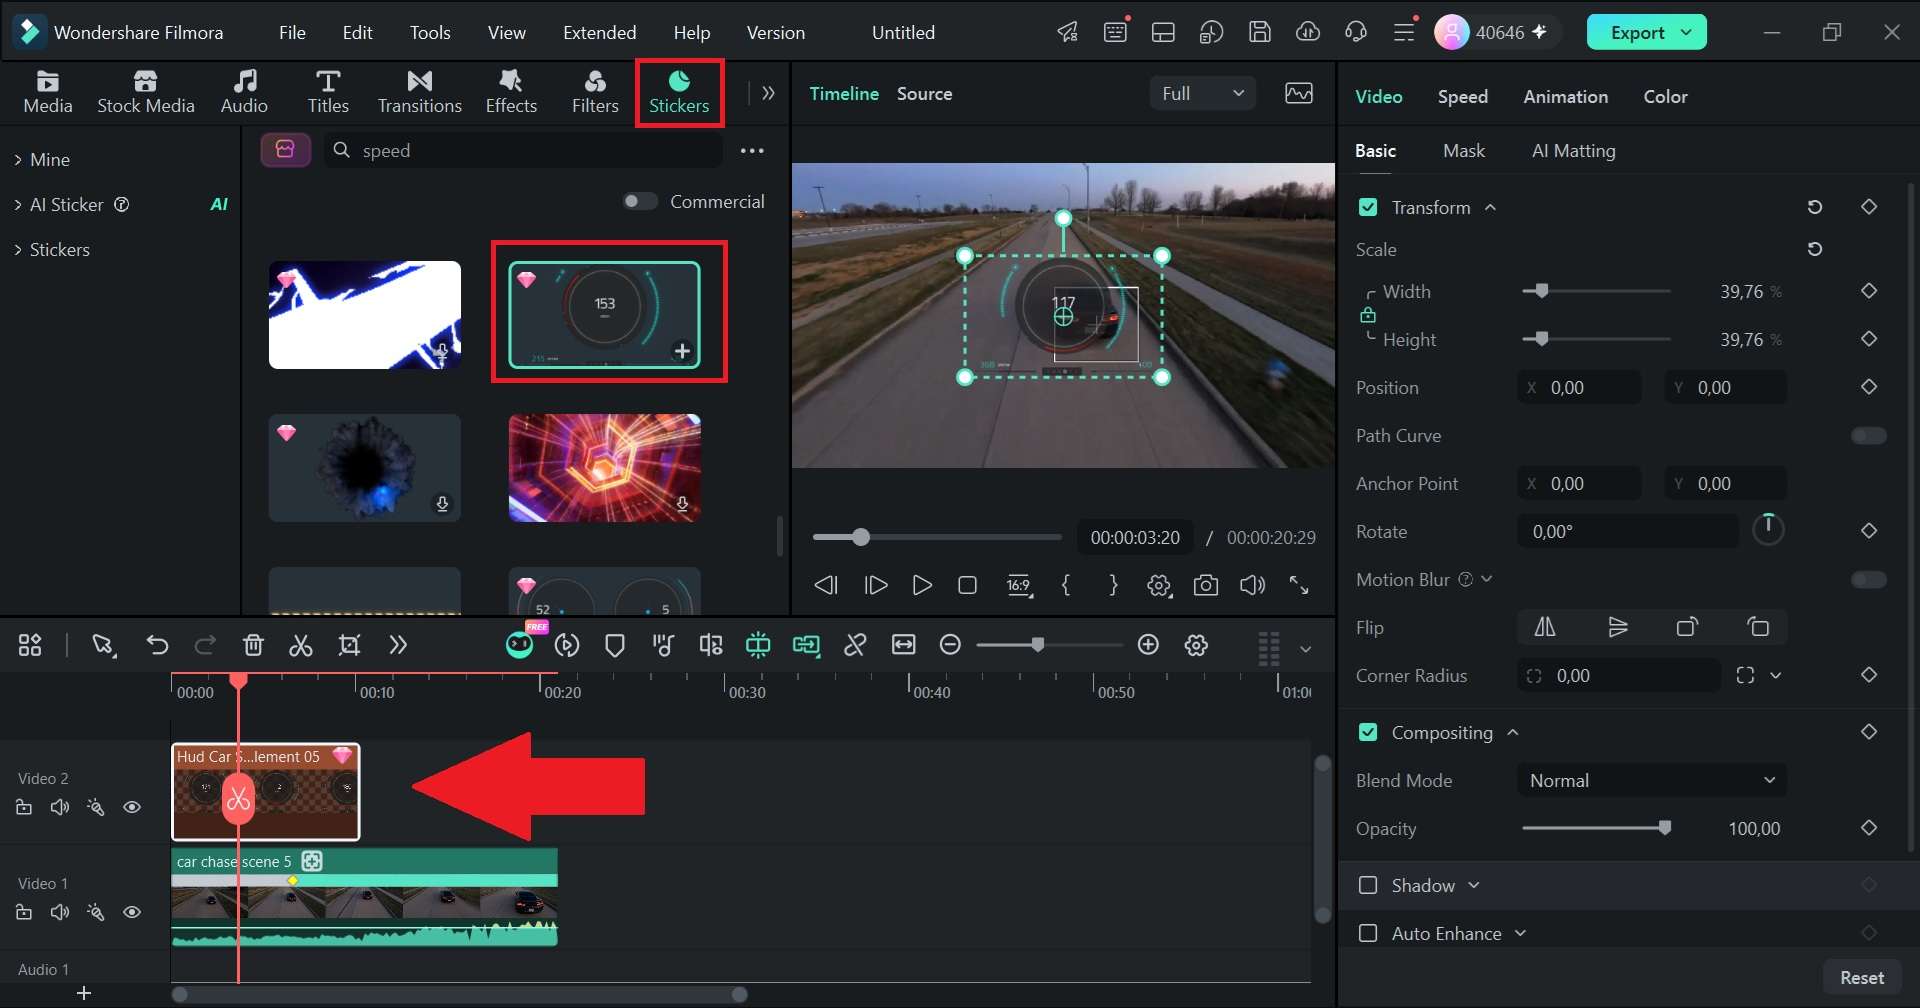
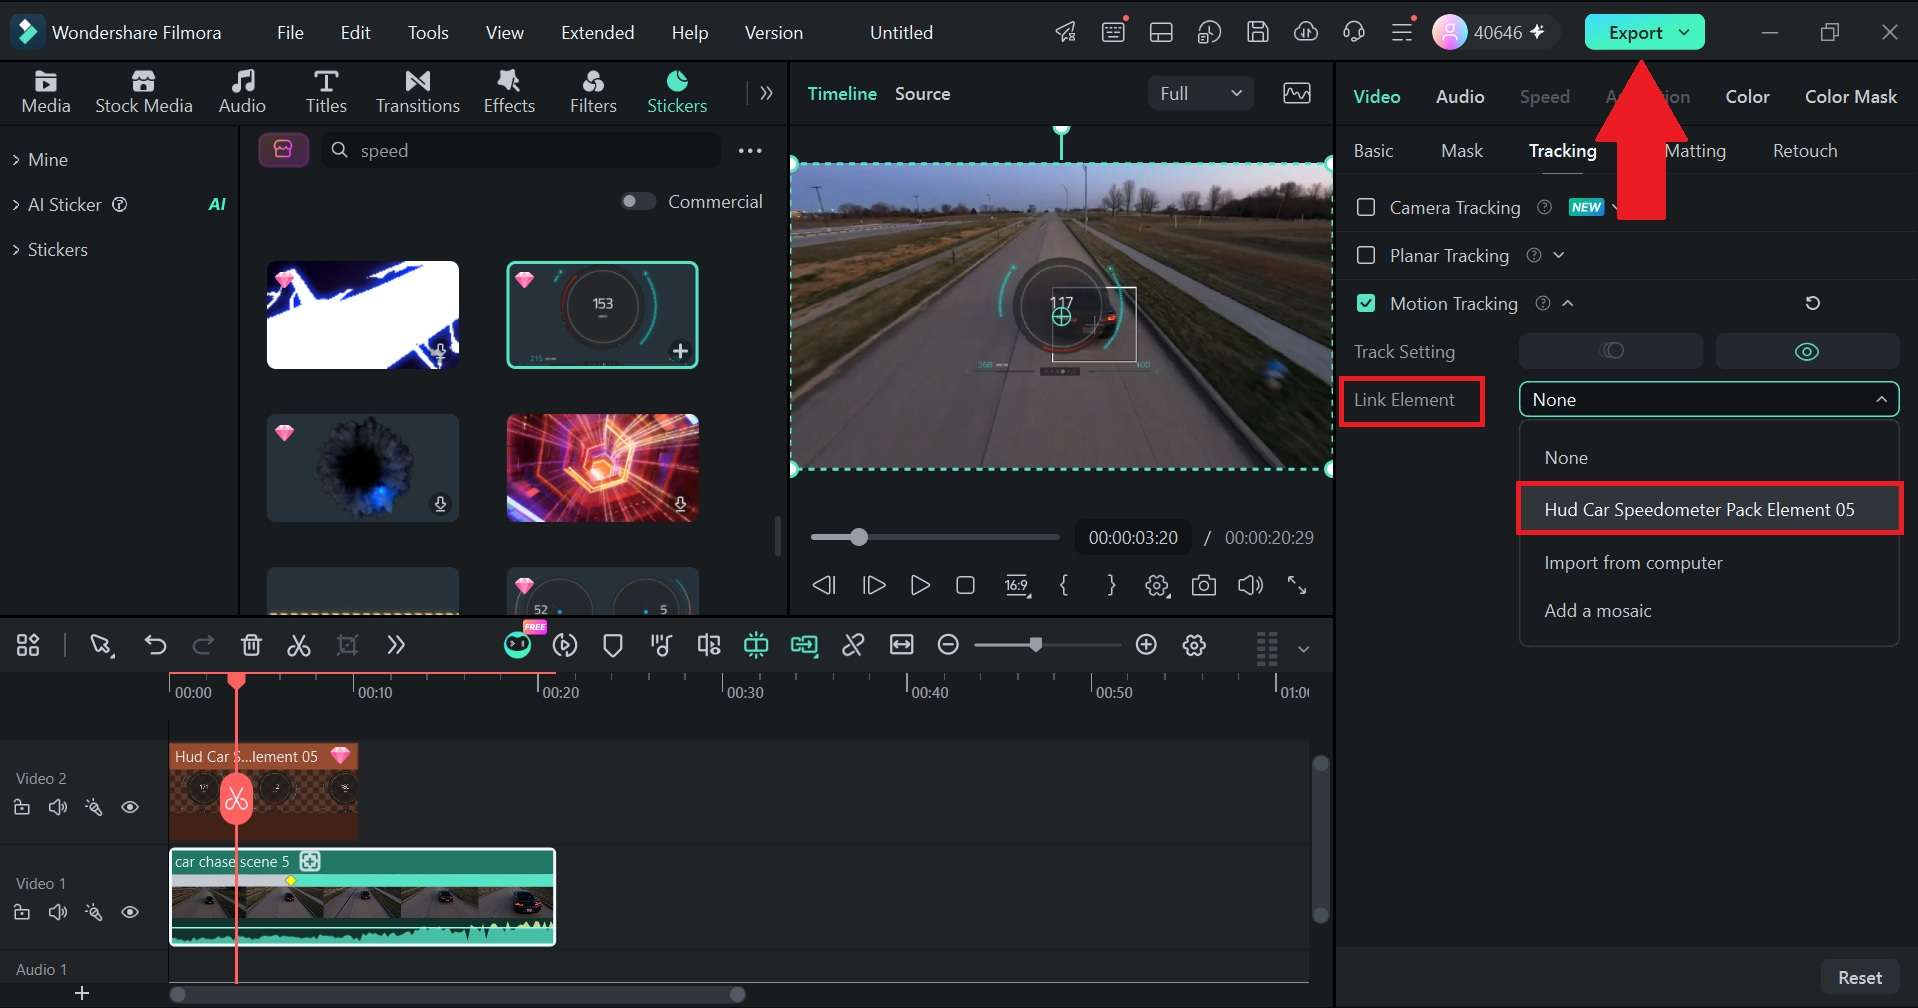
How to Access Planar Tracking in Filmora
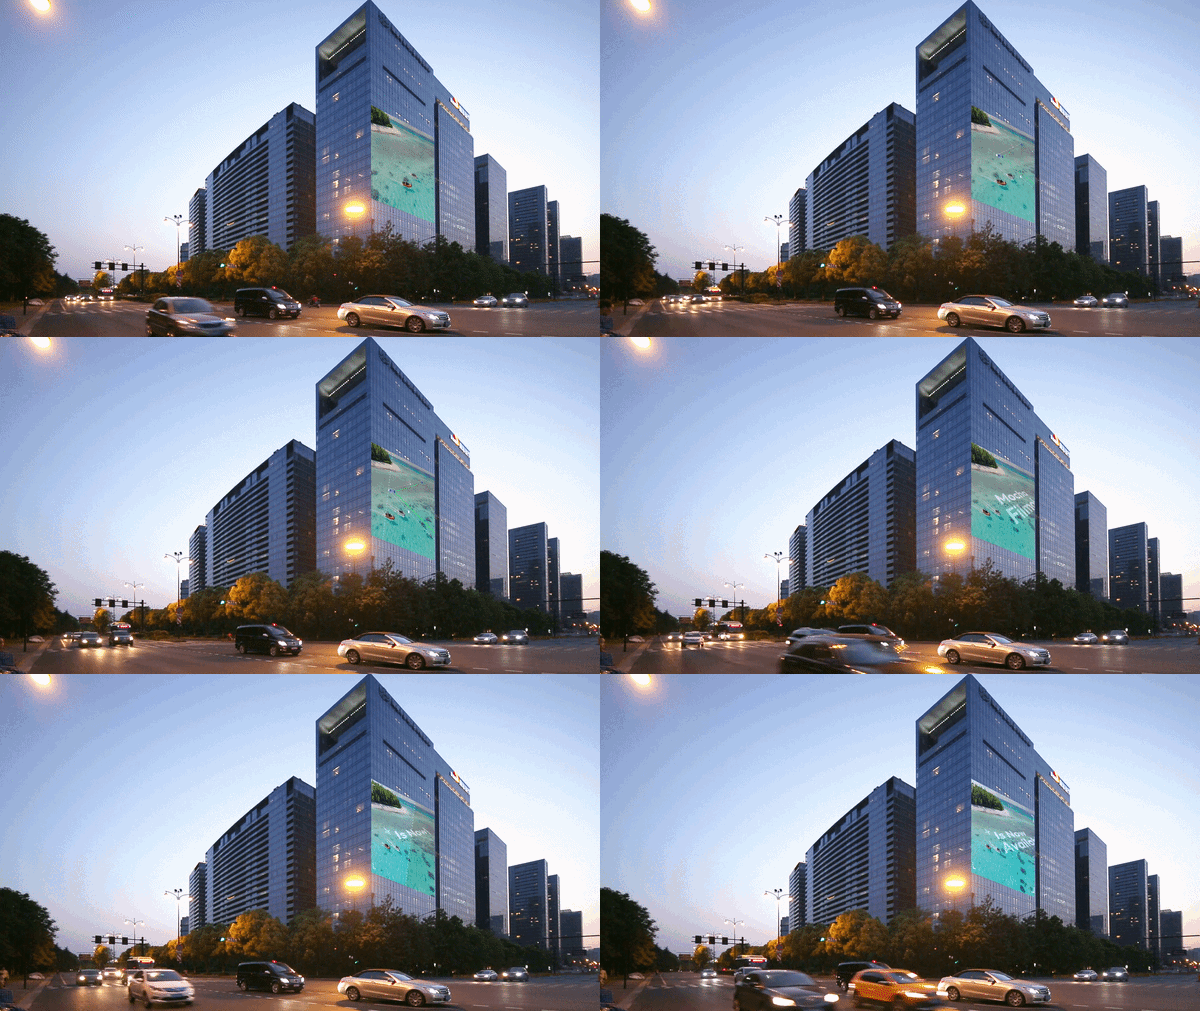
Planar tracking is the precision tool of the three, made for anything that needs to stick to a flat surface. Compared to the other two tracking methods, it takes an extra step or two, but the payoff is a graphic that really looks like it belongs in the scene.
 Secure Download
Conclusion
Camera tracking, motion tracking, and planar tracking all deal with movement, but they solve different editing problems. Camera tracking changes the framing to keep a selected subject in view, motion tracking makes text or graphics follow a moving target, while planar tracking keeps an element aligned with a surface.
If you want all three options in one editing environment, Filmora is worth considering. Filmora now adds dedicated Camera Tracking features with Head, Body, and Custom targets. Previously, Filmora also included Motion Tracking and built-in Planar Tracking for different kinds of projects. That means you can switch between tracking methods based on the job instead of forcing one tool to do everything.
FAQs
-
Can I combine camera tracking and motion tracking on the exact same video clip?
Yes, you absolutely can! They serve different purposes, so they can be used on the same footage when needed. For example, you could use Camera Tracking to keep a person better framed while also using Motion Tracking to make a text label follow that person. -
Can I use camera tracking to turn horizontal video into vertical video?
Yes, that's one of the best uses for it. Set your project to a vertical aspect ratio, and camera tracking keeps your subject centered inside the narrower frame instead of leaving you to pan by hand. Background Blur Fill helps cover any gaps. For quick whole-video conversions, Filmora's Auto Reframe is another option worth trying. -
Do AI tracking tools require a high-end graphics card (GPU) to render smoothly?
Not necessarily. AI tracking has to analyze every frame, so a stronger computer will finish faster, but you don't need a top-tier GPU to use it. Modern video editors like Filmora are heavily optimized to run smart tracking tools efficiently on standard desktop computers and laptops.
