
 100% Security Verified | No Subscription Required | No Malware

Selfies just don't feel complete without a good filter. One of the most popular ones was the outline filter on Instagram, known for adding a sketch-style outline to your portraits.
But if you recently tried to find it, you probably had a hard time locating it. This is because many third-party filters, including the Instagram outline filter, have been removed following Instagram's January 2025 shutdown of creator-made filters.
But don't worry, there are still a few workarounds to recreate that same outline effect! We'll explain what happened to the original filter, and show you how to achieve the same look.
In this article
Part 1. How Do I Find the Outline Filter on Instagram?
The Instagram filters are digital effects that instantly change the look of your photos or videos by using AR (augmented reality) technology. They are usually designed to smooth your skin, shift colors, or even add overlays in real time while you record or snap a selfie.
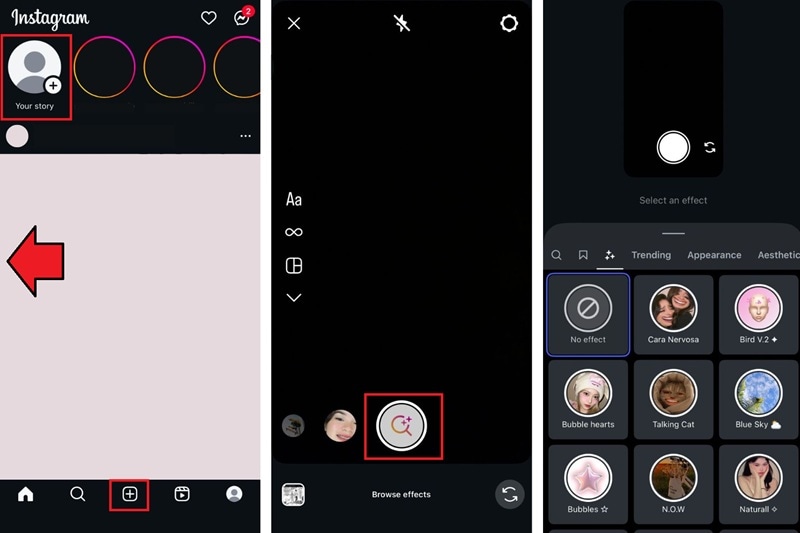
Instagram filters are available directly through Instagram Stories. To access and find them, you can follow these steps:
- Launch the Instagram app on your phone.
- Open the Instagram Story by either swiping right from the Home feed or tapping the plus icon and choosing Story.
- Look along the bottom of the screen. Those circles are your filters and effects.
- Swipe all the way to the end of the carousel and tap Browse Effects.
- Use the search bar and type terms or keywords that describe the kind of filter you're after.
Among the Instagram filters, none quite recreate the popular outline effect. There used to be several outline filters on Instagram, like "outline_peachy" by creator @anna_haechan1.
However, since the outline Instagram filters were created by independent creators and not by Instagram itself, it looks like they're among the filters affected by the new Instagram policy update. Until Instagram allows creator-made effects again or releases its own version, you'll need to look for alternative methods to recreate that outline look for your photos or videos.
Part 2. How to Get the Outline Filter Effect Without Instagram Filters
Since the Instagram outline filters are no longer available, you can still recreate that same sketch or glow outline effect using video editors like Wondershare Filmora. Instead of relying on preset filters, Filmora gives you complete creative control to manually design and animate your outlines just the way you want using the Pen Tool.
 secure download

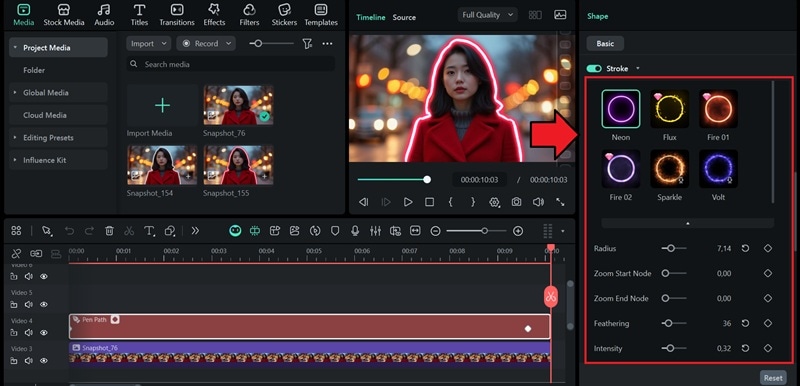
The Pen Tool in Filmora gives you the freedom to create lines, customize them, and even animate them along the path. It also comes with beautiful stroke presets that you can fully adjust, including the thickness, colors, and intensity of the effect.
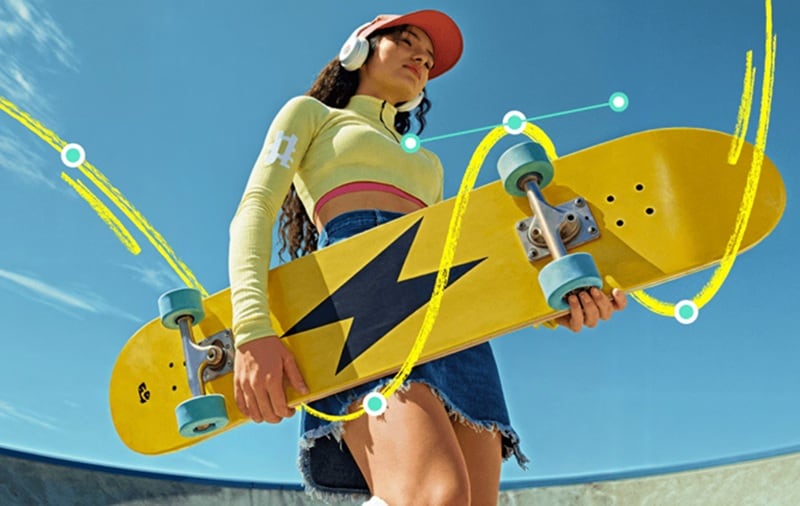
Check out a few outline styles you can try on your portraits using Filmora's Pen Tool:
Example Style 1: Plain Outline

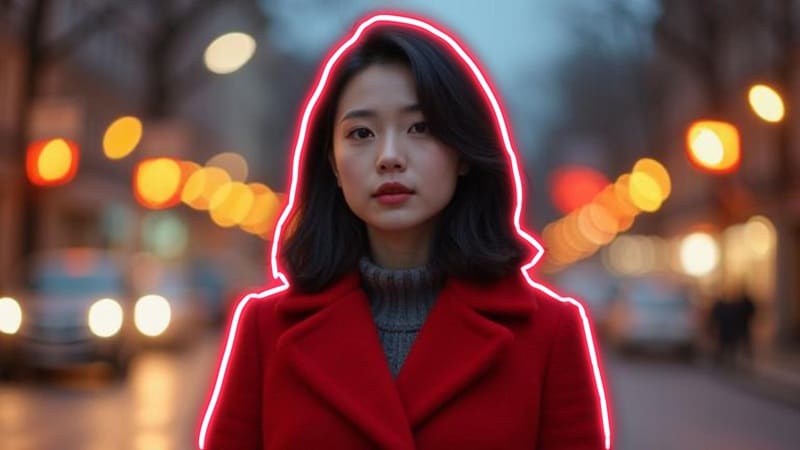
Example Style 2: Outline with Neon Stroke Effects
Example Style 3: Dashed Line Outline

Advantages of Filmora Pen Tool
- Freely Draw Any Outline Path — No preset restrictions, just draw exactly how you want.
- Stylized Strokes — Animate your lines effortlessly using Trim Path for smooth reveals or handwriting effects.
- Path Following — Make text, shapes, or graphics move perfectly along your custom path.
- Works Across All Formats — Great for Instagram Stories, Reels, TikTok edits, or even long videos and YouTube intros.
- Fully Adjustable Strokes and Outlines — Change width, color, and style, and even combine effects to get the results you want.
- Precise Control — Use anchor points and Bezier curves for accurate shaping and natural motion.
- Creative Flexibility — Combine the Pen Tool with keyframes, masks, or motion blur to make cinematic line animations.
How to Outline a Picture for Instagram Using Filmora's Pen Tool
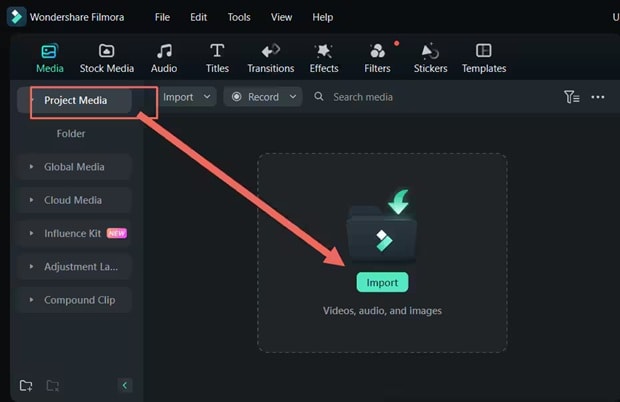
Step 1Import Your Photo to Filmora
After opening Filmora, create a new project and import your photo. Drag it to the timeline.
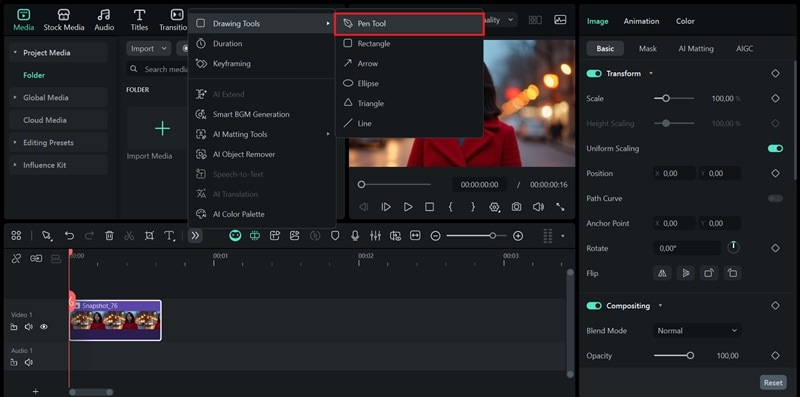
Step 2Access Filmora's Pen Tool
Select the Drawing Tools icon from the toolbar and select Pen Tool.
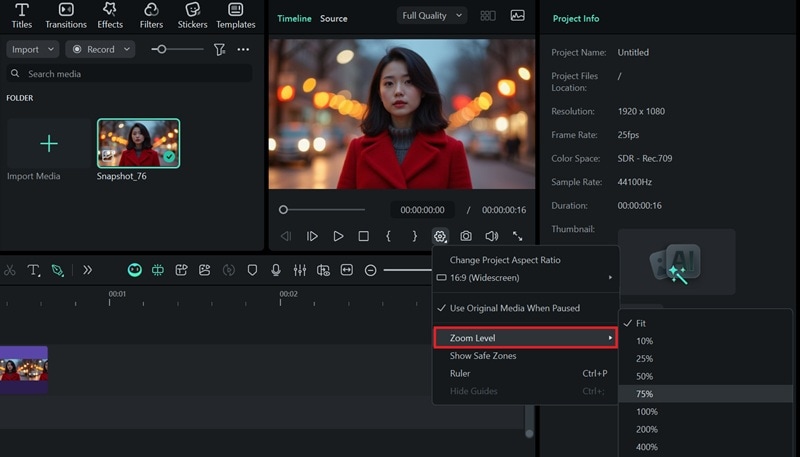
Step 3Start Drawing the Outline around Your Portrait
Before you start tracing, zoom in on the preview window to get a closer look at your photo. Set it to around 50–70% to give you a comfortable view.
After that, start placing points along the edges of your photo to trace the outline.
- Click on a starting point, then continue clicking along the edges to form a line.
- To create smooth curves, click and hold while dragging your mouse, then adjust the Bezier handles to refine the flow of each curve.
- When you're done drawing or want to end the path, press Esc.
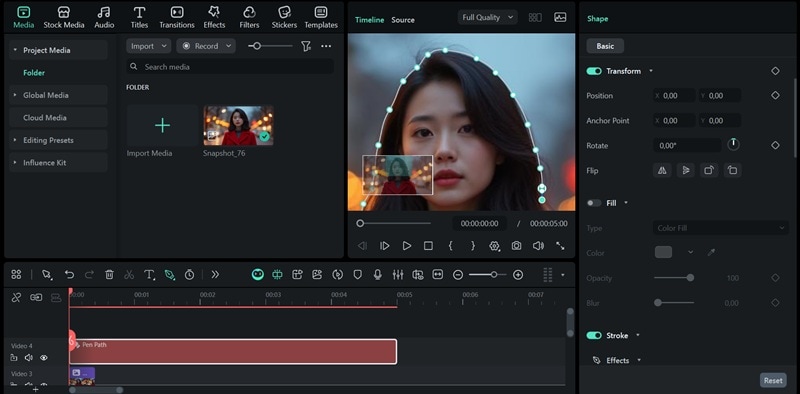
And since you're zoomed in, you can move around the canvas and navigate different parts of the photo by dragging within the mini-preview window.
Step 4Customize the Outline
After finishing your outline, navigate to the properties panel on the right. Under Stroke > Effects, you'll find several customization options to enhance your outline.
You can adjust the stroke color, thickness, opacity, blur, style (solid line, dotted, or dashed), and more.
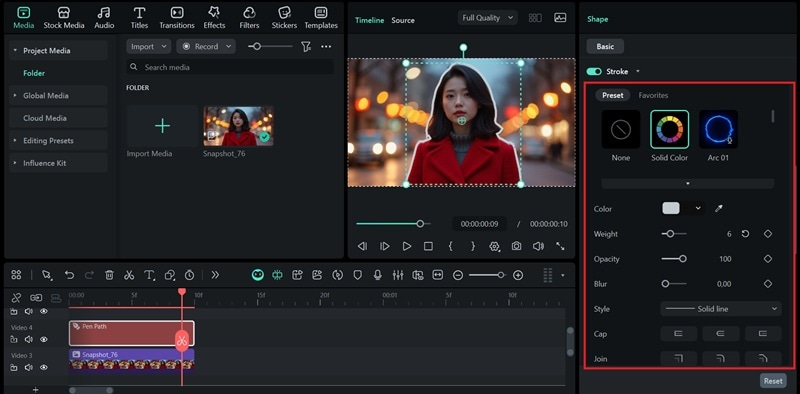
Or, select one of the stroke presets to instantly create a stylish outline effect. Each preset includes its own adjustable settings.
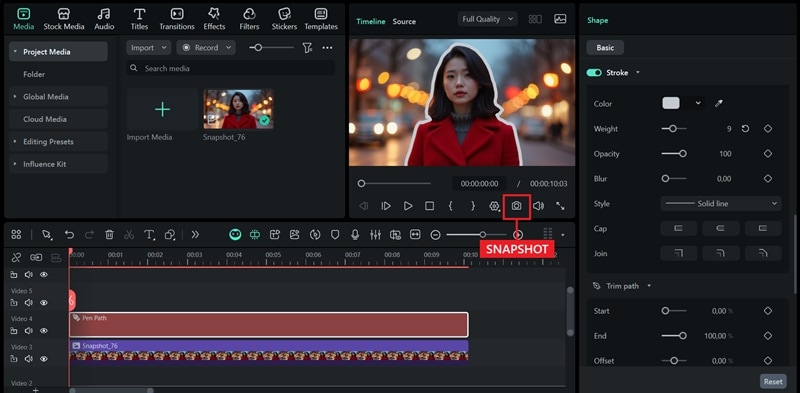
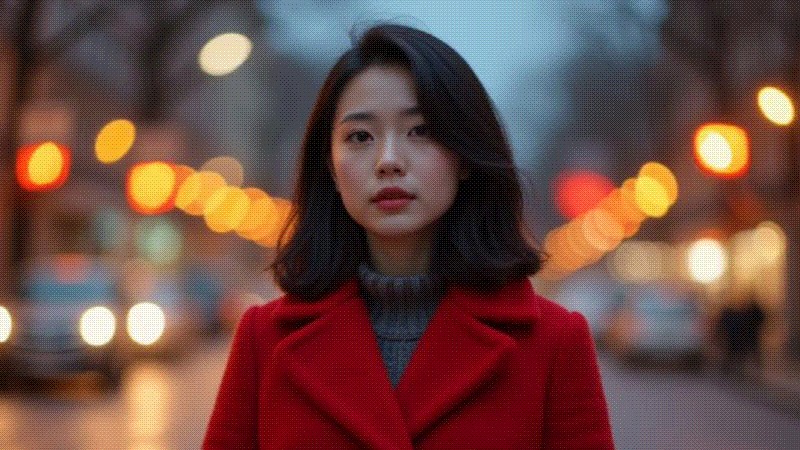
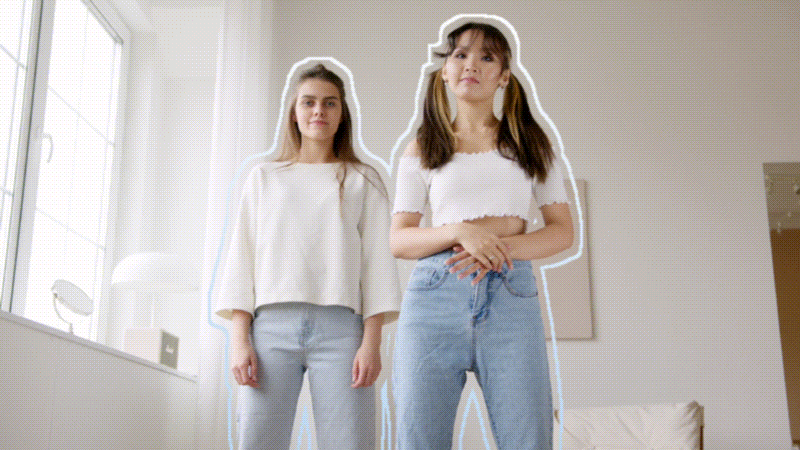
There you go! The outline effect you just created can look just like the Instagram outline filter — or even better. Because you drew it manually, you have full control over how it looks, from the shape and flow of the lines to the final edit.
Click the Snapshot button to save it in an image format.
Tip: Animate the Outline to Move Along the Path
Now that your outline is ready, you can create a smooth drawing or tracing effect by animating it to move along the path.
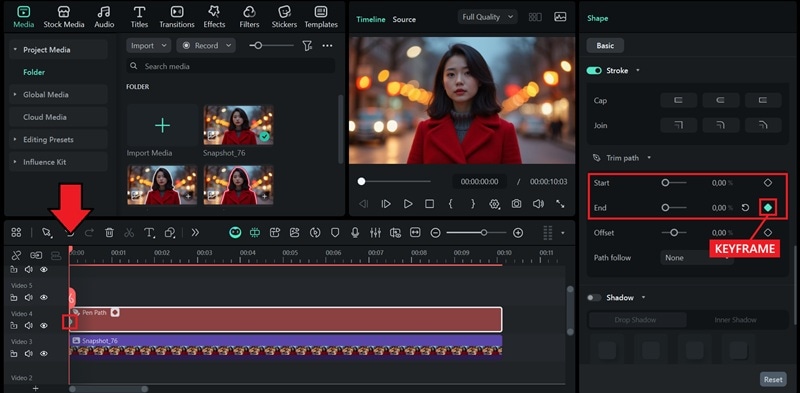
To do this, you need to use the Trim Path feature. Follow the tutorial below.
Step 1: In the Stroke > Effects settings, scroll down to find the Trim Path panel. Move the playhead to the start of your clip.
Step 2: Set the Start and End values to 0%, then add a keyframe on the End property.
Step 3: Move the playhead to the point where you want the animation to finish. Change the End value to 100%, and Filmora will automatically add another keyframe (the small diamond-shaped bullet on the timeline).
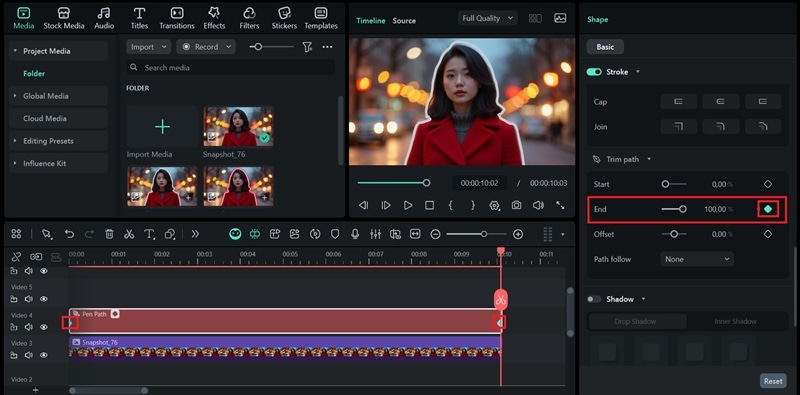
Now, play it back to see your outline smoothly animate along the path! These same steps also work if you're using a stroke preset, so you can easily apply animation to any outline style you choose.
Click Export and save your project in the format you prefer, whether it's a video or a GIF.
Part 3. How to Outline Pictures or Videos for Instagram Using Built-in Effects
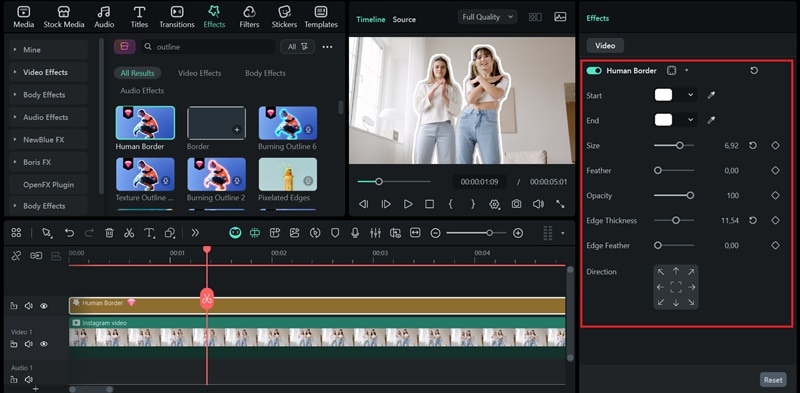
Aside from using the Pen Tool in Filmora, you can create an outline look quickly using its built-in effects. This option works especially well for videos, as it can automatically add dynamic edges and glowing contours that move along with your subject.
Unlike the Pen Tool, which lets you manually draw and customize every path, the built-in outline effects work automatically. This feature detects your subject and applies the stylish moving outline in just a few clicks. Follow the steps below.
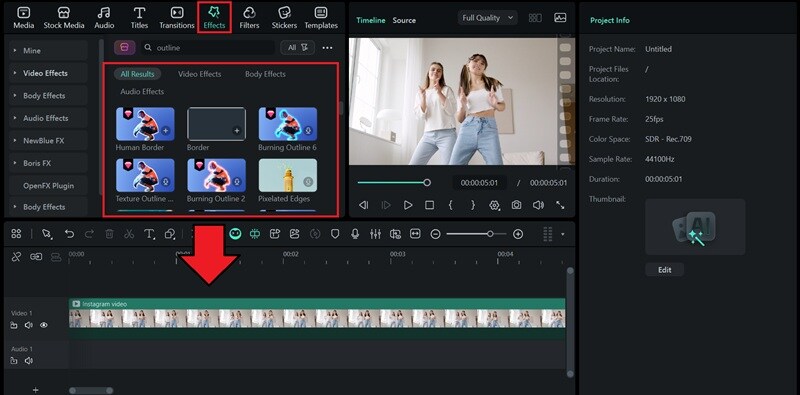
Step 1Access the Effects Tab
- After importing your video or photo, select the Effects tab in Filmora and search for "outline" effects.
- Browse through the options, then download the one you like and drag it onto the timeline above your video or photo clip.
Step 2Customize the Outline Effect
Head to the properties panel to fine-tune the effect. You can adjust the outline color, thickness, feather, and other parameters depending on the effect you selected.
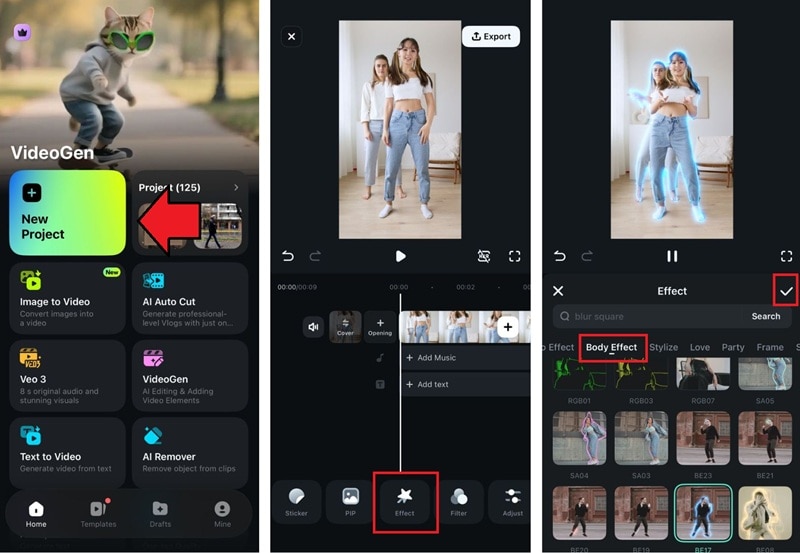
Step 3Create an Outline Effect on Mobile
For those who prefer editing straight from their phones, Filmora Mobile App makes adding outline effects for Instagram simple and fast. You can download it on the App Store (for iOS) or Google Play (for Android).
To create the outline effects on your phone, follow these steps:
- Create a new project and import your video.
- Tap Effects from the bottom toolbar.
- Choose Body Effects from the categories and browse through the available styles.
- Tap on the effect you like, then hit the checkmark to apply it to your video.
There are even more stylish outline effects available on the Filmora mobile app that you can instantly apply to your video. After that, you can also share it directly to your Instagram without leaving the app.
secure download Part 4. How to Apply the Outline Effect Across Different Content Types
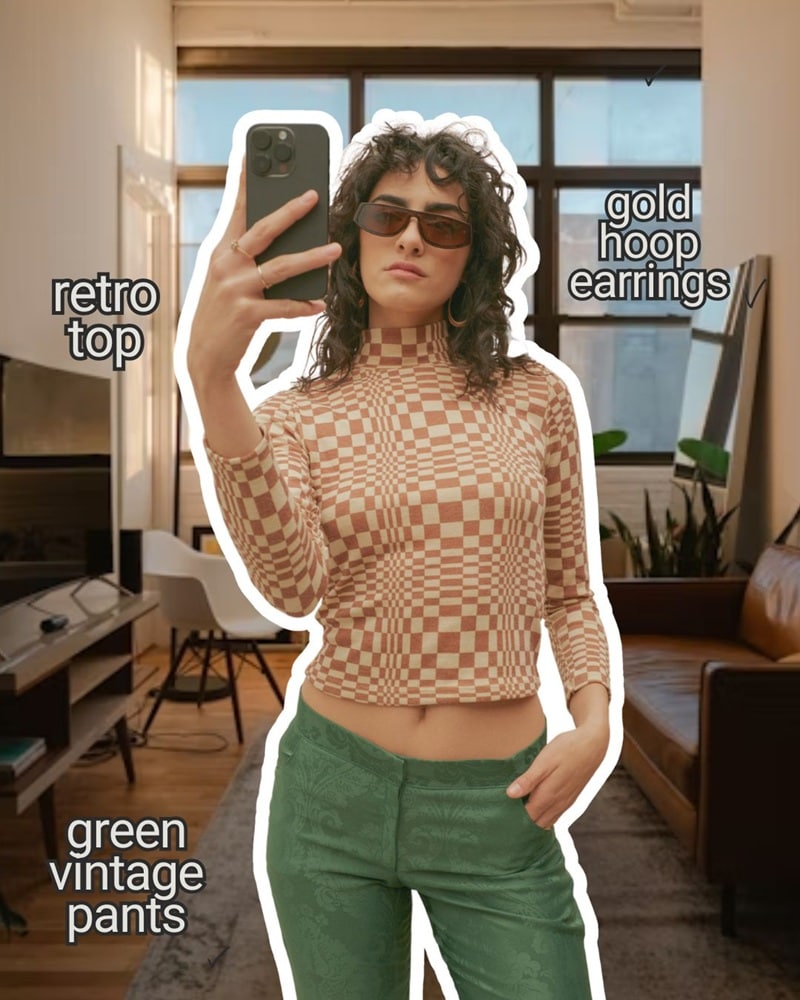
Whichever style you're going for, outline effects can be used in tons of creative ways, especially for an Instagram post. You can use them to layer different shots together, add accents around your subject, or make an artistic collage of your cherished moments.
Since the outline adds a bit of spacing and contrast, it naturally helps separate your subject from the background. These are a few creative ways you can try to make the most out of the outline effect.
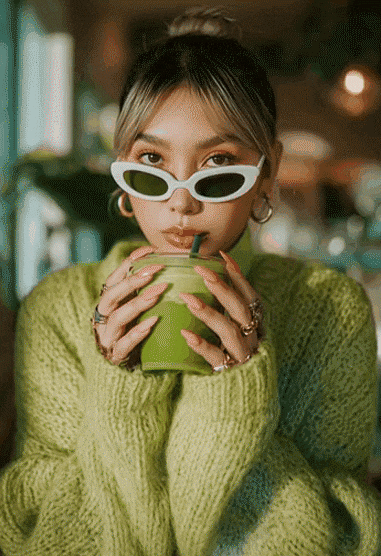
1. Add a Little Style to Your Insta Story
Not sure how you can elevate your selfie for your Insta story? Since the Instagram outline filter is no longer available, you can still recreate the same look, either for your OOTD (outfit of the day), outfit checks, or even mirror selfies.
Pro Tip: Static posts with outlines look great, but here's a secret: animated OOTD videos get way more engagement. Filmora makes this ridiculously easy with its image-to-video OOTD templates.
- OOTD Collage
- OOTD Instant
- One Click OOTD
2. Make Your Product/Subject Stand Out on Instagram Ads
When you're showcasing products for an Instagram ad, adding an outline creates a modern, cut-out look that adds depth while keeping the design clean and minimal.

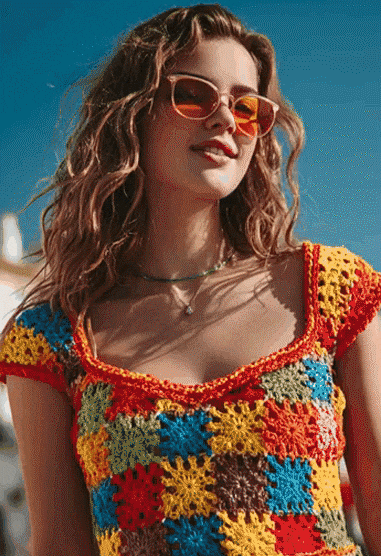
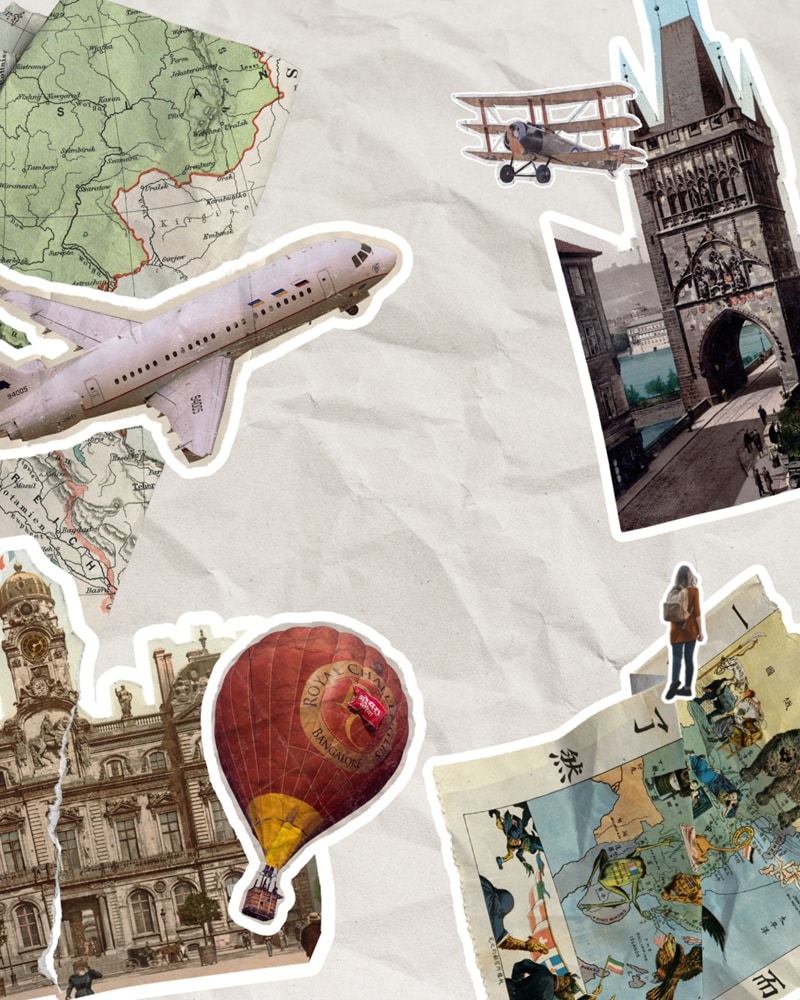
3. Make a Scrapbook Style Edits for Your Instagram Post
If you love giving your feed that artsy vibe, you can add the outline effect to give that scrapbook look. It can make your photos look like stickers you can layer, move, and mix with doodles, text, or paper textures.
Conclusion
Even though the original Instagram outline filter is gone, you can still recreate that same sketch-style effect in your own way. Using a video editor like Filmora, you have more freedom to draw, animate, and customize outlines exactly how you want, be it for your image portraits or video to post on your Reels or Instagram Story.
secure download 