When looking for a free video editor online, 123 Video Editor often comes up as a top recommendation. It’s popular as a go-to solution for quick and easy online video editing. As a free tool, it offers essential functions like trimming, cutting, and basic editing. It’s perfect for simple editing on the fly without downloading any software.
In this article, we’ll dive further into the features of 123apps Video Editor. We’ll also provide a step-by-step guide for editing your videos with this tool. Then, for those looking for more advanced editing capabilities, we’ll introduce Wondershare Filmora as a complement. Ready to improve your video editing skills? Let’s get started!
In this article
Part 1. Overview of 123apps Video Editor Online
123 Video Editor by 123apps is a free, web-based video editing tool. Since it operates entirely within a browser, there's no need for downloads or installations. This tool is an ideal choice for simple edits and for those who don’t have any editing experience.
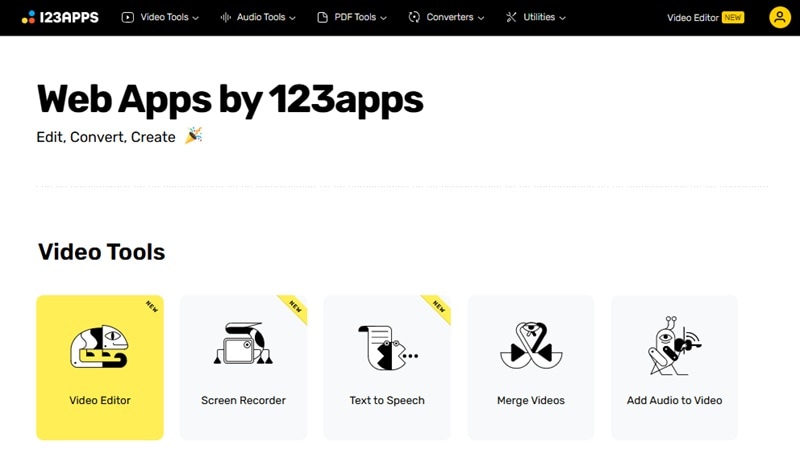
It also provides a premium plan for users who need to work with larger files or access more advanced features. With the premium plan, you’ll have faster processing speeds and increased upload limits.
Key Features
- Basic Video Editing Tools
It includes essential editing functions like cropping, trimming, adjusting video speed, and changing opacity.
- Text and Overlay Options
You can easily add text overlays, captions, and stickers to your videos.
- Recording Feature
The editor also includes a built-in recording option. You can use it to record your camera, audio, and screen recordings directly within the tool.
- Text-to-Speech Function
It offers a text-to-speech feature that allows users to convert text into audio. It lets you customize the voice, pitch, and speed.
We’ve done exploring the features of 123 Video Editor. Now, it’s time to dive into one of its most frequently used tools: cutting or trimming videos. The following section will show you how to cut and trim videos with the 123 Video Cutter tool.
Part 2. Steps on How to Cut Video Using 123apps Video Cutter
Cutting and trimming videos with the 123apps Video Cutter can be completed in just a few clicks. Follow the step-by-step instructions below to cut and trim your videos using the video cutter of 123 apps:
Step 1. Open 123apps Video Editor
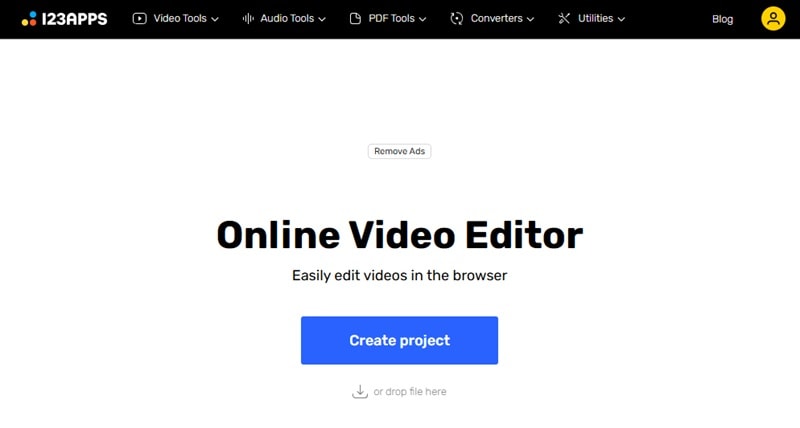
Go to the 123apps Video Editor website and click on the Create Project button to open the video editing workspace.
Step 2. Choose the Canvas Size
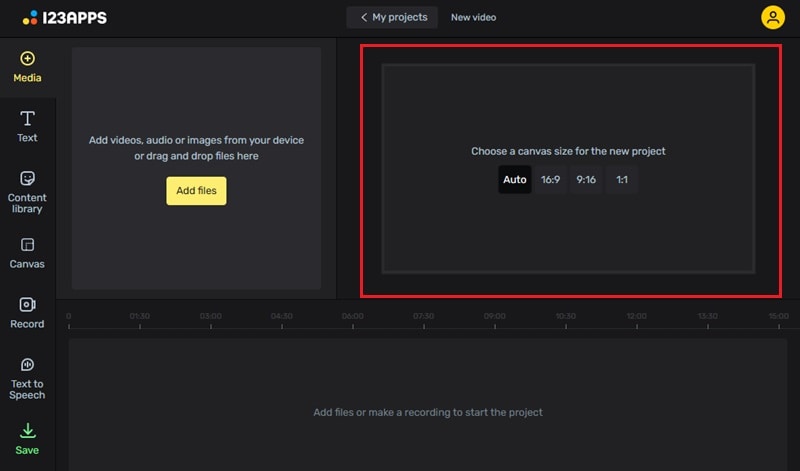
Next, you need to set the canvas size for your video project. The options are Auto, 16:9, 9:16, and 1:1. Select the aspect ratio based on your preferences.
Step 3. Upload Your Video
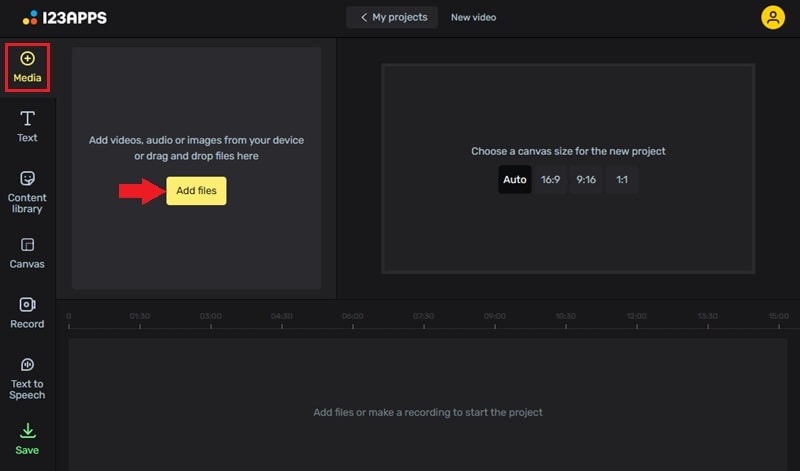
To upload your video, navigate to Media > Add Files. Then, select the video file you wish to edit. Remember, the maximum file size for the free version is 500 MB.
Step 4. Trim the Video
Once your video is uploaded, you’ll see a timeline slider below the video preview. Drag the Sliders on either end to define the section of the video you wish to keep. Then, it will trim the section right away. You can preview your selection by clicking on the Play button (or Space key).
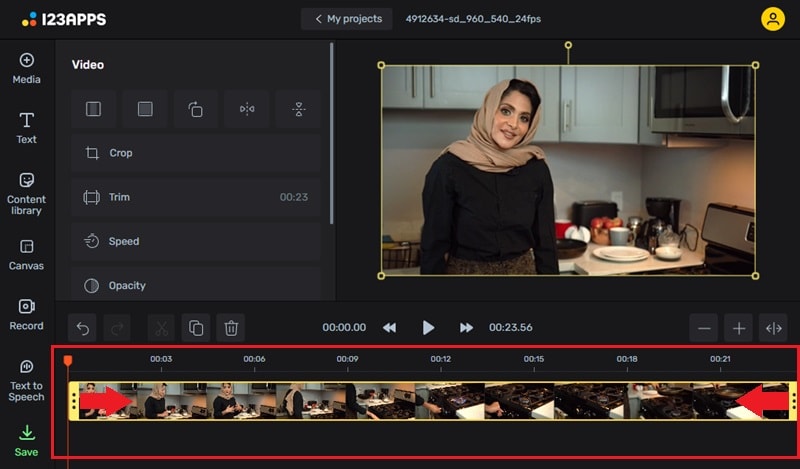
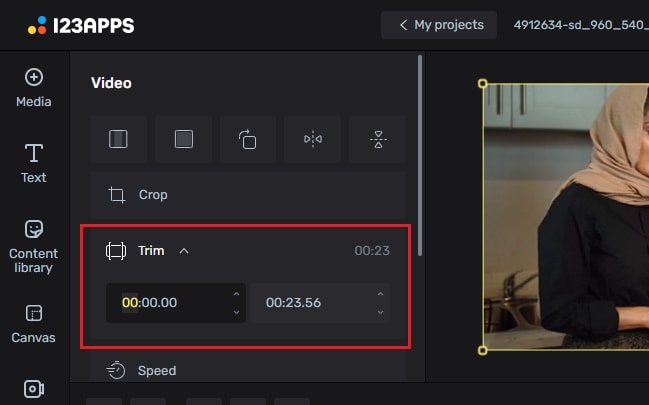
For more precision, manually enter the start and end times of the section you want to keep by typing the exact times in the Trimming boxes next to the video preview. This way allows you to select more accurate timing, ensuring you don’t miss any crucial frames.
Step 5. Edit the Video
Next, you can make other edits. For instance, you can add Text or Captions, insert assets from the Content Library, or add voiceover using its Text-to-speech feature.
Step 6. Export Your Edited Video
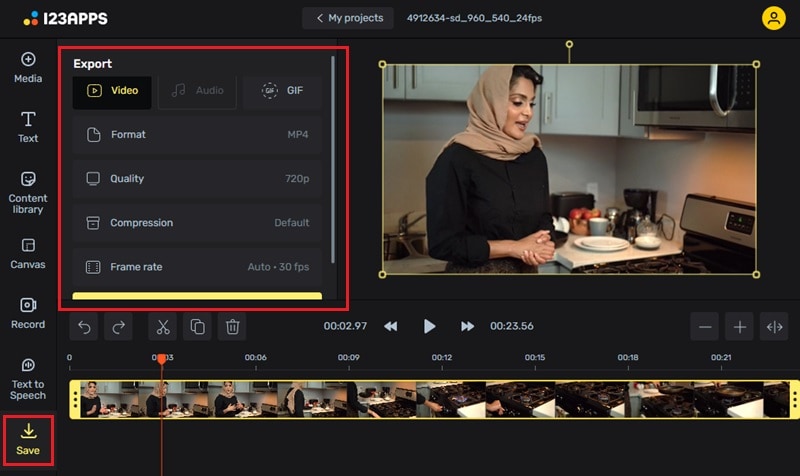
After you’re done with editing, go to the Save panel on the bottom-left side of your screen. Here, you can choose the export Format, Quality, and Frame Rate that best suits your needs. Then, scroll down to find the Export button.
After learning how to cut and trim videos using 123apps Video Cutter, you may want to explore more advanced features for your projects. For those who need extra functionality, let’s go straight to the next section.
Part 3. Enhance Your Video with More Advanced Video Editor: Wondershare Filmora
Are you looking for more advanced features beyond the basic features offered by 123 Video Editor? Wondershare Filmora is a great option that provides a more comprehensive and advanced solution for you. It’s available on Windows, Mac, iOS, and Android, making it a versatile choice for users across various devices.

- Vast video/audio effects and creative assets.
- Powerful AI for effortless content creation.
- Intuitive, professional yet beginner-friendly.
- Works on Mac, Windows, iOS, and Android.

Key Features
- AI-powered Video Editing Tools
Filmora has many AI tools that can help you speed up the editing process. For instance, Filmora has AI copywriting, AI Audio Denoise, AI Music Generator, and AI Image Generator. Many other AI tools are waiting to let you focus more on creativity than on the editing process.
- Smart Short Clips
The Smart Short Clips feature helps you create short videos from longer recordings by identifying key moments.
- Keyframing
- Creative Assets (2.9M+)
Filmora's Creative Assets offers a vast library of over 2.9 million assets. These assets include video effects, music, transitions, and stock footage.
User Preference: Filmora vs. 123 Video Editor
On review platform like Capterra, Filmora Filmora consistently receives higher ratings than 123 Video Editor. On Capterra, Filmora holds a 4.7/5 rating, with users praising its wide range of features and ease of use. In contrast, 123apps holds a 4.0/5 rating, where users appreciate its simplicity but often note the limitations in advanced features.
How to Use Filmora’s Smart Short Clips – A Step-by-Step Guide
Filmora’s Smart Short Clips feature allows you to create short videos by identifying key moments in longer footage. Follow these steps to use it:
Step 1. Open Smart Short Clips
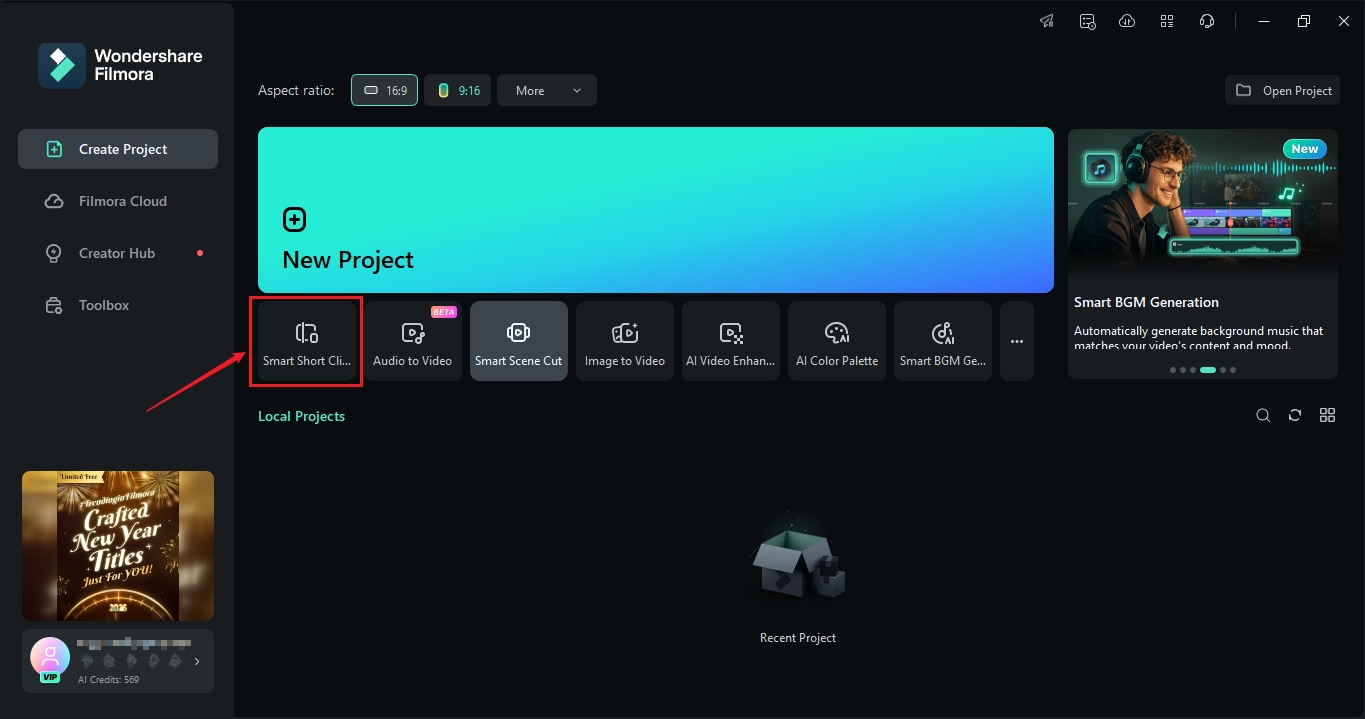
Launch Filmora and go to the Create Project tab on the left panel. From the list of tools, choose Smart Short Clips to begin creating short clips from your video footage.
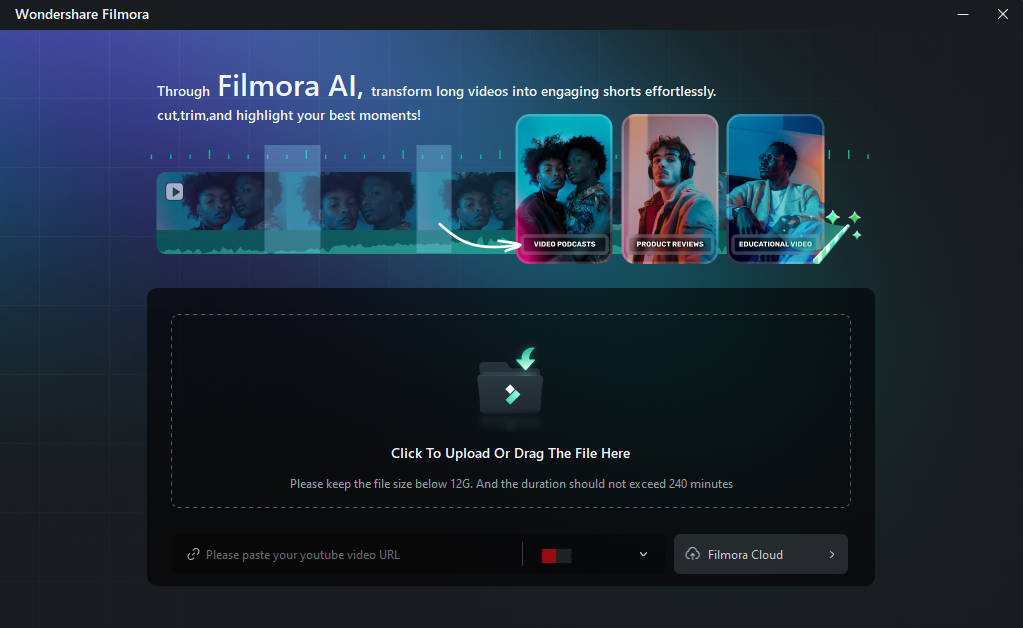
Step 2. Import Your Video
Upload your video from your device, use a YouTube link, or choose from your Filmora Cloud storage.
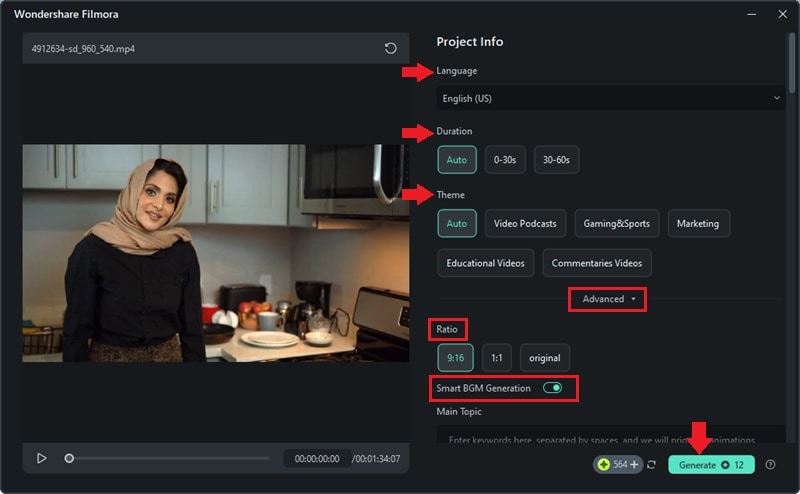
Step 3. Set Video Preferences
Once your video is uploaded, a settings window will appear. Here, you can select options like Language, Duration, and Themes. For more control, explore the Advanced options, to set Aspect Ratio and enable Smart BGM Generation.
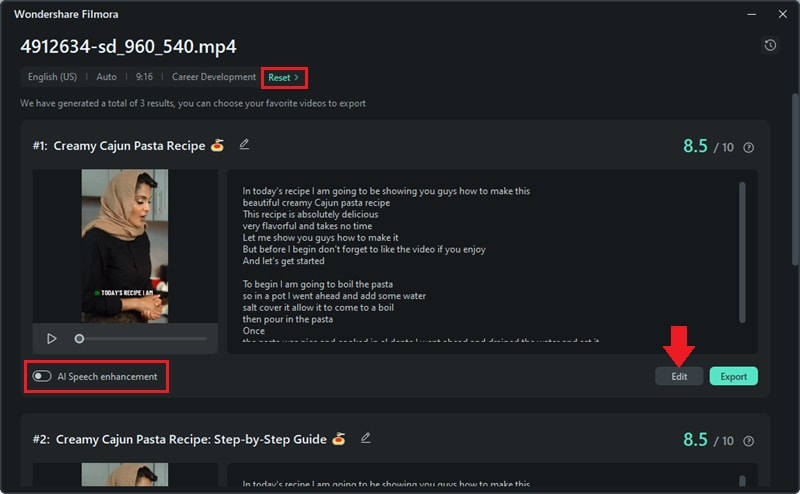
Step 4. Choose Your Short Clip
After analyzing your video, Filmora will generate several short clip options. Review these clips and select the one you like best. Or, click Reset if you want to regenerate new clips. You can also use AI Speech Enhancement to improve audio quality. Click Edit to refine it further in the editing workspace.
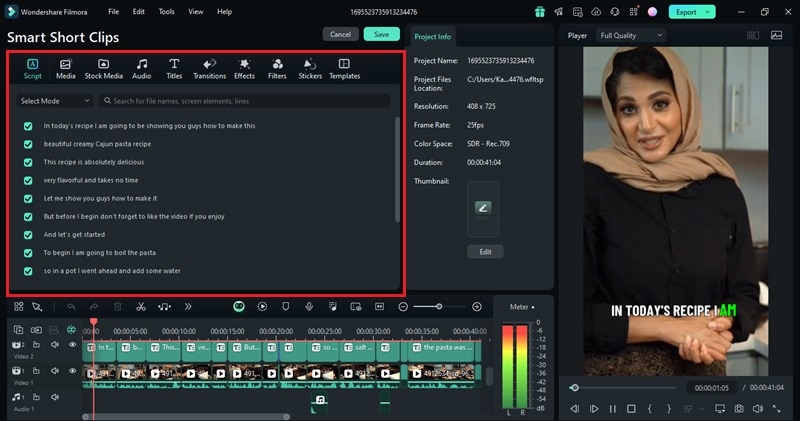
Step 5. Edit Your Clip
Here, you can add Titles, Transitions, Filters, and Stickers to make your video more engaging.
Step 6. Export Your Video
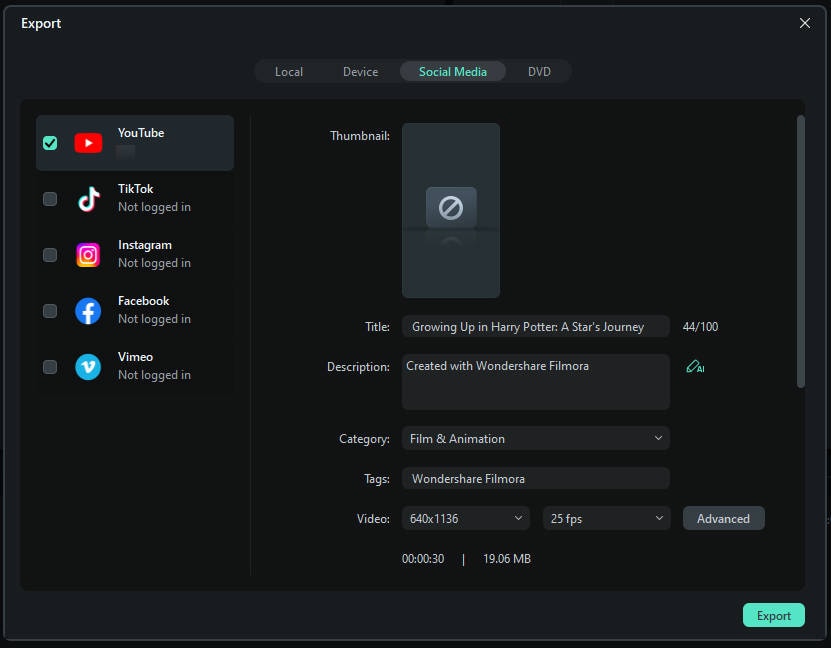
Once you’re satisfied with your video, click the Export button to save it to your device. You can also share it directly on social media platforms like YouTube, TikTok, or Vimeo. Furthermore, you can even schedule it for future posting.
Conclusion
123 Video Editor is a tool for users seeking quick, basic video edits without downloading any software. It provides essential features such as trimming, cutting, and text overlays, making it perfect for beginners or those working on simple projects.
If you’re looking for more advanced editing tools, Wondershare Filmora is a fantastic choice. Filmora provides a much broader range of editing capabilities. These are essential for users who need more control over their edits. Try Filmora today to unlock your full creative potential!


