

 TL;DR:
Powered by the Veo 3.1 model, Google's Flow AI video generator produces up to 4K cinematic clips with natively synced audio, and accessing it directly inside Wondershare Filmora eliminates the need for manual downloading and timeline importing.
● Flow AI generates higher resolution videos (up to 4K) and integrates directly with the Google ecosystem like YouTube Shorts and Gemini, but it restricts video length to 4-8 seconds compared to the longer 15-30 second capabilities of Sora 2 and Kling AI.
● For consistent generation and fewer errors, format your prompts using a specific structural formula: Subject + Action + Environment + Camera Movement + Lighting or Style + SFX Instructions.
● Generating Veo 3.1 clips directly through Filmora's Text-to-Video tool bypasses browser workflows, allowing you to instantly apply AI Smart Cutout, AI Audio Denoise, and Auto Captions to the raw AI footage within a single timeline.
Ask AI for a summary
 ChatGPT
 Perplexity
 Gemini
 Claude
 Grok
Grok
If you've been tracking the latest AI trends, you've likely encountered the Flow AI video generator. Powered by Google's groundbreaking Veo 3.1 model, this tool is redefining cinematic AI creation. But is it just hype? In this guide, we'll dive deep into the Google Flow AI video generator, exploring its pro features and how you can harness Veo 3.1 directly within Wondershare Filmora for a seamless editing workflow.

Part 1. What is Google Flow AI Video Generator & Veo 3.1?
The Flow Google AI video generator is basically Google stepping into full cinematic mode. It's built under Google Labs, and is designed more like a creative studio powered by AI. In fact, according to an August 2025 report from CNET, Flow has already been used to create over 100 million AI videos, which shows just how quickly creators are adopting it. That kind of scale does not happen by accident.
That's because the whole idea behind the Flow AI Google video generator is to give you more control, more realism, and something that actually looks intentional instead of accidental.
Flow Core Models
Flow didn't start at this level. Earlier versions ran on older Veo models (Veo, Veo 2, and Veo 3), which were already solid. But the latest Flow Veo 3.1 AI video generator is where things really start to click.
Here's what changed:
- Better physics simulation.
- Improved character consistency.
- Native audio generation.
- More realistic lighting and cinematic motion.
This is the point where the Flow AI video generator stops feeling like a fun experiment and starts feeling like something you could actually use for real projects.
Part 2. Why Flow Might Be the Most Advanced Flow AI Video Maker Right Now
Flow is rapidly becoming the go-to Flow AI video maker for professionals. Unlike basic generators, the Google Flow AI video generator focuses on cinematic quality. When paired with an advanced editor like Wondershare Filmora, these Veo 3.1 clips can be transformed into studio-grade content instantly. So, let's break down what makes this Flow AI video maker stand out and why so many creators are paying attention.
1. Native Audio Generation (Not Just Silent Clips)
Unlike many tools that give you visuals only, Veo 3.1 in Flow AI video maker generates:
- Sound effects synced to actions.
- Environmental audio.
- Background ambience.
For example, if you create an off-road muddy car scene. You will not just see the car tearing through dirt. You will hear the engine rev, the tires spinning, mud splashing around. It all lines up with the movement.
2. Ingredients to Video (Keeps Things Consistent)
One of the best things inside the Flow AI video generator is Ingredients to Video. It lets you upload reference images and combine them with your prompt. The tool then uses those images as a guide, so the result stays closer to what you want.
This helps a lot with consistency, because:
- Your character keeps the same face and outfit.
- Objects don't randomly change.
- Scenes feel connected.
3. Cinematic Controls That Feel Like Real Directing
The Flow AI video generator is not just typing something and hoping it turns out okay. Instead of hoping the AI guesses the right angle, you can actually guide how the scene moves. That includes:
- Camera panning.
- Slow or fast zoom.
- Tracking shots that follow a subject.
- Smoother scene transitions.
That small bit of control makes a big difference. It feels less like you are guessing and more like you are directing.
Part 3. Time to Try It: How to Use Flow AI Video Generator Step-by-Step
After seeing what the Flow AI video generator can do, you're probably curious to try it yourself and see if it really lives up to the hype. So, let's stop talking about it and actually use it.
Follow the simple steps below and you'll be creating with the Flow AI video maker in no time.
Visit https://labs.google/fx/tools/flow.
Sign in with your Google account if needed.
Click Create with Flow to start a new project.
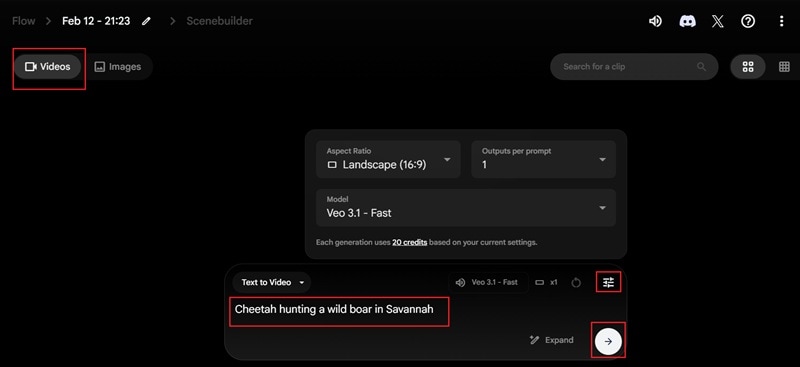
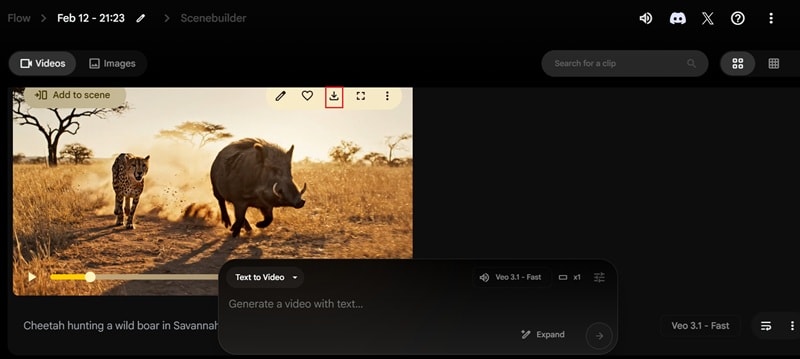
Click Videos at the top left to start creating a video.
Type your prompt in the description box.
Click the settings icon and choose the aspect ratio, AI model, and output options you want.
Press the arrow icon or hit Enter to generate your scene with the Flow AI video generator.
When the video is finished generating, click play to preview the result.
Watch it through to make sure everything looks right.
Click the download icon to save the video to your device.
And that's it! Just a few simple steps and you've created your video using the Flow AI video generator. The whole process is pretty straightforward, so even if you're a total beginner, you can follow along without feeling lost. Now, let's take a closer look at the video you just made and see how it turned out.
Bonus Master Class: Flow AI Video Generator Prompt Formula
Creating videos with the Flow AI video generator can be a bit hit or miss. We even had to generate ours twice before it looked right, and the first version was not great. Most of the time, it really comes down to the prompt you write.
If you want better results from the Flow Google AI video generator, keep your prompt clear and structured.
A simple formula that works well is:
Subject + Action + Environment + Camera Movement + Lighting or Style + SFX Instructions
Use that as your base every time.
To make it easier to see how this works in real projects, here are a few Flow AI video generator prompt examples you can copy and adjust.
Example 1: E-commerce Product Video
Prompt used: "Luxury smartwatch rotating on marble table, soft product spotlight, slow cinematic zoom in, studio lighting, subtle ticking sound effect."
Example 2: Short Form Social Clip
Prompt used: "Street dancer performing at night in Tokyo alley, handheld camera movement, neon lighting, energetic vibe, city ambience and distant traffic SFX."
Example 3: Film Scene
Prompt used: "Medieval knight walking through a foggy battlefield at sunrise, dramatic tracking shot, golden hour lighting, cinematic color grading, distant war drums and wind SFX."
Part 4. Flow AI vs. Sora 2 vs. Kling AI: The 2026 Comparison
Alright, now that you've played around with the Flow AI video generator, things probably look pretty impressive. That said, Flow with Veo 3.1 is not the only AI model getting attention right now.
Sora 2 is making headlines. Kling AI is also improving fast. Each one claims to deliver better realism, smoother motion, and stronger results. So, instead of guessing which one is better, let's put them side-by-side and see how they really compare. That way you can decide which tool fits you best.
| Feature | Flow AI (Veo 3.1) | Sora 2 | Kling AI |
| Resolution Support | Up to 4K | Up to 1080p | Up to 1080p |
| Video Length | 4-8 seconds | 15–25 seconds | 10–30 seconds |
| Native Audio | Yes | Yes | Yes |
| Physical Simulation Realism | Good cinematic realism and multi-shot consistency | Strong realistic motion and physics feel | Moderate realism with efficient short clips |
Flow Key Advantage
If you just look at the specs in the table, the Flow AI video generator might not look wildly ahead of everyone else. However, the Flow AI video maker lives inside the Google ecosystem. And that changes how you actually use it. It connects naturally with:
- YouTube Shorts workflow
- Google Cloud storage
- Gemini for better prompt understanding
That kind of built in connection gives Flow an edge that is not obvious in a simple feature list, but you definitely feel it when you start using it seriously.
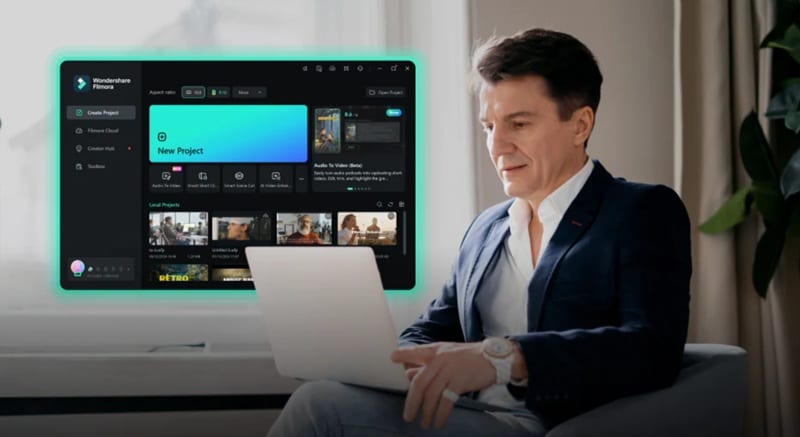
Part 5. How to Use Google Veo 3.1 AI Video Generator in Wondershare Filmora
The thing is, you don't always have to jump into the browser to make something like the Flow AI video generator produced. That's because Veo 3.1 can also be accessed inside video editors that support it, and one of them is Wondershare Filmora.
That means no switching tabs. No downloading a clip just to upload it again somewhere else. The workflow is much simpler: you generate, edit, trim, add music, add subtitles, and export without switching tools. It feels smoother, faster, and less messy.
Steps to Generate Veo 3.1 Inside Filmora
For creators who actually want to turn AI clips into finished videos, having Veo 3.1 inside an editor like Filmora just makes the whole workflow easier and more practical. Ready to try it yourself? Follow the simple steps below and you'll be up and running in minutes.
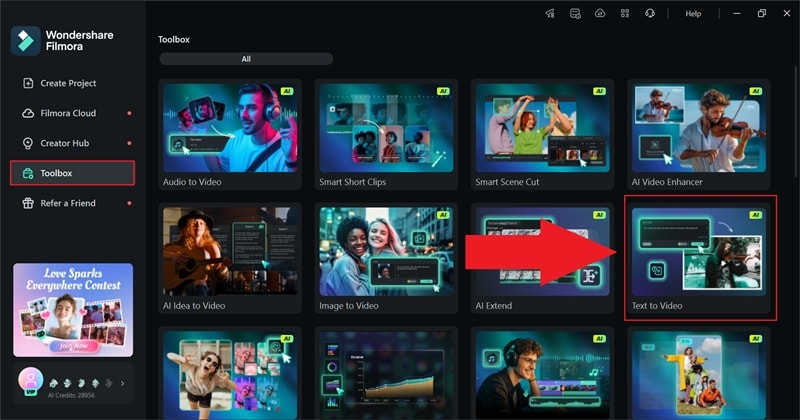
Download and install the latest version of Filmora on your device.
Open the program and go to the Toolbox menu.
Click Text to Video to launch the feature.
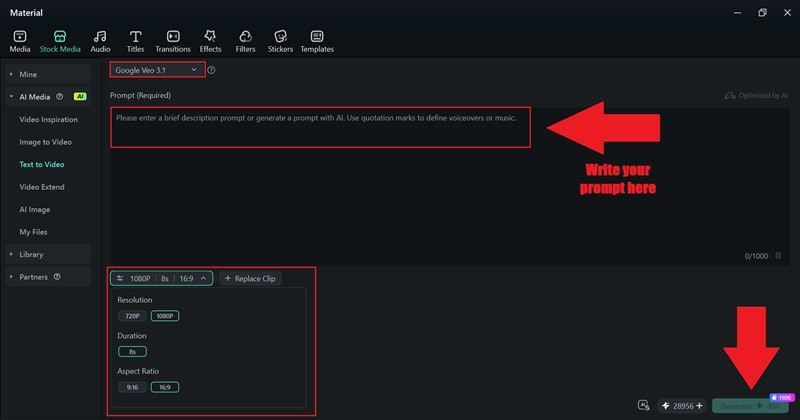
Inside the feature page, select Google Veo 3.1 as your AI model.
Type your prompt into the description box.
Choose your preferred duration, aspect ratio, and resolution.
Click Generate to create your video.
Usually, the video quality is already strong from the start, and if something feels slightly off, you don't have to rewrite prompts or regenerate everything again. You can just fine-tune it directly in Filmora using the built in editing tools and polish it until it looks exactly how you want.
Creating an Epic Movie Clip with the Right Prompt in Filmora
Just like when you use the Flow AI video maker, the prompt you write inside Filmora really matters. So, when you're using Veo 3.1 inside Filmora, it helps to be a bit more specific. Think like a director. What is the camera doing? What does the lighting look like? What does it sound like?
Here's a simple template you can follow:
Subject + Specific Perspective + Motion Detail + Lighting Mood + Audio Cue
Example:
"A cheetah chasing a wild boar from a low tracking camera angle, fast forward motion, warm sunset lighting with dust in the air, intense drum beats and heavy breathing sound."
With that prompt, this is the result you get inside Filmora.
Right away, it feels more complete. Compared to the cheetah scene made earlier with the Flow AI video generator, the version in Filmora already looks more cinematic. The motion feels smooth, the background audio matches the action, and the scene has more depth.
And if you feel like something is missing, you can fix it on the spot. Add color grading to boost the mood. Record a voiceover and drop in subtitles. Adjust the sound. Everything is in one place, so polishing the video feels easy and natural.
Part 6. Why Filmora's Built-In Integration Makes a Big Difference
After you try the workflow in Filmora, you can really feel the difference. Having Veo 3.1 inside your editor saves a lot of back and forth. After all, a lot of creators lose time switching platforms.
To make it clearer, here's a simple workflow comparison.
| Feature | Filmora with Veo 3.1 | Other Tools |
| Direct Timeline Editing | Yes. Generate and edit in one timeline | No. Editing usually happens in another app |
| Upload or Download Needed | No extra steps | Yes. Generate, download, then upload |
| Built-In Audio Editing | Full audio controls and mixing | Through prompt only |
| Scene Trimming | Instant trimming and clip splitting | Must export first |
| Export Control | Flexible formats and resolutions | Limited export options |
What You Unlock When You Pair Filmora with Flow AI
The Flow AI video generator gives you a solid starting point. But when you bring that into Filmora, you are not just editing. You are upgrading the whole result. The combo between the Flow Google AI video generator tech and Filmora's built-in AI tools just makes everything feel more complete.
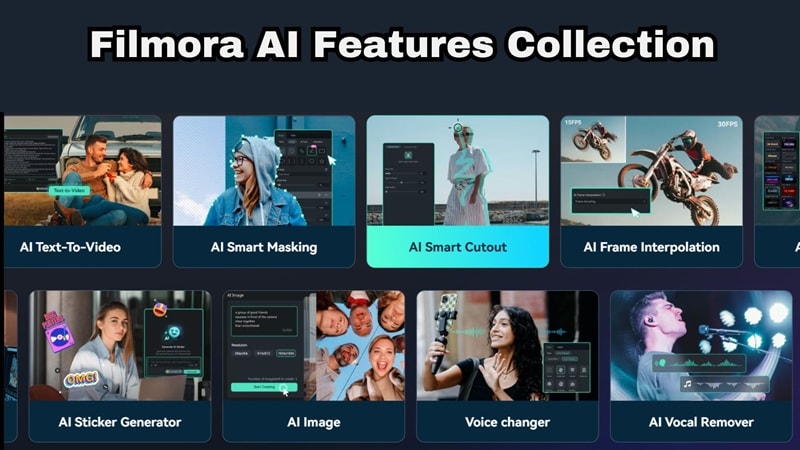
Here's what you get on top:
1. AI Smart Cutout
If you want to add effects behind your character or place them in a new scene, Filmora makes it quick and clean. With its AI Smart Cutout feature, you can easily remove backgrounds or isolate subjects in seconds.
2. AI Noise Removal
With Filmora's AI Audio Denoise feature, you can clean up unwanted background sound instantly. Even if your generated clip has layered audio, you can refine it and make it clearer.
3. Advanced Color Tools
Filmora allows you to push the cinematic mood further. With Filmora's AI Color Palette feature, you can make your clip darker, warmer, more dramatic, or more vibrant without starting over.
4. Auto Captions
Adding subtitles is easy with Filmora thanks to its AI Caption feature. One click and you're done. That alone makes your videos feel more ready for social platforms.
5. Full Timeline Control
You can trim awkward parts, adjust timing, layer music, or add effects without leaving the editor. You are not stuck with the first version the AI gives you.
Conclusion
After spending time with the Flow AI video generator, it is clear that the tool isn't just another AI video trend. With Veo 3.1 powering it, strong cinematic controls, and built-in audio generation, it's clearly aiming for professional-level output.
That said, the real magic happens when the Google Flow AI video generator becomes part of a full editing workflow. Pair it with Filmora and you get the best of both worlds. Filmora gives you Veo 3.1 directly inside the editor, plus extra AI tools like smart cutout, noise removal, color control, and auto captions to refine everything in one place. Instead of stopping at a generated clip, you can shape it into a finished video that is ready to publish.
